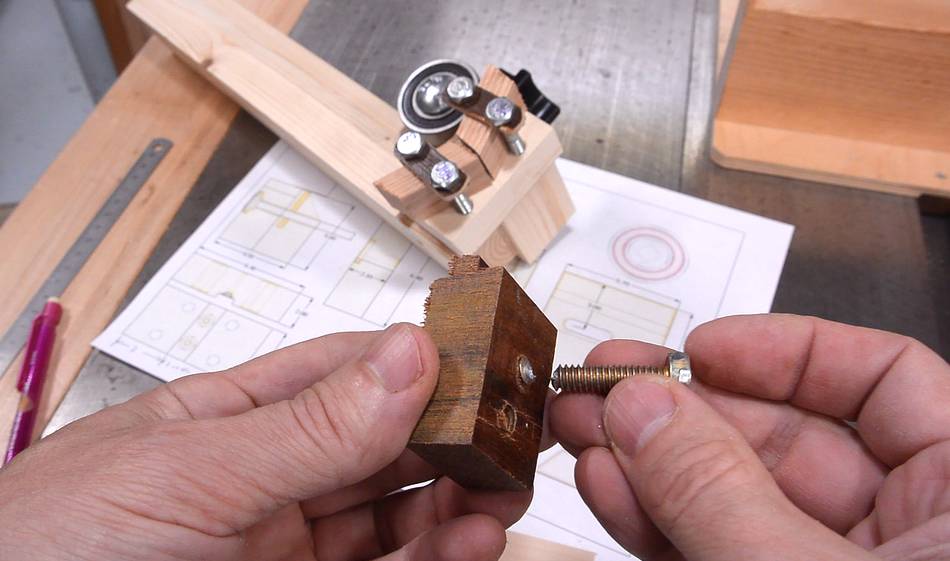
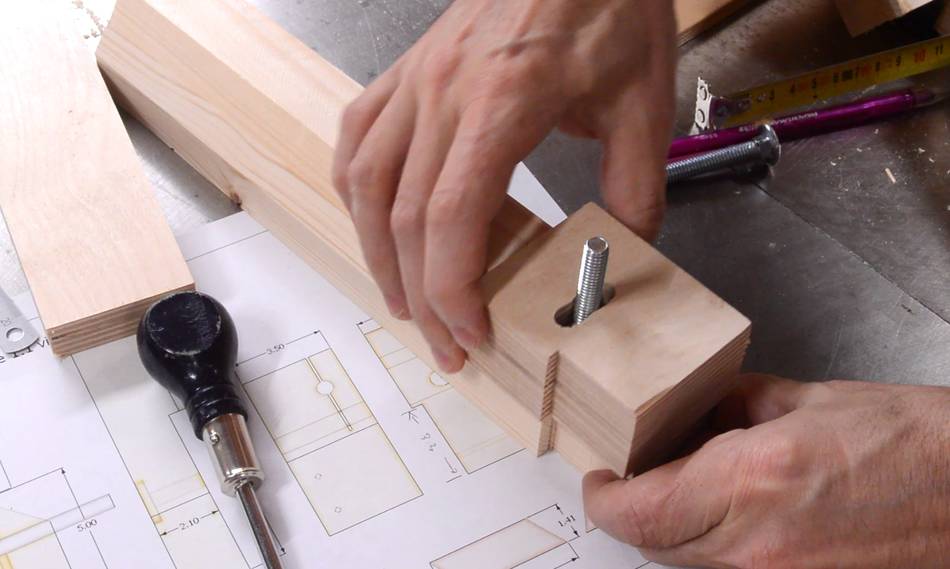
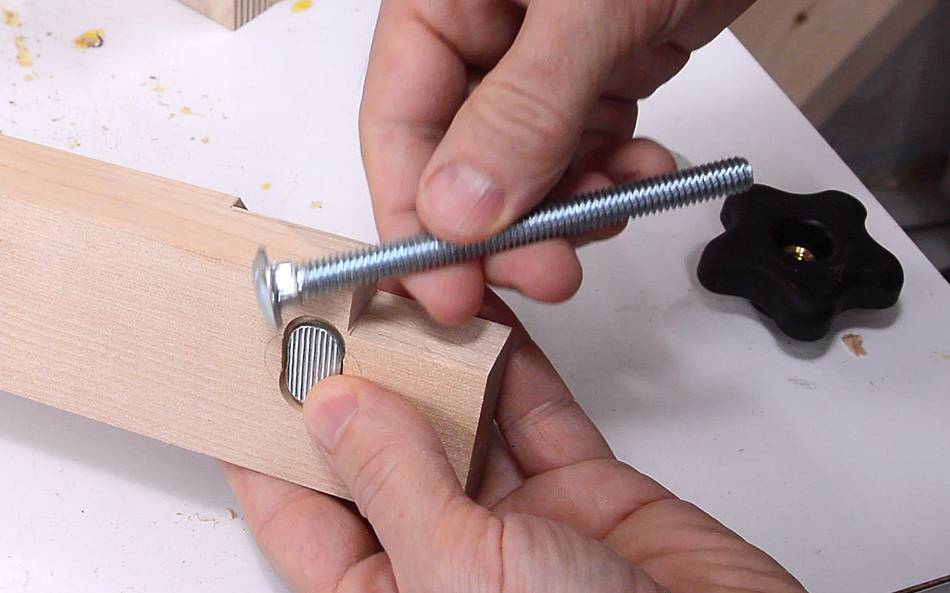
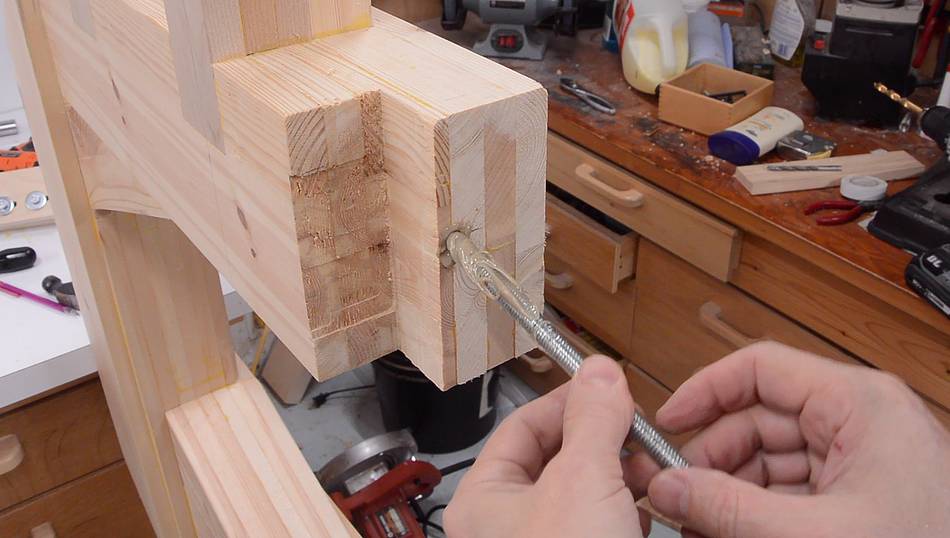
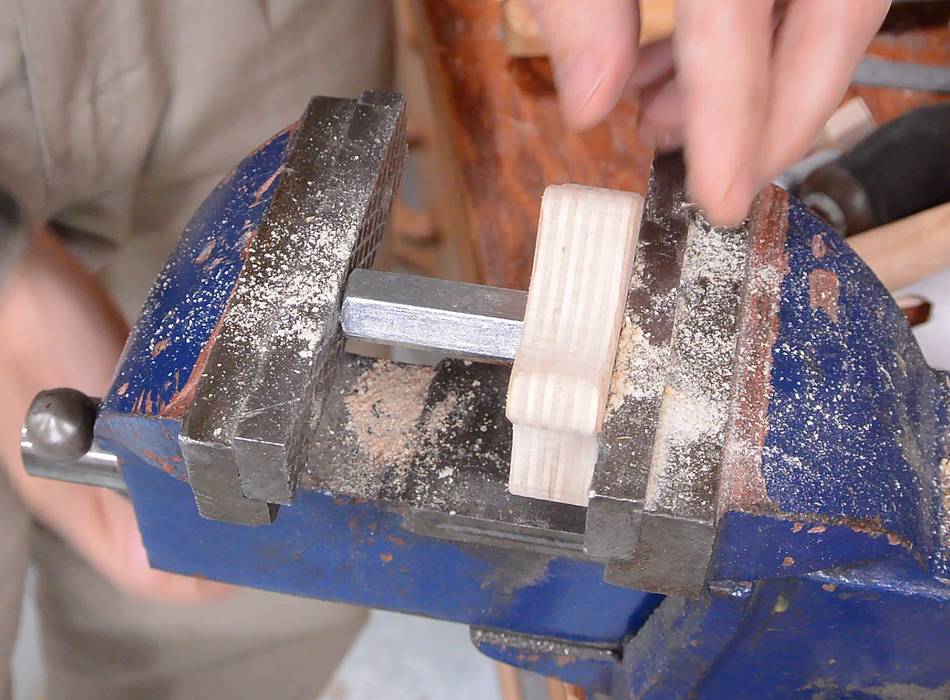
 Trying to keep the design compact, I figured it was best to just cut a
machine screw thread into the wood and screw the 1/4" bolts straight into that.
That method worked out on my 14" bandsaw.
Trying to keep the design compact, I figured it was best to just cut a
machine screw thread into the wood and screw the 1/4" bolts straight into that.
That method worked out on my 14" bandsaw.
The design of these blade guides is similar to the ones on my 16" bandsaw and my 14"bandsaw. But with wider guide blocks needed for wider blades, I opted to put the screws on either side of the blocks instead of through them.
Trying to keep the design compact, I figured it was best to just cut a
machine screw thread into the wood and screw the 1/4" bolts straight into that.
That method worked out on my 14" bandsaw.
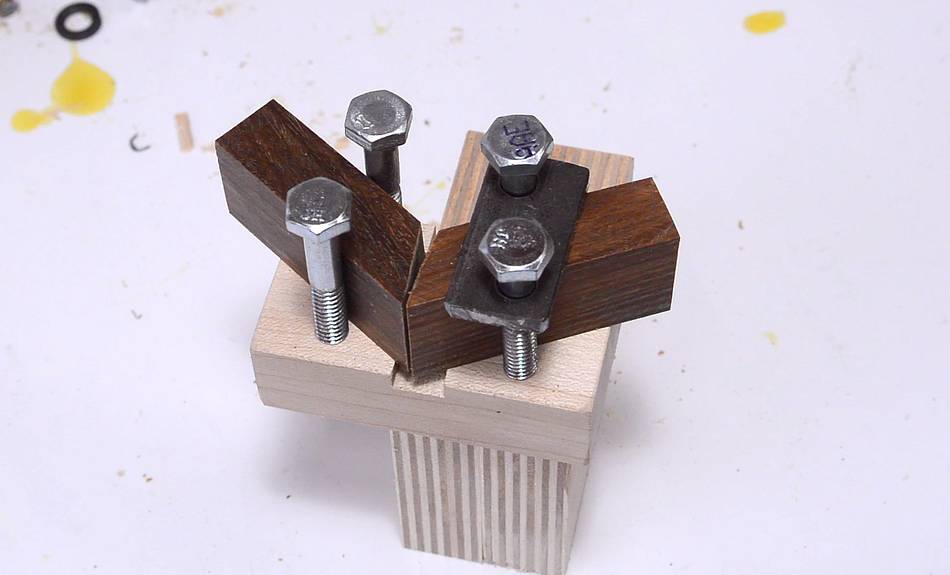
But I wasn't sure if this would hold adequately, so I tested various woods by tapping a thread into them, screwing a screw in and tightening until the thread in the wood stripped. But then, with some exotic wood, my bolt twisted off. At this point, I realized, the wood, even regular hardwood, would be more than strong enough.
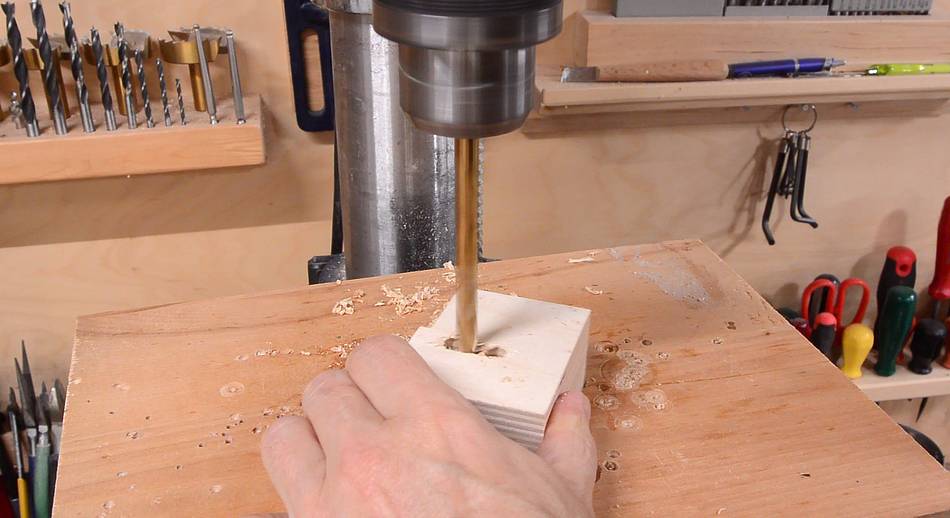
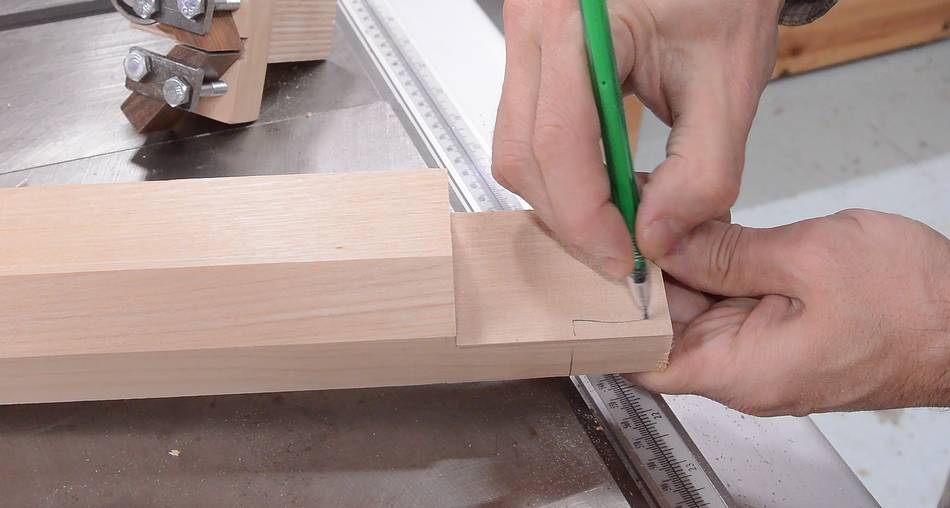
 The block that the guide blocks screw onto has a wide slot for the
mounting screws. I cut this on the table saw.
The block that the guide blocks screw onto has a wide slot for the
mounting screws. I cut this on the table saw.
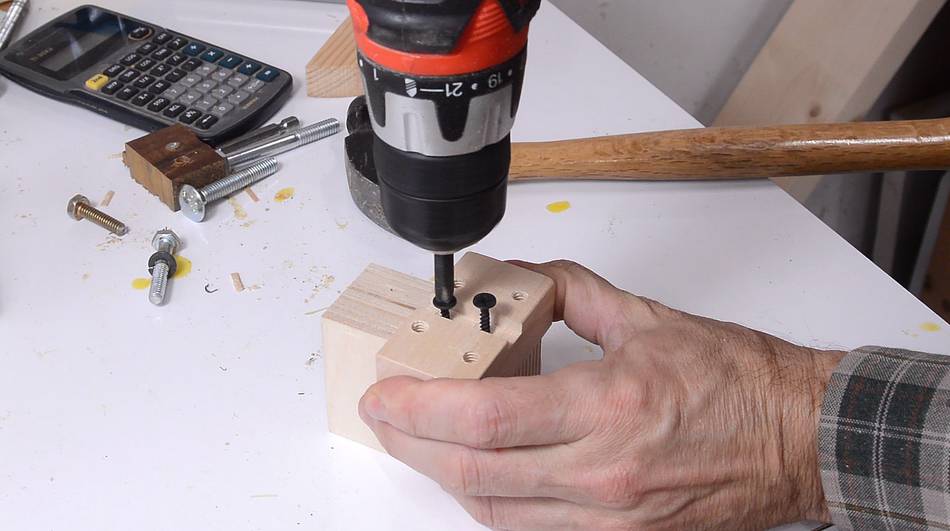
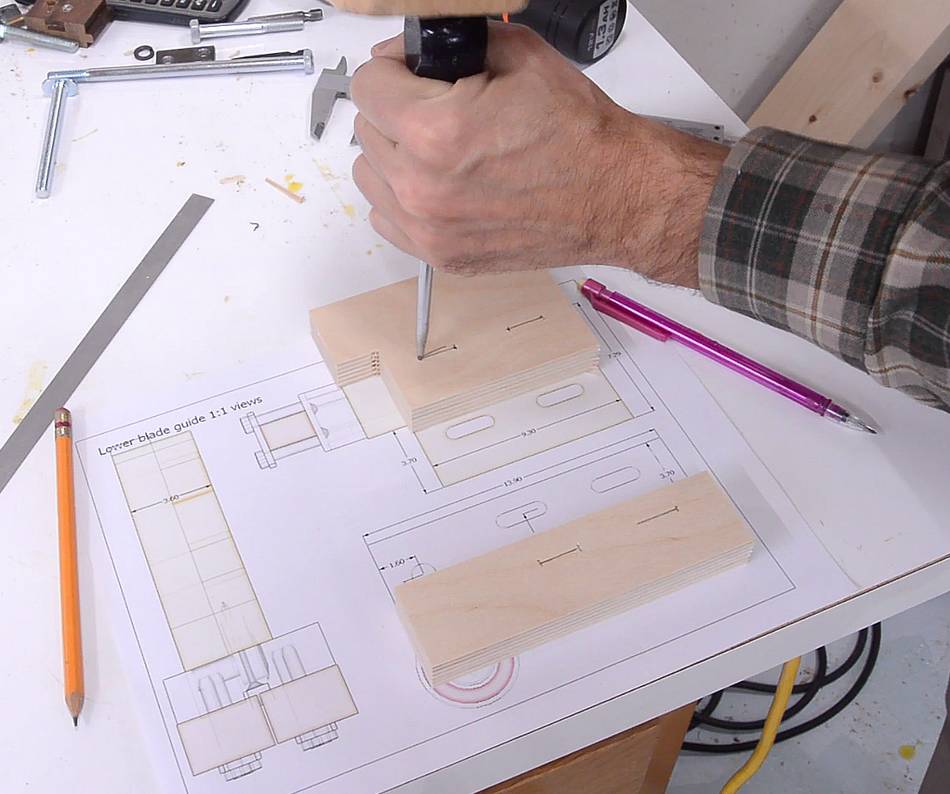
I marked all the screw hole locations by using callipers to scratch where the holes need to go. I added countersinks to the holes in the slot using the point of a larger drill bit because there was no room for a countersink bit.

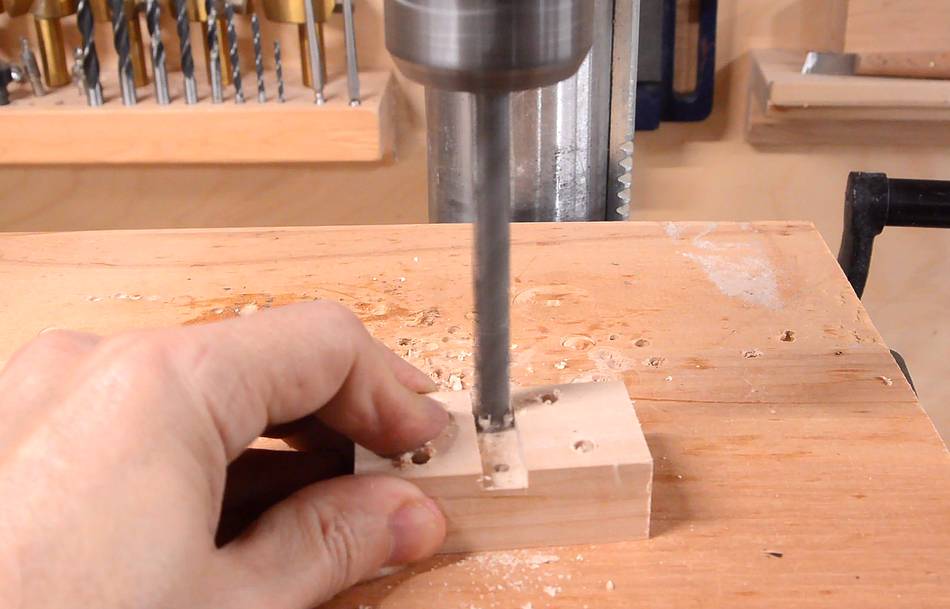
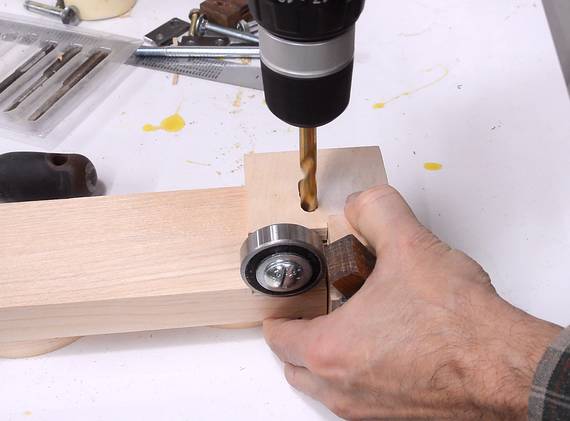
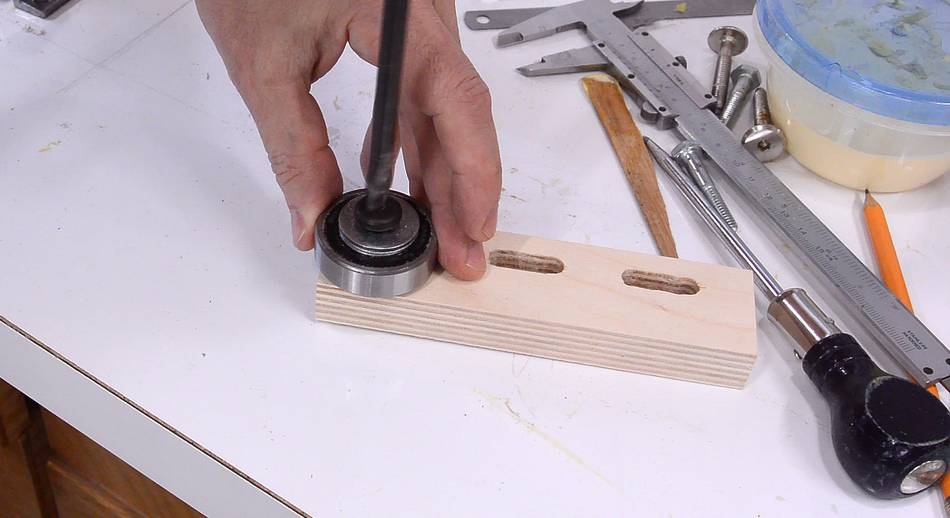
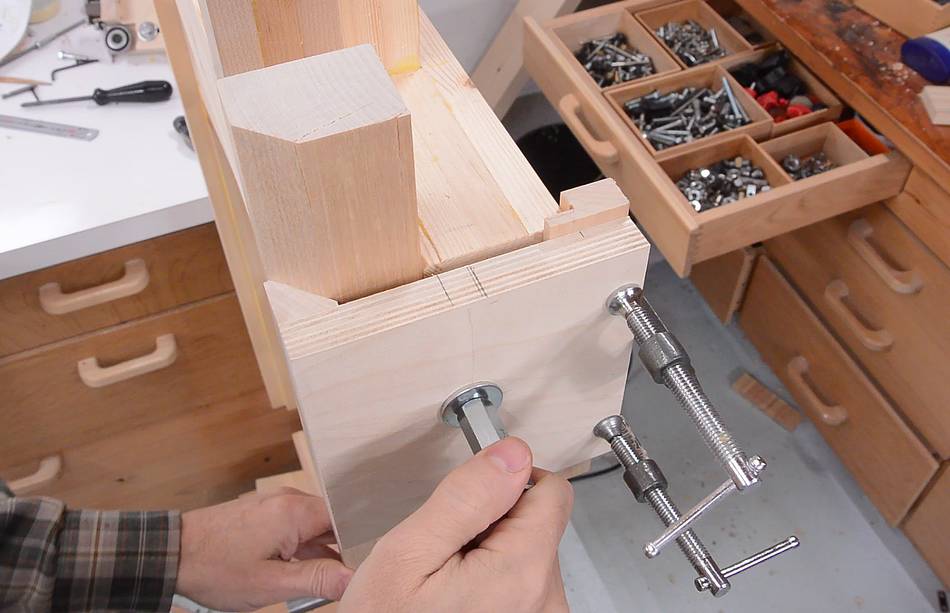
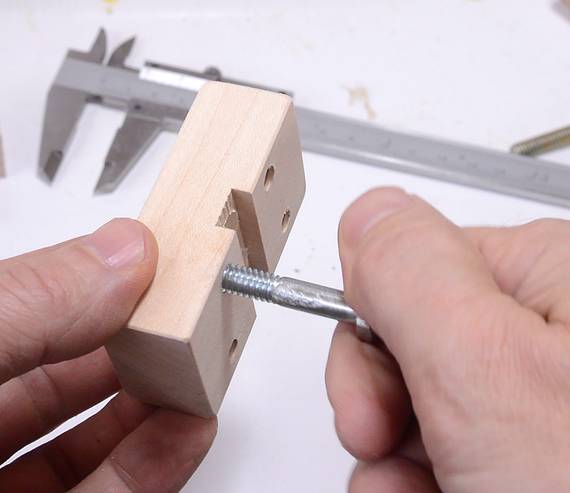 Then I put a 1/4" machine screw tap in a drill and cut threads in
the holes, then checked them with a bolt.
Then I put a 1/4" machine screw tap in a drill and cut threads in
the holes, then checked them with a bolt.
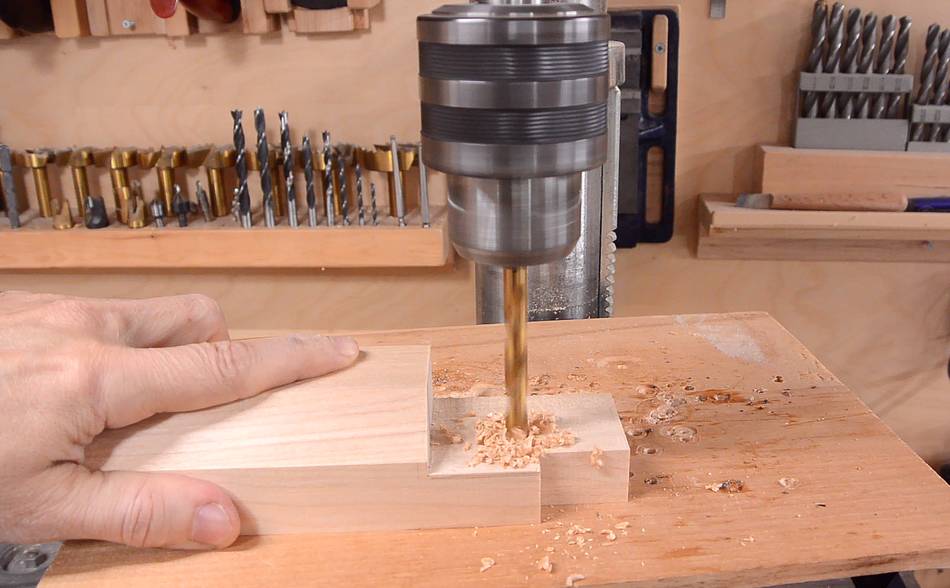
 The side of the main body for the blade guide gets a slot cut in it. I first drilled
three holes next to each other, then drilled between them, moving
the workpiece side-to-side to join the holes into a slot.
This only works, just barely, with a brad point bit.
The side of the main body for the blade guide gets a slot cut in it. I first drilled
three holes next to each other, then drilled between them, moving
the workpiece side-to-side to join the holes into a slot.
This only works, just barely, with a brad point bit.
 The slot allows the body of the blade guide to move forward and back
when mounted to the guide post.
The slot allows the body of the blade guide to move forward and back
when mounted to the guide post.
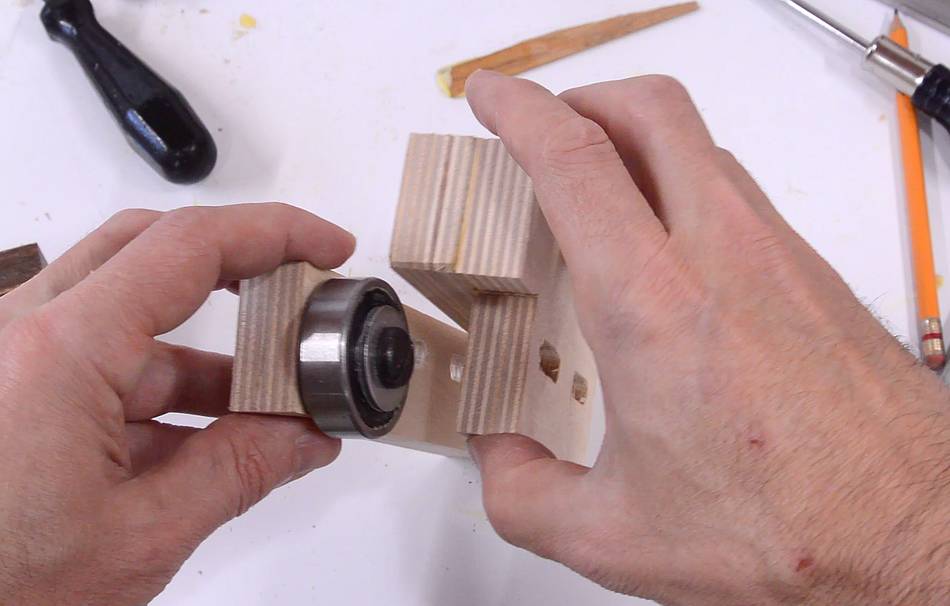
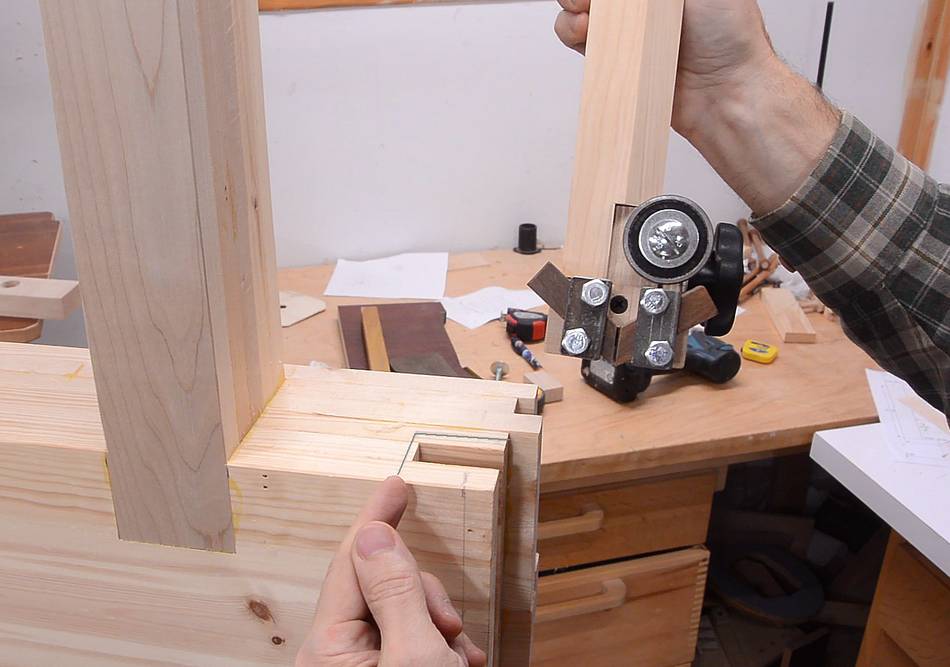
 Attaching the block that holds the guide blocks to the main body
of the blade guide.
Attaching the block that holds the guide blocks to the main body
of the blade guide.
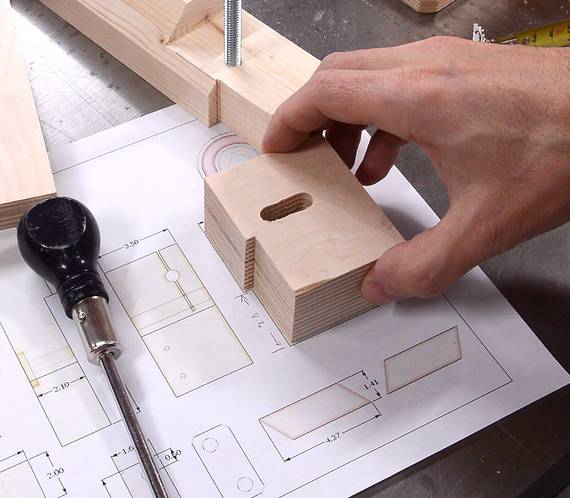
 The guide blocks, which I cut from lignum vitae, will form a sort of "V"
shape. If you don't have lignum vitae, any other exotic hardwood should
also work (I previously used Bocote, but ran out). The guide blocks on my
first homemade bandsaw are made of maple, and I have not needed to replace
them yet.
The guide blocks, which I cut from lignum vitae, will form a sort of "V"
shape. If you don't have lignum vitae, any other exotic hardwood should
also work (I previously used Bocote, but ran out). The guide blocks on my
first homemade bandsaw are made of maple, and I have not needed to replace
them yet.
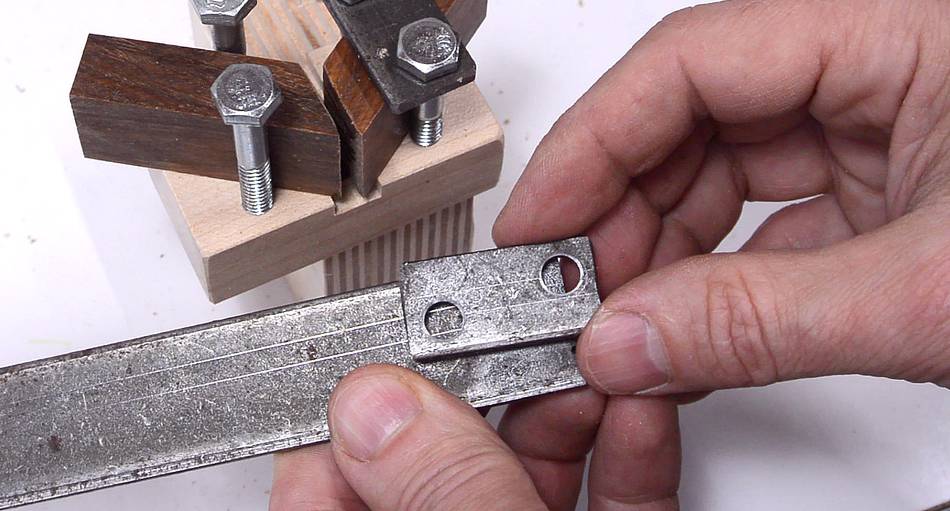
 The guide blocks are held on with two screws and small metal plates,
about 3 mm thick.
The guide blocks are held on with two screws and small metal plates,
about 3 mm thick.
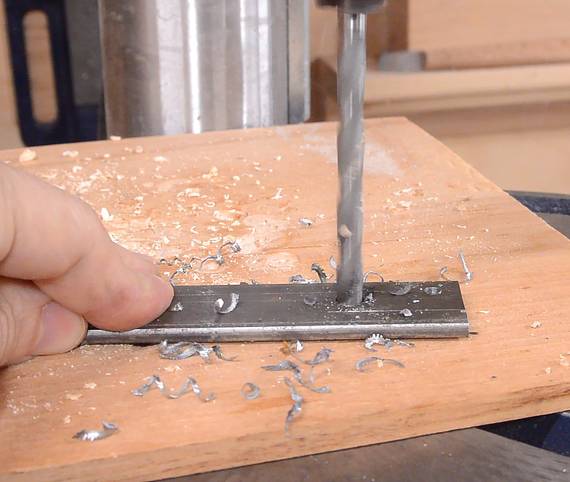
I made these from some bar stock. I used callipers to scratch lines for where the holes need to go, then punched center divots with a center punch and drilled them on the drill press. When drilling metal, it makes it is easier to drill a smaller pilot hole before drilling the hole up to full size.
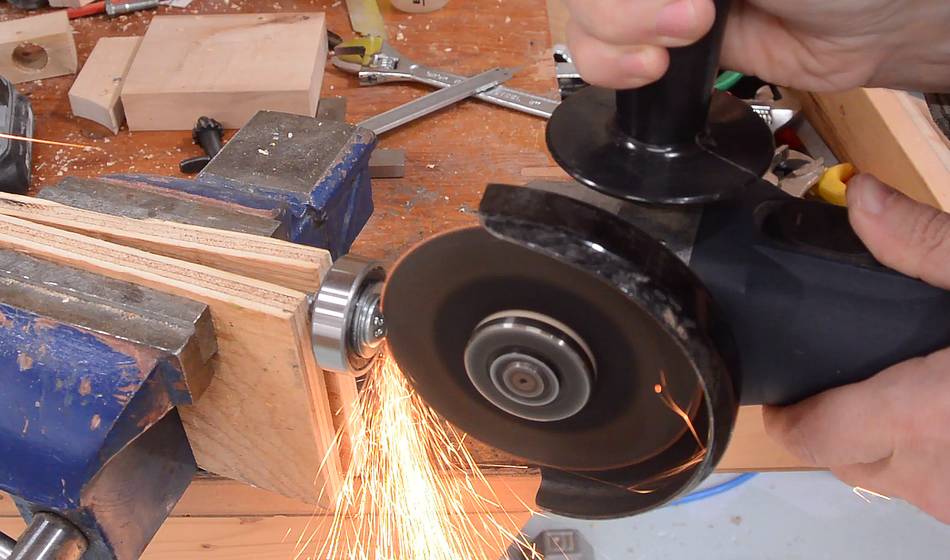
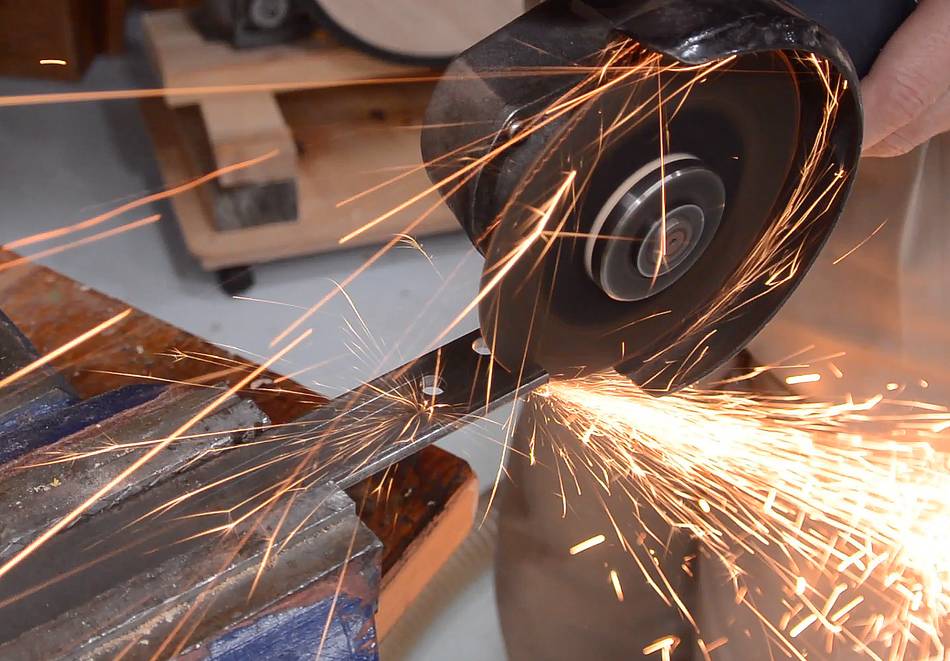 After that I used an angle grinder with a thin cut-off disk to cut the plates
out.
After that I used an angle grinder with a thin cut-off disk to cut the plates
out.
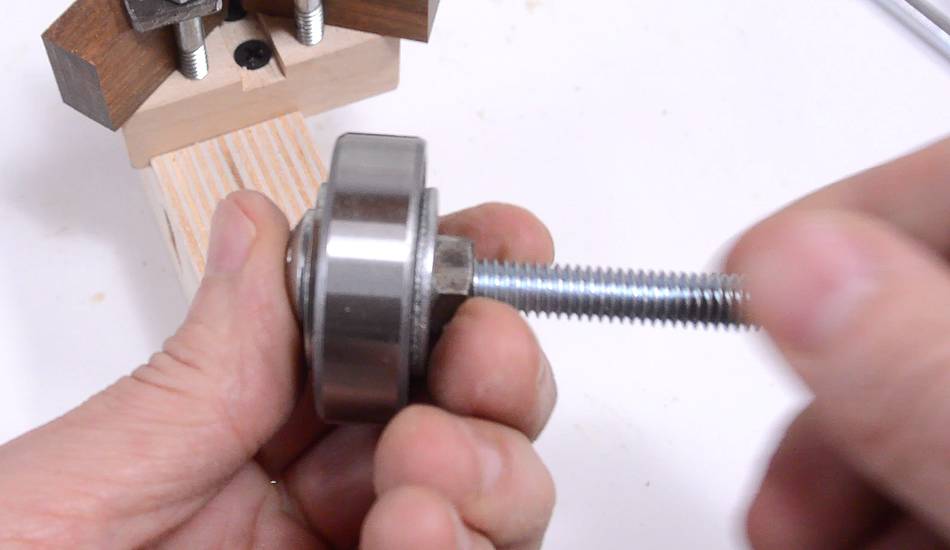
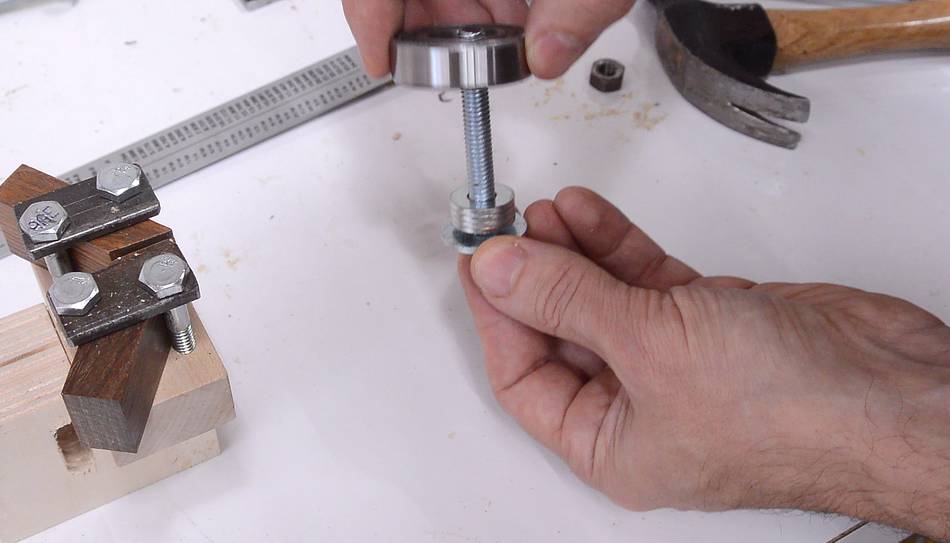 A "thrust bearing" goes above the guide blocks. The back edge of
the blade pushes against it while making a cut. I'm using a ball bearing,
which I mounted on a 5/16" bolt. A larger washer on either side of
the bearing clamps it in place, while smaller washers, which are the size of
the inside of the bearing, keep it centred.
A "thrust bearing" goes above the guide blocks. The back edge of
the blade pushes against it while making a cut. I'm using a ball bearing,
which I mounted on a 5/16" bolt. A larger washer on either side of
the bearing clamps it in place, while smaller washers, which are the size of
the inside of the bearing, keep it centred.
 Bearing mounted.
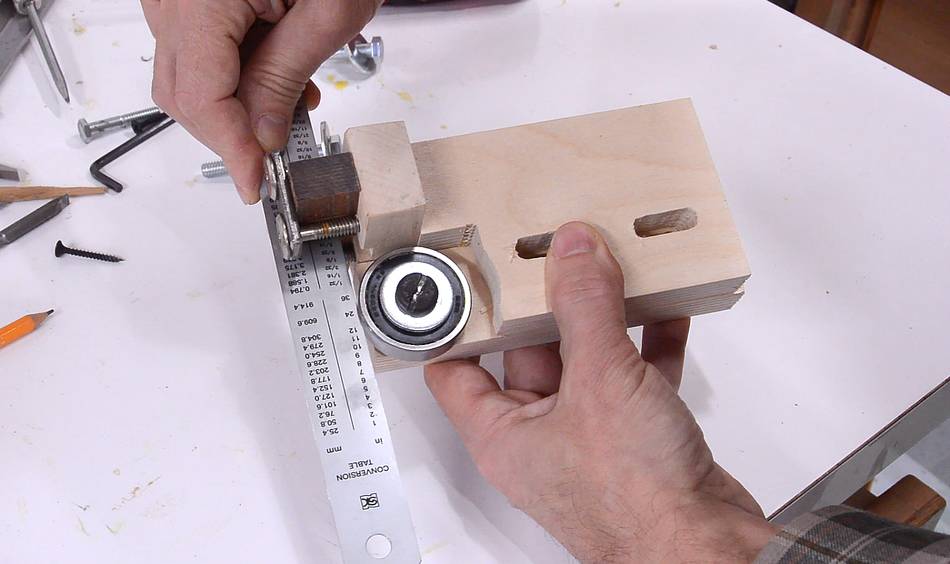
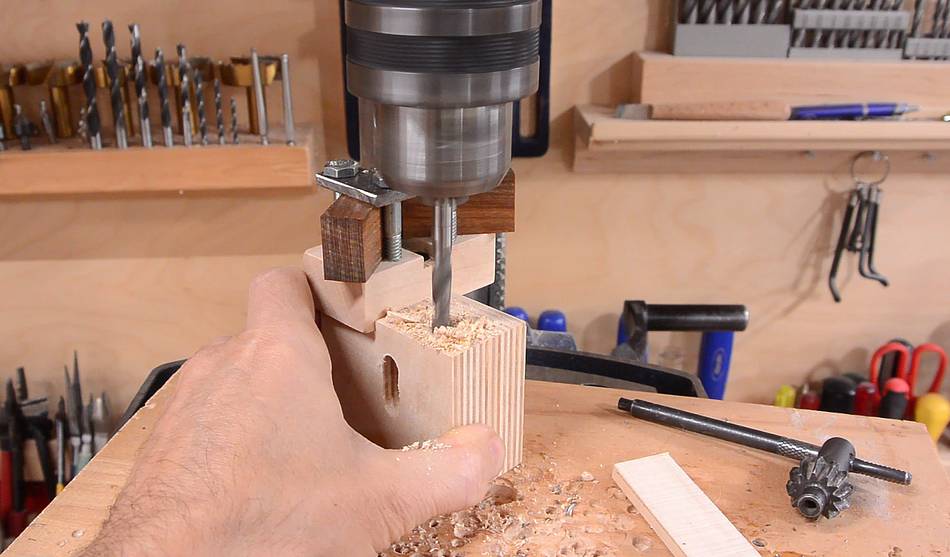 Drilling the hole in the guide bearing to fit the nut
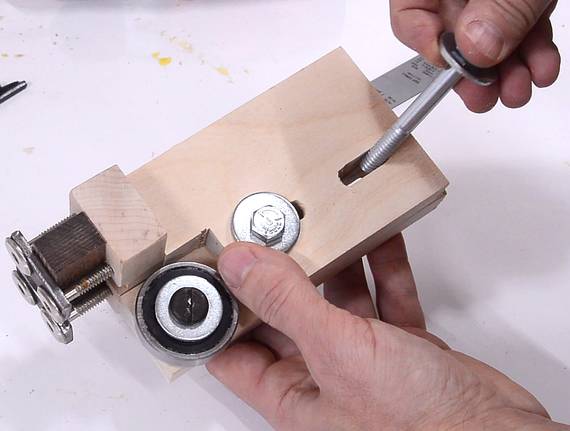
 Then tapping a thread into it with a machine screw tap using
a drill.
Then tapping a thread into it with a machine screw tap using
a drill.
I also drilled a larger hole around this hole to allow for room for the nut on the back of the guide bearing.
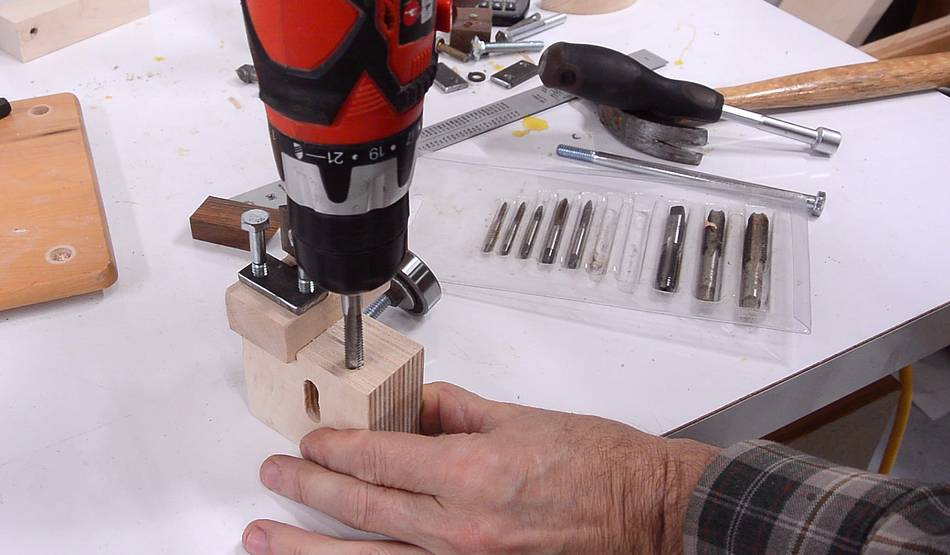
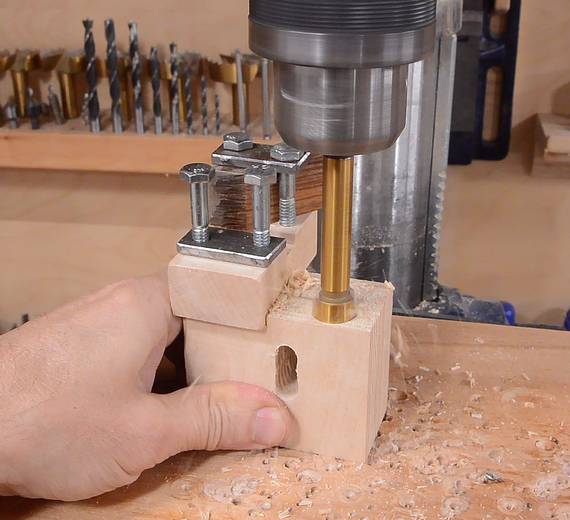
 I cut a slot in the head of the carriage bolt so I can turn it with
a screwdriver to adjust how far back the bearing is.
I cut a slot in the head of the carriage bolt so I can turn it with
a screwdriver to adjust how far back the bearing is.
 I cut a deep slot in the body of the guide bearing so that when the
screw holding the guide is tightened, it also clamps down on the screw
for the thrust bearing, locking it in place.
I cut a deep slot in the body of the guide bearing so that when the
screw holding the guide is tightened, it also clamps down on the screw
for the thrust bearing, locking it in place.
 Then I made the post for the upper guide bearing. This post has a 45°
chamfer on one edge for clamping it down.
Then I made the post for the upper guide bearing. This post has a 45°
chamfer on one edge for clamping it down.
 Cutting away part of the post for where the blade guide will mount.
 Another notch needs to be cut away so the blade guides can be moved further back.
 After that, I placed the blade guide on the post, pushed it back as far
as it would go, then put a drill in the front-most position in the slot
and started drilling, drilling only about 1 mm deep.
After that, I placed the blade guide on the post, pushed it back as far
as it would go, then put a drill in the front-most position in the slot
and started drilling, drilling only about 1 mm deep.
I then finished drilling the hole on the drill press.
 I drilled two shallow holes on the back to make room for the head of a
T-slot bolt (I have some extra T-slot bolts). Otherwise, I would have used
a carriage bolt.
I drilled two shallow holes on the back to make room for the head of a
T-slot bolt (I have some extra T-slot bolts). Otherwise, I would have used
a carriage bolt.
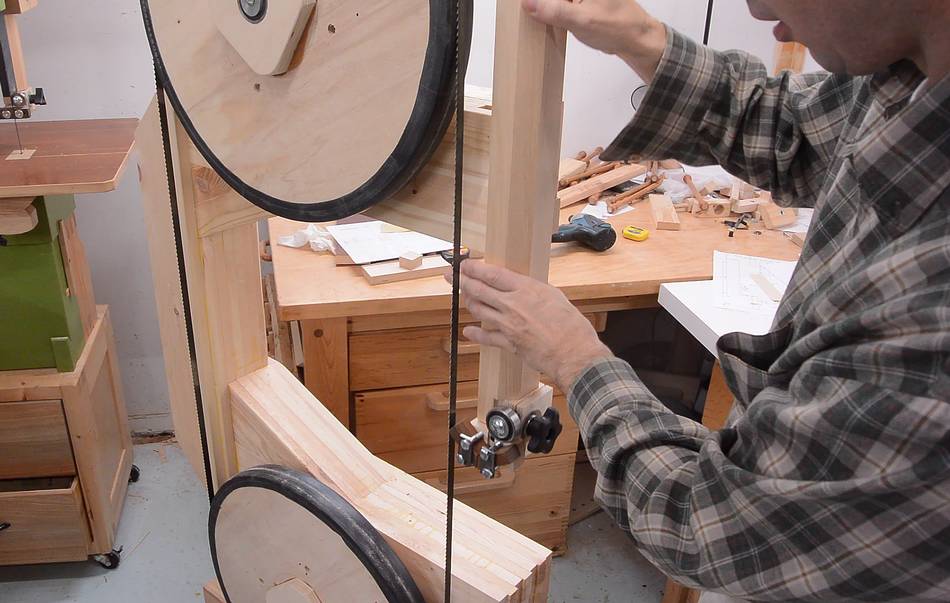 The guide post needs to be mounted on the bandsaw body. But before I do
that, I'll make the lower blade guide.
The guide post needs to be mounted on the bandsaw body. But before I do
that, I'll make the lower blade guide.
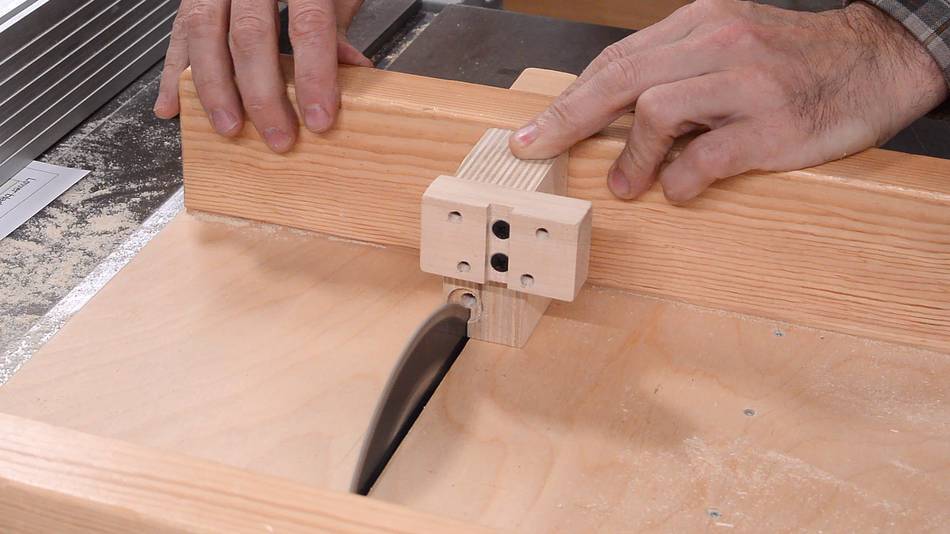
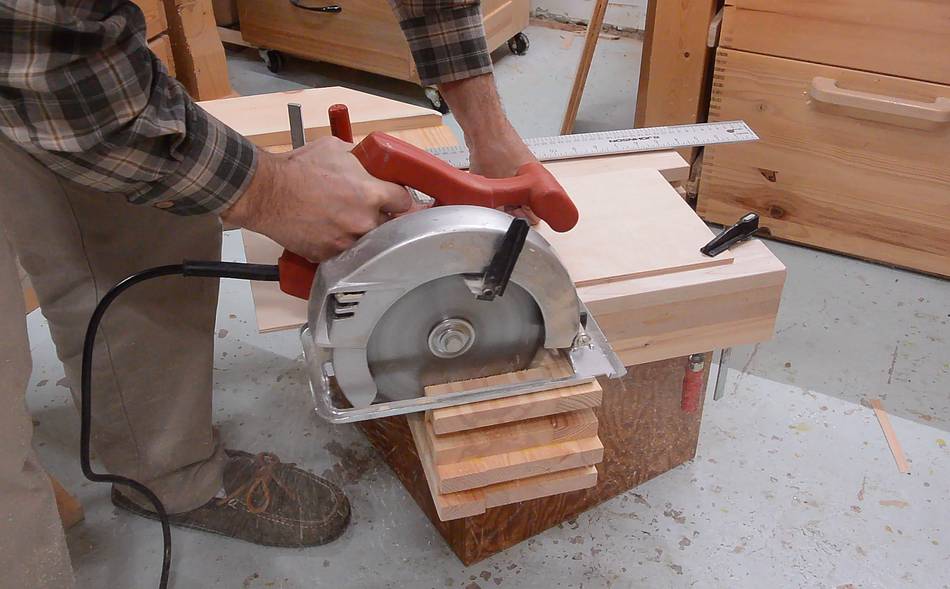
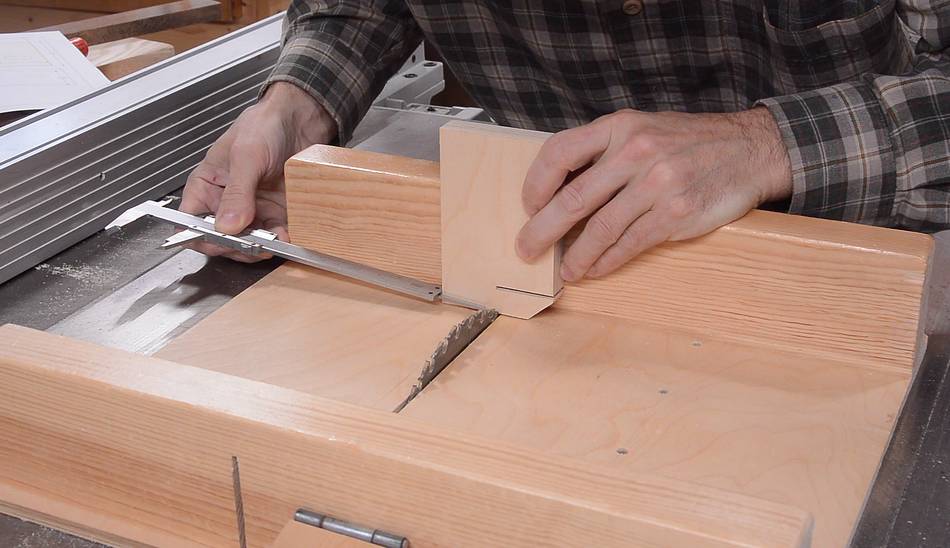 The body of the lower blade guide needs a notch cut out of it.
I'm cutting this with several cuts on my table saw sled, using callipers to
set the position with respect to the blade.
The body of the lower blade guide needs a notch cut out of it.
I'm cutting this with several cuts on my table saw sled, using callipers to
set the position with respect to the blade.
 Two main pieces of the lower guide body cut, on thhe 1:1 printout
from my plans.
Two main pieces of the lower guide body cut, on thhe 1:1 printout
from my plans.
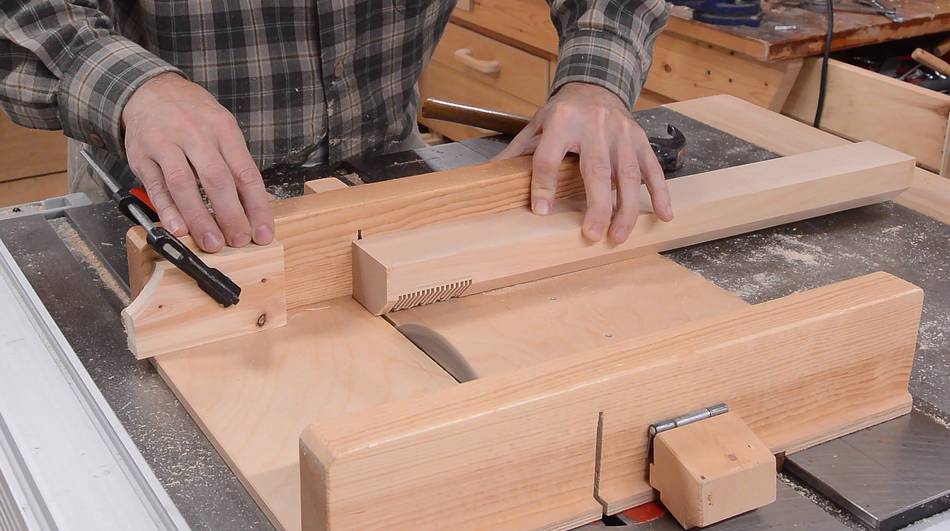
Two slots need to be cut in each of these two pieces. A slot mortiser would be good for cutting these slots, but you may not have one, so I'm demonstrating cutting these on the drill press.
I start by center-punching holes on either end of the slots, plus another hole in the middle.
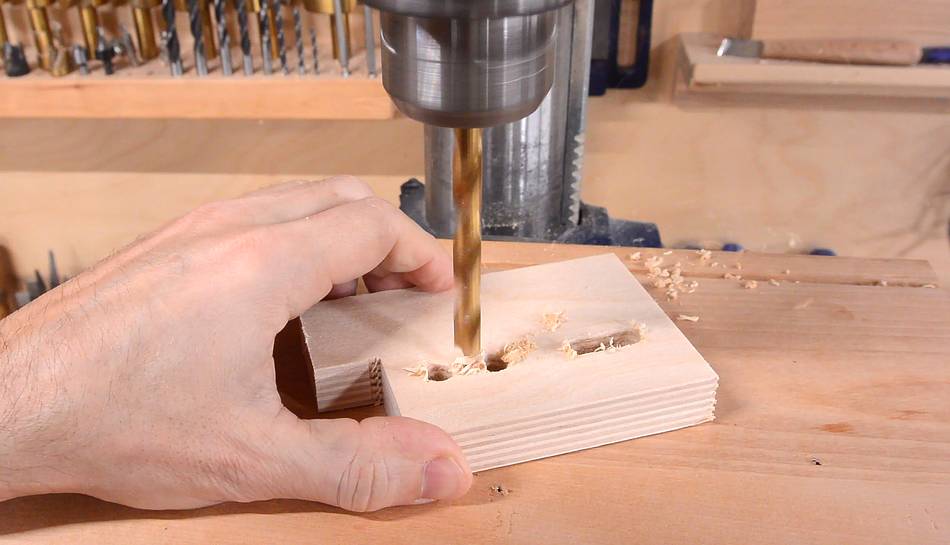 I drilled the three holes, then drill between the holes. This is tricky to do
with a brad point bit. It would be impossible with a metal drill bit.
After enough drilling and side to side movement, it turns into
a slot. I used a file to clean up the sides of the slot.
I drilled the three holes, then drill between the holes. This is tricky to do
with a brad point bit. It would be impossible with a metal drill bit.
After enough drilling and side to side movement, it turns into
a slot. I used a file to clean up the sides of the slot.
 The main part of the lower blade guide body needs another layer glued onto it.
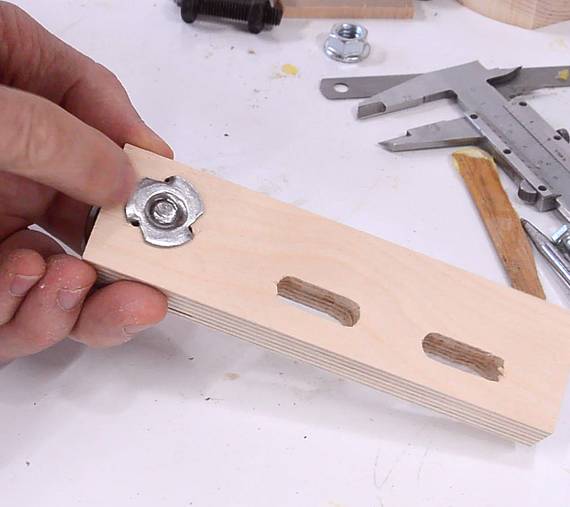 The other side gets a thrust bearing mounted onto it.
I put a T-nut on the back to hold it. In retrospect, I should have just
screwed it straight into the wood, but by the time I thought of it, I
had already drilled the hole too large for that.
The other side gets a thrust bearing mounted onto it.
I put a T-nut on the back to hold it. In retrospect, I should have just
screwed it straight into the wood, but by the time I thought of it, I
had already drilled the hole too large for that.
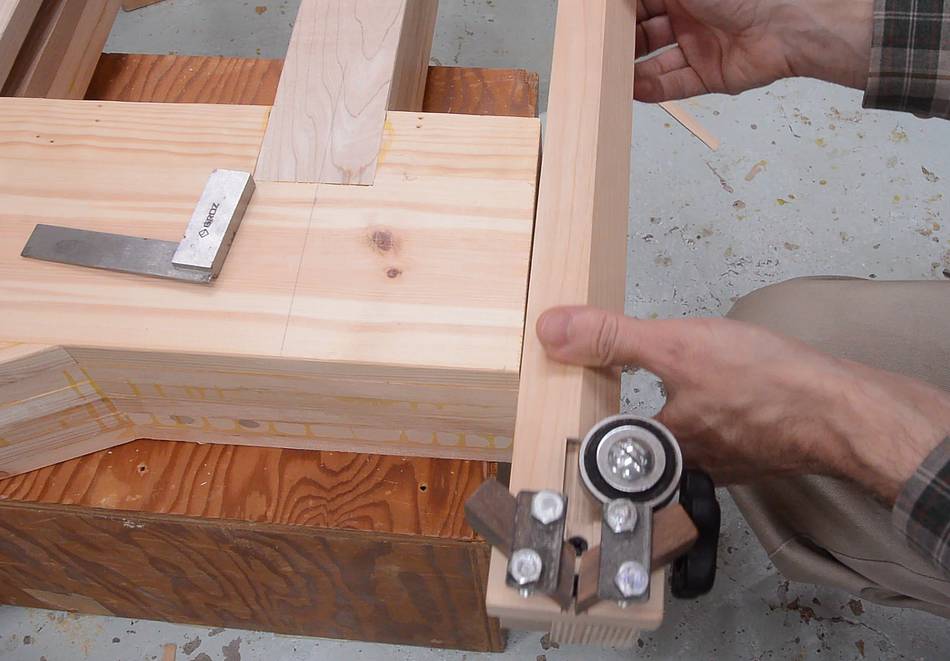
 This is how the two pieces fit together.
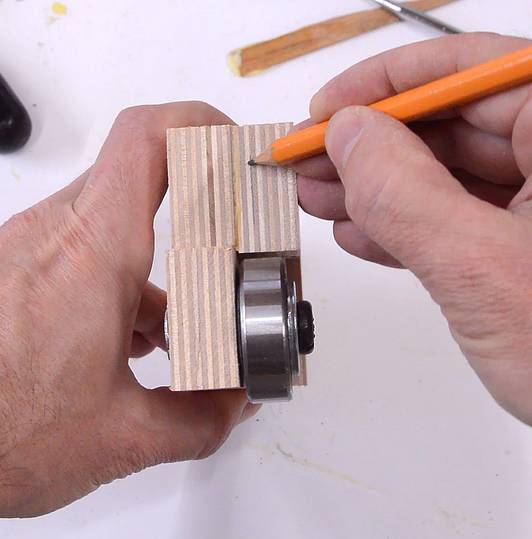
I want the blade to end up just to the left of center on the ball bearing, so if the bearing wears a groove into it, I can just flip it over.
Here marking where I want the blade to end up.
 Then screwing the block that mounts the guide blocks on. The screws end up
on the line that I marked. I did, of course, drill pilot holes before
screwing it on.
Then screwing the block that mounts the guide blocks on. The screws end up
on the line that I marked. I did, of course, drill pilot holes before
screwing it on.

 This is how the blade will run through the blade guide.
The guide will attach to part of the table with two bolts, once I build the table. But that will have to wait for later.
 I can, at this point, mount the upper blade guide.
I start by marking a line on the frame directly behind the blade.
 The furthest back that the blade guides will need to go is when using
a narrow bandsaw blade, because the front edge of the guide blocks
needs to move back because the blade's front edge is further back.
The furthest back that the blade guides will need to go is when using
a narrow bandsaw blade, because the front edge of the guide blocks
needs to move back because the blade's front edge is further back.
With the guide moved back as far as it will go on the post, I'm checking how far back the post will have to go on the frame.
 I also measured the distance from the center of the guides to the left edge
of the guide post. 28 mm on my guides, so the cut-out for the guide needs to
be 28 mm to the left of the blade.
I also measured the distance from the center of the guides to the left edge
of the guide post. 28 mm on my guides, so the cut-out for the guide needs to
be 28 mm to the left of the blade.
 I clamped a piece of plywood to the frame to act as a guide for a circular
saw, then made the cut. I made a series of cuts to hog out most
of the notch, then cleaned it up with a chisel.
I clamped a piece of plywood to the frame to act as a guide for a circular
saw, then made the cut. I made a series of cuts to hog out most
of the notch, then cleaned it up with a chisel.
 Checking the fit with the post. Not perfect. The cut was neither
straight nor square.
Checking the fit with the post. Not perfect. The cut was neither
straight nor square.
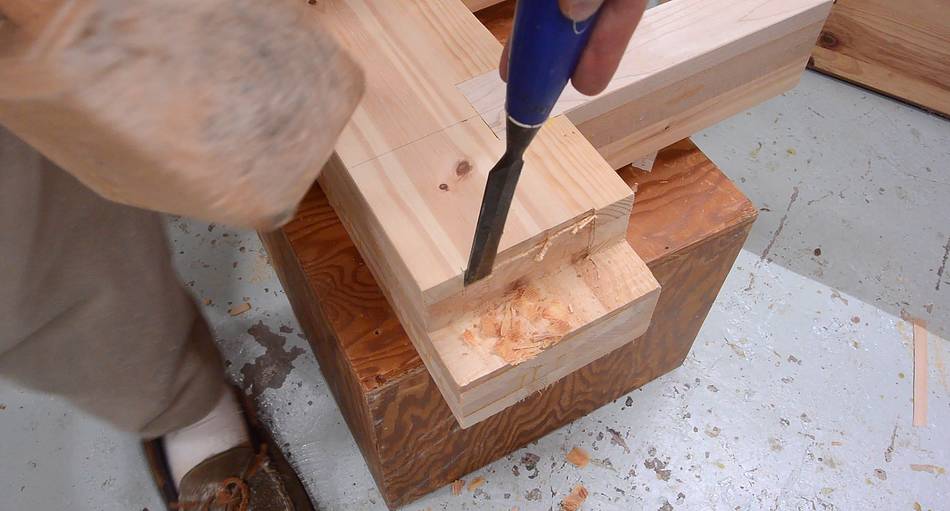 I'm cutting a notch in the middle of the beam so the post will only touch
near the top and bottom. That way, I don't have to try to make the whole notch
dead straight. After that, I carved the ends of the notch to be square.
I'm cutting a notch in the middle of the beam so the post will only touch
near the top and bottom. That way, I don't have to try to make the whole notch
dead straight. After that, I carved the ends of the notch to be square.
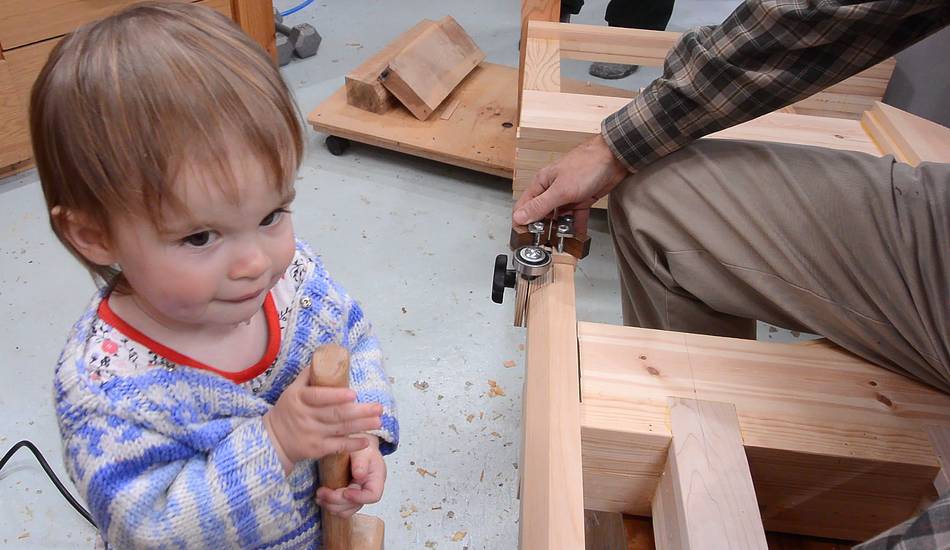 Checking the fit, while baby Harriet came for a brief visit.
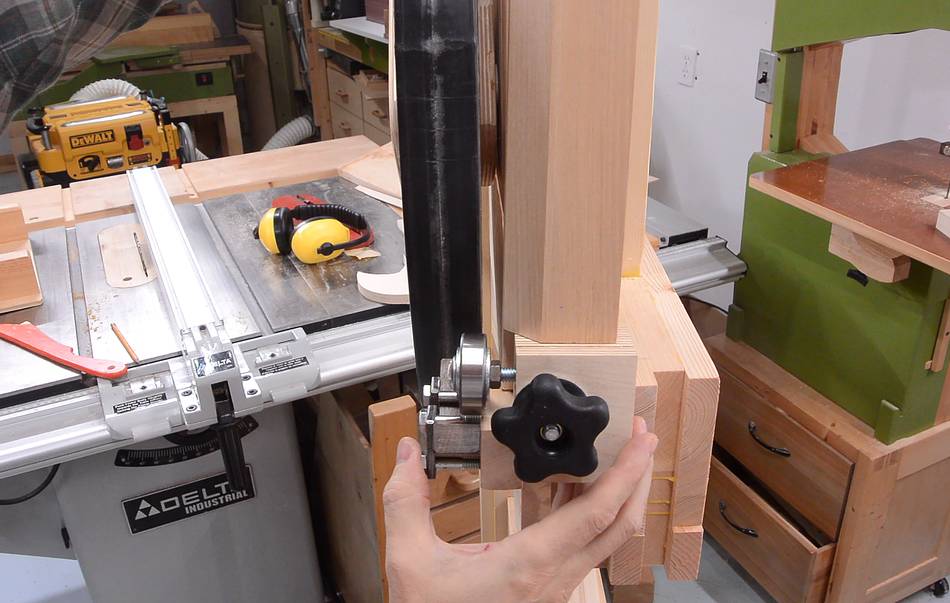
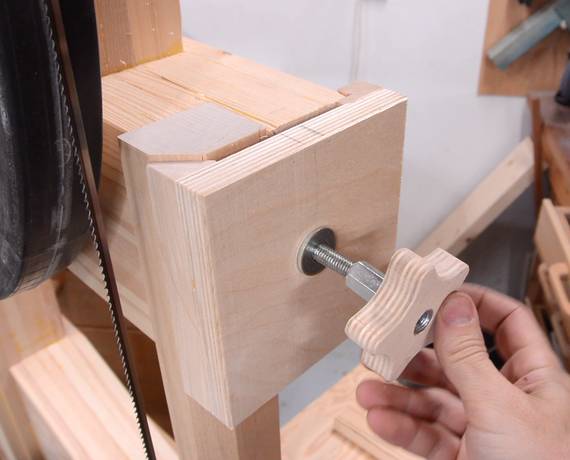
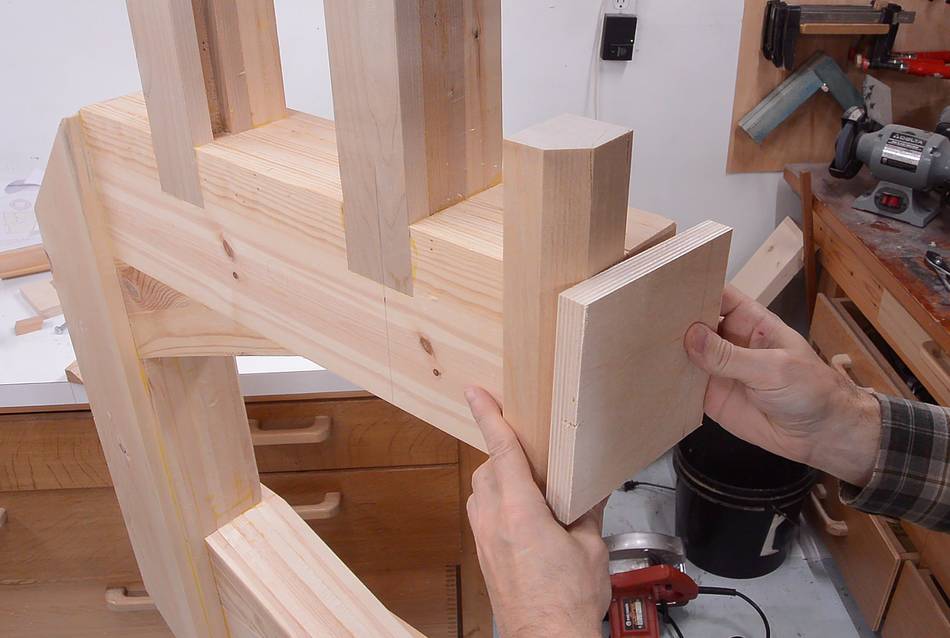 I need to make a clamp to clamp the post into the notch in the frame.
I made this one out of Baltic birch plywood, like the guides.
I need to make a clamp to clamp the post into the notch in the frame.
I made this one out of Baltic birch plywood, like the guides.
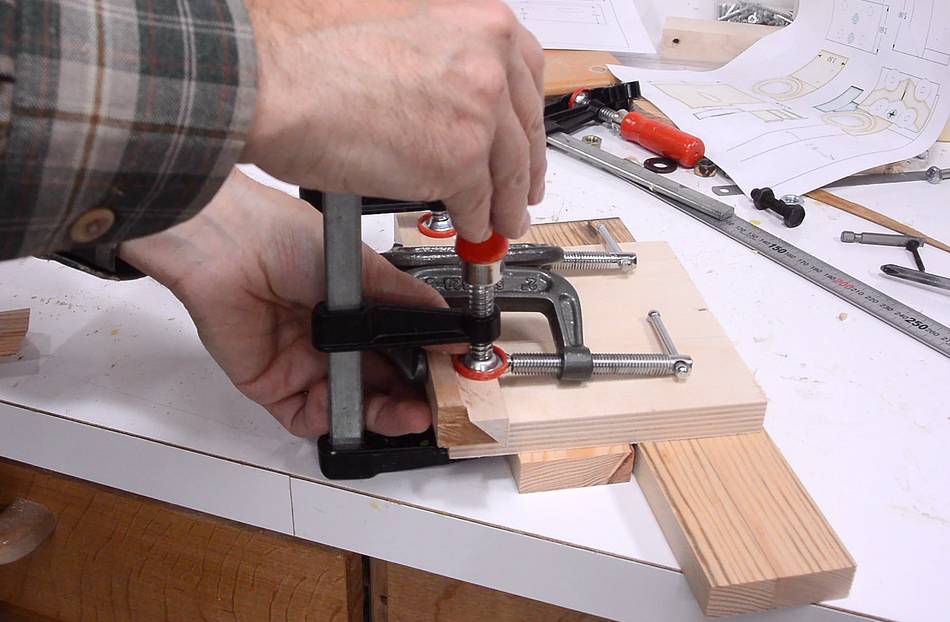 A strip of wood with a 45° bevel clamps to the edge.
I used the 45° piece I cut off, holding it in place with C-clamps to provide a clamping surface.
I should have just glued this piece on while it was still square and then cut the bevel on it on the table saw. That would have been easier.
 Drilling a hole for a threaded rod to go into the frame. I drilled this as
deep as the drill would allow.
Drilling a hole for a threaded rod to go into the frame. I drilled this as
deep as the drill would allow.
I'm holding a scrap of wood onto the end of the frame to help me guide the drill square to the surface.
 I then used a thin strip of wood to work some construction adhesive
into the hole. I also covered the end of the threaded rod with construction
adhesive before pushing it into the hole.
I then used a thin strip of wood to work some construction adhesive
into the hole. I also covered the end of the threaded rod with construction
adhesive before pushing it into the hole.
 Back to working on the clamp. The back of the clamp has a rabbeted piece
on it to keep the clamp from sliding forward as the bevelled part
pushes onto the guide post.
Back to working on the clamp. The back of the clamp has a rabbeted piece
on it to keep the clamp from sliding forward as the bevelled part
pushes onto the guide post.
I wanted to make sure I got the placement of the rabbeted piece just right before gluing it on, so here test fitting it, with the rabbeted piece only held on with C-clamps.
After checking it, I glued it on and trimmed off the excess.
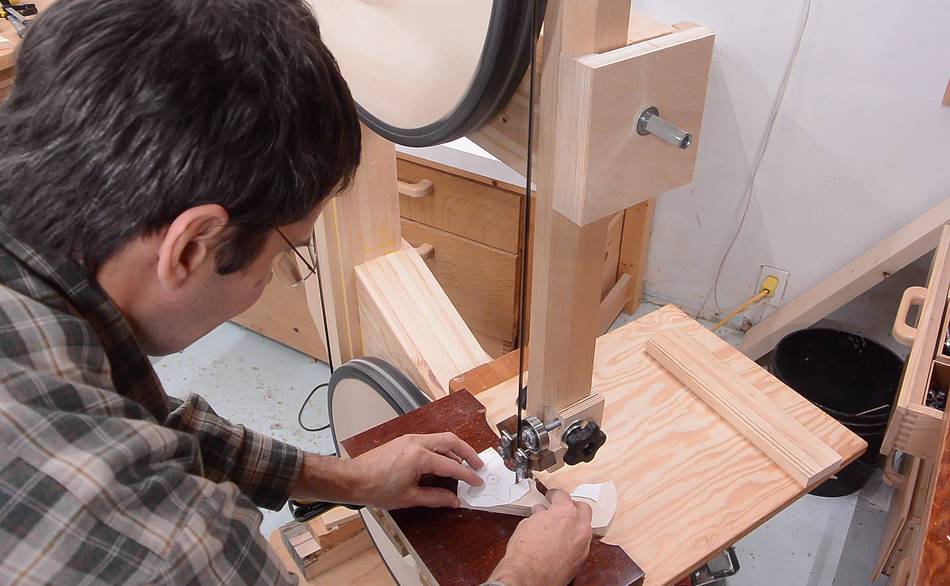
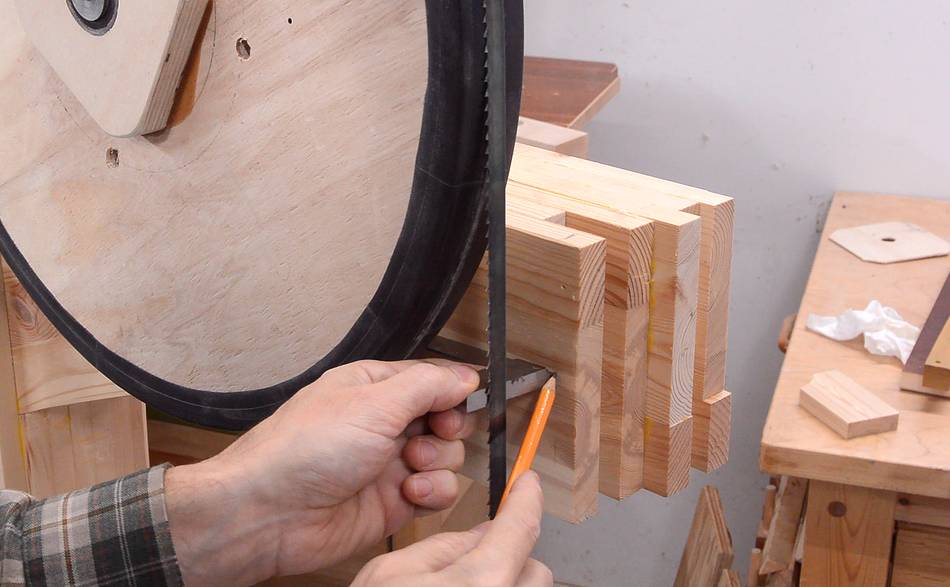
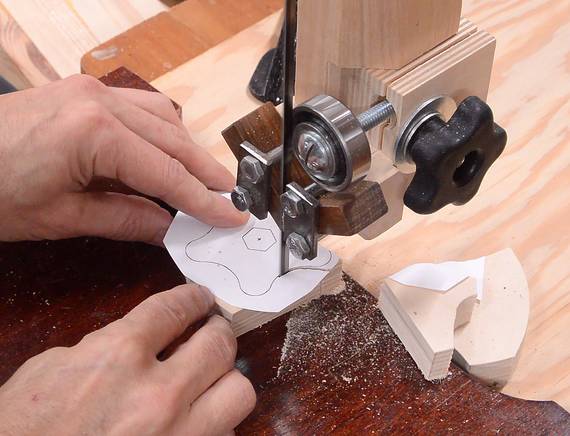 I figured it would be nice to have a star knob on the coupler nut. I put a
1/4" blade into my unfinished bandsaw and used it to cut out the knob,
using a template shape from my plans.
I figured it would be nice to have a star knob on the coupler nut. I put a
1/4" blade into my unfinished bandsaw and used it to cut out the knob,
using a template shape from my plans.
 I drilled a hole slightly smaller than the coupler nut into the plywood
and used a chainsaw file to file it slightly hexagonal before pressing
the coupler nut in with a vise.
I drilled a hole slightly smaller than the coupler nut into the plywood
and used a chainsaw file to file it slightly hexagonal before pressing
the coupler nut in with a vise.
The bandsaw is usable in its unfinished state. That means I can use it to cut out the trunnions for the tilting table.
Next: Trunnions and table
 Table and trunnions (2016)
 Making the bandsaw wheels (2016)
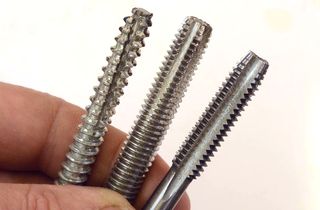 Making wood thread taps from threaded rod or bolts (2017)
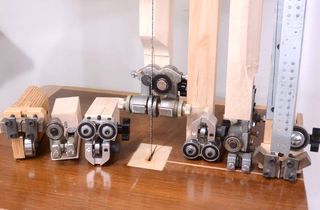 Comparing bandsaw blade guides
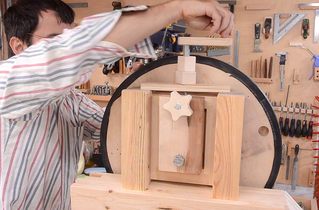 Making the wheel mounts for this bandsaw
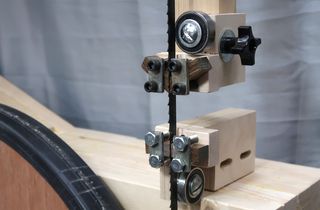 Blade guides for my 26" bandsaw
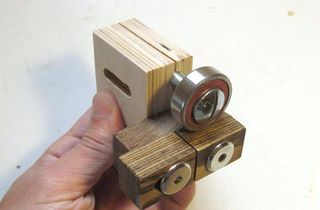 Blade guides for my 14" bandsaw