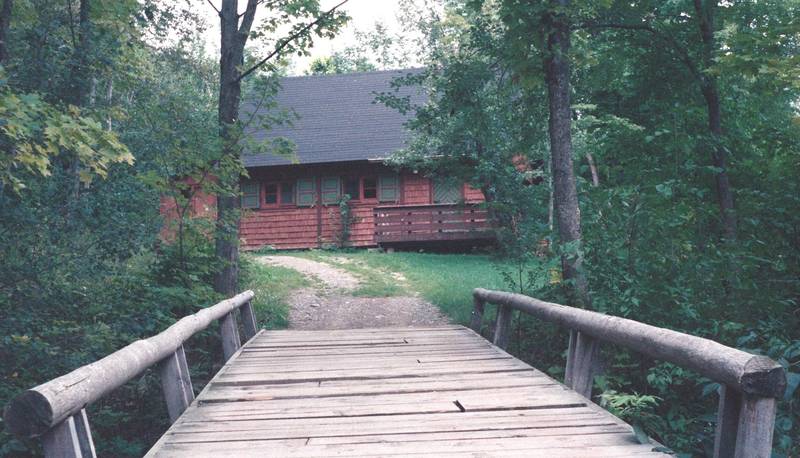
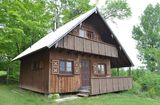
 The western-most of the cottages at
Amogla camp
was built, back in 1984, on the other side of a small creek from the rest of the cottages.
Connecting it to the rest of the camp necessitated crossing the creek
in some way, so my dad built a wooden bridge that same year.
The western-most of the cottages at
Amogla camp
was built, back in 1984, on the other side of a small creek from the rest of the cottages.
Connecting it to the rest of the camp necessitated crossing the creek
in some way, so my dad built a wooden bridge that same year.
The cottage is the one I wrote about
jacking up the foundations of in a previous
article.
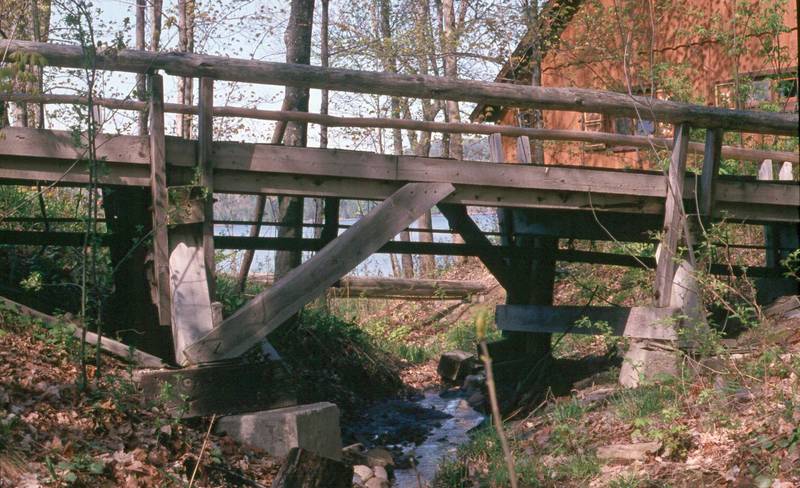 The bridge was built mostly out of cedar beams, milled on our old
sawmill.
The bridge is supported on either end and by two more frames over the creek.
It's 8.6 meters (29 feet) long, with the longest span about 3 meters (10 ft)
in length.
The bridge was built mostly out of cedar beams, milled on our old
sawmill.
The bridge is supported on either end and by two more frames over the creek.
It's 8.6 meters (29 feet) long, with the longest span about 3 meters (10 ft)
in length.
The bridge had to be able to support heavy American SUVs driving across, weighing in at well past two tons, so my dad used some large beams, 20x20 cm (8"x8"), with four parallel beams running under the decking for each span.
For the railing, my dad cut down two long and narrow poplar trees. We knew that poplar wouldn't last that long exposed to the elements, but there weren't any more suitable trees that long and straight. I guess they lasted for a while. The photo at left was taken in 1992, so eight years after construction, they were still ok.
In the background of this photo: cottage #2.
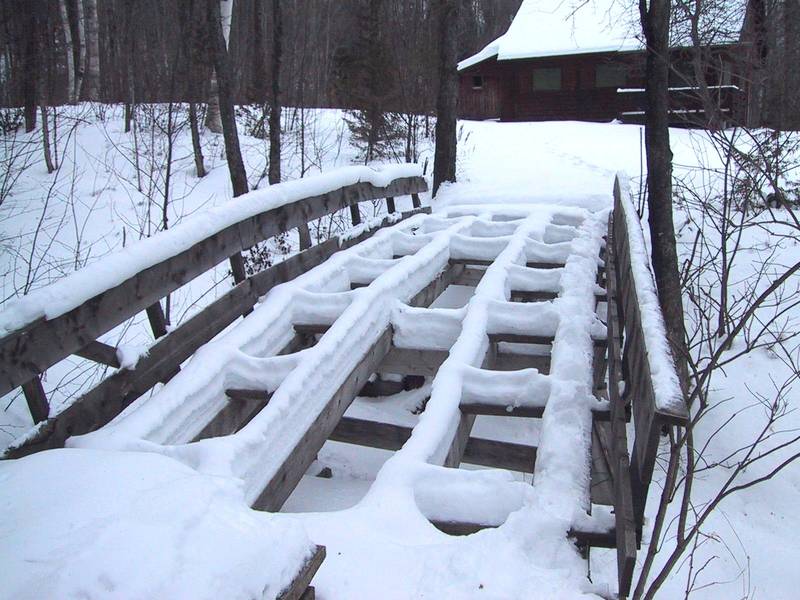 My dad anticipated that frost on the foundations would be a problem. But with
an insulating layer of snow on the ground, the ground often doesn't freeze very much.
So the strategy was to remove the decking boards every fall so that snow could fall
through the bridge and cover the ground around the foundations.
My dad anticipated that frost on the foundations would be a problem. But with
an insulating layer of snow on the ground, the ground often doesn't freeze very much.
So the strategy was to remove the decking boards every fall so that snow could fall
through the bridge and cover the ground around the foundations.
This strategy, it turned out, had very limited success. And with the waterlogged ground from the creek, the foundations shifted a lot. What kept the bridge usable over the years is that my dad propped up and moved the supports after every winter to keep the bridge reasonably straight.
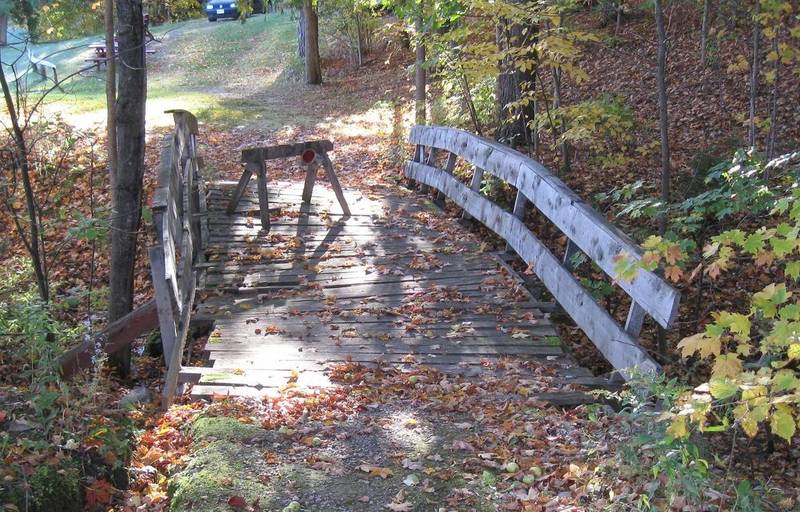
The photo at left was taken in 2000. By that time, my dad had replaced the railings,
as the original poplar railings had become too rotten. The rest of the bridge, mostly
made of cedar, was still solid.
 In 2005, my parents closed Amogla camp to tourists as they were getting too old
to keep up with it
The wooden bridge, by then 21 years old,
was closed to vehicle traffic. An alternate vehicle access was constructed to
the westernmost cottage from a public road. The bridge was still used for walking
and for the riding mower. But the bridge, at this point,
was no longer maintained.
In 2005, my parents closed Amogla camp to tourists as they were getting too old
to keep up with it
The wooden bridge, by then 21 years old,
was closed to vehicle traffic. An alternate vehicle access was constructed to
the westernmost cottage from a public road. The bridge was still used for walking
and for the riding mower. But the bridge, at this point,
was no longer maintained.
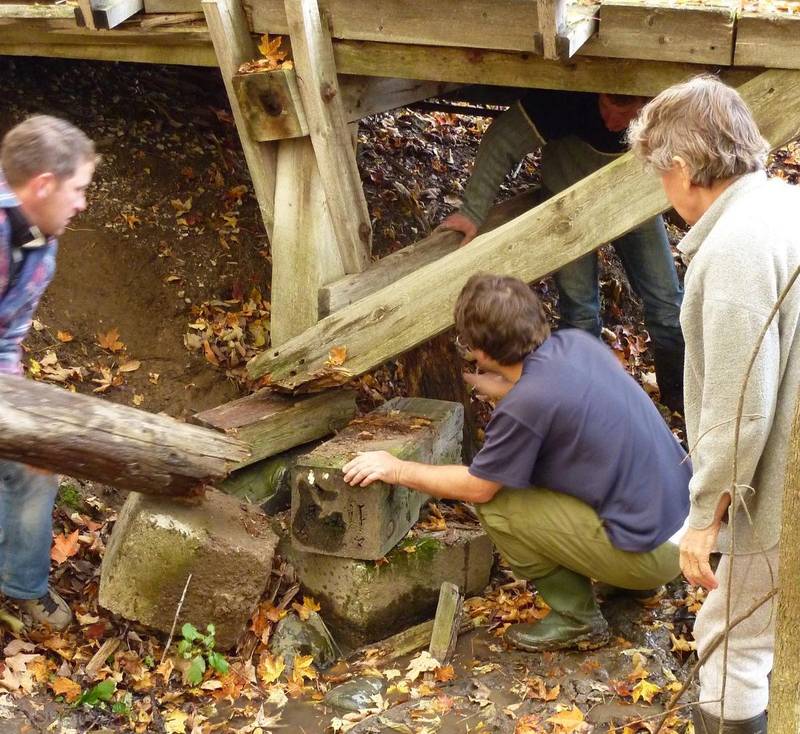
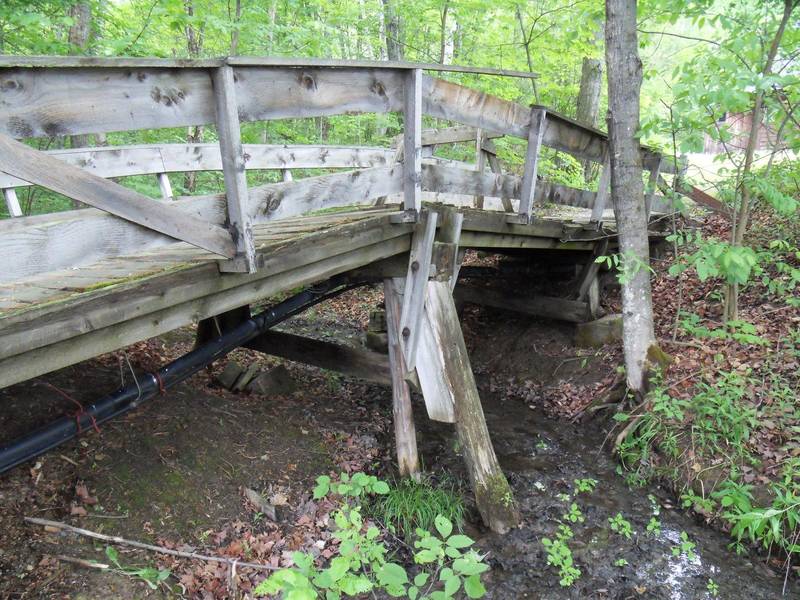 My dad had at some point replaced some of the concrete foundation blocks with
cedar posts driven into the ground. But these had also started to work their way out of
the ground (see here on how that happens).
My dad had at some point replaced some of the concrete foundation blocks with
cedar posts driven into the ground. But these had also started to work their way out of
the ground (see here on how that happens).
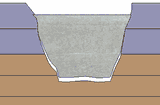
And so the bridge had developed a very serious kink to it, and the wood looked fairly rotten too. We figured we'd have to tear the bridge down. I had some ideas for how a simpler, shorter unsupported walking bridge could be constructed across the creek, but stairs would be needed to get down to the level of the creek, so it wouldn't be possible to drive the mower across it.
But having for the most part given up on the bridge, that does give one a bit of a "nothing to lose" attitude towards bodging it to maybe last a few more years.
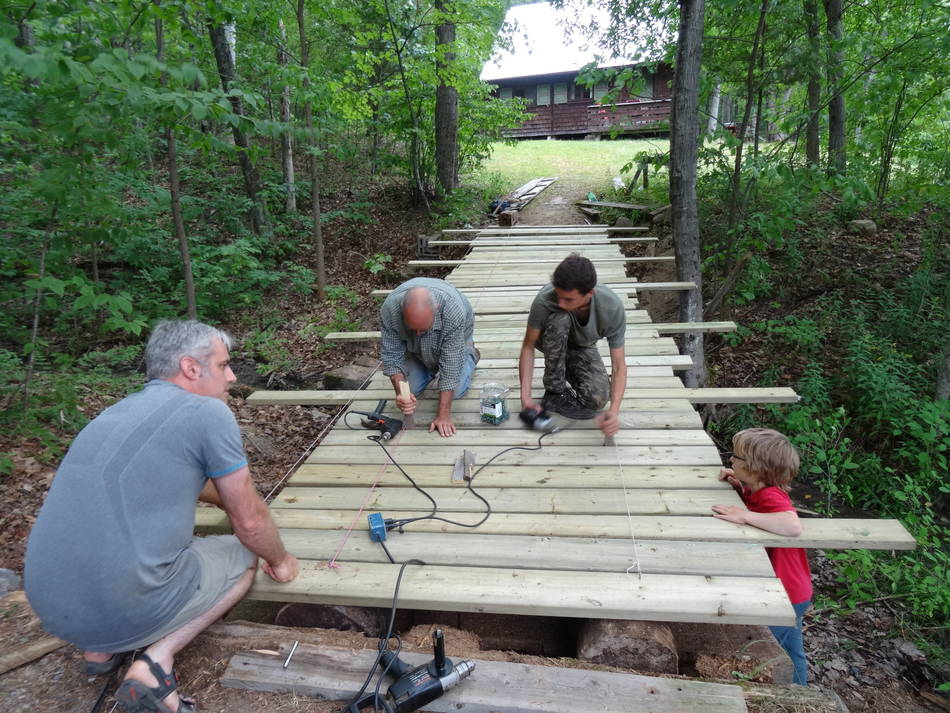
It was also at this time, in 2011, that three cousins were visiting from Germany.
Two of them happen to be of the profession of "zimmerman", or timber framers.
So working with beams was totally in their element.
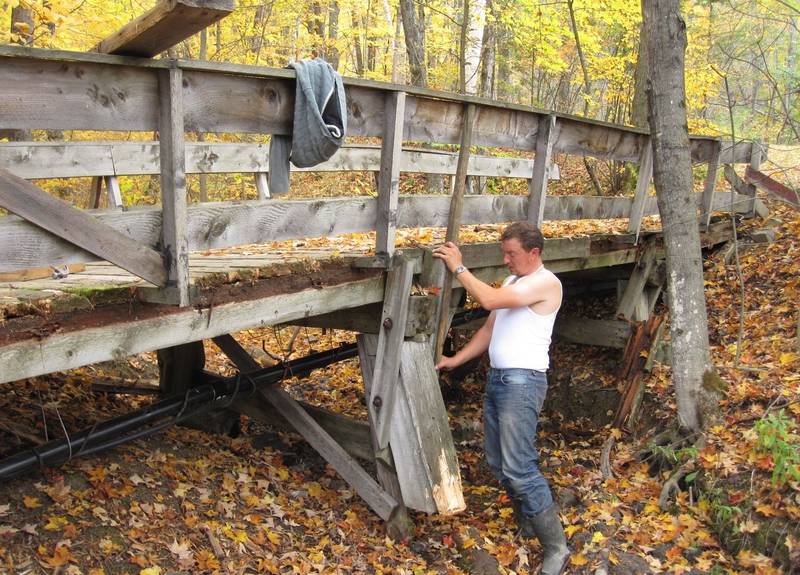
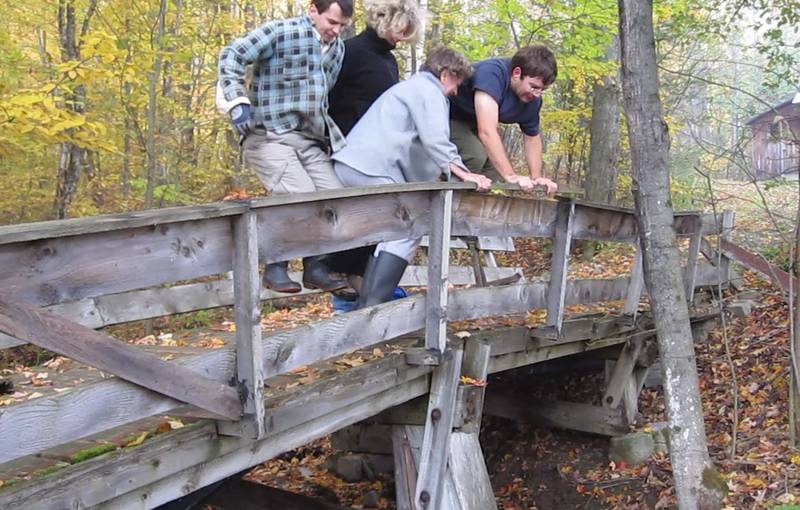 There are two posts that support the bridge where it worked its way up. We cut away the
more rotten of the two, but the other one still looked good. Problem is, it was too high.
There are two posts that support the bridge where it worked its way up. We cut away the
more rotten of the two, but the other one still looked good. Problem is, it was too high.
The post just sits in muck that goes quite a ways down. So by collectively jumping on that spot on the bridge, we were able to drive it a considerable distance back into the ground. We then propped up that side of the bridge a little, and cut another 10 cm off the top of the post to get it level again.
After that exercise, the bridge also had a bit of a sideways kink to it, but we straightened
that out by winching it against a tree.
 We piled bits of beam and blocks under some of the other supporting beams. Taking the attitude
that we are only fixing it to last a few more years gives one a lot of freedom in terms
how solid the repairs need to be. Seeing that the bridge won't be reopened to vehicle
traffic, we don't need to support that much load.
We piled bits of beam and blocks under some of the other supporting beams. Taking the attitude
that we are only fixing it to last a few more years gives one a lot of freedom in terms
how solid the repairs need to be. Seeing that the bridge won't be reopened to vehicle
traffic, we don't need to support that much load.
The ground consists of 100% muck that goes much deeper than we cared to dig. Pilings driven deep into the ground would probably be the only solid way of getting a footing, but that old bridge doesn't justify the expense of bringing in heavy equipment to work on it.
Even originally, the bridge was built by hand. The only machines that were used
were a chainsaw, drill, circular saw, and a small cement mixer.
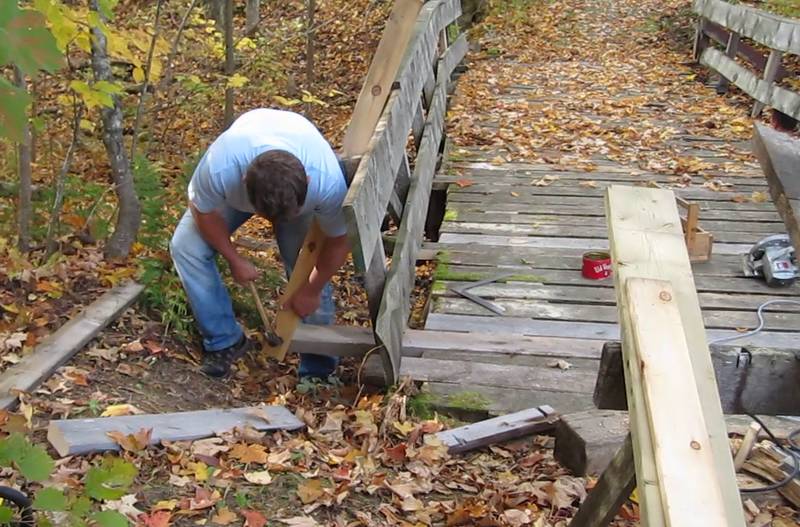
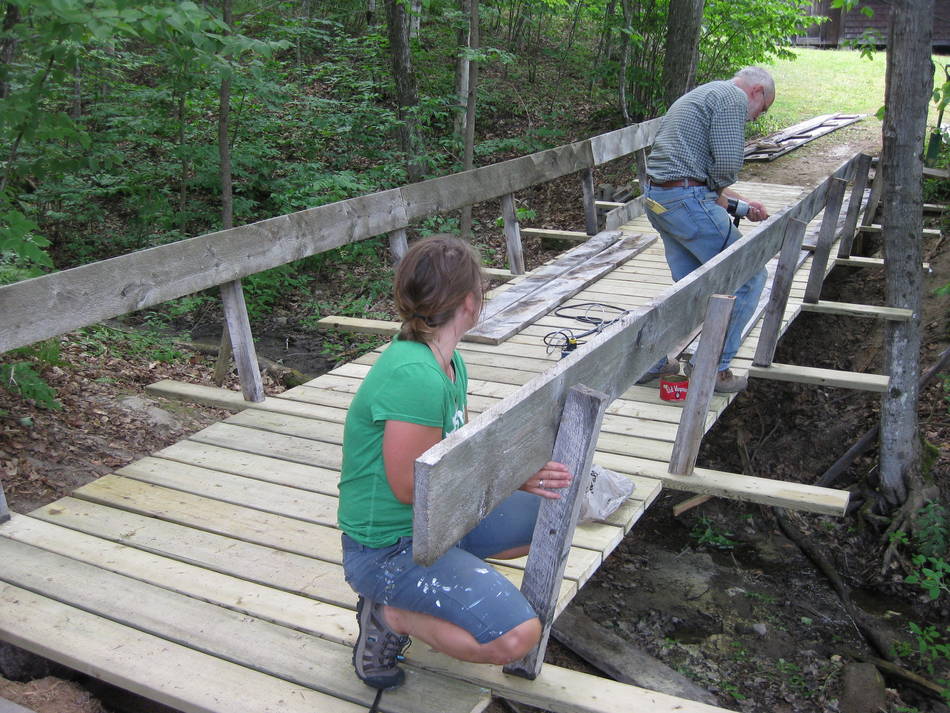
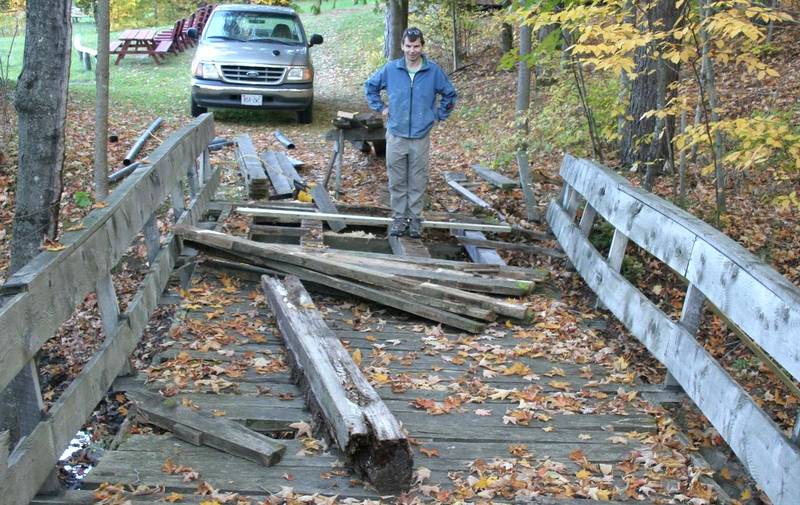 One of the beams on one end of the bridge seemed to be a little bit "low" so we took the decking
off to shim that up. On closer examination, the reason the beam was low was that it was
completely rotten. That beam was made out of red oak, which, as it turns out, is not nearly
as rot resistant as the cedar beams. We took that beam out, and it's in the foreground of the photo.
We replaced it with a thinner beam of pine. It's the one to the right of the one I'm standing on.
One of the beams on one end of the bridge seemed to be a little bit "low" so we took the decking
off to shim that up. On closer examination, the reason the beam was low was that it was
completely rotten. That beam was made out of red oak, which, as it turns out, is not nearly
as rot resistant as the cedar beams. We took that beam out, and it's in the foreground of the photo.
We replaced it with a thinner beam of pine. It's the one to the right of the one I'm standing on.
To my European readers: The red oak, so common in Canada, is a different species from the "white oak" common in Europe. Red oak is less rot resistant than white oak, though still better than maple or birch. Also, what we call "cedar", or "white cedar" here is not technically cedar at all, but known as tuja by Europeans. Western red cedar is another different species from the "white cedar" that grows in Ontario.
But the white cedar beams supporting bridge were all still quite solid, which is quite
impressive after 26 years exposed to the elements, under a bridge and over a creek.
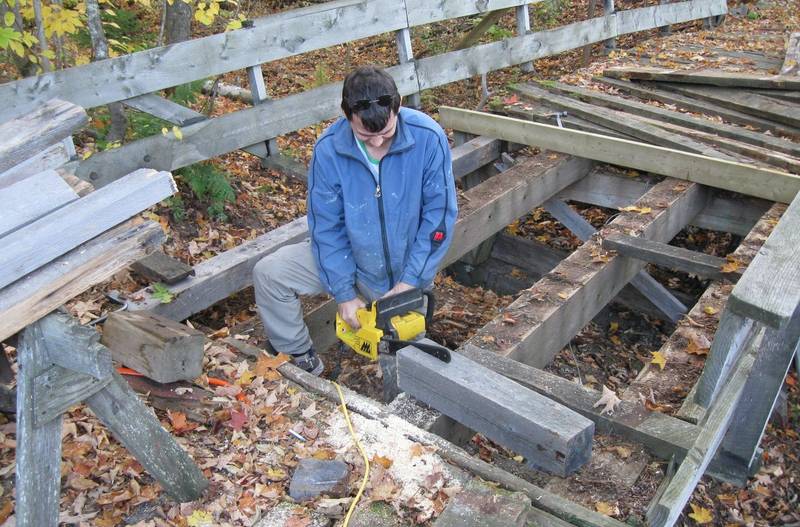 Electric chainsaws are very handy when working with beams. Cheap, and much lighter and easier to
handle than gas-powered chainsaws.
Electric chainsaws are very handy when working with beams. Cheap, and much lighter and easier to
handle than gas-powered chainsaws.
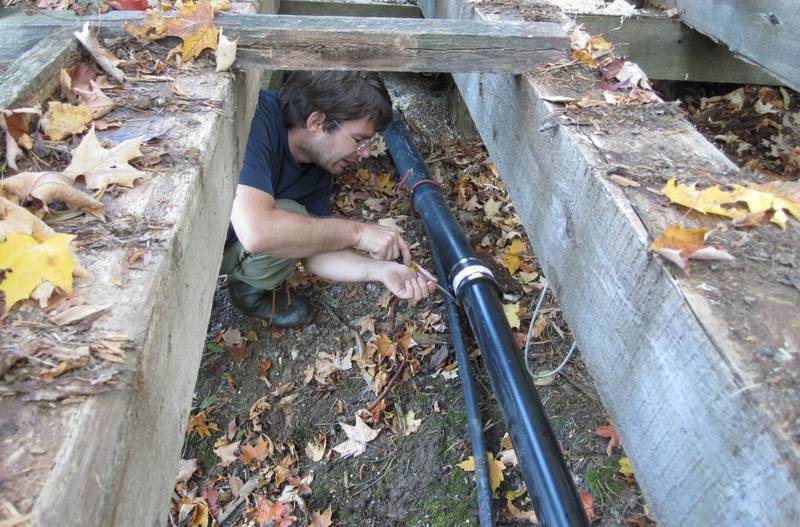 We also replaced the septic pipe that runs under the creek. With all the cracks in the
old septic pipe, it was surprising that it still held together. We attached the new section
with flexible rubber couplings. With everything shifting around every year, hopefully,
the rubber couplings will absorb some of that.
We also replaced the septic pipe that runs under the creek. With all the cracks in the
old septic pipe, it was surprising that it still held together. We attached the new section
with flexible rubber couplings. With everything shifting around every year, hopefully,
the rubber couplings will absorb some of that.
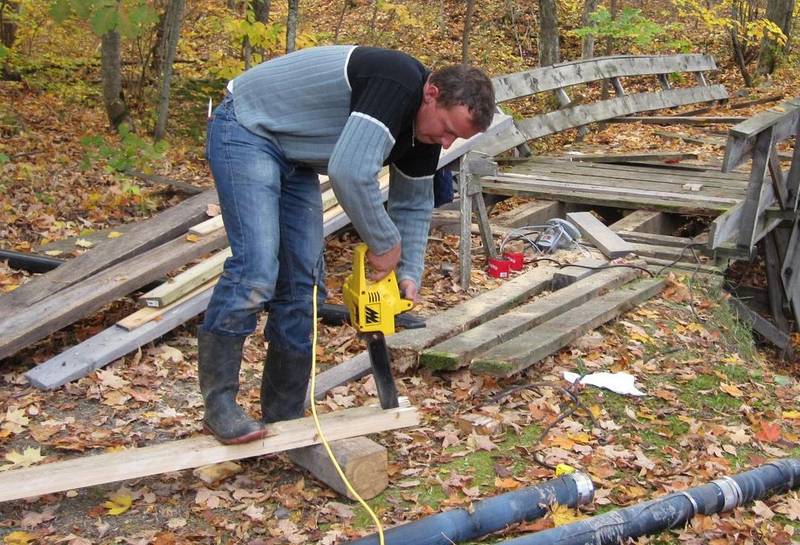 One of my cousins working on boards for the decking. This board needed a notch cut into it
to attach around one of the railing posts.
One of my cousins working on boards for the decking. This board needed a notch cut into it
to attach around one of the railing posts.
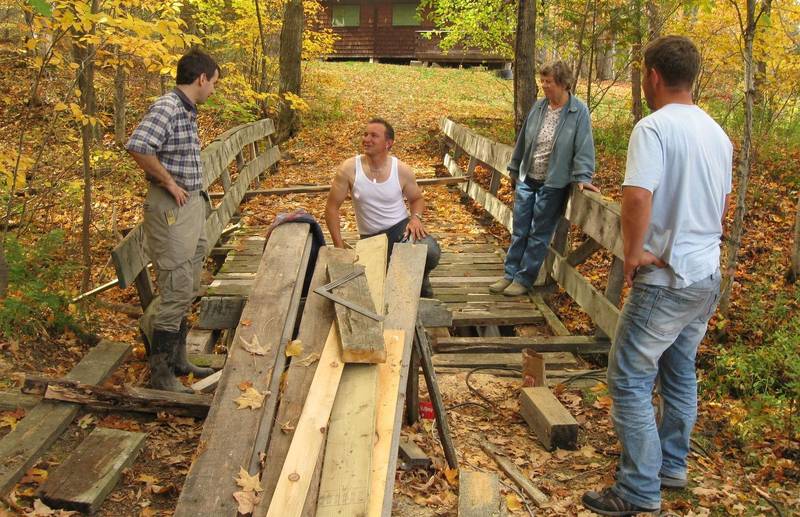 Taking a short break. From left to right; me, my cousin Andreas, my mom, and my cousin Thomas.
My brother Markus was helping too, but he took this photo.
Taking a short break. From left to right; me, my cousin Andreas, my mom, and my cousin Thomas.
My brother Markus was helping too, but he took this photo.
 The old way the railings were attached was with a bridle joint to some of the planks that were
nailed in place. But these planks were oak, and some of them had become rotten.
This time around, where the old supports had let go, we just extended the planks out a bit
further and nailed a support at an angle. It doesn't look as elegant, but it does the job.
The old way the railings were attached was with a bridle joint to some of the planks that were
nailed in place. But these planks were oak, and some of them had become rotten.
This time around, where the old supports had let go, we just extended the planks out a bit
further and nailed a support at an angle. It doesn't look as elegant, but it does the job.
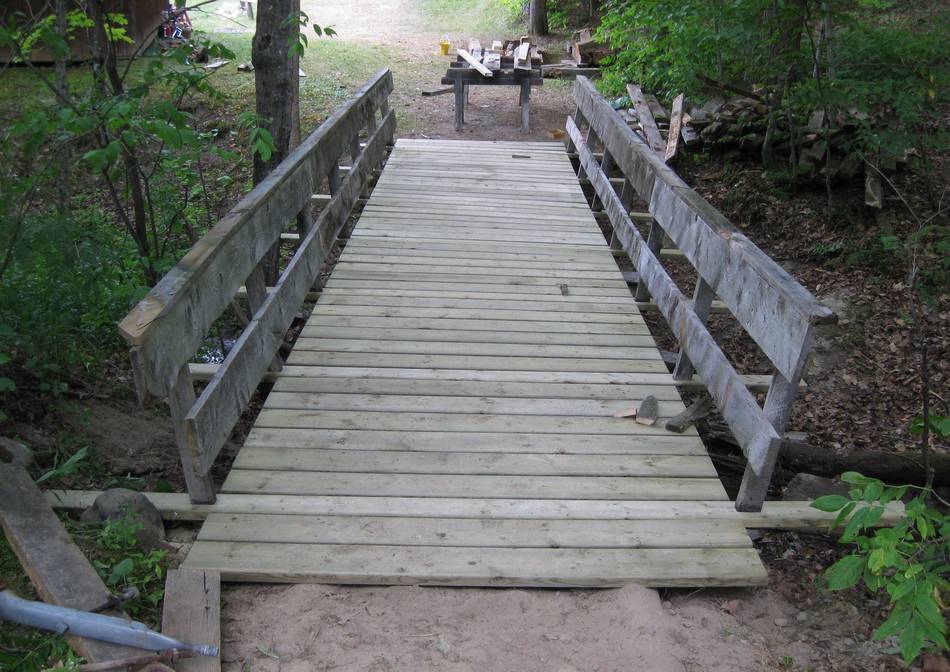
 More work securing the railings...
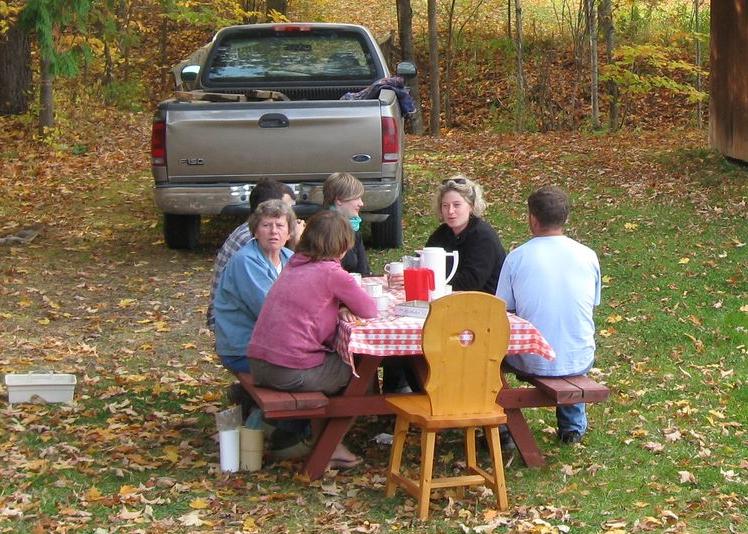 And to finish it all off, my mom brought some deserts and coffee to have right next to the bridge.
(The bridge is behind the truck)
And to finish it all off, my mom brought some deserts and coffee to have right next to the bridge.
(The bridge is behind the truck)
Thanks mom!
Update 2015:
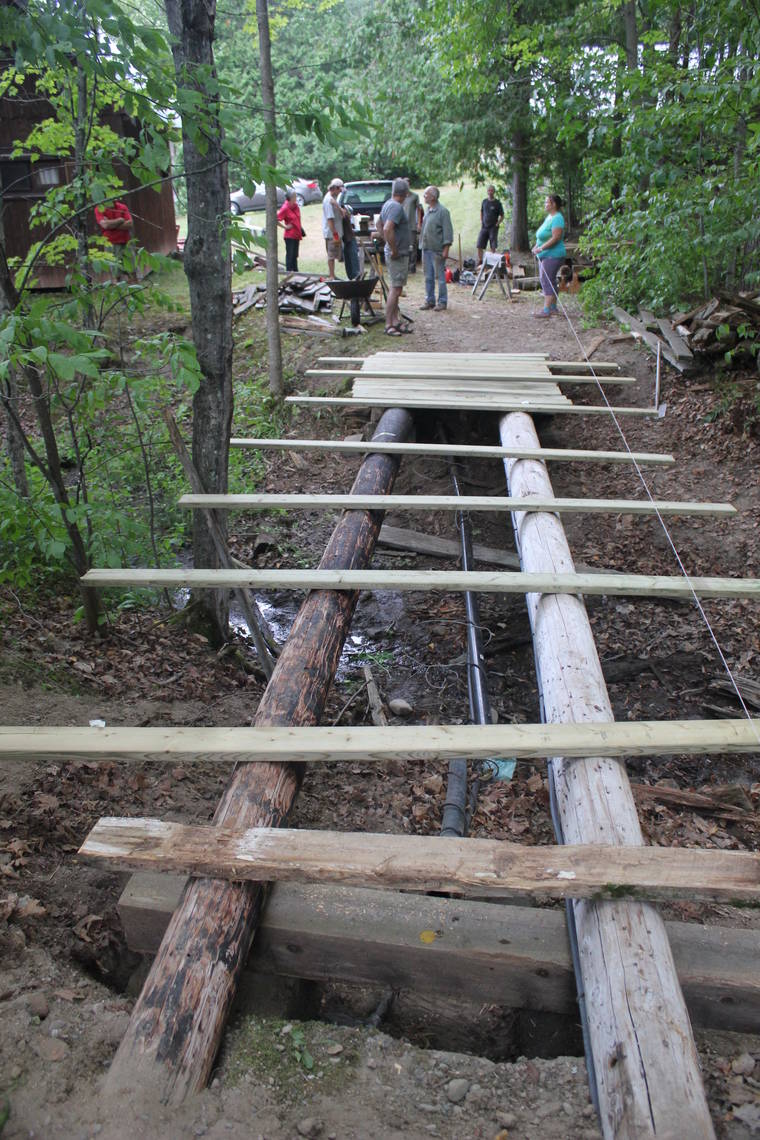 By 2015, four years on, the bridge had again shifted too much to drive even a lawn
mower across it. But mom managed to get the old power line poles when they
were replaced. Two of these formed the basis of a new bridge, built mostly
by visiting friends. One of them was Kurt, who's
woodworking machines I wrote about before. I wasn't at the camp for this
as my wife had just given birth, so
there's just pictures that my brother took, no video.
By 2015, four years on, the bridge had again shifted too much to drive even a lawn
mower across it. But mom managed to get the old power line poles when they
were replaced. Two of these formed the basis of a new bridge, built mostly
by visiting friends. One of them was Kurt, who's
woodworking machines I wrote about before. I wasn't at the camp for this
as my wife had just given birth, so
there's just pictures that my brother took, no video.
 Touring cottage #2
More home improvement projects on my Woodworking website
 Foundation problems
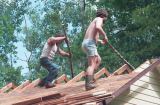 Dismantiling old cottages
 Framing a cottage
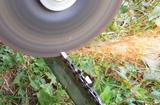 Chainsaw sharpening
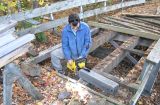 Bodging a bridge
 Wood rot and fixing