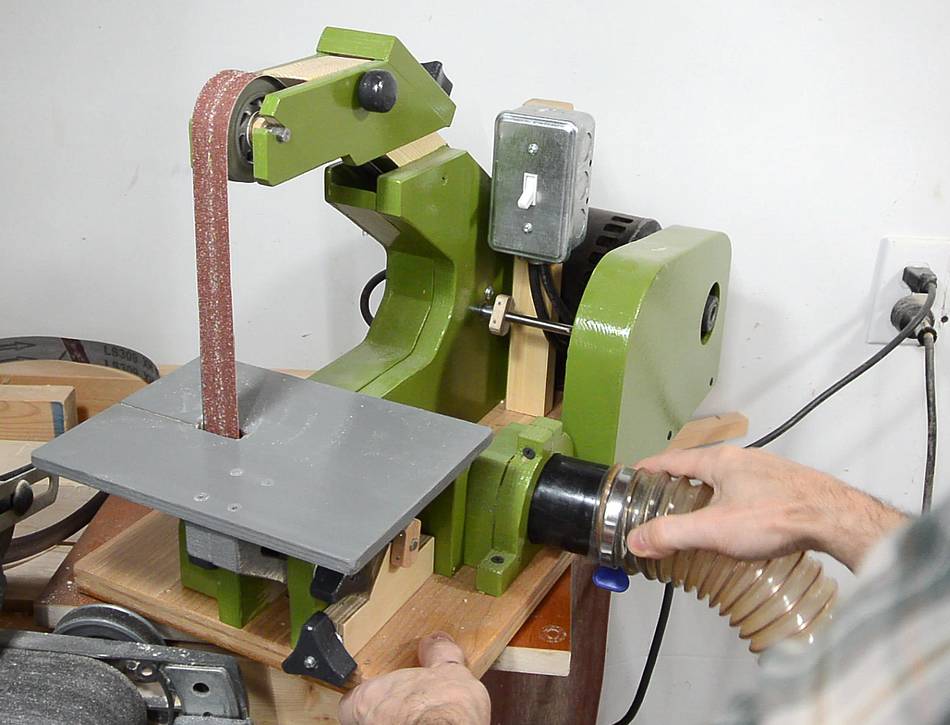
My motivation for this experiment was that I'm usually too lazy to hook
up the dust collector to my strip
sander. So I figured I'd try building a really really low power
dust collector to leave hooked up to the sander and run off the same
power switch.
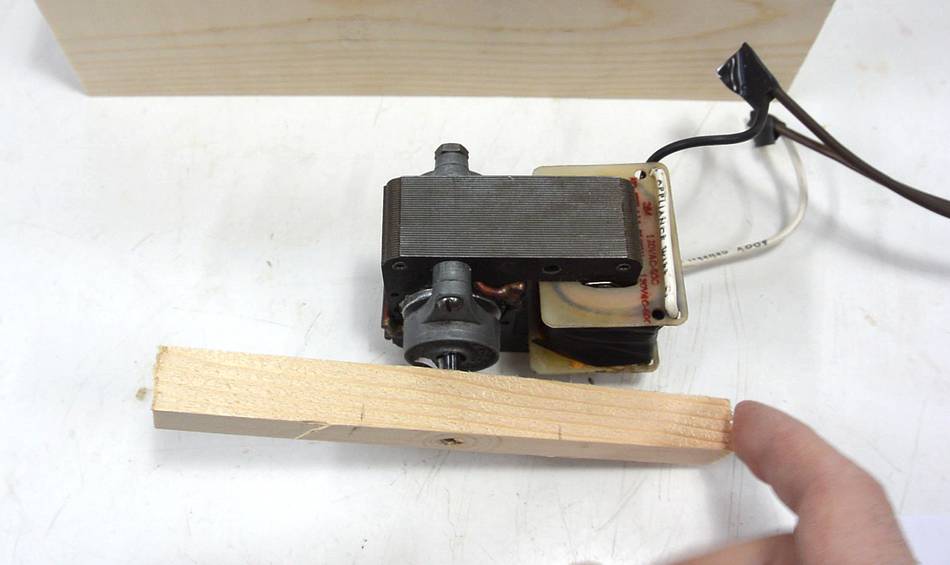
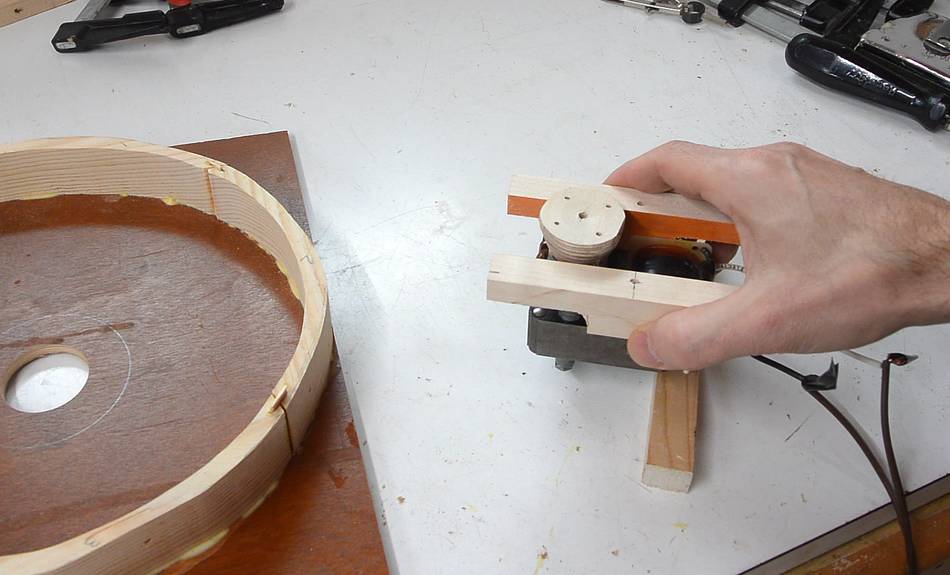
I started with a small shaded-pole motor and experimented with how big a
piece of wood I could spin with it to determine how big an impeller
it could drive. I came up with this method for judging motor power vs.
impeller size when I built this
blower.
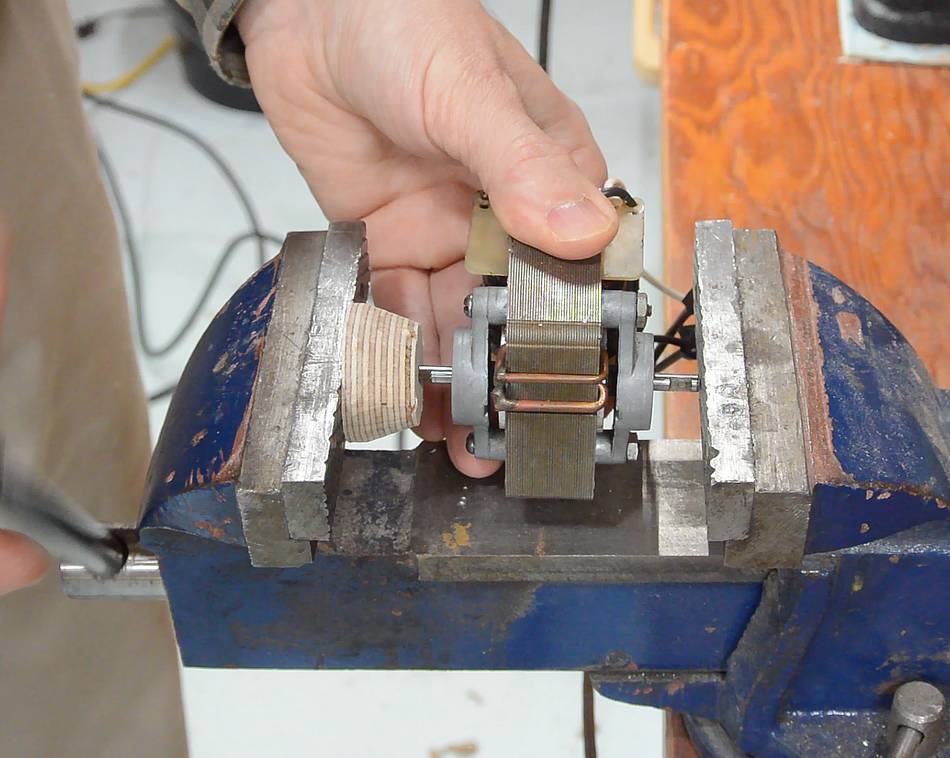
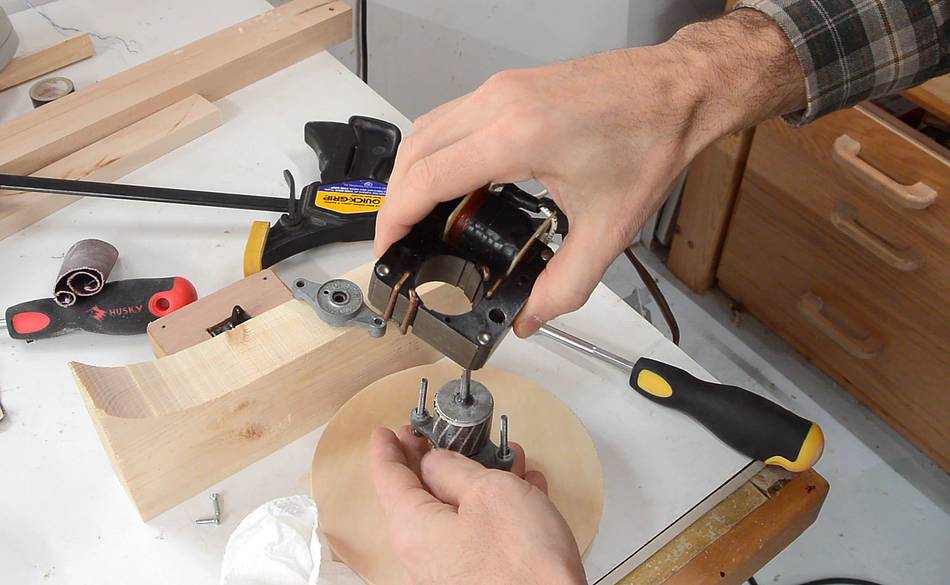
Unfortunately, the shaft on this motor is very short. I made a "flange"
out of baltic birch plywood to fit on the shaft. It has a slightly
undersized hole. I "mounted" this on the shaft by pressing it on in the vise.
My "flange" ended up less flat on the face than I hoped. There was about
0.010" (0.25 mm) of variation, and this wasn't even measuring at the edge.
So I let the motor spin and used a chisel to "turn" the face flat.
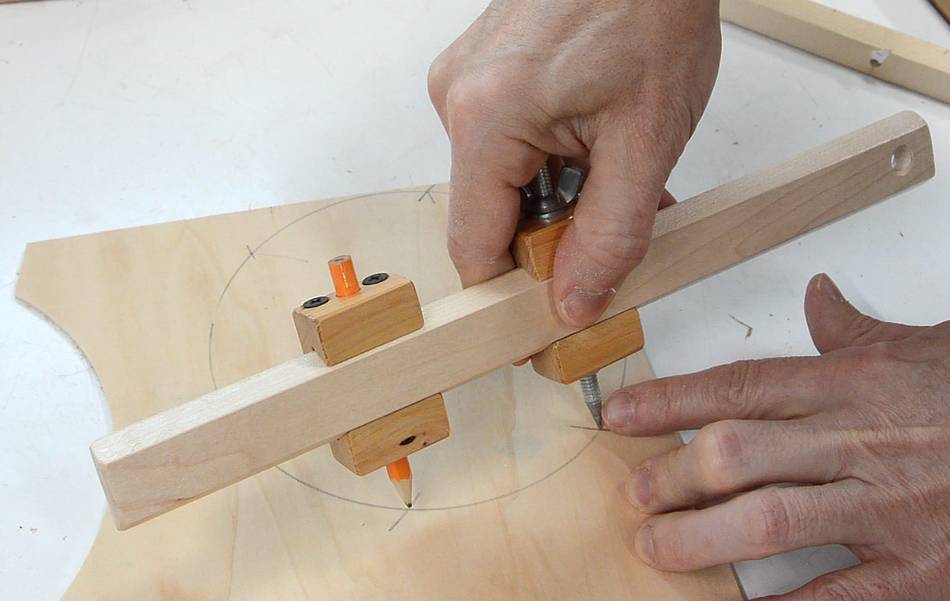
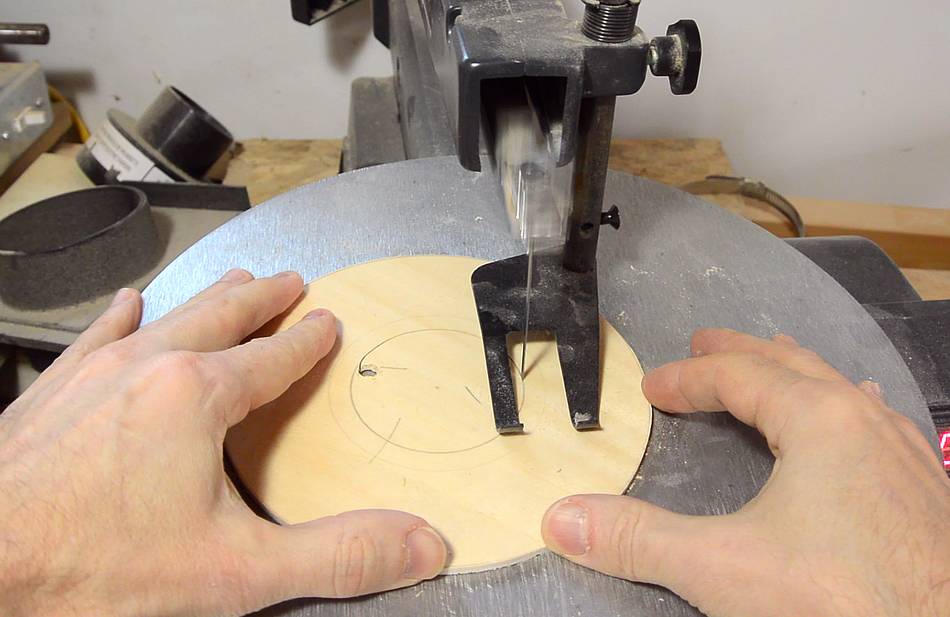
I drew the circle and laid it out for 6 vanes using my
beam compass
Test mounting the impeller disk. The impeller disk and the
motor's flange both have four holes, though I got the radius slightly wrong
so the spacing on the impeller disk was a bit larger.
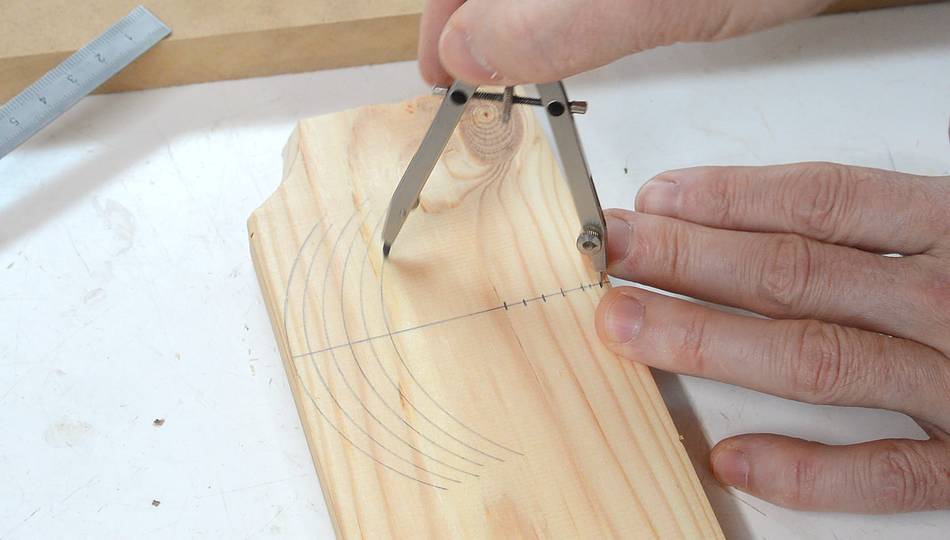
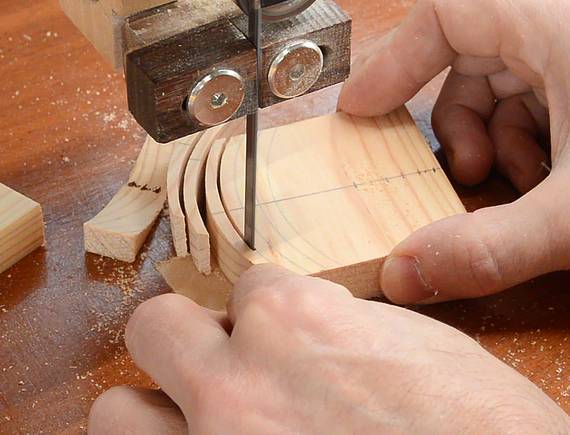
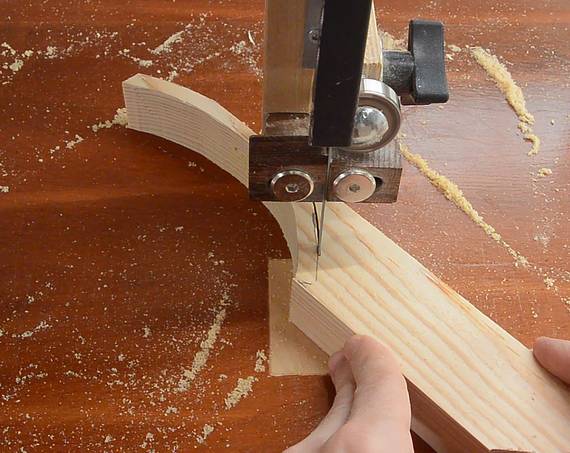
I drew a series of arcs on a piece of wood, then cut those out on
the bandsaw to make the impeller vanes.
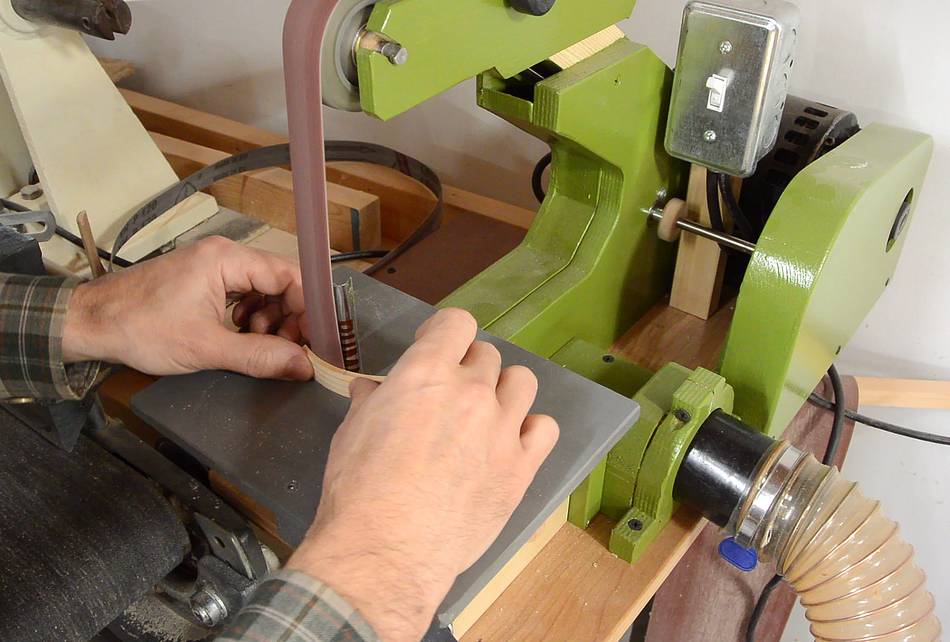
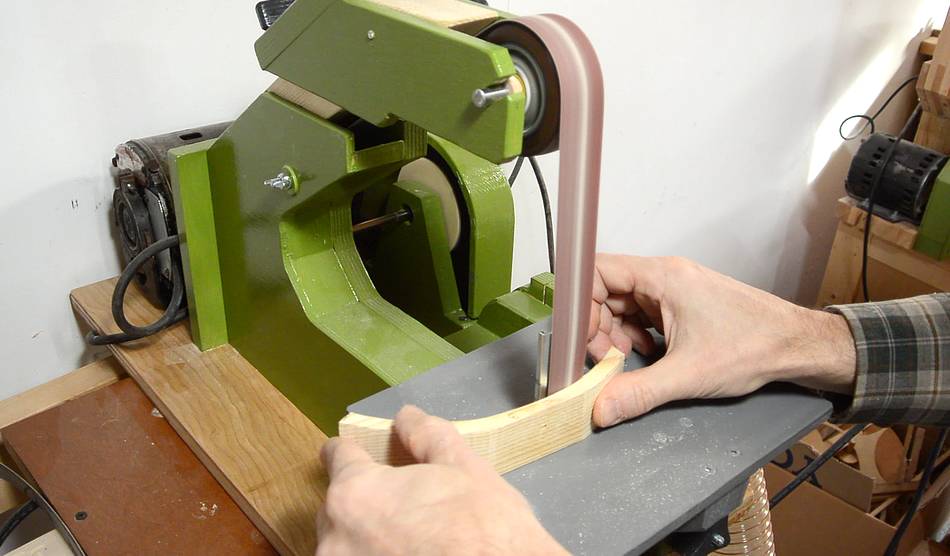
I sanded them smooth on both sides using my
strip sander. I used a convex platen behind the sanding belt to sand
the inside curve of the vanes.
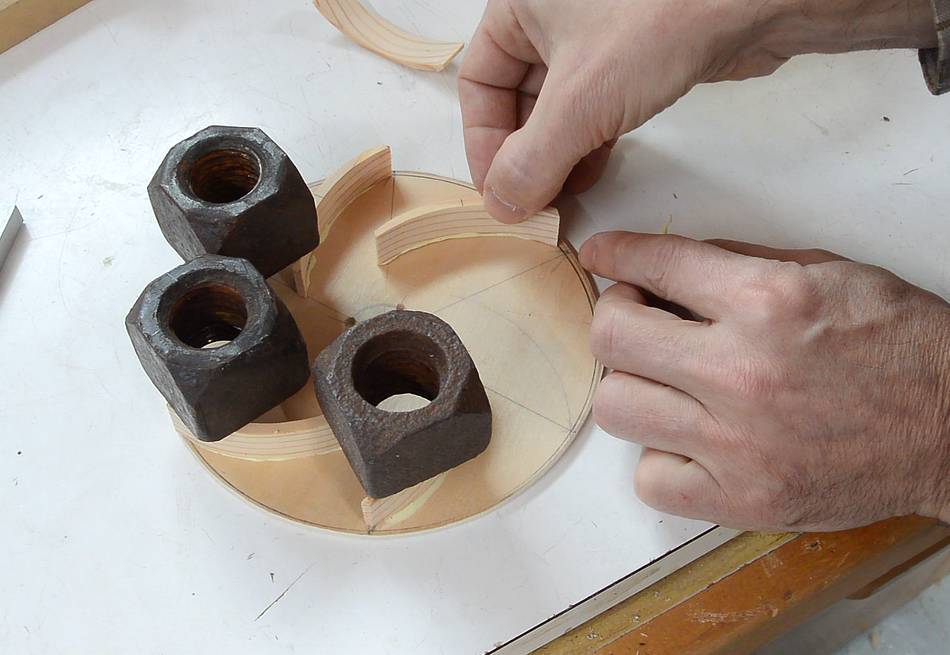
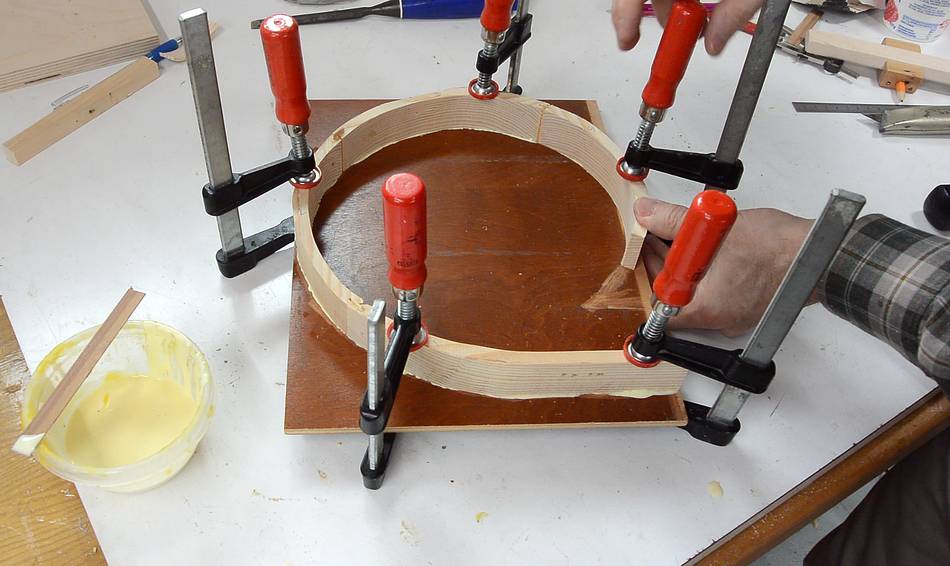
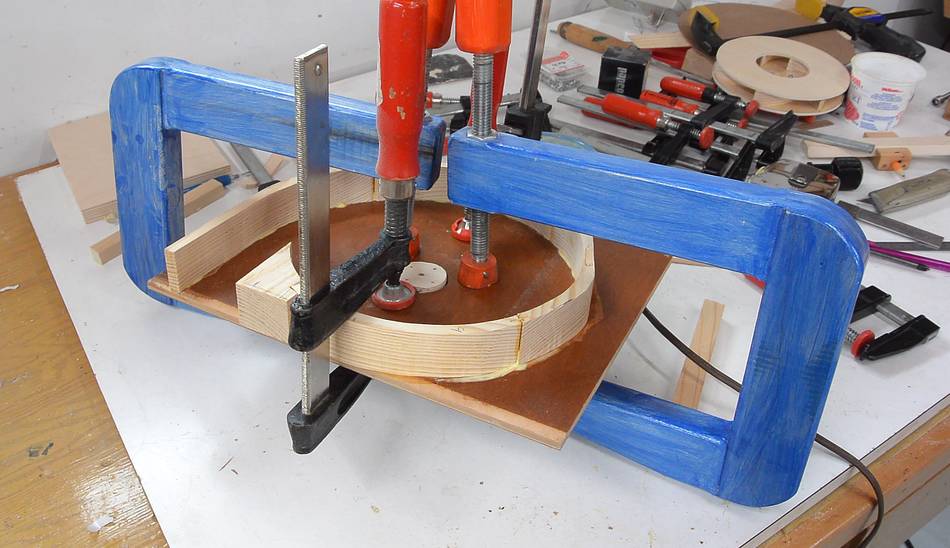
Gluing the vanes onto the impeller disk. I gave the plywood a slight
sanding before gluing on the vanes. Some quick experiments I did in the
past revealed that old wood glues better if given a light sanding.
Atmospheric gunk deposits on the surface over time, making the glue
stick less well. Sanding clears the gunk. I'm using some big steel
nuts to clamp it while the glue dries.
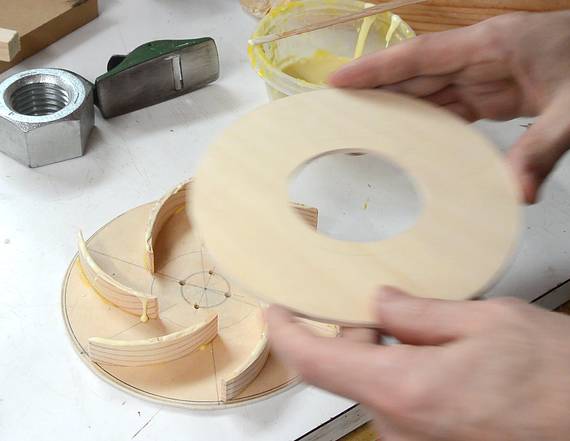
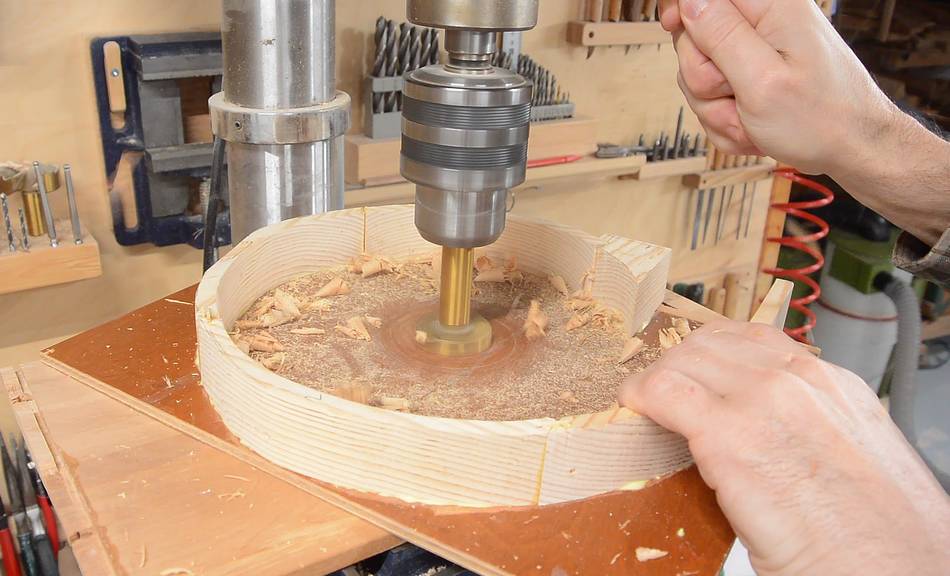
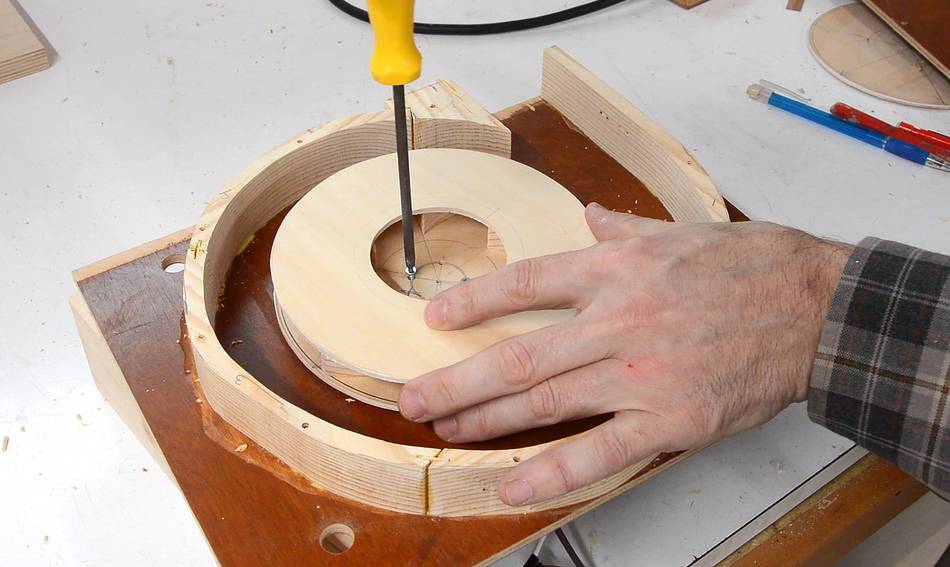
Cutting the hole for the front impeller disk with a scrollsaw,
then gluing it on.
Running it for the first time, the motor was not able to bring it up to speed.
Too much air resistance. Though if I plugged the hole in the middle, it
would get up to full speed.
Then I realized, I built the impeller to run counter-clockwise, but the
motor runs clockwise. I could have just put my flange on the opposite
shaft of the motor, but then I would have had to re-true it. So instead
I just flipped over the stator of the motor to reverse it.
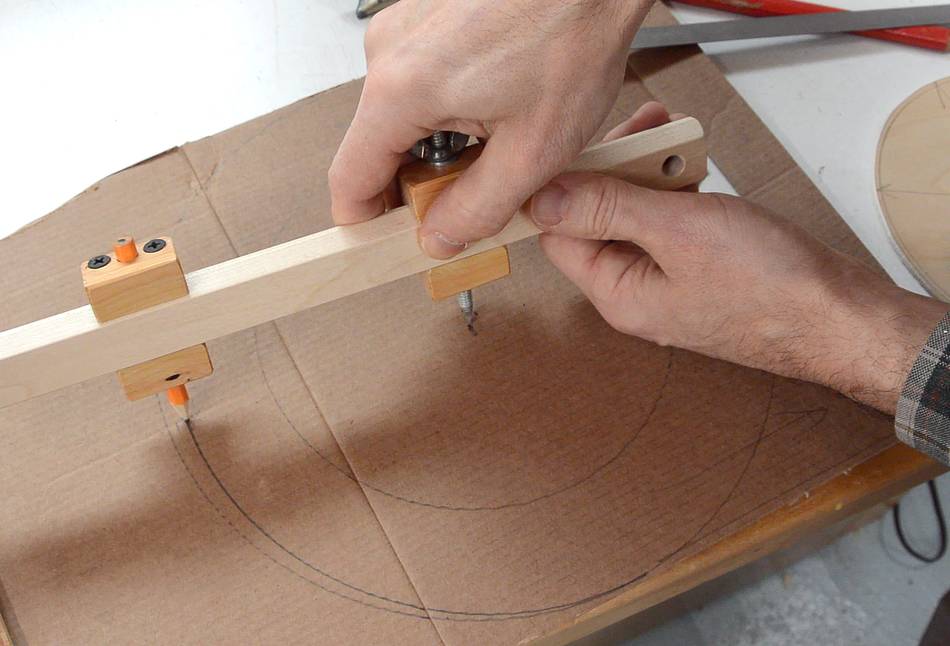
I then laid out a spiral shape for the blower housing on some cardboard.
I started by drawing two circles with 4 cm difference in diameter. I
then marked 1 cm in where the compass is pointed, 2 cm towards the top,
and 3 cm in towards the right. I then joined these points with
circular arcs of a radius that is between the radius of the two points I
was joining. If you need more details on how I did this, read this article where I explain it in
more detail, or watch the video.
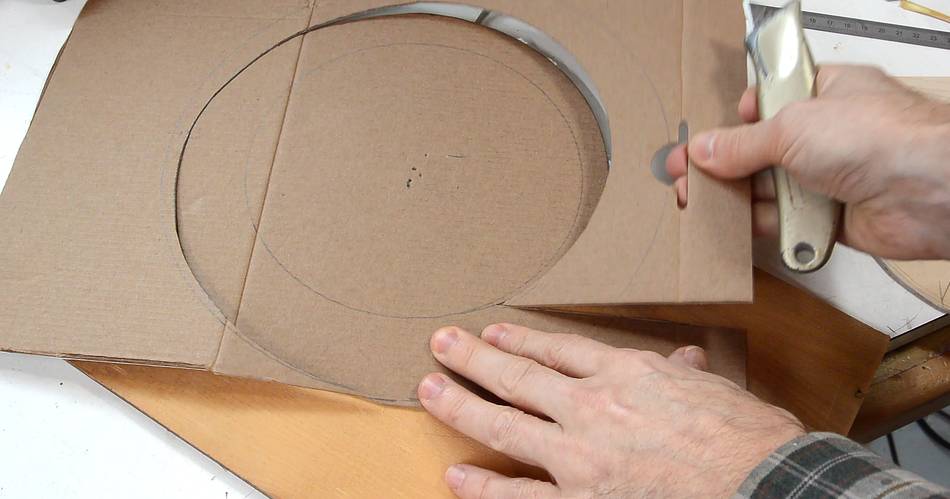
I then cut out this shape with a utility knife.
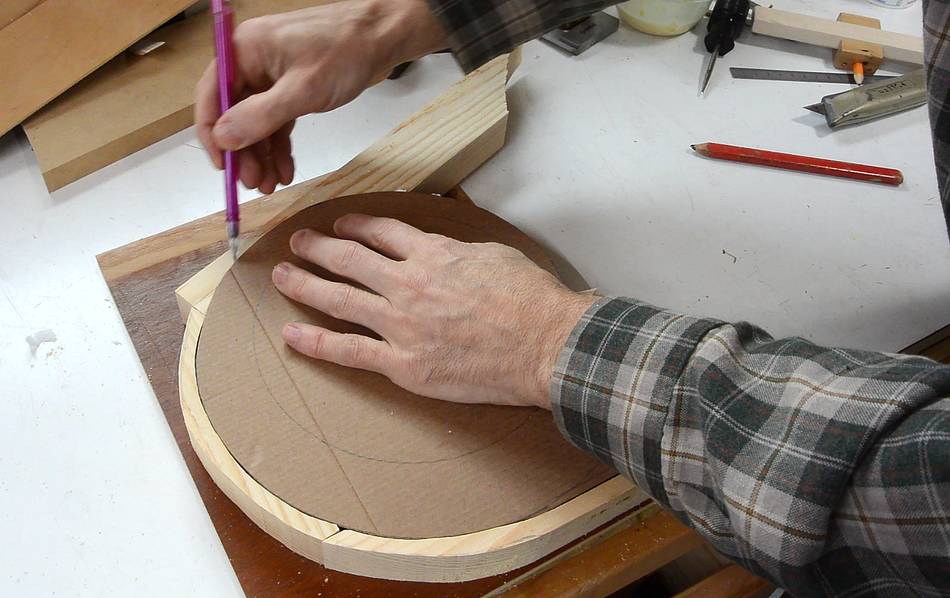
I used the template to mark the curves on some solid pieces of wood,
which I cut out with the bandsaw, cutting out a piece and adding it
to the housing one at a time.
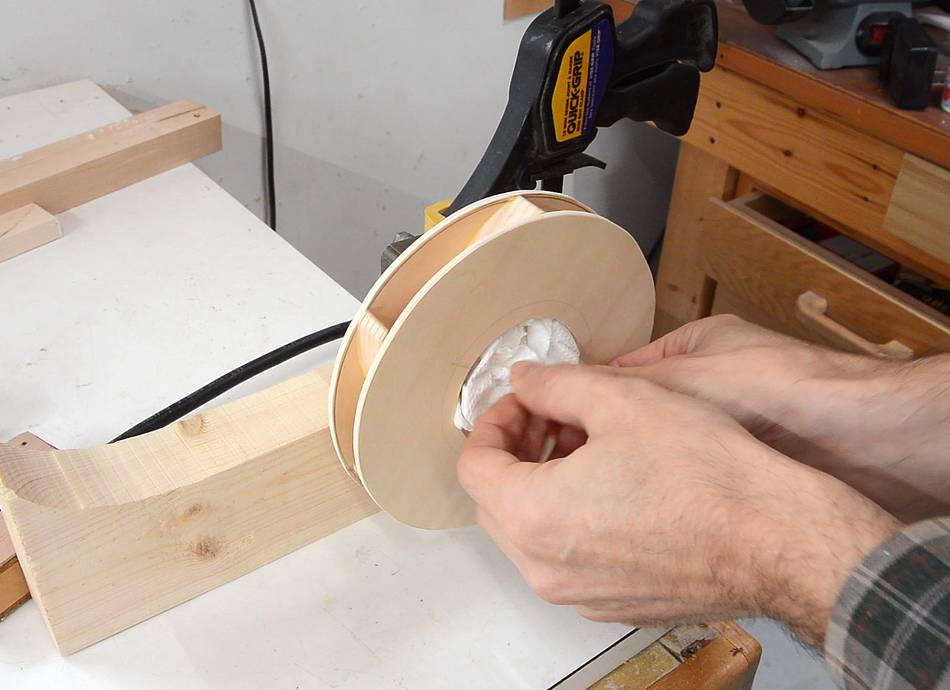
I sanded these on my strip sander to make the inside smoother.
I also cut a small slot in the ends of the pieces so I could use
a thin piece of wood to join them.
Then gluing them down on the back of the housing. The housing is
made from some recycled plywood that is varnished.
I scraped the varnish off where the glue goes.
I drilled a big hole for the motor flange to go through.
I made two motor mounts out of maple. I figured the best way
to get this on so that the motor flange is centered in the hole was to just
glue it on.
After carefully placing it, I used a few clamps to get it on tight.
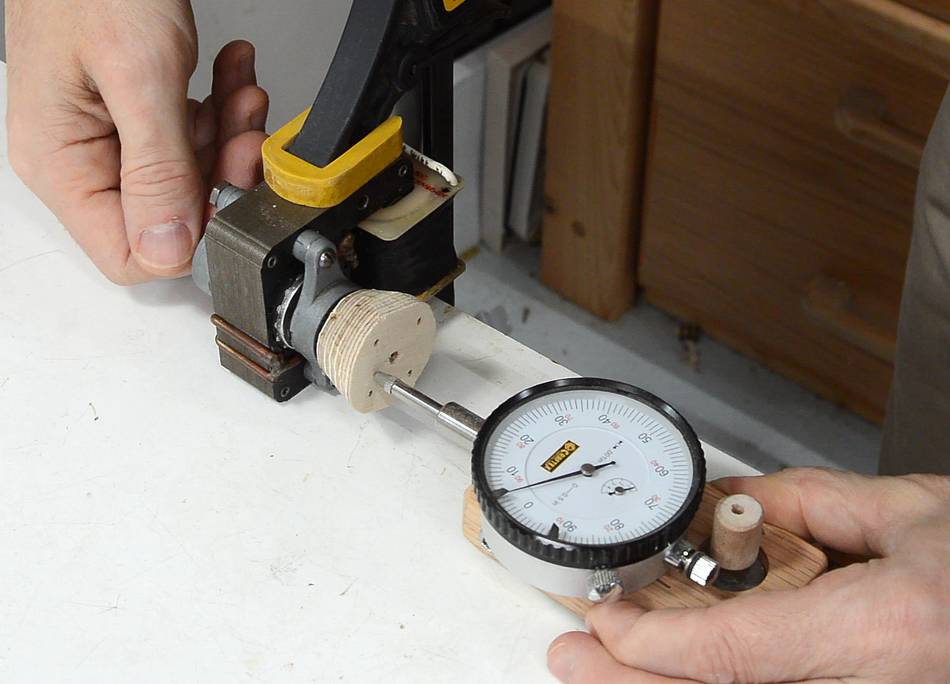
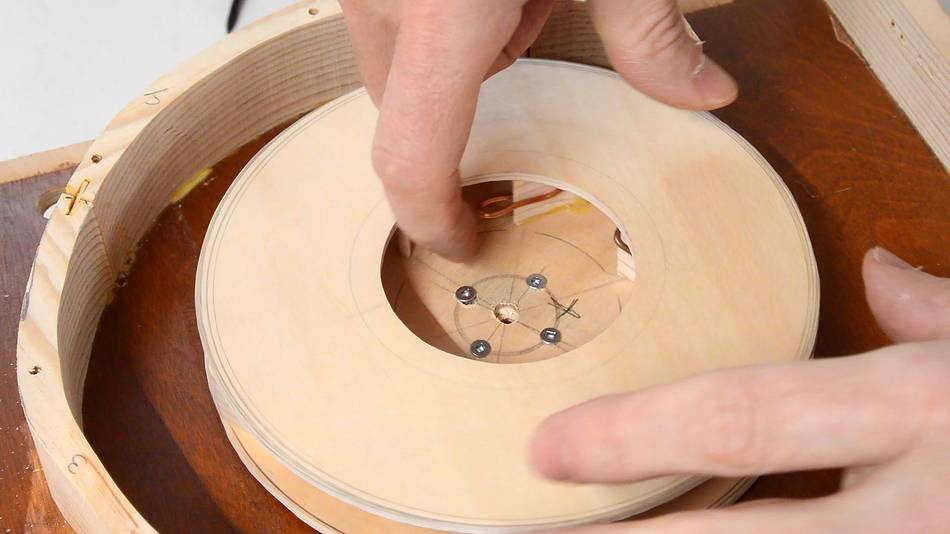
Then screwing the rotor to the flange. It was tricky getting it
centered just right. I wish I had drilled the holes more accurately,
but I accidentally had the compass set to a slightly bigger radius
when I marked a circle for them on the rotor's plywood.
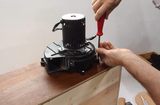
Screwing on the front of the blower.
You can't see it here, but I also put a "ring" on the back of the hole to
make the gap between the front of the impeller and the back of the front
plate smaller. That way, air from the high pressure outside
of the blower can't flow back around the impeller as easily. This makes
the blower a bit more efficient.
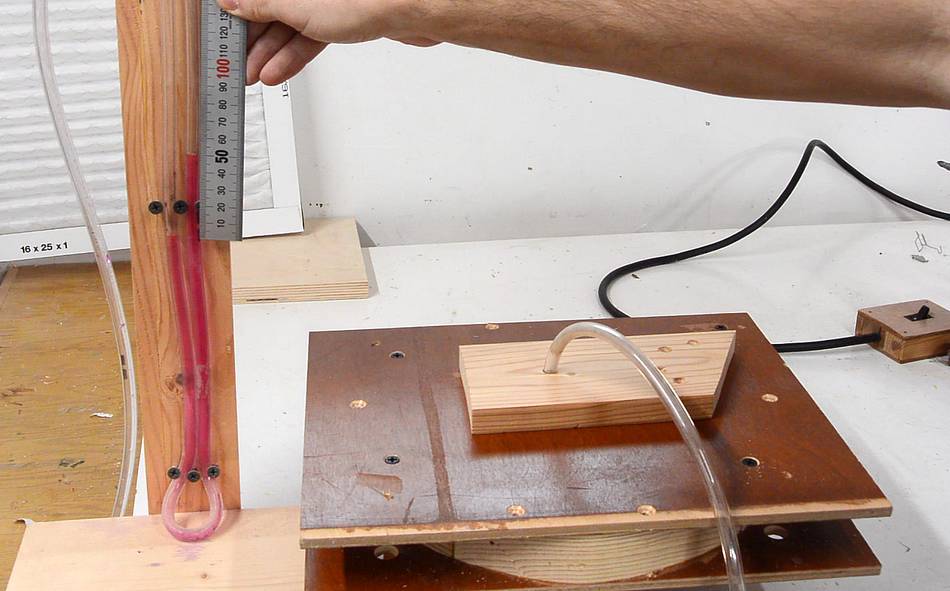
Testing the blower. I got about 5 cm of water column height for
pressure. This is one third the pressure of my cheap dust collector, one
sixth of my small dust
collector, but three times as much pressure as a forced air furnace
blower. It's also just slightly more pressure than my
homemade pipe organ
uses. So if I ever build another one, I'll know where to get a blower.
I don't expect it to be powerful enough to suck wood chips out
of a machine, but I figure it should be enough to suck the sanding dust
out of my sander.
The vibrations were a bit much, so I experimented with balancing it
by sliding pieces of #14 copper wire onto the vanes, checking which position
reduced the vibrations the most. Two pieces of copper wire on two
vanes considerably reduced the vibrations.
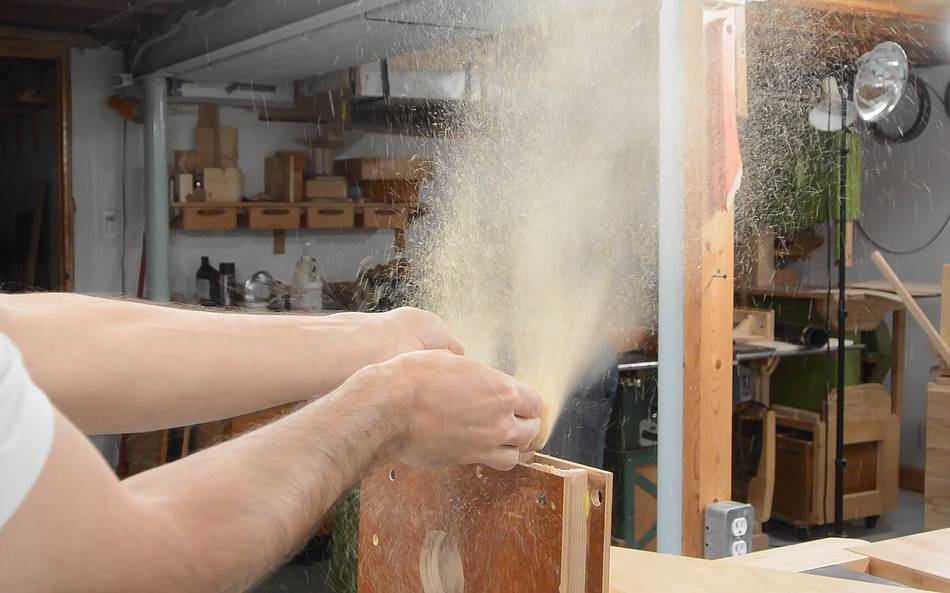
For a test, I dropped some bandsaw sawdust onto the air coming out of it,
and it blew it up into the air quite nicely. Should be ok, I think.
 My motivation for this experiment was that I'm usually too lazy to hook
up the dust collector to my strip
sander. So I figured I'd try building a really really low power
dust collector to leave hooked up to the sander and run off the same
power switch.
My motivation for this experiment was that I'm usually too lazy to hook
up the dust collector to my strip
sander. So I figured I'd try building a really really low power
dust collector to leave hooked up to the sander and run off the same
power switch.


 A different approach to dust collection
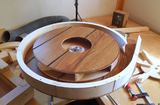 First dust collector blower
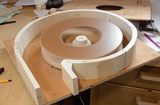 Blower design
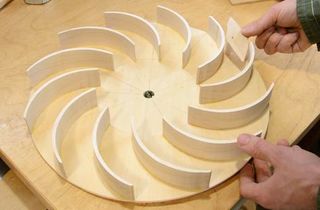 Second dust collector blower
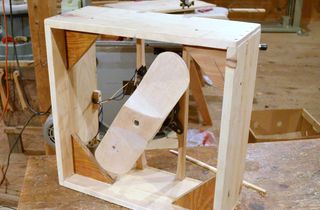 Homemade box fan
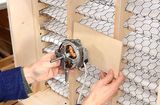 Workshop air cleaner