
I had a rather large printout of a photograph that I had taken that I wanted to frame. The photograph printout is 120 cm wide, so it needed a fairly hefty frame. I also wanted to experiment with cutting a nice profile for a picture frame, so this was a good project to experiment with.
 I wanted the frame to be fairly wide. As material, I used some 2x4 construction lumber, as usual. Although because
I needed to plane it down a fair bit, I decided to start with some relatively crooked lumber, seeing that I could
straighten it as I planed it down. Hopefully, this won't be a choice I will regret.
I wanted the frame to be fairly wide. As material, I used some 2x4 construction lumber, as usual. Although because
I needed to plane it down a fair bit, I decided to start with some relatively crooked lumber, seeing that I could
straighten it as I planed it down. Hopefully, this won't be a choice I will regret.
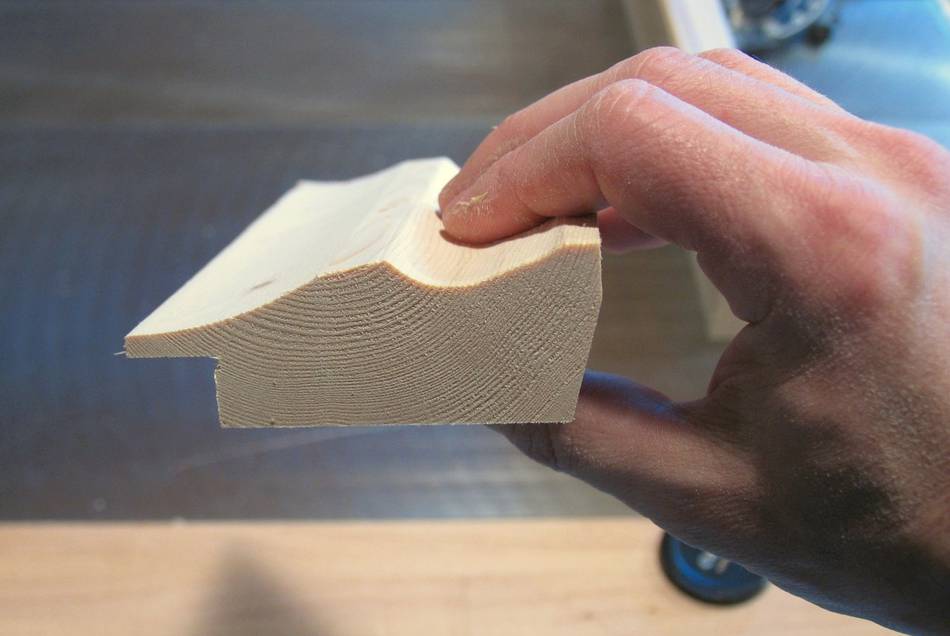
The profile I made was about 8 cm wide. A section of the final profile is shown on the left.
 I cut the inside rounds by using the table saw cove cutting technique. I wanted
some relatively large diameter inside rounds. I don't even know where I could get router bits that would even
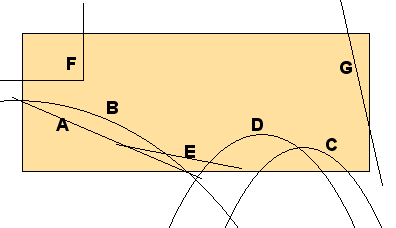
approximate such curves like that. A raised panel cutter could possibly have been used for the initial curve 'B' though.
I cut the inside rounds by using the table saw cove cutting technique. I wanted
some relatively large diameter inside rounds. I don't even know where I could get router bits that would even
approximate such curves like that. A raised panel cutter could possibly have been used for the initial curve 'B' though.
As it is, the profile is entirely done as table saw coves and straight cuts. I started by cutting a bevel 'A' with the table saw, so that I wouldn't have to make as many passes to cut cove 'B'. Next I cut cove 'C'. I originally intended coves 'C' and 'D' to be one cove, but once I realized I put my cut for C too far to the right, stopped cutting that one deeper, and started a new cove for 'D'. I didn't want to go deeper on it than I did, so part of cove 'C' can still be seen. This wasn't intentional, but I liked how it looked, so all is well.
I made cut 'E' with a jointer afterwards, to give the frame a general inward sloping look. After that, I cut the rabbet F with two cuts on the table saw. I also decided the frame would look a bit better if the outside was bevelled towards the back, so I cut the bevel G last, with the table saw.
all in all, with the multiple passes required for some of the coves, I passed each piece of the frame over the saw at least 15 times. Making moulding on the table saw can be time consuming!
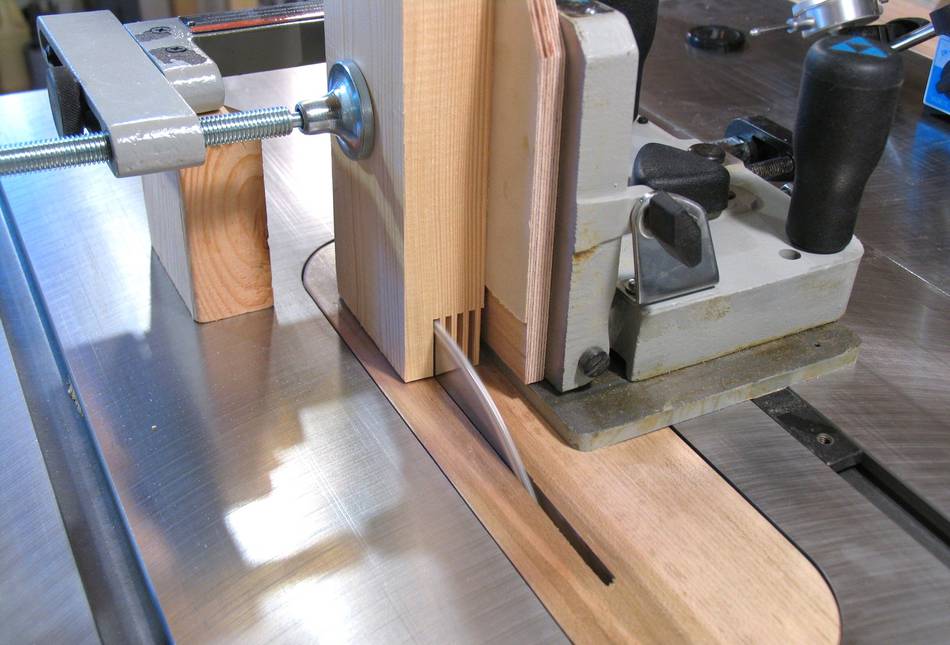
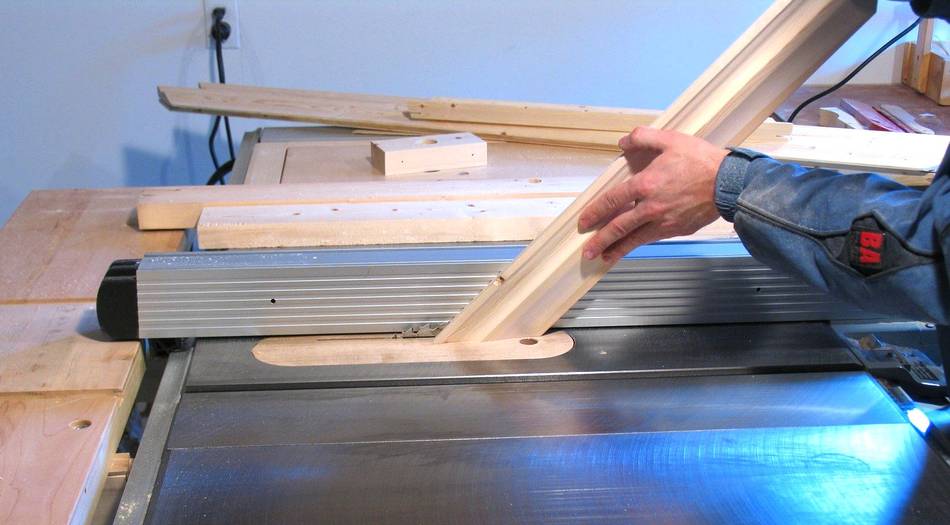 I joined the corners with some splines. This wasn't just for strength, but also to help align the pieces
as I glued them. The photo at left shows cutting the slots for the splines.
A tenon jig for cutting the slots for the splines would have been more accurate, but the pieces
were a little large to clamp in the tenon jig.
I joined the corners with some splines. This wasn't just for strength, but also to help align the pieces
as I glued them. The photo at left shows cutting the slots for the splines.
A tenon jig for cutting the slots for the splines would have been more accurate, but the pieces
were a little large to clamp in the tenon jig.
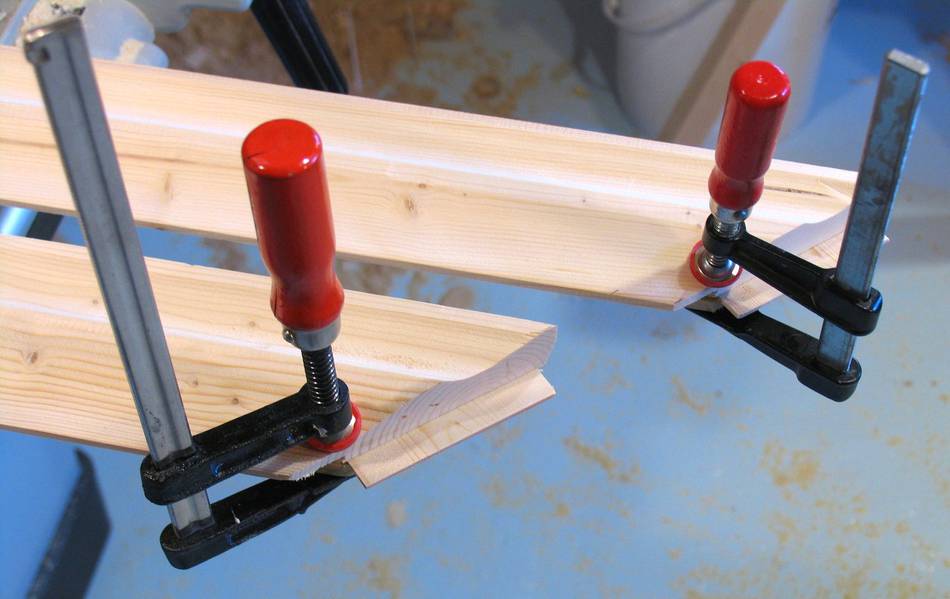 I glued the splines into the long pieces of the frames first, so I wouldn't have to worry about positioning
them right once I glued the whole frame. At the thin end of the profile, I clamped it a little bit, just
to make extra sure the joint was tight.
I glued the splines into the long pieces of the frames first, so I wouldn't have to worry about positioning
them right once I glued the whole frame. At the thin end of the profile, I clamped it a little bit, just
to make extra sure the joint was tight.
 It's important that the grain goes across the splines, not length wise. I made the splines by cutting a series
of slots into the end of a piece of 2x4 on my delta tenon jig.
It's important that the grain goes across the splines, not length wise. I made the splines by cutting a series
of slots into the end of a piece of 2x4 on my delta tenon jig.
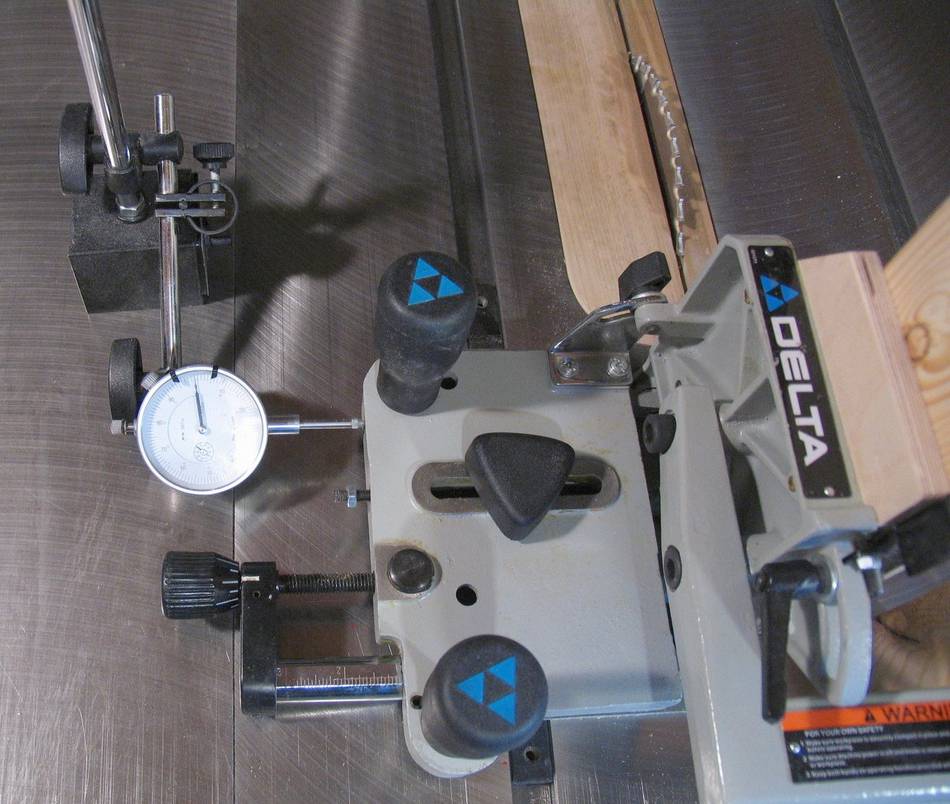 To get the thickness of these pieces just right, I used my dial indicator to measure exactly the right amount
of movement between cuts. Essentially, twice the thickness of the blade's cut, to leave a blade thickness of
spline in between.
To get the thickness of these pieces just right, I used my dial indicator to measure exactly the right amount
of movement between cuts. Essentially, twice the thickness of the blade's cut, to leave a blade thickness of
spline in between.
After making five cuts in the end, I just cut the splines off with a band saw.
(this was before I built my quick-set tenon jig which has a dial indicator built onto the jig)
 The first two joints I glued one at a time, much like I describe in my article about
miter joints
The first two joints I glued one at a time, much like I describe in my article about
miter joints
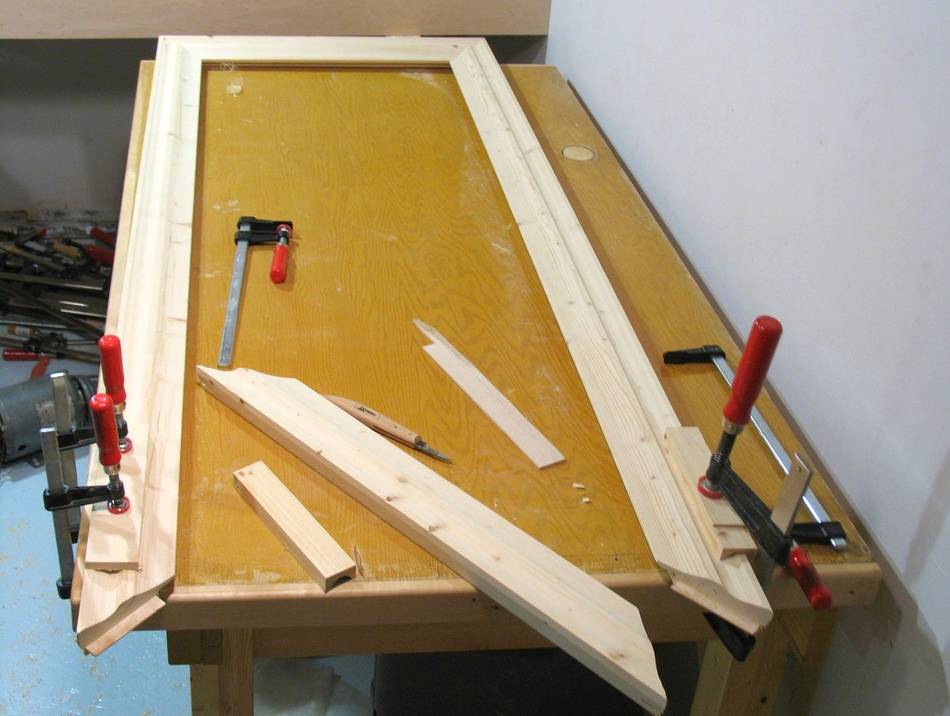
With the frame so large and long, to get the last piece in accurately, I dry fitted it, and then clamped the ends of the frame securely to my workbench. This reduced the amount of alignment I'd have to worry about while the glue was wet. With the splines cut to be fairly tight, I really didn't have much time to move things around before the glue gets too firm to budge.
 And with the last piece glued in.
I put a few clamps on it to make sure everything was in tight while it dried.
And with the last piece glued in.
I put a few clamps on it to make sure everything was in tight while it dried.
I had a small bit of vertical misalignment because my splines and frame parts were not cut consistently. So I used a chisel trim the shape around the miters to get the alignment all flush.
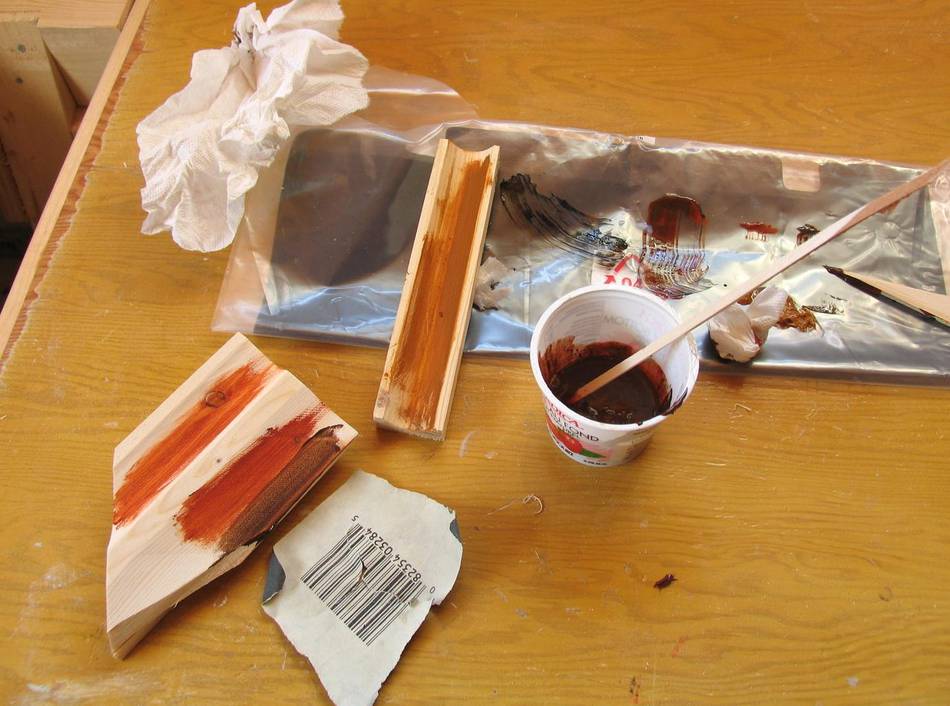
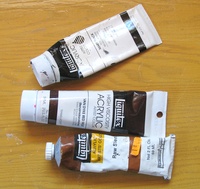 The next step was to stain the frame. I wanted the colour to be 'just so'. I ended up mixing some water based
varnish with a bit of acrylic artist paint in a small plastic container. It took a few adjustments
to get the colour just right. I still used less than one tenth of a tube of paint for the whole frame.
The next step was to stain the frame. I wanted the colour to be 'just so'. I ended up mixing some water based
varnish with a bit of acrylic artist paint in a small plastic container. It took a few adjustments
to get the colour just right. I still used less than one tenth of a tube of paint for the whole frame.
 I applied the stain just by rubbing it on with a piece of paper towel. This wasn't ideal because the paper
towel started to disintegrate as I did this. Cloth would have been better.
I applied the stain just by rubbing it on with a piece of paper towel. This wasn't ideal because the paper
towel started to disintegrate as I did this. Cloth would have been better.
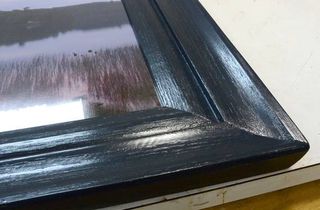
Because my 'stain' was actually about three quarters varnish by volume, it was really more of a varnish coat. I ended up putting two layers on. The shot at left shows just starting the second layer, so the frame had not yet reached its final colour.
After letting the stain/varnish mixture dry for a few hours, I put two more coats of varnish on top of it for a nice smooth finish.
Because I only used 2x4 lumber for the frame, I only spent around $4 on wood. Add another dollar or so for the paint and varnish, and it ended up being a very cheap picture frame. Unfortunately, the plexiglass front for the frame cost me around $40, so that blew the other expenses out of the water.
 Another picture frame
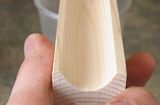 Cove cutting
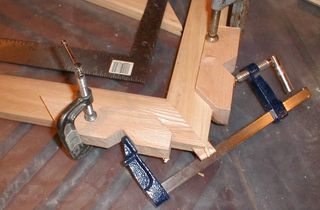 Half decent way of
 Moulding tricks with a
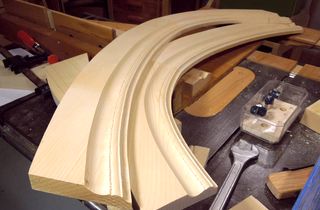
 Asymmetric cove cutting