In the house we moved into recently, I refinished some of the floors,
and we had other parts professionally replaced, but did some
details myself. My plan all along was to make the baseboards. I wanted to make these out of
oak, but I didn't have enough. I found a guy who had some in his shed that
he was willing to sell at a good price. Various widths and thicknesses, Most of it rough sawn.
I started by straightening one edge of each board on the jointer.
I had to rip them into strips 8 cm wide. The old baseboards were 3" (7.5 cm)
wide. I needed the new ones to be slightly wider to cover up the edge left in the paint.
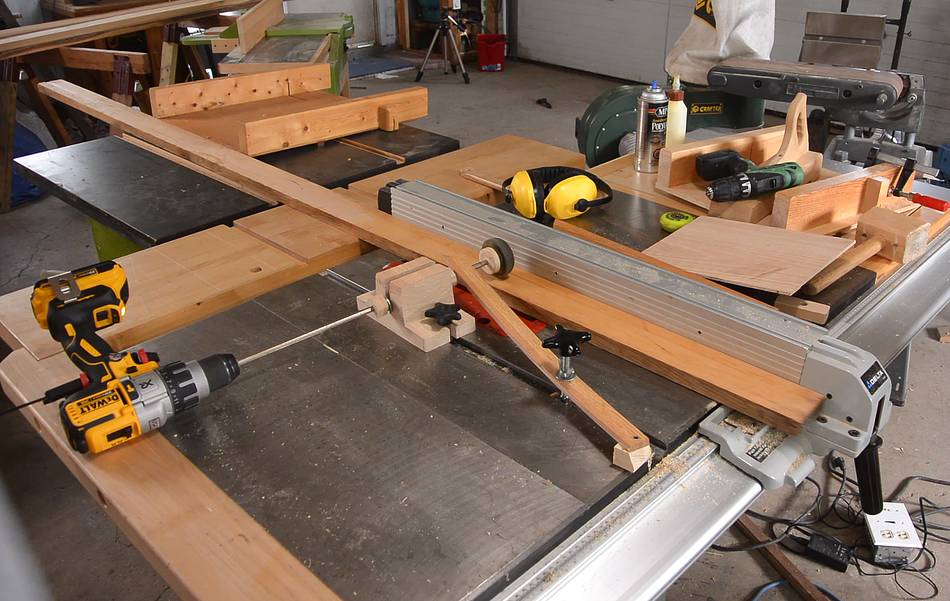
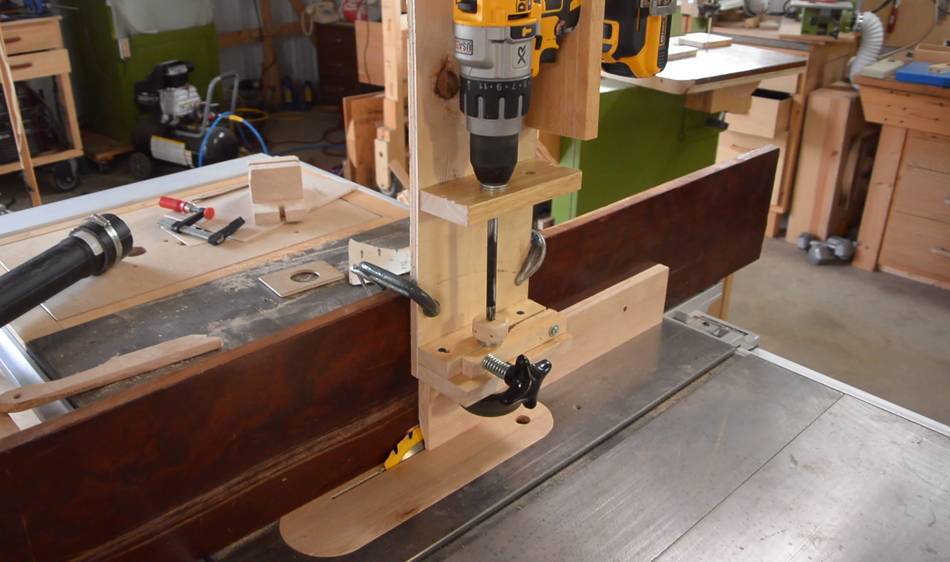
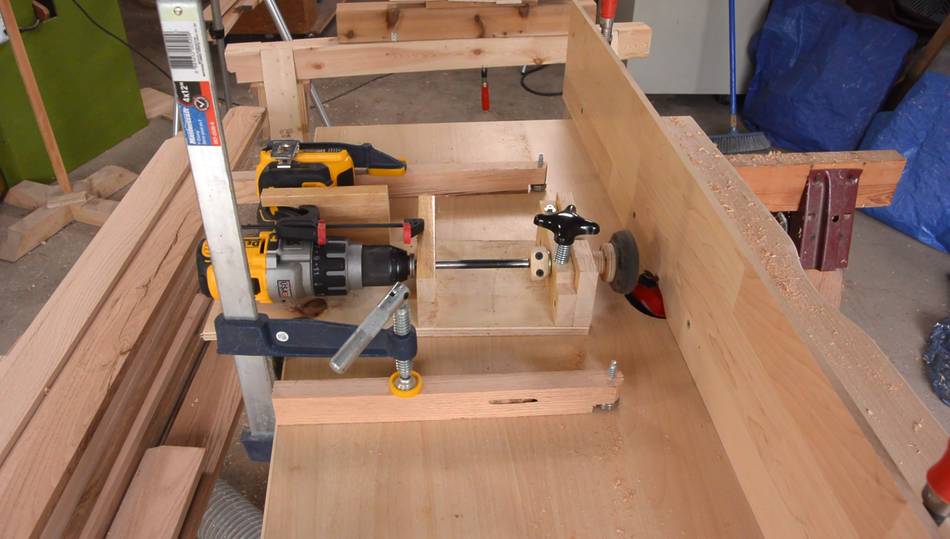
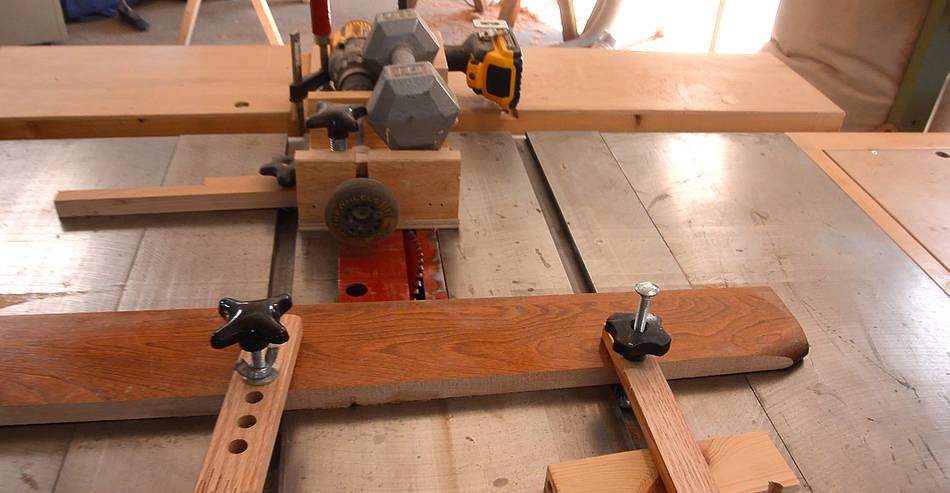
I figured a power feeder would be handy for this work, so I attached
a roller skate wheel to the end of a shaft, and spun that slowly with
a drill. My DeWalt cordless drill has three gears, and even at low speeds, the variable
speed trigger regulates the speed very well. So this drill was very suitable for this.
I should add, I don't like this drill much for drilling - it's too big and heavy for
most things. But for this job, it was almost perfect.
A few of the boards were quite long and too wide to fit under my improvised
power feeder. They were also too long for where I had the saw, so I had to turn it
it at an angle to make room.
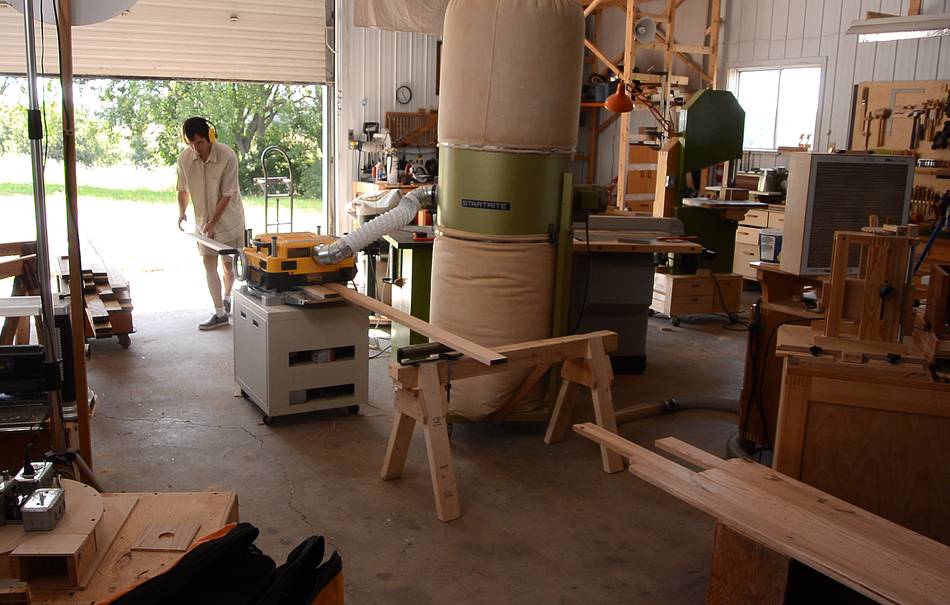
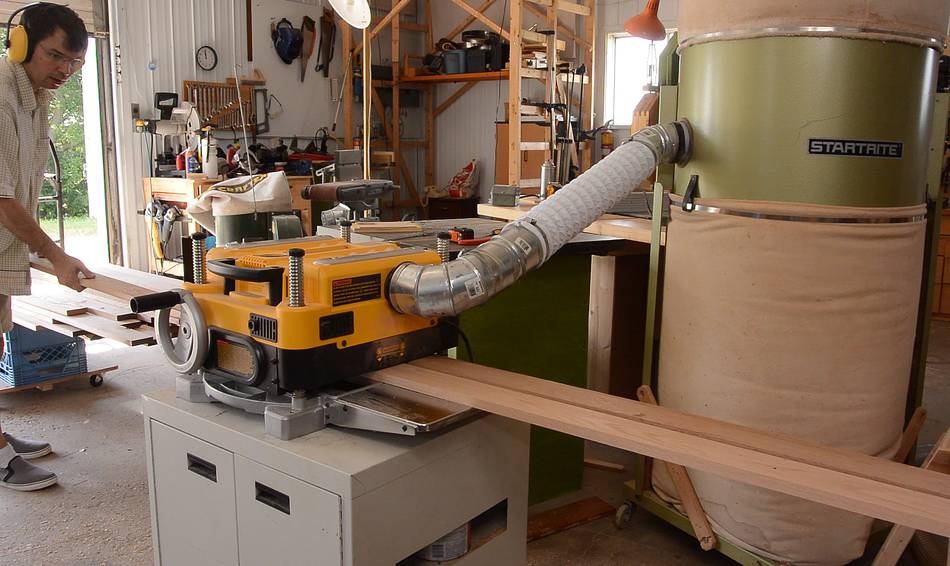
Then planing all the pieces to thickness. Some of the wood needed quite a bit planed off,
but this planer can only take off at most 3 mm at a time,
so it was a lot of passes through the planer.
I always fed multiple pieces through, making sure there was always at least one piece
of wood in the planer all the times to avoid the snipe that happens at the start
or end of a board. Overlapping the boards side-by-side is enough to nearly eliminate
any snipe.
It was a lot of running back and forth feeding boards in and taking them from the
outfeed.
Back in the 80s in my dad's shop, when I still
lived at home, it was often my job to take the boards from our
sawmill out of the planer. We didn't
have any dust collection, so I'd get the chips thrown at me and breathing a lot of dust.
Also no hearing protection. We'd plane a LOT of wood at times. Not fun!
With so many boards, I staked them on some boxes on a dolly so I could wheel the whole stack
back to the infeed side between passes.
I had the planer hooked up to my big dust collector with just a piece of dryer hose.
Dryer hose is NOT designed for this. The planer shoots the chips out
at high speed, and soon the hose developed a hole in it from this.
I didn't have a suitable short piece of proper dust collector hose to replace
it with, and figured, if I change the next bit of piping after the
elbow to be metal piping, it might not be so
bad. And the hose held up for doing the rest of the planing. For hobbyist purposes
the dryer hose can be made to work. It's just not ideal for production work.
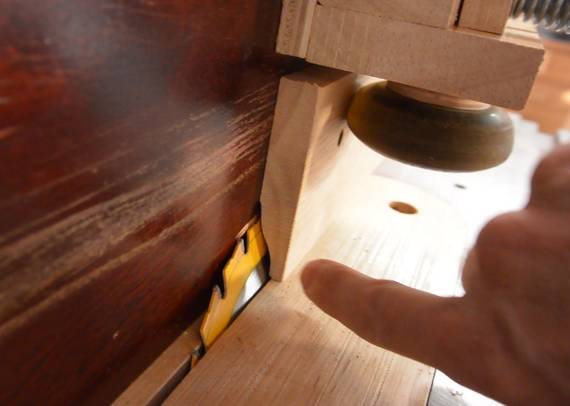
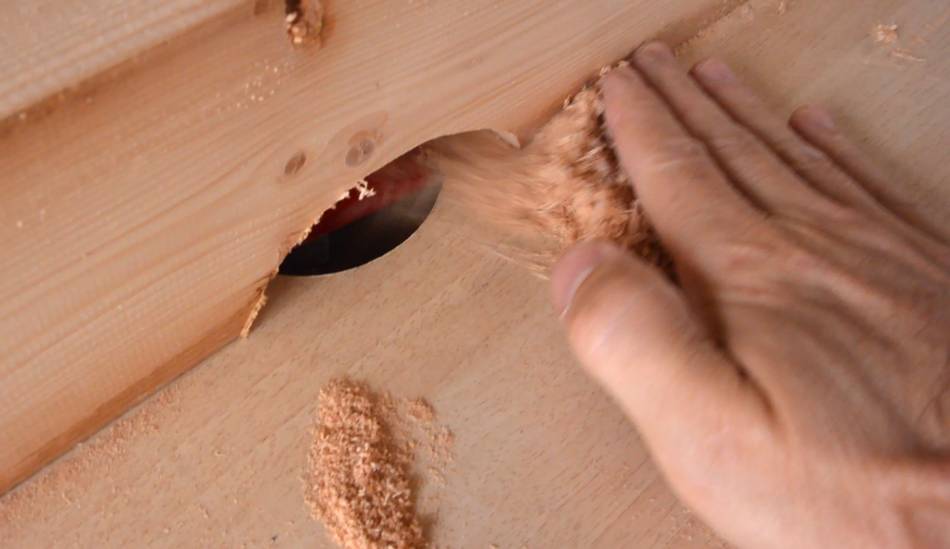
Some of the boards were not new and had a few screw holes in them.
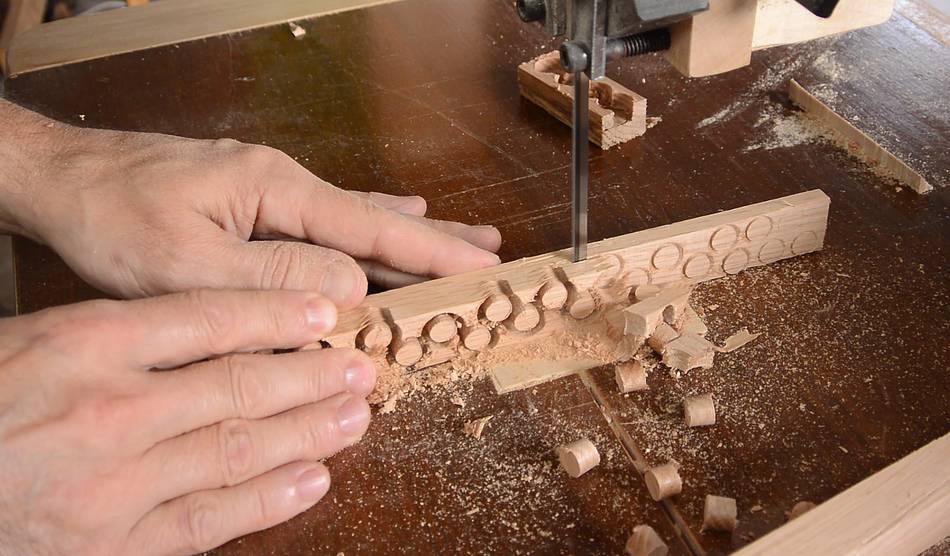
I used my plug cutter on the drill press to cut out a whole bunch of plugs, then
cut them free on the bandsaw.
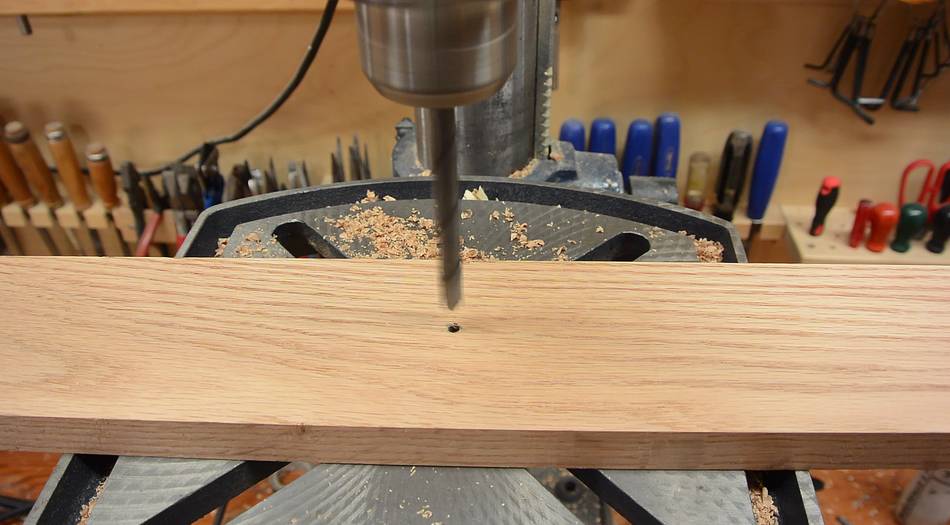
I then drilled out the nail holes to the size of my plugs (I was already using
my smallest plug cutter for this)
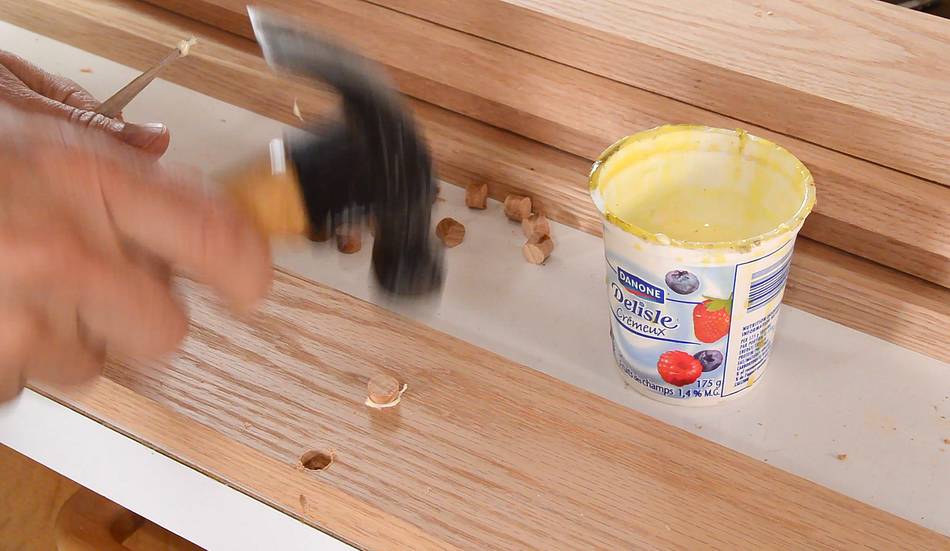
The plug cutter makes plugs with a slight taper. Gluing and hammering them in
makes for a tight fit.
I then trimmed them flush on the bandsaw. The blade scratched the surface a bit
but that was ok because I still had one pass through the planer.
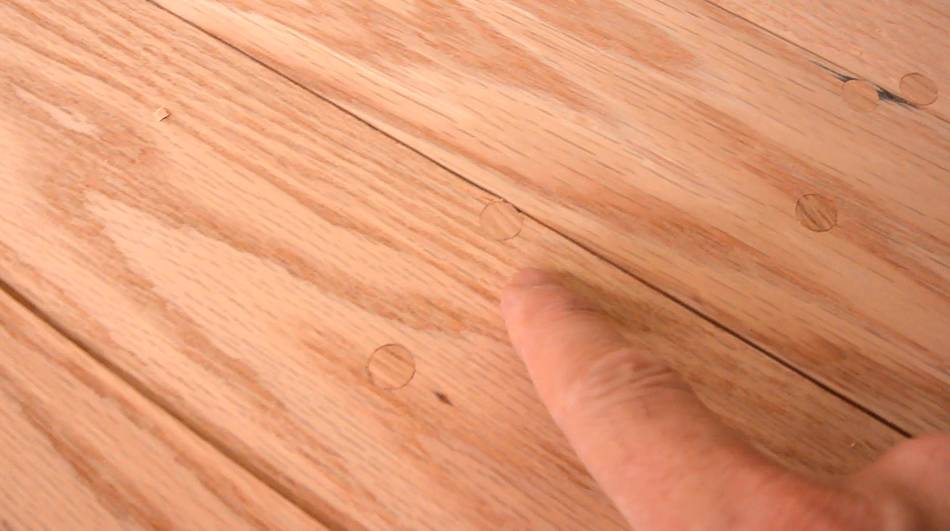
And here's what the plugs looked like after planing. Good enough for baseboards.
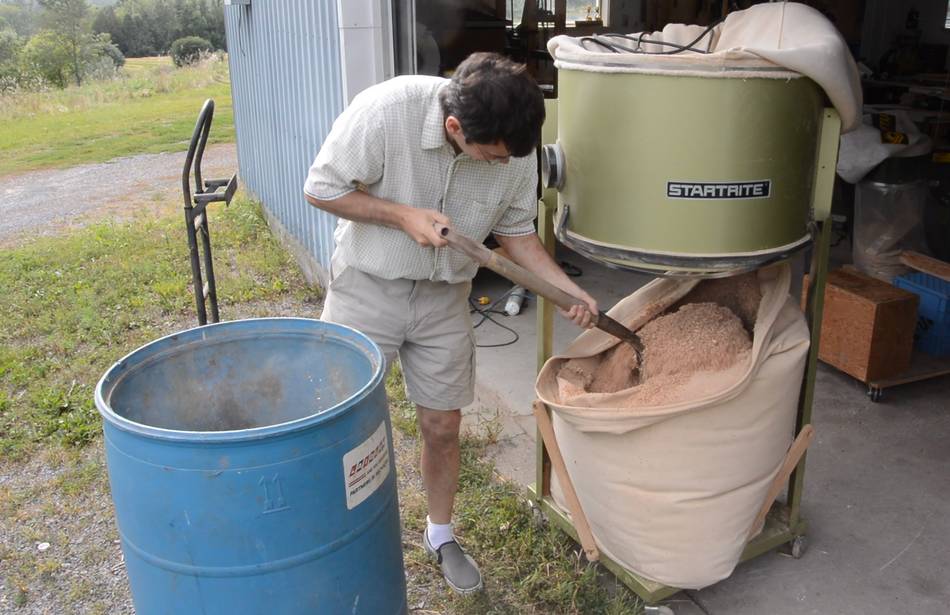
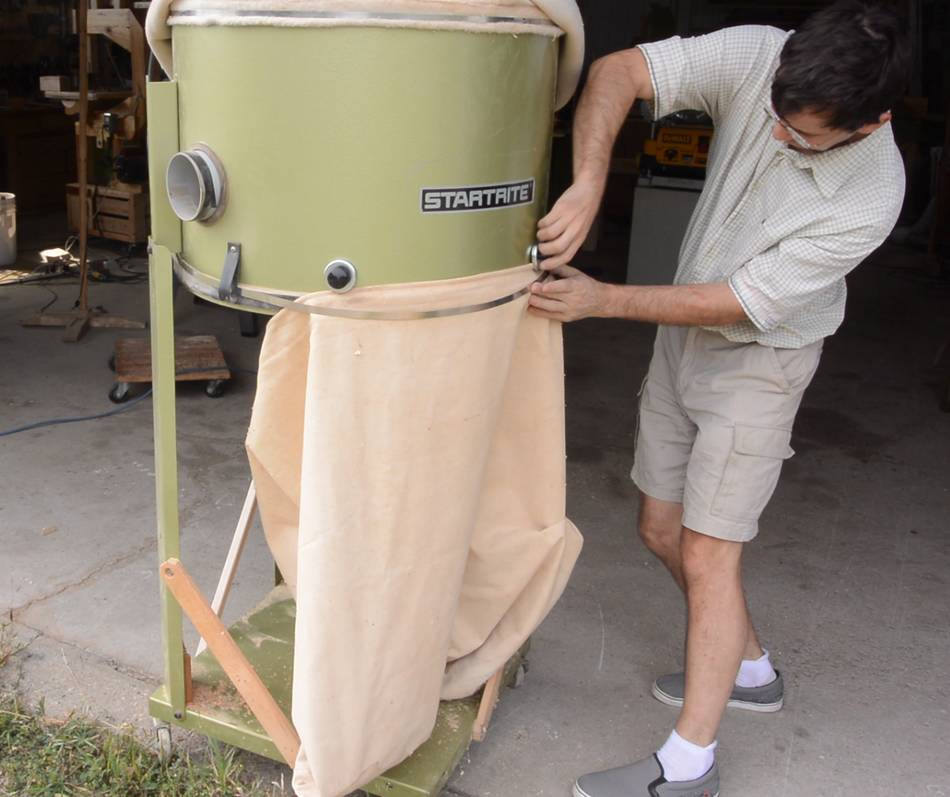
I started with the big dust collector empty, but with all the planing, it
filled up. The bag was too full to lift straight out, so I shovelled out
the first bit, then dumped the rest straight in the big plastic barrel, which
was filled up entirely.
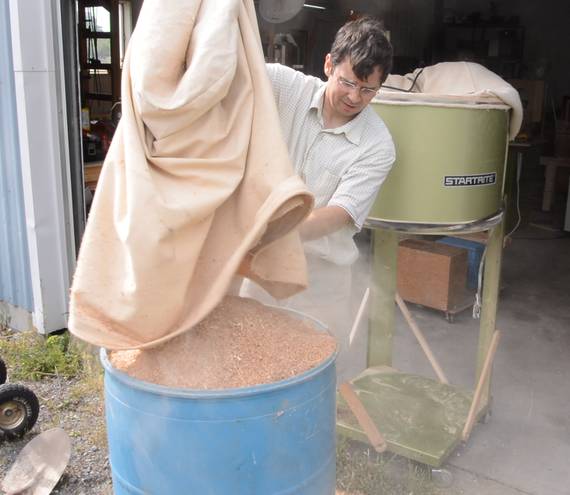
I get a lot of "advice" in YouTube comments. A rare piece of advice that was
really useful was to hold up the dust collector bag with magnets wile putting
it back on. That made it so much easier!
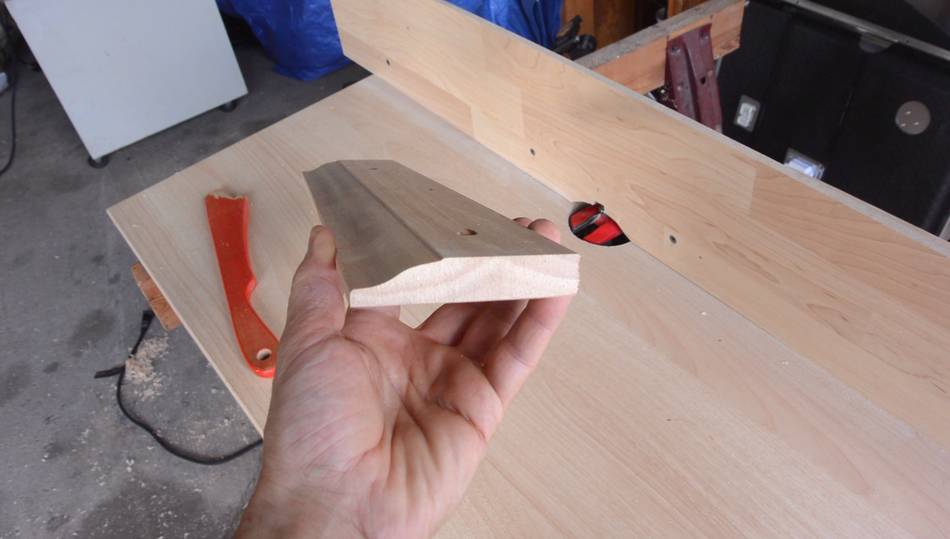
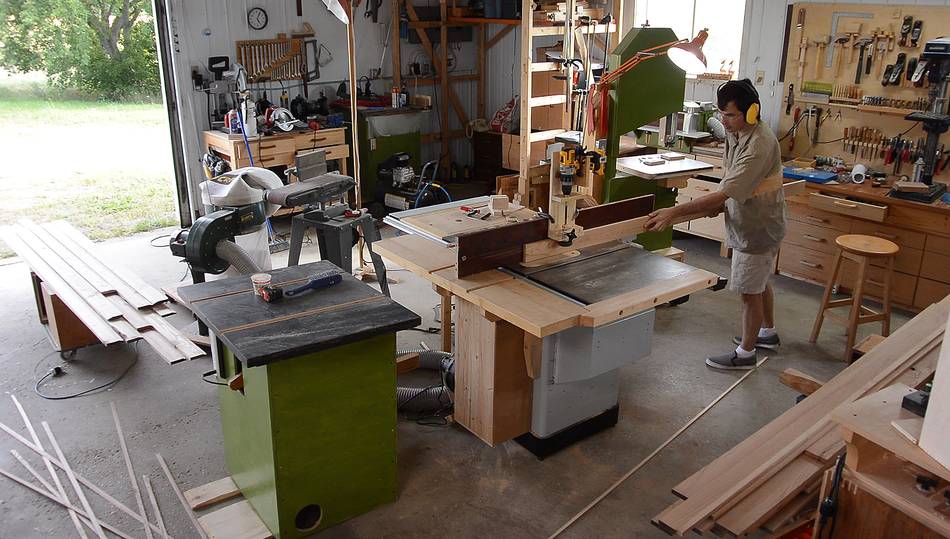
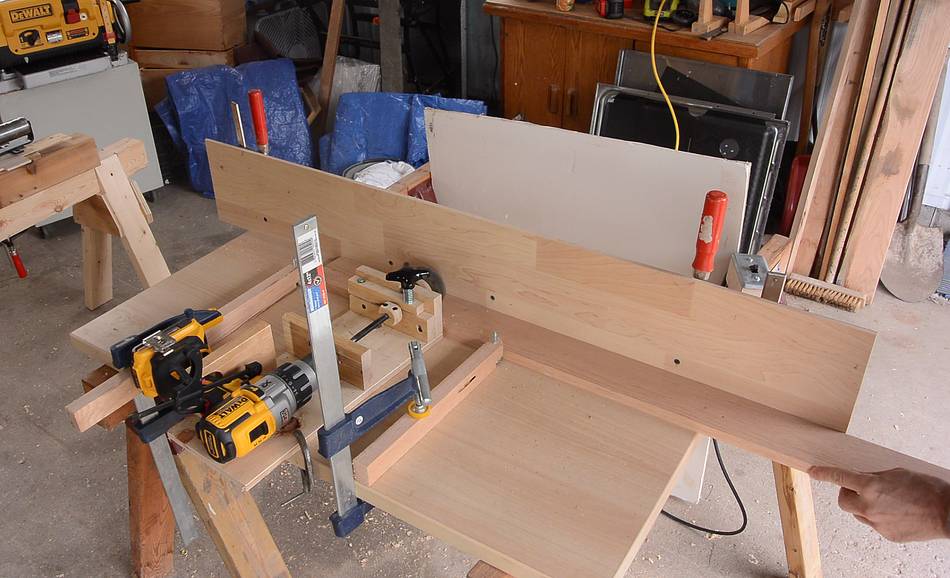
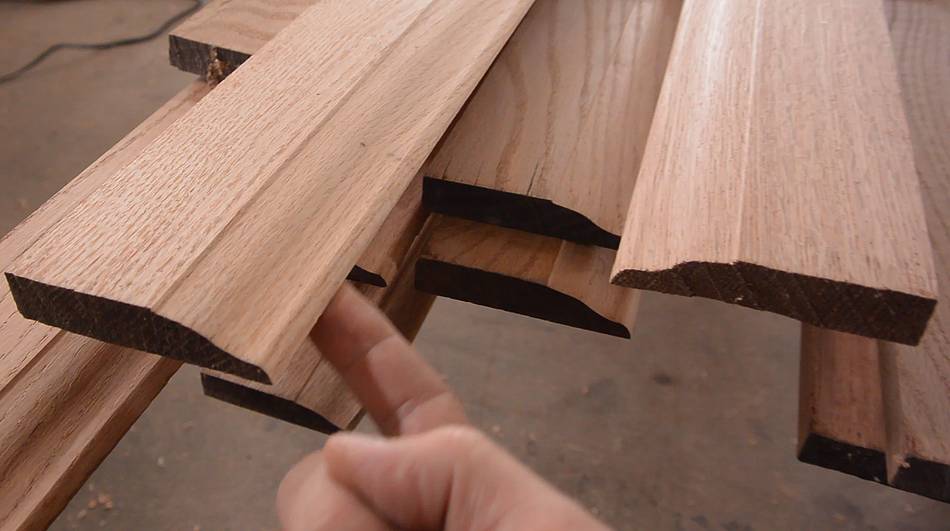
With the stock all milled square, I took a piece of scrap to try a profile on.
I used a raised panel bit to make this. I liked how that looked, so decided
to go with that shape.
But it makes for a lot of material to remove, and I didn't want to have to do
it in several passes. To save router and router bit life, I
made a bevel cut first to remove much of the material before routing.
I figured my improvised power feeder would be useful for that, except I had
to mount it vertically on the table saw, so I made an improved version of it
and clamped it to a sacrificial fence on the saw.
The improved improvised feeder worked better. Still not perfect though.
It takes a lot of force to push the boards through the saw, and with the
feeder vertical, it was pushing the boards against the sacrificial fence,
which had more friction than the cast iron table. I tried putting
some UHMW tape against the fence, but that didn't last long before it
started to peel off and make things worse.
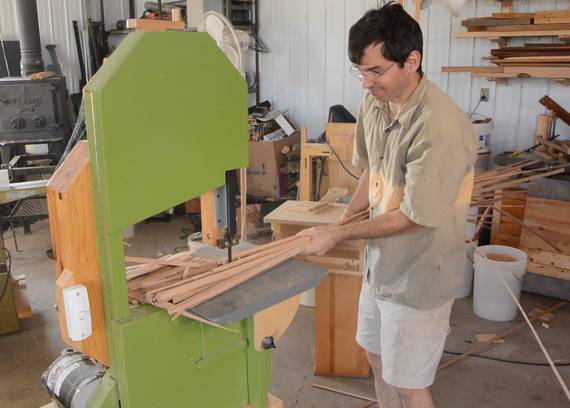
The operation made a lot of thin triangle profile offcut scraps, which
held as a bundle and cut into short pieces on the bandsaw. These will
make good kindling.
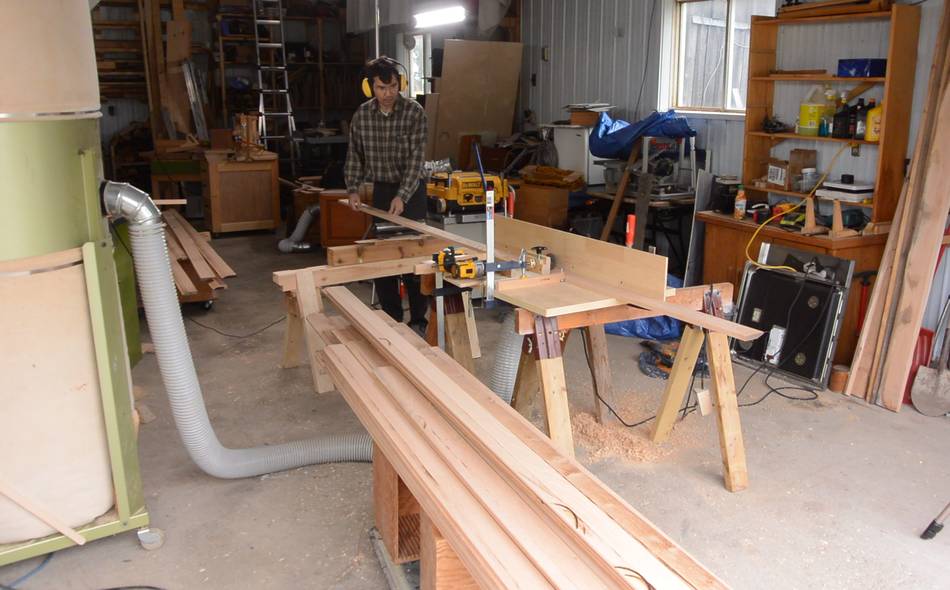
Next I mounted the improvised power feeder onto my improvised
router table. I didn't use my regular
router table / lift because the table on
that one is too small, and it's also on my old table saw which I moved
out of my shop and into the house's basement. So for this, I just screwed
the router's fixed base to the bottom of a big piece of melamine coated
particle board. The particle board slides fairly easily. For the fence,
I used a piece of laminate flooring, which also slides easily.
Feeding a test piece through.
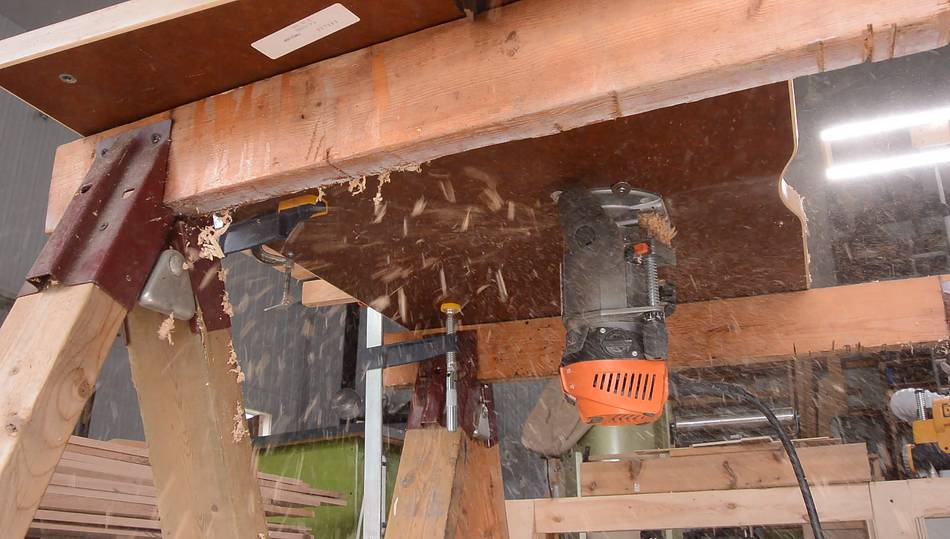
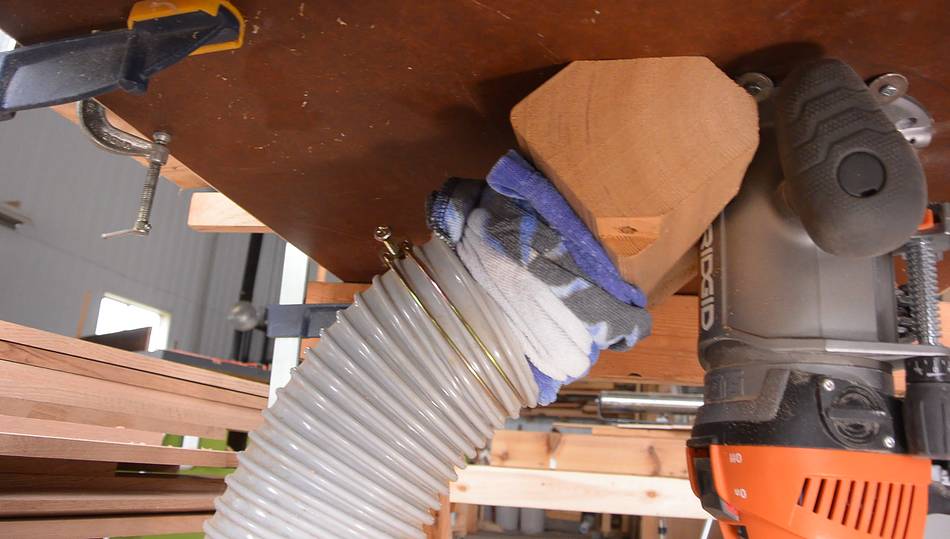
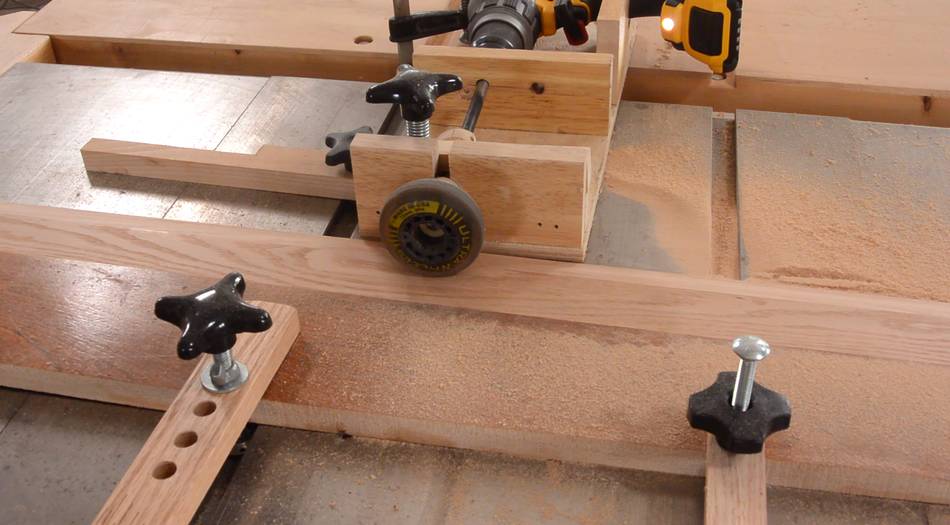
Router dust collection
Chips were flying all over the place below the table, and even after one board,
one side of the router was plugged up, reducing the router's cooling air flow.
If I were to route all the boards like this, I was fairly certain I'd burn out the router.
So I made a block of wood to fit around the router, with a big hole for a piece of
3" ducting to fit in.
I connected that to my 4" dust collector hose by wrapping some
towel around the 3" pipe before pushing the 4" hose on.
I got lots of air flow this way, just pushing some chips hear the bit got them
sucked in.
All along, I was worried about burning out the router, and monitored it's power consumption
with a power meter. I checked the router's temperature just by touching it a few
times, but with the dust collector sucking even more cooling air through the router,
the housing never got warm to the touch.
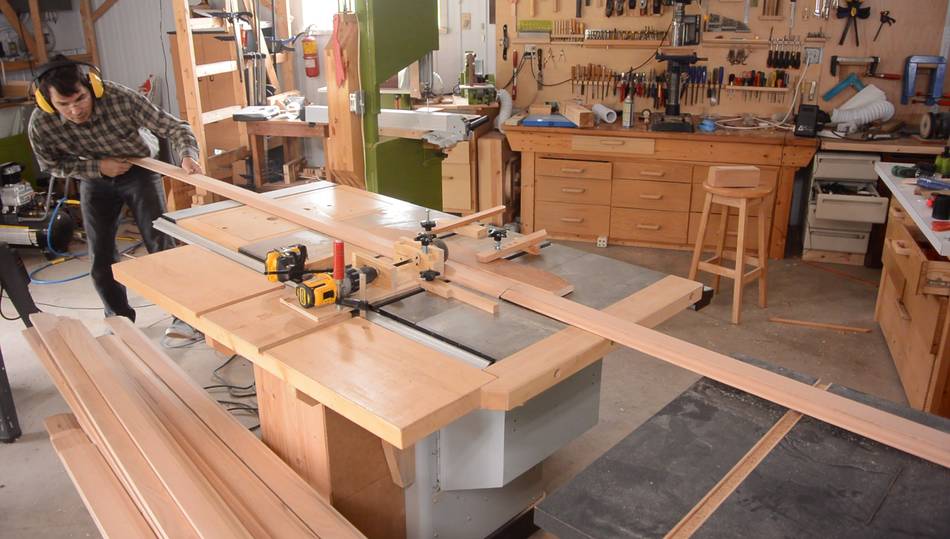
Then routing all the boards, with the power feeder.
The drill has this annoying feature that, if the trigger is continually pressed
for about five minutes, it will stop turning, so I have to take
the clamp off the trigger and set it again to restart.
But even so, this was so much more pleasant than running boards through the
shaper in my dad's shop. We cut tongue and grooves on all the paneling for all
the boards in the cottages we built.
No power feeder, no dust collection, no hearing protection.
Not fun!
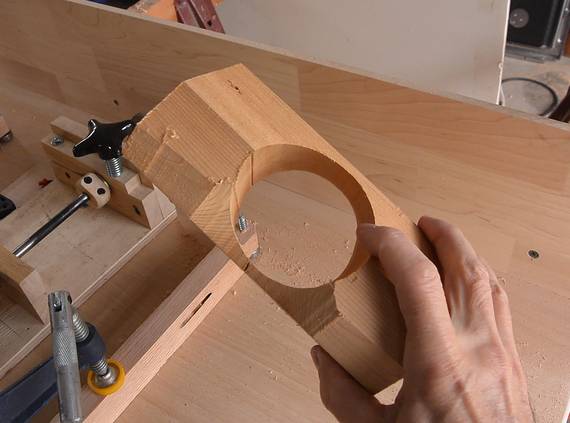
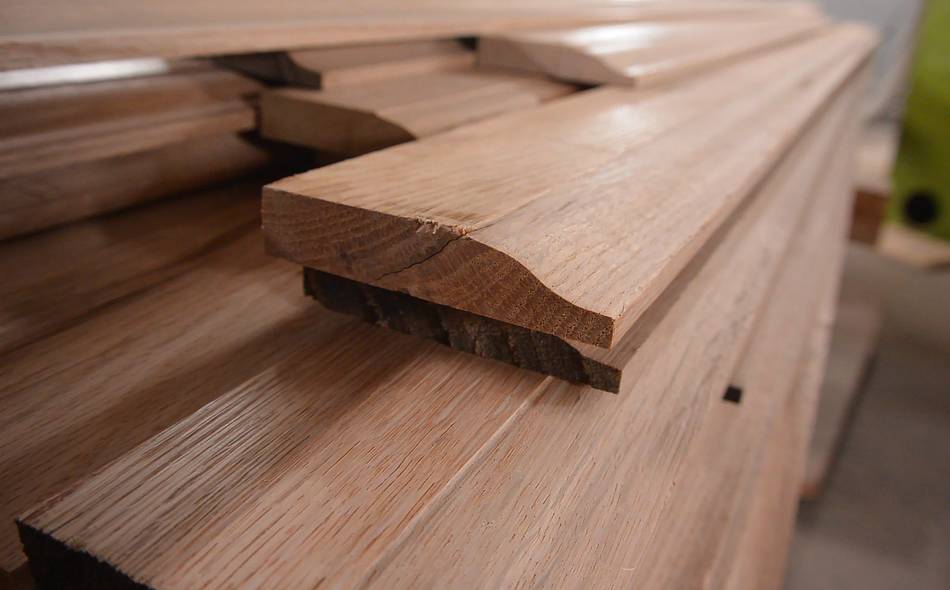
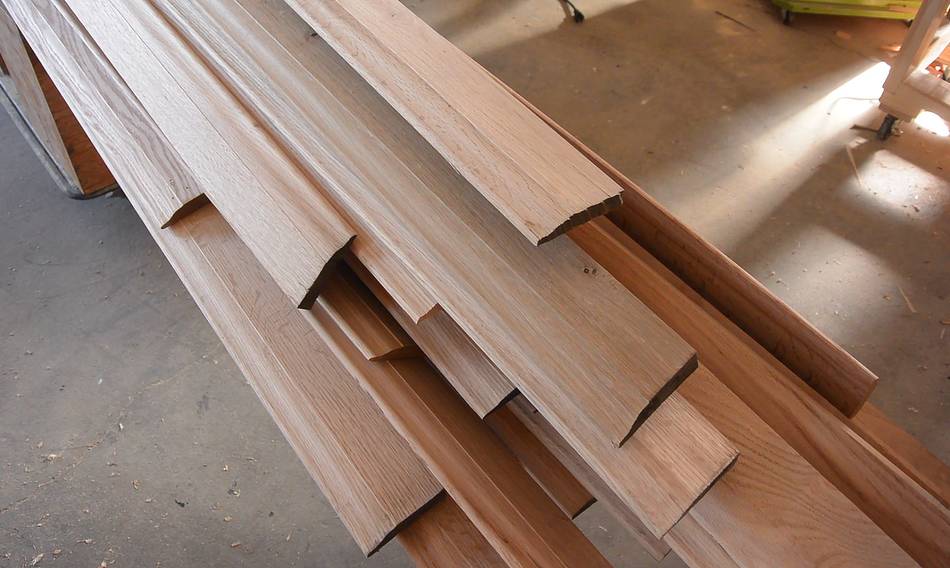
Here's what the boards looked like after cutting the profile on them.
There is a sharp edge near the top. If it was just a few boards, I would have
added a slight roundover with a hand plane,
but with this many boards (over 100m), it was worth setting up the router to do this.
Here's the boards after the 1/4" roundover was added.
This operation went much faster. Removing so little material, I was able to bump
up the router's RPM and increase the feed rate quite considerably.
I figured it would be best if I added a slight hollow to the back of the boards,
which would make it easier to get the top edge of them to touch the wall even if the
wall is uneven.
I figured the best way to cut that was using a cove cut on the table saw. I tilted
the blade 45 degrees so that I'd still be cutting with the top of the blade (the top
of the blade cuts MUCH better than the side of it does). And again, I used
my power feeder.
Feeding the pieces through. The power feeder really helped to make for a slow
consistent feed rate, which is important for cove cuts.
I cut the cove in two side-by-side passes to get enough width. I really didn't need the
cove to be very deep, but I wanted it to be most of the width of the baseboards.
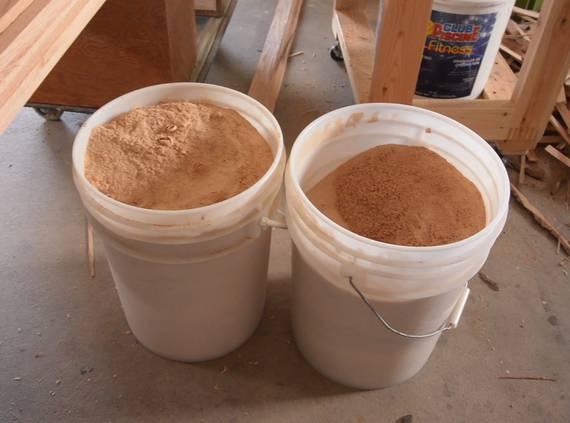
Making just the cove cuts on all the boards made enough dust to nearly fill two 20 liter
buckets! The mini dust collector
that I made for my table saw wasn't meant for this sort of production work, and I had
to clean it and the saw out a few times before I was done. I could have hooked my
big dust collector up to the saw while cutting the coves, but it was less work to
clean out the saw a few times than to switch to the big one and then back to the little one
for normal use.
Overall, I'd say I pulverized more than half the wood I started with into planer shavings
and sawdust. Kind of a shame that way, but that's how it goes.
I'm really happy with how consistent these all came out, and that has much to do
with using a power feeder.
 In the house we moved into recently, I refinished some of the floors,
and we had other parts professionally replaced, but did some
details myself. My plan all along was to make the baseboards. I wanted to make these out of
oak, but I didn't have enough. I found a guy who had some in his shed that
he was willing to sell at a good price. Various widths and thicknesses, Most of it rough sawn.
In the house we moved into recently, I refinished some of the floors,
and we had other parts professionally replaced, but did some
details myself. My plan all along was to make the baseboards. I wanted to make these out of
oak, but I didn't have enough. I found a guy who had some in his shed that
he was willing to sell at a good price. Various widths and thicknesses, Most of it rough sawn.


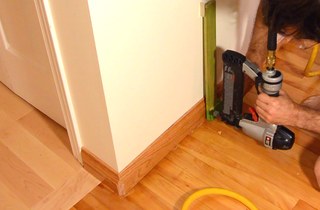 Installing baseboards
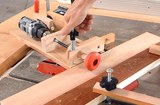
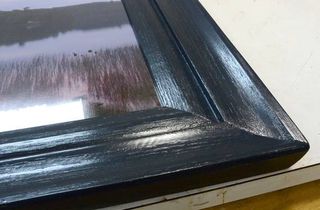 Making a picture frame (molding on a table saw)
 Molding tricks with a
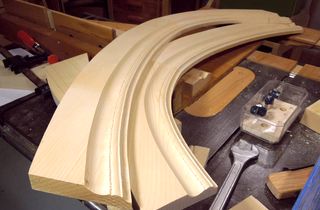
 Flooring around stair spindles
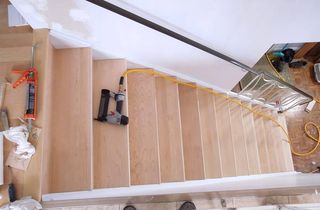 New treads for old stairs