 I wanted to make my new homemade table saw project cheap and accessible,
so I didn't want the building of a table saw to be dependent on already
having one.
I wanted to make my new homemade table saw project cheap and accessible,
so I didn't want the building of a table saw to be dependent on already
having one.
I wanted to make my new homemade table saw project cheap and accessible,
so I didn't want the building of a table saw to be dependent on already
having one.
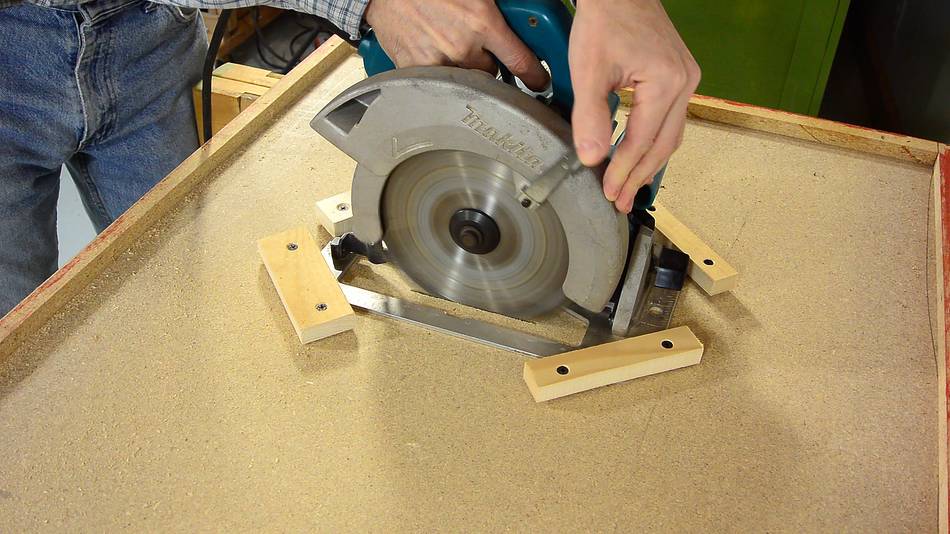
But some sort of table saw really helps when building one. So I started my build by improvising a table saw by screwing a handheld circular saw to the bottom of a piece of particle board.
If you are using particle board, be sure to pre-drill all the screw holes. Particle board is hard and brittle, and driving a screw into it without a pilot hole can cause it to break out.
Once the saw was screwed down, I turned it on and plunged it through the particle board.

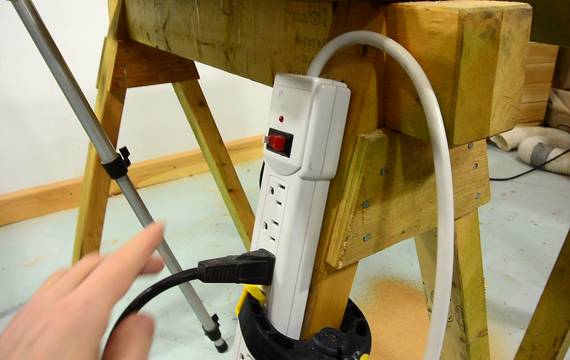 I used a zip-tie to lock the trigger down. At first I turned the saw
on and off by plugging it in, but using a power bar is a better solution.
I clamped the power bar to the leg of one of my
sawhorses
so I wouldn't accidentally step on the switch and turn it on.
I used a zip-tie to lock the trigger down. At first I turned the saw
on and off by plugging it in, but using a power bar is a better solution.
I clamped the power bar to the leg of one of my
sawhorses
so I wouldn't accidentally step on the switch and turn it on.
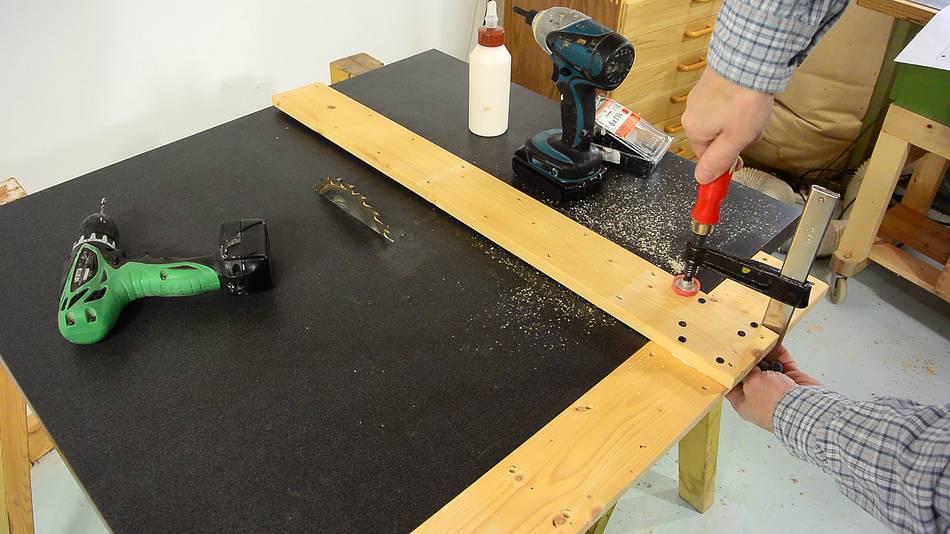
 It's always a bad idea to cut freehand on a table saw. So the next I made
a big T-square by gluing and screwing two pieces of wood together
at a right angle. The glue is very important because it really stiffens
the joint.
It's always a bad idea to cut freehand on a table saw. So the next I made
a big T-square by gluing and screwing two pieces of wood together
at a right angle. The glue is very important because it really stiffens
the joint.
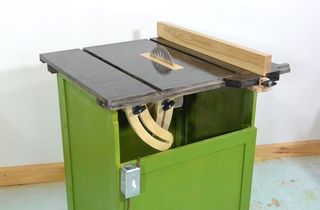
 Clamping the fence on for ripping. I had to cut a notch in the square
to be able to reach across it with the clamp.
Clamping the fence on for ripping. I had to cut a notch in the square
to be able to reach across it with the clamp.
My table is a piece of old counter top from a kitchen island. It's large, perfectly flat, and has a melamine top. If you build your own table saw, some melamine coated particle board is excellent material. If you are on the lookout, you can often find such material as part of discarded furniture. The main downside is that particle board is not as strong as plywood.
 Going over my plans, there are quite a few rectangular parts for the
saw mechanism. These are best cut out on a table saw.
Going over my plans, there are quite a few rectangular parts for the
saw mechanism. These are best cut out on a table saw.
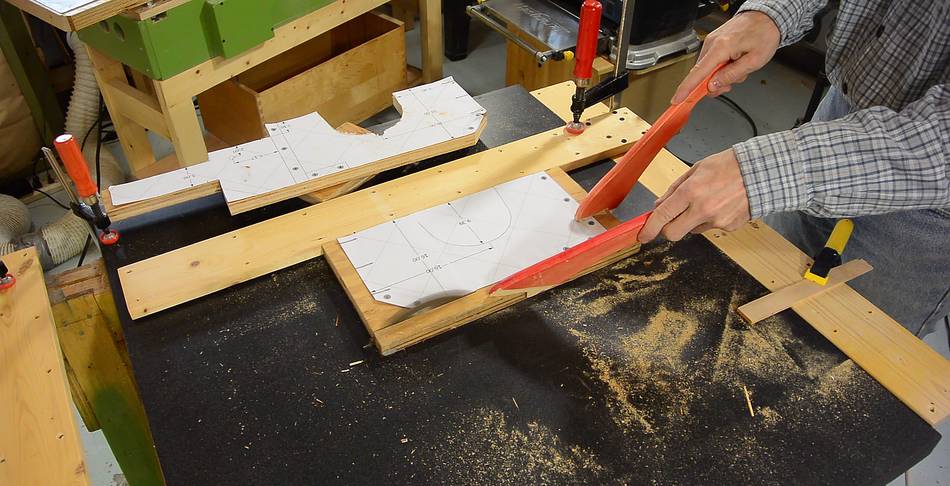
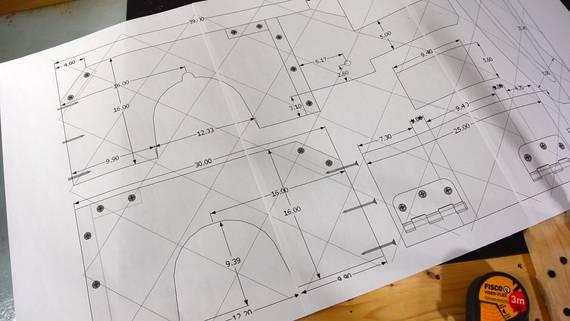
I cut out the individual templates and pasted them onto scraps of wood that were big enough, then cut them out. I'm just using scraps of medium quality plywood from the garbage, not the fancy Baltic birch plywood, because I want to make sure this saw can be built cheaply.
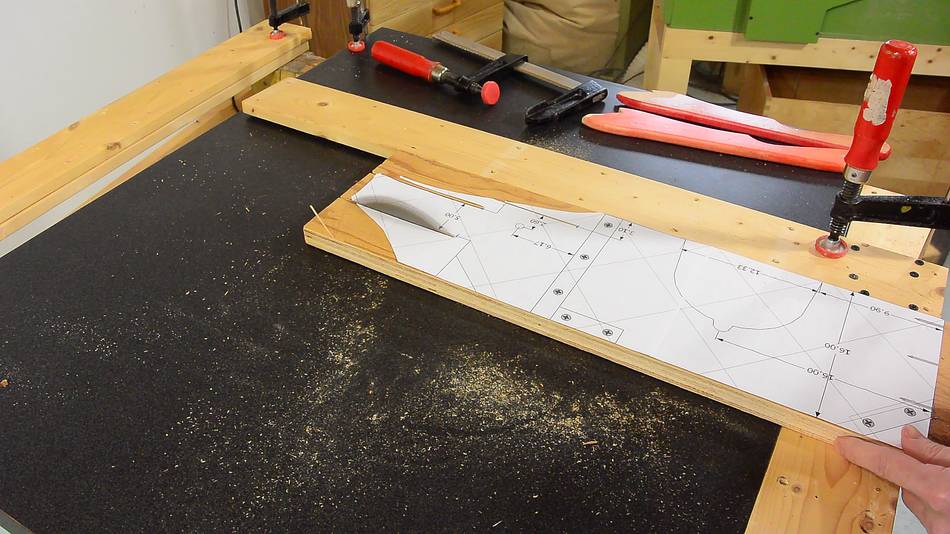
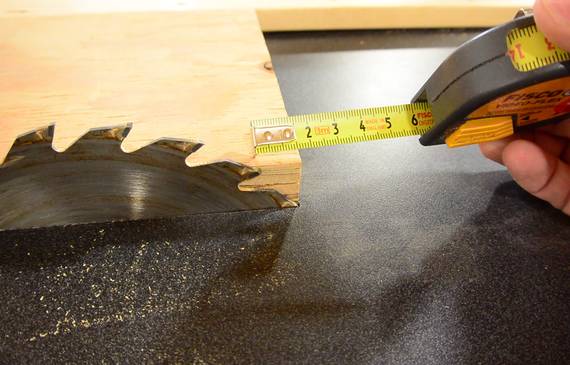 There are a few inside corners that need to be cut. Here I'm measuring how far
back I have to stay from the corners to avoid over-cutting on the bottom side.
There are a few inside corners that need to be cut. Here I'm measuring how far
back I have to stay from the corners to avoid over-cutting on the bottom side.
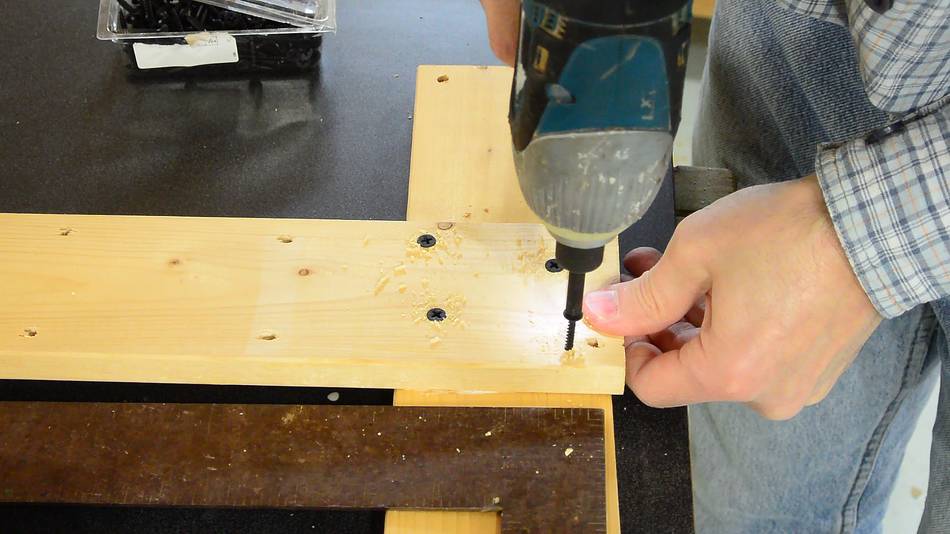
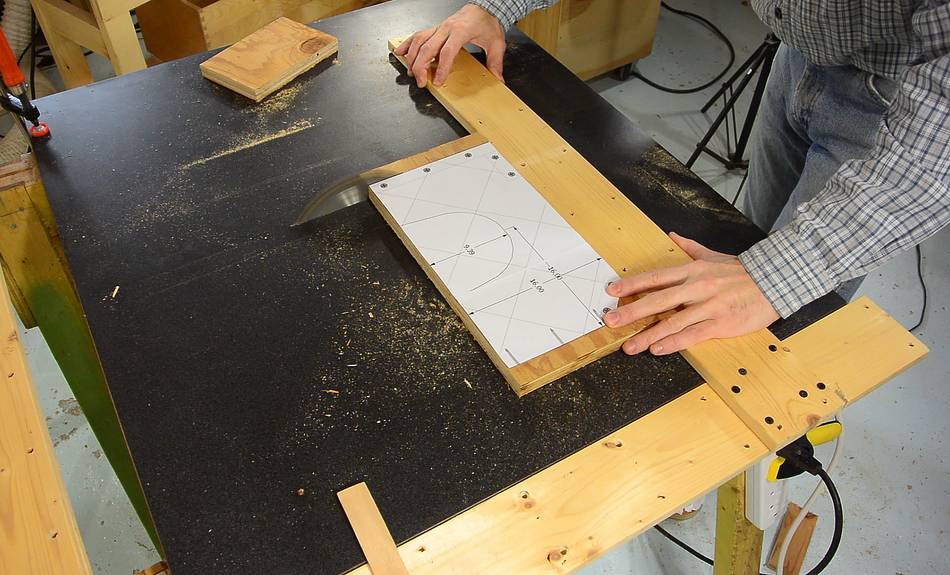 Making cross cuts. I have to apply constant force to the right to keep the T-square
pushed against the left edge of the table. I also clamped a small piece of wood
to the part of the square sliding against the table to keep it from dropping down.
Making cross cuts. I have to apply constant force to the right to keep the T-square
pushed against the left edge of the table. I also clamped a small piece of wood
to the part of the square sliding against the table to keep it from dropping down.
It's important to only cut as far as the wood that I'm cutting. This cuts slightly into my square, but I don't go further than necessary so I won't cut the square in two.
 And cutting out a whole lot of small pieces (from the plans) that I know I will need
later. Once I start mounting the circular saw in its mount, I won't have the improvised
table saw any more, so it's important to cut these pieces now.
And cutting out a whole lot of small pieces (from the plans) that I know I will need
later. Once I start mounting the circular saw in its mount, I won't have the improvised
table saw any more, so it's important to cut these pieces now.
I always use push sticks when I need to push close to the blade, and so should you. I do not recommend any sort of push blocks or the L-shaped variety of push blocks. Those require you to get your hands too close to the blade.
Next: Saw mount and depth adjustment mechanism
 Homemade table saw
 Why I'm building