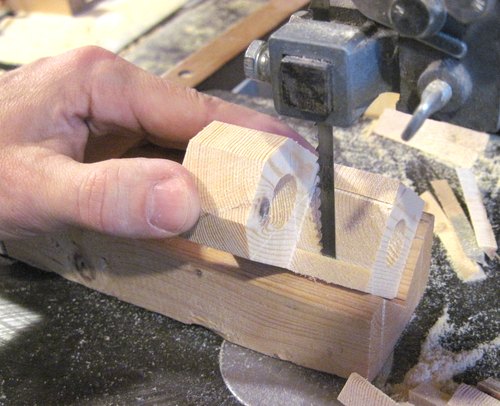
 To cut down waste I made the ramp blocks in pairs.
I drilled the holes for the marble interlock before cutting the block into
two wedge shaped pieces. That way, I didn't have to worry about supporting
the angled piece on my drill press.
To cut down waste I made the ramp blocks in pairs.
I drilled the holes for the marble interlock before cutting the block into
two wedge shaped pieces. That way, I didn't have to worry about supporting
the angled piece on my drill press.
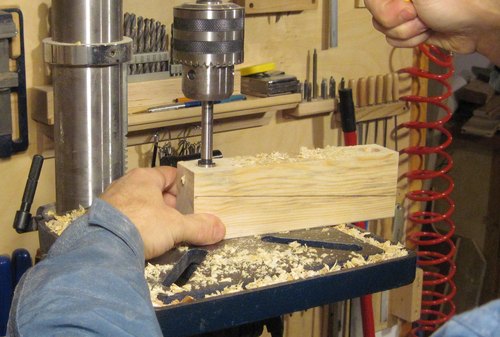
I took a lot of photos while making the various elements for my marble run blocks, so here's a graphical guide to their construction.
To cut down waste I made the ramp blocks in pairs.
I drilled the holes for the marble interlock before cutting the block into
two wedge shaped pieces. That way, I didn't have to worry about supporting
the angled piece on my drill press.
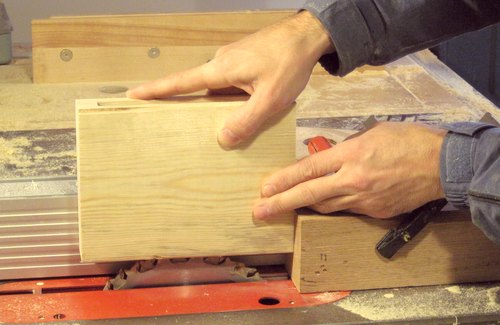
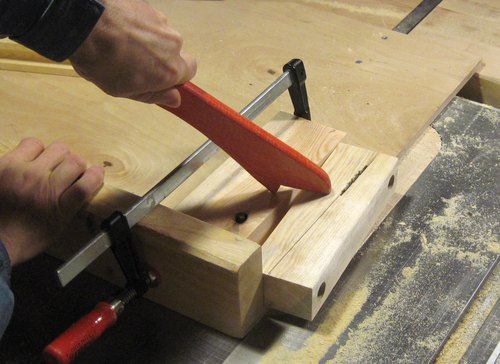 I cut the blocks apart on my table saw. I used my table saw sled with a few
pieces of wood clamped to it as an improvised taper jig. The advantage
of using the table saw jigged up like this is that I didn't even need
to mark where the blocks would need to be cut. For this photo and the
previous one I did draw a line where the cut would be just for illustration.
I cut the blocks apart on my table saw. I used my table saw sled with a few
pieces of wood clamped to it as an improvised taper jig. The advantage
of using the table saw jigged up like this is that I didn't even need
to mark where the blocks would need to be cut. For this photo and the
previous one I did draw a line where the cut would be just for illustration.
I'm using a push stick to hold the block in place on my table saw sled. It's not an overly secure that way to hold it but it's quick and my fingers aren't near the blade. So if something bad were to happen during the cut it wouldn't result in any cuts to me.
 After ripping the blocks into wedges, I routed the groove into them. I did this
with a 3/4" ball nose router bit in several passes of increasing depth.
After ripping the blocks into wedges, I routed the groove into them. I did this
with a 3/4" ball nose router bit in several passes of increasing depth.
Most cheap 20-piece router bit sets come with a 3/4" ball nose bit so I didn't have to go out of my way to buy an extra bit.
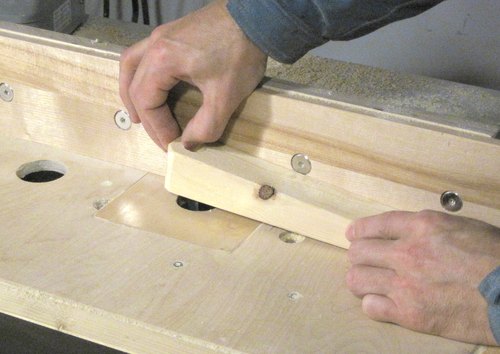 I squared out the tracks near the top to keep the marble from
bouncing it if it enters the track sideways. I used a 3/4" square dadoing bit
to do this. The most expedient way to make the cut was to just drop the piece
onto the spinning cutter.
I squared out the tracks near the top to keep the marble from
bouncing it if it enters the track sideways. I used a 3/4" square dadoing bit
to do this. The most expedient way to make the cut was to just drop the piece
onto the spinning cutter.
Things can go wrong when doing that sort of thing. I have my right hand supported on the router table fence so that my fingers won't quite reach the bit even if the piece got thrown out of my hands. My left hand is far enough away from the cutter that it also is out of danger.
With just a 3/4" bit on the router, the router couldn't throw the piece all that hard, so I'm less concerned with what the piece might hit if it does get thrown. I didn't encounter any problems making these pieces, but its always good to anticipate possible accidents. In retrospect, maybe I should have just used my slot mortising machine to make this cut.
 To make side exits I just drilled a hole in from the side with a
forstner bit. I held the track piece at a slight angle, so that the side entrance
has a bit of a downward slope to it.
To make side exits I just drilled a hole in from the side with a
forstner bit. I held the track piece at a slight angle, so that the side entrance
has a bit of a downward slope to it.
 I cut some 3/4" dowel down the middle and into short segments and glued the segments
into the end of the slots.
This makes the end of the track nice and square so that the marble isn't deflected
upwards if it hits the end of the track hard.
I cut some 3/4" dowel down the middle and into short segments and glued the segments
into the end of the slots.
This makes the end of the track nice and square so that the marble isn't deflected
upwards if it hits the end of the track hard.
 I beveled the edges of the support blocks on my bandsaw. The idea of beveling the
edges is that it's possible to let the track that sits on the lower part of the
support exit at an angle of less than 90 degrees.
I beveled the edges of the support blocks on my bandsaw. The idea of beveling the
edges is that it's possible to let the track that sits on the lower part of the
support exit at an angle of less than 90 degrees.
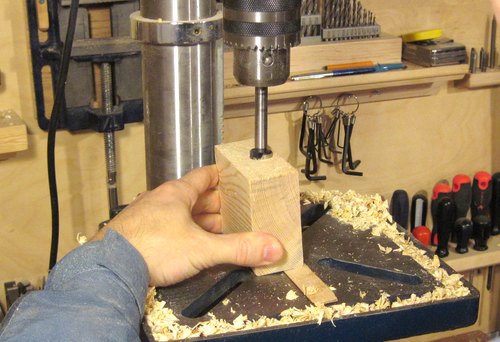
 To make the mini-bowls, I started by drilling the exit hole into the block
with a forstner bit. The hole is drilled at a slight angle. I angled
my block by putting a thin shim on the drill press table.
To make the mini-bowls, I started by drilling the exit hole into the block
with a forstner bit. The hole is drilled at a slight angle. I angled
my block by putting a thin shim on the drill press table.
I could have tilted the drill press table, but I don't like doing that. I have the table set to dead-square and the screw tightened really hard. That way I can count on my drill press table always being square. Its easier to just put the piece on a slight wedge than it is to mess with the drill press table's angle.
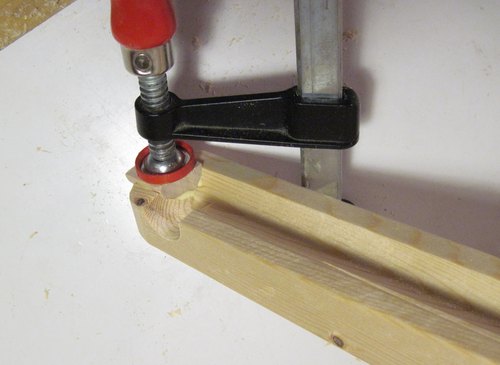
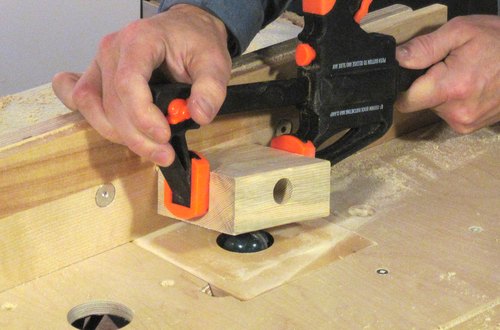 To make the blocks with the mini-bowls, I routed around the inside edge of a 7/8"
hole with a 1/2" radius cove bit on my router table.
I wasn't comfortable holding such a small workpiece on the router against the
size of bit I was using
so I used a bar clamp to hold the block. This bar clamp is one
of those clamps mostly made out of plastic, which for this application is
ideal. If the clamp were to somehow come in contact with the
router bit I wouldn't end up with a bunch of flying shrapnel from metal
hitting metal.
To make the blocks with the mini-bowls, I routed around the inside edge of a 7/8"
hole with a 1/2" radius cove bit on my router table.
I wasn't comfortable holding such a small workpiece on the router against the
size of bit I was using
so I used a bar clamp to hold the block. This bar clamp is one
of those clamps mostly made out of plastic, which for this application is
ideal. If the clamp were to somehow come in contact with the
router bit I wouldn't end up with a bunch of flying shrapnel from metal
hitting metal.
I also have my right hand hooked over the router table fence so that if something really bad were to happen my fingers wouldn't reach down to the spinning cutter.
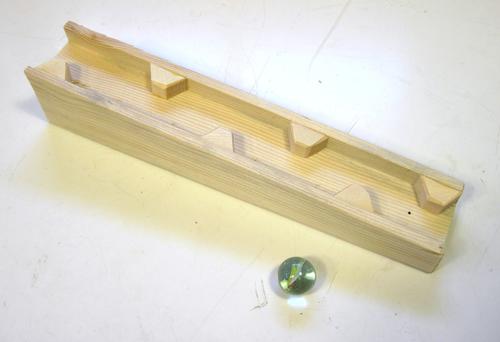 I built the zigzag tracks by cutting a wide square track in the block with two
passes on the router table. I then made these trapezoid shaped blocks which I
glued on the inside as obstruction. I neglected to take any photos of making
these because all the steps were pretty straightforward.
I built the zigzag tracks by cutting a wide square track in the block with two
passes on the router table. I then made these trapezoid shaped blocks which I
glued on the inside as obstruction. I neglected to take any photos of making
these because all the steps were pretty straightforward.
 I used a decidedly unsafe method to make the tracks in which the marbles rock
back and forth.
I plunged a block of wood onto a spinning dado blade. Instead of
building up a 3/4" dado stack, I just used my box joint cutter and did this in several
plunge cuts side-by-side.
I used a decidedly unsafe method to make the tracks in which the marbles rock
back and forth.
I plunged a block of wood onto a spinning dado blade. Instead of
building up a 3/4" dado stack, I just used my box joint cutter and did this in several
plunge cuts side-by-side.
I clamped a heavy block of oak to my table saw fence to keep the block in
place and prevent it from getting kicked by the saw blade. I also used a work piece
large enough for two of the rocker ramps and plunged it on both sides.
That gave me a bigger block to hold and could keep my fingers further from the blade.
Perhaps slightly less risky would have been to clamp the block to the fence and then
raise the spinning dado cutter into it. but even this way, a heavy block of wood in front
of it to keep the work piece secure would be advisable. When I made more blocks like
that for my modular marble machine, I sandwiched them out
of three layers cut out on the bandsaw. Much safer that way!
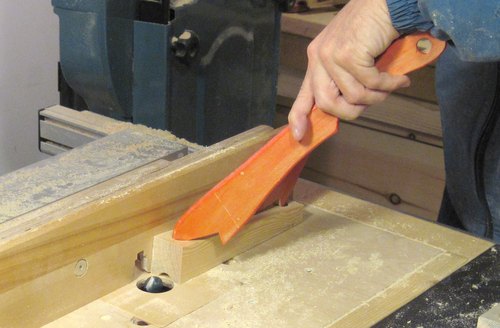
 I made the exit hole by measuring the depth of my dado blade slot
and then drilled a slightly angled hole from the side so that it would just
touch the bottom of the dado blade slot.
It's important that the curved groove is mostly continuous at the bottom
so that the marble's rolling back and forth is not disrupted by a big notch. I ended up
using a carving knife to shape the last little bit of this slot to get the
shape of the exit just right.
I made the exit hole by measuring the depth of my dado blade slot
and then drilled a slightly angled hole from the side so that it would just
touch the bottom of the dado blade slot.
It's important that the curved groove is mostly continuous at the bottom
so that the marble's rolling back and forth is not disrupted by a big notch. I ended up
using a carving knife to shape the last little bit of this slot to get the
shape of the exit just right.
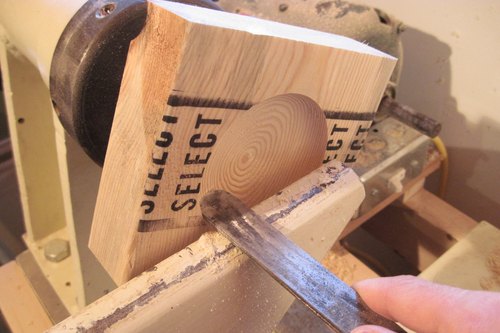 I made the larger bowls on the lathe. I used some relatively heavy pieces of
construction lumber. I didn't even bother planing the labeling off the
lumber before turning the bowl. After turning the cavity, I ran it across
the jointer to clean up the top and trim it to its final thickness and
then cut the outside dimensions to its final size.
I made the larger bowls on the lathe. I used some relatively heavy pieces of
construction lumber. I didn't even bother planing the labeling off the
lumber before turning the bowl. After turning the cavity, I ran it across
the jointer to clean up the top and trim it to its final thickness and
then cut the outside dimensions to its final size.
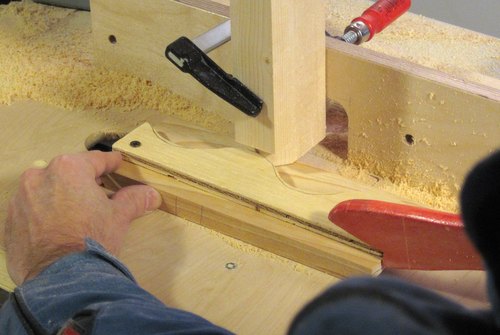 To cut the slalom track I made a curvy template which I screwed to the back of
board. I made an offset guide that I clamped to the router table fence to engage
the curvy guide, and then cut the track in several passes, increasing
the depth of cut each time.
To cut the slalom track I made a curvy template which I screwed to the back of
board. I made an offset guide that I clamped to the router table fence to engage
the curvy guide, and then cut the track in several passes, increasing
the depth of cut each time.
This was another adventurous use of the router for me, and I kept my fingers well clear of the cutter.
 My guide was right above the router bit. A side benefit was that I had mounted
the guide low enough to almost touch my work piece, which helped keep it
in place. Also, with the guide right above the router bit there was less
chance of getting my fingers into the router.
My guide was right above the router bit. A side benefit was that I had mounted
the guide low enough to almost touch my work piece, which helped keep it
in place. Also, with the guide right above the router bit there was less
chance of getting my fingers into the router.
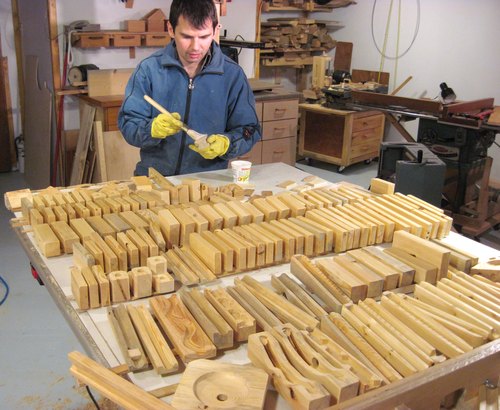 After making all the pieces, I rounded all the sharp edges on the belt sander.
I also put one coat of varnish on everything to seal it up a little. Hopefully, food stains won't soak into the wood.
More than one coat would have made the blocks slippery, which is an undesirable property for building blocks. It also saved a lot of work.
I'm wearing rubber gloves while varnishing the small pieces. With small bits I always end up with some varnish drying on my hands just from holding them. That varnish really sticks and is hard to get off my hands.
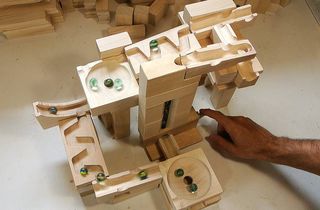
Do you want plans for the blocks? Numerous people have asked if they can buy plans for the marble run building blocks. I have since come up with a newer design which I do have plans for sale for.
 Marble run toy blocks
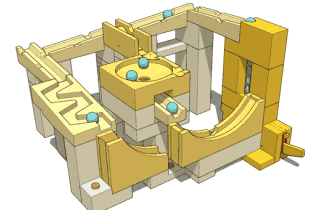 Marble run block plans
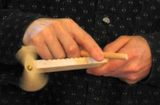 More wooden toys
See also: my Marble machines
to my Woodworking website.
 More about these
 Marble machine 2.1
 Modular marble machine
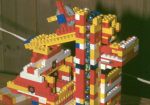 Lego marble machine
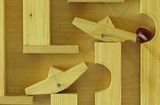 Binary marble adding machine