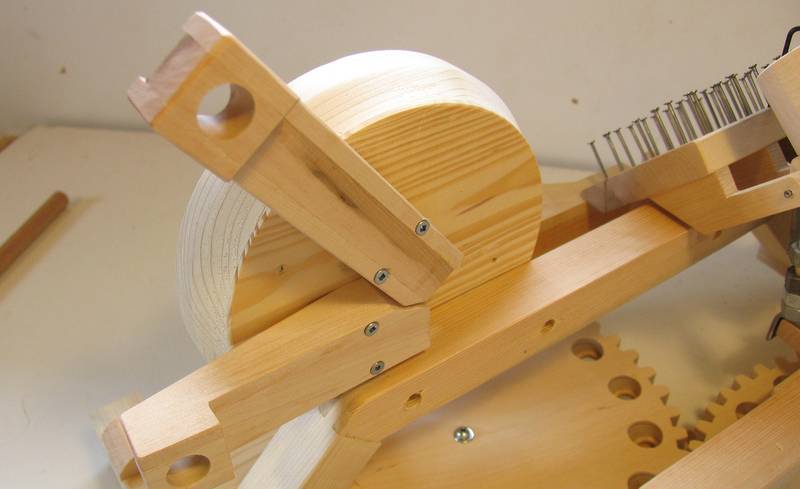
Below-bowl ramps
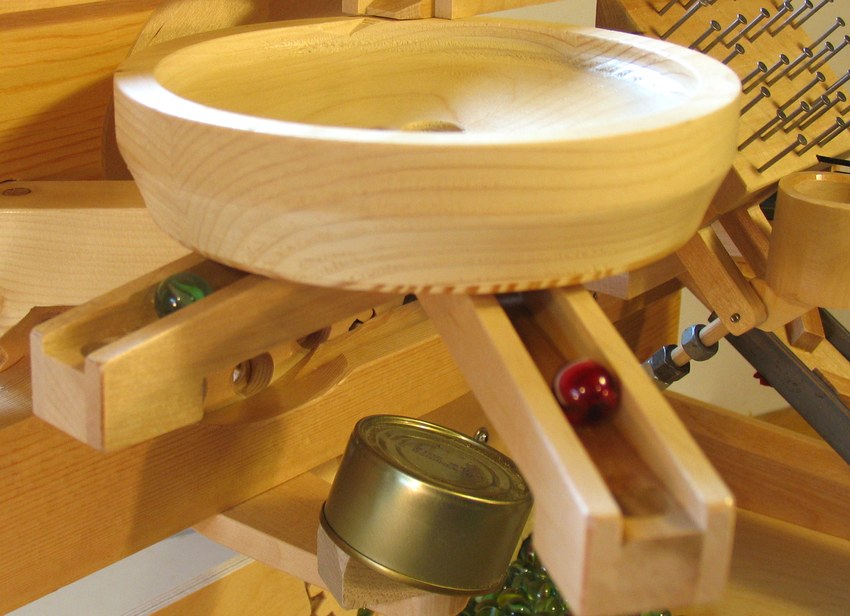 The marbles that swirl around the bowl eventually fall out one of three
holes at the bottom. Two of these holes lead to ramps that move the
marbles over to where they are dropped onto percussion elements.
The third hole just drops them straight down.
The marbles that swirl around the bowl eventually fall out one of three
holes at the bottom. Two of these holes lead to ramps that move the
marbles over to where they are dropped onto percussion elements.
The third hole just drops them straight down.
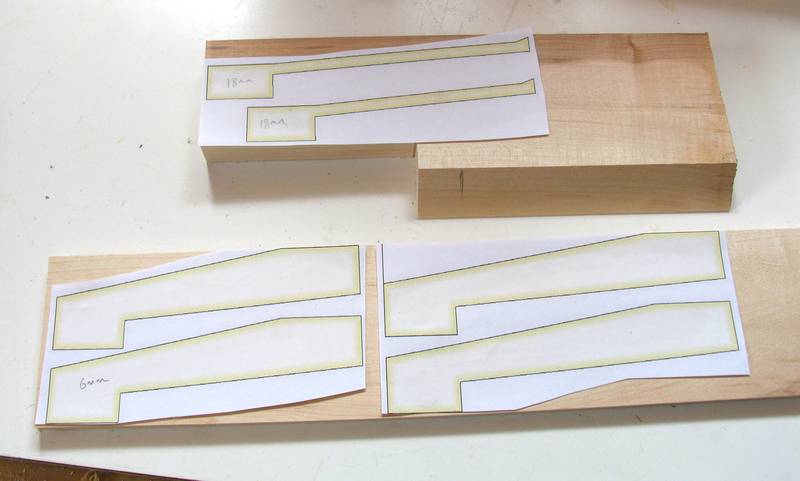 Each ramp is sandwiched together out of three layers, with the outside
layers 7 mm thick, and the middle layer 18 mm thick.
Here are my paper templates glued onto the pieces of wood I'm about to cut.
Each ramp is sandwiched together out of three layers, with the outside
layers 7 mm thick, and the middle layer 18 mm thick.
Here are my paper templates glued onto the pieces of wood I'm about to cut.
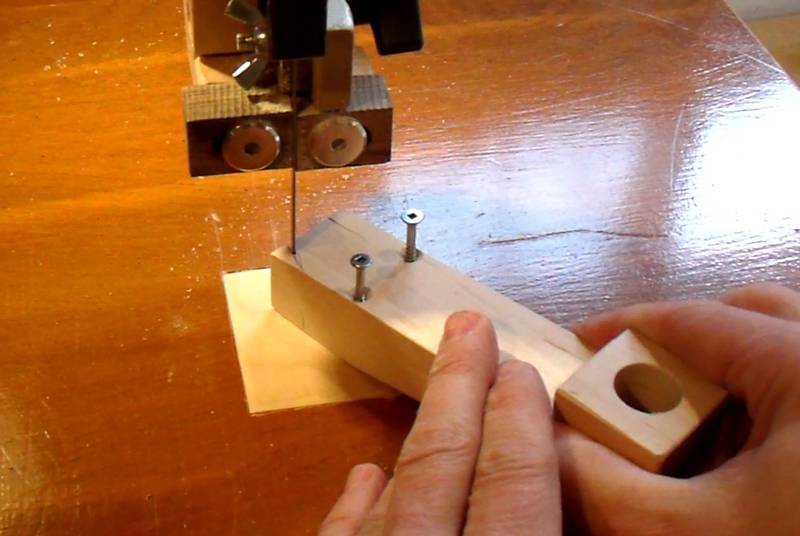
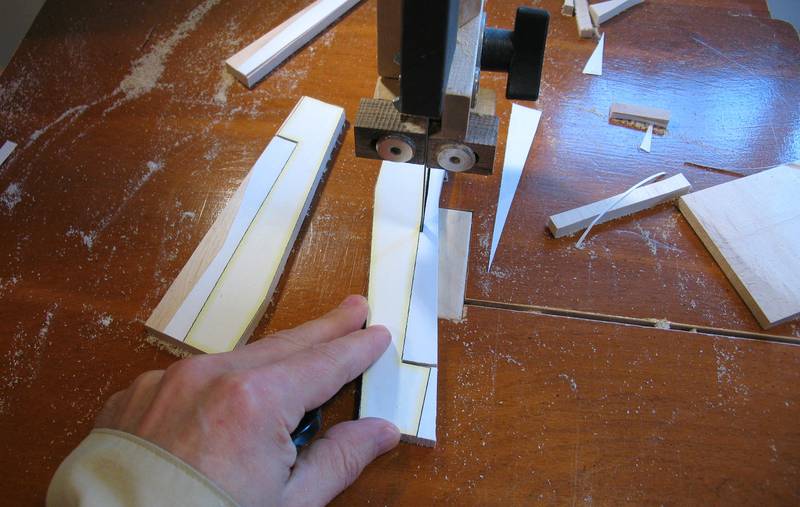 Cutting the pieces out on the bandsaw...
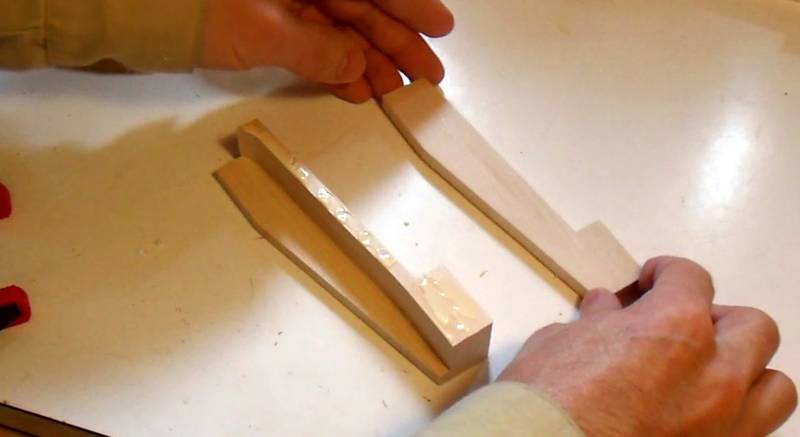 ... and gluing them together.
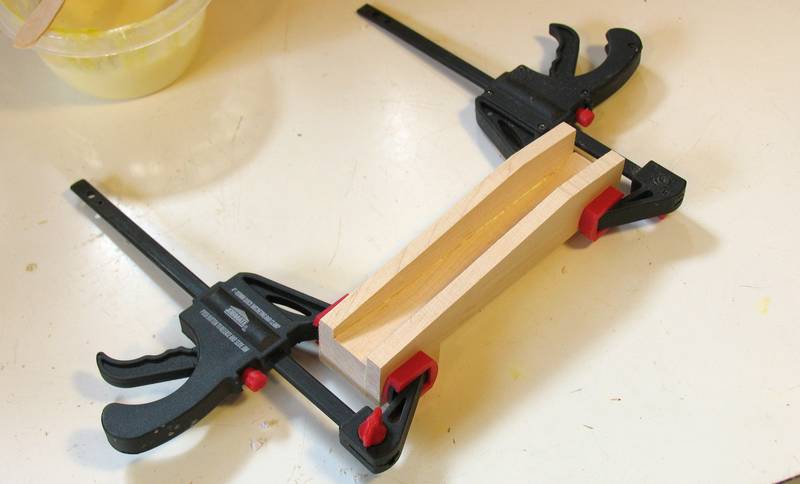 Clamped and waiting for the glue to dry. I pressed the part down on the table
in the orientation shown while applying the clamps to ensure proper alignment.
Be careful when you apply the clamps - they often cause parts to slip out of alignment.
Clamped and waiting for the glue to dry. I pressed the part down on the table
in the orientation shown while applying the clamps to ensure proper alignment.
Be careful when you apply the clamps - they often cause parts to slip out of alignment.
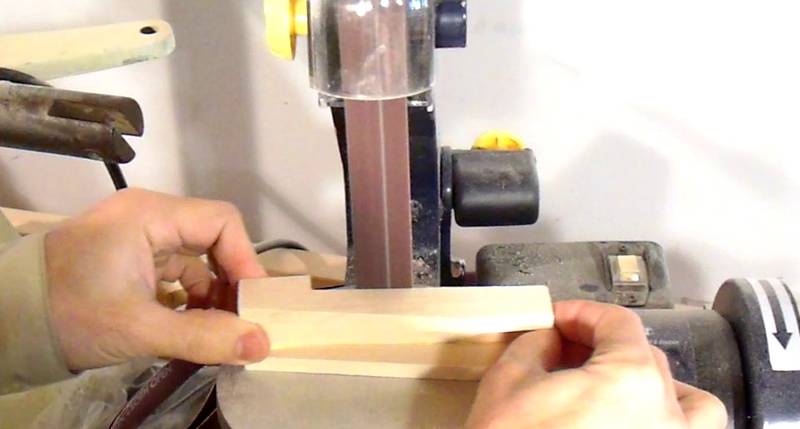 Cleaning up some of the rough edges after assembly.
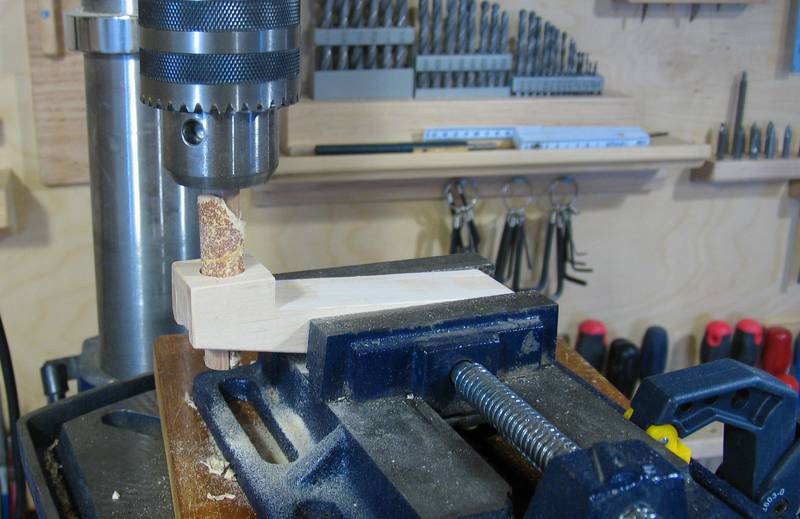
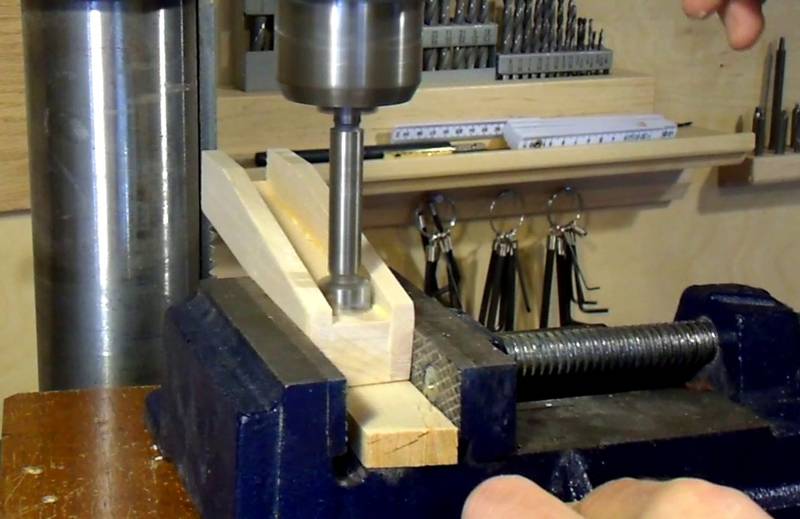 Once the glue was dry, I'm drilling the exit holes for the ramps.
I'm using a 5/8" (16 mm) drill. A drill that is a tiny bit larger would be ideal, but
such drill sizes are very hard to find. A 3/4" or 18 mm hole would be too large.
For a hole that large, marbles might go through a hole at an angle and then miss
their target below.
Once the glue was dry, I'm drilling the exit holes for the ramps.
I'm using a 5/8" (16 mm) drill. A drill that is a tiny bit larger would be ideal, but
such drill sizes are very hard to find. A 3/4" or 18 mm hole would be too large.
For a hole that large, marbles might go through a hole at an angle and then miss
their target below.
The problem with 5/8" or 16 mm is that some of the marbles are slightly larger than that and will get stuck in the holes.
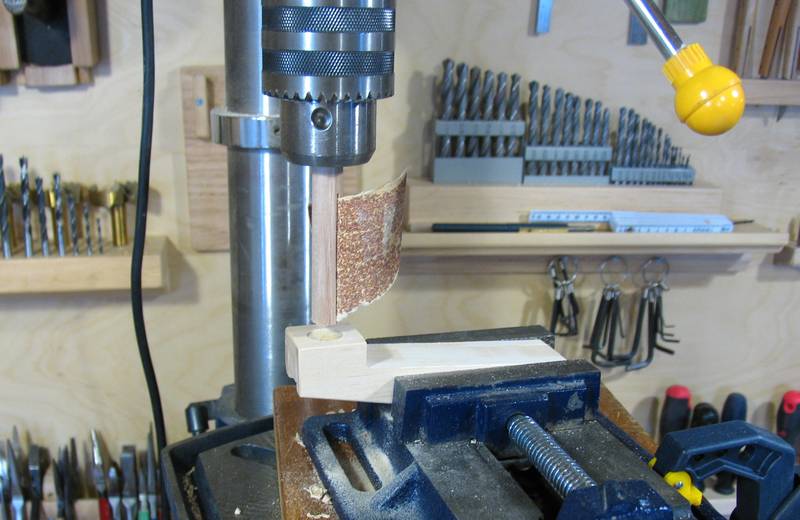 My solution was to sand out the inside of the hole. I don't have a sanding spindle that small,
so I used a piece of 1/2" dowel (about 12 mm) and cut a slot in it. I then put a piece of
very coarse sandpaper in that slot. No need to glue the sandpaper into the slot, but the
important thing is that the lower edge of the sandpaer is at an angle. This helps the sandpaper
wrap itself around the dowel as the spinning dowel is pushed into the hole
My solution was to sand out the inside of the hole. I don't have a sanding spindle that small,
so I used a piece of 1/2" dowel (about 12 mm) and cut a slot in it. I then put a piece of
very coarse sandpaper in that slot. No need to glue the sandpaper into the slot, but the
important thing is that the lower edge of the sandpaer is at an angle. This helps the sandpaper
wrap itself around the dowel as the spinning dowel is pushed into the hole
 With the drill lowered into the hole, the drill is moved up and down while the work piece
is pushed in various directions. Ideally, the hole will get enlarged by about half a
millimeter. Some larger marbles may still get stuck in the holes,
just put those marbles aside.
With the drill lowered into the hole, the drill is moved up and down while the work piece
is pushed in various directions. Ideally, the hole will get enlarged by about half a
millimeter. Some larger marbles may still get stuck in the holes,
just put those marbles aside.
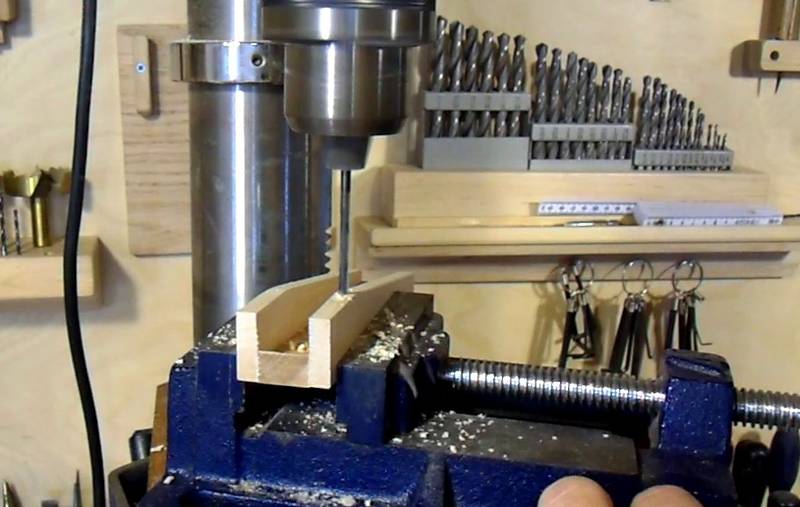 Next drilling the mounting holes using a 9/64" (3.5 mm) drill.
A countersink is also added to the bottom of the ramp for the screw heads.
Next drilling the mounting holes using a 9/64" (3.5 mm) drill.
A countersink is also added to the bottom of the ramp for the screw heads.
 Marking the location for the pilot holes of the longer of the two ramps.
Make sure the ramp lines up with the hole in the bowl and that it points
towards the corner of the machine. The back edge
of the ramp should not extend past the edge of the hole, as space will be very tight.
Marking the location for the pilot holes of the longer of the two ramps.
Make sure the ramp lines up with the hole in the bowl and that it points
towards the corner of the machine. The back edge
of the ramp should not extend past the edge of the hole, as space will be very tight.
Also make a pencil line for the outline of the ramp on the bottom of the bowl.
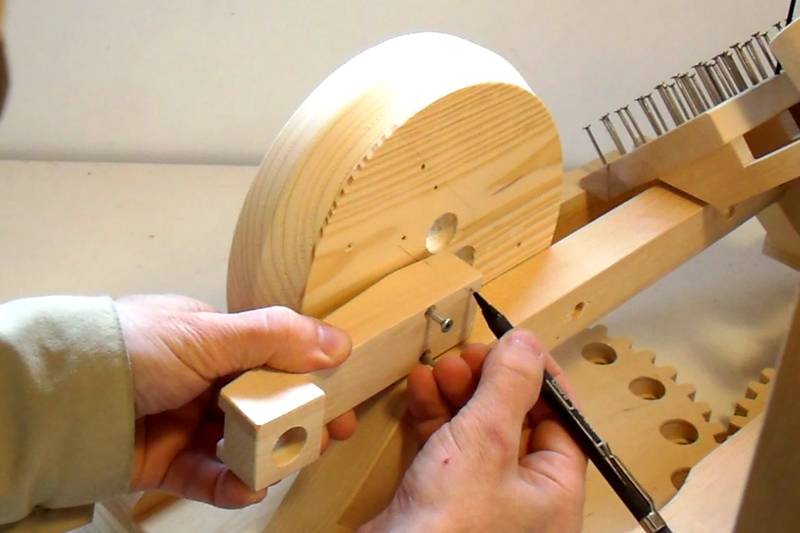 Next hold the second ramp in place. Using the previously marked outline, mark how much
needs to be cut away from the end of this ramp to fit next to the other ramp.
Next hold the second ramp in place. Using the previously marked outline, mark how much
needs to be cut away from the end of this ramp to fit next to the other ramp.
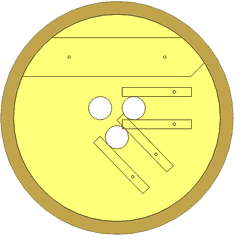 If you constructed the rest of the machine exactly according to
the dimensions in the plans, you can also use a template to mark the
mounting points and pilot holes on the bottom of the bowl.
If you constructed the rest of the machine exactly according to
the dimensions in the plans, you can also use a template to mark the
mounting points and pilot holes on the bottom of the bowl.
 Cutting away part of the corner of the ramp to accomodate.
 I ended up cutting away parts of both ramps to accommodate the fit.
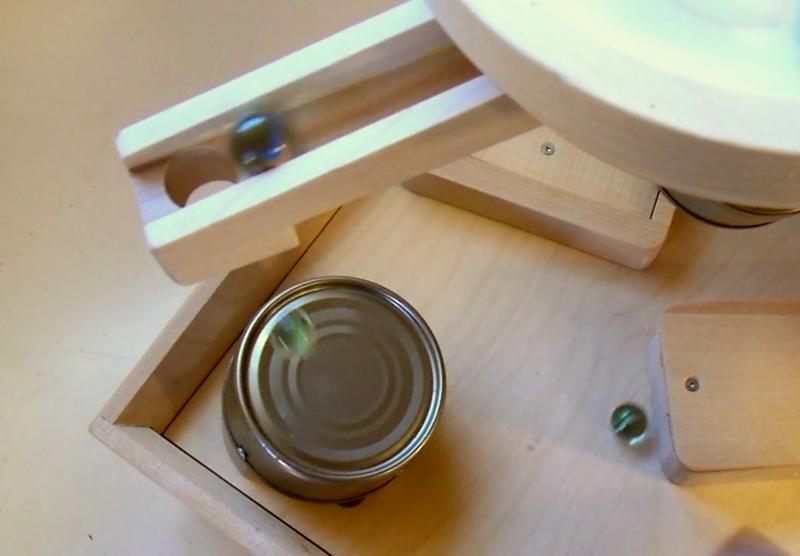 With the exit hole only slightly larger than the marbles, the ramps
drop the marbles straight down so that they hit their targets
fairly consistently.
With the exit hole only slightly larger than the marbles, the ramps
drop the marbles straight down so that they hit their targets
fairly consistently.
Next: Can drums
Back to Marble machine 2.1