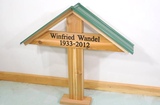
When I was carving the inscription for an urn that I built, I figured a pantograph would have been an ideal tool to do this with instead of carving manually with a knife. So that got me itching to build a pantograph - but not until after I completed the urn.
 For my first lettering test I just traced along a paper template with the stylus.
It was slow going - I had to be careful to stay on the lines.
With half the weight of the router on the stylus, I was worried that it
might tear the paper. But I polished the end of my follower rod, and it slid
well enough on the paper without tearing.
For my first lettering test I just traced along a paper template with the stylus.
It was slow going - I had to be careful to stay on the lines.
With half the weight of the router on the stylus, I was worried that it
might tear the paper. But I polished the end of my follower rod, and it slid
well enough on the paper without tearing.
I
 My first results were a little bit squiggly. I guess I'm not that good at following lines.
I also encountered a lot of burn marks. The hard maple that I used was not
very suitable for router carving with a V bit. That was the wood that I used for the
top of the urn earlier, so I guess a
router would not have worked that well for the inscription.
My first results were a little bit squiggly. I guess I'm not that good at following lines.
I also encountered a lot of burn marks. The hard maple that I used was not
very suitable for router carving with a V bit. That was the wood that I used for the
top of the urn earlier, so I guess a
router would not have worked that well for the inscription.
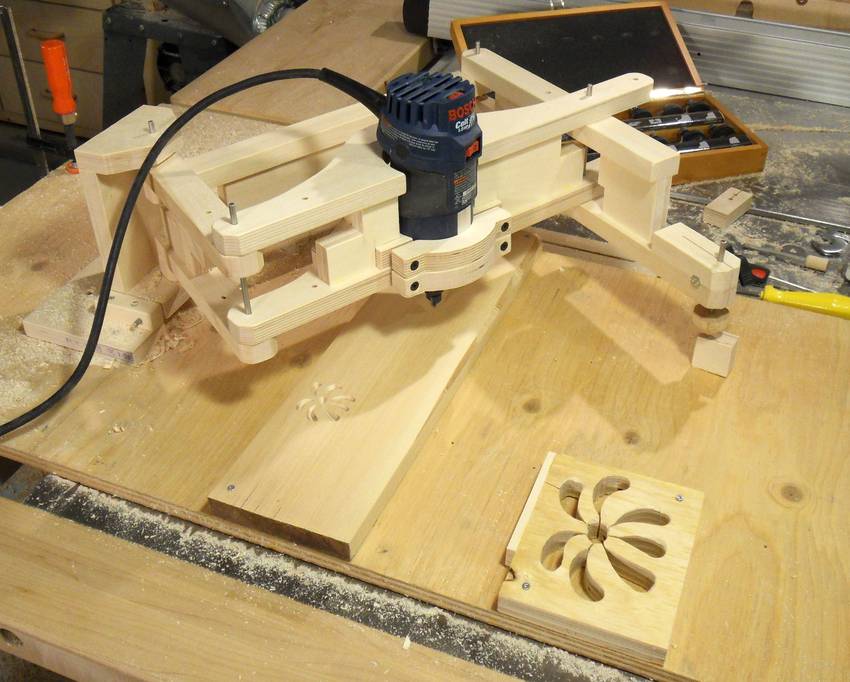
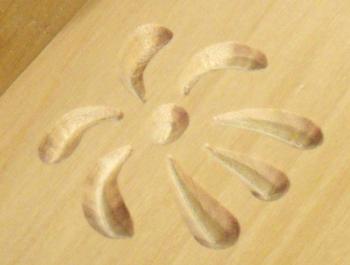 My next experiment was to carve a shape with varying depths of cut.
I cut a sort of wilting flower shape template on the bandsaw.
My next experiment was to carve a shape with varying depths of cut.
I cut a sort of wilting flower shape template on the bandsaw.
Instead of a straight shaft, I used the conical follower on the end of my pantograph. The cone would dip deeper into wider sections of the template. As the follower dips deeper, the whole pantograph tilts forward, which also brings the router deeper into the stock.
I didn't get any burning with birch wood, so I guess the burning really was from the hard maple I tried initially.
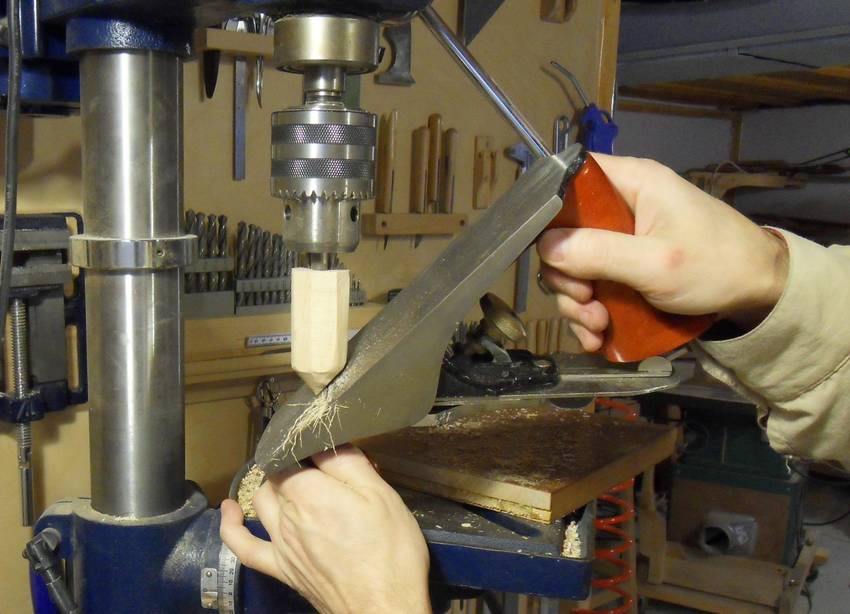 I have too much junk piled on my lathe, and I don't have the right kind of
chuck for it anyway, So I shaped the conical follower with a hand plane held against the
spinning piece of wood in the drill press. In retrospect it would probably have been
easier to mount the cone in the hand drill and hold it against a running belt sander.
I have too much junk piled on my lathe, and I don't have the right kind of
chuck for it anyway, So I shaped the conical follower with a hand plane held against the
spinning piece of wood in the drill press. In retrospect it would probably have been
easier to mount the cone in the hand drill and hold it against a running belt sander.
 Having had success with the wilting flower shape, I tried reproducing a Times Roman font.
Serif'd fonts like that have varying stroke widths, so I was keen to see
how it would work out. That first test looked really nice.
(You can click the image to enlarge it)
Having had success with the wilting flower shape, I tried reproducing a Times Roman font.
Serif'd fonts like that have varying stroke widths, so I was keen to see
how it would work out. That first test looked really nice.
(You can click the image to enlarge it)
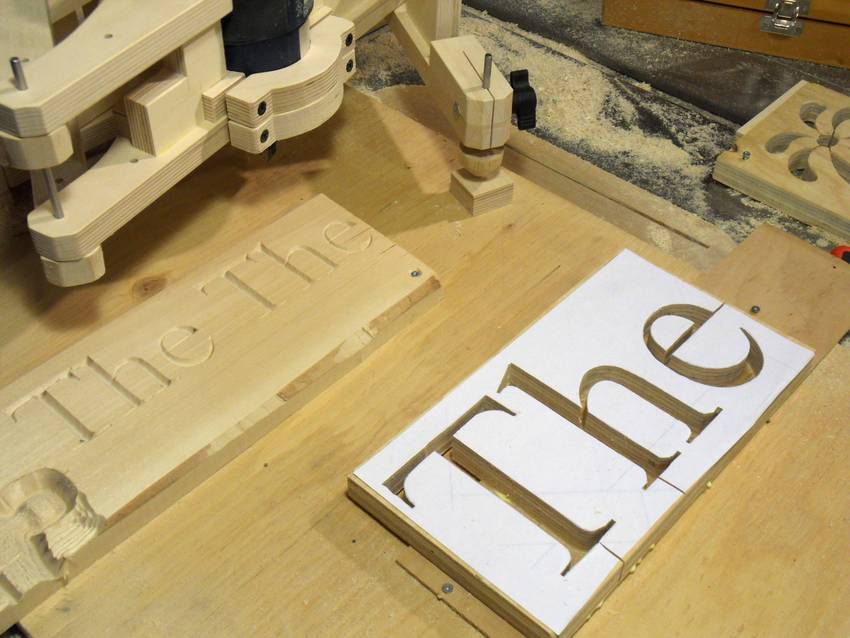
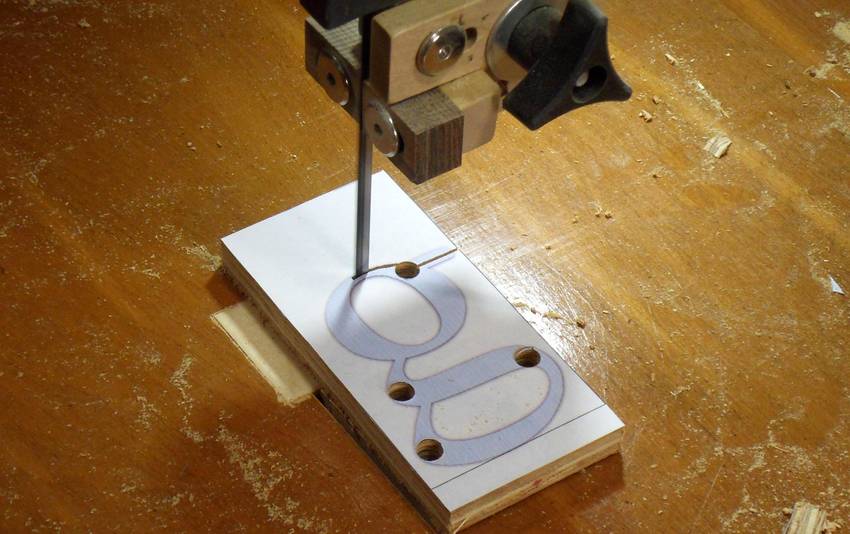 Next I made individual letter blocks to form a bigger word, and
I cut these out on the bandsaw. I wrote an
online stencil maker to make the letter block shapes.
I drilled holes where there are tight corners
to help turn around with the bandsaw blade.
To get into the inside I just started the cut from the outside.
That left a gap in the template, but as long as I don't follow that gap
with the follower, it doesn't matter.
Next I made individual letter blocks to form a bigger word, and
I cut these out on the bandsaw. I wrote an
online stencil maker to make the letter block shapes.
I drilled holes where there are tight corners
to help turn around with the bandsaw blade.
To get into the inside I just started the cut from the outside.
That left a gap in the template, but as long as I don't follow that gap
with the follower, it doesn't matter.
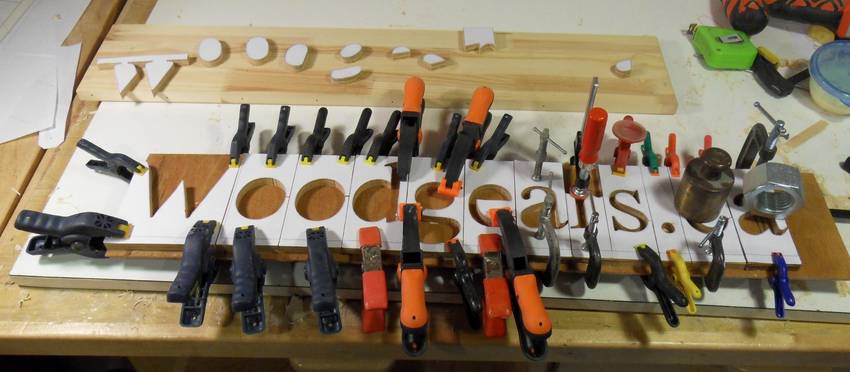 I glued all the templates onto a thinner piece of backing plywood.
This helps keep them rigid, and holds the middle pieces in place for
letters with holes in them like "o".
I glued all the templates onto a thinner piece of backing plywood.
This helps keep them rigid, and holds the middle pieces in place for
letters with holes in them like "o".
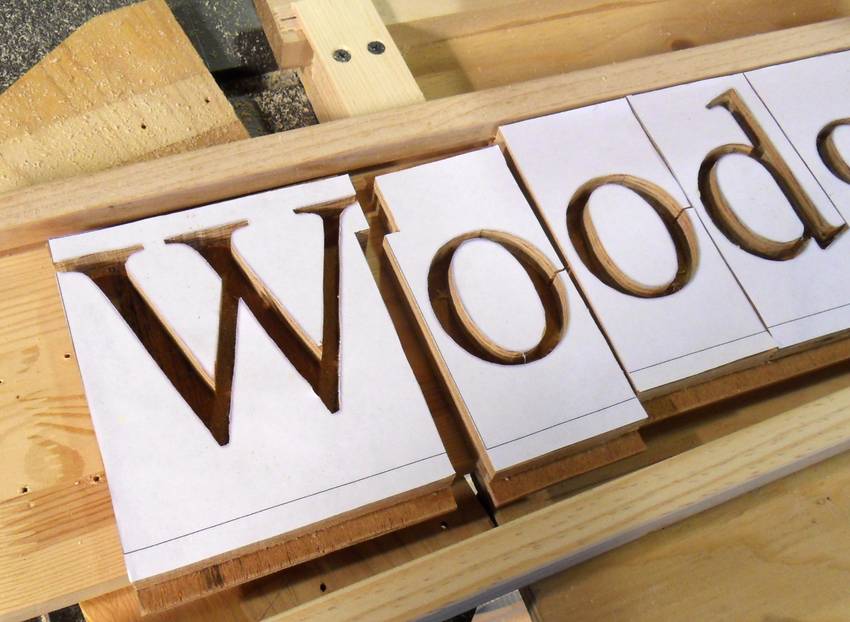 I found that the space between the "W" and the first "o" of "woodgears.ca",
to look right, had the "W" and the next "o" overlapping vertically:
I found that the space between the "W" and the first "o" of "woodgears.ca",
to look right, had the "W" and the next "o" overlapping vertically:

So I cut a notch in both letter templates to move them closer together.
Apparently the same thing was done with the old movable type. This is where the term
kerning originated from.
(When I wrote this article, on Windows XP, the "W" and 'o' were displayed too far apart to look right, but newer versions of Windows actually do kerning.
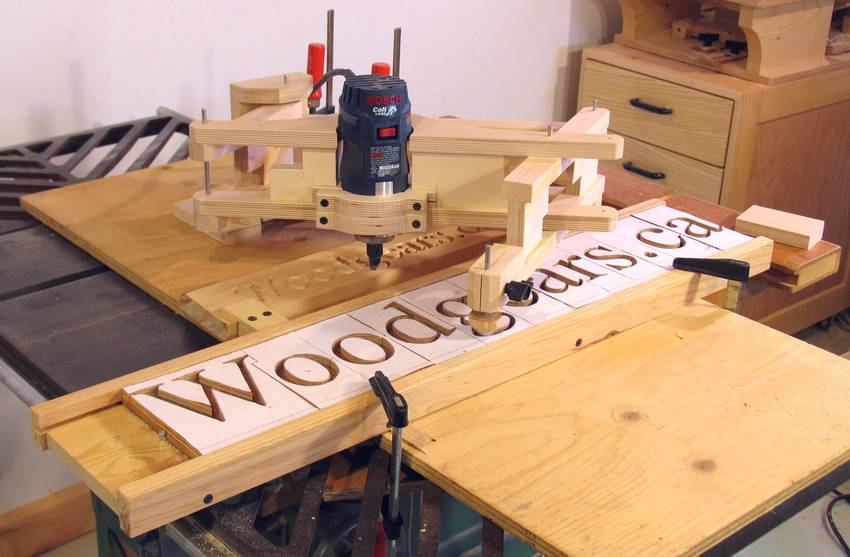
 I attached two rails with a groove along the sides of a board
to hold the letter blocks in place.
I attached two rails with a groove along the sides of a board
to hold the letter blocks in place.
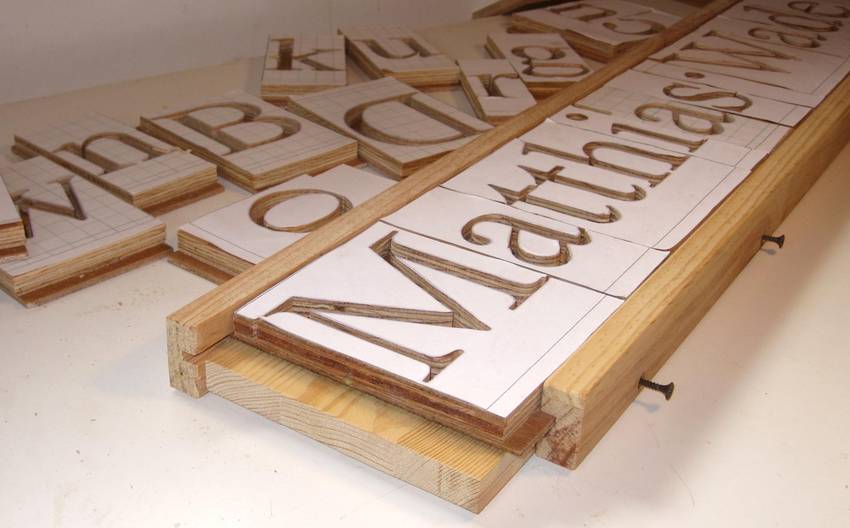
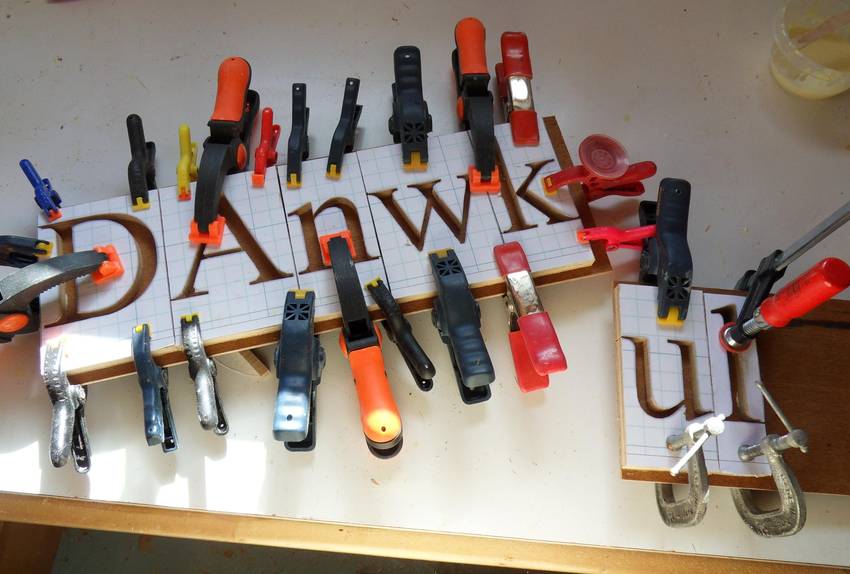 I ended up making quite a few more letter blocks. Every time I went to spell a new name
or word I found I was short by just a letter or two. It was a good way to use up
small scrap bits of plywood
I ended up making quite a few more letter blocks. Every time I went to spell a new name
or word I found I was short by just a letter or two. It was a good way to use up
small scrap bits of plywood
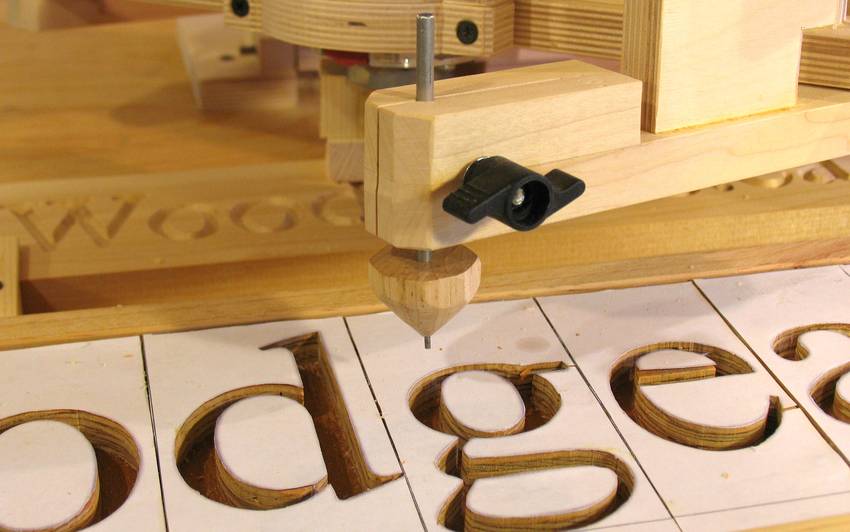 I added a pin to protrude from the bottom of the follower cone. When I did my initial tests
I found that when I pushed the follower cone into a tight corner, sometimes I would push
it all the way out of the groove. With a pin in the tip of the follower cone, the cone
can't ride out of the grove without me lifting it up.
I added a pin to protrude from the bottom of the follower cone. When I did my initial tests
I found that when I pushed the follower cone into a tight corner, sometimes I would push
it all the way out of the groove. With a pin in the tip of the follower cone, the cone
can't ride out of the grove without me lifting it up.
 Once the templates are set up, it only takes a minute or two to carve out a sign.
It's much faster than following a paper template by eye because I don't have
to be as careful. I just have to make
sure to trace the follower into every corner of every letter.
And the nice thing with this setup is that I have an unobstructed view of the work,
so it's easy to see that I covered every corner.
Once the templates are set up, it only takes a minute or two to carve out a sign.
It's much faster than following a paper template by eye because I don't have
to be as careful. I just have to make
sure to trace the follower into every corner of every letter.
And the nice thing with this setup is that I have an unobstructed view of the work,
so it's easy to see that I covered every corner.
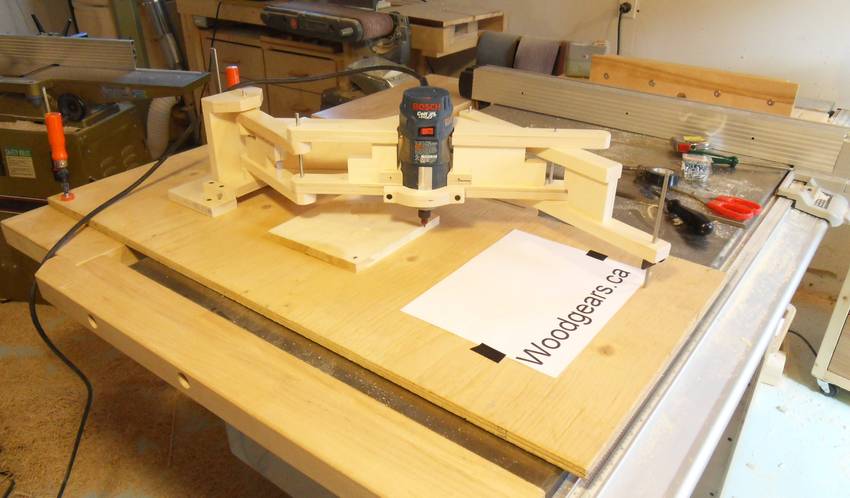
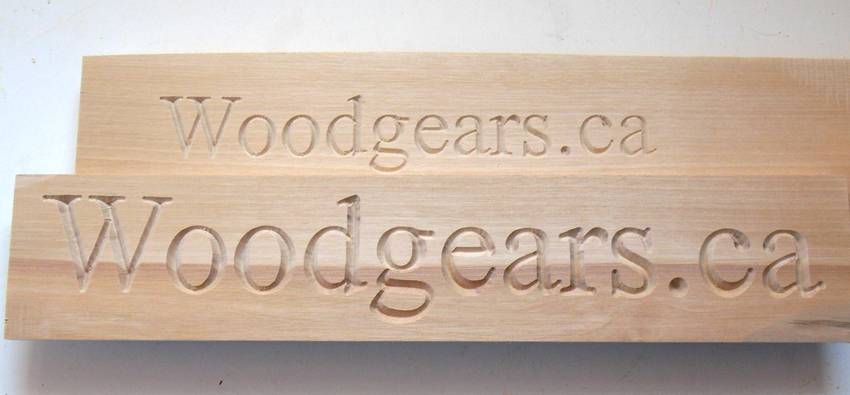 Here's two signs carved from the same template. The top one i
had the pantograph set to one-third scale, while the bottom one had the
pantograph set at half scale.
Here's two signs carved from the same template. The top one i
had the pantograph set to one-third scale, while the bottom one had the
pantograph set at half scale.
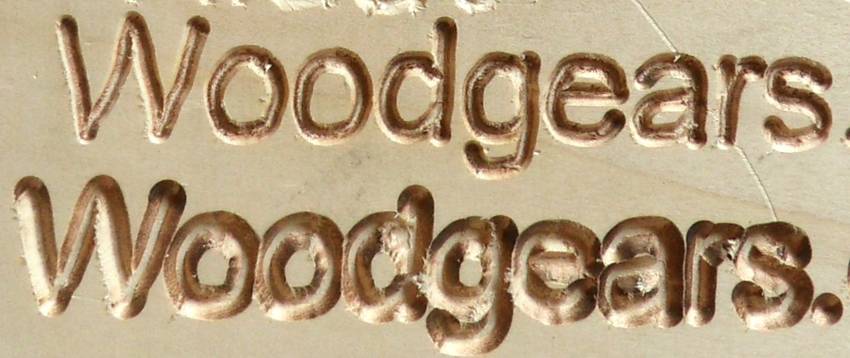
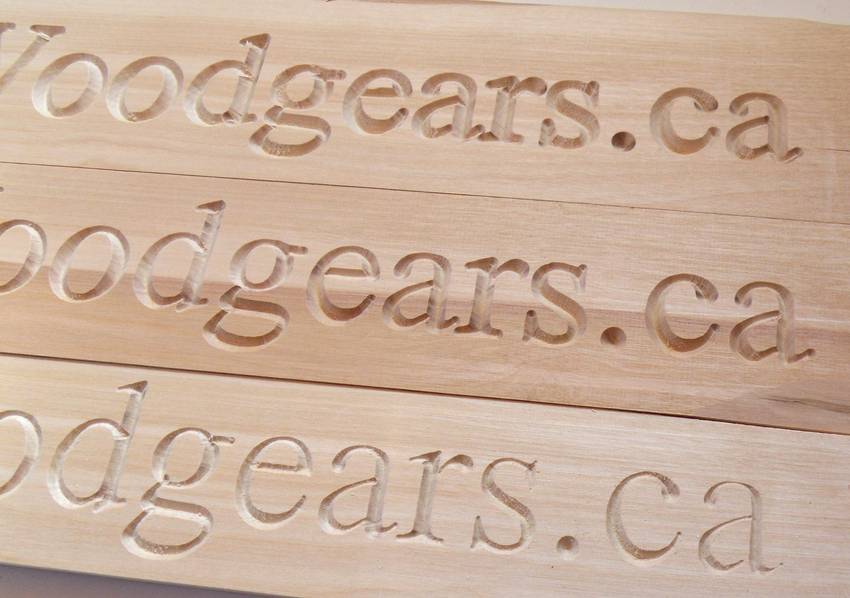 I can also vary the font weight by adjusting the depth of cut,
so various degrees of bolding can be cut from the same template.
I can also vary the font weight by adjusting the depth of cut,
so various degrees of bolding can be cut from the same template.
Back to Router pantograph
See also:Online stencil maker
Here's another video showing 3D letter carving by Ryan Hardy, using his pantograph
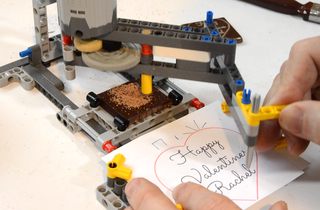 Chocolate carving Lego pantograph
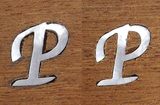 Guitar inlay experiments
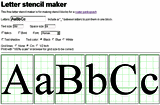 Online stencil maker
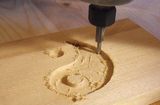 Template based inlay carving