 Over the years I have played around with various solutions for a hold down for my
pantorouters and slot mortiser. Here are most of the ones that I tried.
Over the years I have played around with various solutions for a hold down for my
pantorouters and slot mortiser. Here are most of the ones that I tried.
Over the years I have played around with various solutions for a hold down for my
pantorouters and slot mortiser. Here are most of the ones that I tried.
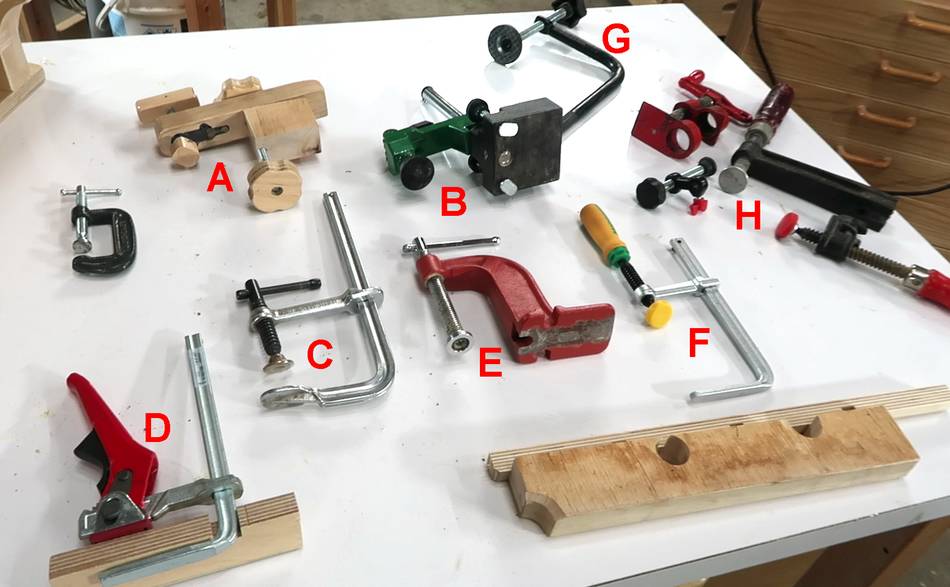
A This is the one I made for the pantorouter, though I built it before I announced the machine, so I put it on the slot mortiser.
B Hold down clamp for the metal pantorouter. Works nicely, but doesn't press down hard enough, so I also need to constrain the workpiece from moving side to side.
C Welding clamp. I used this one on the pantorouter XL. The nice thing about it is that it can be slid through a relatively small hole in the table. No article, you can see it used here.
D Bessey lever clamp. Fits in the slots on the metal pantorouter. Kind of expensive. I have used it on my slot mortiser at times too, putting it through a hole in the table with a special block that fits under the table to hold the bottom part in place.
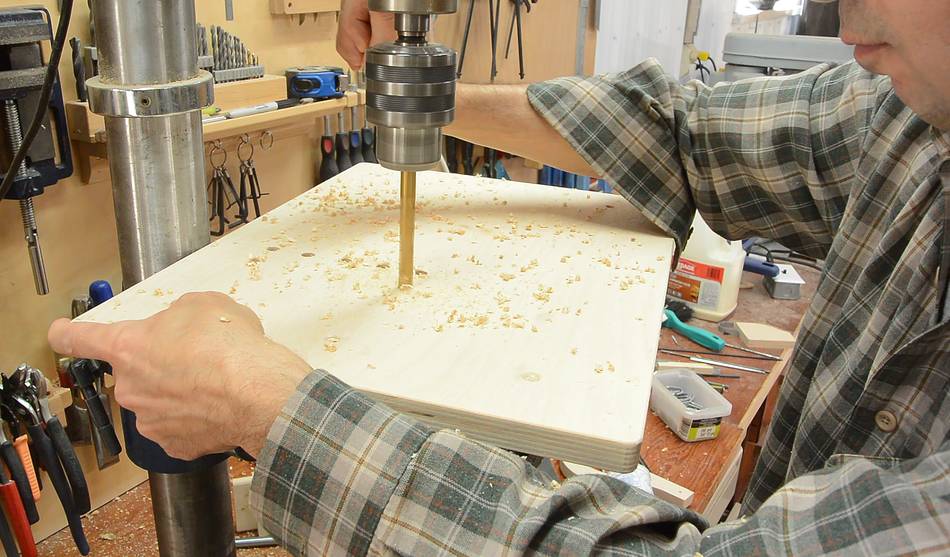
 E Drill press hold down. The problem with this one is that it doesn't reach
over the stock very far, and it needs multiple bolts to really hold it in place.
E Drill press hold down. The problem with this one is that it doesn't reach
over the stock very far, and it needs multiple bolts to really hold it in place.
 F Dovetail slot clamp, which fits in dovetails milled into a piece of wood.
I think this is better than a T-track screwed into the table. But if
there is a gap in the stock where the clamp is, there is risk of tearing
apart the dovetail (at right).
F Dovetail slot clamp, which fits in dovetails milled into a piece of wood.
I think this is better than a T-track screwed into the table. But if
there is a gap in the stock where the clamp is, there is risk of tearing
apart the dovetail (at right).
G A holddown from a power tool (I got this at a yard sale)
H Micellaneous clamp pieces I'm thinking of using for the next one.
 Then there is this adjustable C-clamp, a really oddball clamp that I bought on clearance.
I need a big slot in the table to put it through, but then I can slide the pieces together
around the table and use it as a hold down. But I don't think you can buy one of these
anymore, so that's not a solution.
Then there is this adjustable C-clamp, a really oddball clamp that I bought on clearance.
I need a big slot in the table to put it through, but then I can slide the pieces together
around the table and use it as a hold down. But I don't think you can buy one of these
anymore, so that's not a solution.
 So after thinking about it for a while, I decided to make another one of these
clamps for the new pantorouter.
So after thinking about it for a while, I decided to make another one of these
clamps for the new pantorouter.
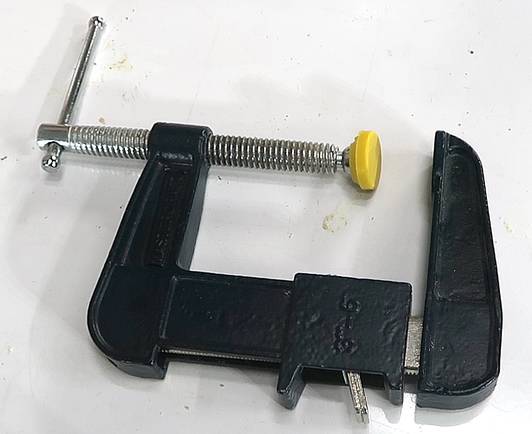
The screw from this one is from a cheap C-clamp.
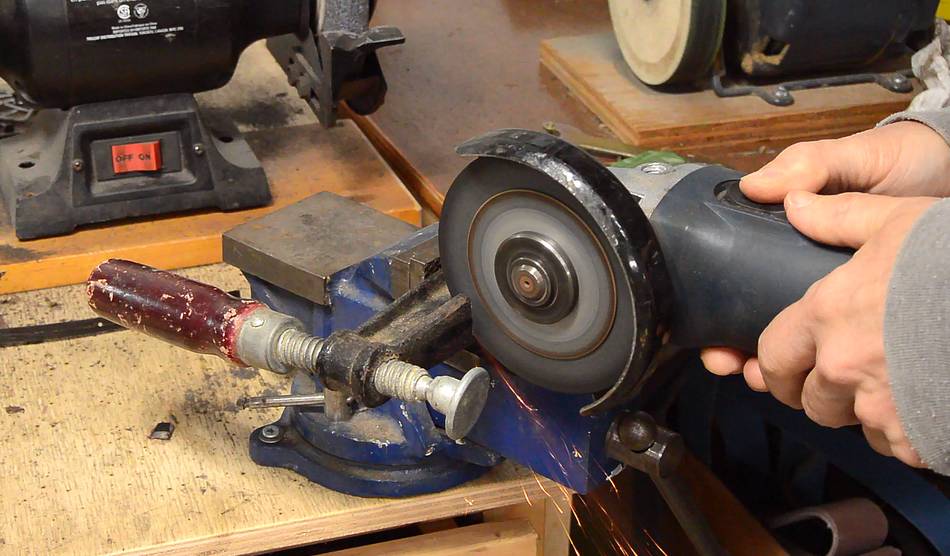 I had a busted bar clamp kicking around (the casting broke where it attaches to
the bar, so it was no longer usable as a clamp).
I cut off the part that I wanted to re-use with an angle grinder.
I also drilled a hole in the side of the clamp for securing it to the wood.
I had a busted bar clamp kicking around (the casting broke where it attaches to
the bar, so it was no longer usable as a clamp).
I cut off the part that I wanted to re-use with an angle grinder.
I also drilled a hole in the side of the clamp for securing it to the wood.
 If you have to start with a new clamp, I'd recommend
using a C clamp
like I did last time.
If you have to start with a new clamp, I'd recommend
using a C clamp
like I did last time.
 I cut a slot in a piece of wood, then carefuly whittled it down until it
fit snugly around the metal part of the clamp.
I cut a slot in a piece of wood, then carefuly whittled it down until it
fit snugly around the metal part of the clamp.
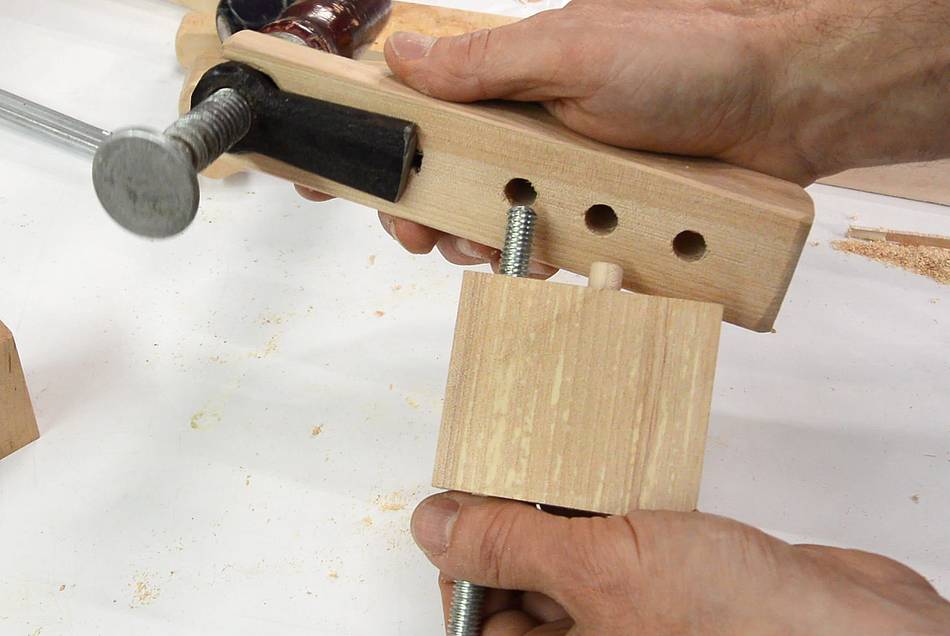
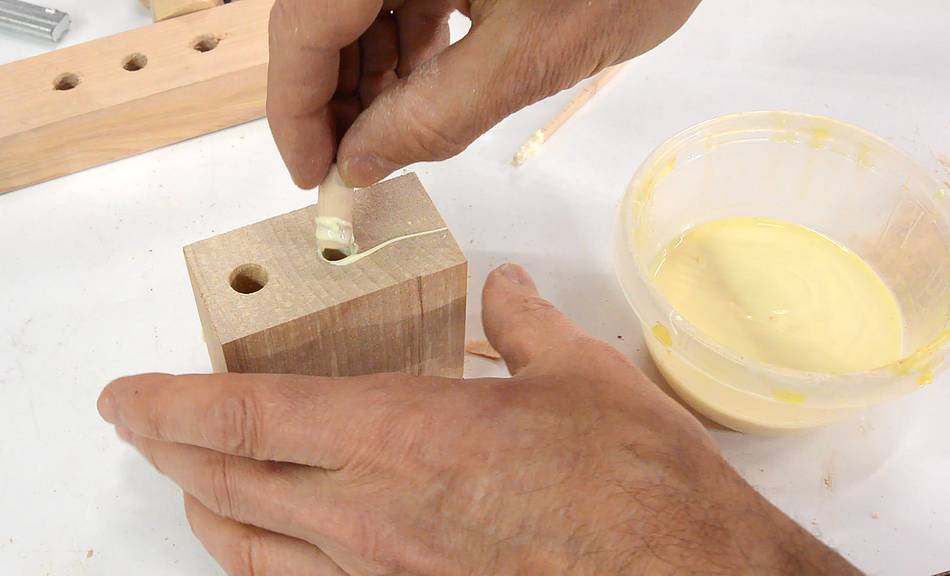 This block, with a dowel pin sticking out if it, is the "riser" for this clamp
to get it at the right height.
This block, with a dowel pin sticking out if it, is the "riser" for this clamp
to get it at the right height.
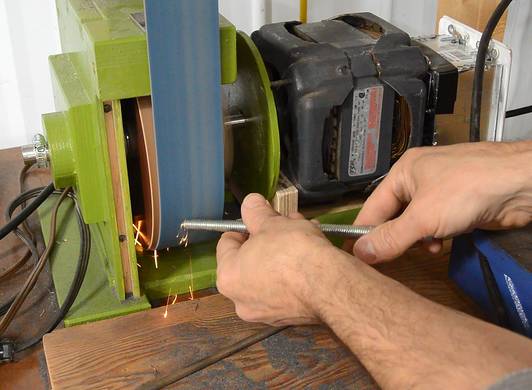 I cut a piece of 3/8" (M10) threaded rod to hold the clamp to the table. I always
grind a slight taper on the ends, which makes it easier to put a nut on and also grinds
away any bent threads from cutting it off. (Yes, I know the trick about putting a nut
on first and using that to straighten the threads, I just find that unnecessary.)
I cut a piece of 3/8" (M10) threaded rod to hold the clamp to the table. I always
grind a slight taper on the ends, which makes it easier to put a nut on and also grinds
away any bent threads from cutting it off. (Yes, I know the trick about putting a nut
on first and using that to straighten the threads, I just find that unnecessary.)
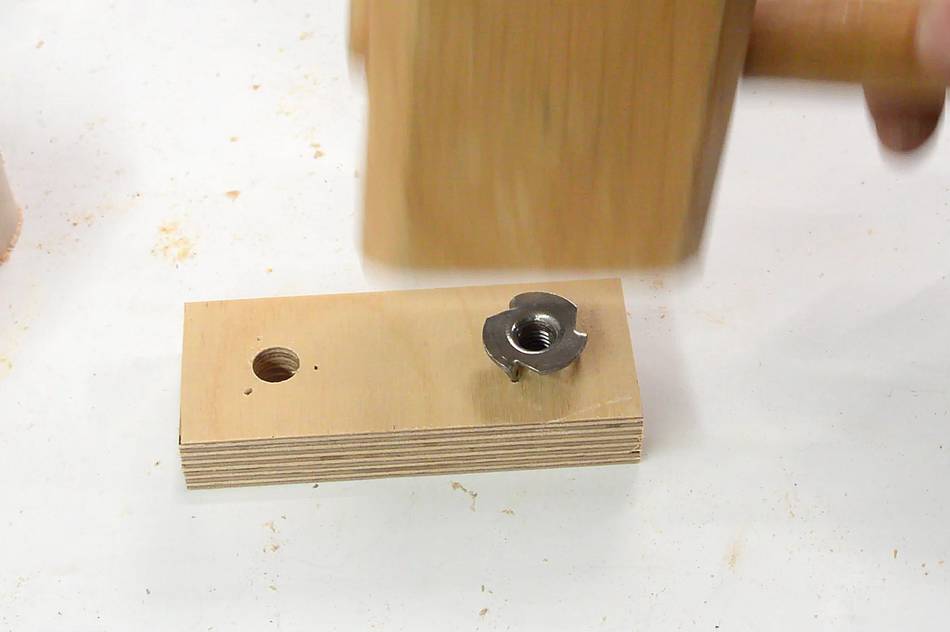
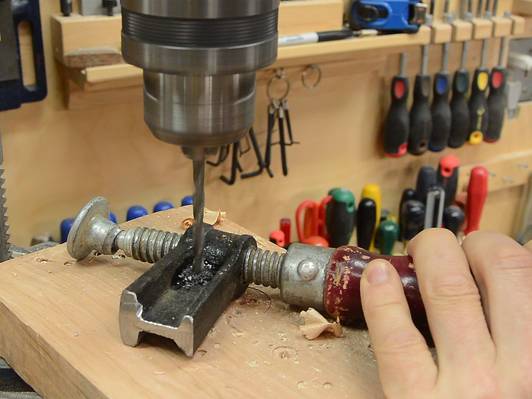
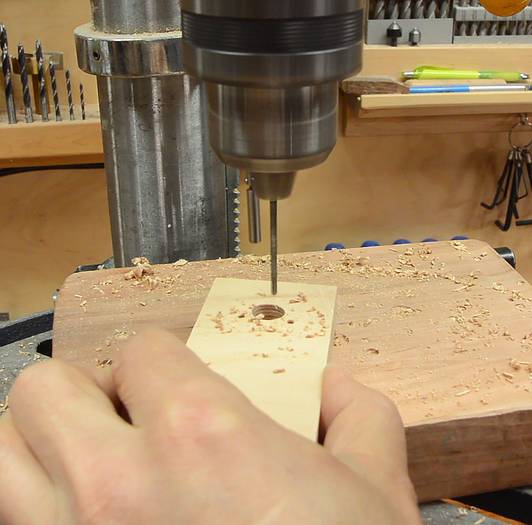 I needed a knob to go on either end of the threaded rod. I tapped a T-nut into some
holes to mark where the prongs need to go, then drilled holes for the prongs.
I needed a knob to go on either end of the threaded rod. I tapped a T-nut into some
holes to mark where the prongs need to go, then drilled holes for the prongs.

 After I cut my workpiece into two sqares, I sanded each side concave and the
corners round. I also sanded a bevel on all the edges to make a nice knob.
After I cut my workpiece into two sqares, I sanded each side concave and the
corners round. I also sanded a bevel on all the edges to make a nice knob.
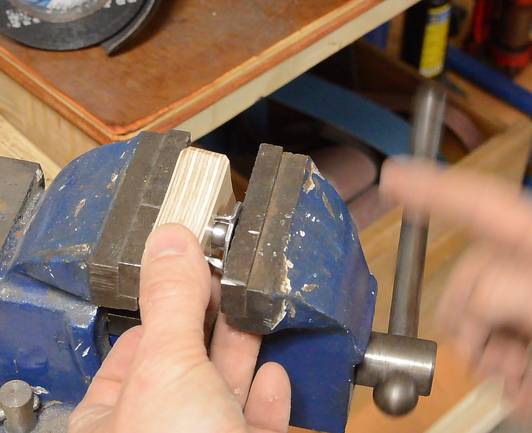
I pressed the T-nut in with a vise.
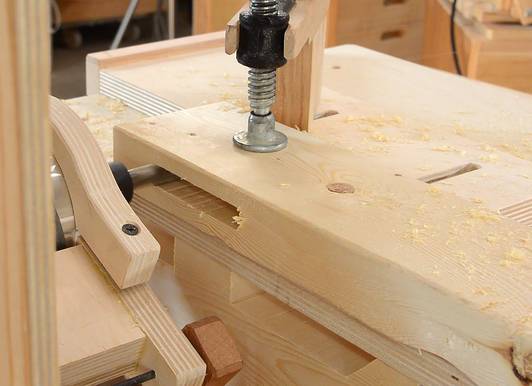
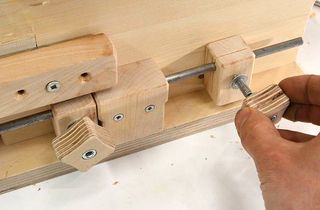
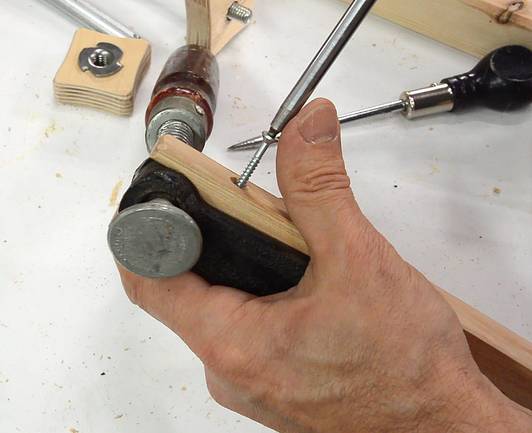 Finally, I put a screw through the hole in the clamp to hold it in place (see
photo at right).
Finally, I put a screw through the hole in the clamp to hold it in place (see
photo at right).
Next I needed to drill holes in the table to be able to attach this clamp, but where to put the holes depends on the fence. So first I had to finalize the new fence design.
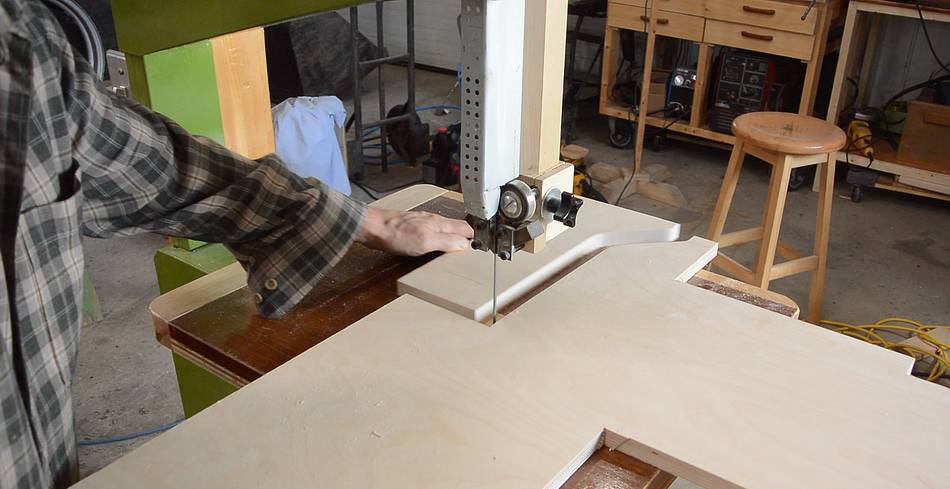
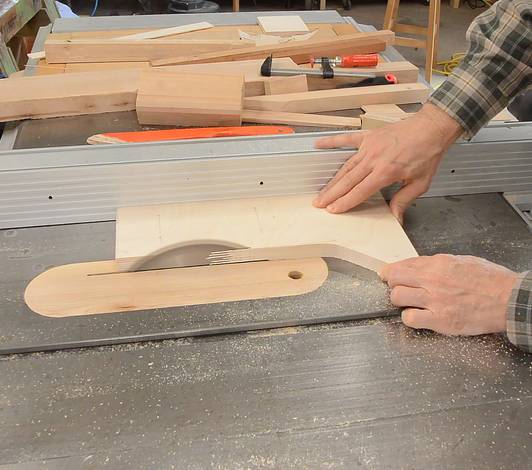 I cut the shape for the main body of the fence straight out of a larger piece
of baltic birch plywood, then re-cut the straight cuts on the table saw
to make sure it was square.
I cut the shape for the main body of the fence straight out of a larger piece
of baltic birch plywood, then re-cut the straight cuts on the table saw
to make sure it was square.
 The fence has two slots in it. I drilled holes on the ends of these slots,
then cut between them with a jigsaw.
The fence has two slots in it. I drilled holes on the ends of these slots,
then cut between them with a jigsaw.
 I then glued a wider piece of wood against the edge of it. This will help square
the fence up against the table.
I then glued a wider piece of wood against the edge of it. This will help square
the fence up against the table.
 I then measured the hole layout on the table and drilled all the holes...
 ... then used a countersink bit to add a chamfer to all the holes.
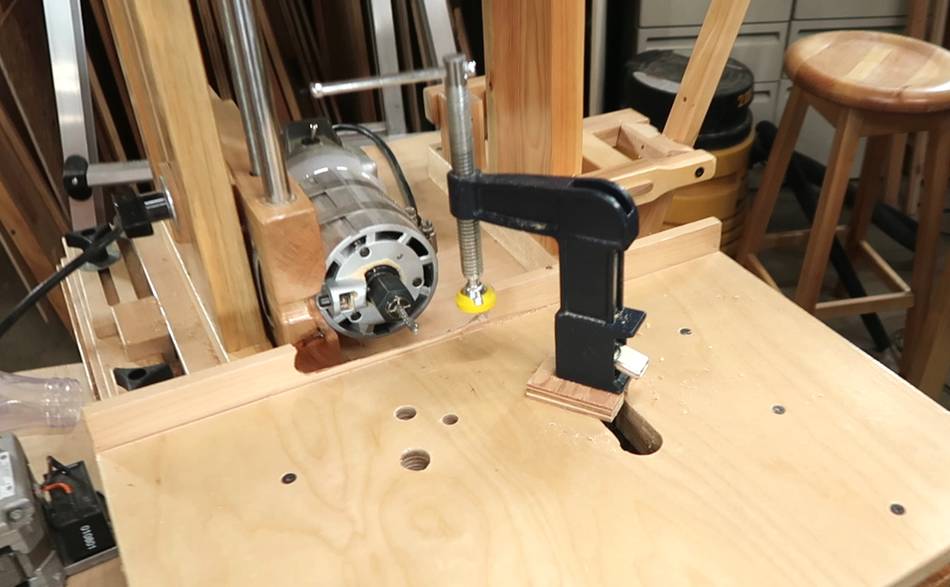
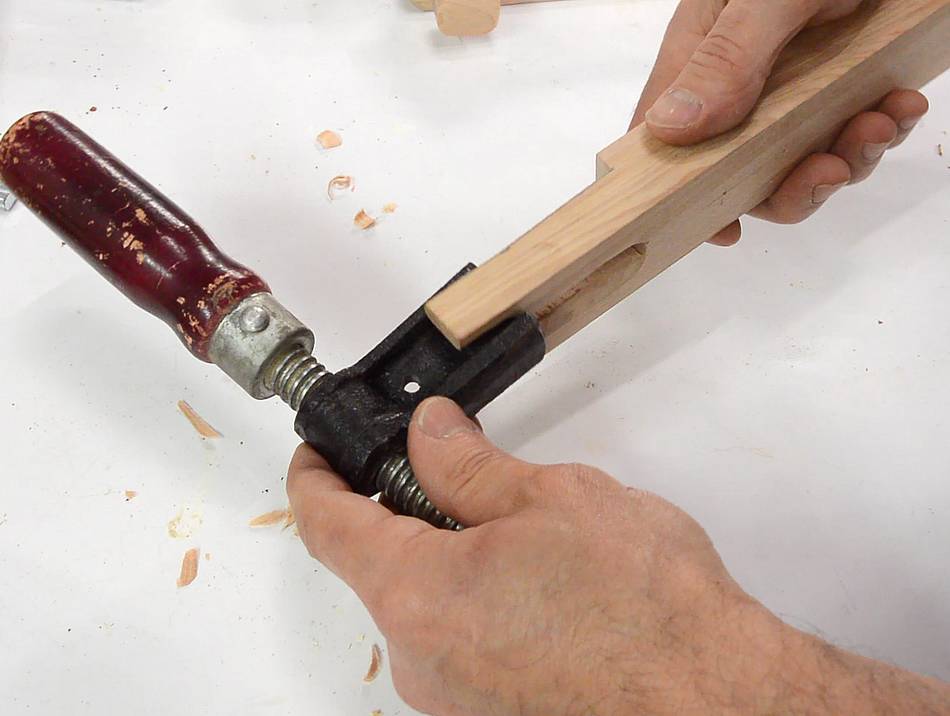
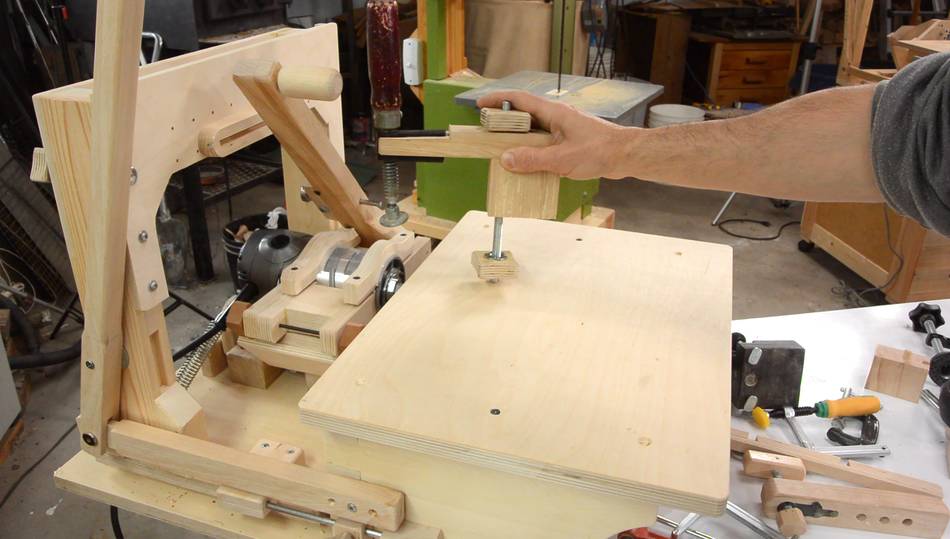
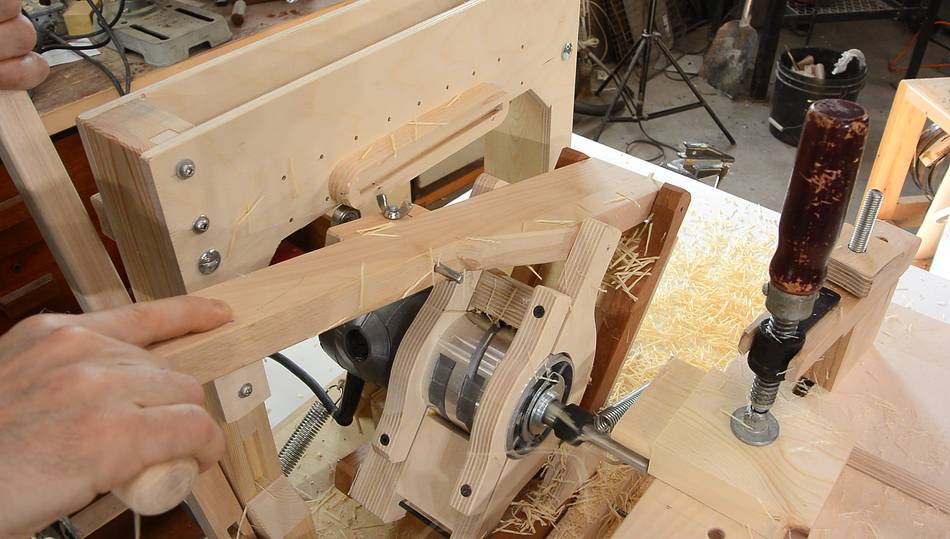
 Trying out the new fence. The clamp attaches through a slot in the fence.
Attaching the clamp helps to secure the fence. The second slot in the fence
is for an extra screw and knob to help secure it, though I didn't find that
necessary this time.
Trying out the new fence. The clamp attaches through a slot in the fence.
Attaching the clamp helps to secure the fence. The second slot in the fence
is for an extra screw and knob to help secure it, though I didn't find that
necessary this time.

 The fence can also be put on from either side to act as a back-stop
when using the pantorouter to make mortises.
The fence can also be put on from either side to act as a back-stop
when using the pantorouter to make mortises.
 I then flipped the follower over, with the bearing running along the outside
of the template for cutting the tenon (whereas before I had the pin-end of the
follower in the slot of the template). I proceeded to cut a tenon to fit into
the mortise I just made.
I then flipped the follower over, with the bearing running along the outside
of the template for cutting the tenon (whereas before I had the pin-end of the
follower in the slot of the template). I proceeded to cut a tenon to fit into
the mortise I just made.
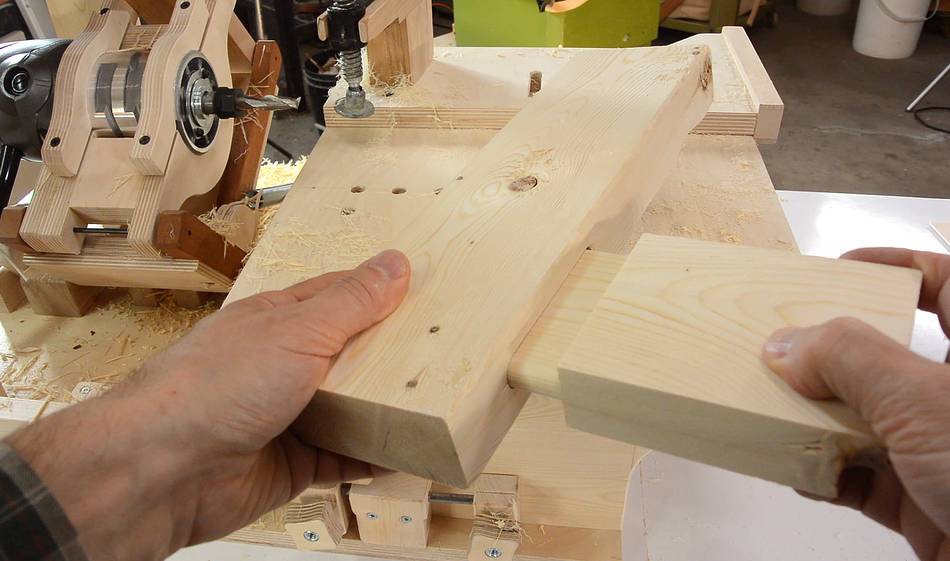 And checking the fit.
 Pantorouter XL plunge lever and stops
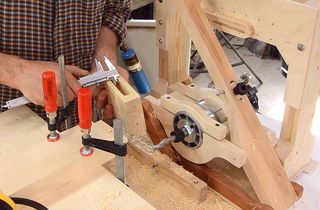 First cut and adjusting for accuracy
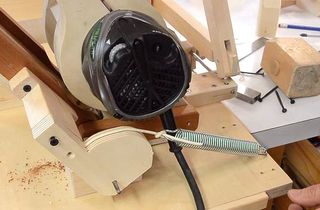 Springs for router weight compensation
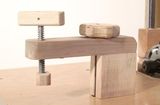 Previous pantorouter holddown clamp build