Mobile planer stand
|
I used to just keep my planer on a milk crate on small dolly. I kept it low to the floor, not for ergonomic considerations but because that way, I could just roll it partially under the extension of my table saw. I don't use the planer that often, and I don't have a problem bending down to use it.
 But finally, I decided that I should build more of a proper 'stand' for the planer.
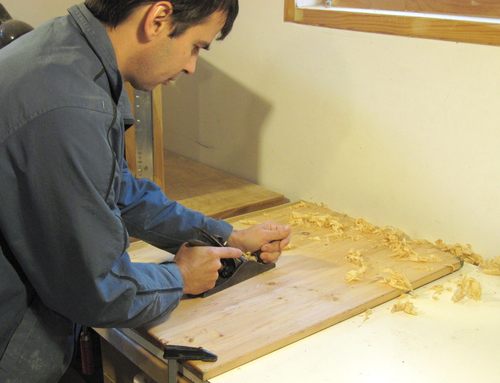
I made it out of panels of recycled lumber. Some from the trash, some from Ikea
shelving. They were already glued up to the width I needed. But one of them
did need some re-planing. So I planed it by hand. I'm not
much into hand planing, and is perhaps ironic that one of the few times that
I hand planed some stock was when making a stand for a power planer!
But finally, I decided that I should build more of a proper 'stand' for the planer.
I made it out of panels of recycled lumber. Some from the trash, some from Ikea
shelving. They were already glued up to the width I needed. But one of them
did need some re-planing. So I planed it by hand. I'm not
much into hand planing, and is perhaps ironic that one of the few times that
I hand planed some stock was when making a stand for a power planer!
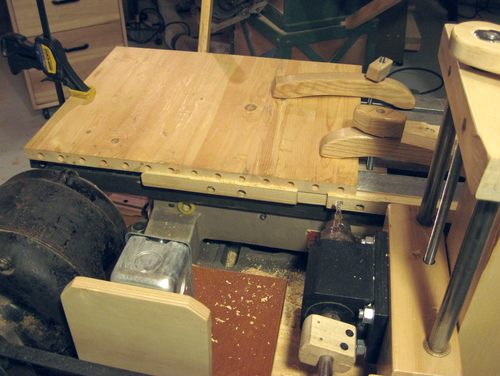
 I figured this project would be a good chance to use my newly built
horizontal boring machine to join
the box for the stand with a precisely aligned row of dowels. I couldn't use
my box joint jig, because the panels were too wide to fit in it.
I figured this project would be a good chance to use my newly built
horizontal boring machine to join
the box for the stand with a precisely aligned row of dowels. I couldn't use
my box joint jig, because the panels were too wide to fit in it.
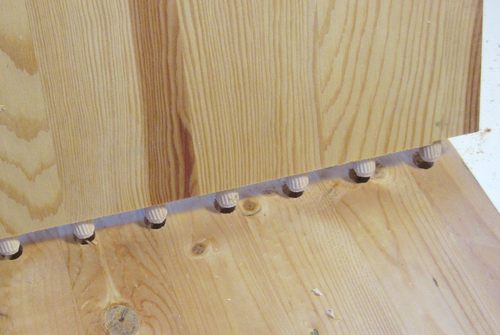
My home-made horizontal boring machine has an indexing feature that allows me to precisely and repeatably drill holes at fixed intervals.
Though, it turned out, the pieces, with a width of 45 cm, were still too wide for the sideways range of motion of my horizontal boring machine. I had to move and re-clamp the panels once each to get the whole series of holes in.
 The horizontal boring machine is ideal for drilling holes in the end or edge of
a board or panel. To drill the holes in the face of the panels, I could have just
used a drill press. But I still wanted to use the machine's indexing feature,
so I had to make an L shaped jig to hold the panel on the machine.
The horizontal boring machine is ideal for drilling holes in the end or edge of
a board or panel. To drill the holes in the face of the panels, I could have just
used a drill press. But I still wanted to use the machine's indexing feature,
so I had to make an L shaped jig to hold the panel on the machine.
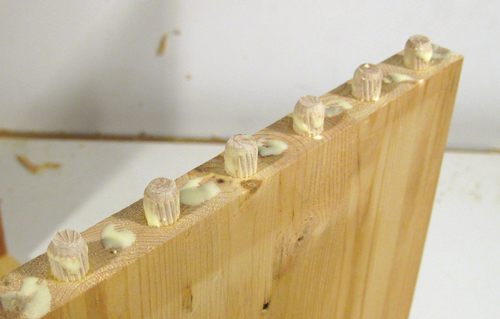
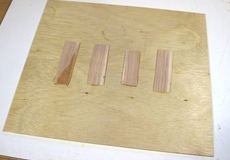
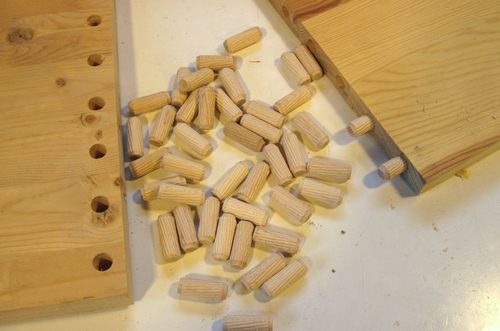 I bought these special dowels, pre-compressed, cut, and, most conveniently, tapered
on both ends. They didn't cost that much more than it would to cut up a regular
a dowel myself, but they saved a lot of time.
I bought these special dowels, pre-compressed, cut, and, most conveniently, tapered
on both ends. They didn't cost that much more than it would to cut up a regular
a dowel myself, but they saved a lot of time.
I have since experimented with making joints like that using a self centering dowel jig and a jig of my design that I like to call a dowel jig t-square to make similar joints without a horizontal boring machine.
 The tapering of the dowels really makes it easier to get the joint together. And with
14 dowels all in one row, once I got the first two lined up, the rest of them
were just guided in by their tapers.
The tapering of the dowels really makes it easier to get the joint together. And with
14 dowels all in one row, once I got the first two lined up, the rest of them
were just guided in by their tapers.
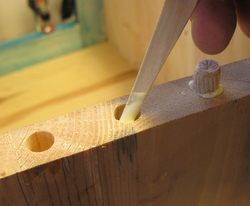 To be on the safe side, I applied glue to all the surfaces, as well as the dowels.
I used a wooden split to smear the glue on the insides of the holes before inserting
the dowels.
To be on the safe side, I applied glue to all the surfaces, as well as the dowels.
I used a wooden split to smear the glue on the insides of the holes before inserting
the dowels.
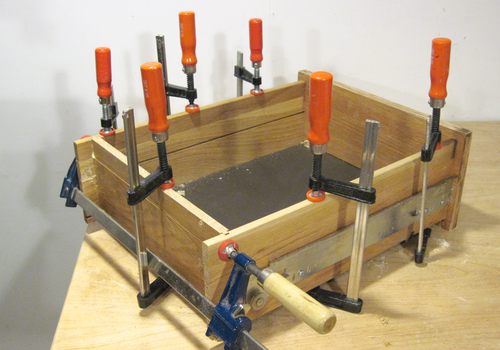
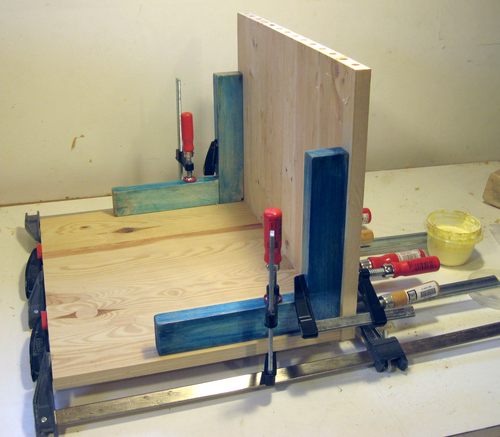 Clamping the first joint together. I used some home-made
clamping squares to
ensure that the joint was all square. The clamping squares are just some very
sturdy squares made out of maple. The idea is to just clamp them to
the work while gluing up to force the joints into square-ness.
Clamping the first joint together. I used some home-made
clamping squares to
ensure that the joint was all square. The clamping squares are just some very
sturdy squares made out of maple. The idea is to just clamp them to
the work while gluing up to force the joints into square-ness.
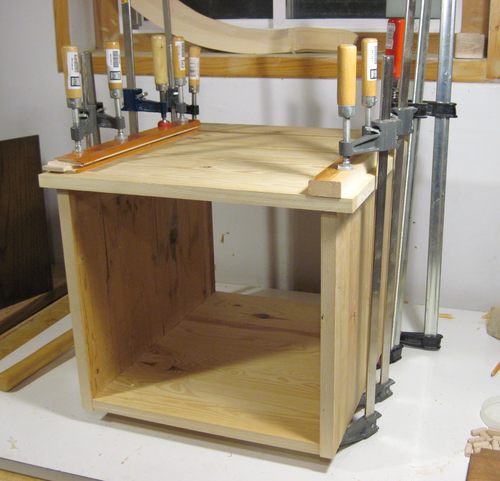 Clamping on the top of the box.
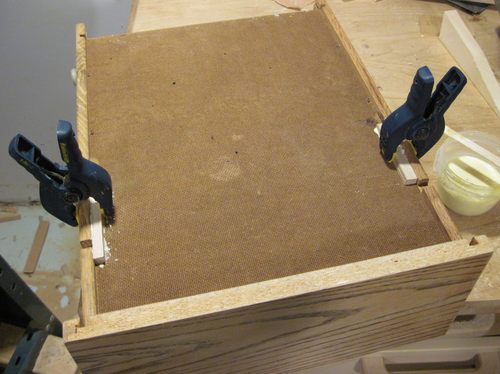
One end of the box would be open for the drawers. The other end, I closed with
plywood. I had a scrap of nice veneer plywood lying around that was just over
 half the width of what I needed, so I joined the two pieces, edge to edge, by
gluing a few thin pieces of wood against them. These joining pieces face the
inside of the box, so they aren't visible in the assembled stand.
The joint is just noticeable from the other side, but it's not that
critical for a piece of workshop furniture.
half the width of what I needed, so I joined the two pieces, edge to edge, by
gluing a few thin pieces of wood against them. These joining pieces face the
inside of the box, so they aren't visible in the assembled stand.
The joint is just noticeable from the other side, but it's not that
critical for a piece of workshop furniture.
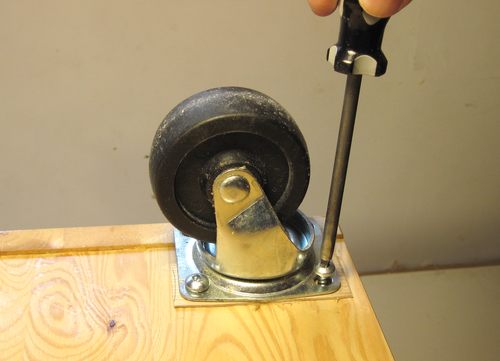 I mounted the casters directly to the underside of the box. With the sides of the
box protruding past the bottom just a little bit, I had to make some shims to
get the casters to mount level.
I mounted the casters directly to the underside of the box. With the sides of the
box protruding past the bottom just a little bit, I had to make some shims to
get the casters to mount level.
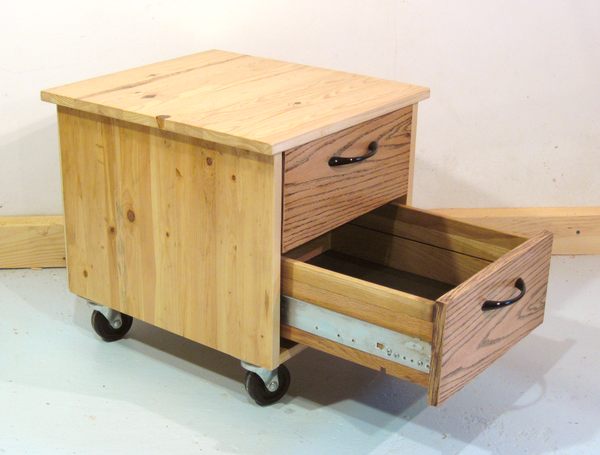
 For the drawers, I used some drawers that I trash picked. They had solid oak
sides, but just veneered particle board for the front. I ended up knocking some
of the joints apart a little to re-glue them. Recycling drawers always seems
to involve some repair work for me. But it sure does cut down on material,
and it's still less work than making drawers from scratch.
For the drawers, I used some drawers that I trash picked. They had solid oak
sides, but just veneered particle board for the front. I ended up knocking some
of the joints apart a little to re-glue them. Recycling drawers always seems
to involve some repair work for me. But it sure does cut down on material,
and it's still less work than making drawers from scratch.
 I decided that the drawer's sides should be higher than they were. So I cut up one extra
drawer, and cut strips from the sides and back pieces to make height extensions for
my drawers by gluing them onto the tops of the existing sides.
I decided that the drawer's sides should be higher than they were. So I cut up one extra
drawer, and cut strips from the sides and back pieces to make height extensions for
my drawers by gluing them onto the tops of the existing sides.
 The drawers already came with metal drawer glides, though, unfortunately, these are not
to the full length of the drawers. Also, ironically, they were mounted somewhat inaccurately.
The lack of precision in some factory made furniture can be quite surprising.
The drawers already came with metal drawer glides, though, unfortunately, these are not
to the full length of the drawers. Also, ironically, they were mounted somewhat inaccurately.
The lack of precision in some factory made furniture can be quite surprising.
 So I started by calculating where the drawer slides in the case should mount, and mounted them
without consideration of where the slides were on the drawers.
Then I re-mounted the slides on the drawers so that the fronts all line up square on the front.
The green thing I'm holding is a wooden try-square.
So I started by calculating where the drawer slides in the case should mount, and mounted them
without consideration of where the slides were on the drawers.
Then I re-mounted the slides on the drawers so that the fronts all line up square on the front.
The green thing I'm holding is a wooden try-square.
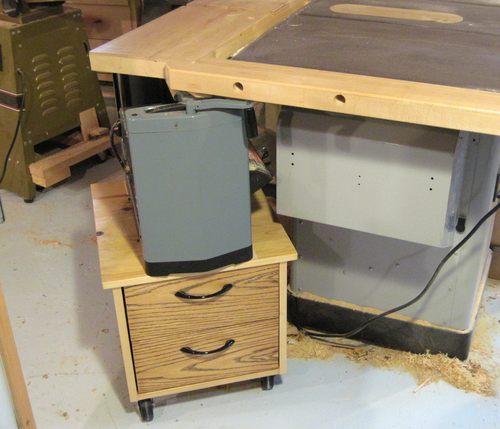 And here's the planer stand "in use". With my cheap delta planer on it, parked
partly underneath my table saw extension.
And here's the planer stand "in use". With my cheap delta planer on it, parked
partly underneath my table saw extension.
Overall, the only new material on the planer stand is the dowels that I used. And maybe the casters, seeing that I took those off the dolly that I had originally bought new.
See also:
 Mobile tool stand
 Welding cart from an
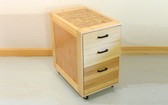 Older mobile tool stand
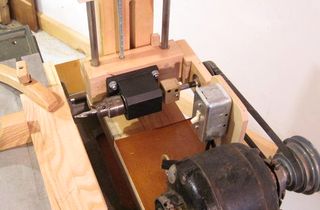 Horizontal boring machine
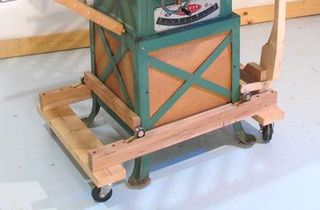 More mobile bases
 Causes of snipe on
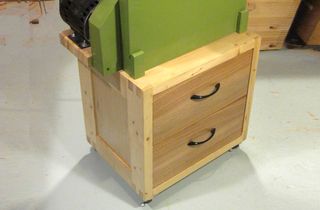 Bandsaw stand
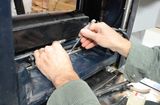 Changing planer knives
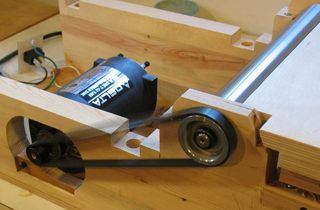 Homemade jointer
Back to my Woodworking website
![]()