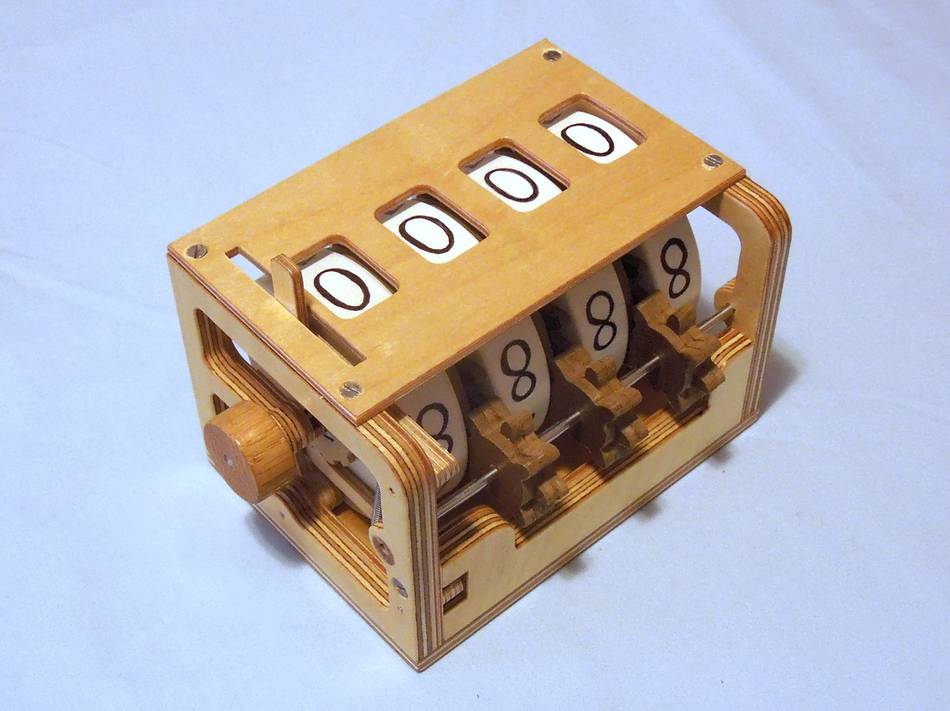
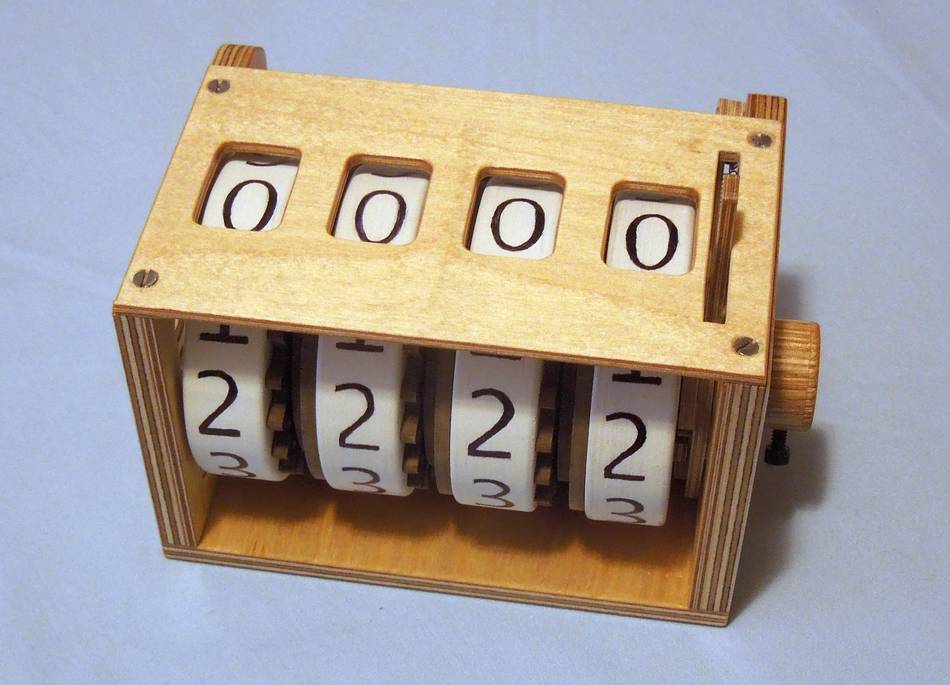
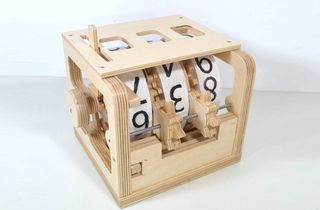
Ron Walters's 4-digit counter
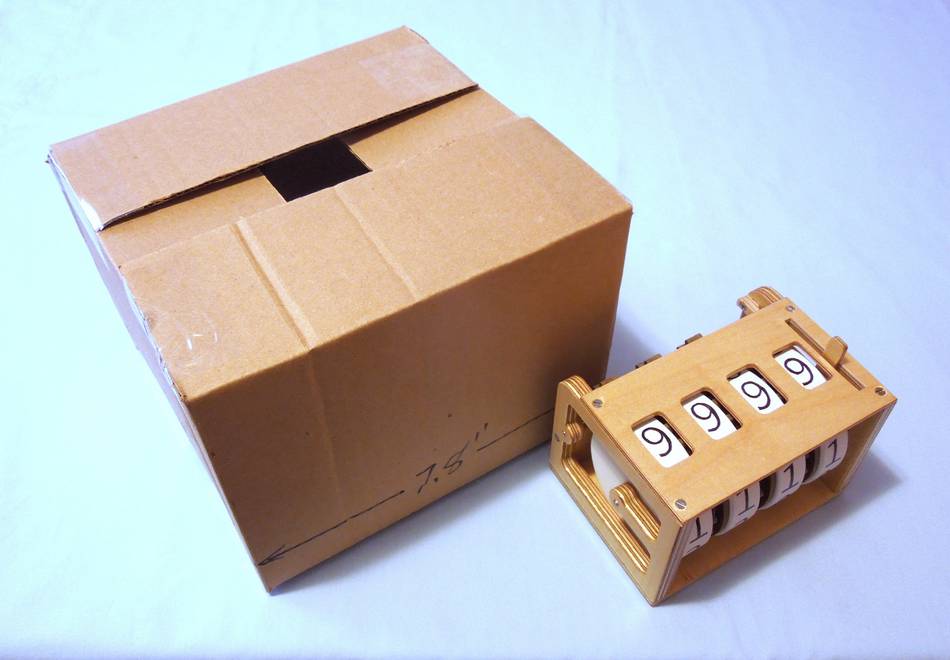 The cardboard box in the photo is the same size as the original
full-size 3-digit counter.
Reducing the dimensions 50% would produce a
3-digit counter 1/8 of the original volume. With the 4th digit added, my
version is around 28% larger than that or roughly 1/6 the original size.
The cardboard box in the photo is the same size as the original
full-size 3-digit counter.
Reducing the dimensions 50% would produce a
3-digit counter 1/8 of the original volume. With the 4th digit added, my
version is around 28% larger than that or roughly 1/6 the original size.
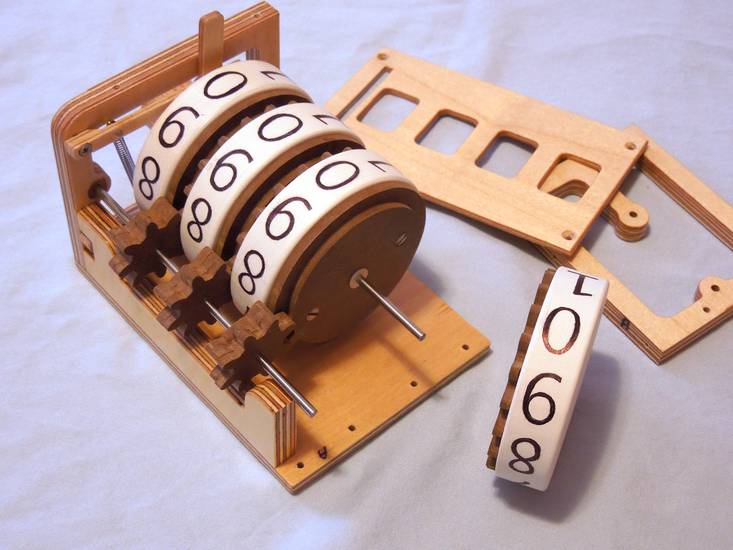
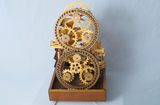
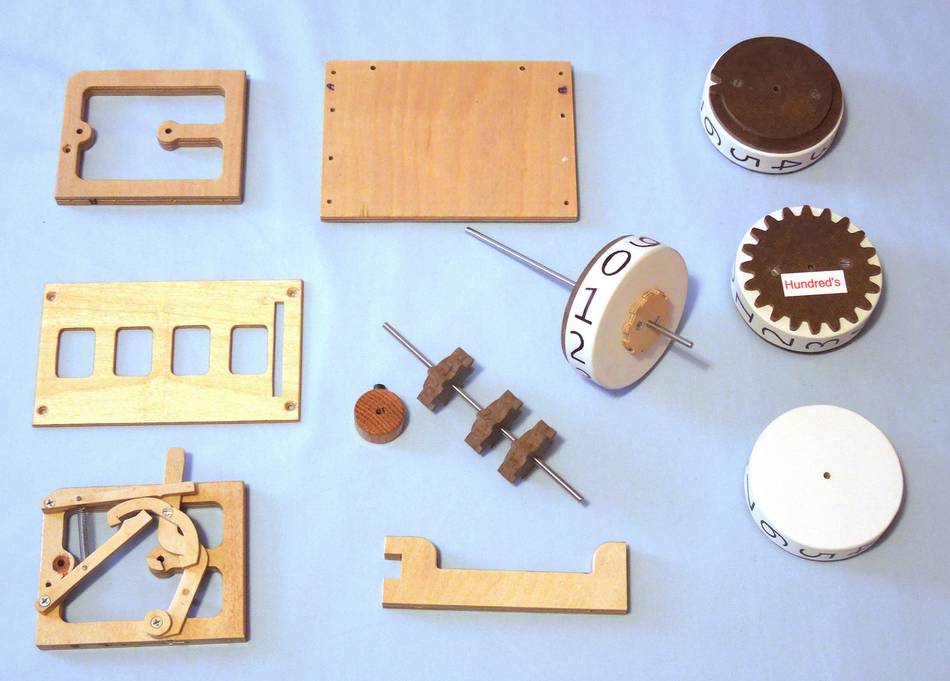 All the parts for the counter.
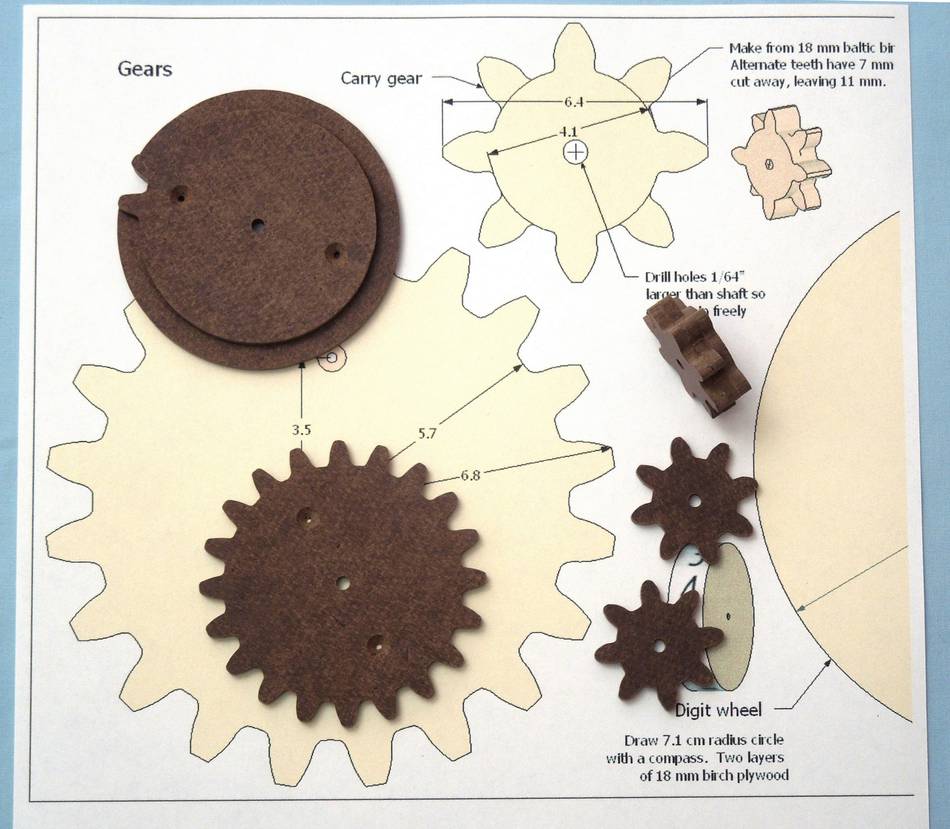
The paper template in the photo is for the original full-size plans is shown for size comparison. My gears and carry notch discs are made from 1/8" tempered hardboard. I made my carry gears in three parts, two (2) 1/8" thick 8-tooth gears and one (1) 1/8" thick 4-tooth skip-tooth gear. The carry notch discs and the carry gears were glued together with Titebond Glue.
The carry gear and main rotor shafts are both 1/8" piano wire. The center points for all holes were accurately located with an optical center finder (Lee Valley Tools). The axle shaft center holes were first drilled with a 1/8" brad point bit and then re-drilled with a No.30 (0.128) bit, which provided sufficient clearance for the digit wheels to turn freely.
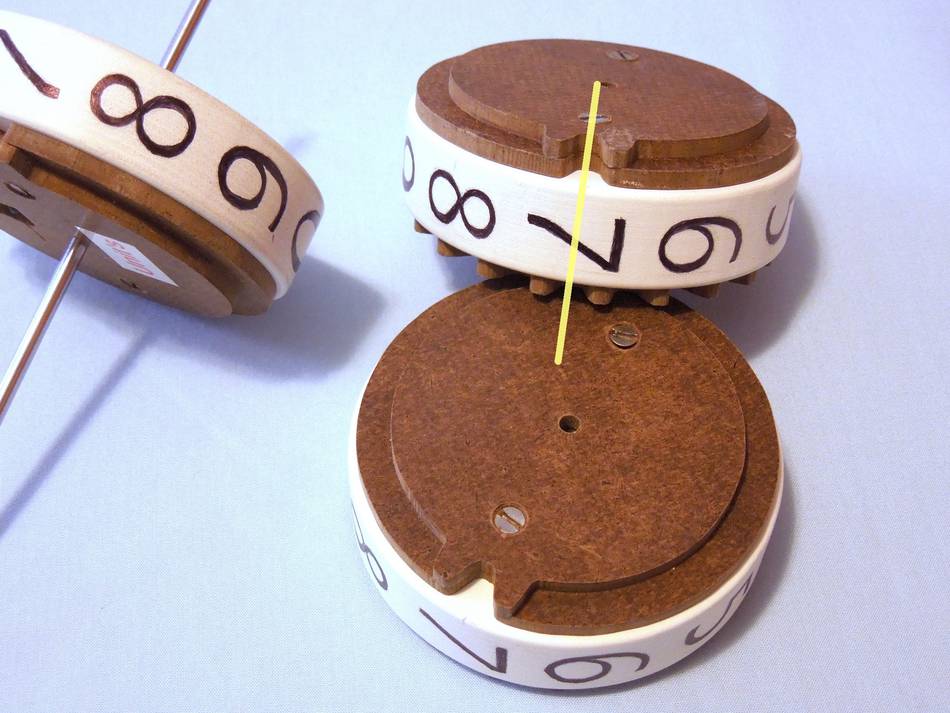 The digit wheels were spray painted with flat white paint. The digits
were rubbed onto the wheels using Matthias's process and then drawn
using a Sharpie ink marker - ultra fine point. As an additional point of
reference, each number should be centered on every other notch of the
Advance Gear.
The digit wheels were spray painted with flat white paint. The digits
were rubbed onto the wheels using Matthias's process and then drawn
using a Sharpie ink marker - ultra fine point. As an additional point of
reference, each number should be centered on every other notch of the
Advance Gear.
The Geneva Drive or carry notch is centered on the "7" on the Unit's, Ten's and Hundred's digit wheels (ref yellow line). The carry notch is also aligned with a notch on the Advance Gear.
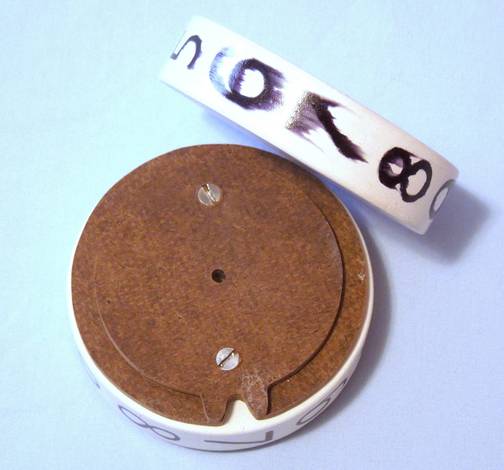 Originally I had intended to spray the numbers with clear acrylic but
the solvent in the acrylic and the ink didn't like each other. It's a
good thing I made a few extra parts.
Originally I had intended to spray the numbers with clear acrylic but
the solvent in the acrylic and the ink didn't like each other. It's a
good thing I made a few extra parts.
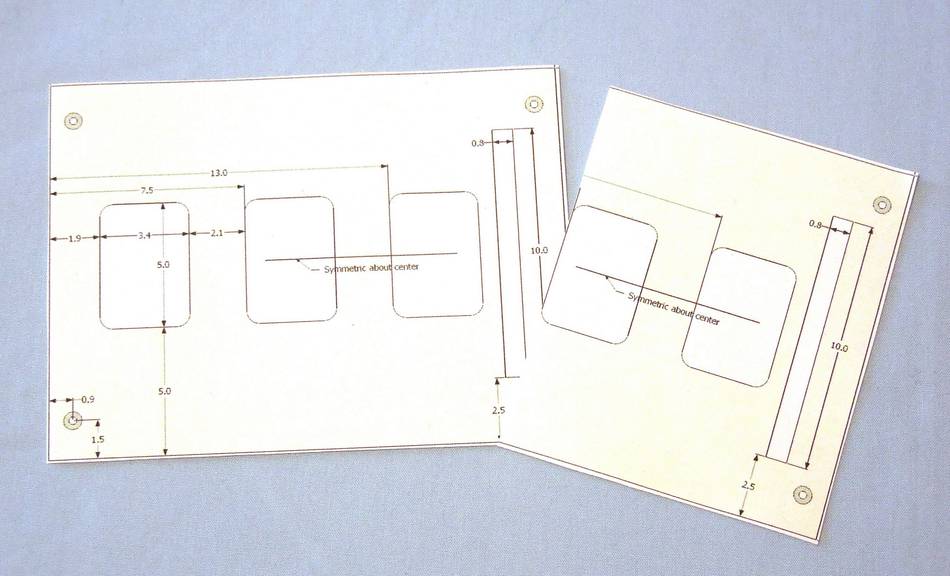
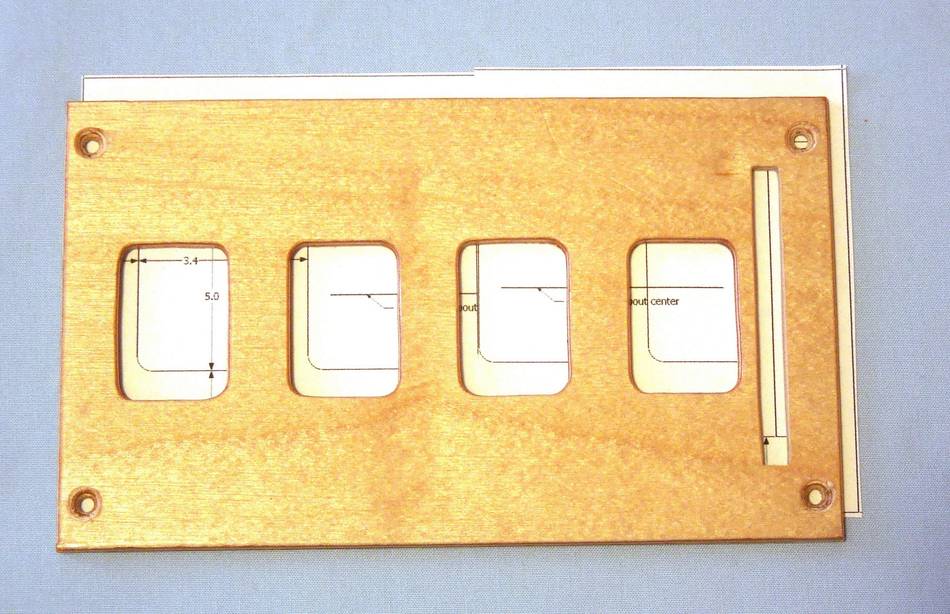
For the 4-window top, I used two copies of the 3-window template.
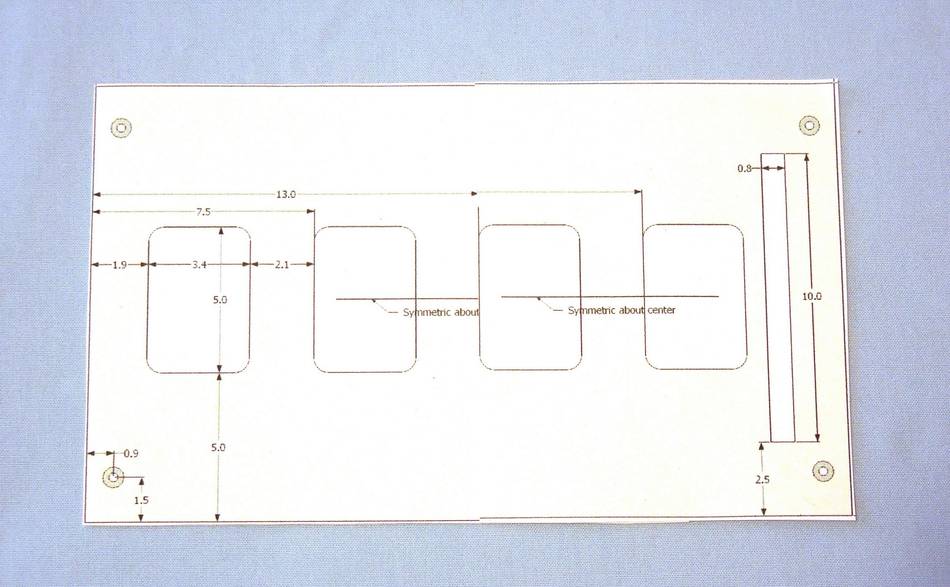 I cut off part of the second copy, aligned it carefully with the first
and taped the two pieces together to provide a 4-window template.
I cut off part of the second copy, aligned it carefully with the first
and taped the two pieces together to provide a 4-window template.
 The plywood top fit perfectly. Other than modifying the top, bottom and
back due to the wider 4-digit counter, nothing was measured. I just cut
out the pieces using the templates, which I printed at half-scale
using the BigPrint Program. I used a scroll
saw and then a scroll saw file to just sand away the template lines on
the wheels, carry notch discs and ratchet advance parts. I was quite
impressed with how accurately all the half-sized parts fit together. I
had to do zero fine-tuning of the gears or carry notches.
The plywood top fit perfectly. Other than modifying the top, bottom and
back due to the wider 4-digit counter, nothing was measured. I just cut
out the pieces using the templates, which I printed at half-scale
using the BigPrint Program. I used a scroll
saw and then a scroll saw file to just sand away the template lines on
the wheels, carry notch discs and ratchet advance parts. I was quite
impressed with how accurately all the half-sized parts fit together. I
had to do zero fine-tuning of the gears or carry notches.
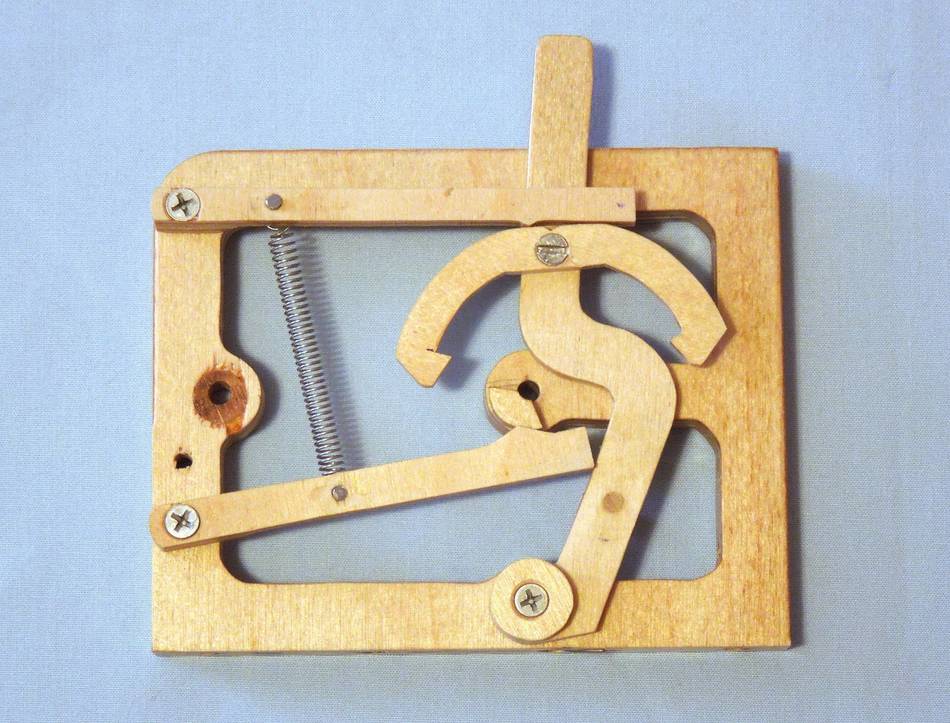 The ratchet advance parts are made from 1/8" 6-ply aircraft grade
plywood. The grain of the two center plies is aligned to essentially
make this 5-ply plywood. Note: Plywood is normally expected to have an
odd number of plies so the sheet remains balanced against environmental
changes (adds stability to prevent warping).
The ratchet advance parts are made from 1/8" 6-ply aircraft grade
plywood. The grain of the two center plies is aligned to essentially
make this 5-ply plywood. Note: Plywood is normally expected to have an
odd number of plies so the sheet remains balanced against environmental
changes (adds stability to prevent warping).
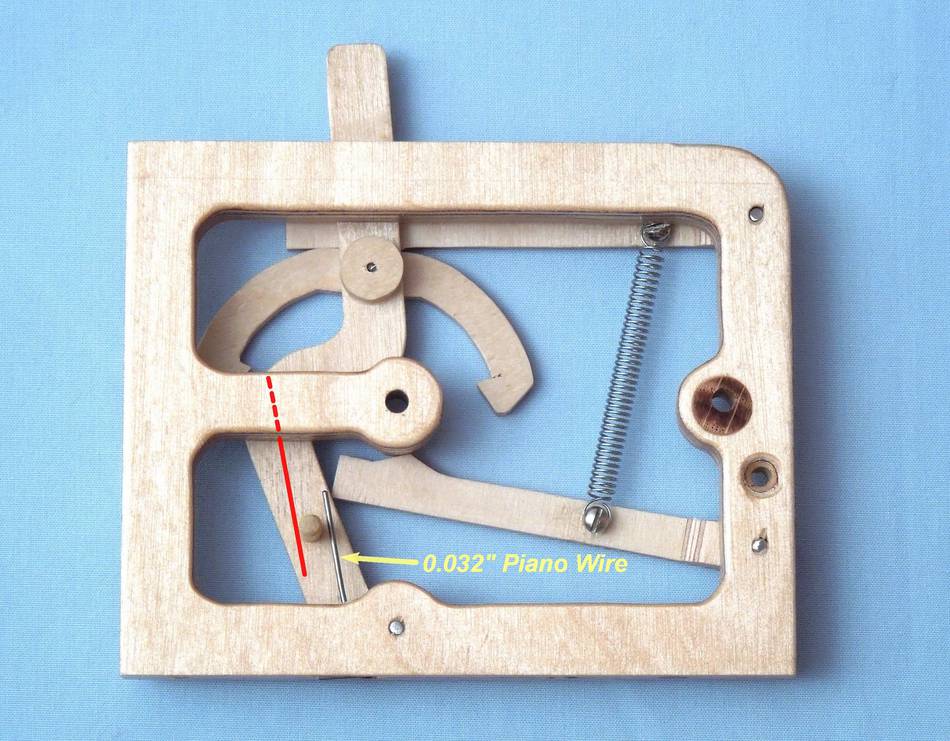 I wanted the Advance Lever to return to center when incrementing. I
used a straight piece of 0.032 piano wire for a return spring pushing
against a 1/8" dowel I added to the advance lever. I did not provide a
return spring for decrement, as I did not need one. If I wanted a
decrement return spring, I would experiment with the location of a
second 0.032 piano wire as suggested by the red line.
I wanted the Advance Lever to return to center when incrementing. I
used a straight piece of 0.032 piano wire for a return spring pushing
against a 1/8" dowel I added to the advance lever. I did not provide a
return spring for decrement, as I did not need one. If I wanted a
decrement return spring, I would experiment with the location of a
second 0.032 piano wire as suggested by the red line.
Other projects by Ronald Walters:
 Marble machine
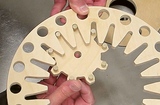 Pin gear experiment
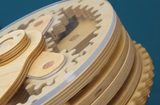 Planetary gears
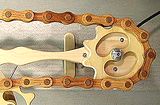 Wooden roller chain
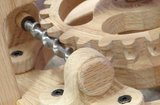 Worm drive experiment
See also:
 Mechanical counter
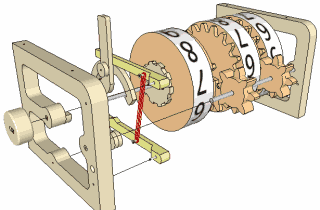 Mechanical counter plans
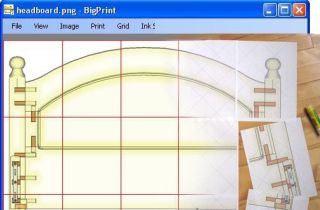 BigPrint program
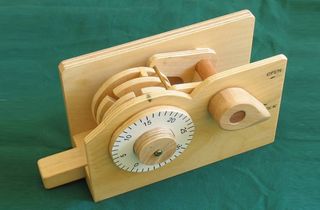 Combination lock model
Back to my Woodworking website.