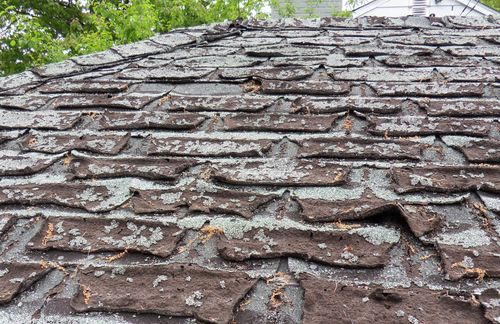
 The shingles on my detached one-car garage were looking rather horrible, and it was time to do
something about it. Not that the roof was leaking or that it would have done
much damage if it did, but the shingles were getting to be very unsightly.
The shingles on my detached one-car garage were looking rather horrible, and it was time to do
something about it. Not that the roof was leaking or that it would have done
much damage if it did, but the shingles were getting to be very unsightly.
Whenever I'm faced with a project of this nature, there's always the decision of whether
I should do it myself or whether I should pay somebody to do it. When I do it myself,
I always think "that wasn't worth the trouble, I should have just paid somebody",
but when I let somebody do it, I end up thinking "that cost so much, I should have
just done it myself". So seeing that I did it myself this time, this article will
probably convince you to hire a roofer if faced with a similar problem.
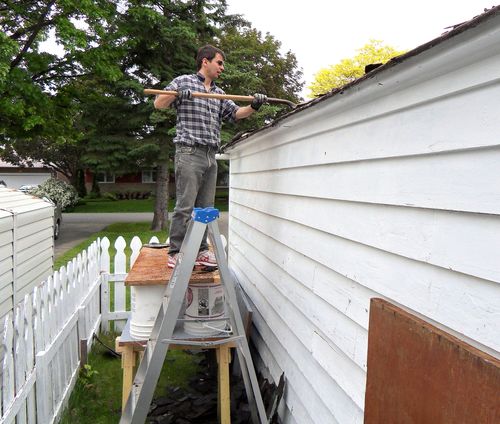 I started by stripping the shingles.
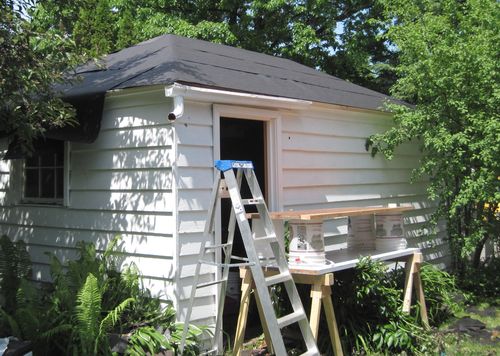
I set up a scaffold of sorts by putting a door on two sawhorses, then four
buckets on that, and another door. It turned out to be a fairly stable work platform.
There were three layers of shingles on the roof, and it was easier
to get under them from below. But ergonomically, it was not ideal. Also, all the loose bits
of roof ended up sliding towards me. Once I got further up the roof, standing on the stripped
roof with all the loose granules that came off the shingles made for a very unsure and
unsafe footing.
I started by stripping the shingles.
I set up a scaffold of sorts by putting a door on two sawhorses, then four
buckets on that, and another door. It turned out to be a fairly stable work platform.
There were three layers of shingles on the roof, and it was easier
to get under them from below. But ergonomically, it was not ideal. Also, all the loose bits
of roof ended up sliding towards me. Once I got further up the roof, standing on the stripped
roof with all the loose granules that came off the shingles made for a very unsure and
unsafe footing.
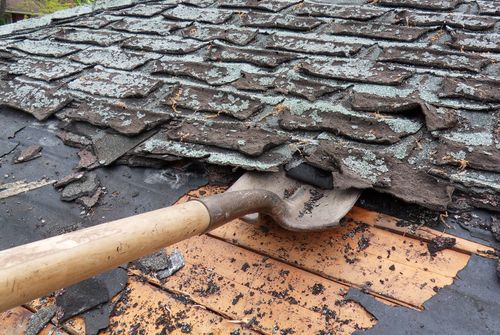 The roof had been reshingled twice,
and each time the new shingles were just nailed over the previous layers of shingles.
Despite this, it was pretty easy to pop the nails with just a regular garden shovel.
The roof had been reshingled twice,
and each time the new shingles were just nailed over the previous layers of shingles.
Despite this, it was pretty easy to pop the nails with just a regular garden shovel.
You can buy special spades for stripping shingles, but the shovel worked well enough,
even though I had to pull out three layers worth of nails. When I had the roof on my
previous house reshingled, I didn't see the roofers use a special spade for stripping either.
The important thing is to use a shovel, not a flat spade. The shovel is much better
at getting good leverage. Also, make sure it has a decent edge. Not a cutting edge,
but a clean edge. If the edge of the shovel starts to fold over, grind it off.
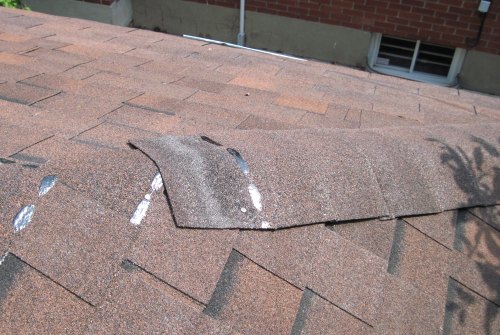
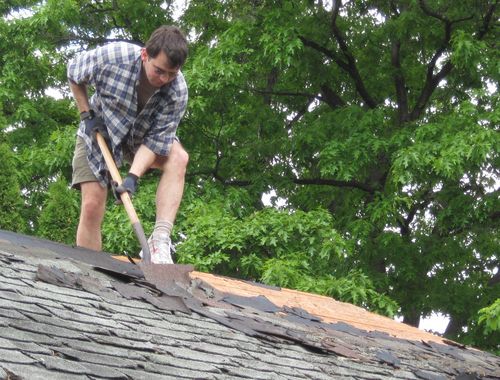 Stripping the shingles by working from the ridge line down is safer and more ergonomic.
You don't end up with all the loose granules from the shingles where you step, so there's
less risk of slipping. Getting a start is trickier though, but once you get
under the shingles in one spot, it's not too hard to continue from there.
Stripping the shingles by working from the ridge line down is safer and more ergonomic.
You don't end up with all the loose granules from the shingles where you step, so there's
less risk of slipping. Getting a start is trickier though, but once you get
under the shingles in one spot, it's not too hard to continue from there.
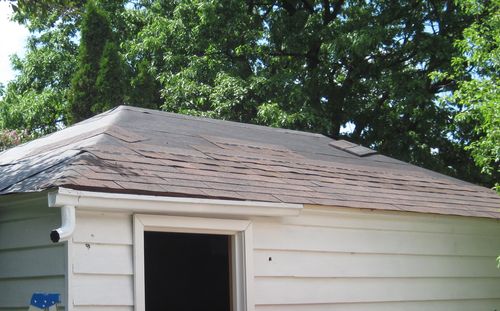
This is me working on the east side of the building, which is facing away from the
prevailing weather. The shingles on that side were not as horrible as on the west side.
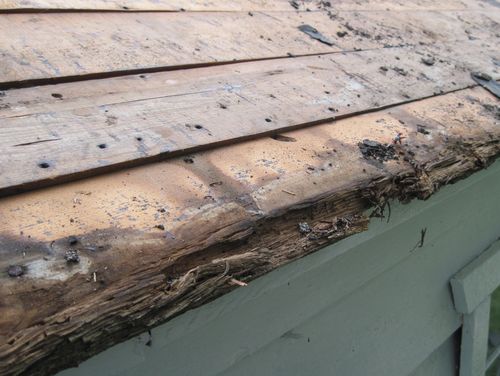 The edge of the roof was in rough shape, with the wood a bit rotten in places.
But the rest of the roof showed no sign of leakage or water damage whatsoever.
So I guess three layers of awful shingles kept all the water out, except for the edge,
where the shingles had peeled back and exposed the edge of the wood.
The edge of the roof was in rough shape, with the wood a bit rotten in places.
But the rest of the roof showed no sign of leakage or water damage whatsoever.
So I guess three layers of awful shingles kept all the water out, except for the edge,
where the shingles had peeled back and exposed the edge of the wood.
That's the beauty of sloped roofs over flat roofs. A sloped roof doesn't have to be
watertight. All it has to do is deflect the water down the slope.
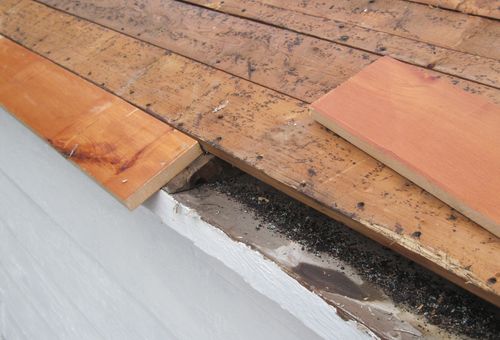 I replaced the last row of boards around the edges. This would have been more difficult to do
if the roof had been covered with OSB or plywood like most roofs nowadays are.
Fortunately, the boards themselves, though rotten, had still protected the wood
underneath, so I still had a good base to nail into.
I really prefer boards for roof sheathing, and when I
built my house addition I also used
individual boards on the roof, even though nobody does that anymore.
I replaced the last row of boards around the edges. This would have been more difficult to do
if the roof had been covered with OSB or plywood like most roofs nowadays are.
Fortunately, the boards themselves, though rotten, had still protected the wood
underneath, so I still had a good base to nail into.
I really prefer boards for roof sheathing, and when I
built my house addition I also used
individual boards on the roof, even though nobody does that anymore.
I'm not sure how professional roofers would have dealt with the rotten boards. Time is money, and that sort of fiddly work really holds things up. The boards weren't of a standard width either.
I cut the replacement boards out of some discarded furniture remains that I scavenged
from the curb in anticipation of needing some for this roof.
 The next step was to roll some felt paper onto the roof. The felt paper is a waterproof
sort of tar paper that goes under the shingles. It's supposed to direct water
down the roof under the shingles if the shingles start to leak. It's supposed
to also make the shingles last longer, though it's not clear to me why.
The next step was to roll some felt paper onto the roof. The felt paper is a waterproof
sort of tar paper that goes under the shingles. It's supposed to direct water
down the roof under the shingles if the shingles start to leak. It's supposed
to also make the shingles last longer, though it's not clear to me why.
I also find the tar paper a peace of mind sort of thing. Once the tar paper on, the roof is protected from the elements even if the shingling isn't done yet.
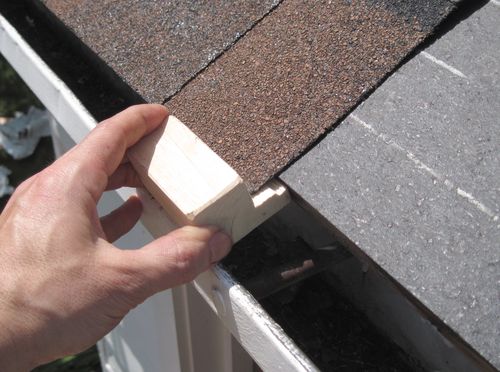 Shingling starts at the bottom edge, with the first shingles overhanging the edge of the roof.
I made a little L-shaped block of wood to use as a guide so my overhang would be
consistent. Professional roofers will just eyeball this sort of thing.
Shingling starts at the bottom edge, with the first shingles overhanging the edge of the roof.
I made a little L-shaped block of wood to use as a guide so my overhang would be
consistent. Professional roofers will just eyeball this sort of thing.
The overhang is important, because it keeps the water away from the wood underneath. A metal drip edge would also help, but I didn't want to invest too much in this old garage.
For normal 3-tab shingles, the first row is put on backwards (tabs facing up the roof) so that there is more of a continuous edge facing down. Then, the next row is put directly over the first row, offset by half a tab, with the tabs facing down slope.
I started the first row with laminated shingles (no tabs), so there was no need to face the tabs
up-slope for the first underneath row.
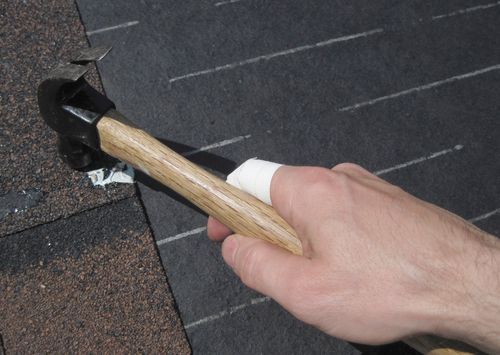 I have helped my dad build cottages, and we nailed entire roofs with just hammers, and I didn't
get any blisters. I guess I had the right kind of calluses on my hands at the
time. But I'm an all soft city slicker now. I could feel a burning sensation on
the side of my index finger, and before a blister could develop, I wrapped that area in tape.
I have helped my dad build cottages, and we nailed entire roofs with just hammers, and I didn't
get any blisters. I guess I had the right kind of calluses on my hands at the
time. But I'm an all soft city slicker now. I could feel a burning sensation on
the side of my index finger, and before a blister could develop, I wrapped that area in tape.
Work gloves also prevent blisters, but it was a hot day.
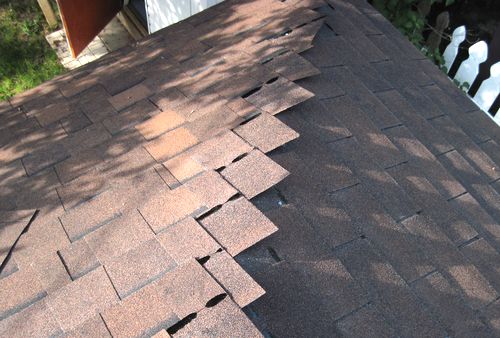
 Roofers will always put shingles up by working at a diagonal, whereas I prefer to do one whole
row of shingles at a time. It means more moving around the roof, but makes any
bundle to bundle variations in colour much less obvious.
Roofers will always put shingles up by working at a diagonal, whereas I prefer to do one whole
row of shingles at a time. It means more moving around the roof, but makes any
bundle to bundle variations in colour much less obvious.
As it turned out, the stack of marked down leftover shingles that I bought was mostly laminated shingles, whereas I thought it was just one bundle of laminated and the rest three-tab. And so I had to switch shingle patterns part way up the west side. Doh!
But because I worked in rows, the difference is actually not all that eye catching. The bottom
four rows are 3-tab shingles, and the next three rows are laminated.
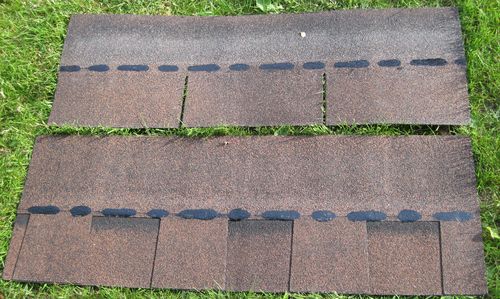 Here's the difference in shingle styles. The top shingle is a regular three-tab shingle,
whereas the bottom one is a fancy laminated shingle. The three-tab shingle is just out of
one piece, whereas the laminated shingle has huge cutouts on the top layer, and another
layer under the cutouts to cover the area.
Here's the difference in shingle styles. The top shingle is a regular three-tab shingle,
whereas the bottom one is a fancy laminated shingle. The three-tab shingle is just out of
one piece, whereas the laminated shingle has huge cutouts on the top layer, and another
layer under the cutouts to cover the area.
Laminated shingles cost a fair bit more,
but the remainder stack I bought was so marked down that they cost substantially
less than the cheapest three-tab shingles. It's just that the marked down stack was not enough. At least
the three-tab shingles I bought at regular price matched in colour!
 Doing a sloping ridge of my hip roof. A hip roof is one of those roofs where the roof comes
down on all sides, as opposed to one with a gable on each end.
Doing a sloping ridge of my hip roof. A hip roof is one of those roofs where the roof comes
down on all sides, as opposed to one with a gable on each end.
 The ridges, both along the top of the roof and the hip lines are covered by cutting
three-tab shingles into threes, and nailing the individual pieces on so they overlap.
The ridges, both along the top of the roof and the hip lines are covered by cutting
three-tab shingles into threes, and nailing the individual pieces on so they overlap.
That way, the only nails that are left exposed are those used to nail the last shingle
on the roof.
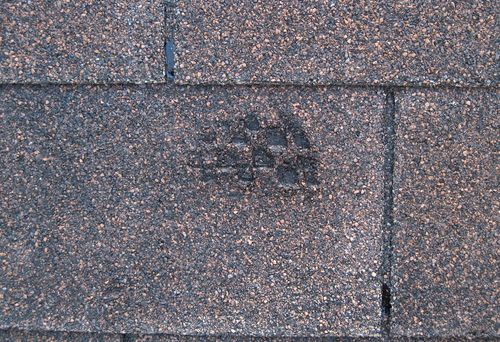 It turned out to be some unusually hot days in May, with 33°C (91 F) temperatures.
That's really too hot to work on shingles. And I was dumb enough to wear shoes
with a fairly aggressive profile, so I left this footprint near the ridge when working
on it when it was already too hot. Oops!
It turned out to be some unusually hot days in May, with 33°C (91 F) temperatures.
That's really too hot to work on shingles. And I was dumb enough to wear shoes
with a fairly aggressive profile, so I left this footprint near the ridge when working
on it when it was already too hot. Oops!
Walking on the roof in cooler temperatures doesn't damage the shingles.
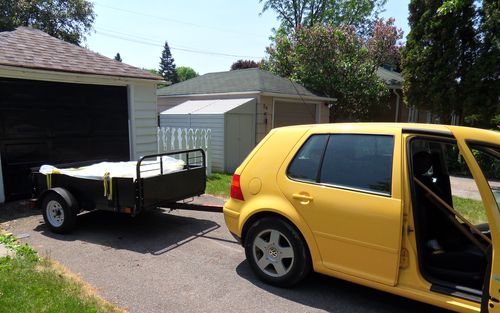 Disposing the old shingles was another matter. I wouldn't have attempted to do this job
myself if I didn't have a trailer to haul away the old shingles. And with three layers of
old shingles, there were a LOT of shingles. It took two trips, and according to the weigh-in
weigh-out at the dump, was 670 kg (1574 pounds).
Disposing the old shingles was another matter. I wouldn't have attempted to do this job
myself if I didn't have a trailer to haul away the old shingles. And with three layers of
old shingles, there were a LOT of shingles. It took two trips, and according to the weigh-in
weigh-out at the dump, was 670 kg (1574 pounds).
The new shingles I used were eleven and a half bundles at 32 kg each, totaling 368 kg
(810 pounds). Considering there were three layers of shingles, the old ones were either
a lot lighter than my new ones, or much of their weight had weathered away.
And there I was in the midst of all that, with my little yellow car and trailer, sweating in the heat and humidity as I pried the shingles off my trailer.
It was a far cry from the sunny trips to an isolated dump that we used to go to in northern
Ontario!
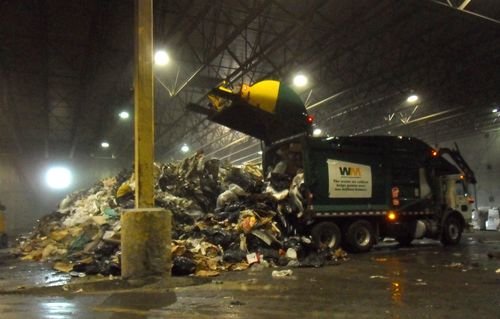 It's a sobering experience, especially reflecting on the fact that just about everything
we buy eventually ends by making a trip here through this hell hole on its way to be buried
somewhere. And if we are lucky, the stuff stays buried and doesn't cause further problems.
It's a sobering experience, especially reflecting on the fact that just about everything
we buy eventually ends by making a trip here through this hell hole on its way to be buried
somewhere. And if we are lucky, the stuff stays buried and doesn't cause further problems.
On my second trip, I brought a camera, with the settings already adjusted to hopefully do a decent job capturing the rather dark scene. I certainly didn't want to linger any longer than necessary or attract attention for taking pictures.
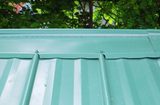 Sheet metal roof
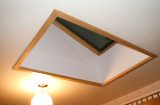 Skylight installation
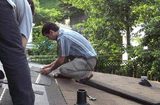 Low sloped roof