
 Then I figured a gearhead motor would be better, and then I figured
a drill would be a pretty good pre-made gearhead motor.
Then I figured a gearhead motor would be better, and then I figured
a drill would be a pretty good pre-made gearhead motor.
My first idea was to use a garage door opener motor, but the plastic worm gears inside those is quite flimsy.
Then I figured a gearhead motor would be better, and then I figured
a drill would be a pretty good pre-made gearhead motor.
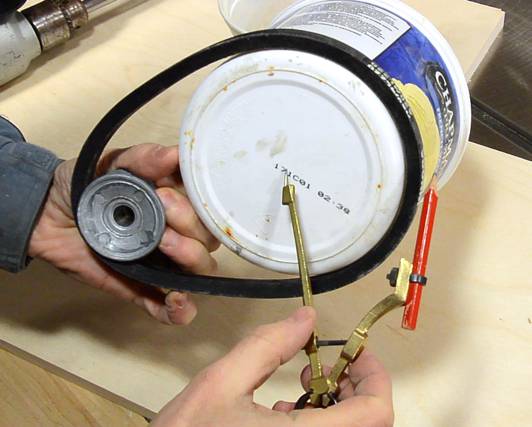
I have this old 550 RPM fixed speed, non reversible drill that I rarely use. With a 2" pulley on a steel shaft, I could use that to drive a belt driving a wheel. So I bought a short belt (the only part I had to buy), and then figured out what size wheel would work best with that.
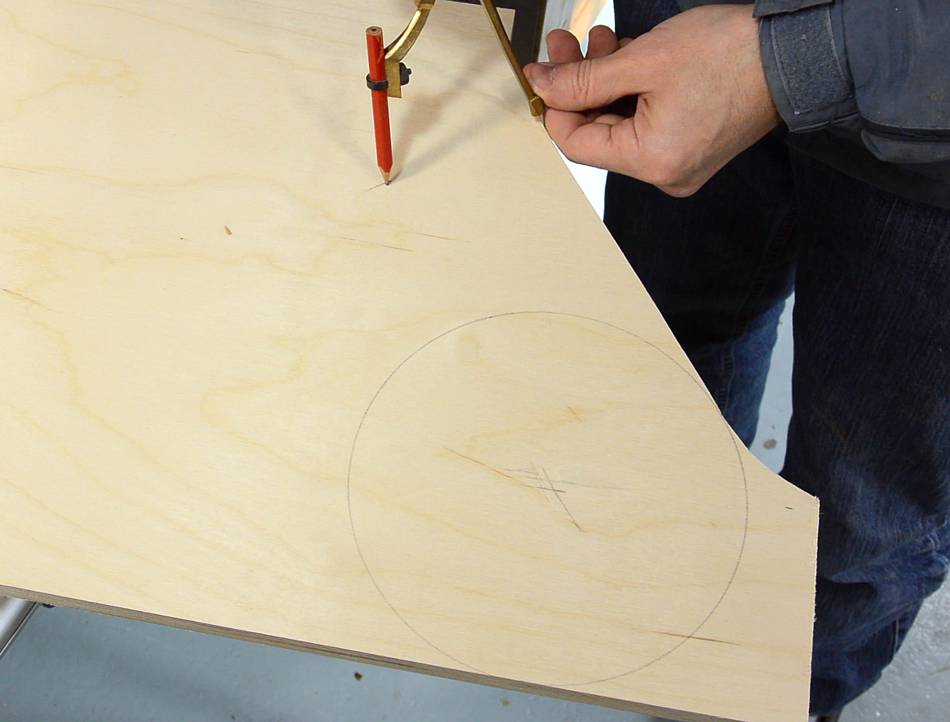
 I cut three disks out of 18 mm birch plywood. To lay out circles from
odd shaped scraps of plywood, I always use the compass to mark a
distance of one radius from the edges, and that tells me where to
put the center so that the circle will just touch the edge.
I cut three disks out of 18 mm birch plywood. To lay out circles from
odd shaped scraps of plywood, I always use the compass to mark a
distance of one radius from the edges, and that tells me where to
put the center so that the circle will just touch the edge.
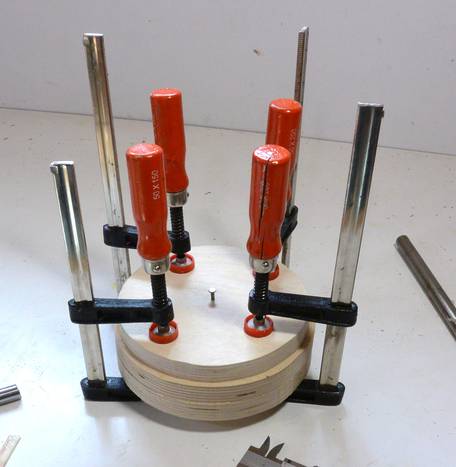
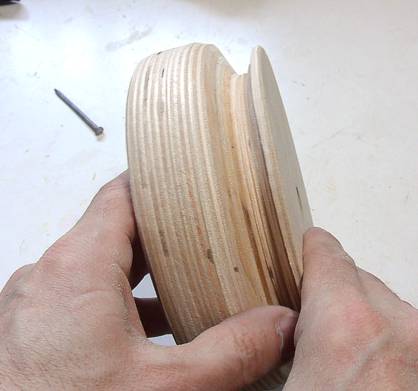
I cut out three circles, one slightly smaller, and glued them together. I used a nail through a hole in the middle of all the disks to keep them aligned as I glued them.
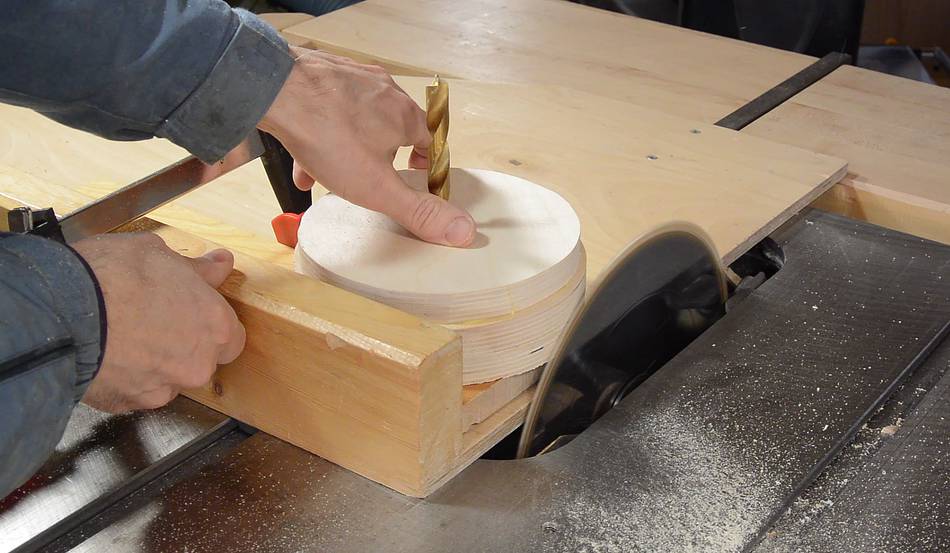
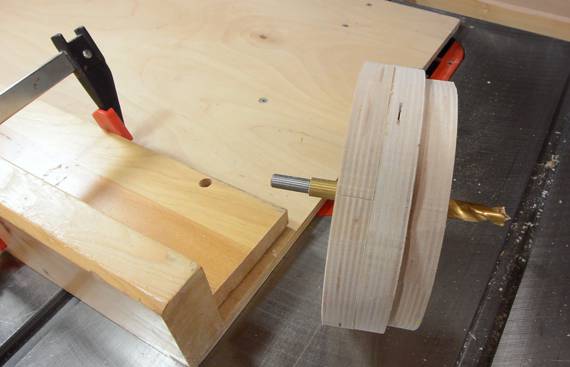 I used my table saw to trim the wheel perfectly round, using the shank
of a drill as the shaft to turn the wheel around.
I used my table saw to trim the wheel perfectly round, using the shank
of a drill as the shaft to turn the wheel around.

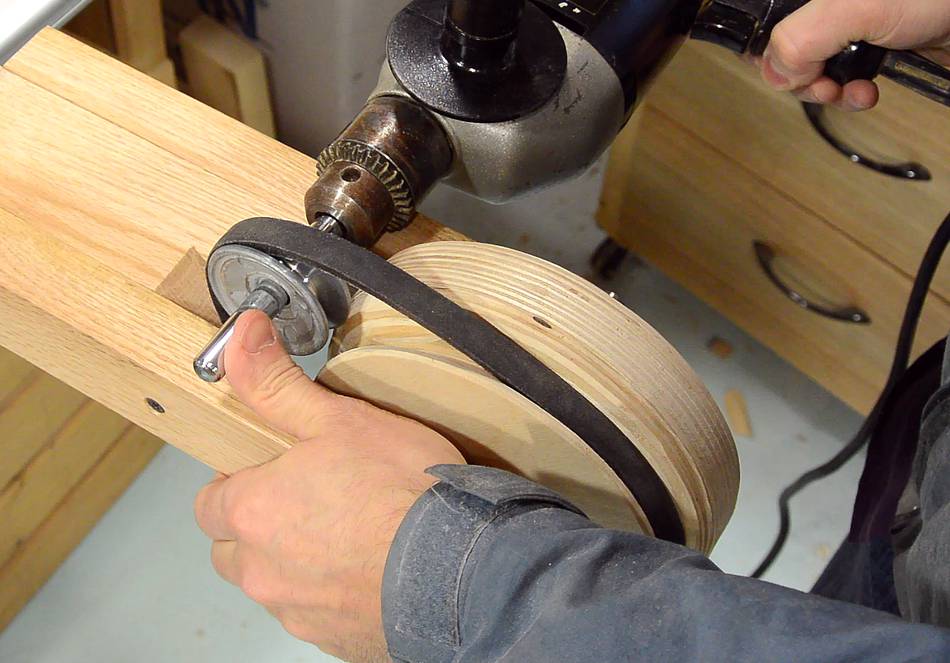
 Cutting the groove of the pulley. I first made a series of cuts around the
perimeter to make a rectangular notch, then a cut on either side of the notch
with the blade tilted 25 degrees to cut the slanted sides for the V-belt groove.
Cutting the groove of the pulley. I first made a series of cuts around the
perimeter to make a rectangular notch, then a cut on either side of the notch
with the blade tilted 25 degrees to cut the slanted sides for the V-belt groove.
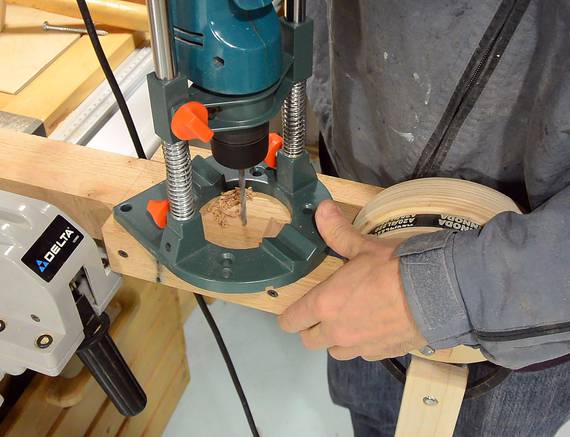
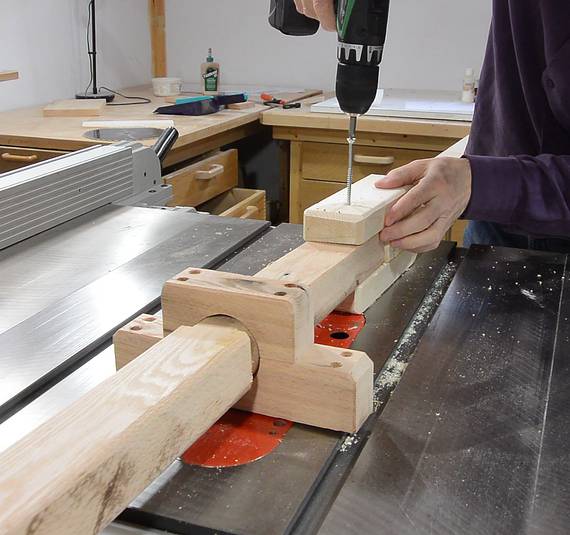
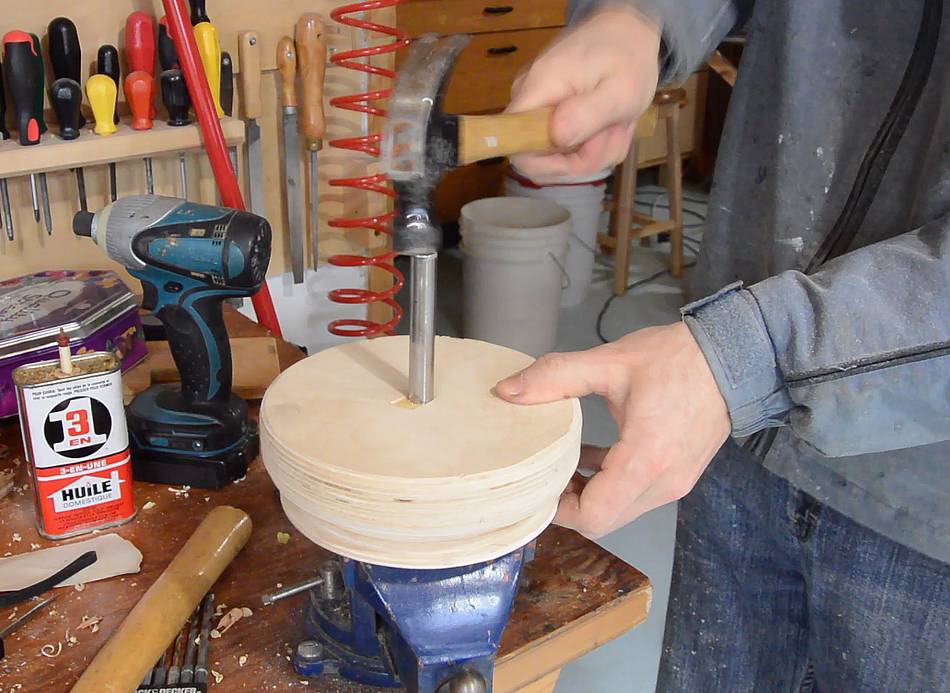 Installing the shaft. I drilled the hole 1/64" (0.4 mm) smaller than the 1/2"
shaft for a tight fit. It took some hammering to get it in. This unfortunately
widened the end of the shaft a bit, so I had to grind that down again.
Installing the shaft. I drilled the hole 1/64" (0.4 mm) smaller than the 1/2"
shaft for a tight fit. It took some hammering to get it in. This unfortunately
widened the end of the shaft a bit, so I had to grind that down again.
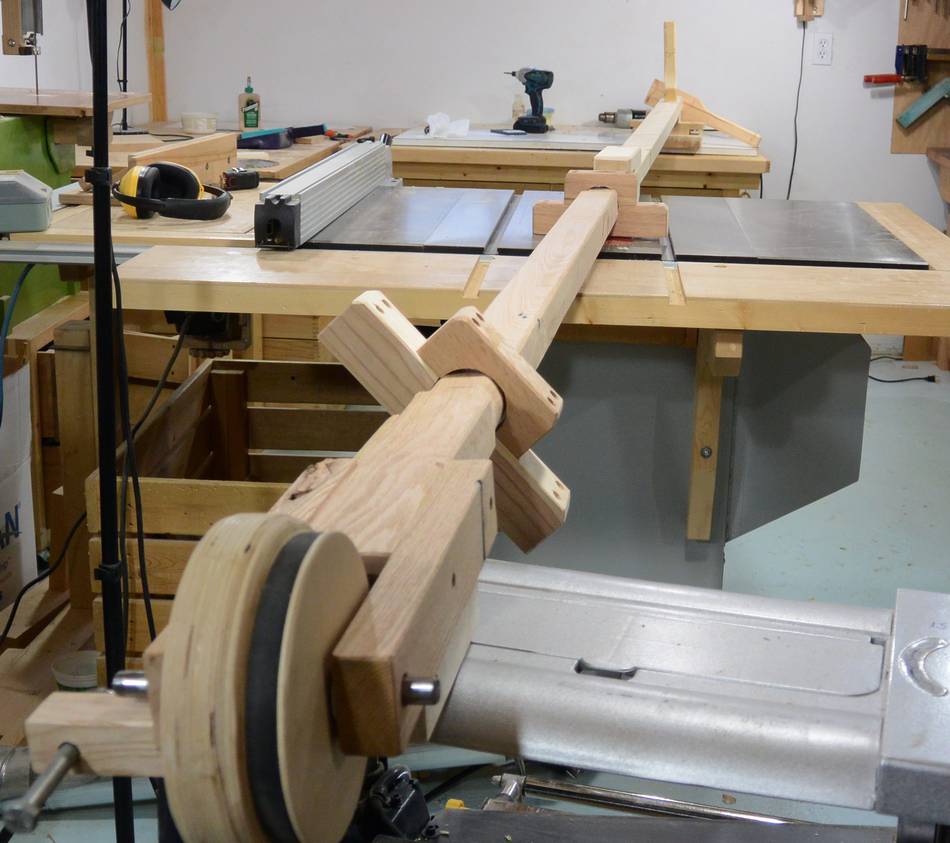
 Next challenge: How to mount the drill and pulley to drive the shaft.
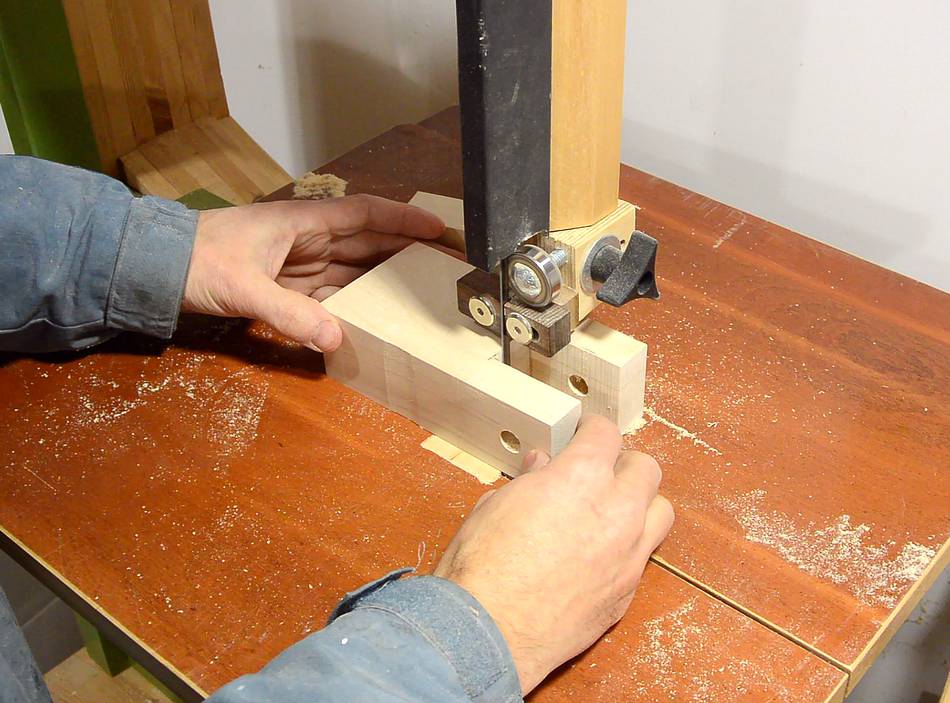 I made a block of wood to hold the shaft, with a notch for the pulley.
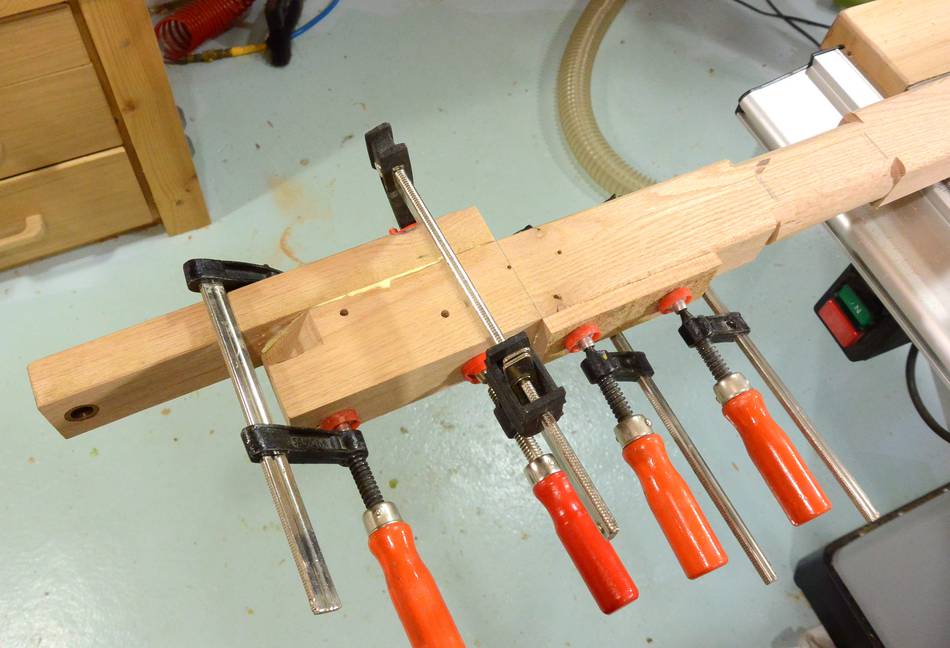
 Two slots allow the block to slide up and down slightly for adjusting the belt
tension. With careful work and a brad point drill, drilling a hole at either
end of the slot, then carefully in between, it's possible to carve out a slot.
Two slots allow the block to slide up and down slightly for adjusting the belt
tension. With careful work and a brad point drill, drilling a hole at either
end of the slot, then carefully in between, it's possible to carve out a slot.
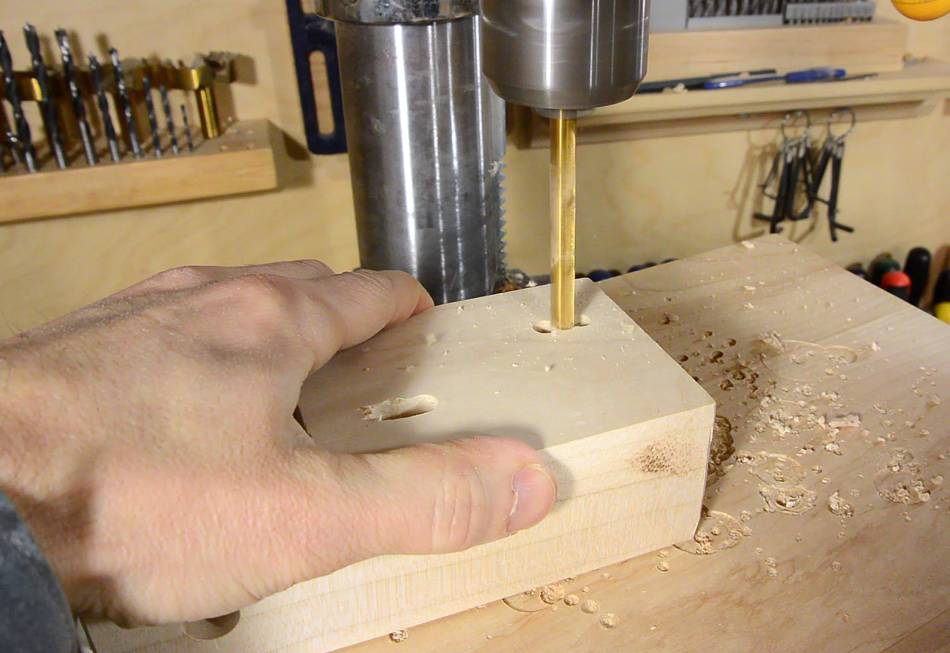
 With the block positioned, I placed two 1/4" bolts in the end of the
slot and hit them with a rubber mallet to mark where the pilot holes need
to go, then drill these out using a drill with a drill guide.
With the block positioned, I placed two 1/4" bolts in the end of the
slot and hit them with a rubber mallet to mark where the pilot holes need
to go, then drill these out using a drill with a drill guide.
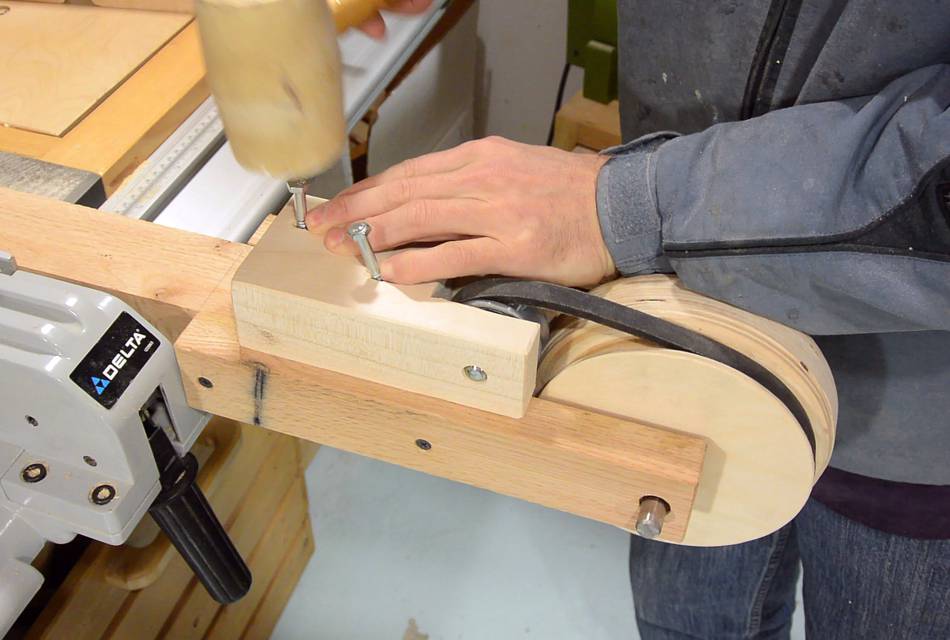
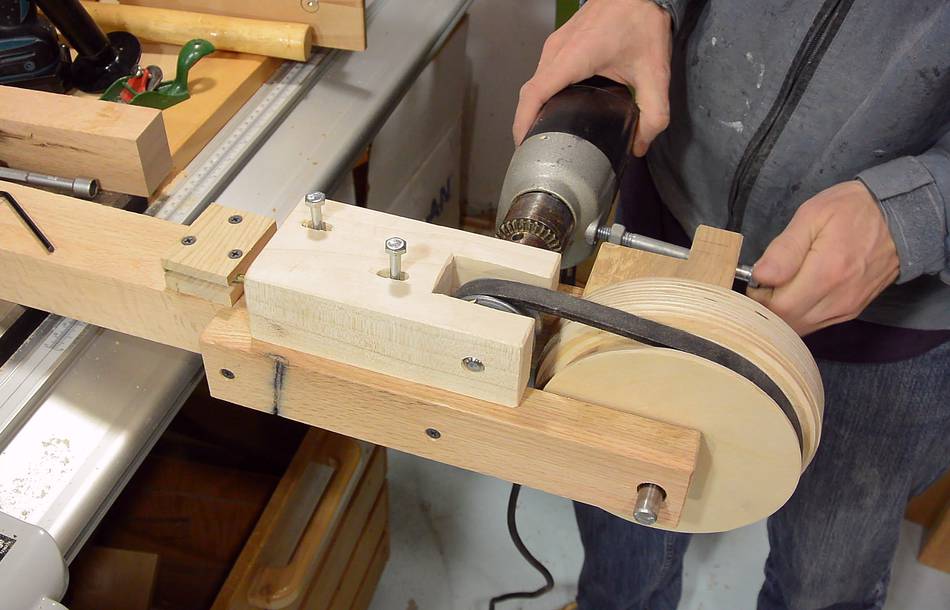 A 3/8" bolt replaces the drill's handle and will keep the drill from spinning.
The drill is only attached by the chuck and this bolt.
A 3/8" bolt replaces the drill's handle and will keep the drill from spinning.
The drill is only attached by the chuck and this bolt.
This way it's not too hard to remove the drill if I need it for something else.
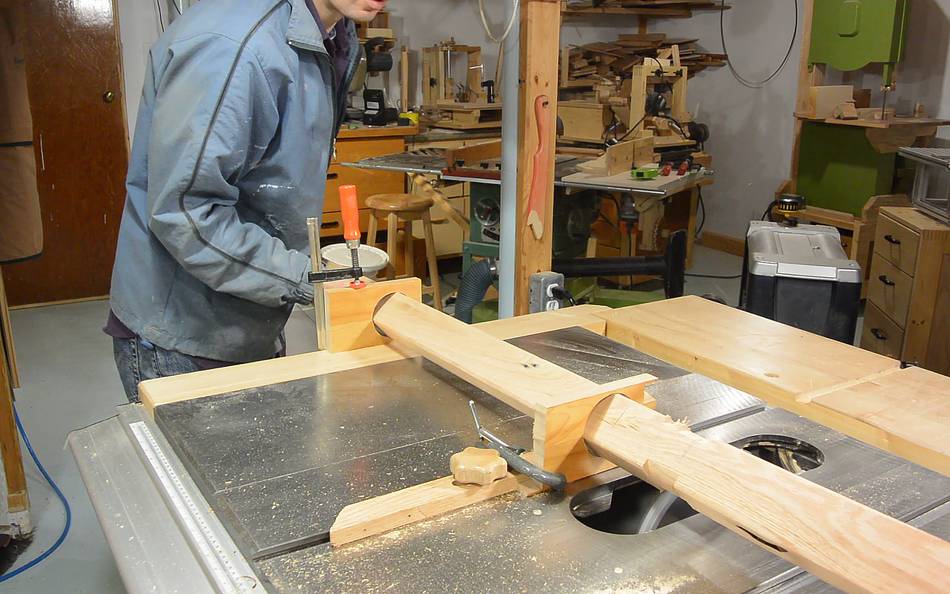
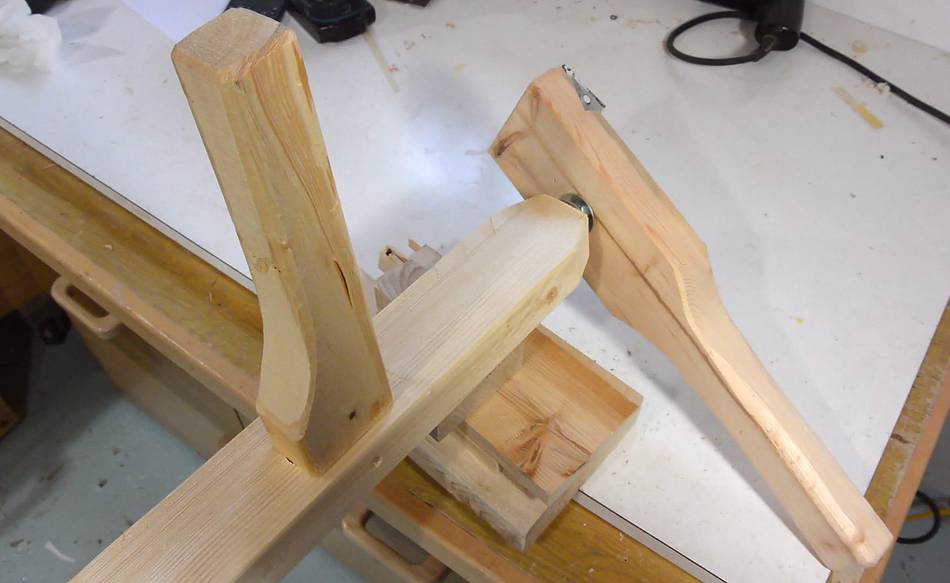
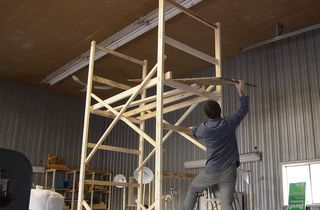
 The whole assembly needs to rotate to provide steering control.
It's attached to the bottom of a long column, and I need to make parts of this
column round to allow it to rotate inside some crude "bearings".
The whole assembly needs to rotate to provide steering control.
It's attached to the bottom of a long column, and I need to make parts of this
column round to allow it to rotate inside some crude "bearings".
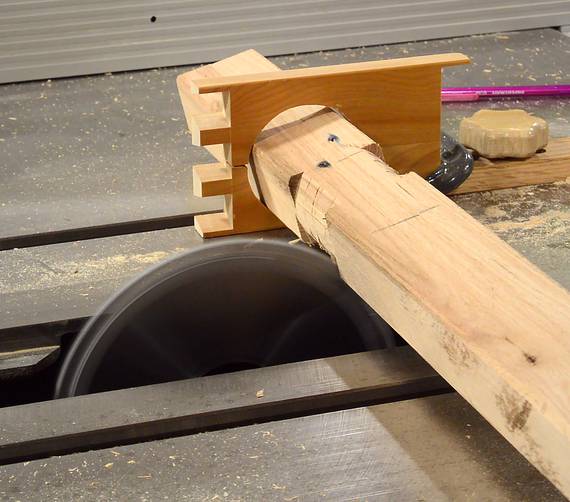
The best way to do that that I could think of was to turn the rectangular column inside two round cutouts that it barely fit into. I have to emphasize that this was the best method I could think of, not a "good" method.
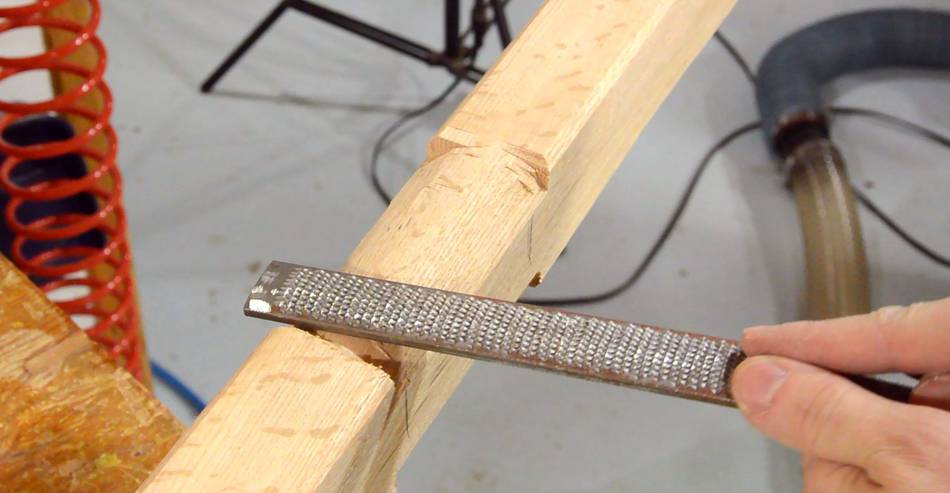 It's impossible to get a precise round that way. I smoothed the result
with a file.
It's impossible to get a precise round that way. I smoothed the result
with a file.
And to think some youtubers recommend a similar method for cutting round tenons. There are some seemingly clever ideas on the internet that really aren't so clever if you actually try to use them.
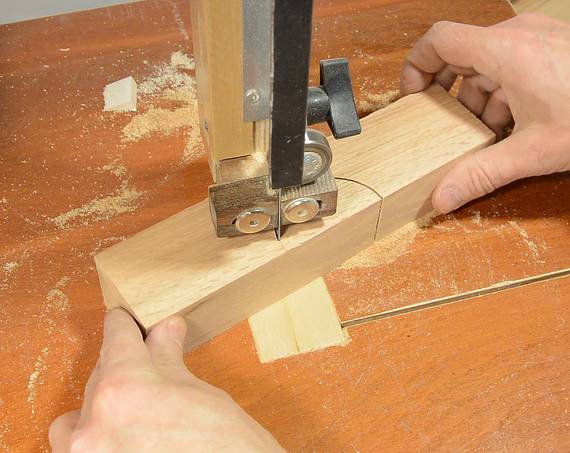 I made some "pillow blocks" of sorts by cutting a half round out on the
bandsaw. Drilling might have been more precise, but the hole I needed was
just a bit larger than my largest drill bit.
I made some "pillow blocks" of sorts by cutting a half round out on the
bandsaw. Drilling might have been more precise, but the hole I needed was
just a bit larger than my largest drill bit.
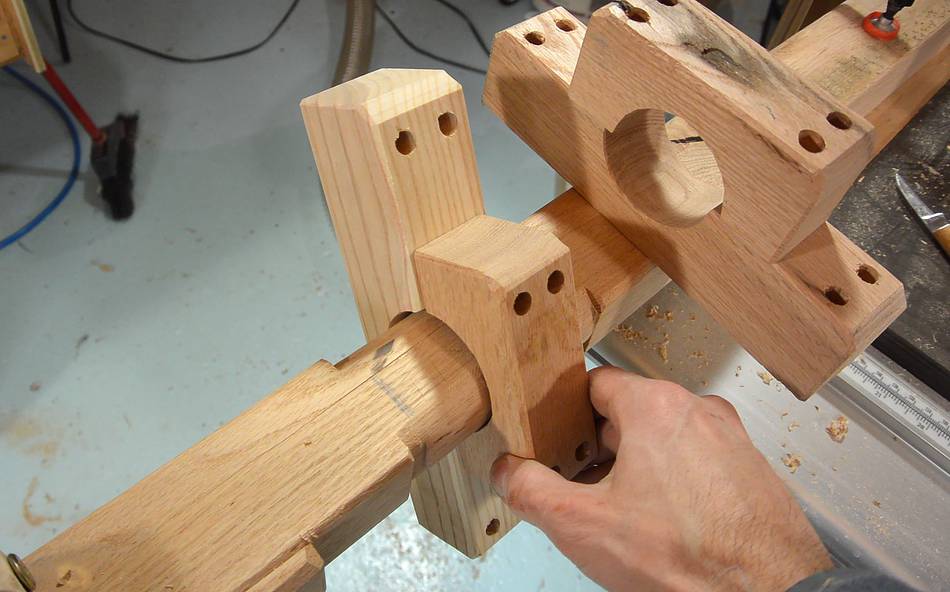
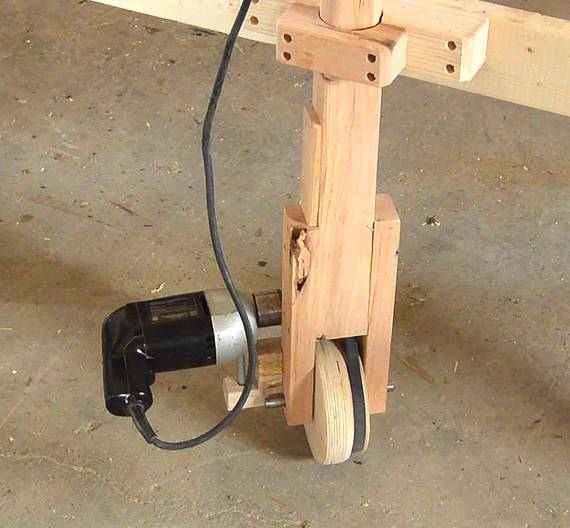
 With the round parts of the column carved, I could now glue on parts of the wheel
mounts. One side is glued, the other side screwed on, but with a block just
above it, so the screws don't have to take up the weight on the wheel.
With the round parts of the column carved, I could now glue on parts of the wheel
mounts. One side is glued, the other side screwed on, but with a block just
above it, so the screws don't have to take up the weight on the wheel.
 The main steering column is about 2 meters long. I made another two meter
long piece that couples with the steering column to extend it all the
way to the top of the scaffold.
The main steering column is about 2 meters long. I made another two meter
long piece that couples with the steering column to extend it all the
way to the top of the scaffold.
 The top end of the steering column. The handle to the left is for rotating
the column. The handle to the right is for pushing the column down.
The idea is that to move the scaffold, the column is pressed down against
the scaffold frame so that the scaffold's legs on that end actually get
lifted off the floor. With the weight normally on the wheel-less
legs on that end, I figure there is no risk of the scaffold starting
to roll unexpectedly.
The top end of the steering column. The handle to the left is for rotating
the column. The handle to the right is for pushing the column down.
The idea is that to move the scaffold, the column is pressed down against
the scaffold frame so that the scaffold's legs on that end actually get
lifted off the floor. With the weight normally on the wheel-less
legs on that end, I figure there is no risk of the scaffold starting
to roll unexpectedly.
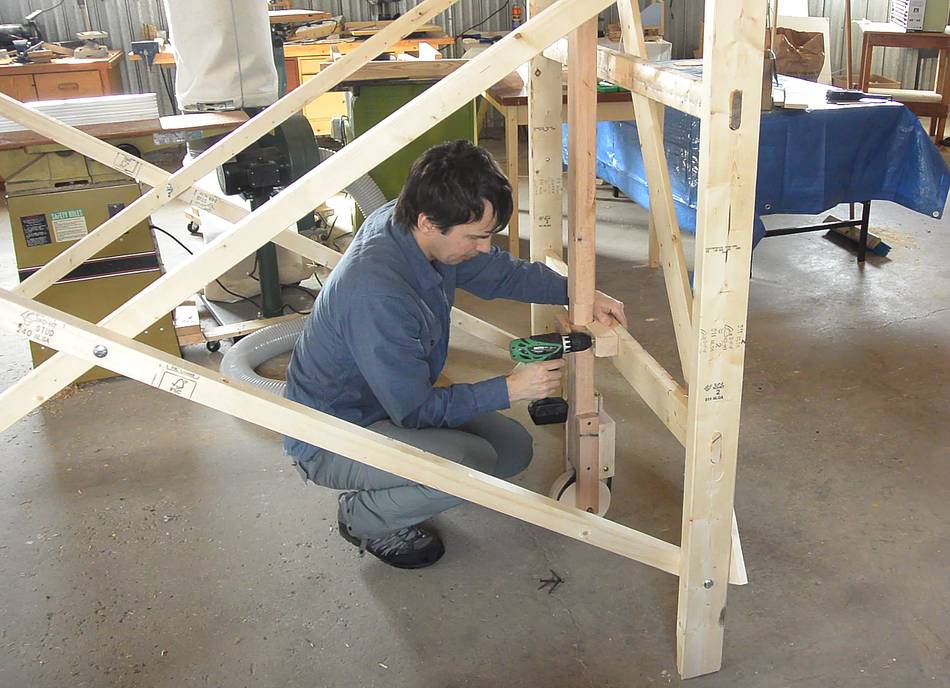
 Mounting for the steering column on the scaffold.
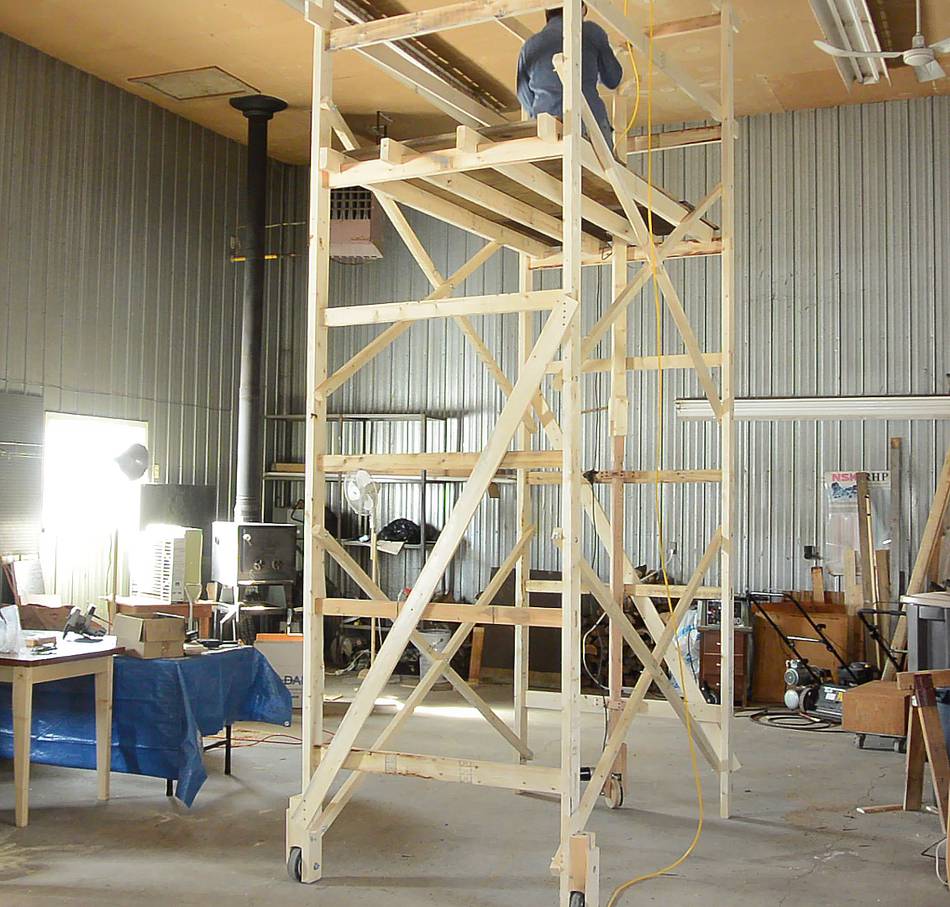
 Test driving the scaffold.
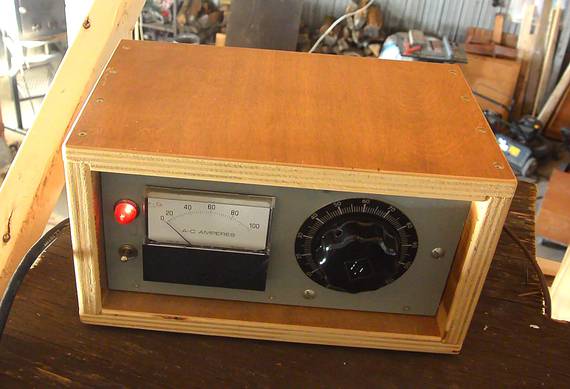
I used a variac to control the voltage for the drill, just to test this at lower speed first. Though eventually, I became confident enough to run it at full speed.
That was a lot of fun driving around, and being able to move the scaffold without having to climb down from it. I had to be careful about the extension cord though, making sure I didn't stretch or run over it.
Cornering ability is very limited. As soon as there is significant amounts of sidewasys acceleration, the legs start dragging on the floor, slowing down the scaffold. So I don't think it would be physically possible to tip this scaffold, even with a faster drill.
If you want to build something like this yourself, be sure to get a very low speed drill. The drill I'm using here only goes up to 550 RPM, and I wouldn't want to go faster than that. Any drill that goes up to 1200 RPM or more will not have enough gear reduction to get the sort of torque needed to move a scaffold.
Of course, building and motorizing that scaffold was much more fun than actually using it,
so it was over a month after building it that I finally got started with painting the
ceiling. I had used the scaffold for a few other things before that though.
 Building a scaffold
 Big garage workshop
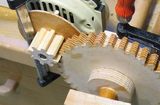 Motorizing the
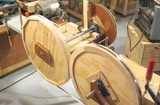 Bandsaw wheels
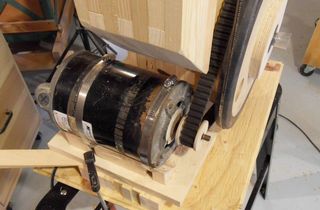 Motorizing the
 Echo reduction in the workshop
 Making sound absorbing panels
 Bandsaw repair fail