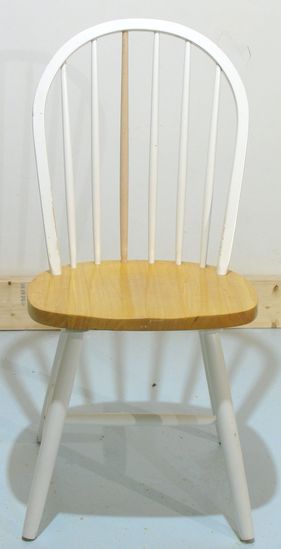
The spindle mounted in the chair
I was recently repairing a chair of the type with the arching back and a series of spokes or spindles going from the seat to the arch. The chair was missing one of the spindles, so had to make a new one. I didn't think turning such a long and thin spindle on a lathe would be a good idea, and carving one out with a spokeshave would have taken too long to get it right. So I thought up a neat method of doing it on a jointer. I'd used a similar technique for making the drum of my apple grinder on my jointer so decided to try it for a narrower spindle.
|
The spindle mounted in the chair |
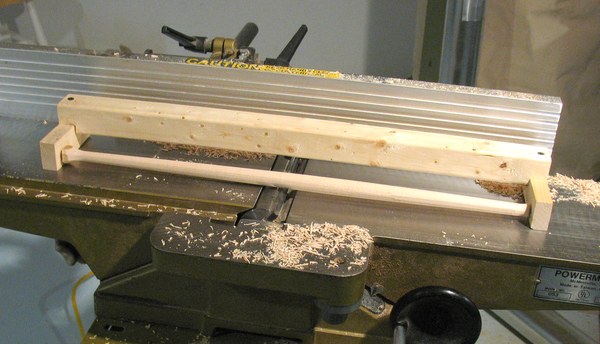
 I made a very simple jig to slide on the jointer, as seen above.
I started with a square piece of maple, about 18x18 mm. On either end, I cut a tenon on the
table saw, and cut it round with a carving knife. The tenons fit into 3/8" holes that I drilled
in the jig, which allow the work piece to be turned.
I made a very simple jig to slide on the jointer, as seen above.
I started with a square piece of maple, about 18x18 mm. On either end, I cut a tenon on the
table saw, and cut it round with a carving knife. The tenons fit into 3/8" holes that I drilled
in the jig, which allow the work piece to be turned.
Then, with the infeed of the jointer set fairly low, it's a matter of passing the jig and workpiece over the jointer, and rotating the workpiece for each successive cut by a little bit. The result is a cone.
I needed to make a spindle that tapered conically on either end, with a cylindrical section in the middle. This required three different setups to cut each section.
To better illustrate how this jig works, I made another conical dowel, this one much larger and more
obviously conical:
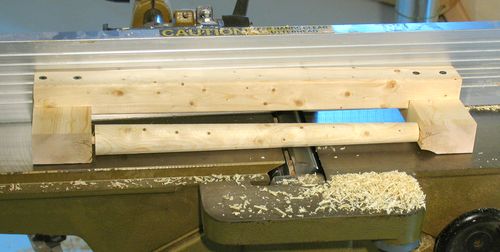
This one again pivots on short tenons in the work piece, although if I was making a lot of cones like that, I'd probably have pins sticking out of the jig pivoting on holes in the work piece. For thinner work pieces, like the chair spindle, a tenon in the work piece makes more sense though.
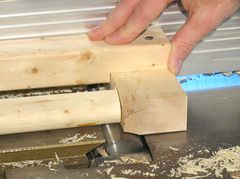 Making the blocks wider also helps by allowing you to move the jig forward enough to get the end of the
cone above the center of the cutter head (see image at left), so there is scrap to cut off the end afterwards.
Making the blocks wider also helps by allowing you to move the jig forward enough to get the end of the
cone above the center of the cutter head (see image at left), so there is scrap to cut off the end afterwards.
The other safety thing you should do is to clamp a block to the jointer bed on either end to limit the forward and backward movement of the jig so that you don't end up running off the end of the tables, or too far over the cutter head with the ends of the jig.
It can also help to make the work piece fit very tightly into the jig, so it will not turn on its own, although that makes it less convenient to turn the spindle. I personally prefer it easier to turn, and hold its rotation in place with my thumb on the outfeed table side of the spindle.
I only adjust the infeed table to get the height on that side. You could also move the outfeed table up and down for easier adjustment on the tail end. But for thin spindles, that would probably not be safe, as the cut part of the spindle rests directly against the outfeed table additional support when the outfeed table is positioned as it would be for normal work.
Another method of making dowels
More about Jointers
Back to my Woodworking website
![]()