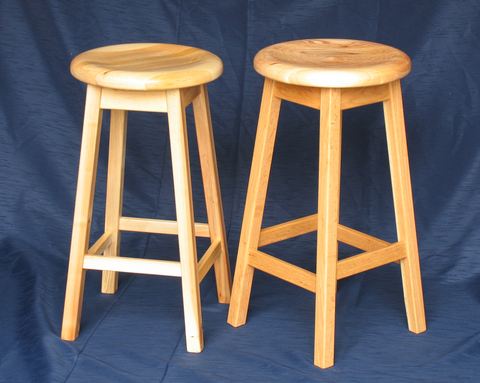
Building stools
|
After building my Mortising jig, I needed some sort of project to test how it would work when actually building a piece of furniture. So I decided to build a pair of stools with it to test it out.
The stools have a wide rung right underneath the seat, and a narrow rung further down, at about the right height for the feet. Most commercially available stools of this overall design have no rung under the seat, or a very narrow one. This always puzzles me a bit, because a wide rung is what gives the stool stability, and the best place to put it is under the seat.
I started out by cutting the legs - just straight and square. I didn't bother cutting the miter on the ends of them, because I figured I'd decided on the final length of the legs later.
 Between the two stools, I had a lot of rungs to cut, so I jigged something up for cutting them.
I don't have a miter gauge for my table saw, so just some blocks clamped to the fence did the job.
Between the two stools, I had a lot of rungs to cut, so I jigged something up for cutting them.
I don't have a miter gauge for my table saw, so just some blocks clamped to the fence did the job.
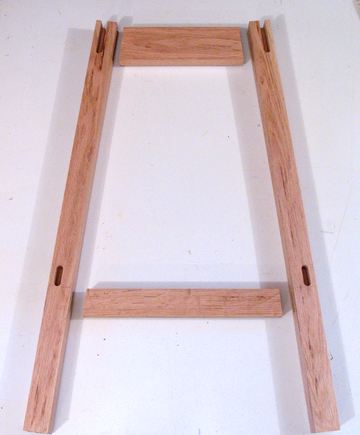
The wide top rungs were all the same length, but the bottom rungs, because I offset them vertically,
are at slightly different lengths. The reason the bottom rungs are offset a bit is so that the tenons
potruding into legs would not overlap (more on that later)
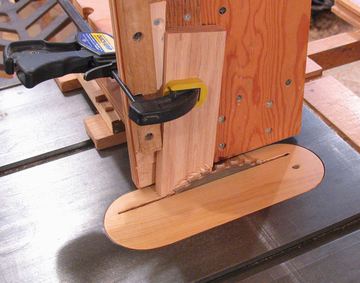
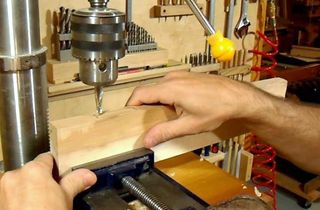
 The rungs are all mortised into the legs. I cut the mortises into the legs using a
Mortising jig that I rigged up.
The rungs are all mortised into the legs. I cut the mortises into the legs using a
Mortising jig that I rigged up.
Note how the mortises for the lower rungs are offset. This to keep them from intersecting.
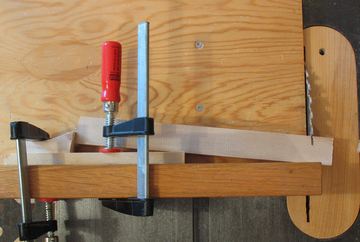
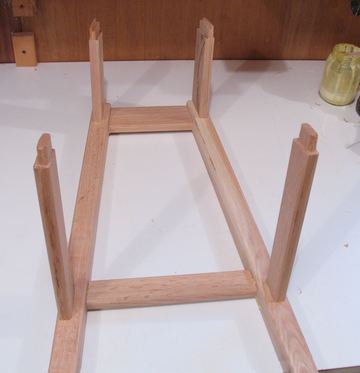
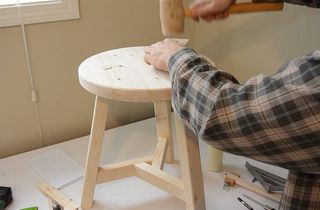
 After cutting the rungs, but before cutting the tenons into the ends of them, I checked the fit.
Because the tenons are all the same length, having all the rungs longer by the same amount should still
allow things to fit nicely. At left shows checking the fit. With the legs pressed against the rungs,
there should not be any gaps. I found I had to trim the lower rungs by a millimeter to
get a perfect fit.
After cutting the rungs, but before cutting the tenons into the ends of them, I checked the fit.
Because the tenons are all the same length, having all the rungs longer by the same amount should still
allow things to fit nicely. At left shows checking the fit. With the legs pressed against the rungs,
there should not be any gaps. I found I had to trim the lower rungs by a millimeter to
get a perfect fit.
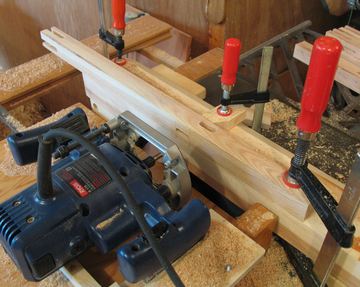
 Cutting the angled tenons with my Tenon jig. Note the wedge just above the clamp. I had to cut it with several
passes, because my saw blade is not thick enough to cut through in one pass. A dado blade would cut
it in on pass, but I get a much cleaner cut from the regular saw blade, so didn't bother with the dado.
Cutting the angled tenons with my Tenon jig. Note the wedge just above the clamp. I had to cut it with several
passes, because my saw blade is not thick enough to cut through in one pass. A dado blade would cut
it in on pass, but I get a much cleaner cut from the regular saw blade, so didn't bother with the dado.
Also note that for any tenon, I always cut with the piece clamped to the tenon jig on the same side in the same way.
Although it might cut down on the number of adjustments, I think its unwise to cut the other side by flipping
the work piece, as this will cause any variations in the work piece to add to inaccuracy.
With hardwood, my experience is that a tenon
that is 0.05 mm too wide takes too much force to insert, and one that is 0.05 mm too narrow is loose. So accuracy
is very important.
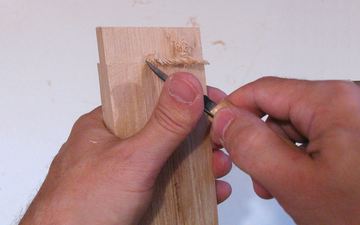 Cutting the tenon like that leaves a bit of a burr, but this comes off easily with just one
stroke of a carving knife.
Cutting the tenon like that leaves a bit of a burr, but this comes off easily with just one
stroke of a carving knife.
 Next cutting the tenons to width. The ends of the tenon are at an angle, so that they fit nicely
into the straight tenon holes.
Next cutting the tenons to width. The ends of the tenon are at an angle, so that they fit nicely
into the straight tenon holes.
 The next step is to cut the edges of the tenon round with a carving knife so that they fit neatly
into the round ends of the mortises. I find rounding the tenons easier than squaring
out the mortises with a chisel.
Do not use an Exacto-knife or any knife with replaceable blades to round the tenons, as these are simply
not strong enough to cut into hardwood and tend to break.
The next step is to cut the edges of the tenon round with a carving knife so that they fit neatly
into the round ends of the mortises. I find rounding the tenons easier than squaring
out the mortises with a chisel.
Do not use an Exacto-knife or any knife with replaceable blades to round the tenons, as these are simply
not strong enough to cut into hardwood and tend to break.
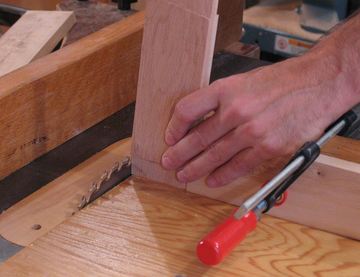
 The next step is to assemble the halves of the stool frame. I check the angles on both sides with a miter
gauge to make sure its all symmetrical. If not, I use a clamp diagonally to bring it into symmetry.
The next step is to assemble the halves of the stool frame. I check the angles on both sides with a miter
gauge to make sure its all symmetrical. If not, I use a clamp diagonally to bring it into symmetry.
Note the jar full of wood glue. Instead of
a squeeze bottle, I prefer to just apply the glue with a split of wood. Very handy for spreading glue,
especially inside of mortises. And when it gets all gummed up, just toss it out and get a new one.
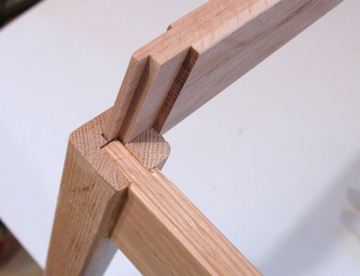 As mentioned previously, the tenons overlap a little bit. So I had to cut a rabbet out of the tenon
for the wide rungs near the top of the stool. With the bottom rungs vertically offset, they didn't
overlap, so no need for that step there.
As mentioned previously, the tenons overlap a little bit. So I had to cut a rabbet out of the tenon
for the wide rungs near the top of the stool. With the bottom rungs vertically offset, they didn't
overlap, so no need for that step there.
 And final assembly. First I glue the rungs into one side, then mate that with the other A-frame.
gluing the four joints at once, clamping, and making sure its all square and symmetric before the glue
becomes too firm doesn't leave any time for photographing, so no pictures of that part.
And final assembly. First I glue the rungs into one side, then mate that with the other A-frame.
gluing the four joints at once, clamping, and making sure its all square and symmetric before the glue
becomes too firm doesn't leave any time for photographing, so no pictures of that part.
 When gluing the, there's always a bit of glue that squeezes out of the joints. If there
isn't, its likely that you didn't use enough glue.
When gluing the, there's always a bit of glue that squeezes out of the joints. If there
isn't, its likely that you didn't use enough glue.
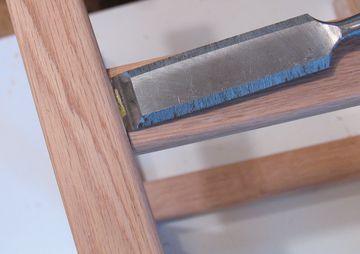
Leave the glue in place. Trying to remove it when wet just risks spreading it over a larger area, and besides, when gluing things, there's more pressing things to do, like checking the angles before the glue fully sets.
Once the glue is hardened, it comes out of the corners quite easily by pushing a sharp
chisel into the inside corners, as shown.
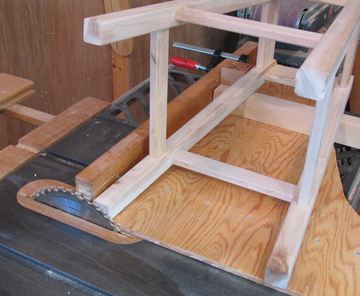 After assembly, I cut the legs so that they are square on the ground. Note the blocks supporting
the stool frame (back at right), so that the right angle cut will produce the right miter on the legs.
I used a similar procedure for the top, except for that end, I put the stool frame flat on the sled,
tilted the blade away from the stool.
After assembly, I cut the legs so that they are square on the ground. Note the blocks supporting
the stool frame (back at right), so that the right angle cut will produce the right miter on the legs.
I used a similar procedure for the top, except for that end, I put the stool frame flat on the sled,
tilted the blade away from the stool.
The next step after that is to laminate some pieces together for the seat, and turn it on the lathe.
Because of the dust that step involves, I also didn't take any pictures of turning it.
 I turn the seat with a nice round edge, and a slight indentation. The indentation makes the stool
very comfortable to sit on. I tested the shape of the indentation by taking the whole seat with
the faceplate off the lathe and placing it on the stool to test it. Did this several times
until I got the shape just right.
I turn the seat with a nice round edge, and a slight indentation. The indentation makes the stool
very comfortable to sit on. I tested the shape of the indentation by taking the whole seat with
the faceplate off the lathe and placing it on the stool to test it. Did this several times
until I got the shape just right.
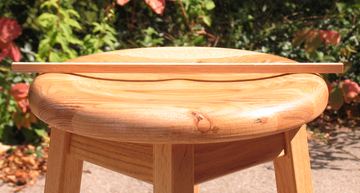
In the picture at left, I put a piece of wood on the seat
so that its shadow makes the seat profile clearly visible.
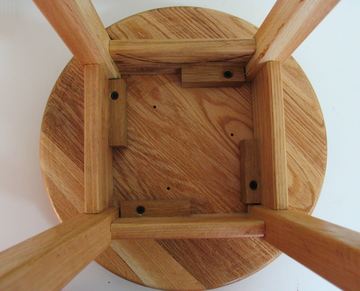 To mount the seat, I glued a some blocks of wood into the corners to put screws in. Pocket holes
would do the trick too, but I think gluing blocks of wood to the inside is a much better solution.
To mount the seat, I glued a some blocks of wood into the corners to put screws in. Pocket holes
would do the trick too, but I think gluing blocks of wood to the inside is a much better solution.
I like to mount the seat with the grain running at a 45 degree angle. With the wood much weaker perpendicular to the grain, this gives the stool a maximum width of support in that direction.
You can also see three small holes in the stool seat from where I had mounted it on the lathe's face-plate.
If you'd like to build some stools like that yourself, here's the dimensions of the ones I built:
-
Seat: 35 cm diameter, 35mm tick.
Legs: 32mm x 32mm x 62 cm long
Width: 32.5 cm apart on bottom, 20.5 cm on top (outside to outside edge of legs)
Top rungs: 60 mm wide, 15 mm thick
Bottom rungs: 38 mm wide, 15 mm thick, 42 from top of A-frame.
See also:
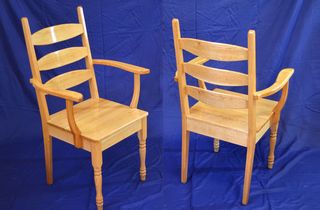 Building kitchen chairs
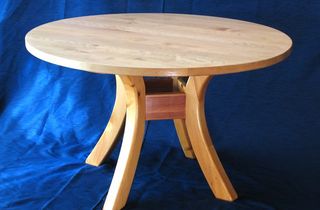 Round dining table
 More on Mortise and
tenon joints
 Building a 3-legged stool using the pantorouter
John Burros's YouTube video on building a stool similar to this one.
To my Woodworking website,
or the Woodwork projects page.
![]()