Making a wooden scimitar sword (or Alladin style sword)
I first built this wooden pirate sword in 2009, before I made build videos of my projects. But swords and such seems to be a very popular topic these days, so I built it again just to make video of it.
The article below is from my original build from 2009. The method of making it is was mostly the same this time, though I was much more confident with the curved cove cutting. I also tilted the blade for the cove cuts, which made it work better.
A YouTube commenter said it was more of an "Alladin" sword. Looking that up, it does indeed look a lot like one of those!
 Halloween is always an awkward time for me because I'm not into costumes.
I had this crazy idea of going to a party as a "lumberjack", seeing that I already
have so many accessories to go with that. But the woman putting on the party
immediately said "I hope you aren't thinking of bringing your chainsaw". Indeed,
that had occurred to me, but I also figured that a gas powered chainsaw, even
if I didn't start it, might be a bit much!
Halloween is always an awkward time for me because I'm not into costumes.
I had this crazy idea of going to a party as a "lumberjack", seeing that I already
have so many accessories to go with that. But the woman putting on the party
immediately said "I hope you aren't thinking of bringing your chainsaw". Indeed,
that had occurred to me, but I also figured that a gas powered chainsaw, even
if I didn't start it, might be a bit much!
But it had me thinking of Halloween and woodworking. I had previously made a straight sword out of wood for an amateur play, and everybody thought that was just so cool. So for an extra challenge, I thought I'd try to make a curved pirate sword.
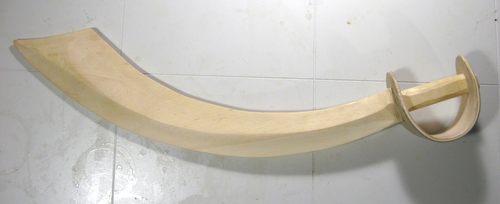
Of course, you can buy this sort of thing cheaply, but these things are small, flat and made of plastic. So to distinguish mine from these, I made mine much longer and with a nice profile.
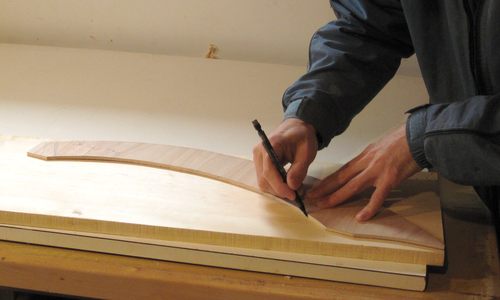 I sketched the shape for the sword blade on a piece of plywood, going over
the lines a few times until I was happy with the shape.
I sketched the shape for the sword blade on a piece of plywood, going over
the lines a few times until I was happy with the shape.
I lined it up so that the part nearest the handle would be
more aligned with the grain. That's where the blade is narrowest but also
likely to get the most stress from being waved around.
Carving the sword blade
 The key to making a sword that looks good is to give it a non-flat profile.
Way back when swords were forged by blacksmiths, they had more of a diamond shaped
cross-section. It's that sort of profile that I was aiming for.
The key to making a sword that looks good is to give it a non-flat profile.
Way back when swords were forged by blacksmiths, they had more of a diamond shaped
cross-section. It's that sort of profile that I was aiming for.
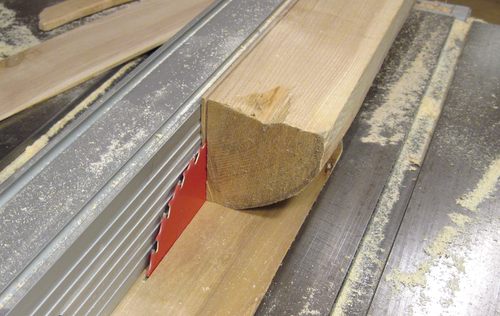
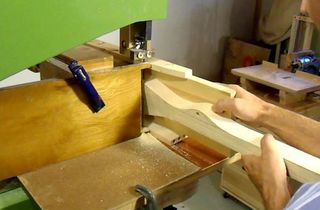
Because the sword is curved, I couldn't just do a regular rip cut to cut a bevel on the sides. Instead, I used more of a cove cutting technique. I passed the sword sideways over the blade, each time raising the blade by about a millimeter. I attached a stop, which is held into the T-slot to help guide the sword and keep it from getting pulled into the saw blade. I cut it on the back side of the saw blade, which pulled the blade against my stop. In retrospect, a safer thing would have been to pass the sword on the front side of the saw blade, which would have pushed the sword away from the blade.
I didn't stand in front of my saw while I was doing this, and I kept my
fingers far away from the blade. I really wasn't sure if this technique would work
or end in disaster when I started. It was more of an experiment that turned out to work!
Because the sword is wider near the tip, I varied the angle at which I passed it over
the blade as I moved it along, so that the blade cut more perpendicular to the edge
for a wider cut near the tip, and about 45 degrees for a narrower cove cut near the hilt.
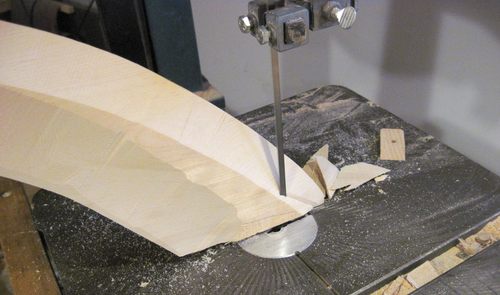 Having cut the edges of the blade on the table saw, I then beveled the tip
on the band saw.
Having cut the edges of the blade on the table saw, I then beveled the tip
on the band saw.
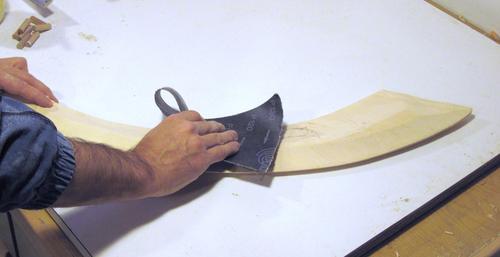 I did a lot of sanding to get the blade smooth after cutting it. Cove cutting
doesn't leave a smooth surface, and with me varying the angle and all it was
even rougher. There were a few spots where I had to trim it with a chisel
to fix it up.
I did a lot of sanding to get the blade smooth after cutting it. Cove cutting
doesn't leave a smooth surface, and with me varying the angle and all it was
even rougher. There were a few spots where I had to trim it with a chisel
to fix it up.
I really couldn't figure out a way to power sand the shape, so it was all hand sanding.
I wanted to maintain the slight concave shape that my cove cut produced, and any
sort of sanding drum would have flattened that out.
 I drilled a small hole in the handle to screw on a drawer knob to act as a "pommel".
Although, with the hand guard I put on the sword, the pommel really had no plausible
function other than decoration.
I drilled a small hole in the handle to screw on a drawer knob to act as a "pommel".
Although, with the hand guard I put on the sword, the pommel really had no plausible
function other than decoration.
I used my new horizontal boring machine
to do this. A hand drill would have sufficed, but I like to use my toys!
Making the steam bent hand-guard
 I needed a curved piece of wood to make the hand guard. I made this using
a bent lamination. I started by cutting 1.5 mm thick slices off a block of
ash that I reclaimed from firewood
I needed a curved piece of wood to make the hand guard. I made this using
a bent lamination. I started by cutting 1.5 mm thick slices off a block of
ash that I reclaimed from firewood
I like to cut the strips with a really thin 7 1/2" blade and cut in from both sides. I waste less wood that way, and the cutting goes a bit faster too. It's also a bit less dangerous, the piece I'm cutting off doesn't get fully wedged behind the saw blade.
A zero clearance insert is essential for
this kind of cut, or the cut off piece always ends up getting sucked into the saw.
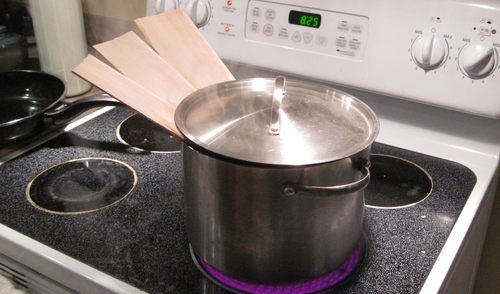 Heating up wood makes it bend easier. So does moisture. That's what steam
bending is about.. I'm not really set up for steam bending, so I just put a bit
of water in a large stock pot, and stuck the pieces in two thirds of the way to start.
Heating up wood makes it bend easier. So does moisture. That's what steam
bending is about.. I'm not really set up for steam bending, so I just put a bit
of water in a large stock pot, and stuck the pieces in two thirds of the way to start.
 Once the end softened a bit, I was able to bend them and get them fully into the pot
for a bit more steaming.
Once the end softened a bit, I was able to bend them and get them fully into the pot
for a bit more steaming.
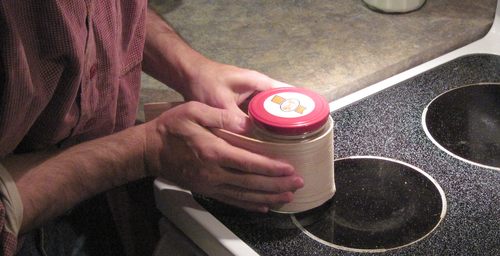 To get the initial bend, I wrapped the pieces around a jar.
It helps to bend them around something to avoid accidentally kinking the wood.
To get the initial bend, I wrapped the pieces around a jar.
It helps to bend them around something to avoid accidentally kinking the wood.
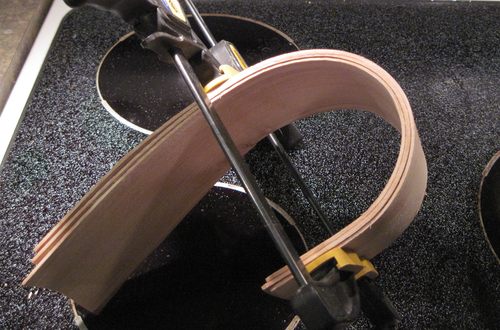 Once I had my three pieces bent, I put a clamp around them, and let them cool
and dry.
Once I had my three pieces bent, I put a clamp around them, and let them cool
and dry.
I didn't use any sort of bending form. Whatever shape my hand guard
would end up with didn't matter so much. With just one clamp around it, it looked like
a pretty good shape already.
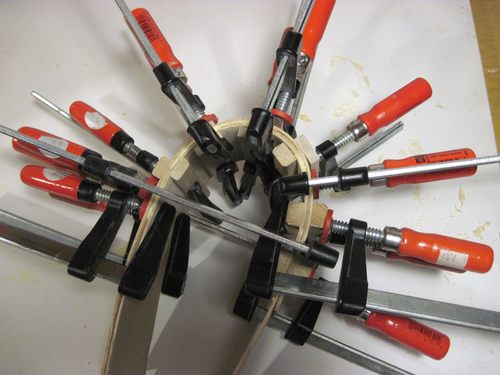 After letting it dry overnight, I spread glue all over the laminations and
then used lots and lots of clamps to make sure the laminations made
good contact as I glued it.
After letting it dry overnight, I spread glue all over the laminations and
then used lots and lots of clamps to make sure the laminations made
good contact as I glued it.
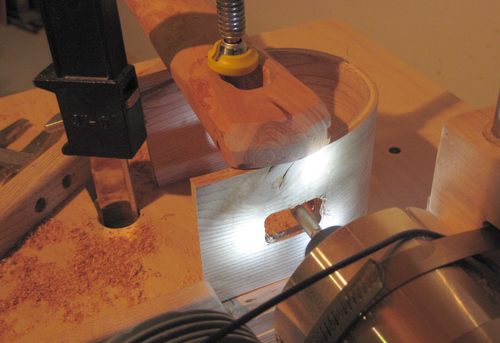 I used my slot mortiser
to cut a rectangular hole for the tang of the sword. I cut a series
of slots side by side to rough out the rectangle, then trimmed the rest
square with a carving knife.
I used my slot mortiser
to cut a rectangular hole for the tang of the sword. I cut a series
of slots side by side to rough out the rectangle, then trimmed the rest
square with a carving knife.
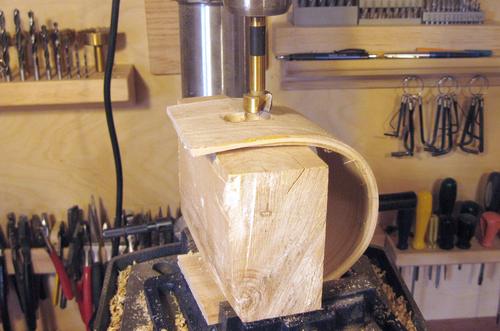 Because I wanted to round the edges of my handle, I figured it would be best if
the bottom hole of the guard was just the shape of my handle. So I drilled a pair
of overlapping 3/4" holes in the guard on my drill press and then carved that out
to an oblong shape.
Because I wanted to round the edges of my handle, I figured it would be best if
the bottom hole of the guard was just the shape of my handle. So I drilled a pair
of overlapping 3/4" holes in the guard on my drill press and then carved that out
to an oblong shape.
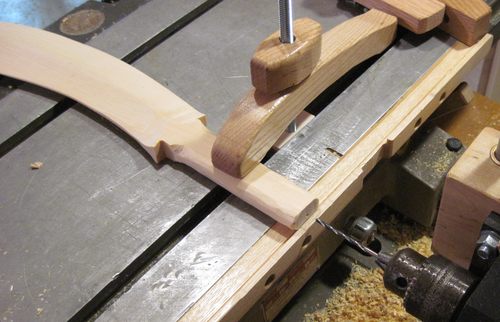
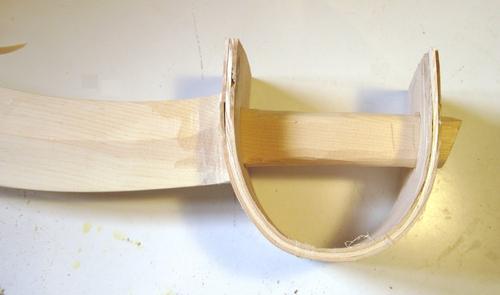 Fitting the guard onto the handle. I hadn't yet trimmed the guard to its final shape
when I took this photo, nor had I cut the end of the handle square for the pommel.
Fitting the guard onto the handle. I hadn't yet trimmed the guard to its final shape
when I took this photo, nor had I cut the end of the handle square for the pommel.
 Next I rounded the edges of the hand guard, first with a bandsaw, then by sanding it.
In the process, I cut away all the messy
part of my lamination. Its now hard to tell that the guard is made of layers
rather than one solid piece of wood.
Next I rounded the edges of the hand guard, first with a bandsaw, then by sanding it.
In the process, I cut away all the messy
part of my lamination. Its now hard to tell that the guard is made of layers
rather than one solid piece of wood.
The pommel is just a wooden drawer knob that I had kicking around. It fit the purpose
just fine. I was too lazy to make one on the lathe for just a quickie project
like this.
 The sword ready for a paint job.
I took the pommel off again before painting the sword. I kind of liked the colour
and finish on it already.
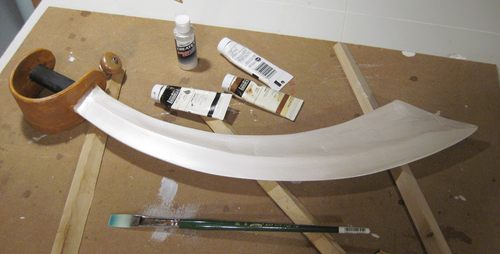 I bought this cheap "silver paint" to paint the blade with. I should have opted for more
expensive silver paint, because the stuff I bought ended up looking more white than
metallic.
I bought this cheap "silver paint" to paint the blade with. I should have opted for more
expensive silver paint, because the stuff I bought ended up looking more white than
metallic.
What probably didn't help is that I started with a base coat of white, to help the "silver" paint look brighter.
Oh well, with the blade glossy and bright it's at least a bit more eye catching.
It was tempting to add blood splatters onto the blade, but with it having come out
so nicely curved and smooth, I didn't want to detract from that aspect.
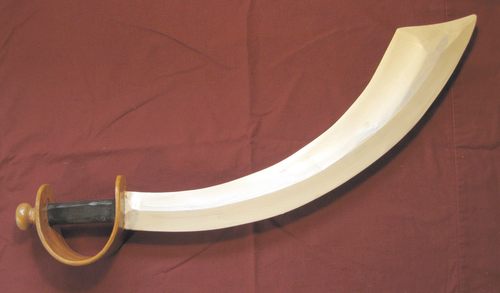 And the finished paint job. I added a light blue streak near the ridge on
the blade to emphasize that a bit more.
And the finished paint job. I added a light blue streak near the ridge on
the blade to emphasize that a bit more.
All ready for Halloween! Yarr!!!
Now what to do about the rest of the costume?
 Plastic cap shooter (2019)
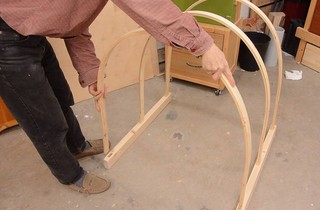 Bent lamination "playhouse" structure
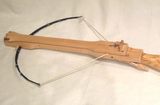 Home made marble shooting crossbow (1986)
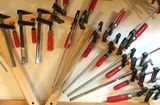 Bent lainations for a weaving frame
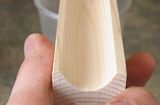
 Carving canoe paddles on the bandsaw.
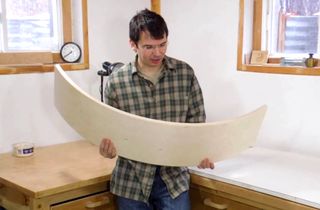 Curvy board A bent lamination experiment (2012)
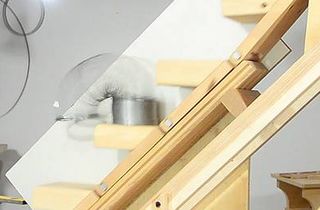 The slinky machine (2015)
 Bending chair back rungs in a kitchen stove
 Carving a chair seat on the table saw (2020, video)
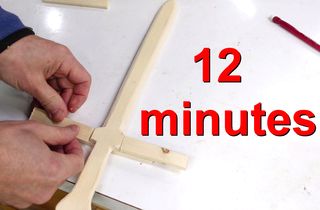 Simple wooden kids sword (2023)
More toy projects on woodgears.ca.