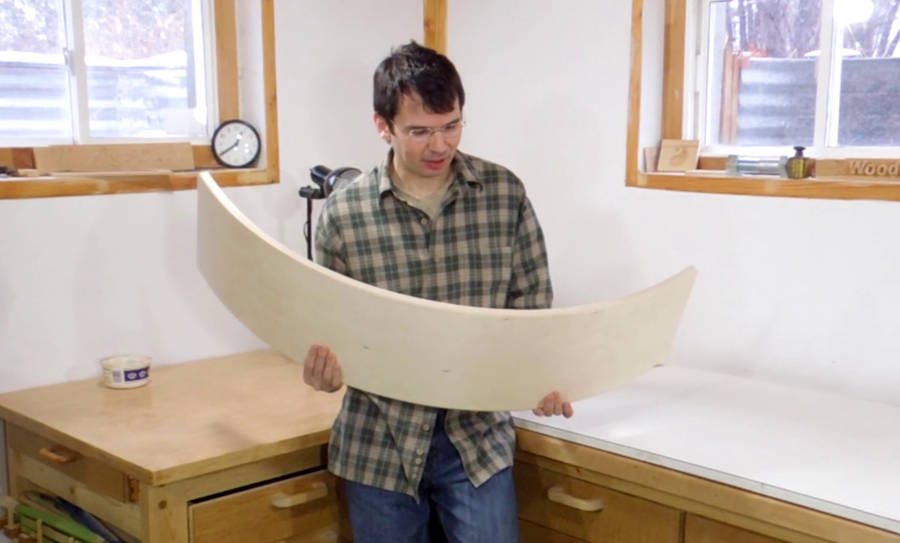
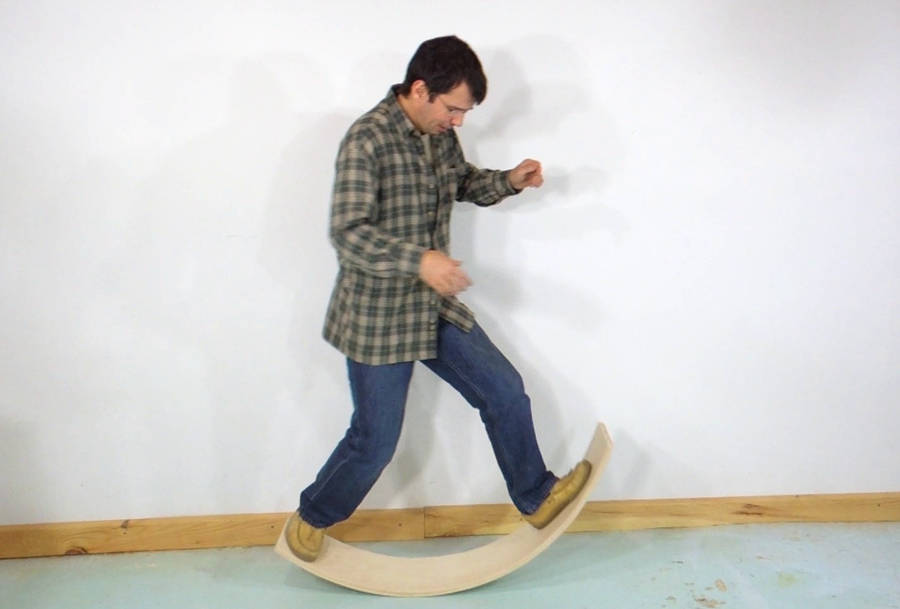
 My sister saw this
curvy board for sale on Etsy, for $120. She wanted to know if it was hard to make
one of these. That is to say, she thought it would be a good gift for her kids if I could
figure out how to make one.
My sister saw this
curvy board for sale on Etsy, for $120. She wanted to know if it was hard to make
one of these. That is to say, she thought it would be a good gift for her kids if I could
figure out how to make one.
My sister saw this
curvy board for sale on Etsy, for $120. She wanted to know if it was hard to make
one of these. That is to say, she thought it would be a good gift for her kids if I could
figure out how to make one.
That got me thinking. My first thought was to maybe make it segmented, with the individual pieces finger joined with my screw advance box joint jig. But then I figured a bent lamination from thin pieces of plywood would be less work.
A big part of a project like that is building the bending form, but when making just one of these, the bending form would involve more work and material than the project itself. So my challenge was to try to make one without making a bending form. I had experimented with semi-free-form bending before with this weaving frame and my pirate sword, but never at this scale.
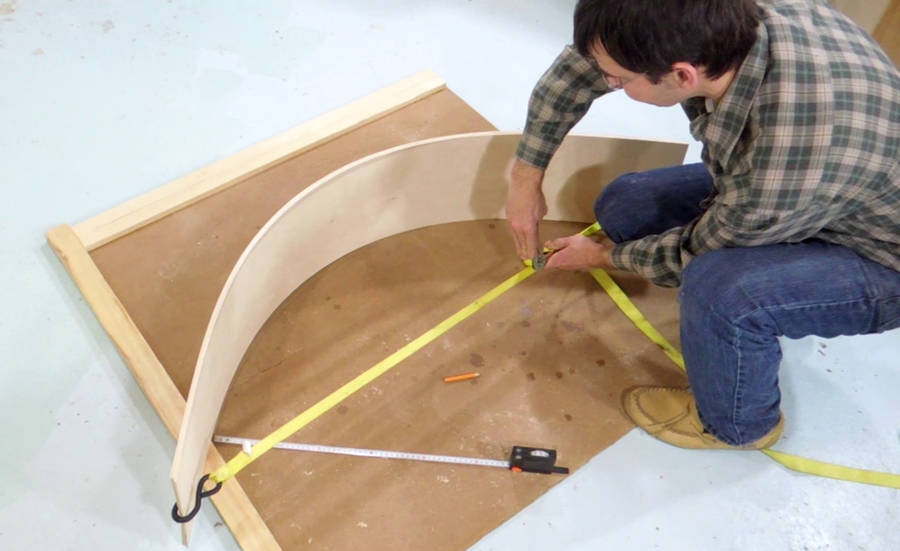
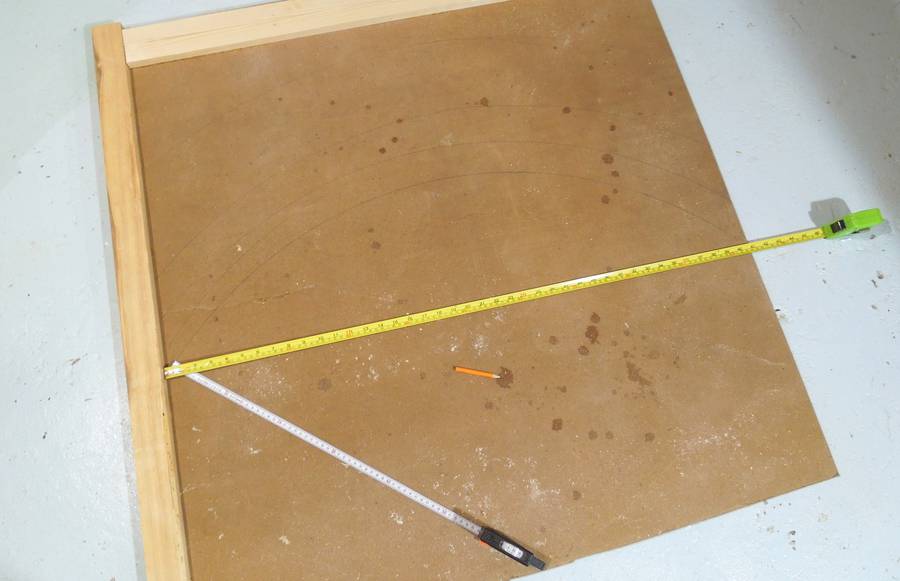 The first step was to work out the shape. I used one of my tape measures as a compass to
draw lines of different radii to figure out what sort of curve I wanted (the pencil lines
are a bit hard to see in the photo - click photo to enlarge).
This project was very much experimental, so no CAD here!
The first step was to work out the shape. I used one of my tape measures as a compass to
draw lines of different radii to figure out what sort of curve I wanted (the pencil lines
are a bit hard to see in the photo - click photo to enlarge).
This project was very much experimental, so no CAD here!
 For material, I bought a 5'x5' (1.5m x 1.5m) sheet of 1/8" (3 mm) Baltic birch plywood.
This cost me $28 with tax - a tolerable price for an experiment.
For material, I bought a 5'x5' (1.5m x 1.5m) sheet of 1/8" (3 mm) Baltic birch plywood.
This cost me $28 with tax - a tolerable price for an experiment.
I had it cut in half at the store so I could get it in my car. I then cut each half into three strips 25 cm wide.
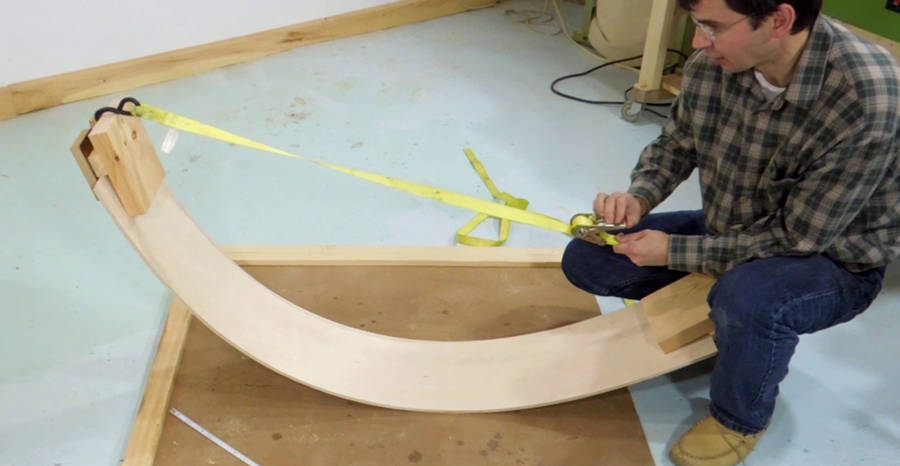
 My first experiment with bending the curve. I'm using a cargo strap, hooked to
either end, to see what kind of bend I'm getting.
My first experiment with bending the curve. I'm using a cargo strap, hooked to
either end, to see what kind of bend I'm getting.
The cargo strap doesn't apply any leverage at the ends, so the ends of the boards, with much less bending moment on them, are relatively straight. I didn't find that curve very satisfying.
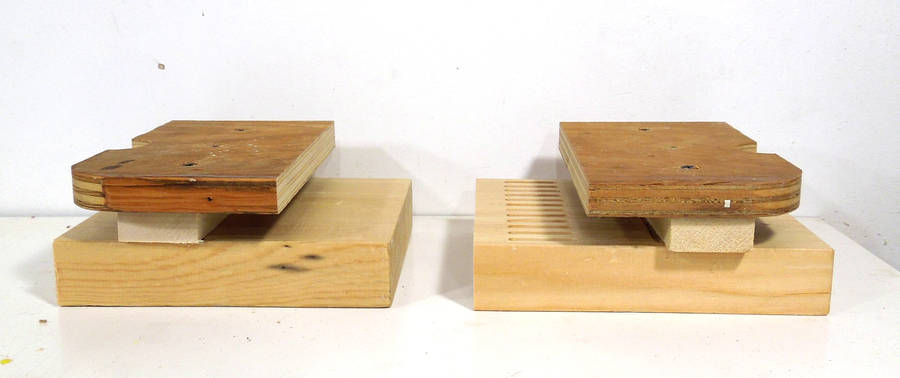 So I made these blocks to hook onto the ends of the board to extend it.
That way, I'd get more bending leverage all the way to the ends.
So I made these blocks to hook onto the ends of the board to extend it.
That way, I'd get more bending leverage all the way to the ends.
 Testing it out, with just three layers initially. This worked out quite well.
In fact, if I was trying it again, I'd make the blocks longer to get even more
leverage.
Testing it out, with just three layers initially. This worked out quite well.
In fact, if I was trying it again, I'd make the blocks longer to get even more
leverage.
 The next step was to try gluing it up.
I decided to just glue up three layers at first, and if that worked out,
add the remaining layers.
The next step was to try gluing it up.
I decided to just glue up three layers at first, and if that worked out,
add the remaining layers.
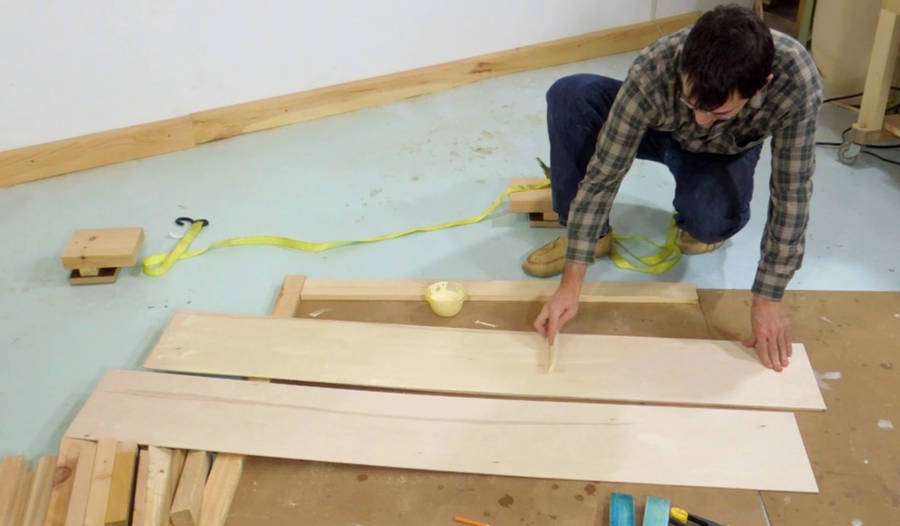
I'm using a rubber spatula to spread the glue. This worked out ok enough, but if I was doing it again, I'd probably use a big rubber squeegee. Time is of the essence for a large glue-up like that, and a wide squeegee would be faster.
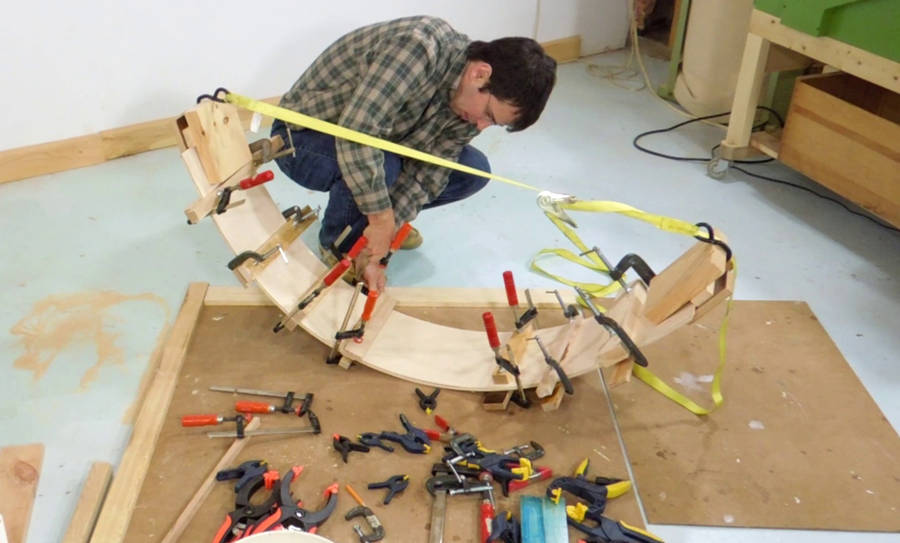 With the three layer lamination pulled into an arc, I'm applying lots of clamps.
This took far too long. If I was doing it again, I would have all my C-clamps already screwed to the right opening. Also, if I had clamping cauls that my clamps could somehow hook to, that would cut down on fiddling with them.
I'm not sure if the clamping cauls apply much pressure in the middle. Lightly curved clamping cauls would help a lot too.
Mind you, I'm even more skeptical of the typical two-sided bending forms that people make. If the bending form is rigid on both sides, there's no guarantee that it applies even pressure across the whole workpiece.
 I let the glue dry for 24 hours like that.
 The next day, I removed all the clamps and undid the strap. I had quite a bit of
spring-back. But with a bent lamination of just three layers, a considerable amount
of spring-back is to be expected.
The next day, I removed all the clamps and undid the strap. I had quite a bit of
spring-back. But with a bent lamination of just three layers, a considerable amount
of spring-back is to be expected.
 Still, the resulting form held its shape quite well. But being only 3/8" (9 mm)
thick, it was also quite flexible.
Still, the resulting form held its shape quite well. But being only 3/8" (9 mm)
thick, it was also quite flexible.
At any rate, I decided that this was successful enough to continue with the experiment.
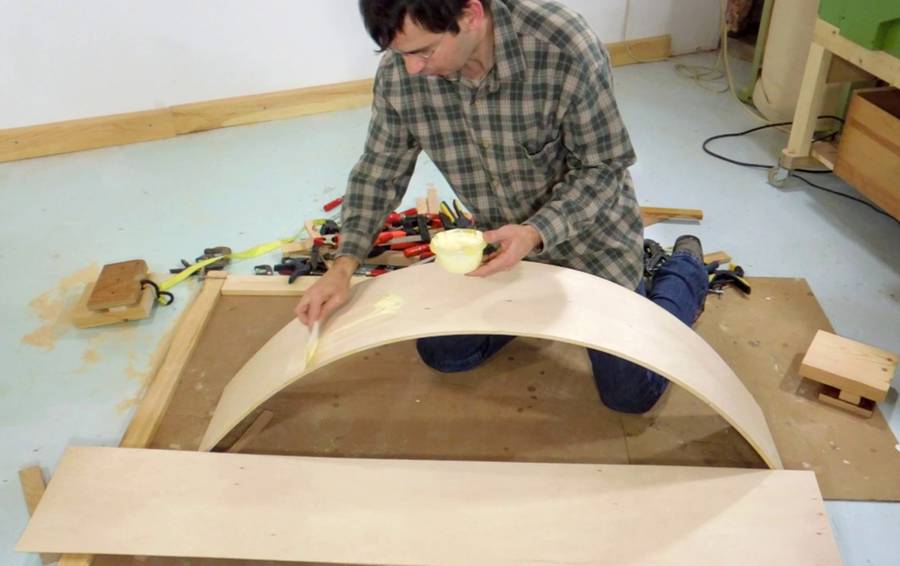 Applying glue again. Foolishly, I started by applying glue to the outside of the
already built shape.
By the time I finished applying glue to the other five surfaces,
that first surface already started to dry, so I had to add a second coat of glue.
Applying glue again. Foolishly, I started by applying glue to the outside of the
already built shape.
By the time I finished applying glue to the other five surfaces,
that first surface already started to dry, so I had to add a second coat of glue.
I hadn't really thought this through that much. For the first three layers, I only had four surfaces to apply glue to, but to add three layers meant applying glue to six surfaces. A faster method of applying glue, like a squeegee would certainly have helped! A bigger glue container would also have helped - I had to refill partway thru the glue-up.
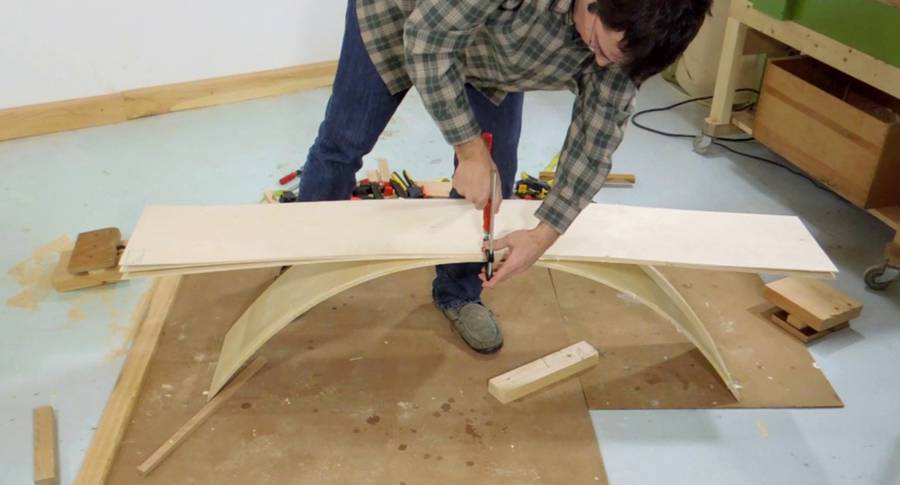 Before starting the glue-up, I had marked the centers of all the boards, so
to get proper alignment, I just lined up the centers first.
Before starting the glue-up, I had marked the centers of all the boards, so
to get proper alignment, I just lined up the centers first.
 After that, I pushed the layers down and clamped them on each side.
This straightened out the curve a bit more. But I figured this would actually help me in the end.
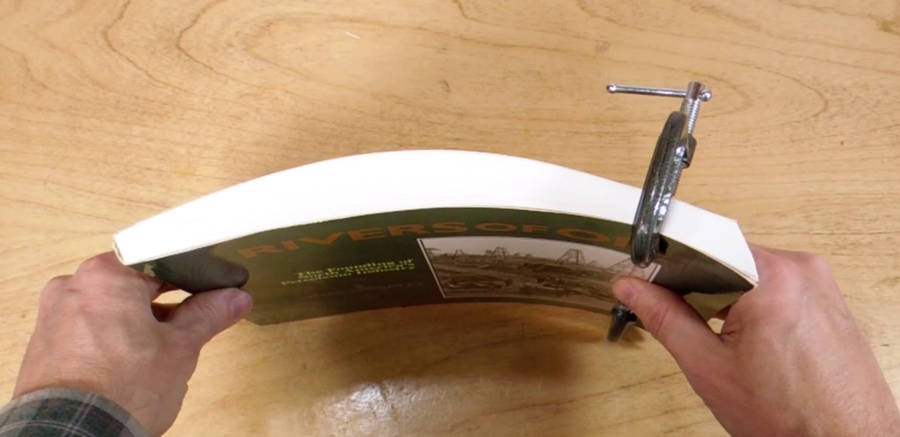 To illustrate, think of the pages of this book as a lamination.
With the pages rigidly tied to each other on either end...
To illustrate, think of the pages of this book as a lamination.
With the pages rigidly tied to each other on either end...
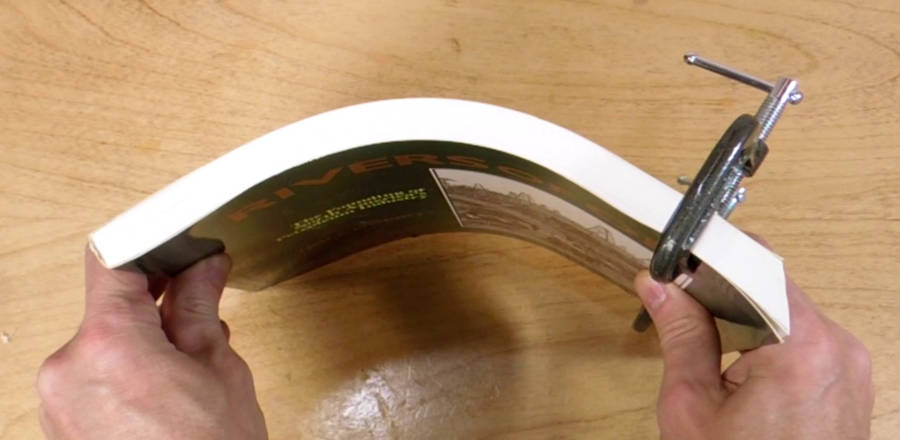 ... if I now increase the curvature, that actually presses the layers together.
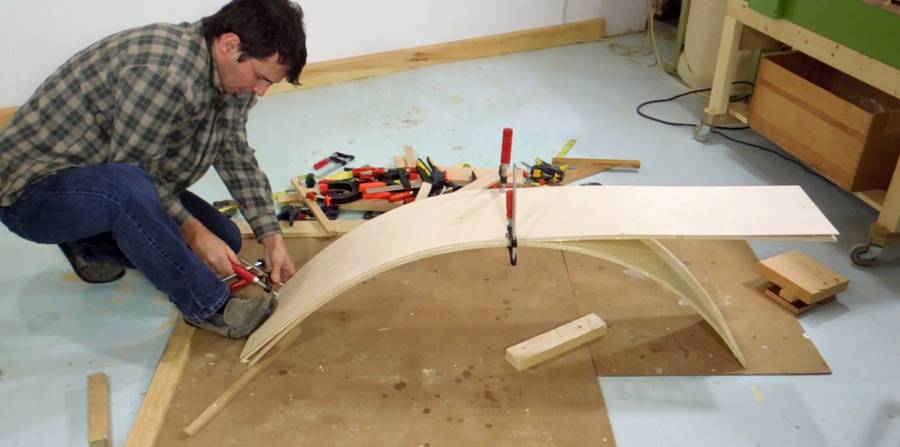
 So I clamped the parts on either end, and then pulled the ends together again
with my cargo strap, figuring this should pull the layers together everywhere.
So I clamped the parts on either end, and then pulled the ends together again
with my cargo strap, figuring this should pull the layers together everywhere.
Things were made more complicated by the fact that the sandwich was now too thick for my blocks to hook over the ends. So that involved more delays unscrewing the blocks and screwing them back together with a slight gap in them.
There are so many things I could do better if I was doing it again! Much learned!
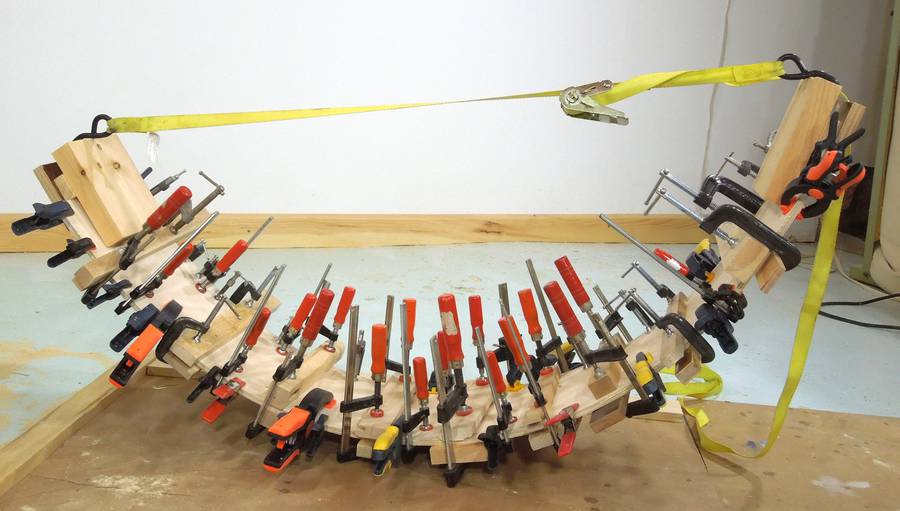
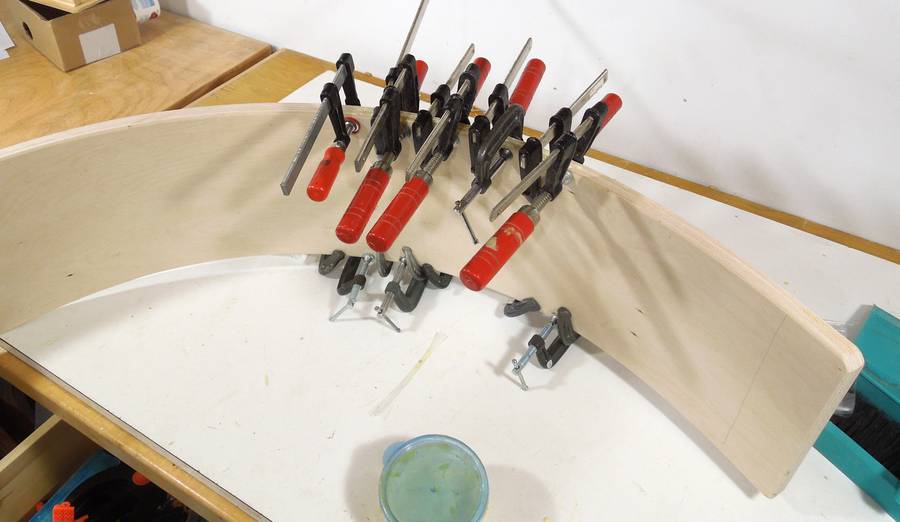
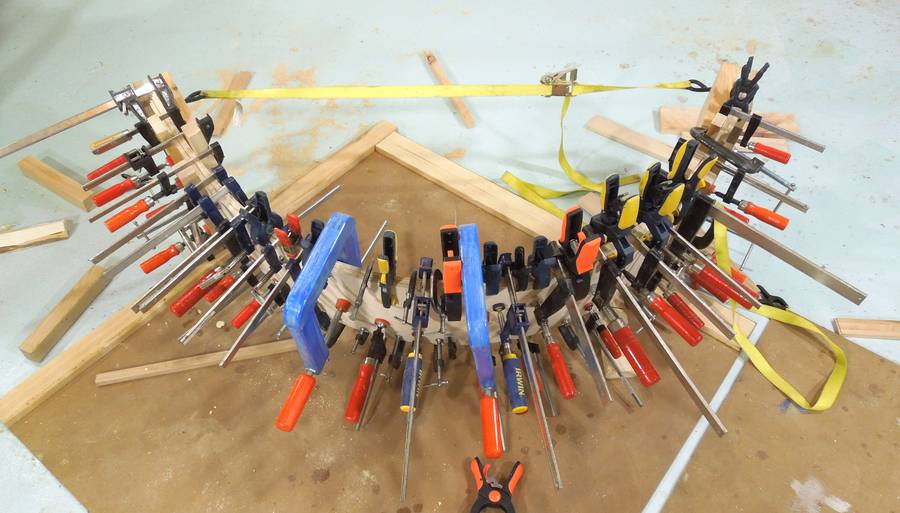 With some gaps still visible at the edges of the wood, it was time to apply clamps
again. Lots of clamps!
With some gaps still visible at the edges of the wood, it was time to apply clamps
again. Lots of clamps!
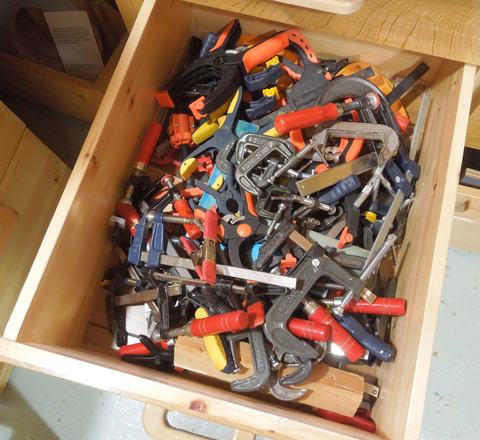
You may wonder - just how many clamps does this guy have? I have a lot,
enough to fill my clamp racks and a large drawer!
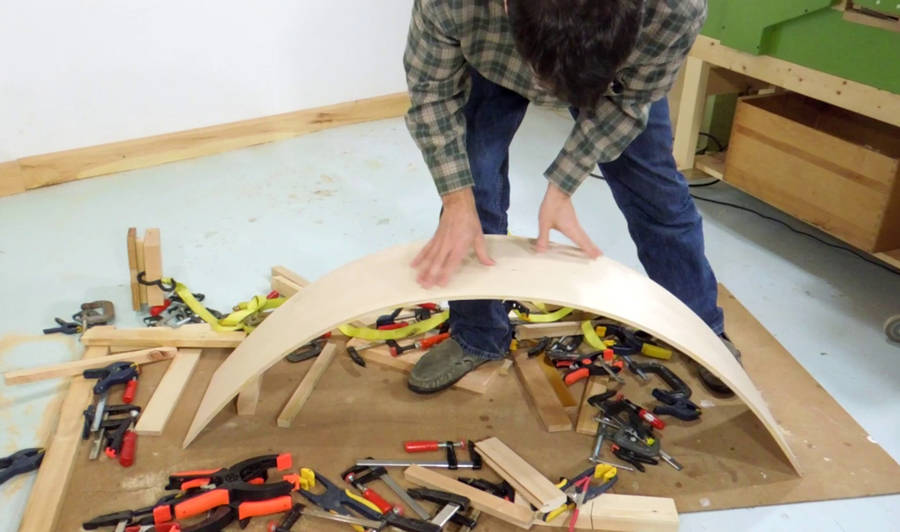
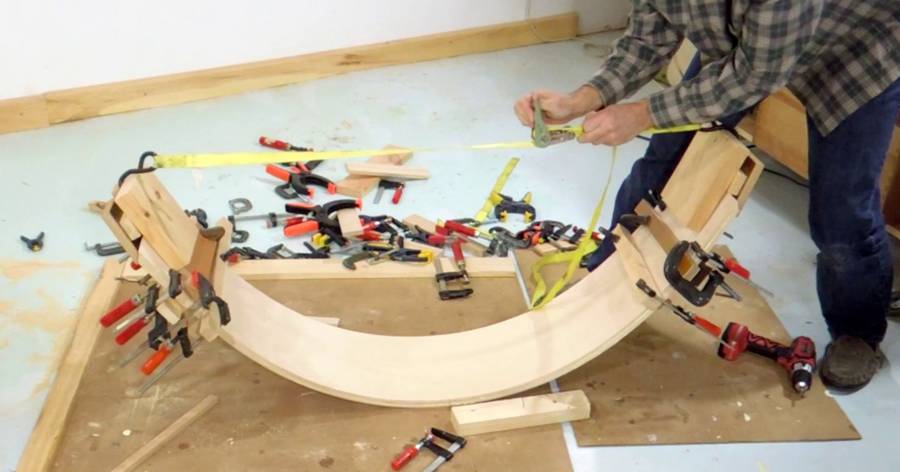
 The next day, when I took the clamps and the cargo strap off, I had hardly any
spring back.
The next day, when I took the clamps and the cargo strap off, I had hardly any
spring back.
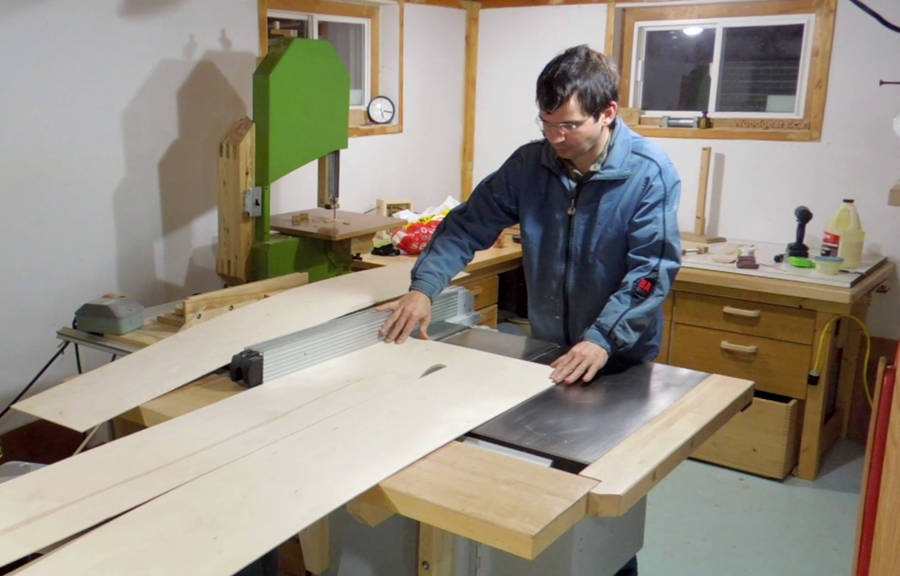
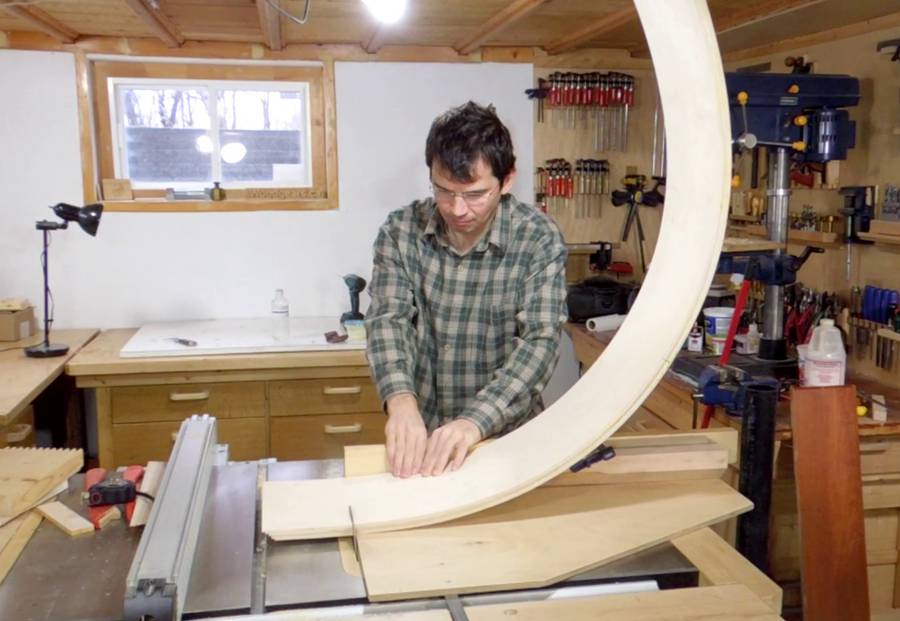
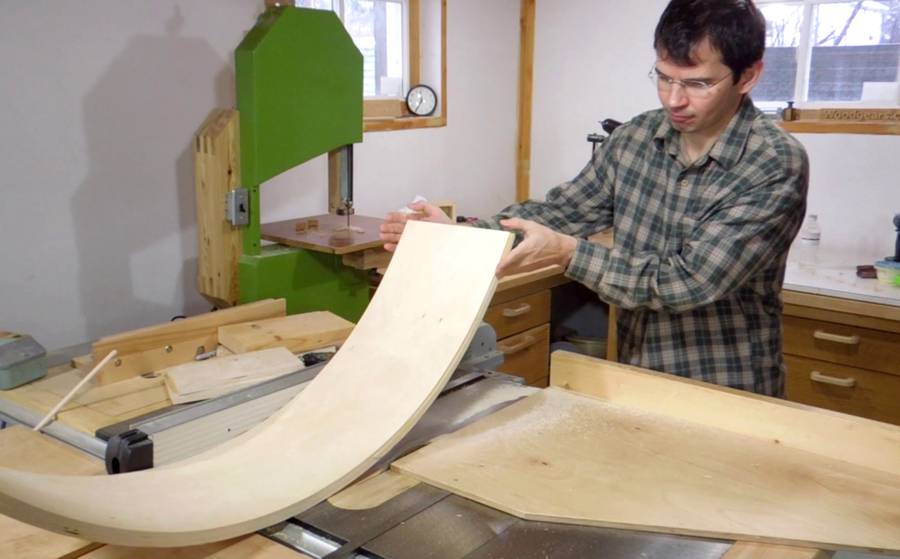
I cut the board to its final length. My laminates were 1.5 meters (60") long, but that's a bit unwieldy. The curvy board that you can buy is only 34" (86 cm) long. I left mine at about 1.2 meters long.
 Trimming the edges. My first thought was to do that on the jointer, a bit like
I did for my crokinole board frame
or the weaving frame, but
since I discovered that plywood damages jointer knives
I decided to trim it on the table saw instead.
Trimming the edges. My first thought was to do that on the jointer, a bit like
I did for my crokinole board frame
or the weaving frame, but
since I discovered that plywood damages jointer knives
I decided to trim it on the table saw instead.
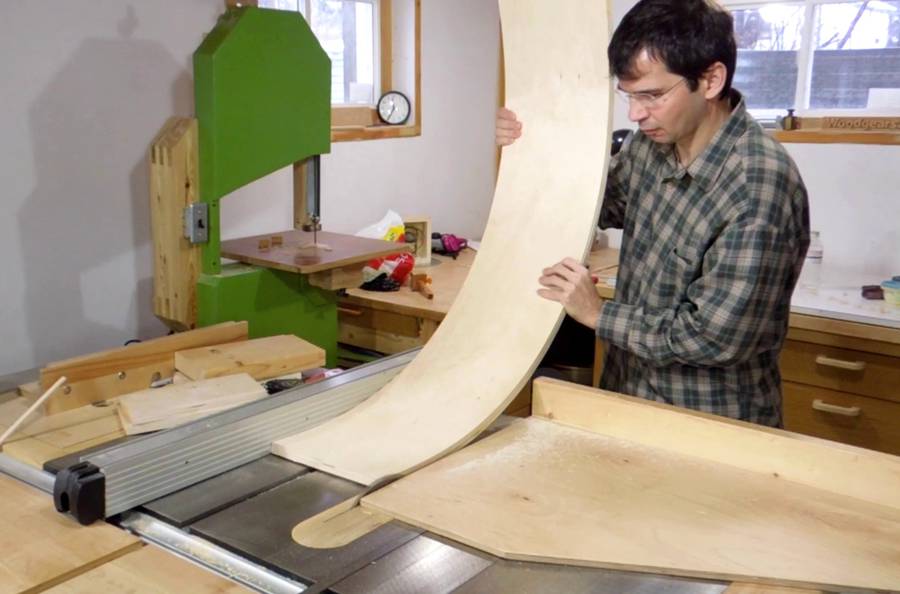
 It would be too difficult, and too unsafe to push the whole arc along the saw in one motion,
so once I got past the half-way point, I pushed it straight across past the blade...
It would be too difficult, and too unsafe to push the whole arc along the saw in one motion,
so once I got past the half-way point, I pushed it straight across past the blade...
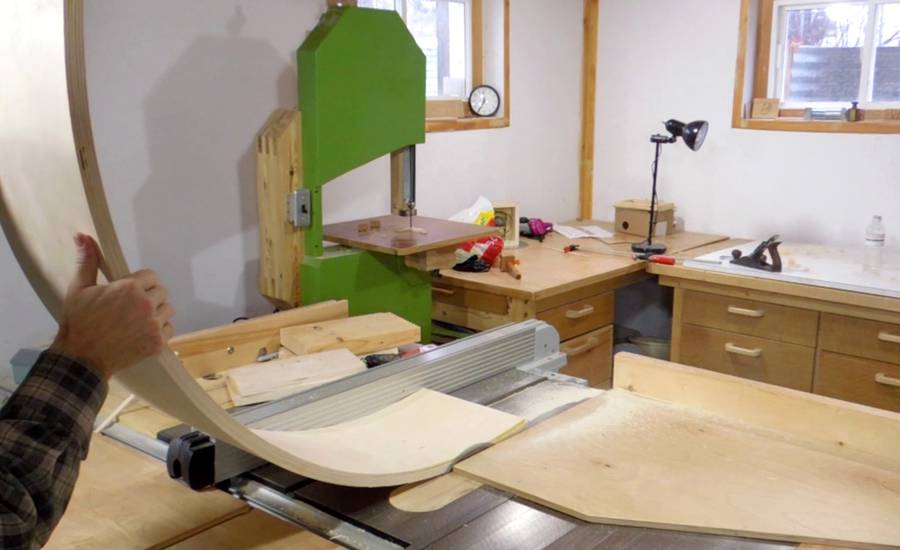 ... then walked around the saw, rocked the board towards me, backed it into the blade
again, and finished the cut.
... then walked around the saw, rocked the board towards me, backed it into the blade
again, and finished the cut.
I'm sure the safety trolls will have something to say about that: "What an idiot, that will cause kickback, guaranteed", but no such thing happened. The risk of kickback is actually much smaller with heavier workpieces, and with me on the outfeed side of the saw and holding the stock far from the blade, kickback would have mostly damaged the workpiece or my saw, but not me.
Note also that I left my crosscut sled on the left side. I figured if something did go wrong, it would just slam up against that. With me only trimming 2 mm off the board, it didn't get in the way.
 Next rounding the edges. I'm using my older
router lift, just because it's attached to my bigger saw so I have a bigger table
to work with.
Next rounding the edges. I'm using my older
router lift, just because it's attached to my bigger saw so I have a bigger table
to work with.
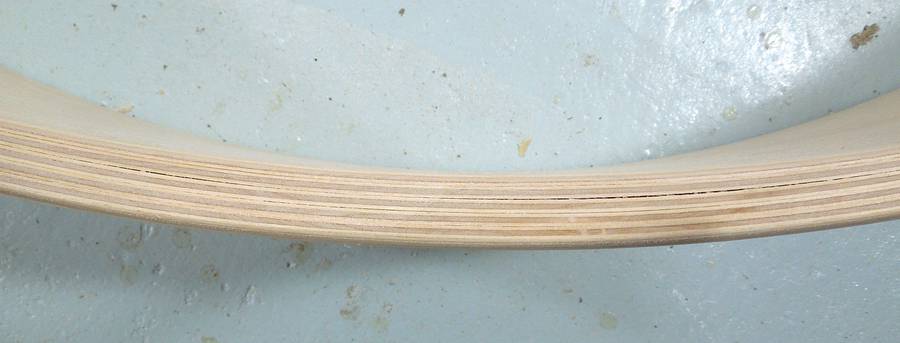 Unfortunately, there was some imperfect gluing of the laminations, as you can see
in this photo (click photo to enlarge). Aside from taking too long to apply
glue and clamp, and having my glue get too dry, I should have also applied
more glue. But even so, I used up about 300 milliters (10 oz) of glue.
Unfortunately, there was some imperfect gluing of the laminations, as you can see
in this photo (click photo to enlarge). Aside from taking too long to apply
glue and clamp, and having my glue get too dry, I should have also applied
more glue. But even so, I used up about 300 milliters (10 oz) of glue.
 So I decided to shoot the intro scene for my video before putting much stress
on the board. I would have been ok with it exploding into a million pieces. This
experiment was interesting enough even if it was a failure.
So I decided to shoot the intro scene for my video before putting much stress
on the board. I would have been ok with it exploding into a million pieces. This
experiment was interesting enough even if it was a failure.
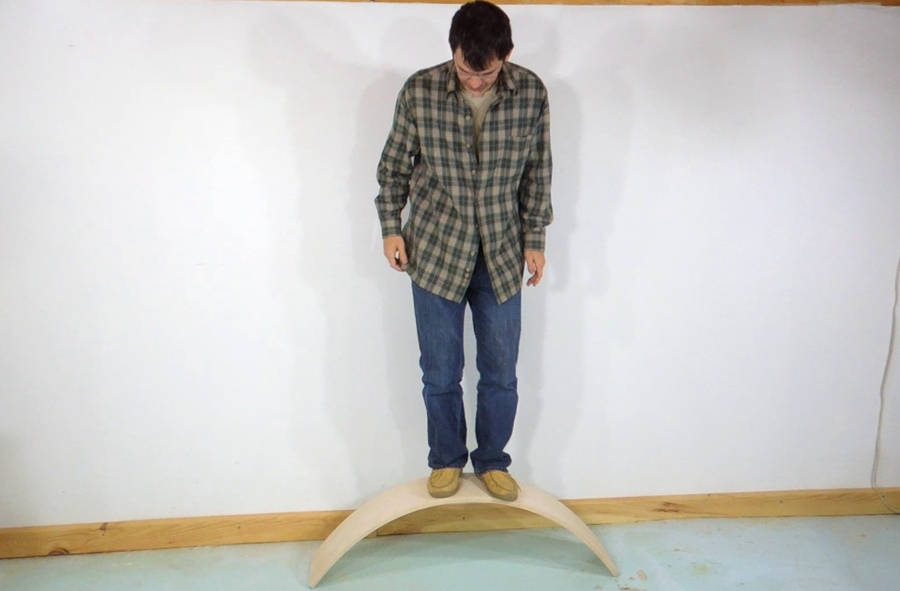
But surprisingly, standing on it, even bouncing up and down a bit, it held my weight!
 Testing it as a balancing board, rocking back and forth. I heard a pop while I was
doing that!
Testing it as a balancing board, rocking back and forth. I heard a pop while I was
doing that!
Trying to push the lamination straight is the worst thing you can do to it. If you look at the previous example with the book, if increasing curvature pushes the laminates together, trying to straighten the curve really pulls them apart!
 I was able to slip a shim about 5 cm into the biggest gap that opened up,
so I put lots of glue on the cracks and worked it in with a shim as best as
I could, then clamped the gap together.
I also shortened the board by about 10 cm after that so there would be less length to
get leverage on.
I was able to slip a shim about 5 cm into the biggest gap that opened up,
so I put lots of glue on the cracks and worked it in with a shim as best as
I could, then clamped the gap together.
I also shortened the board by about 10 cm after that so there would be less length to
get leverage on.
This has been an interesting experiment. The imperfections in my glue-up
would not be that critical if this was part of some furniture, but being a kid's toy
it's likely to get abused. I'm not sure if it will hold up. Fortunately, there is
no warranty!
 It would be fun to create a bending form to do one of these "properly". I think the best
way would be to have convex cylindrical mold, and then push the laminates onto the mold
by having some straps pulled very tightly around the curved mold. That would ensure
even pressure. And if I combined that with a better method of applying glue to the layers,
making a curvy board would be a snap!
It would be fun to create a bending form to do one of these "properly". I think the best
way would be to have convex cylindrical mold, and then push the laminates onto the mold
by having some straps pulled very tightly around the curved mold. That would ensure
even pressure. And if I combined that with a better method of applying glue to the layers,
making a curvy board would be a snap!
And just what does one use a curvy board for? Well, it's a teeter totter, a rocking cradle, a bridge, a ramp for jumping toy cars, a roof beam for a fort made of couch cushions, and whatever comes to mind.
But in a child's world dominated by TV, video games and action figures, a kid might not know what to do with it. Fortunately, my sister is a bit more selective about what to entertain her kids with.
What prompted this one is my neighbour getting rid of some junk, including some curved pieces of wood from a round table that he'd been saving. I figured a good use of these would be to make another curby board. They were about the right size and curvature for this, so a good use of wood that otherwise would only have been useful as firewood.
 The Hui game
 Bent lamination "playhouse" structure
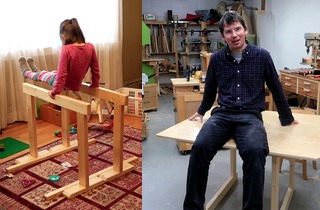 Sawhorses, barre, or table legs?
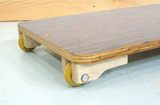 Wheelie board
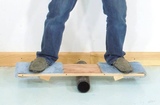 Balancing board
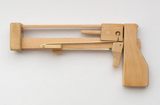 Jenga pistol
 Lego domino row
 Crokinole board
 Large wooden dice
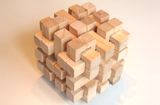 Making wooden
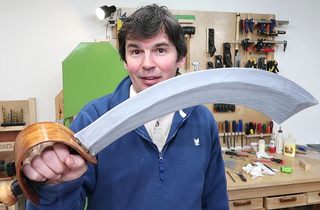 Pirate sword
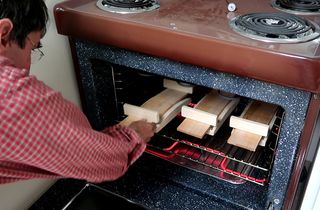 Bending chair back rungs in a kitchen stove