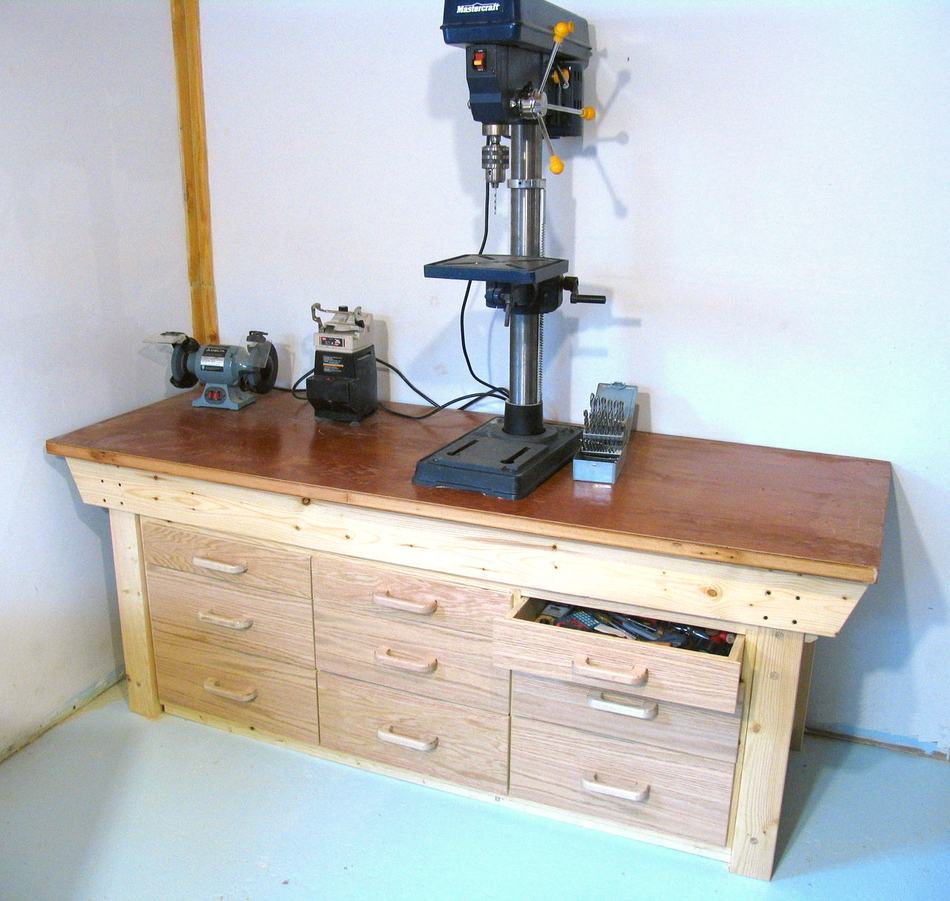
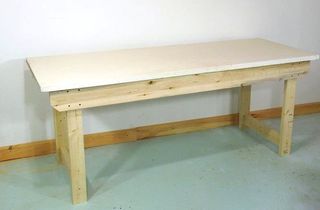
After I built my workbench, I still needed a place to put the tools.
I actually deliberately left the workbench all open on the bottom in anticipation of building some
sort of drawer unit later.
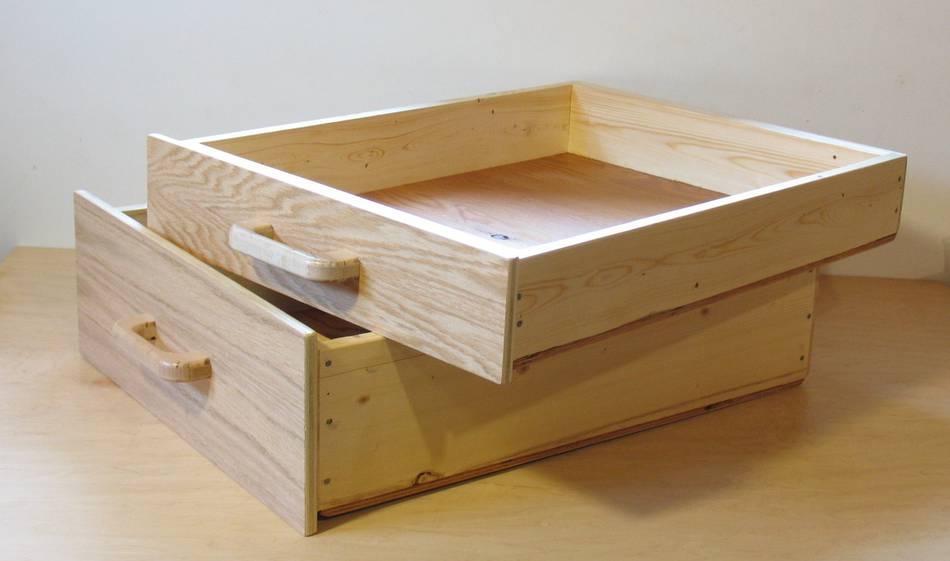 The drawers I made are simple wooden drawers, sliding wood on wooden runners.
Metal drawer slides with ball bearings are nice, but add up in terms of cost, and take up more space.
The drawers I made are simple wooden drawers, sliding wood on wooden runners.
Metal drawer slides with ball bearings are nice, but add up in terms of cost, and take up more space.
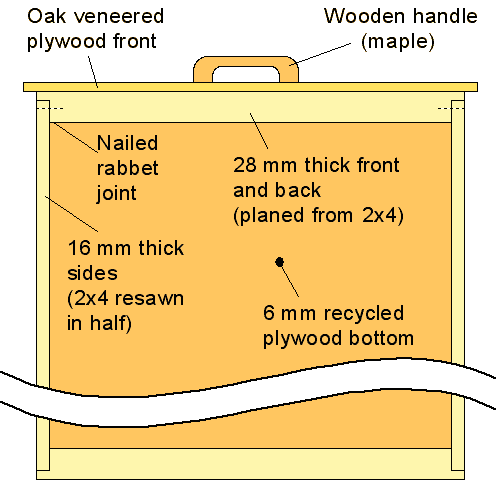 The drawers are cut out of 2x4, and 2x8 lumber. For the sides of the drawers,I resawed the 2x4's and 2x8's
in half. I resawed the wood on the table saw. But with a lot of tension in the wood, the resulting wood
still needed a bit of planing to flatten it, so I was left with just 16 mm of wood for the drawer side.
Still sufficient.
The drawers are cut out of 2x4, and 2x8 lumber. For the sides of the drawers,I resawed the 2x4's and 2x8's
in half. I resawed the wood on the table saw. But with a lot of tension in the wood, the resulting wood
still needed a bit of planing to flatten it, so I was left with just 16 mm of wood for the drawer side.
Still sufficient.
To give the rabbet joints in the corners a little more contact area, I made the fronts and backs of the drawers thicker. I planed these down from the 2x4 and 2x8 to get a reasonable thickness of 28 mm.
 Even with a reduced thickness, the rabbet was too wide to cut in one pass with my dado blade.
So I ended up just cutting it with a regular blade in two passes from two directions.
I used a table saw sled, as I usually do to accomplish this.
Even with a reduced thickness, the rabbet was too wide to cut in one pass with my dado blade.
So I ended up just cutting it with a regular blade in two passes from two directions.
I used a table saw sled, as I usually do to accomplish this.
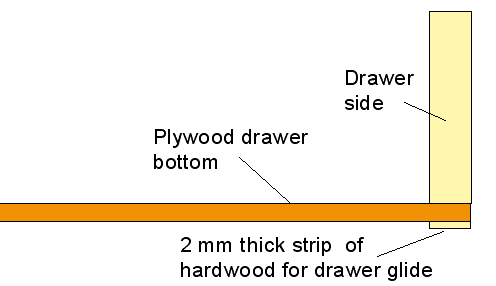 With wooden drawers, there's all kinds of ways of making the drawer slides, such as having a grove in the
sides of the drawers. But with the sides of my drawers only 16 mm thick, cutting a grove into them
would not have been a good idea, so decided to just have the drawers slide on their bottom edges.
With wooden drawers, there's all kinds of ways of making the drawer slides, such as having a grove in the
sides of the drawers. But with the sides of my drawers only 16 mm thick, cutting a grove into them
would not have been a good idea, so decided to just have the drawers slide on their bottom edges.
Sliding hardwood on hardwood is best for drawer slides. Except I hadn't made these drawers out of hardwood. So I glued strips of hardwood to the edges of the drawers, on which they would slide in the cabinet.
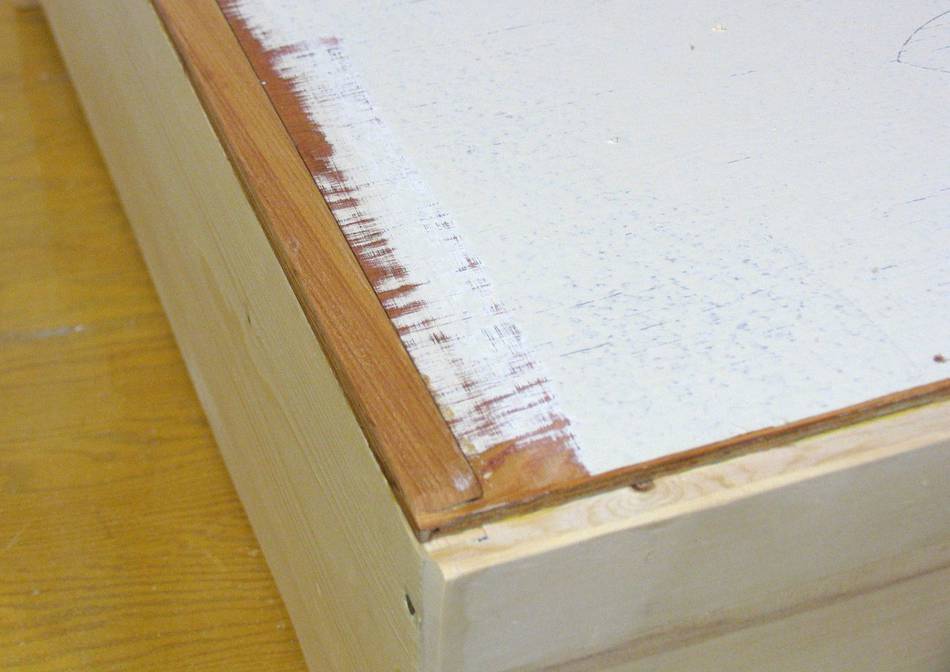 For the drawer bottoms, I actually ended up using some recycled plywood, which was painted on one side.
I had to sand the paint off the edges where I glued the strip of hardwood on.
For the drawer bottoms, I actually ended up using some recycled plywood, which was painted on one side.
I had to sand the paint off the edges where I glued the strip of hardwood on.
Also note that I used the plywood with the grain going side to side. Seeing that I'm not sliding the drawer on the actual plywood, this didn't matter so much.
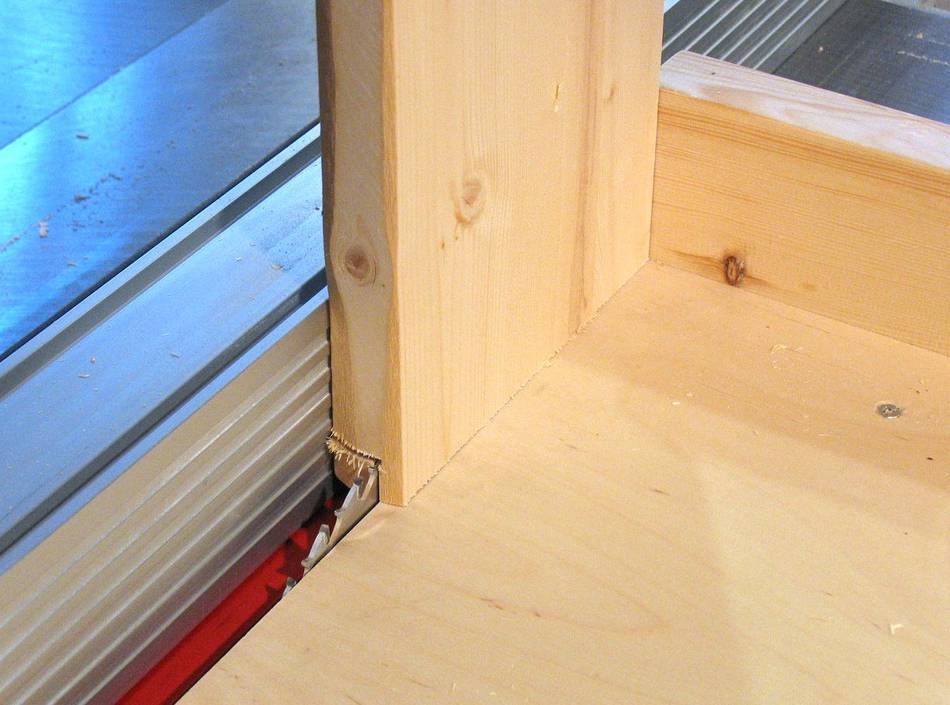
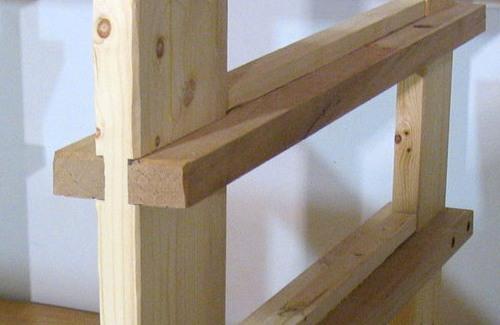
 The 'cabinet' isn't really a cabinet, because I didn't bother actually enclosing it on any
of its sides. It consists of two frames made out of spruce.
The 'cabinet' isn't really a cabinet, because I didn't bother actually enclosing it on any
of its sides. It consists of two frames made out of spruce.
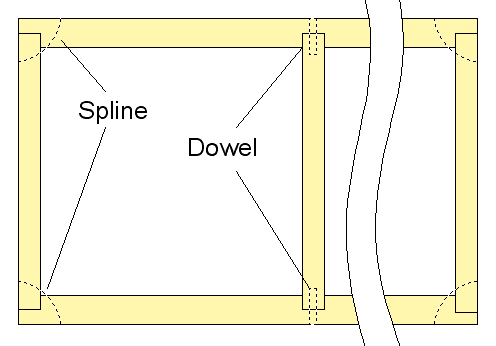 The uprights are dadoed into the
horizontals, with splines dowels connecting the T joints,and splines reinforcing the corners.
The splines are 1/4" wide slots cut with a dado blade, with a piece of wood inserted to fill
the space, with the grain running at 45 degrees.
The uprights are dadoed into the
horizontals, with splines dowels connecting the T joints,and splines reinforcing the corners.
The splines are 1/4" wide slots cut with a dado blade, with a piece of wood inserted to fill
the space, with the grain running at 45 degrees.
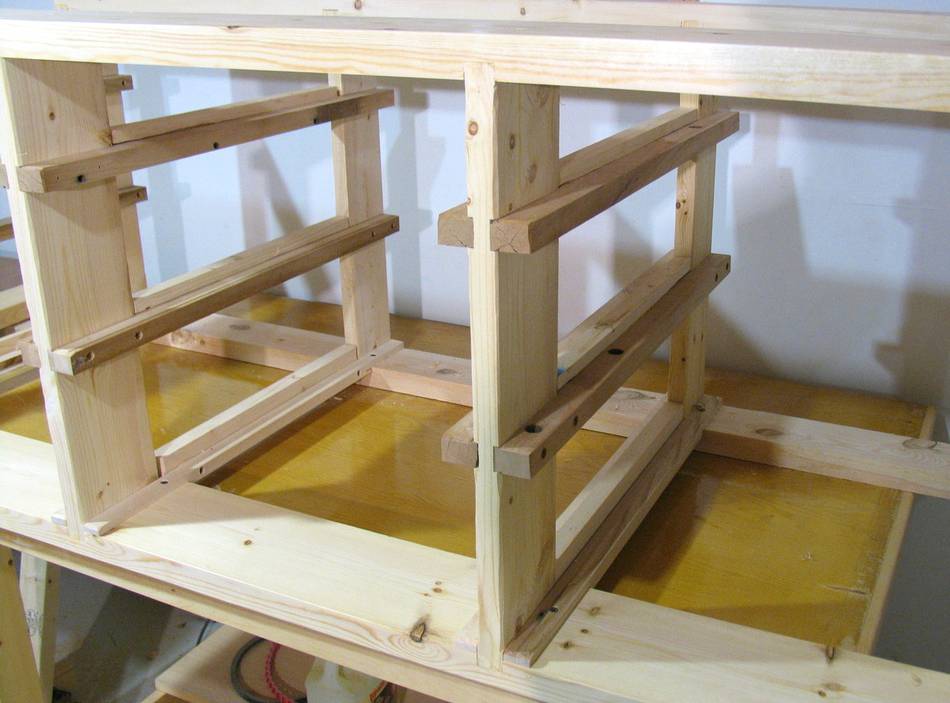 I used pieces of recycled hardwood for the drawer slides. The drawer slides are attached
to the front frame and the back frame, and are the only things that hold the two frames together.
but with 18 drawer slides in all, its sufficient to give the frame a lot of rigidity.
I used pieces of recycled hardwood for the drawer slides. The drawer slides are attached
to the front frame and the back frame, and are the only things that hold the two frames together.
but with 18 drawer slides in all, its sufficient to give the frame a lot of rigidity.
The drawer slides are all rabbeted into the uprights. The dado joint isn't so much for strength, but to help align things when assembling the whole cabinet.
 I glued a piece of wood between the two drawer slides for the part where they stretch between the two
frames. Without that, it was too easy to push the drawer in at a slight angle, which would then
cause it to hit the back frame on pushing it in.
I glued a piece of wood between the two drawer slides for the part where they stretch between the two
frames. Without that, it was too easy to push the drawer in at a slight angle, which would then
cause it to hit the back frame on pushing it in.
 I didn't take photos of every step. But the sequence to do it that works best for a 3x3 drawer cabinet
is:
I didn't take photos of every step. But the sequence to do it that works best for a 3x3 drawer cabinet
is:
Attach the right and left middle drawer fronts. Do these by aligning them the drawers themselves. Align the bottom edge of the front flush with the bottom edge of the drawer.
Next place something heavy in these drawers, and put them in the cabinet. Place the middle drawer in the cabinet, also with something heavy in it, and glue and align its front with the drawers to its left and right.
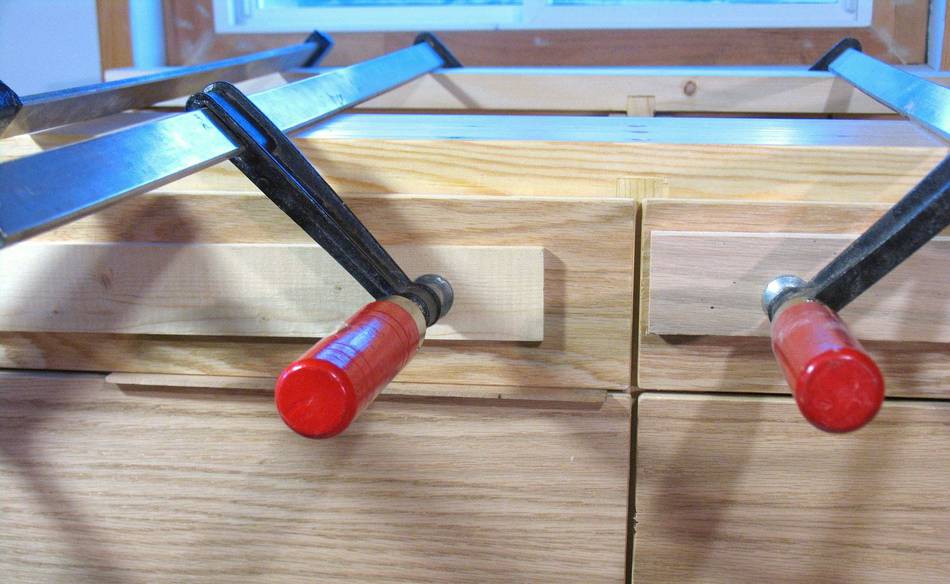 Next, do the top row. Use a narrow piece of wood as a spacer
(you can see it between the drawers at left) to align the drawer fronts of the top row to the row below.
Next, do the top row. Use a narrow piece of wood as a spacer
(you can see it between the drawers at left) to align the drawer fronts of the top row to the row below.
Next do the bottom row. Best to do this just one drawer at a time, so that you can reach around the drawers from the left and right with clamps.
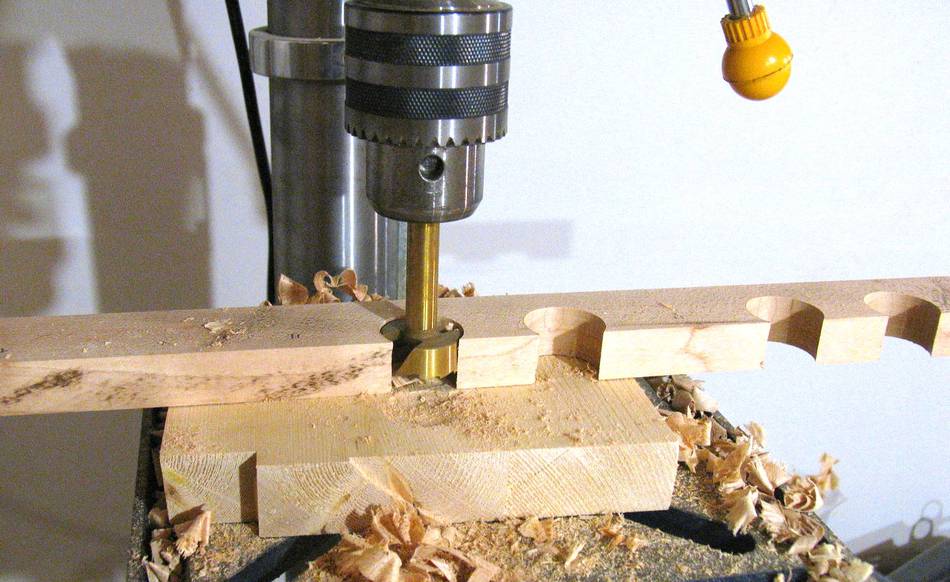 To get the inside radius, I drilled two holes for each handle, then cut the excess out with
a band saw.
To get the inside radius, I drilled two holes for each handle, then cut the excess out with
a band saw.
Next, I routed them with a 1/4" round router bit, then cut out the outside shape, and routed that also with a router bit.
More on making drawer handles
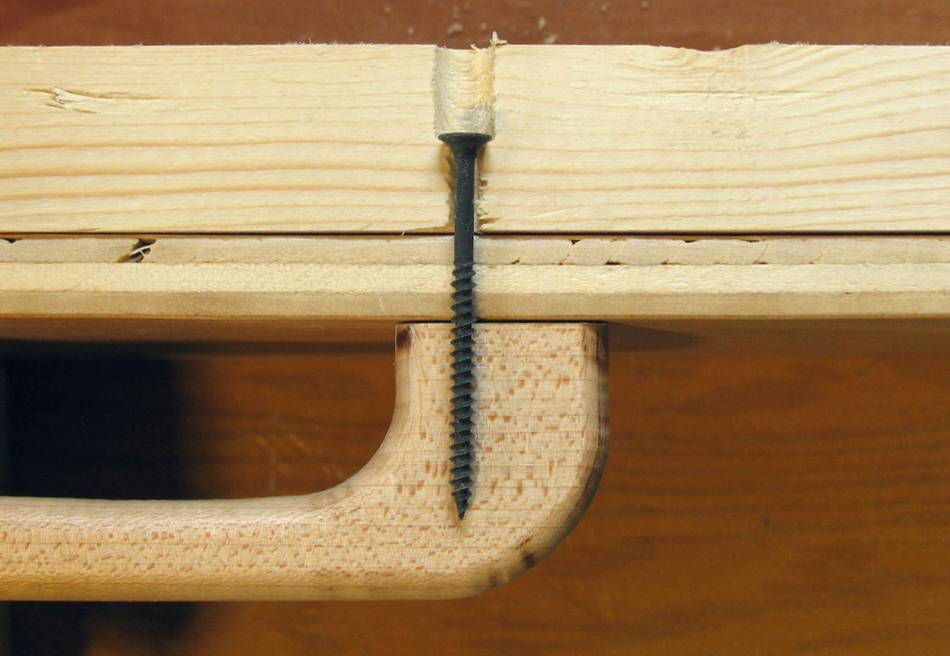 I screwed the handles on in such a way that the screws would go most of the way into the handle,
so as to reduce the risk of the handle breaking apart from pulling on it.
I screwed the handles on in such a way that the screws would go most of the way into the handle,
so as to reduce the risk of the handle breaking apart from pulling on it.
The picture at left is actually just a few pieces of wood arranged to illustrate how it goes together.
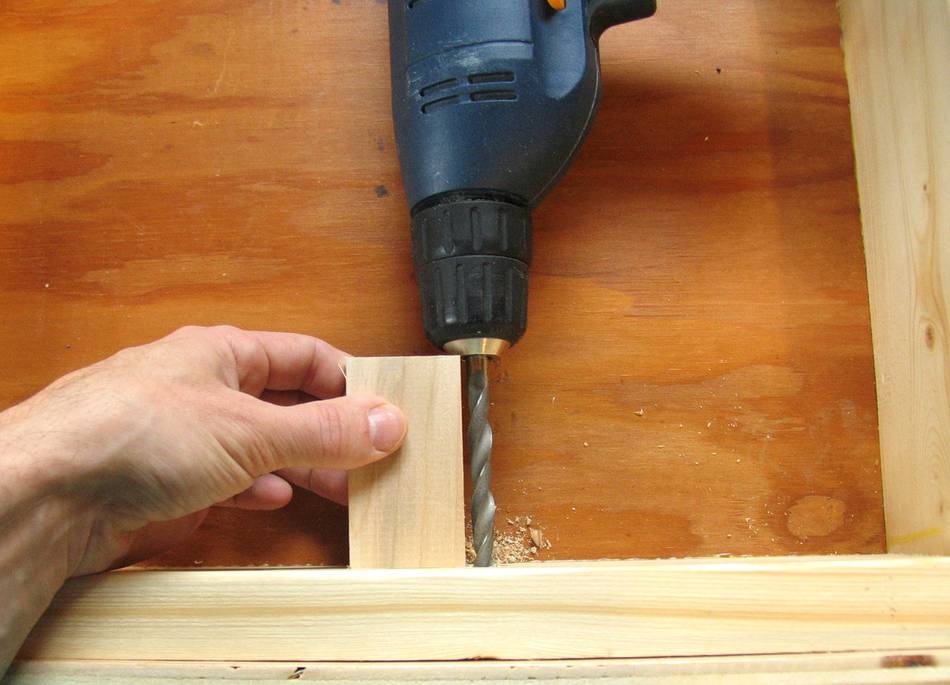 To drill the holes to a consistent depth, I just cut a small block of wood to use as a depth
stop with the hand drill. This worked quite well for the size drill I was using, as the drill's jaws
were completely inside the chuck, so it didn't catch the block any once I hit full depth.
To drill the holes to a consistent depth, I just cut a small block of wood to use as a depth
stop with the hand drill. This worked quite well for the size drill I was using, as the drill's jaws
were completely inside the chuck, so it didn't catch the block any once I hit full depth.
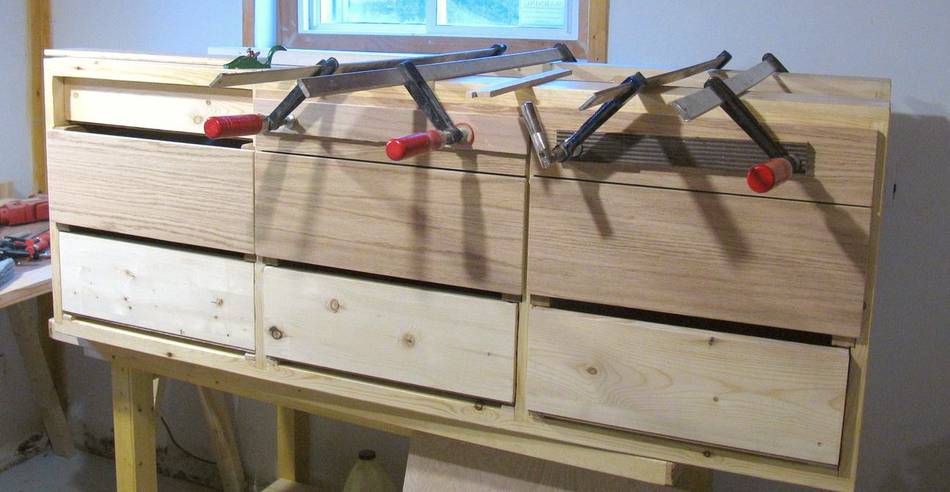
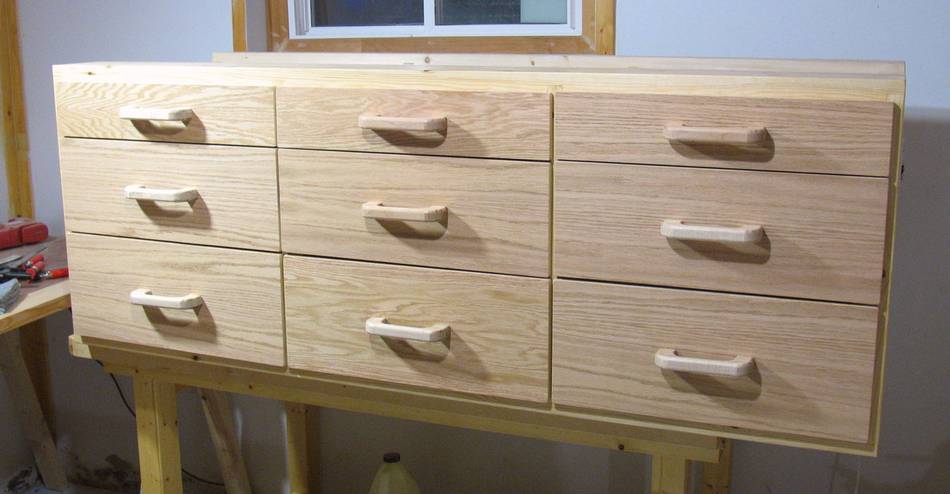 And finally, the drawers all put together on the workbench.
Before placing it under the workbench, I added another strip of 2x2 wood to the bottom of the frame,
to space the drawers off the floor just a little bit.
And finally, the drawers all put together on the workbench.
Before placing it under the workbench, I added another strip of 2x2 wood to the bottom of the frame,
to space the drawers off the floor just a little bit.
 Ryan's Workbench
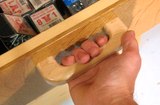 Making drawer handles
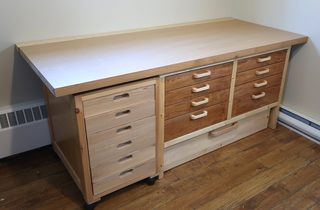 Building a workbench with lots of drawers
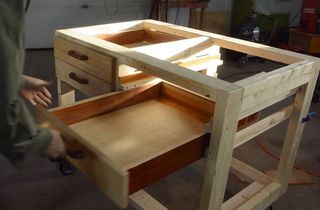 Drawers for the work-
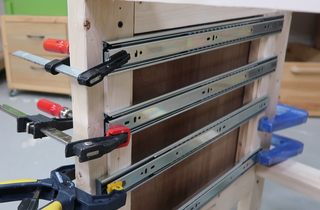 Using spacers to lay out drawer slides
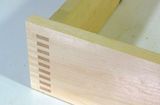 Box joined drawers
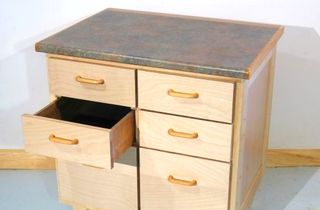 Building a dresser
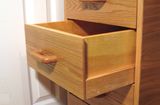
 Building a workbench
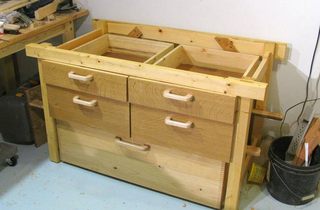
 Trash to treasure:
 Workshop tour
 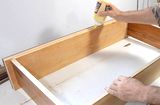 Making drawers