Thank you for the plans! It's been more than a year since I bought them, mainly for the 20" bandsaw.
First of all, let me introduce myself. My name is András Hamerli, I'm 26 and from Hungary. I work as a software developer, so it's quite far from woodworking.
A couple of years ago I started to do projects out of wood, more and more complicated ones as I learnt new tricks. My favourite things to build are tools to build other tools! This actually culminated in the building of my sliding-table table saw, but today it consists of more metal (a large part of it is aluminium extrusion now) than wood - I fine tuned it; a little bit improvement there, after that a little bit improvement on another part and so on. But this email is not about the table saw, but the bandsaw that I finally finished.
My main concern was to have a high-quality bandsaw that I can use for small cuts as well as resawing logs up to about 34-35 cm in diameter. You can buy quite good factory-made bandsaws here in Hungary, but they are usually small ones (Makita LB1200F for example with 12" wheel, so no resawing there) or they cost large amounts of money (for example the Felder ones). Plus to this, the tool- making hobby I mentioned earlier. So I went for a home-made machine and I ordered your plans.
At the start, I reviewed all the plans and I inventoried all the parts that were leftovers from the table saw build. These consisted of the followings:
During the assembly, I more or less followed your video series and articles, but the procedure was really long for me, as I had a lot of other stuff to do and the COVID pandemic slowed down a lot of things unfortunately. The actual build time was about 4 or 5 weeks, with large gaps from start to finish, so the end result is about 1 year.
I run into a couple of problems here and there. One of them is that after gluing about 2/3 of the frame, I noticed that the wood grain in the support triangles in the C part should be at an angle of 22.5°, but I cut them (only the square cutting was done by CNC) with the grain parallel with the top and bottom parts of the frame. I just continued with this error, because it was nearly impossible to replace the already glued in parts. (The final frame closes a little bit less than a 1 mm - measured between the table and the top blade guard - from full tension of a 30x0.6 mm log cutting blade, so I don't think that there will be any problems in frame strength). I fixed the original table however, as I didn't pay attention to the glue up and one of the clamps was not on the table, but on a small piece of wood, so it became crooked. This bugged me, so I replaced it totally with a slightly bigger one made from aluminum extrusions (25x100 mm, MK 2025.03) and some L aluminium. My table saw with a proper aluminium-cutting blade was a must-have in this case.
For the frame and the wheels I used three coats of colourless oil based lacquer and for the blade covers, I used the same stuff in a purplish-reddish colour. (It is semi transparent, so the wood grain is visible but still gives a nice colour. We call it lazúr in Hungarian, but I'm not familiar with the proper English term for it and Google Translate was not so helpful in this case). I used Danish oil for the moving parts (blade guide holders, trunnions, trunnion beam) as it will not "glue" together the parts if I don't use the machine for a longer period. I used cast-iron star knobs for securing the top blade guide and the table.
I really enjoyed the building process, your plans were easy to follow (or modify :) ). The machine turned out to be really precise, nice (at least in my opinion), and I actually built a sawmill attachment for it (inspiration comes from one of your readers' bandsaw build) from aluminium extrusions and linear bearings. Thanks again for making the plans public! With all the things considered, it was probably not so much cheaper to build the saw than buying one, but I'm really happy with the result and for me, that is the most important thing.
Finally, I insert some pictures:
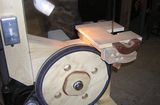
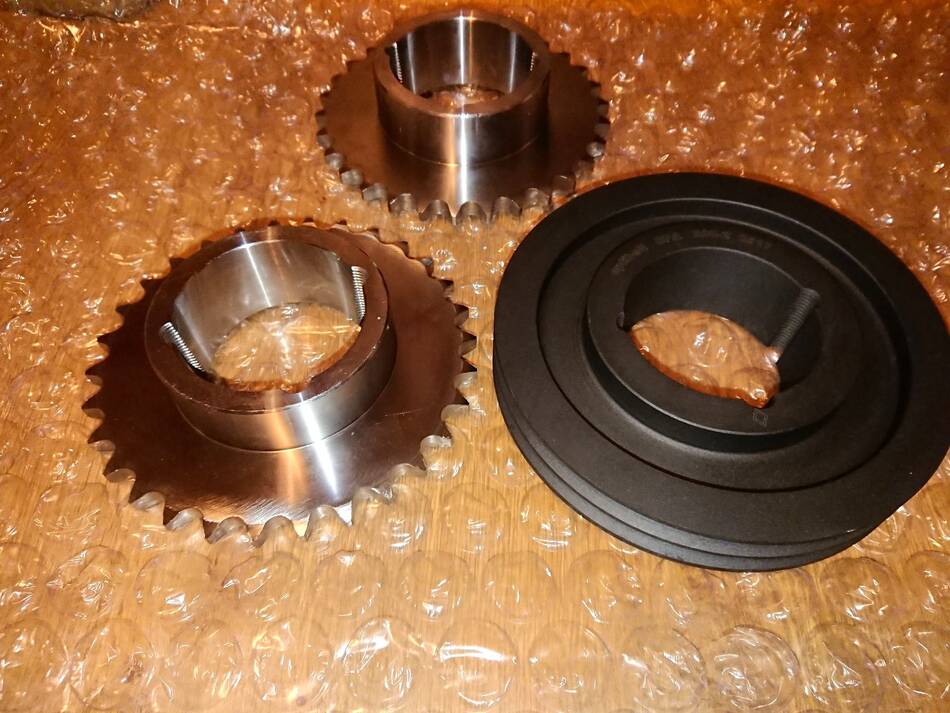 This is the cast iron 2 groove pulley for the lower arbour, and the two sprockets I
used as wheel hubs. I drilled and tapped 8 M12 holes on each one. Probably a
little bit overdone. I unfortunately lost the picture from the shafts I ordered. They
have proper keyways. The lower one is longer and has keyways on both ends. I
choose C45 steel as it is quite common and cheap and a good choice for
driveshafts. (And a good choice for the manufacturer as well because it is really
easy to turn.)
This is the cast iron 2 groove pulley for the lower arbour, and the two sprockets I
used as wheel hubs. I drilled and tapped 8 M12 holes on each one. Probably a
little bit overdone. I unfortunately lost the picture from the shafts I ordered. They
have proper keyways. The lower one is longer and has keyways on both ends. I
choose C45 steel as it is quite common and cheap and a good choice for
driveshafts. (And a good choice for the manufacturer as well because it is really
easy to turn.)
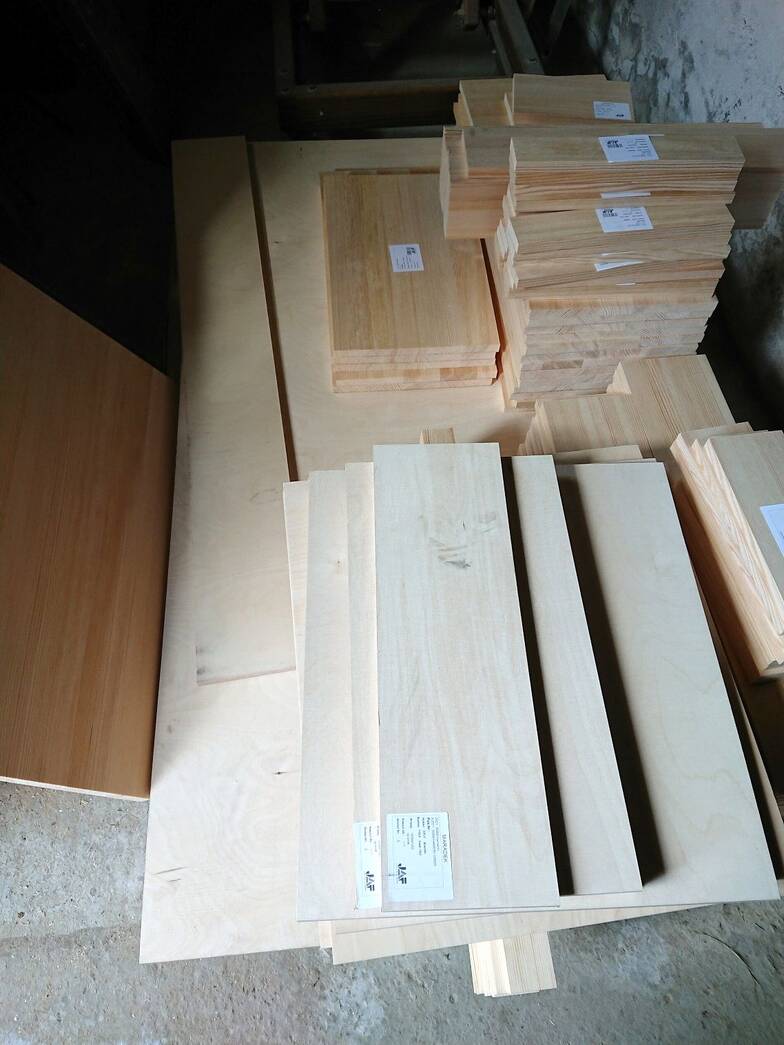 The pre-cut wood for the bandsaw, some jigs for the table saw and for some pine
furniture as well for my family.
The pre-cut wood for the bandsaw, some jigs for the table saw and for some pine
furniture as well for my family.
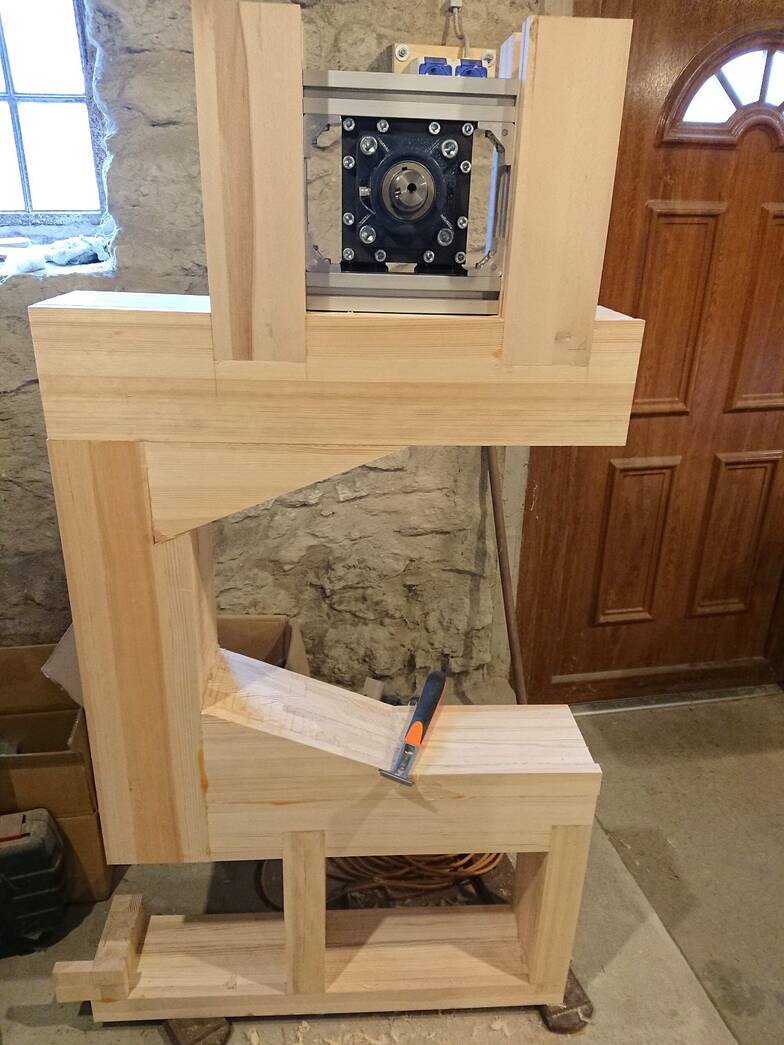
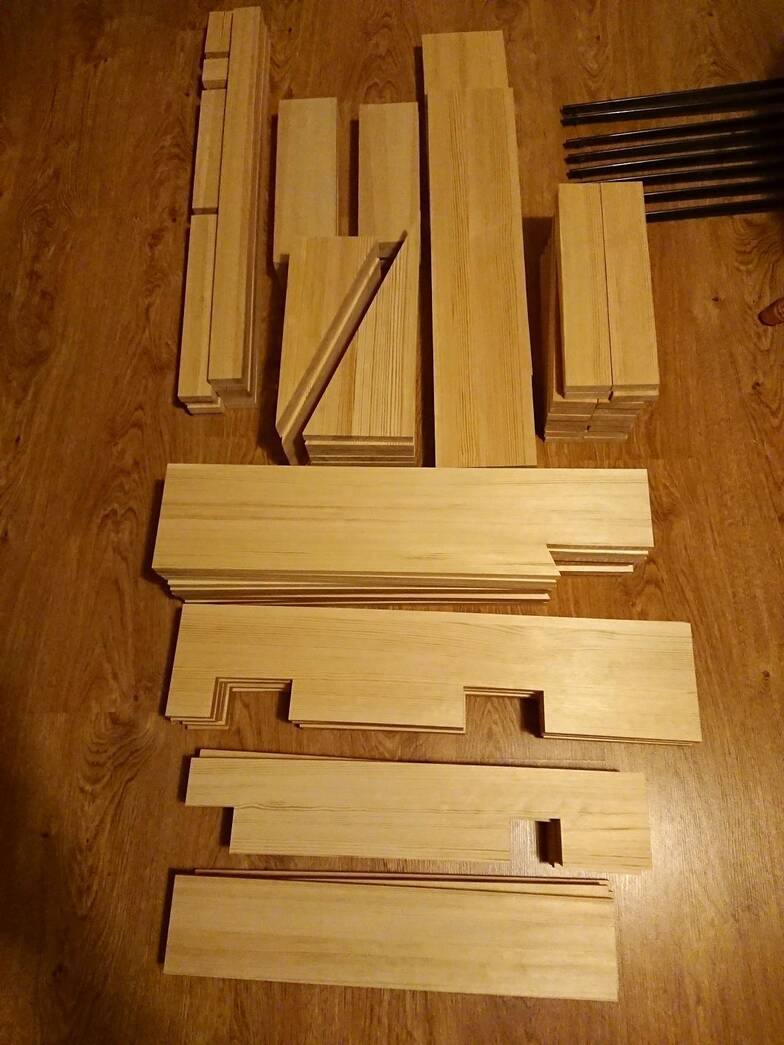 The prepared wood for the frame. I didn't notice the wood grain problem in the
triangles here. My shop was very cold at the time so I glued the frame inside the
house. It was not the best idea however, because the frame was not terribly flat.
After the 4th or 5th layer I took it out and flattened it with a router.
The prepared wood for the frame. I didn't notice the wood grain problem in the
triangles here. My shop was very cold at the time so I glued the frame inside the
house. It was not the best idea however, because the frame was not terribly flat.
After the 4th or 5th layer I took it out and flattened it with a router.
 The glued up frame, but later I changed the motor mount part. Instead of the
little thing coming up I cut it off and used a longer, flat part. The top wheel
mount assembly is in its place There is another bearing unit at the back side.
The glued up frame, but later I changed the motor mount part. Instead of the
little thing coming up I cut it off and used a longer, flat part. The top wheel
mount assembly is in its place There is another bearing unit at the back side.
 I turned the wheels round in place with my router after I cut off all the corners on
the table saw. The crown was made the same way at an angle of 5°. I had to use
some leftover spruce for the legs as I ran out of pine.
I turned the wheels round in place with my router after I cut off all the corners on
the table saw. The crown was made the same way at an angle of 5°. I had to use
some leftover spruce for the legs as I ran out of pine.
 This is the underside of the table. The 4 nuts with the black set screws around
the blade opening are used to level the insert plate. The blade opening is done with
the router as well.
This is the underside of the table. The 4 nuts with the black set screws around
the blade opening are used to level the insert plate. The blade opening is done with
the router as well.
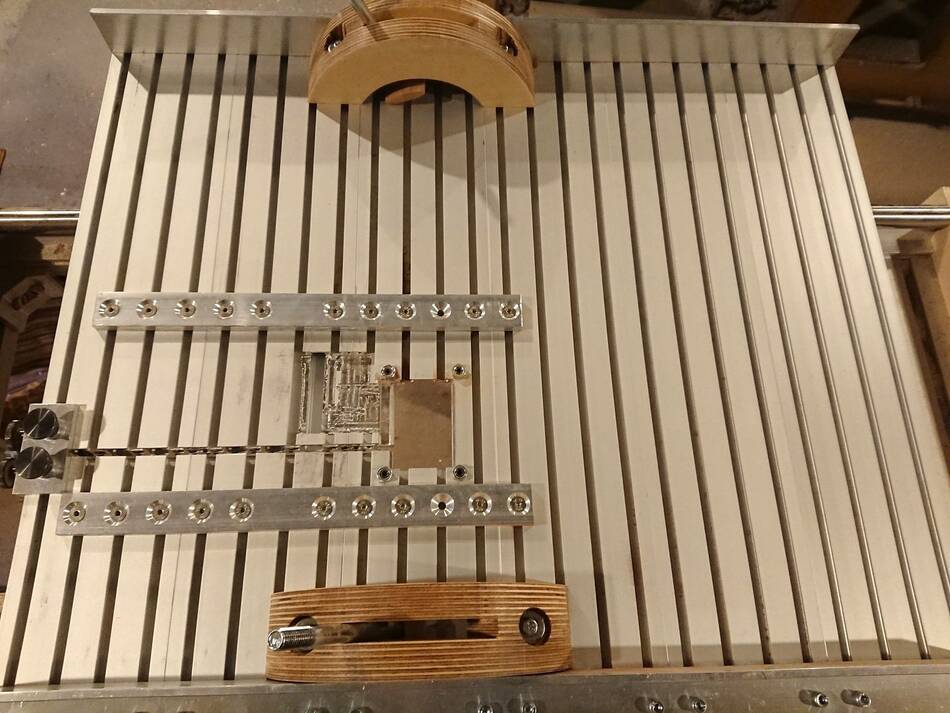
I had to carve out a little bit to make room for the blade guides. I did it with my router. Carbide tipped woodworking tools can be used for aluminium as well. The trick is to go with only light passes with small diameter router bits and slow-mid rpm. Slow process, but I was able to do it myself without any special equipment.
 A big time jump, here the saw is about half way done, mounted on the base. The
old (and crooked) table is used here and the base is on some small casters (not
suitable after all, I replaced them). The lower cover was not ready yet but the
wiring is finished and I actually used the saw in this state for quite a time before I
finished it.
A big time jump, here the saw is about half way done, mounted on the base. The
old (and crooked) table is used here and the base is on some small casters (not
suitable after all, I replaced them). The lower cover was not ready yet but the
wiring is finished and I actually used the saw in this state for quite a time before I
finished it.
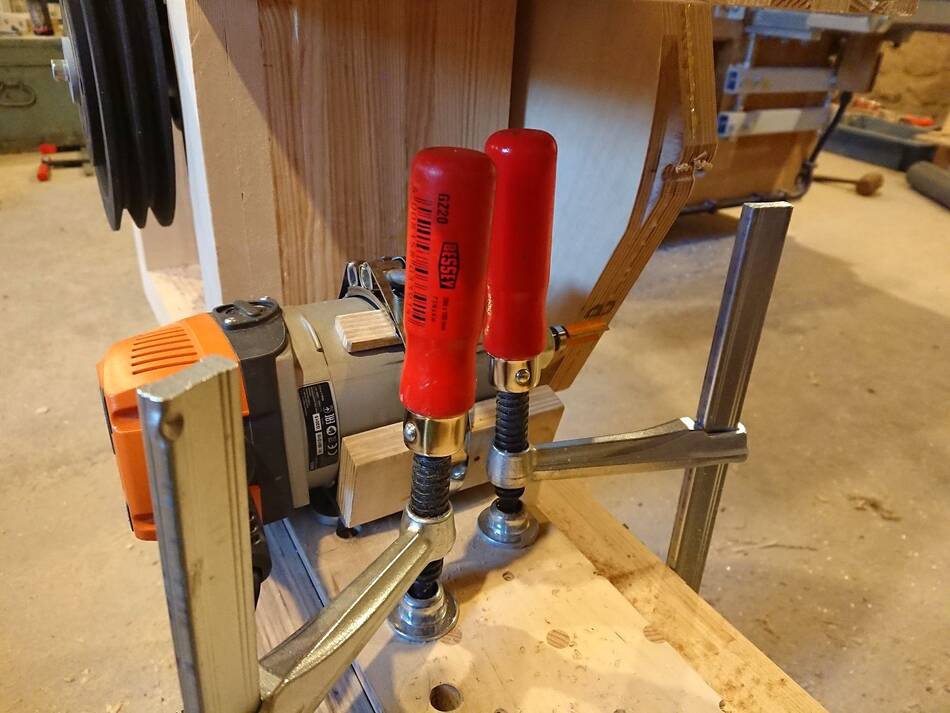
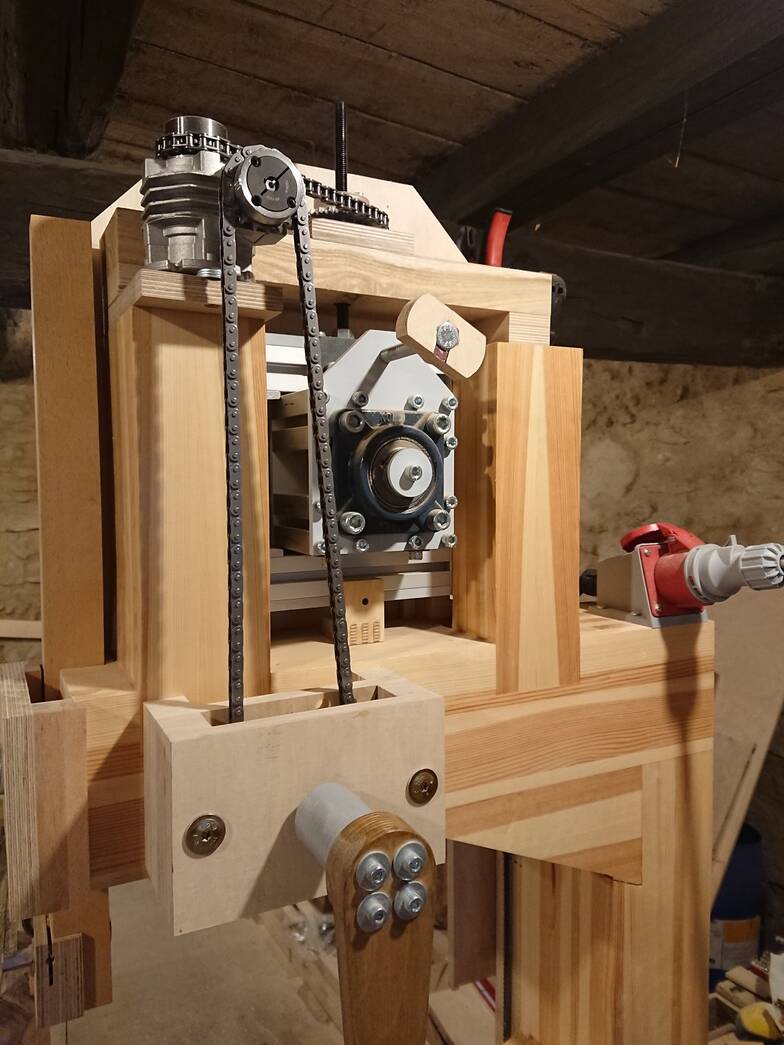 I built the new tensioning system with some sprockets, chains and a worm gear
drive. It has a 1:5 drive ratio, so the tensioning is much slower than your solution,
but I don't have to use a box or other tools to stand on. The handle for it is
common with the blade tilting and lowering mechanism of my table saw. It can
be pulled off easily from the shaft which has an M5 hex head bolt screwed into it
to act as a key.
I built the new tensioning system with some sprockets, chains and a worm gear
drive. It has a 1:5 drive ratio, so the tensioning is much slower than your solution,
but I don't have to use a box or other tools to stand on. The handle for it is
common with the blade tilting and lowering mechanism of my table saw. It can
be pulled off easily from the shaft which has an M5 hex head bolt screwed into it
to act as a key.
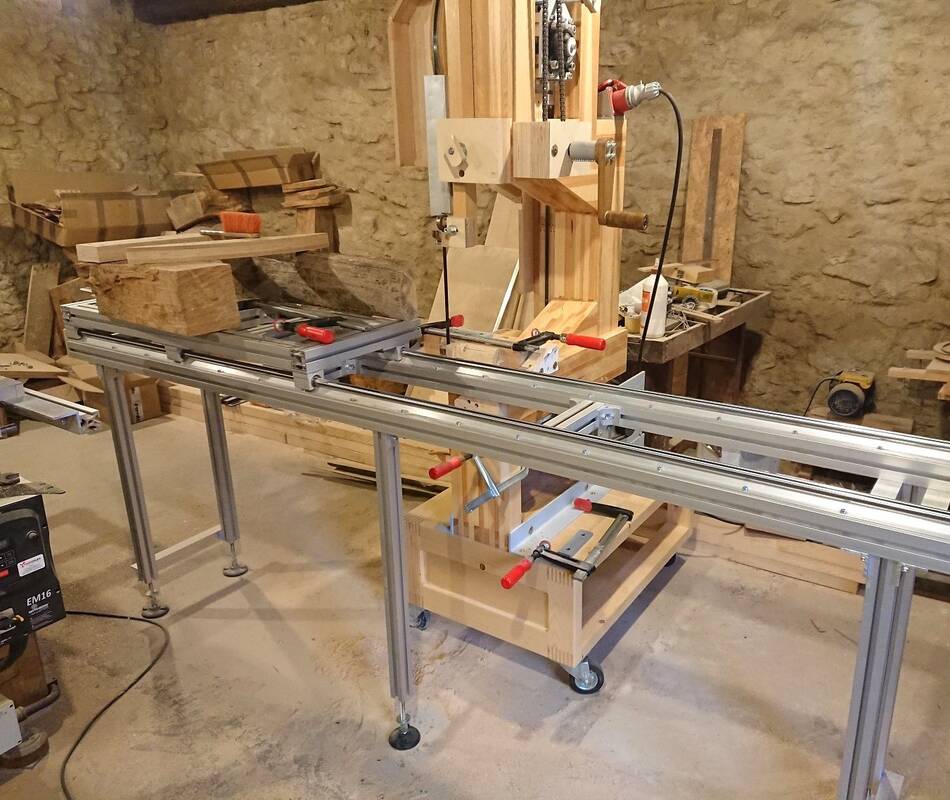 The not-yet-finished bandsaw is used with the sawmill attachment I built for it. It
can handle 1.3 meter long logs which is about the size I can transport.
On the left side of the picture, there is the VFD I use on my table saw for soft-
start and aggressive braking. (The 315 mm blades I use for it can be stopped
from ~4300 rpm in 1.3 seconds!)
The not-yet-finished bandsaw is used with the sawmill attachment I built for it. It
can handle 1.3 meter long logs which is about the size I can transport.
On the left side of the picture, there is the VFD I use on my table saw for soft-
start and aggressive braking. (The 315 mm blades I use for it can be stopped
from ~4300 rpm in 1.3 seconds!)
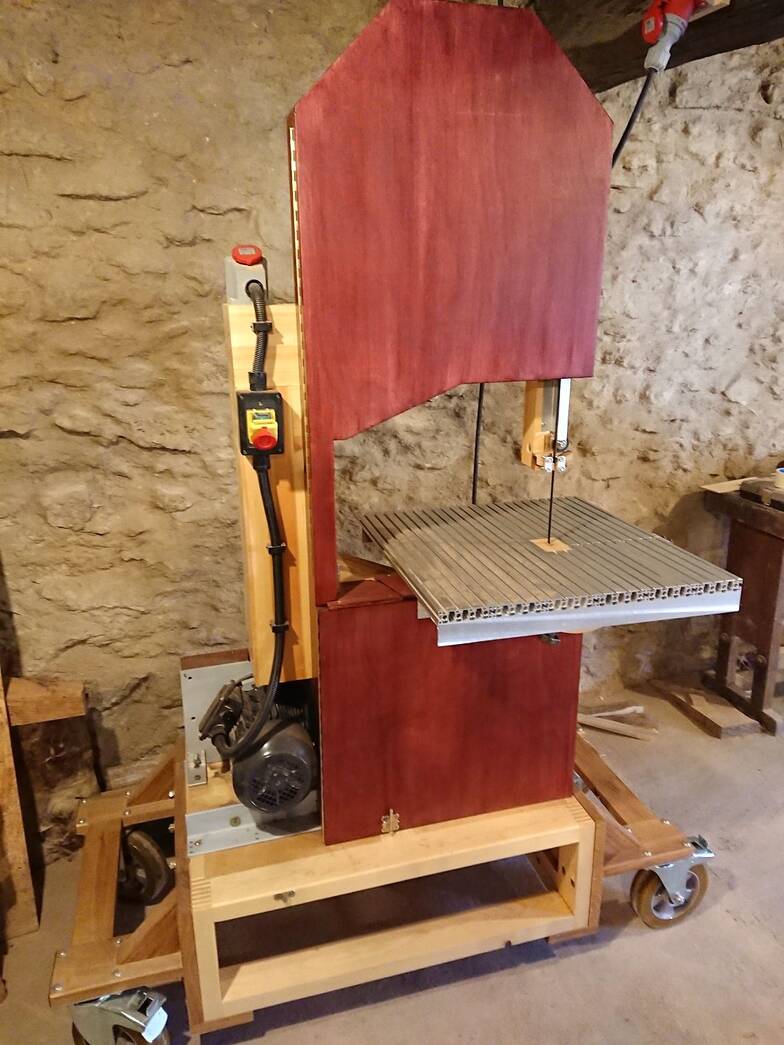
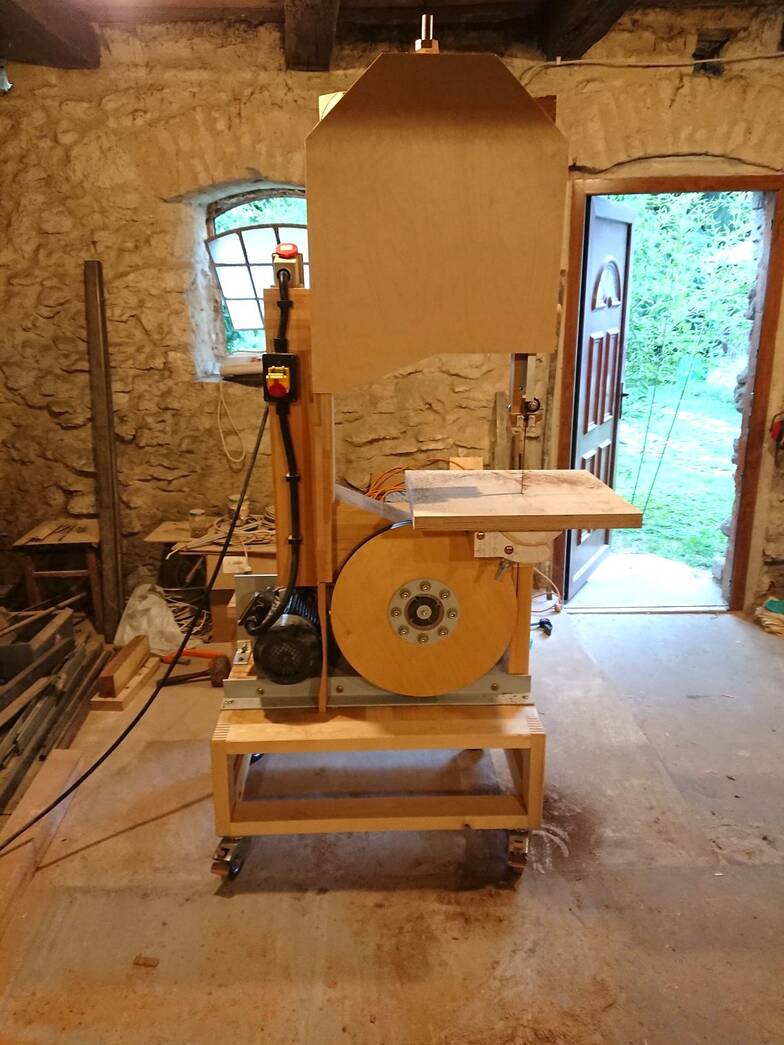
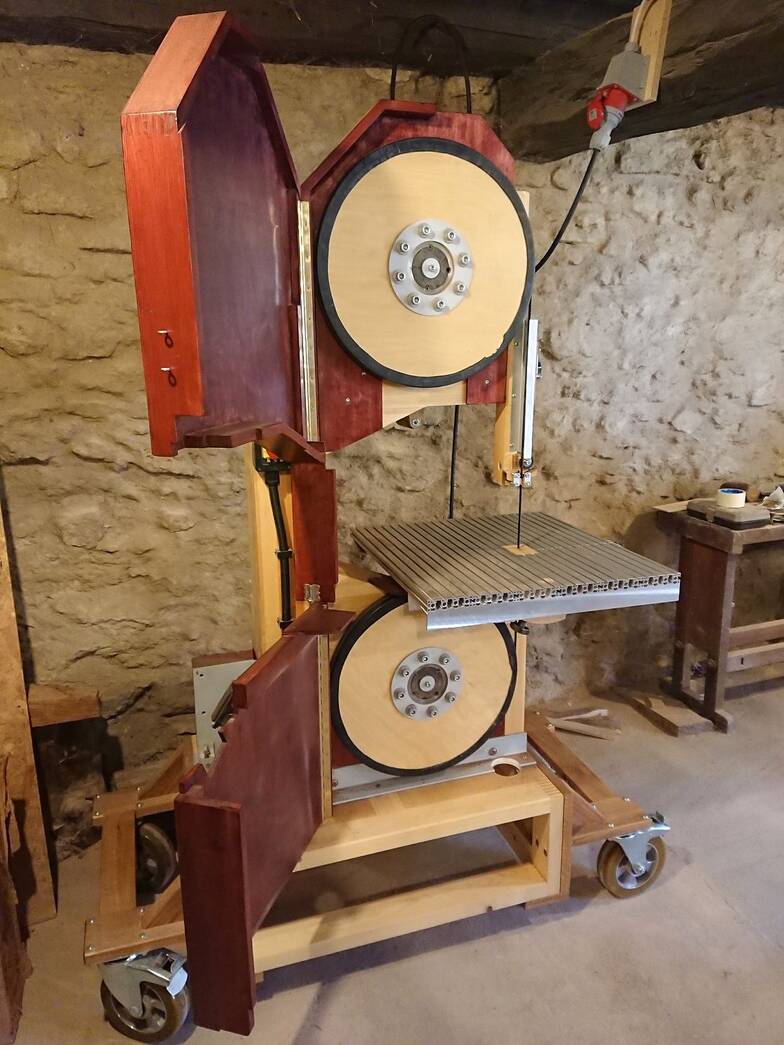 A big time jump again, here is the finished bandsaw with the replaced casters
(200 mm in diameter, rated for 500 kg each. Probably a little bit overkill for the
bandsaw, but my floor is concrete and quite rough. I had to build two side
platforms for them because of the height limitations. I used some nice oak here.)
In this picture, the wheel rings are visible. The wheels are pressed on the
sprockets - hence no play - and secured with 8 bolts using the rings I mentioned
as a single "washer". The bolts are screwed into the tapped holes I made. I used
thick conical spring washers between the bolts and the ring to prevent loosening
from vibration. The half octagon of the top door is made from beech and joined
together with box joints cut at an angle of 45°.
A big time jump again, here is the finished bandsaw with the replaced casters
(200 mm in diameter, rated for 500 kg each. Probably a little bit overkill for the
bandsaw, but my floor is concrete and quite rough. I had to build two side
platforms for them because of the height limitations. I used some nice oak here.)
In this picture, the wheel rings are visible. The wheels are pressed on the
sprockets - hence no play - and secured with 8 bolts using the rings I mentioned
as a single "washer". The bolts are screwed into the tapped holes I made. I used
thick conical spring washers between the bolts and the ring to prevent loosening
from vibration. The half octagon of the top door is made from beech and joined
together with box joints cut at an angle of 45°.
The doors are closed here. The top one follows the shape of the frame. The front
part of the aluminium table is shiny because I cut off a couple of tenth of a
millimeter from it on my table saw. It left nice machine marks. The top part of it is
really hard and slippery as it is anodized. The base of the bandsaw will
accommodate one or two drawers later to store blades for example (similarly as
you did in your base building video).
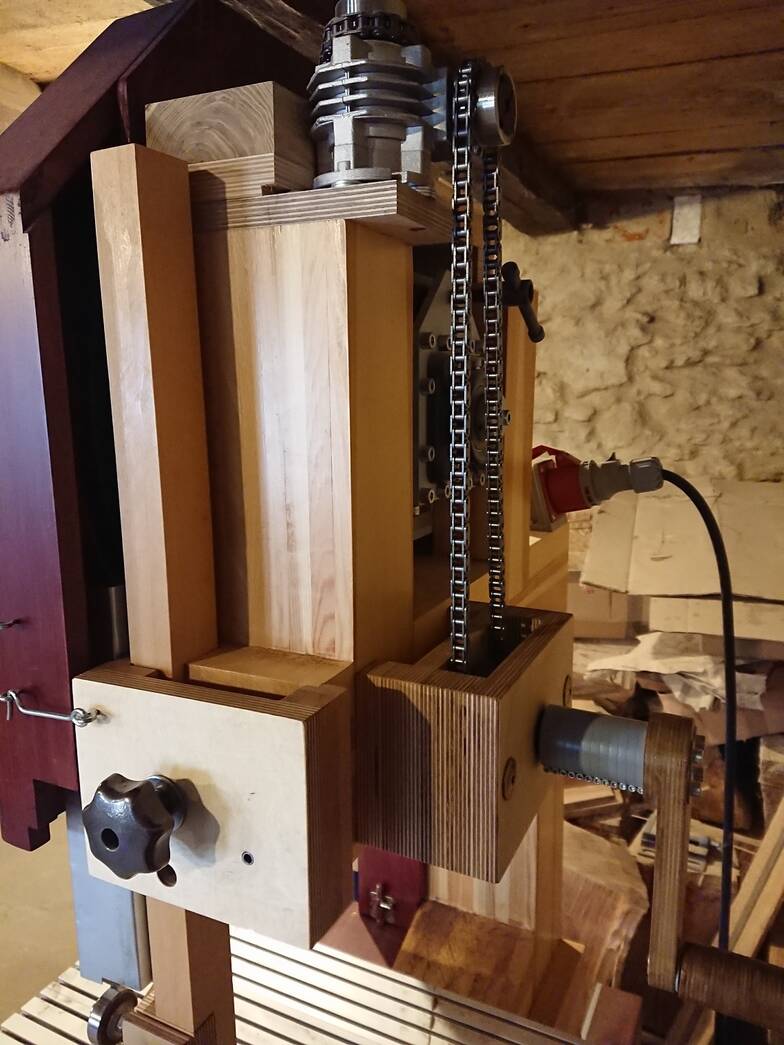 Blade tensioning mechanism from a different angle. Next to the chain, the
tracking adjustment screw is visible. In the background, there is some nice wood
(it was said that it is Morus nigra) but unfortunately it was split into big chunks of
firewood before I got it. But I can mill some nice boards out of it.
Blade tensioning mechanism from a different angle. Next to the chain, the
tracking adjustment screw is visible. In the background, there is some nice wood
(it was said that it is Morus nigra) but unfortunately it was split into big chunks of
firewood before I got it. But I can mill some nice boards out of it.
Best regards,
András Hamerli
 More reader
 20" bandsaw build
 Bandsaw plans