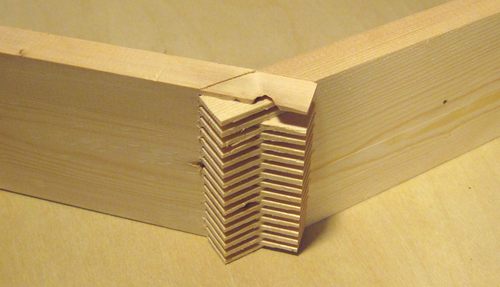
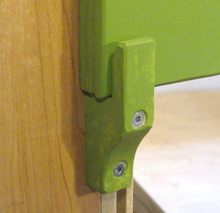
 The top right corner of my bandsaw has some 45-degree angles.
I figured a fingerjoint would be the best way to make this joint sturdy.
The top right corner of my bandsaw has some 45-degree angles.
I figured a fingerjoint would be the best way to make this joint sturdy.
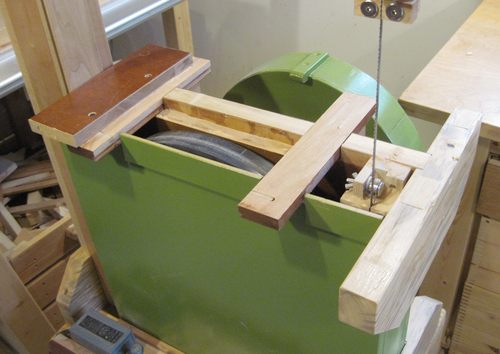
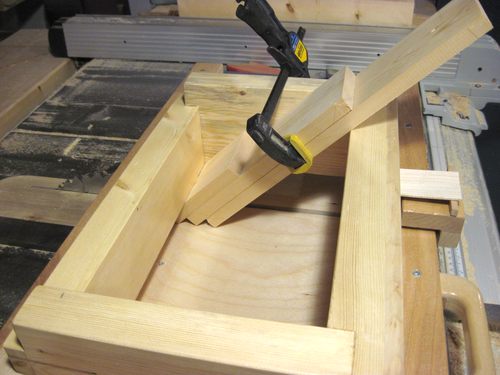 I cut these at an angle by clamping the pieces of wood into my
screw advance box joint jig
I cut these at an angle by clamping the pieces of wood into my
screw advance box joint jig
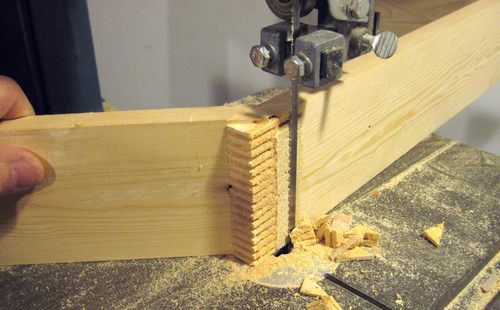 I went for maximum overlap in the joint. This does leave for a fair
bit of excess material.
I went for maximum overlap in the joint. This does leave for a fair
bit of excess material.
I trimmed the excess material off with my 14" bandsaw. My homemade
bandsaw would have been far enough along to make this cut, but I had it
in pieces at the time.
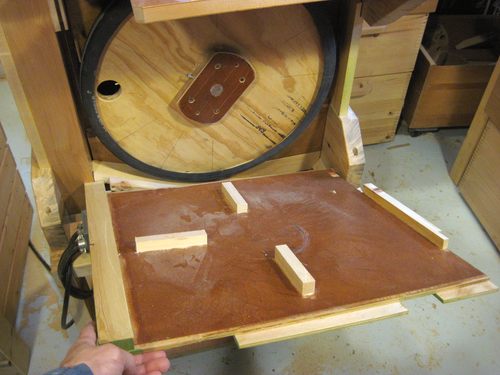
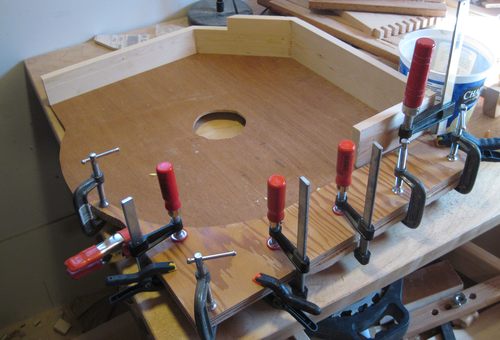 Gluing the top cover together. I needed to add a layer of plywood on
the left side of the cover to bring it forward of the post a little bit
to be clear of the wheel. The clamps are holding this piece in place
while the glue is drying.
Gluing the top cover together. I needed to add a layer of plywood on
the left side of the cover to bring it forward of the post a little bit
to be clear of the wheel. The clamps are holding this piece in place
while the glue is drying.
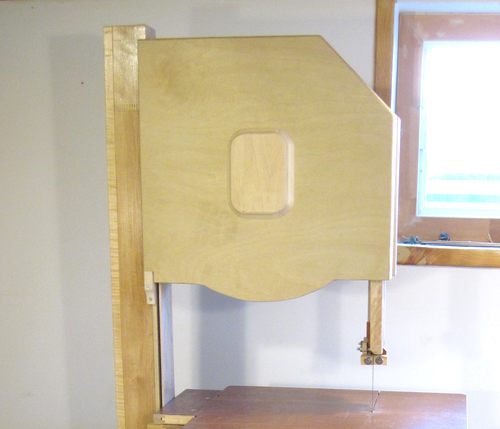
I also had to cut a hole in the middle of the cover to accommodate
the hub of the flange, which protruded just slightly beyond the
plywood.
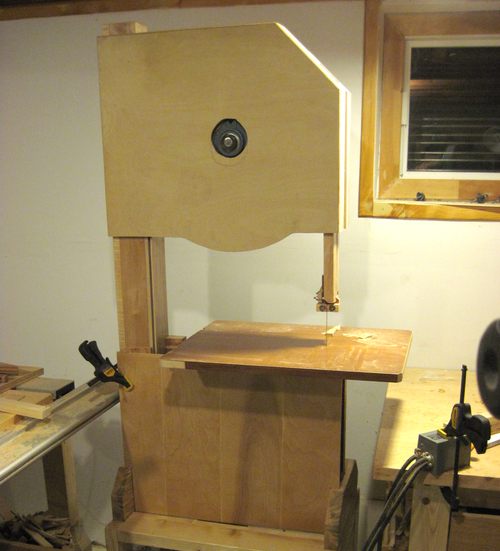 The top and bottom covers in place. Once I attached the covers,
I thought the saw looked a little stupid.
The whole thing just looks kind of chubby and fat, whereas a typical
bandsaw tends to have more emphasis on the vertical aspect.
The top and bottom covers in place. Once I attached the covers,
I thought the saw looked a little stupid.
The whole thing just looks kind of chubby and fat, whereas a typical
bandsaw tends to have more emphasis on the vertical aspect.
Of course, part of the reason it looked that way is that
my bandsaw really is short and squat.
Most 18" bandsaws tend to have the
wheels further apart and go down to the floor, so they have much more height.
 I couldn't do much about the overall dimensions of my saw at this point,
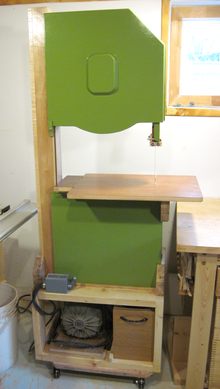
but I could do a little bit about the aesthetics. So I cut the top cover
to not extend over the post. I did the same with the bottom cover.
Painting the top and bottom covers a different colour helped emphasize
a slightly more vertical aesthetic.
I couldn't do much about the overall dimensions of my saw at this point,
but I could do a little bit about the aesthetics. So I cut the top cover
to not extend over the post. I did the same with the bottom cover.
Painting the top and bottom covers a different colour helped emphasize
a slightly more vertical aesthetic.
 The top cover is held in place by two pegs at the top of the
saw that fit into holes in the cover. The cover also slips behind a hook
on the bottom left corner.
The top cover is held in place by two pegs at the top of the
saw that fit into holes in the cover. The cover also slips behind a hook
on the bottom left corner.
I didn't bother adding any sort of hook to the bottom right of the cover because
my cover had a slight twist to it that forced that corner closed already. That,
and I couldn't think of an unobtrusive way of adding another hook on the
bottom right of that cover.
 The bottom cover just hooks into the base at the bottom. The top end
of the bottom cover is held in place by the table, so it's
necessary to take the table off to remove the cover.
But the table already needs to come off for blade changes, so this is no big deal.
The bottom cover just hooks into the base at the bottom. The top end
of the bottom cover is held in place by the table, so it's
necessary to take the table off to remove the cover.
But the table already needs to come off for blade changes, so this is no big deal.
Making the table easy to remove also makes it much easier to get at the
bottom blade guides for adjustment.
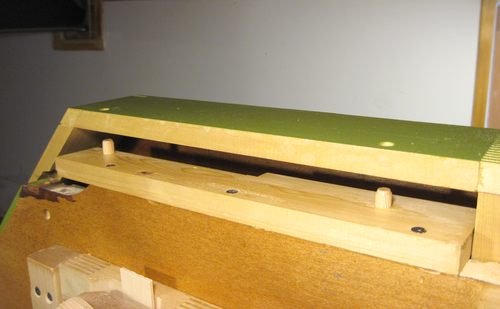
 This shows the inside of the bottom dust cover. I found that the spinning
of the wheels caused quite a whirlwind inside the case, causing the
sawdust to get blown all around.
This shows the inside of the bottom dust cover. I found that the spinning
of the wheels caused quite a whirlwind inside the case, causing the
sawdust to get blown all around.
I wanted the sawdust to just fall out of the bottom of the bottom case,
so I figured all this wind in the case was counter productive.
I added some baffles to the inside of the case that hopefully
interfere with the circular air motion of air that the wheel kicks up.
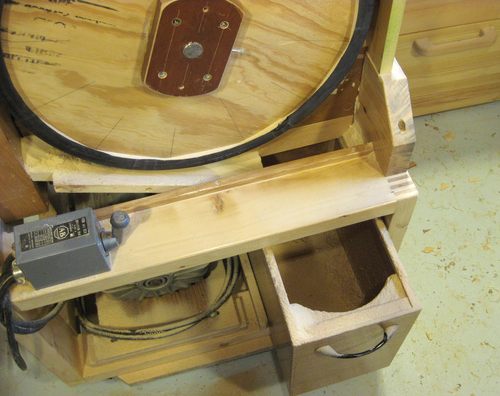 The bottom of the case has a hole in it to allow the sawdust to
fall down and into the sawdust drawer.
The bottom of the case has a hole in it to allow the sawdust to
fall down and into the sawdust drawer.
It's not a perfect design, but I figure about 80% of the sawdust makes it into
the drawer. This bandsaw is much better at containing sawdust
than my 14" bandsaw, which kind of blows a lot of sawdust to the right
below the table. The difference in dust collection between this saw and
my 14" bandsaw is like the difference between an old contractor saw and a
cabinet maker's saw. The cabinet maker's saw will collect most of the
dust inside of it, even without a dust collector, whereas the
contractor saw will just blow it all around.
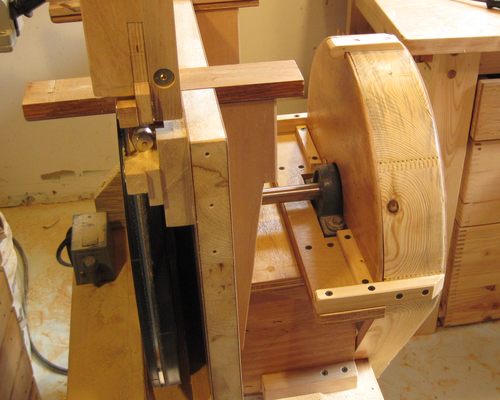
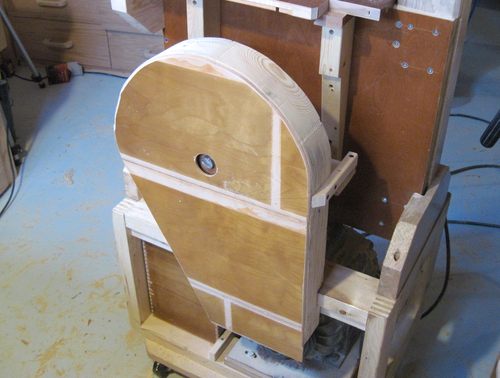 I needed some sort of cover for the pulley on the back of the saw.
This wasn't so much to protect me from the pulley, but to protect
the pulley from pieces of wood that might fall off the back of the bandsaw table.
Small bits of wood always accumulate behind my bandsaw, so I know I drop
a lot of bits off the table. I wanted to prevent those bits from
getting jammed between the pulley and the case of the saw.
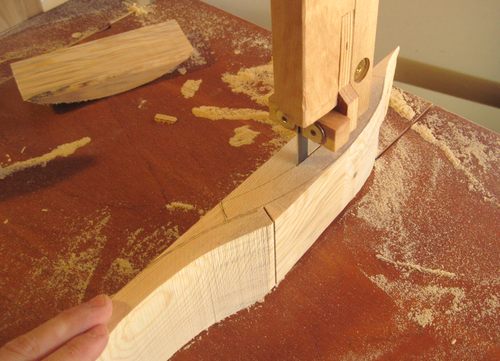 Just for the heck of it, I decided to make the belt housing to be curved to follow
the circumference of the main pulley. I had often thought about making a curved
piece of wood by fingerjointing several cut out curved pieces together.
Just for the heck of it, I decided to make the belt housing to be curved to follow
the circumference of the main pulley. I had often thought about making a curved
piece of wood by fingerjointing several cut out curved pieces together.
But maybe the biggest reason for doing it this way is that it gave me an excuse to
use my bandsaw while still building the bandsaw!
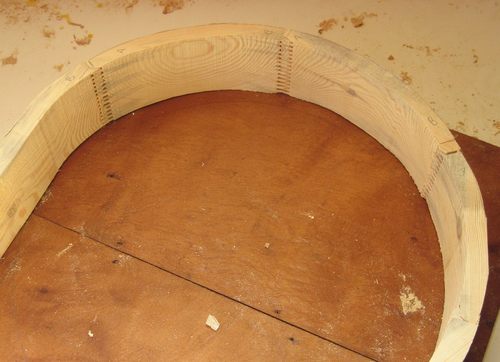 Here's checking the fit of the fingerjointed pieces.
Because this was just a belt cover, I wasn't overly concerned about cutting the finger
joints at precisely the right angle. The joint would be more
than strong enough even if the fingers weren't fully meshed.
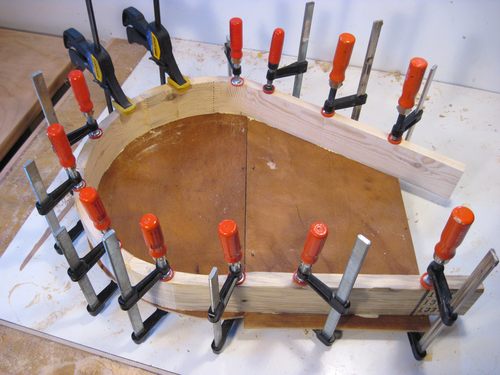 I used some pieces of recycled scrap plywood for the back of the belt cover.
The plywood had some very glossy finish in places. It looked a bit odd, but I planed
on painting the belt cover anyway, so it didn't matter.
I used some pieces of recycled scrap plywood for the back of the belt cover.
The plywood had some very glossy finish in places. It looked a bit odd, but I planed
on painting the belt cover anyway, so it didn't matter.
 Here's the belt cover. I varnished it to act as a seal coat before painting it.
I like how the belt cover looks in this photo - somehow, it looks like there
might be something more substantial inside of it than just a wooden V-belt pulley!
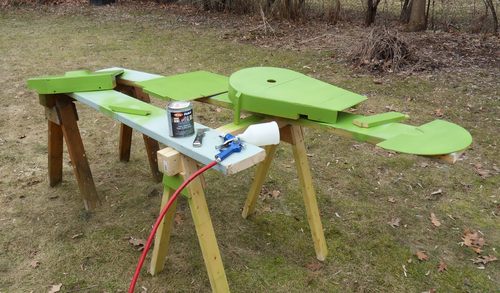 I spray painted the pieces of cover outside on a relatively warm day in March.
This saves me from having to worry about overspray or respirators.
The paint I used was actually "bathroom paint". It probably wasn't meant
for spraying and came out of the gun a bit spluttery compared to thinner paints,
but it dried smooth and I was able to avoid having any brush marks on my casing.
I spray painted the pieces of cover outside on a relatively warm day in March.
This saves me from having to worry about overspray or respirators.
The paint I used was actually "bathroom paint". It probably wasn't meant
for spraying and came out of the gun a bit spluttery compared to thinner paints,
but it dried smooth and I was able to avoid having any brush marks on my casing.
I put a coat of clear varnish on top of the paint to give it more gloss, sort of
in the spirit of an automotive clear coat.
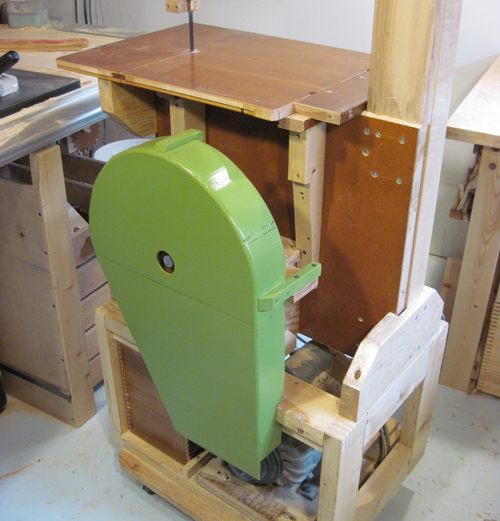 And here's the belt guard painted up. I didn't bother painting the back of
the saw at all, but the belt cover is visible from various angles from the front,
so I figured that part was worth painting.
And here's the belt guard painted up. I didn't bother painting the back of
the saw at all, but the belt cover is visible from various angles from the front,
so I figured that part was worth painting.