Jim Wheeler's bandsaw
Jim Wheeler writes:
"Hello,
These are photos of my shop-built bandsaw. Please excuse the photo quality, as they were shot with a film camera years ago and later scanned into the computer. I hope they come through okay.
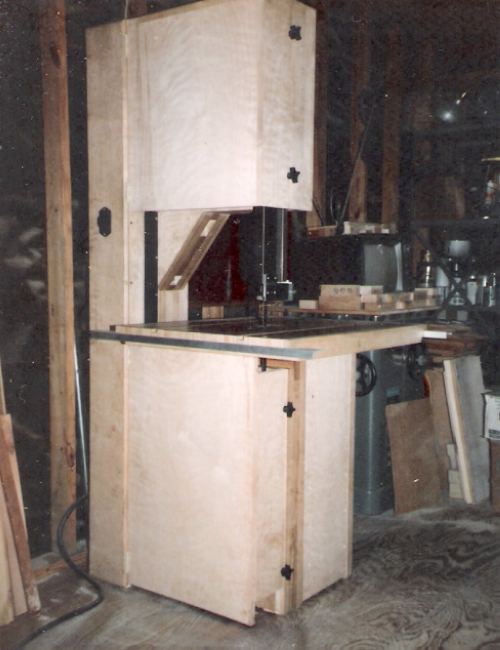
"I actually designed and built this back in the 1980's in collaboration with the founder of Gilliom Mfg. He furnished me a parts kit and I worked out a design for the saw. He was to help me get an article about it published in Fine Woodworking Magazine, but he passed away in '86 or '87, and then the magazine published a different design by someone else. Also, that was the time when the country was being flooded with inexpensive machines from Asia, so there was no longer much interest in homemade machinery. In the late 80's one could buy an Asian made 18 inch bandsaw for about the cost of the parts and materials I had in mine. Grizzly was one such source."
"I built my first Gilliom bandsaw in 1974 using their basic design with a bit of re-enforcing and better cabinet making techniques. Their design didn't even call for glue! I had almost no experience with bandsaws at the time, so I had no idea what to expect from one. I found their frame to be rather flimsy and the saw to be somewhat frustrating. I sold it a few years later for the cost of the motor in it, along with my other tools (long story,) but I always daydreamed of building another with a much stronger frame. Eventually I got my wish.
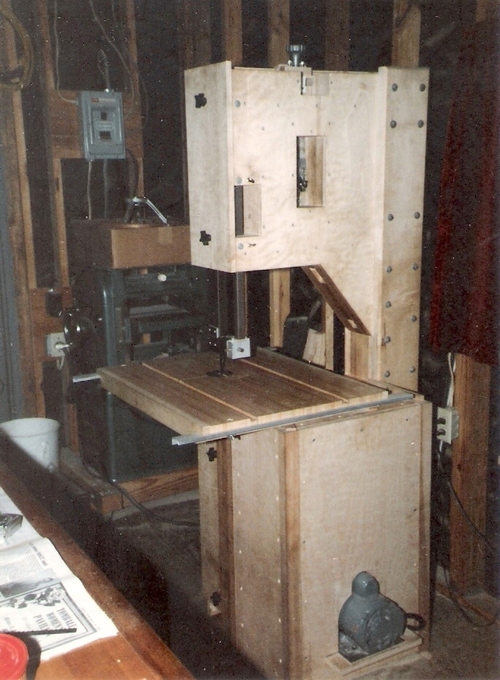
I still have this second saw, the one in the photos. I never completely finished it, but I did complete it to the point where I could resaw with it. I once sawed a large, green pecan log with it; I had pieces on the table as large as 7 x 13 inches by 5 feet long and weighing nearly 200 pounds. Naturally I had some auxiliary bracing under the table to help support the weight.
I have a 1 1/2 horsepower, 1725 rpm motor on the saw running at 230 volts. The switch is from an old bench grinder and is rated high enough. I run the saw at approximately 3000 blade feet per minute and have never bogged the motor down. The wheels will take an eleven foot long blade up to one inch wide, but I generally used to keep a 1/2 inch blade on it. A 3/4 inch blade would be optimum"
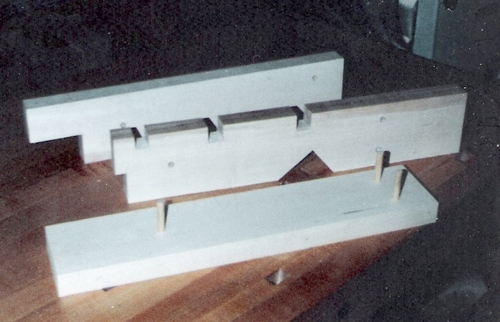
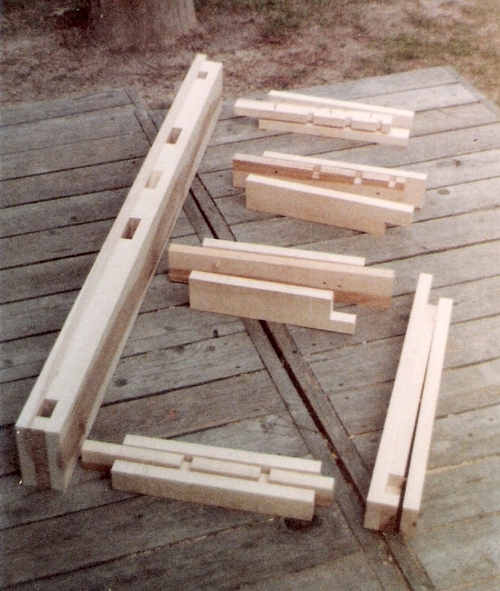
"My saw is constructed out of hard maple for the frame and birch cabinet grade plywood for the panels. Southern yellow pine would have been strong enough and less expensive, douglas fir would have been excellent, but I wanted a nice hardwood to match my workbench. ;-) "
|
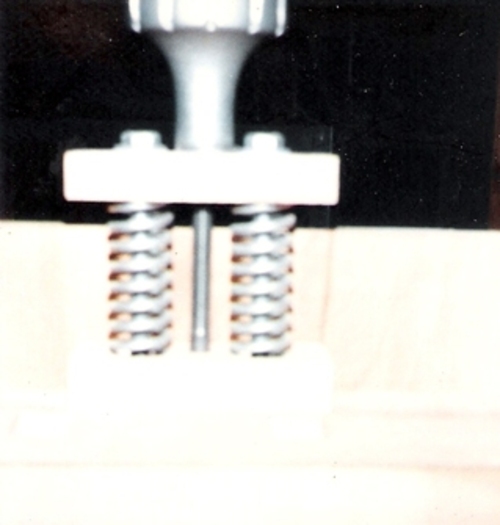
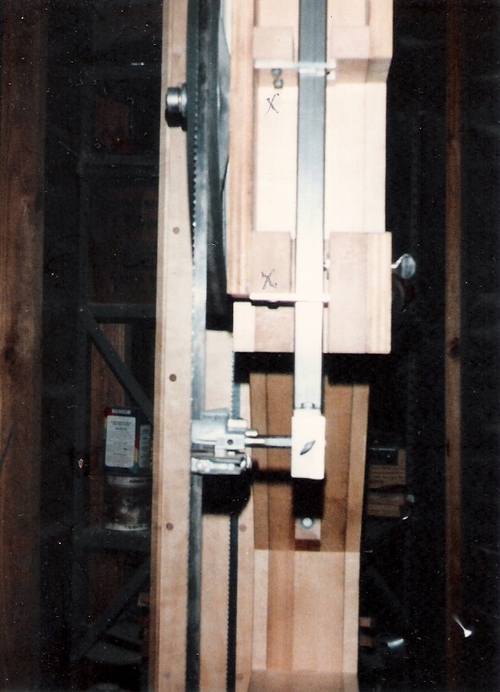
"The blade tension springs are the older style used in Rockwell/Delta's 14 inch saw. They aren't really very good - don't return to their full height, but they are the best I could find at the time. Together they exert about 400 pounds of force on the blade, which is about 250 pounds short of what I would like for a 1 inch blade; 650 pounds would give me about 10,000 to 12,000 psi on a 1 inch blade. I plan to replace them with stronger springs. which is why I want stronger shafting and bearings - and why I may need stronger wheels."
Jim later elaborated:
"I should add that they don't come with a Gilliom parts kit. While I'm not really satisfied with them, they are perfectly adequate for tensioning up to a 1/2 inch blade, which will do most the work one would ever want to do with the saw. They do reasonably okay on a 3/4 inch blade, too. It's only when using a 1 inch blade that their limitations become evident. A 1 inch blade will run on the machine and do a good job of sawing even at less than the optimum amount of tension recommended for such a blade, but the springs suffer for it. I believe I read somewhere several years ago that Delta and Jet have upgraded their OEM springs for their 14 inch saws, so their present ones would probably be fine."
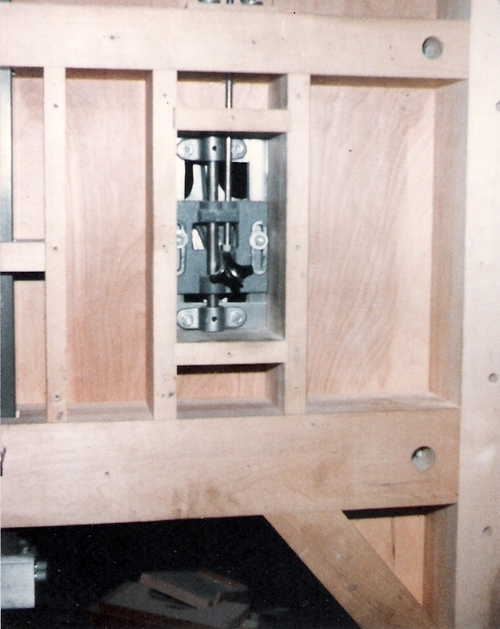
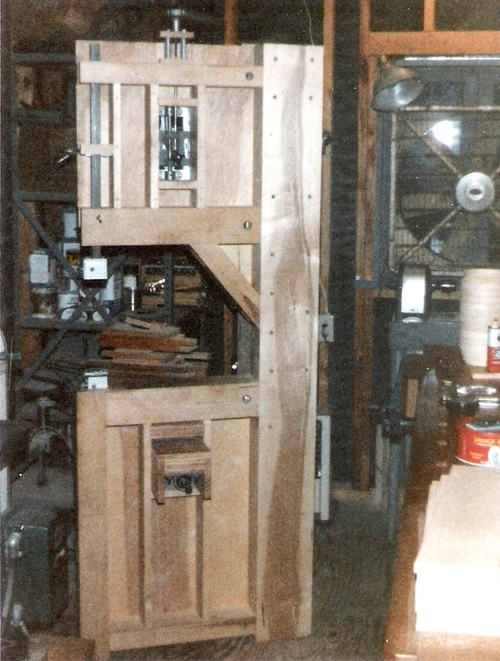
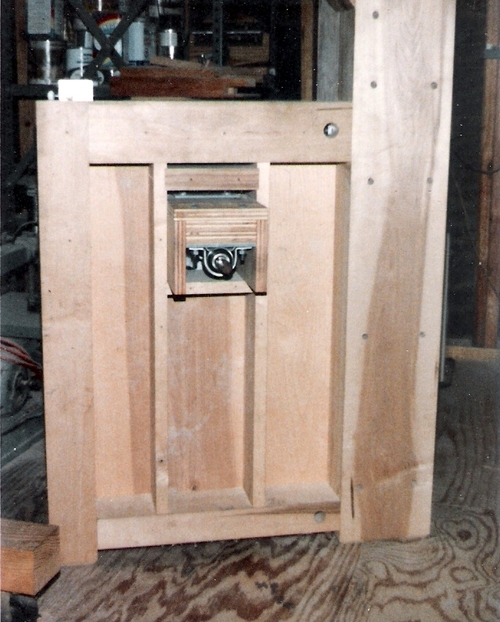
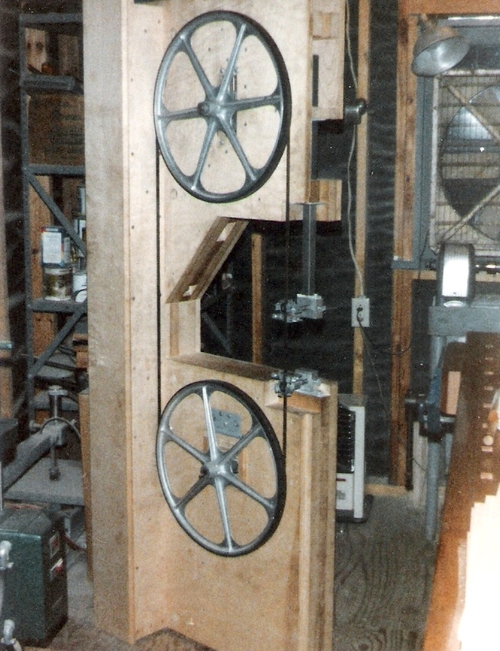
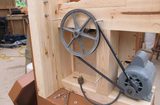
This photos shows the upper wheel mount from the Gilliom parts kit, mounted in Jim's very sturdy hardwood frame.
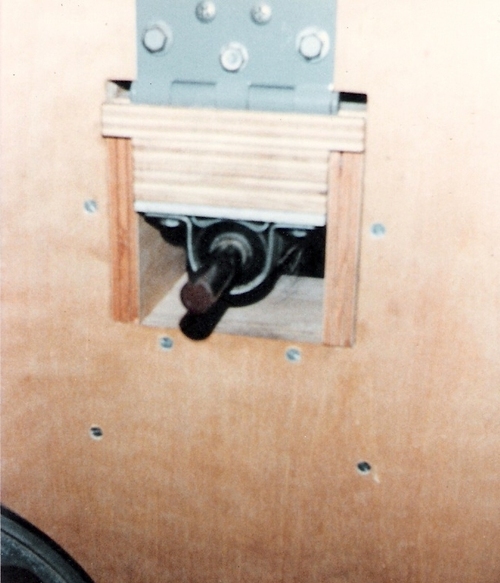
"I used a hinge on the lower wheel bearing mount as a concession to Mr. Gilliom. He was of the opinion that the lower wheel of a bandsaw should be tilted a degree or two off vertical to counter the upward pull of blade tension and the force of pulling a blade through wood being sawn; his own saw design allowed for this and out of politeness I didn't tell him that it needed that because it just wasn't rigid enough. :-) For my part I wasn't sure one way or the other. I had noticed that the lower wheel seemed tilted in a number of manufactured saws that I had had experience with, but I didn't know if that was by intent; I had never seen a saw that had any means of making such an adjustment either, although some do allow to move the shaft sideways.
I bored some additional screw holes in the hinge leaf which attaches to the frame and ran in some long, hex-head lag screws - 2 1/2 or 3 inches. Not visible in the photos, but inside the motor cabinet, are a couple of vertical studs attached to the panel on the back of the frame, on either side of the bearing mount, which give support to the rear of the drive."
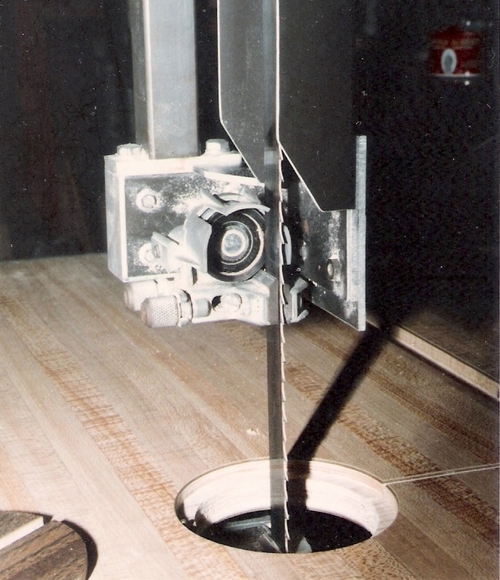
"The blade guides are Carter Products cheapest model and are frankly more expensive than they are worth. I think I could fabricate better ones; your blade guides look intriguing.
The Carter blade guides did not come with the Gilliom parts kit; it contains
guides of a different design intended only for blades up to 1/2 inch wide.
The Carter guides were obtained separately and are intended only for blades
to 3/4 inches wide. However, they do work with a 1 inch blade. These are
the Micro CP30 model which sells for $79 without the mounts - those are extra.
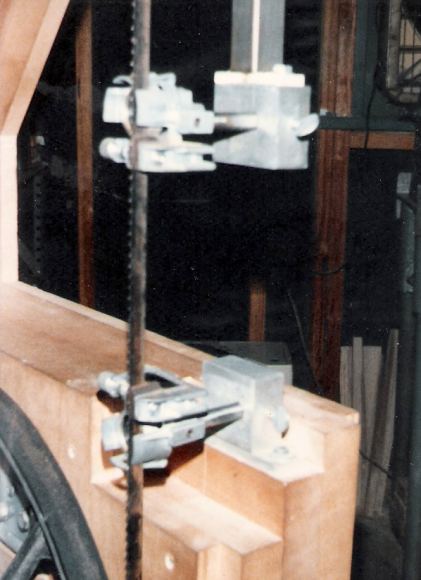
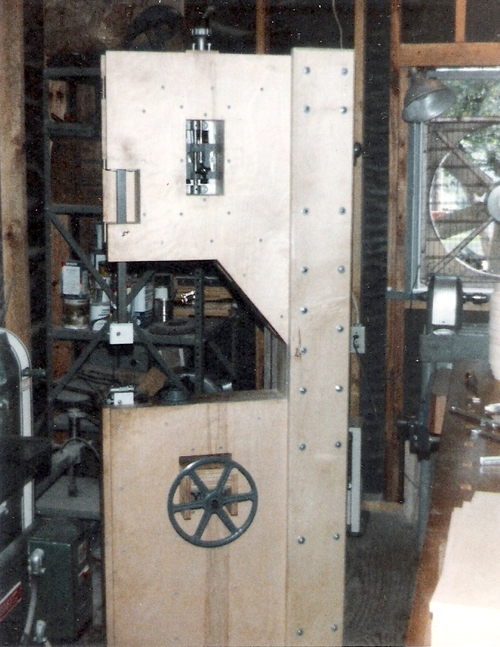
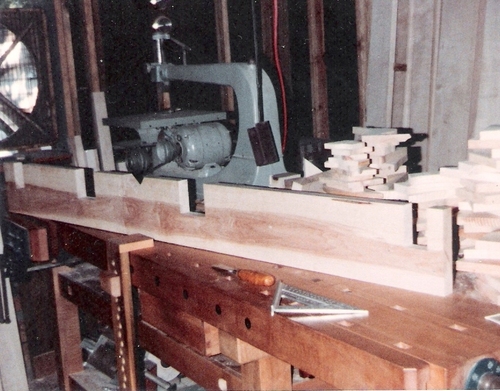
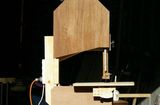
"I use a single belt drive with Browning cast iron pulleys, which did not come with the original kit, but are far superior to die cast. The saw wheels are cast aluminum and are much stronger than one would think. The table is a non-tilting type, although I have a design worked out to fit it with trunnions; something else I will eventually do to it when I get back to it."
Matthias comments:
When I realized the large v-belt pulley on my bandsaw
was causing vibration, I looked into replacing it with a cast iron one as well,
but those cast iron pulleys are quite expensive. So I trued my plywood V-belt pulley
by turning it with a chisel.
"I haven't used the saw since 1994 and presently there is so much stuff piled
around it that I can't get to it ( I have a really tiny shop.) I would like to
finish the thing one of these days though. While my frame seems to be as
strong and rigid as I could ask for, I wish the metal parts were a bit heavier.
The main shaft is only 3/4 inch in diameter and the upper shaft is only 5/8.
The upper wheel seems to be the weakest link, as it has only bronze sleeve
bearings and they wear very quickly. Unfortunately there is not enough
material in the wheel hubs to go to a larger shaft and bearing for the upper
wheel unless I were to put the shaft itself in pillow blocks and make a
different blade tensioning mechanism. That is probably what I will try first."
Matthias comments:
Interestingly enough, when looking at pictures of old (pre ball bearing)
bandsaws on the web, they always have the upper wheel turning with it's
shaft, with the shaft sticking out the back. I would guess that
a bronze bearing turning on a fixed steel shaft is not as long lasting
as a steel shaft turning on a fixed bronze bearing."
Jim's response to my comments above - I'll include it in full, because I think it's very informative:
"Without wishing to seem a know-it-all, I think you are partially mistaken regarding the upper wheel bearings for old bandsaws. Quite a number of them had a bronze sleeve in the hub of the wheel, spinning on a shaft which was bored axially for an oil channel and fitted with an oil cup on its end. The old antique Bental Margedant I own is made that way, as was a slightly newer Superior Machinery Co. saw I rebuilt for someone a number years ago. I've seen numerous other examples over at http://www.owwm.com/photoindex/bytype.aspx (select Band Saw from dropdown menu)
Of course most of these are saws that were made in the 19th century and this method was used into the early 20th. Sometime early on some manufacturers began using a shaft revolving in a babbitted bearing for the upper wheel; this was probably used concurrently with the sleeve type for awhile. Crescent made saws like this. Then with the advent of ball bearings sometime in the 1920's and 30's the better and more expensive machines began using a shaft spinning in ball bearings for both upper and lower wheels. And then later many companies making 20 inch and smaller saws started putting the ball bearings in the hub of the upper wheel itself, and then eventually in the hub of the lower wheel as well.
You are right about the bronze sleeve bearings wearing rapidly - even with the oil channel in the shaft the shafts wore, too. Surprisingly those large early saws were not designed to run with a great deal of tension to the blades. The springs on the few I've had experience with bottom out at around a hundred pounds or so. But the machines were capable of running blades 2 inches wide, so the beam strength needed to resist deflection was inherent in the blade itself. Likewise the original Gilliom saw was not designed to run with much blade tension either, nor was it meant to use a blade wider than 1/2 inch. One could say I've pushed the parts to their limits.
In the case of those big antiques with 36 inch wheels there is already quite a load on the bearing even without straining the blade. I would bet what the designers found was that once the sleeve began to wear a bit and things loosened up, the heavy wheel began revolving eccentrically enough to throw it out of balance. That's probably part of the reason they began to use a revolving shaft for the upper wheels. I note that they often attempted to make the upper wheels lighter on their saws, too - that is probably part of the reason why. The other part was to avoid the flywheel effect in the upper wheel when the saw was shut down - it had a tendency to break blades."
Jim and I had an email exchange about the relative cost merits of building one's own bandsaw with such inexpensive and decent Chinese made bandsaws available these days. Jim reflected on this:
"It's certainly true what you write about being able to buy a manufactured saw for the price of materials needed to build one. I'm not sure what the lumber, plywood, and electricals would cost these days for my saw, but I know a Gilliom parts kit for their 18 inch saw is about $425. My saw doesn't use all the parts in their kit, of course, but it uses the expensive ones. Also, those Carter blade guides are over $75 each now, which I think is way overpriced. I think even the Gilliom parts kit is overpriced, but aluminum and other metals prices are very high these days. The cast iron drive pulleys are not inexpensive either.
If I recall correctly, I arrived at a total price of around $600 for everything needed to build the saw back in 1987 when a Gilliom parts kit was about $200. I think the total could easily be over $1000 these days, if one had to buy everything. For a few hundred more one can get a brand new 16 to 18 inch saw from Grizzly or Jet. I've seen used 14 inch saws on Craigslist lately for less than $300. I suppose the best reason for designing and building one's own saw is not only for the satisfaction of it, but the utility - one can make it just exactly as one wishes and perhaps get better performance.
Gilliom Mfg. is still in business, but doesn't have a web presence. Since the 1940's they have sold metal parts kits for a number of wooden framed, shop built woodworking machines, including an 18 inch bandsaw.

Jim Wheeler lives in Pinehurst, near Houston, Texas |
The Gilliom saw is intentionally designed to be very simple to build so that even a beginner can realize some success with it. Even though it is a somewhat elementary design, that doesn't preclude more experienced builders and users from making it a more sophisticated machine."
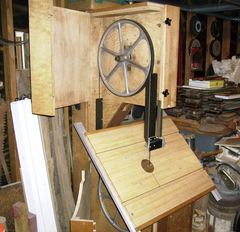
Jim wheeler has since added trunions to his bandsaw to allow the table to tilt.
More about Gilliom manufacturing
See also:
 Warren Brownell's Gilliom/ woodgears bandsaw
 More reader built
bandsaws