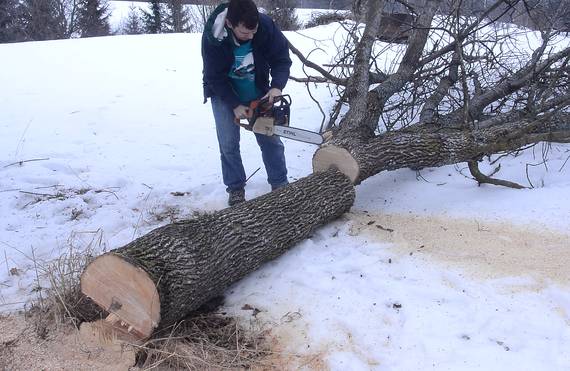
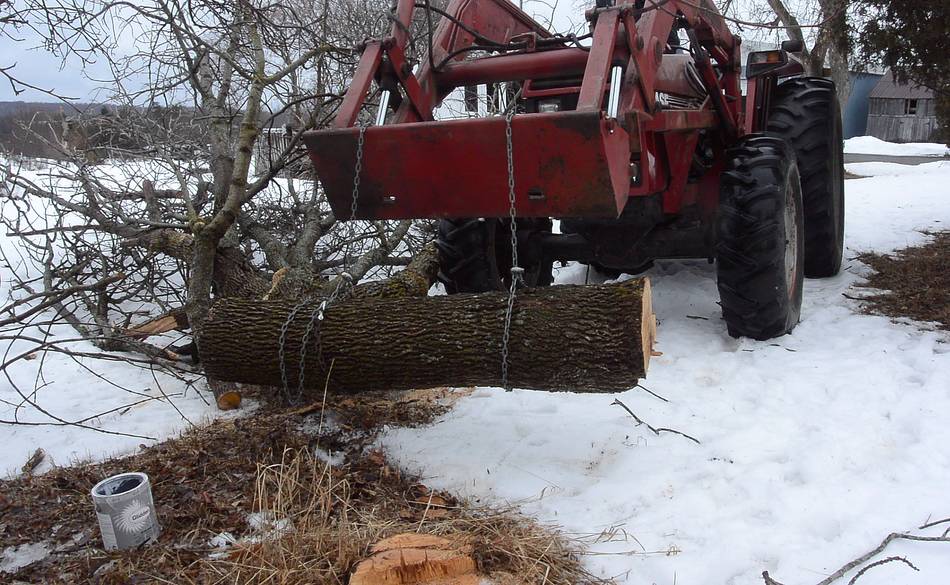
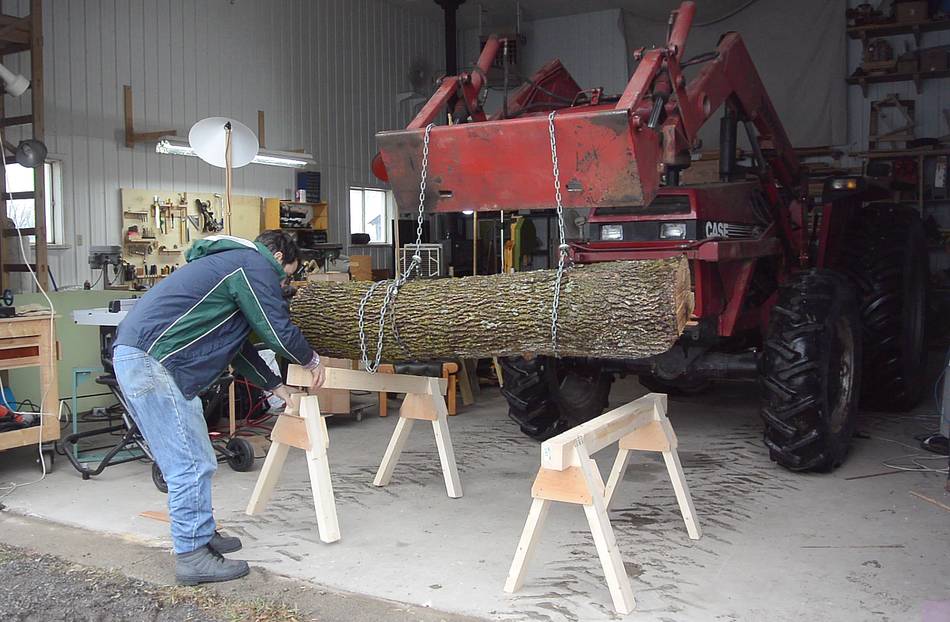
It was my plan all along to try to use my new 20" bandsaw
as a sawmill. So back in January, I cut down an ash tree for a log. I wanted
to get rid of this tree all along because it was shading an apple tree.
Also, the ash borer would get it in a few years anyway.
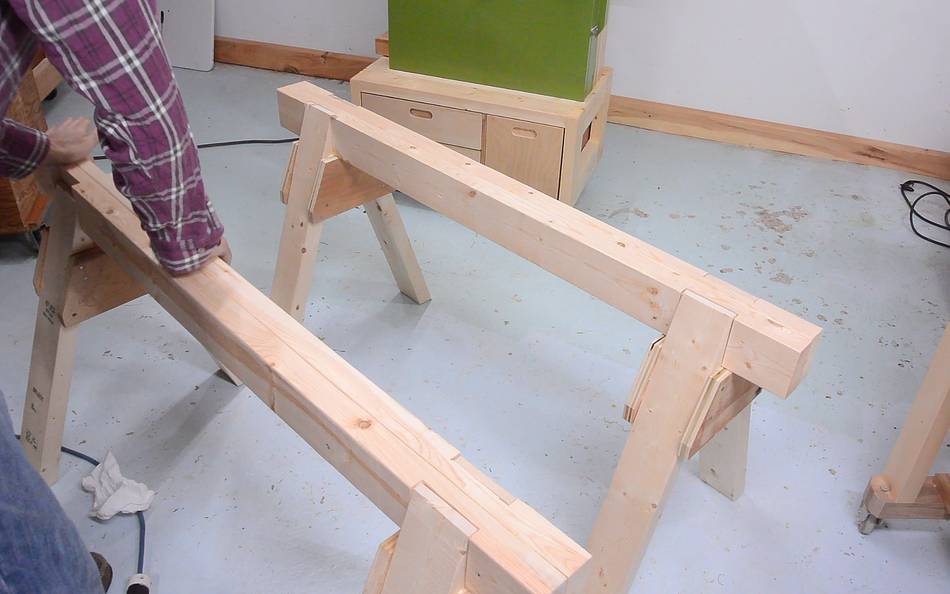
Special sawhorses
The idea was to put the bandsaw on a dolly, and push it along a log resting
on some sawhorses. I needed a pair just the right height.
I built sawhorses similar to these ones,
but making full use of the machines in my shop, which made the work much faster.
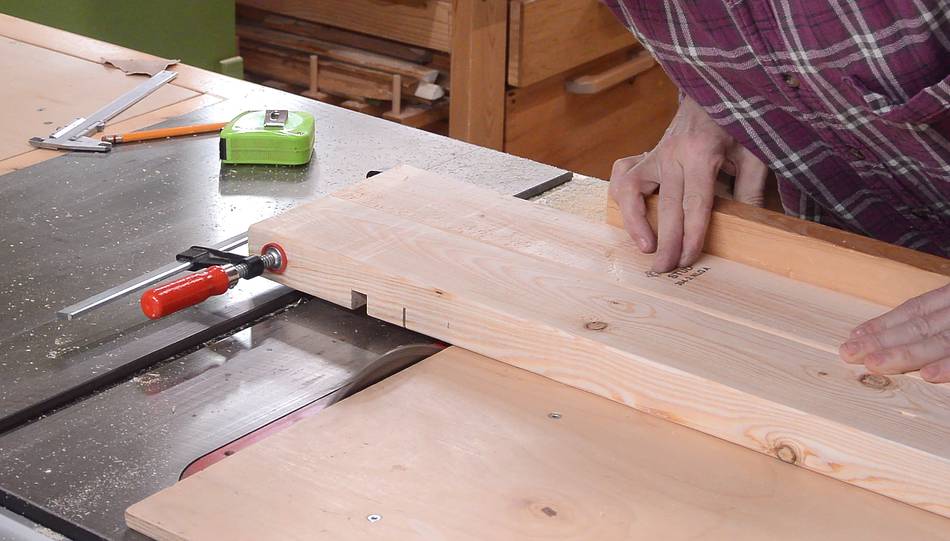
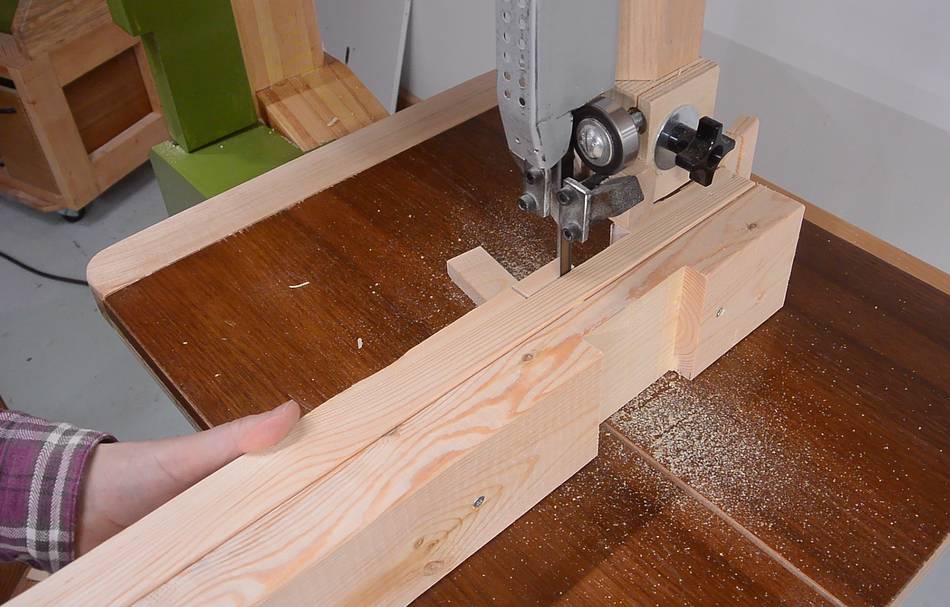
First I made a few cuts in the sides of some 2x4s (two at a time) for a big dado
to accept the legs. I cut away just enough to make it easy to
remove the rest with the bandsaw later.
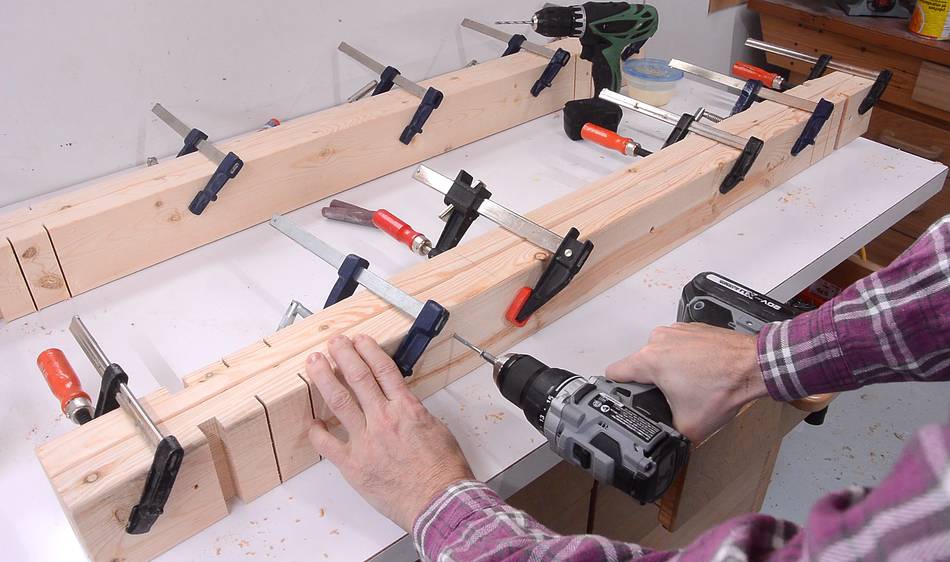
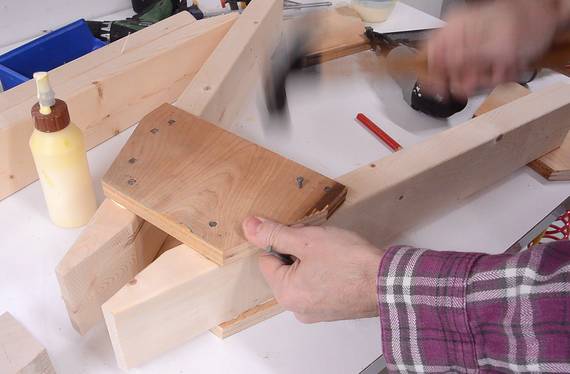
I then glued two 2x4s back to back to form the main beam of the sawhorse. I added
a few screws just to be on the safe side.
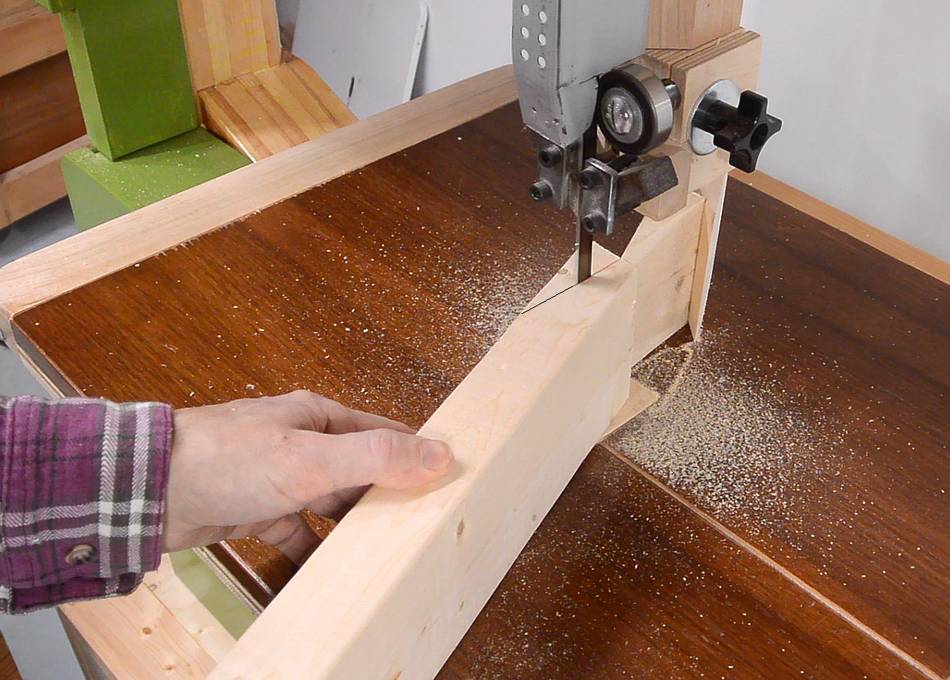
Cutting the legs for the 2x4s, at a 22.5 degree angle.
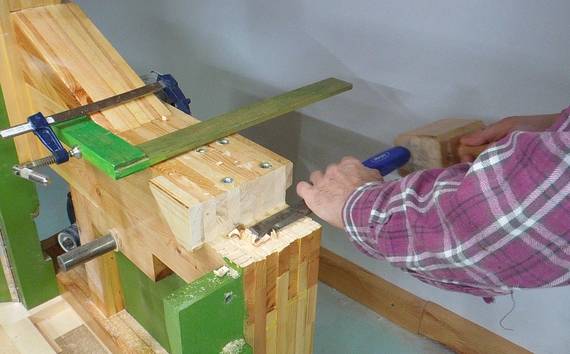
Cutting the shallow angle where the legs meet the beam. This part was
particularly difficult to cut with a handheld circular saw last time.
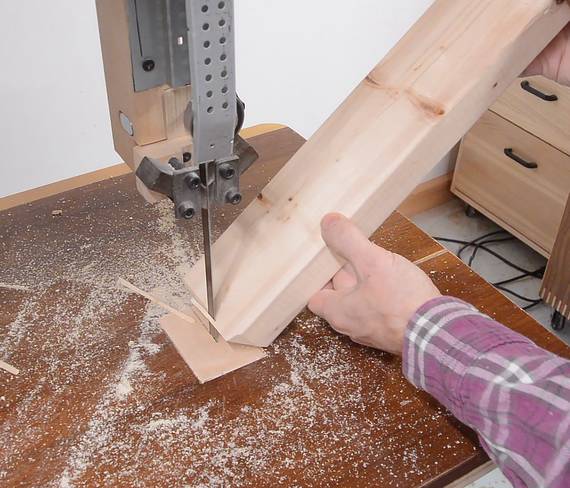
I also chamfered the bottom ends of the legs. Otherwise, they have a tendency
to break out splinters when dragged across the floor.
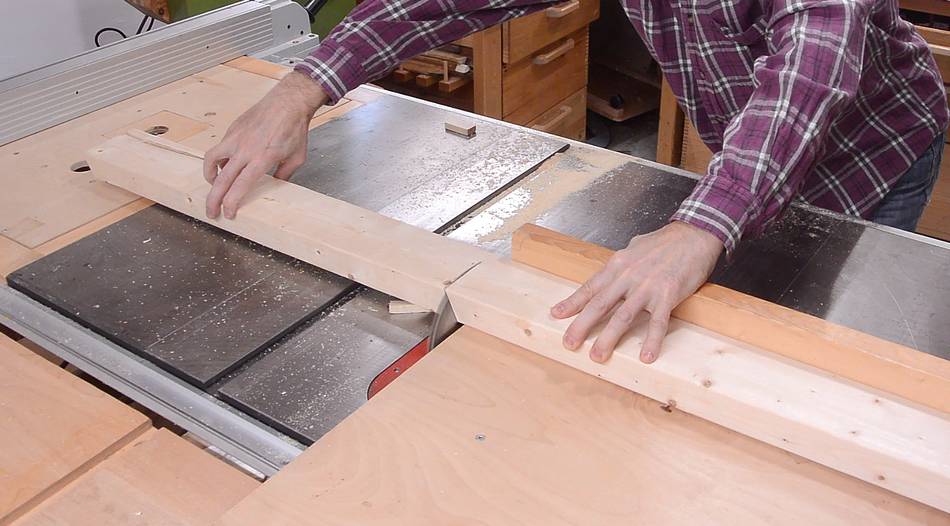
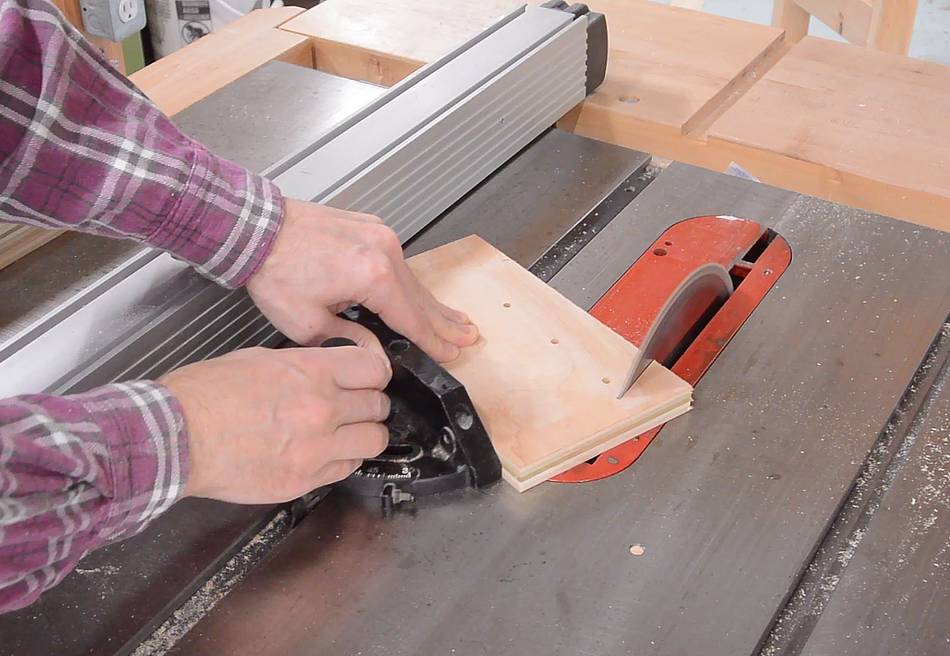
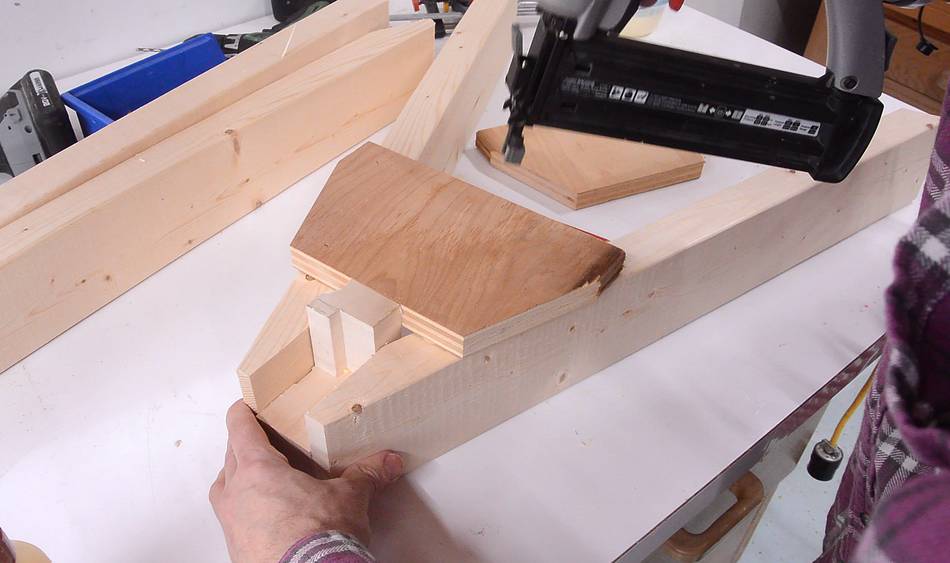
Cutting the gussets to hold the legs together...
... and finishing the big dadoes in the legs on the bandsaw.
I made a spacer to get the legs the right distance apart as I nailed on the gussets.
I first attached the gussets with a few brad nails to fix them in place
then added bigger nails to make them sturdy.
The sawhorse beam just slides into the leg assemblies. I might add screws to make
this more rigid later, but for now, this makes the sawhorses easy to take apart
when I'm not using them.
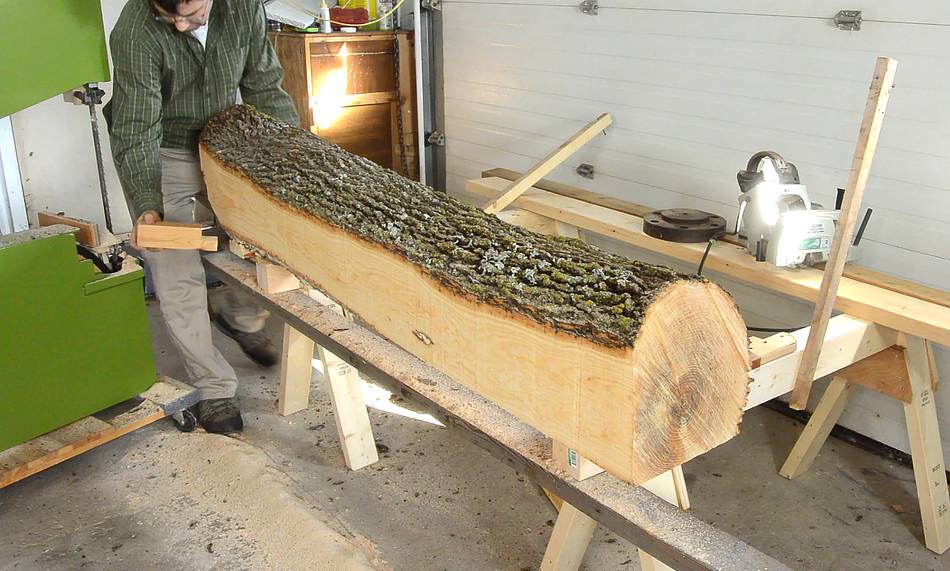
I backed the tractor into my big garage workshop,
assembled the sawhorses under the log, lowered the log, then backed the tractor into the
back corner where I normally park it.
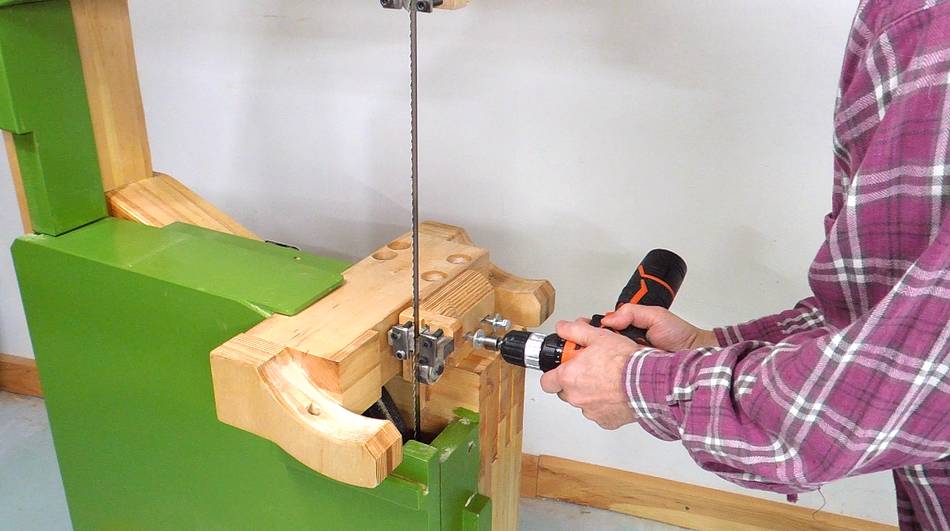
Modifying the bandsaw
I still needed to make some changes to the bandsaw to prepare it for the milling.
Mainly, I wanted to move the lower blade guide further down to give me more
vertical height. Here I'm unscrewing the blade guides from the lower trunnion beam.
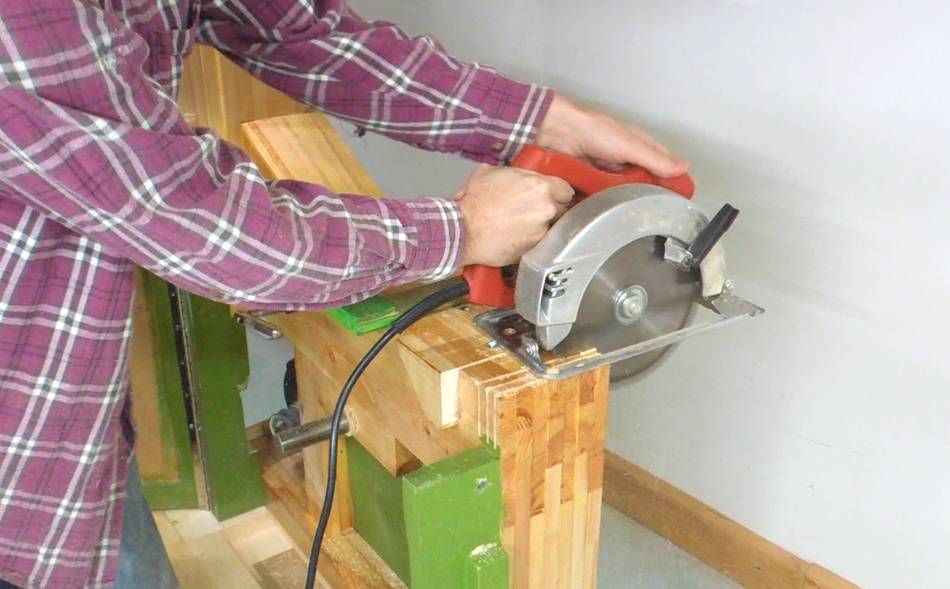
Next I removed the trunnion beam as well.
I then cut away a corner of the frame to be able to move the blade guide
further down, first making a series of cuts with a handheld circular saw, then cleaning it
up with a chisel.
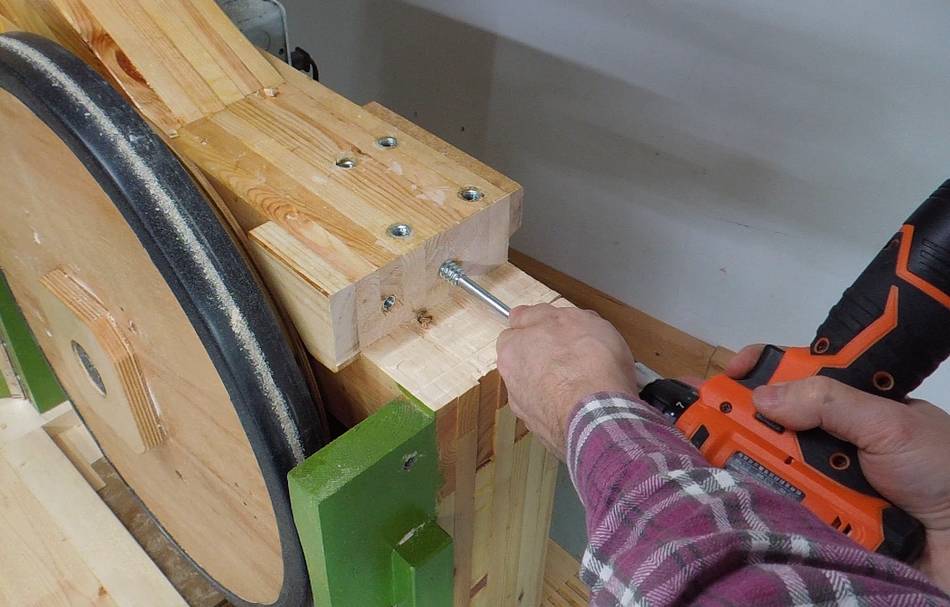
I installed two threaded inserts in the frame so I could screw the blade guide
directly to it. I previously just tapped holes into the trunnion beam for mounting the
blade guides, but this being soft wood and end grain, there would not be enough hold
for a machine screw in the wood. I also put some construction adhesive in the holes
before installing the inserts, just for good measure.
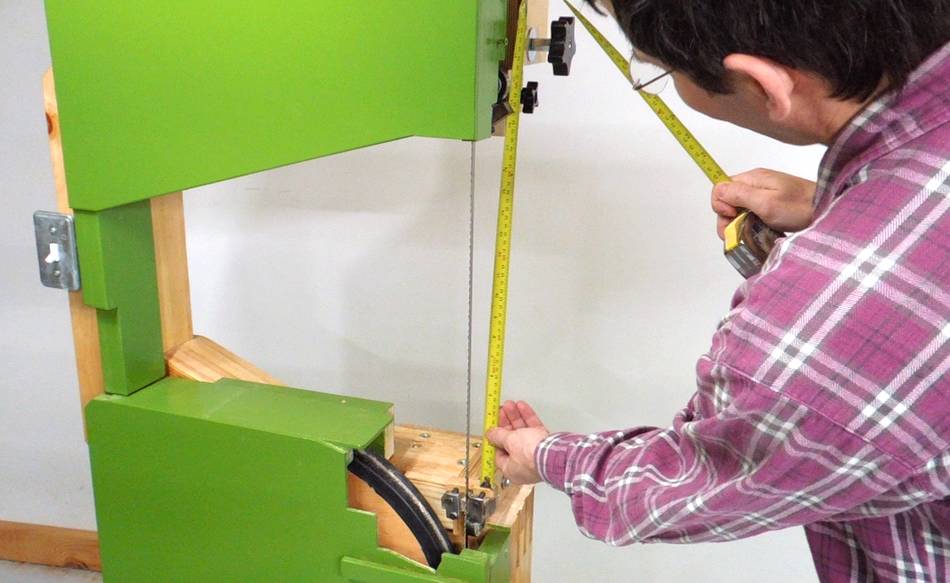
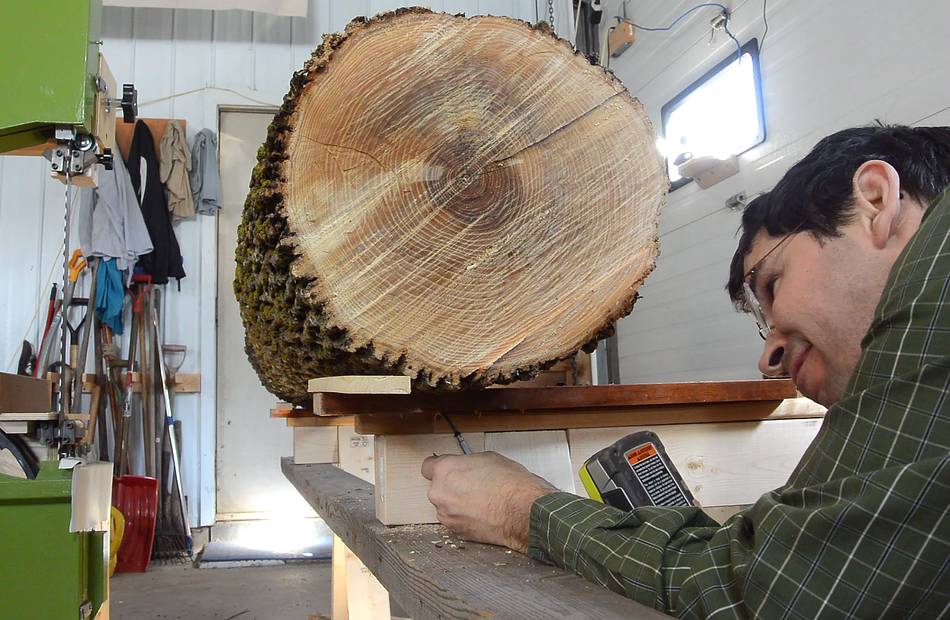
With the upper blade guide all the way up, I now have 44 cm or 17.5" between
the guides.
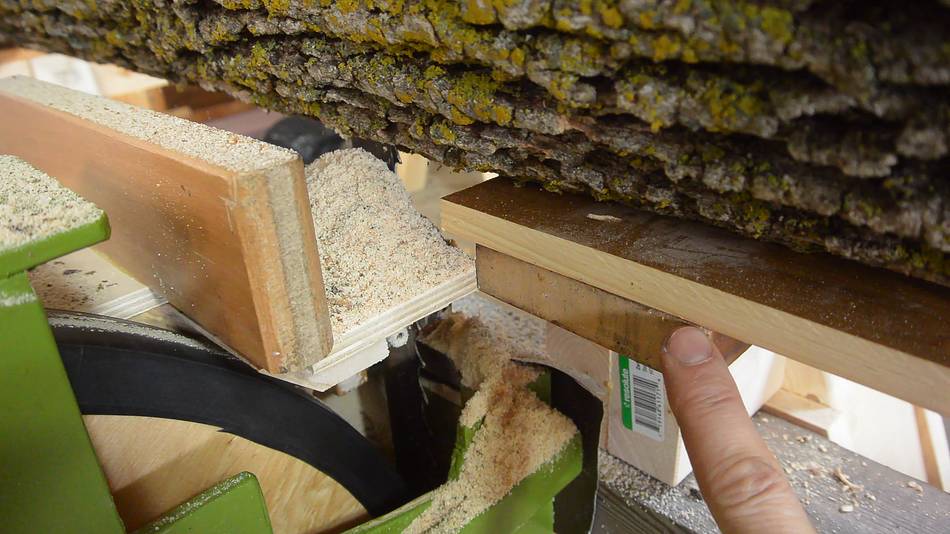
After that, I realized whatever board or slab I cut off the log would end up falling on the blade
guides or potentially hit the wheel. So I made this guard to cover the blade guide and wheel.
I also made a metal cover for the frame. The plan was to push the bandsaw along
a board to guide it straight, and I didn't want to scuff up the paint.
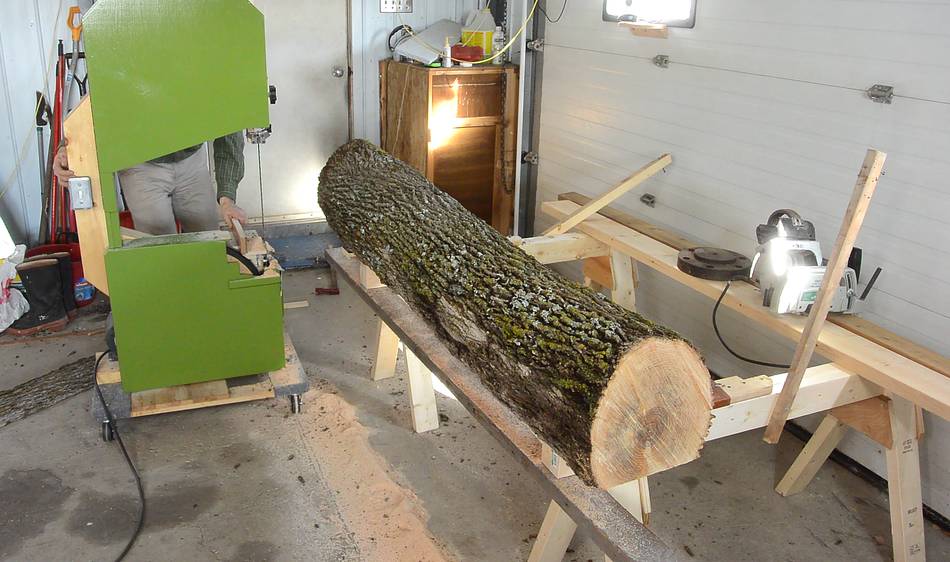
Milling the log
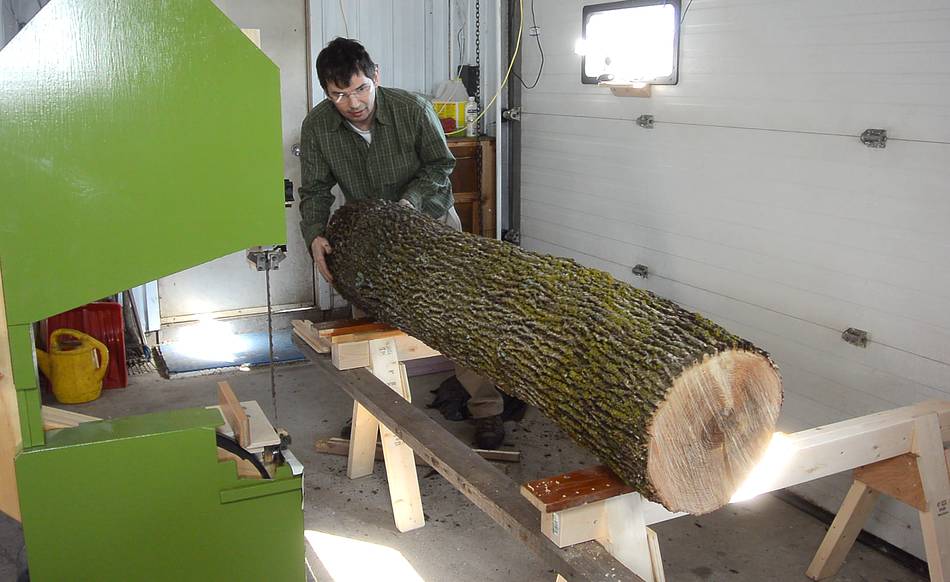
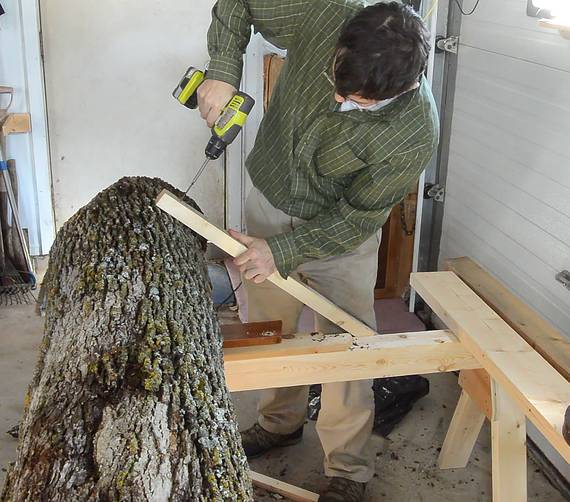
Rolling the log into position.
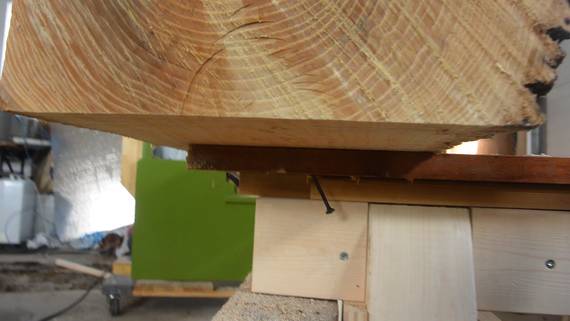
I also added two small boards of hardwood to extend the end of the sawhorse over
the blade guides, without adding too much height.
I realized, with the log over the end of the sawhorses, they might tip over. So
I added some counterweight to the other end of the sawhorses.
I also screwed the log onto the supports from below to make sure it wouldn't
slide around, plus two braces from the back to prevent it from rolling.
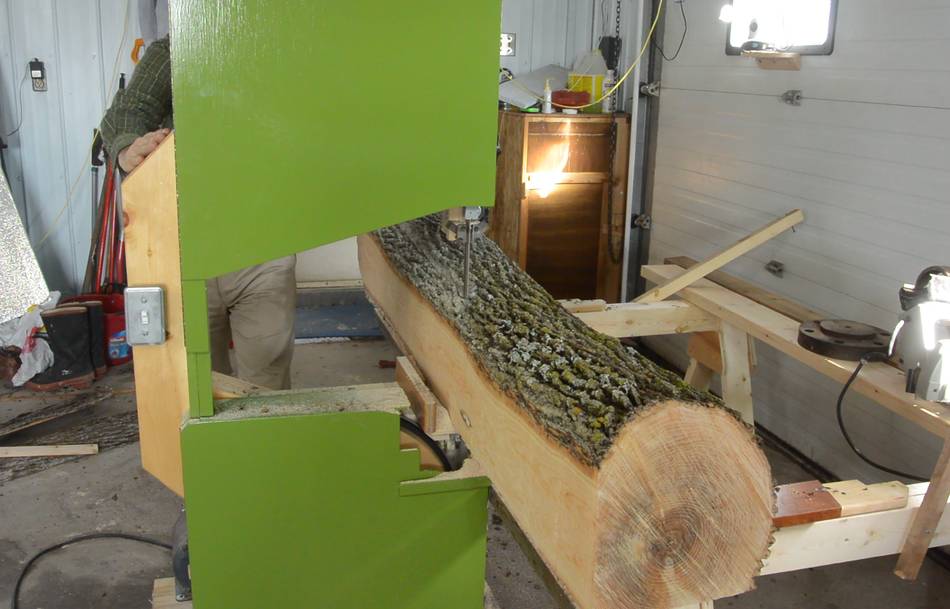
I was very nervous starting the first cut. All kinds of stuff could go wrong,
too much vibration, blade getting caught on the log and the bandsaw jumping up,
etc.
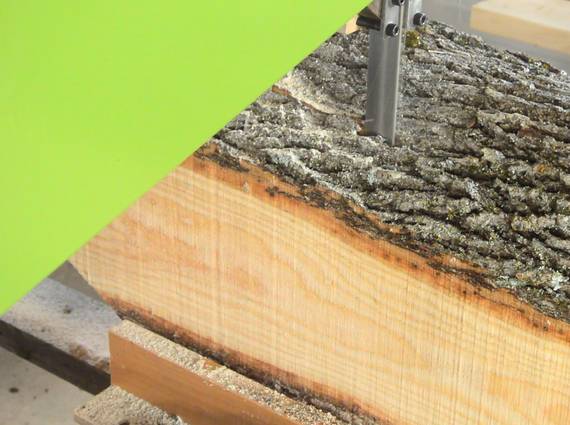
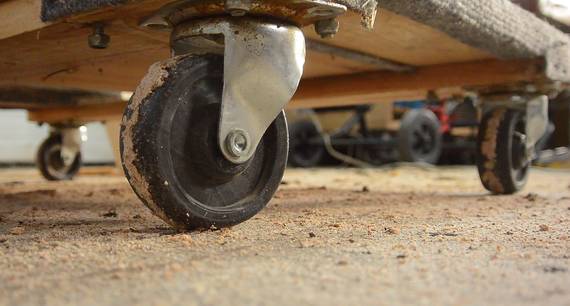
But it worked surprisingly well. I had some difficulty pushing the saw
along at a consistent and slow speed. Cheap casters on a rough concrete floor
made for less than smooth motion.
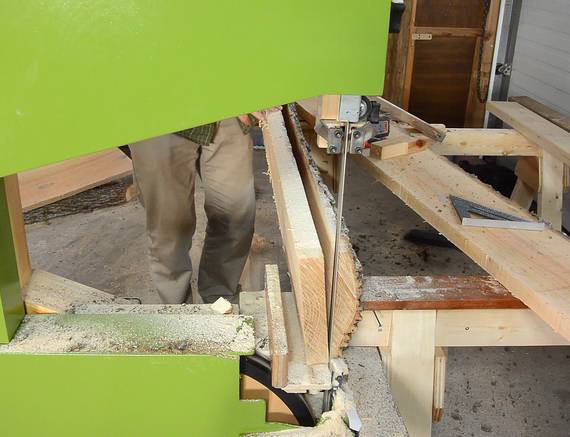
But before I got to the end of the cut, the bandsaw got caught up on the second
sawhorse. My hardwood support was sticking too far
forward. I expected the saw to just cut off the part that was too long, but the
board ended up hitting the guard I just added.
So I shortened it with a reciprocating saw.
Before I finished the cut, it occurred to me the slab falling down
might be a problem. So I clamped it against the end of the log
before finishing the cut.
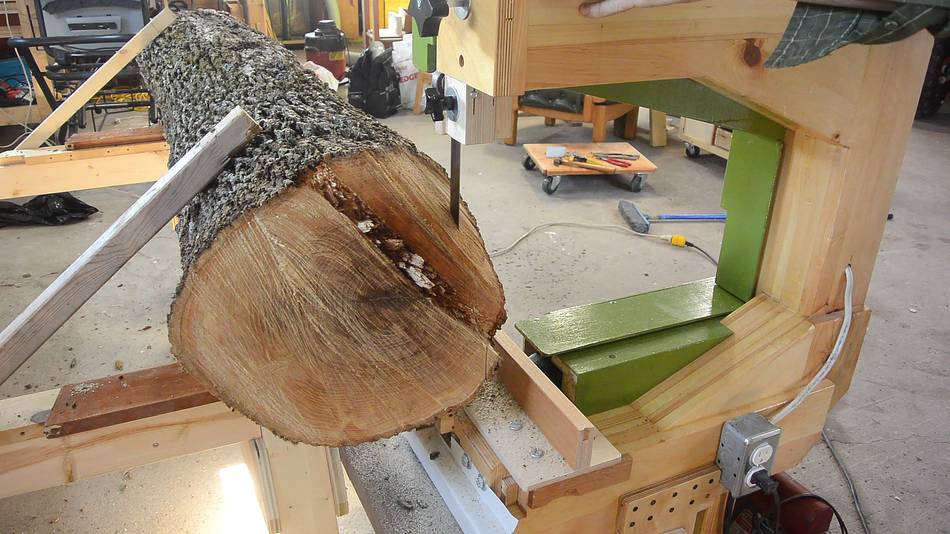
First cut successful. Very straight, though not the smoothest because of the
inconsistent feed rate.
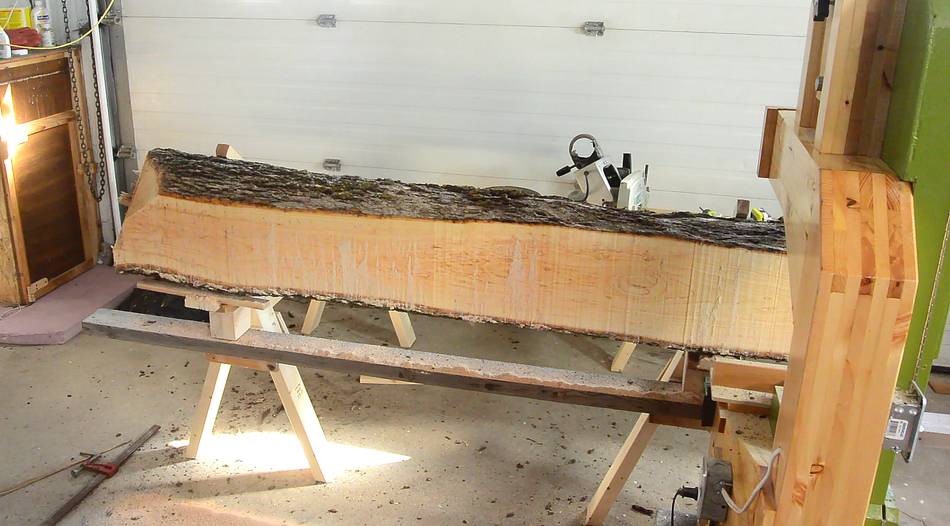
After that, I turned the log 90 degrees with the flat side on the sawhorses,
and pulled the saw back for another cut.
This cut was less deep than the first one and was a bit easier.
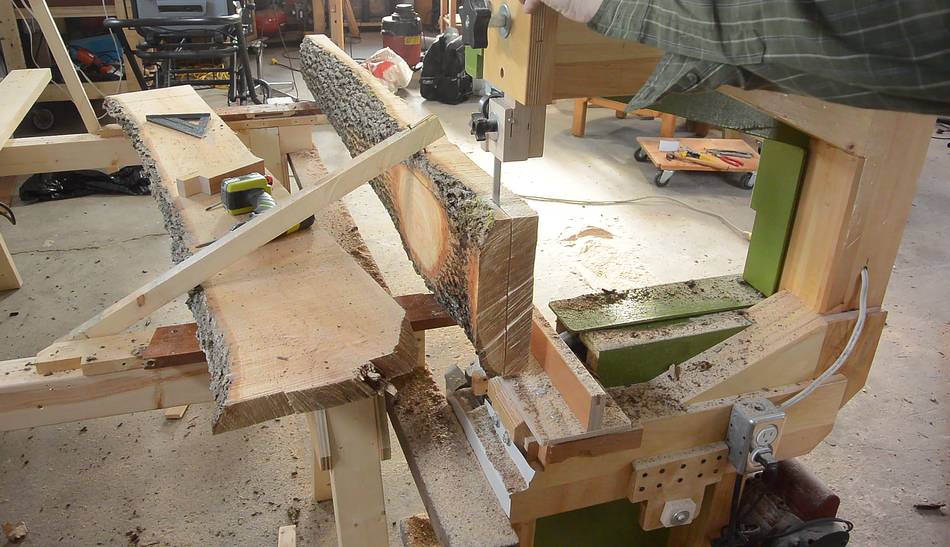
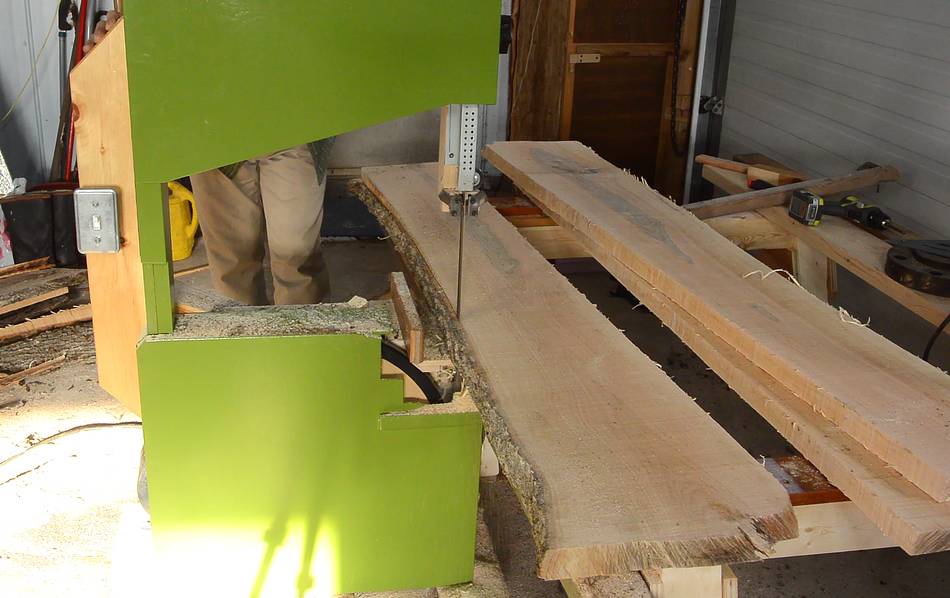
I was now ready to cut some usable boards. I just needed to move the log
forward by whatever amount I wanted to cut off next. I made a spacer to help
me position the log with a consistent overhang from the previous cut.
I still screwed the log down just a bit for each cut, just to make sure it
wouldn't slide around.
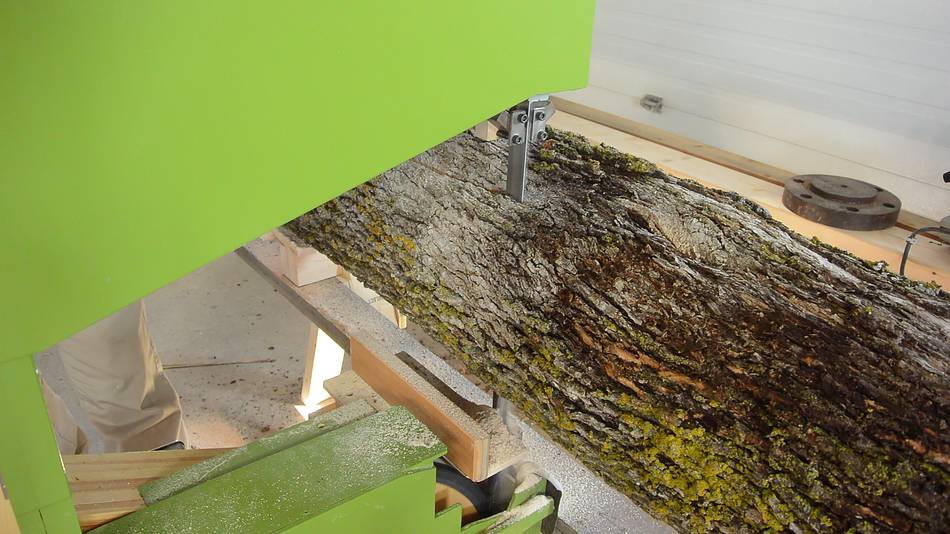
Cutting went fairly well. The 3/4 hp motor that I still had on the bandsaw was
way under-powered and I stalled it a few times. Fortunately,
I was quick enough to turn the power off every time before any damage
occurred or the breaker popped.
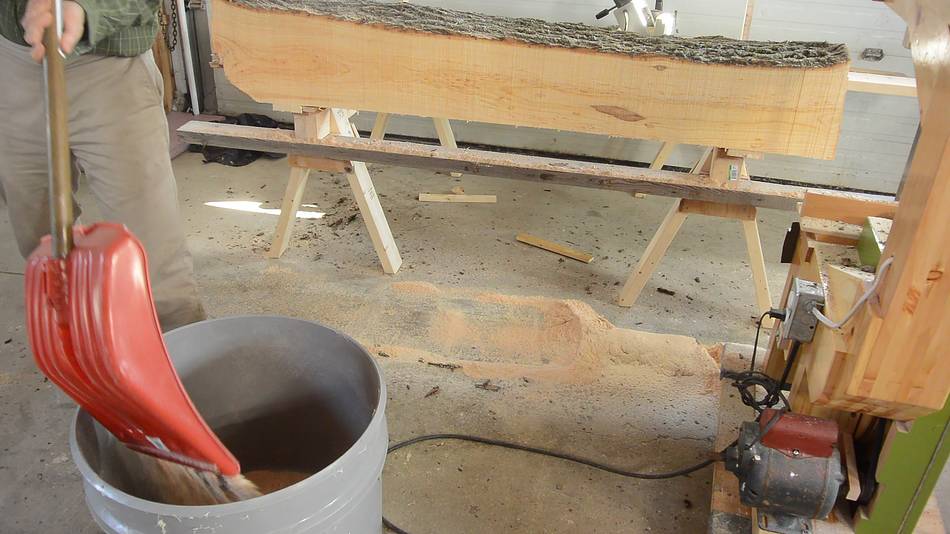
I had to shovel up the sawdust between cuts. But even so, sawdust started sticking
to the casters, which made for an even rougher ride. I should use bigger casters
to get it to roll better.
Getting ready to cut the last board. What's left of the log just barely has
enough support on the edges of the sawhorses to hold it in place. I also added
a brace again to keep this part from tipping off.
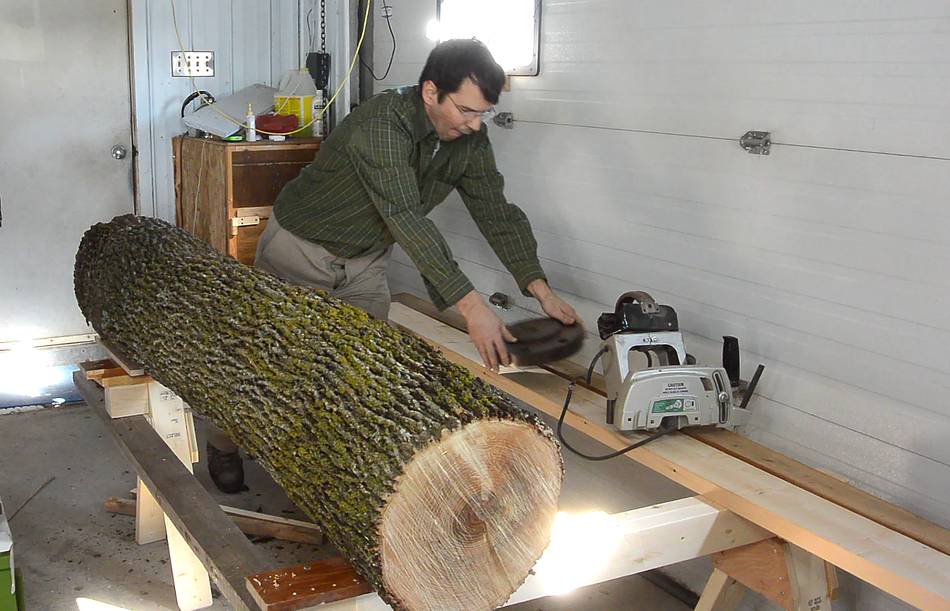
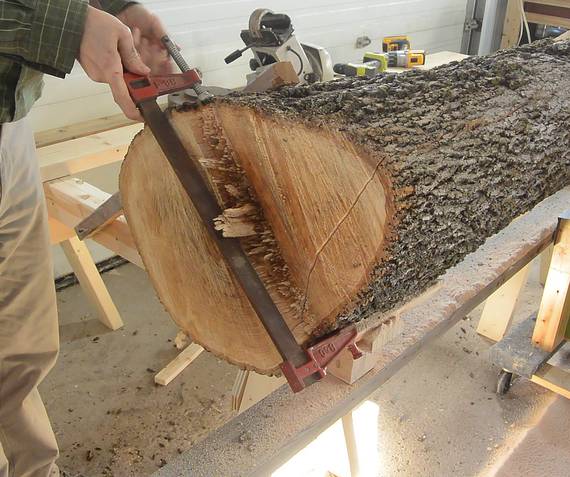
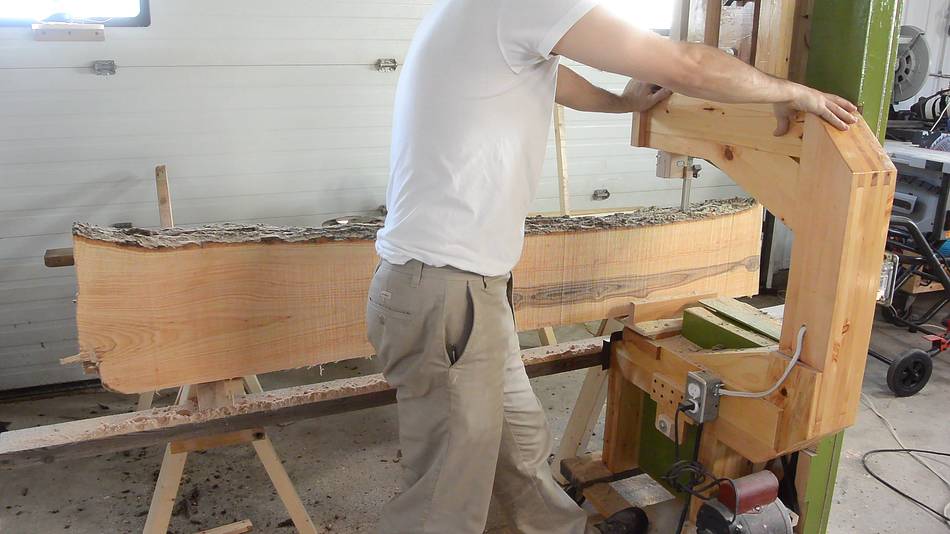
Edging the boards. First I did this with a guide to get a straight cut, but
then I figured it would be better to just follow the edge of the tree, so I'd mostly be
cutting off the bark.
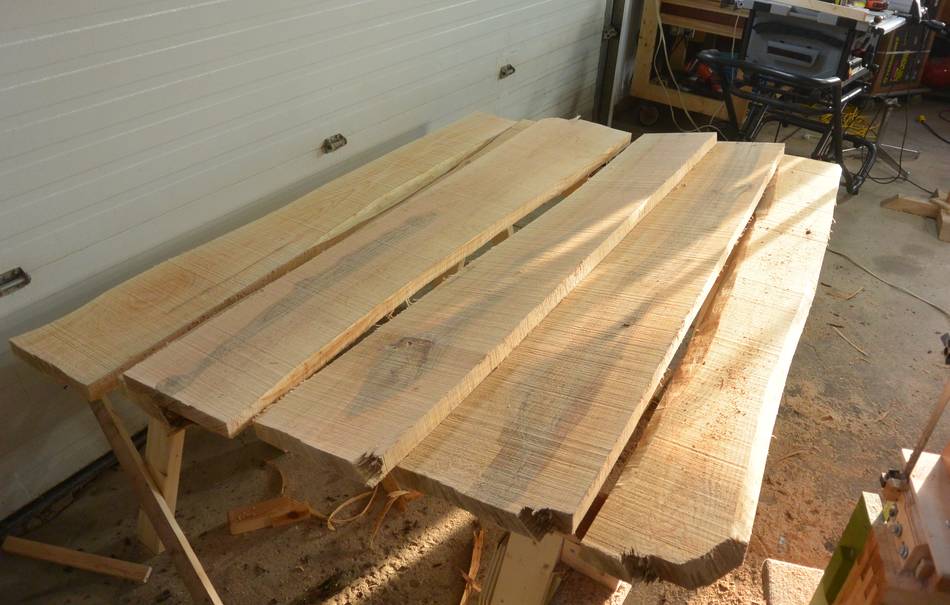
I got six planks out of this log. It took some time to figure out the process, and
there is much that I could still improve.
The capacity of this set-up is limited by the height of the saw to logs of maybe 45 cm
(18") in diameter. A bigger limitation is the need to be able turn and position
the logs by hand. I don't have a firm edge to rotate the log against, so
I can't just flip it over with a canthook.
But I'm pleased with how it works. Much better than chainsaw milling, and also better than
my 14" bandsaw / sawmill. Being able to use a proper
sawmill blade makes a big difference. Sawmill blades can't be used on 14" wheels.
The tight bend required for 14" (35 cm) diameter wheels will cause the thicker blades to fail
prematurely from metal fatigue.

 It was my plan all along to try to use my new 20" bandsaw
as a sawmill. So back in January, I cut down an ash tree for a log. I wanted
to get rid of this tree all along because it was shading an apple tree.
Also, the ash borer would get it in a few years anyway.
It was my plan all along to try to use my new 20" bandsaw
as a sawmill. So back in January, I cut down an ash tree for a log. I wanted
to get rid of this tree all along because it was shading an apple tree.
Also, the ash borer would get it in a few years anyway.


 20" bandsaw build
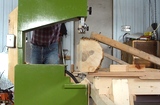 bandsaw-on-a-dolly sawmill improvements
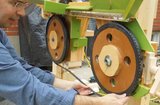 Bandsaw sawmill misadventure
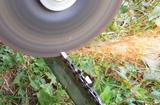 Chainsaw sharpening
 My dad's old sawmill
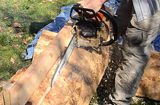 Chainsaw milling experiment
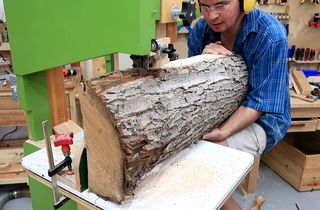 Milling a log on the bandsaw
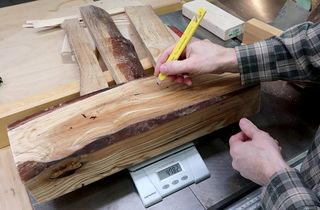 How long does wood take to dry