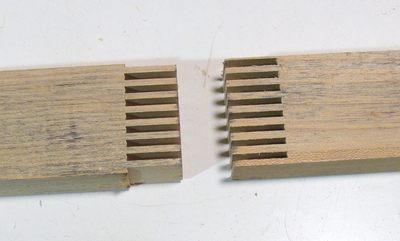
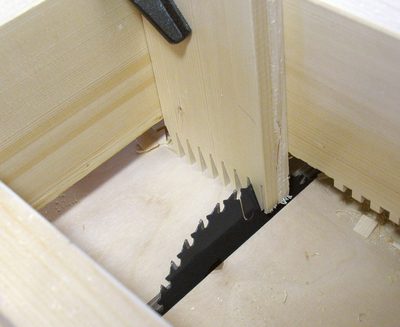
 The joints, being very tight, firmed up surprisingly fast, so that within a few
minutes of me assembling the finger joints, they became very rigid and I could
put them on the jointer to smooth out the resulting rails.
The joints, being very tight, firmed up surprisingly fast, so that within a few
minutes of me assembling the finger joints, they became very rigid and I could
put them on the jointer to smooth out the resulting rails.
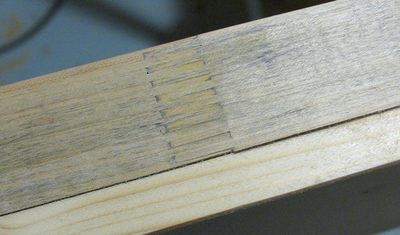
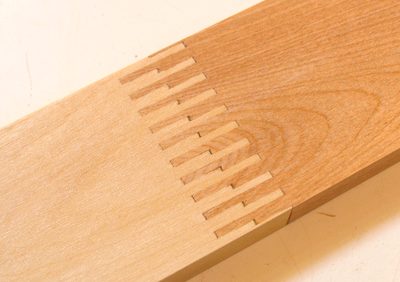
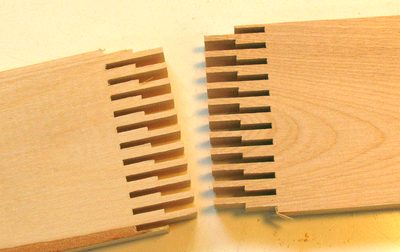
 Using a regular saw blade instead of a dado blade, very fine finger joints can
be cut with my jig
Using a regular saw blade instead of a dado blade, very fine finger joints can
be cut with my jig
This one was done with some pieces of scrap maple. I end to end fingerjointed several pieces so I could use scraps of hardwood for the ledge that goes along the bottom edge of the rails on my queen size bed
The joints, being very tight, firmed up surprisingly fast, so that within a few
minutes of me assembling the finger joints, they became very rigid and I could
put them on the jointer to smooth out the resulting rails.
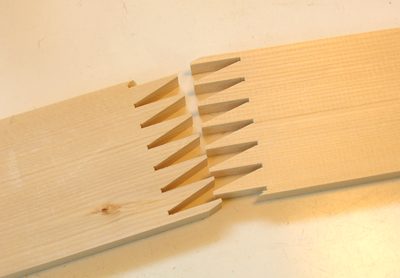
When buying finger joined material, the fingers are always trapezoidal, or triangular. Provided that the glue is strong enough, and the angle narrow enough, this can produce a joint that is nearly as strong as the wood it joins.
Ideally, I would have a sawblade that makes a trapezoidal cut, but such a thing doesn't exist, so I experimented a little with trying other variations on the end to end finger joint.
 One experiment was to make stepped finger joints. With this joint, in theory,
the joint could be two thirds as strong as the wood itself, provided that the fingers
are long enough and the glue strong enough.
One experiment was to make stepped finger joints. With this joint, in theory,
the joint could be two thirds as strong as the wood itself, provided that the fingers
are long enough and the glue strong enough.
 I produced this joint by stacking two sawblades of different sizes, and just
making the cuts.
I produced this joint by stacking two sawblades of different sizes, and just
making the cuts.
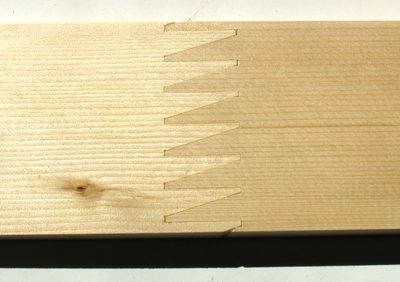
The problem with this type of joint is that it's tricky to set up. The spacing is is only slightly more difficult to set up than a plain finger joint, but the depth of cut needs to be precisely controlled. With the height difference between the two blades determining the height of the step, the blades must be set so that the smaller blade cuts exactly half as deep as the larger blade. I found this very finicky to set up.
 The other catch is that the second piece needs to be flipped over for gluing, which makes
it more difficult to make sure everything lines up ahead of time.
The other catch is that the second piece needs to be flipped over for gluing, which makes
it more difficult to make sure everything lines up ahead of time.
Worse yet, when I tried breaking joints made like that, they still failed along the glue line. Which means maybe I should make the fingers longer. That in turns means using a different combination of sawblades. This joint was cut by stacking a 7 1/4" and a 6 1/2" blade. Maybe I should try a 9" and a 7.25" blade to get longer fingers.
 I also tried making two series of cuts, one series of cuts straight, another series of cuts
with the blade tilted, to more closely approximate a regular finger joint.
I also tried making two series of cuts, one series of cuts straight, another series of cuts
with the blade tilted, to more closely approximate a regular finger joint.
Like the stepped finger joint, this joint ended up rather finicky to set up. I ended up working out the blade tilt angle with a calculator and some trigonometry.
Working out the angle was not too bad, but it took a bit of tweaking to get the lateral position of the second series of cuts just right.
 Like the stepped finger joint, this joint requires one of the pieces to be flipped over.
 I was figuring I'd leave this as just an experiment, because it was finicky to set up.
But I'm actually kind of pleased with how this joint ended up looking. So I might
make this sort of joint again if a need arises for it.
I was figuring I'd leave this as just an experiment, because it was finicky to set up.
But I'm actually kind of pleased with how this joint ended up looking. So I might
make this sort of joint again if a need arises for it.