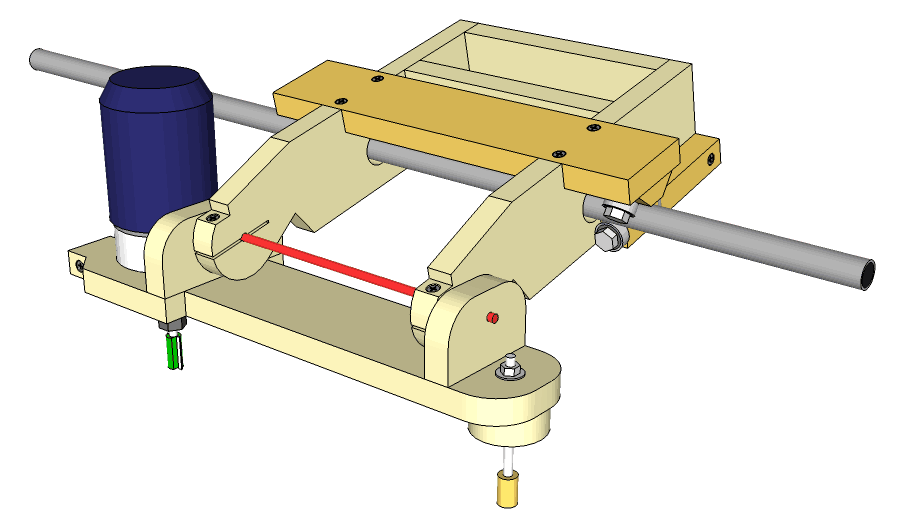
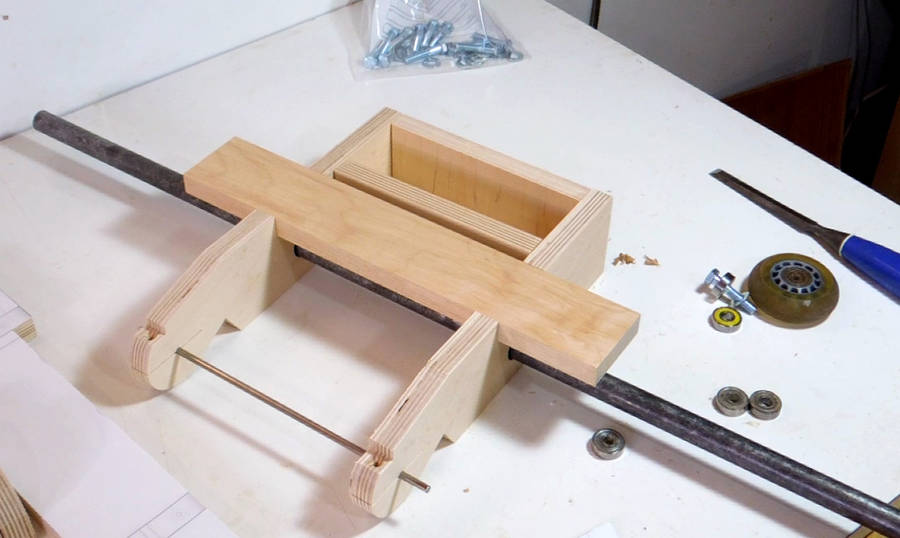
 The router mount and carriage provides three degrees of freedom.
The carriage rolls side-to-side on a steel pipe, but also tilts on that pipe.
A thinner shaft (highlighted in red) also allows the router and follower to pivot.
The router mount and carriage provides three degrees of freedom.
The carriage rolls side-to-side on a steel pipe, but also tilts on that pipe.
A thinner shaft (highlighted in red) also allows the router and follower to pivot.
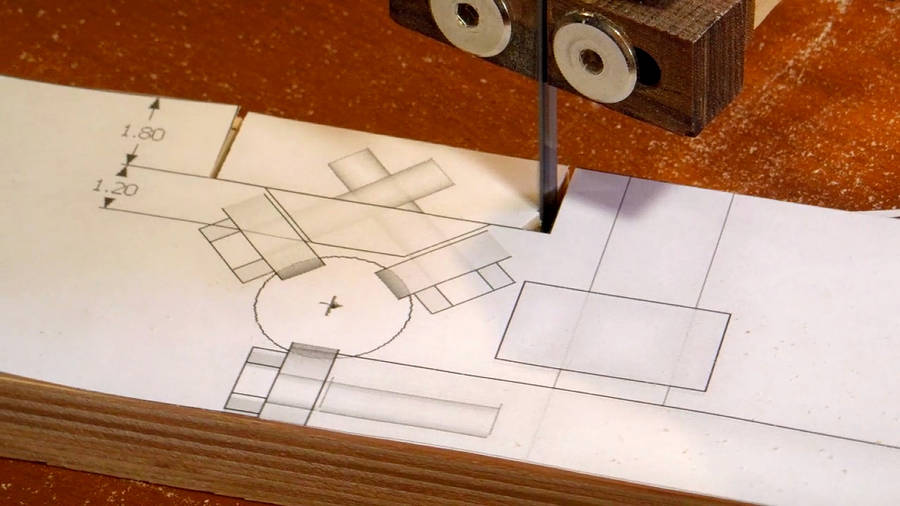
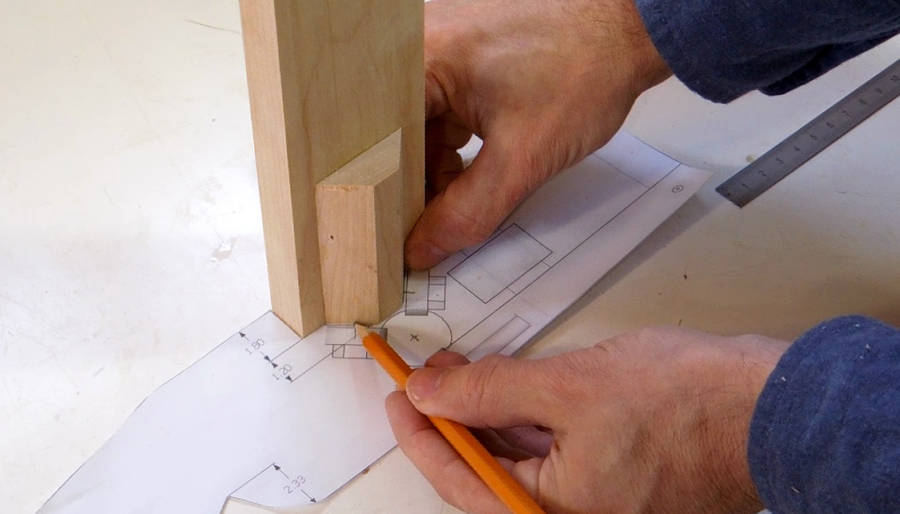
 The most complicated parts for the carriage are the "side arms".
I used my BigPrint program to make the 1:1 printouts, which I used
as paper templates to cut them out. I only used a few dabs of glue to attach them. That
makes them easier to get off again.
The most complicated parts for the carriage are the "side arms".
I used my BigPrint program to make the 1:1 printouts, which I used
as paper templates to cut them out. I only used a few dabs of glue to attach them. That
makes them easier to get off again.
I used an awl to punch divots through all the hole center marks. Best to do that right away so I don't forget later.
I highly recommend using baltic birch plywood. It's made with thin layers of birch throughout. A quarter sheet (2'x4') will be about four times as much wood as you need. You can find the quarter sheets of birch plywood with the "handy panels" at Home Depot.
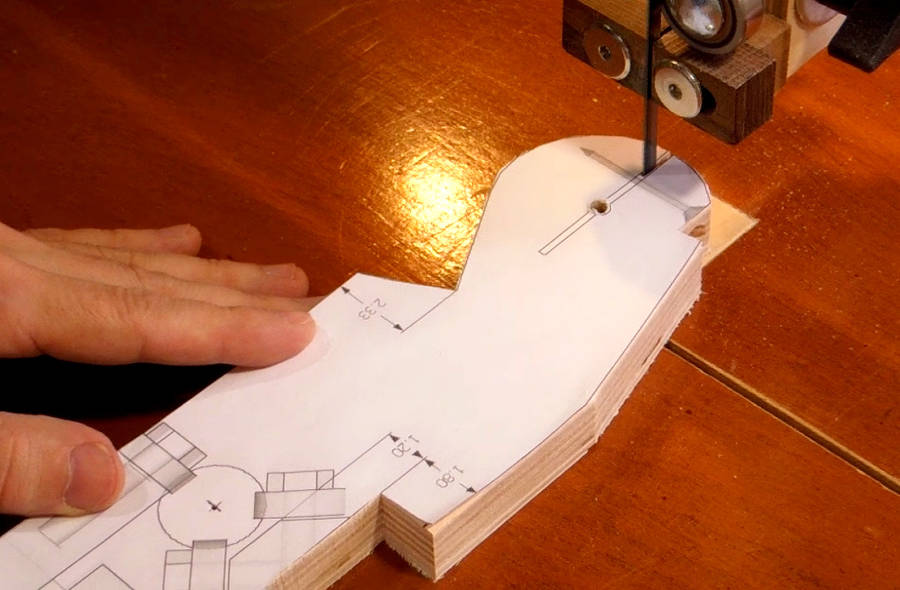
 For making inside square cuts,
I make a series of cuts to widen the cut at the corner until it's wide enough
that I can turn the piece 90 degrees without jamming the blade in the kerf.
For making inside square cuts,
I make a series of cuts to widen the cut at the corner until it's wide enough
that I can turn the piece 90 degrees without jamming the blade in the kerf.
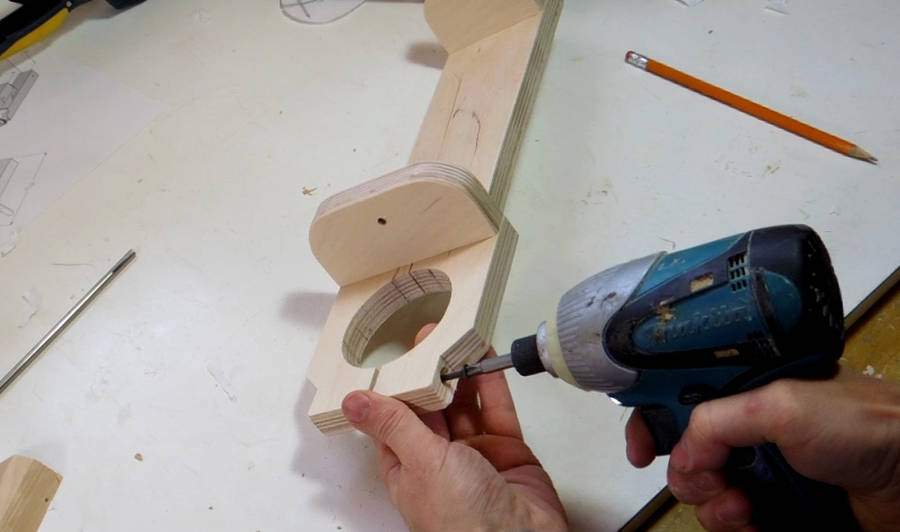
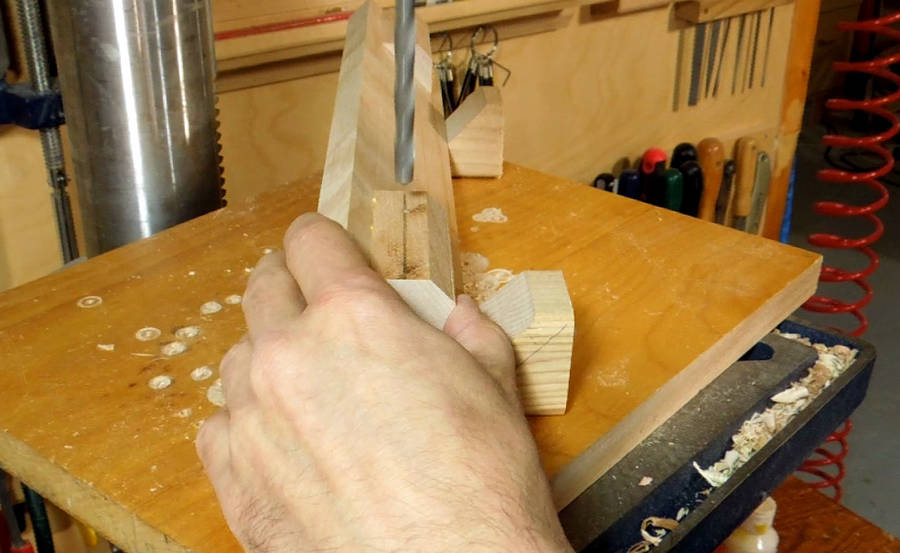
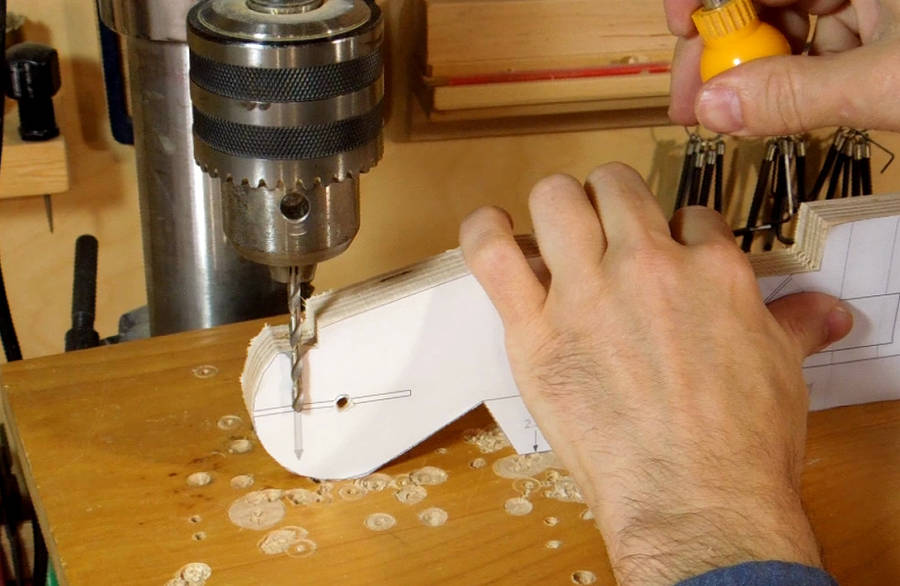 Drilling a hole for the shaft clamping screw at the end of the arm. This screw will clamp
the hole tight, to lock the shaft in place.
Drilling a hole for the shaft clamping screw at the end of the arm. This screw will clamp
the hole tight, to lock the shaft in place.
The screw thread should only engage the bottom half of the arm, so that when the screw is tightened, it pulls the end of the arm together. I'm using a larger drill (5/32") to expand the top part of the hole. Here's checking the depth that I need to drill this to.
 Now cutting that slot. It's important to cut the slot after drilling the pivot hole,
otherwise the drill will chip out the wood near the slot.
Now cutting that slot. It's important to cut the slot after drilling the pivot hole,
otherwise the drill will chip out the wood near the slot.
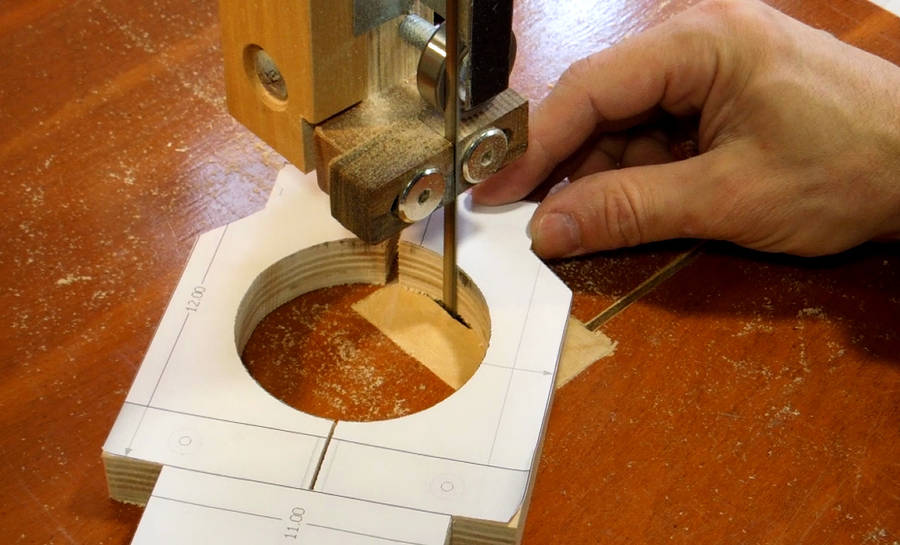
 I cut the router mounting hole with the bandsaw.
I could just cut in from the outside because I need to cut a gap in the circle
anyway. Easier and more accurate than trying to do it with a scroll saw or a circle cutter
on the drill press.
I cut the router mounting hole with the bandsaw.
I could just cut in from the outside because I need to cut a gap in the circle
anyway. Easier and more accurate than trying to do it with a scroll saw or a circle cutter
on the drill press.
 The hole was sized very tight - too tight, so that I could hardly force the
router into it.
The aluminium from the router left some black marks on the wood,
and that tells me where I need to cut away a bit
more material. I'm just using the side of the bandsaw blade
to graze away at the wood where I see dark marks.
The hole was sized very tight - too tight, so that I could hardly force the
router into it.
The aluminium from the router left some black marks on the wood,
and that tells me where I need to cut away a bit
more material. I'm just using the side of the bandsaw blade
to graze away at the wood where I see dark marks.
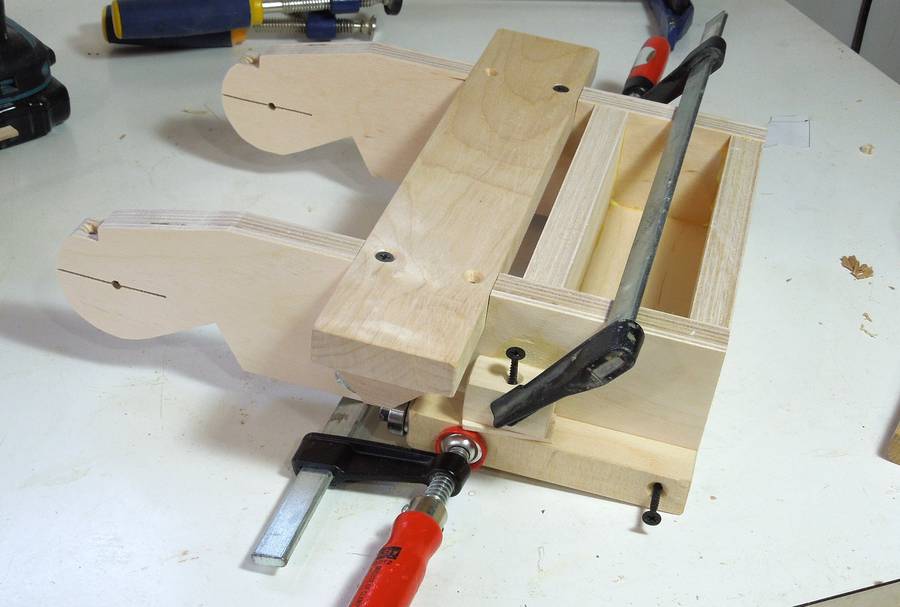
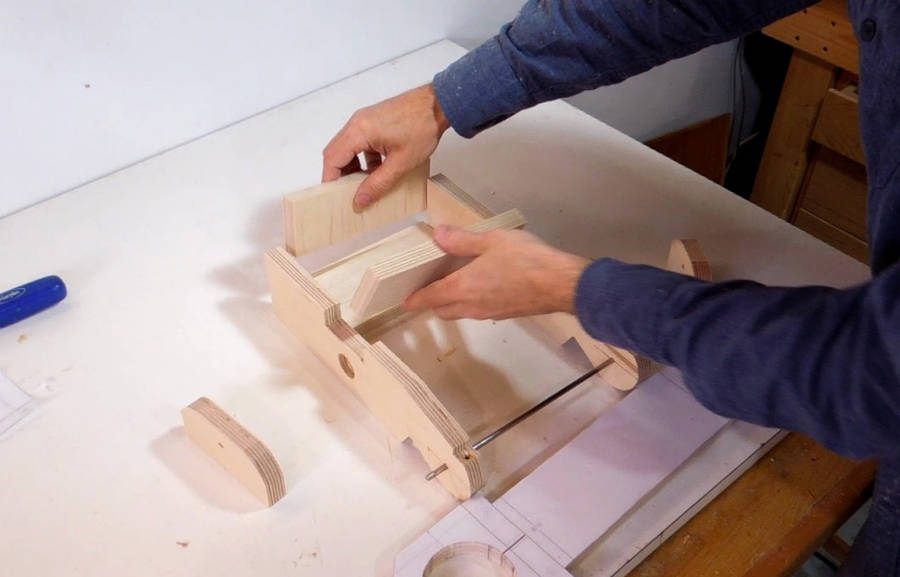 Three pieces of wood form a sort of "box" at the back side of the pivoting arm.
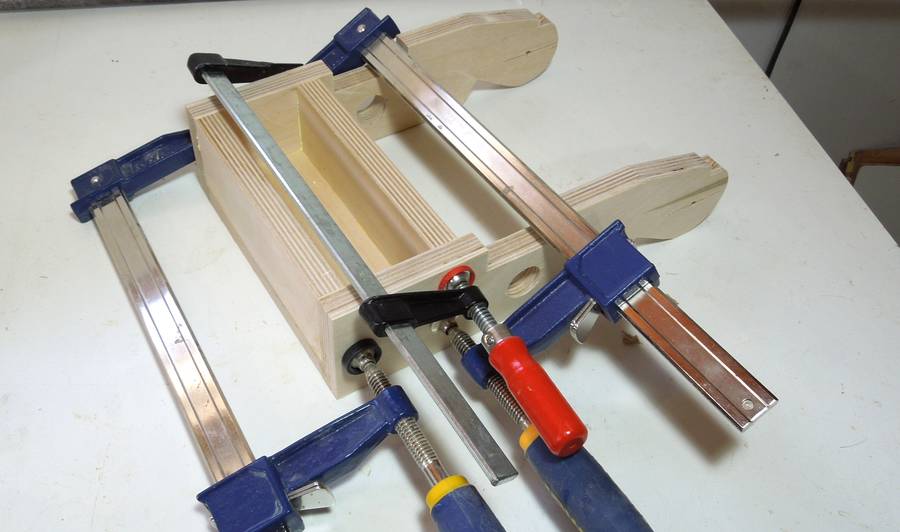 I glued the box together separately, then glued the arms to either end of it.
 I'm just attaching the blocks for the shaft with screws. That way I can still
make changes later (and that turned out to be a good thing)
I'm just attaching the blocks for the shaft with screws. That way I can still
make changes later (and that turned out to be a good thing)
 A screw is used to clamp the router right in the router mount.
 The guide bearings will get mounted to a piece of wood that fits into the
slots of the side arms.
The guide bearings will get mounted to a piece of wood that fits into the
slots of the side arms.
 The bearings are roller blade (or skateboard) bearings, 22 mm outside diameter,
8 mm inside diameter. They are easy to mount with a 5/16" or 8 mm bolt.
The bearings are roller blade (or skateboard) bearings, 22 mm outside diameter,
8 mm inside diameter. They are easy to mount with a 5/16" or 8 mm bolt.
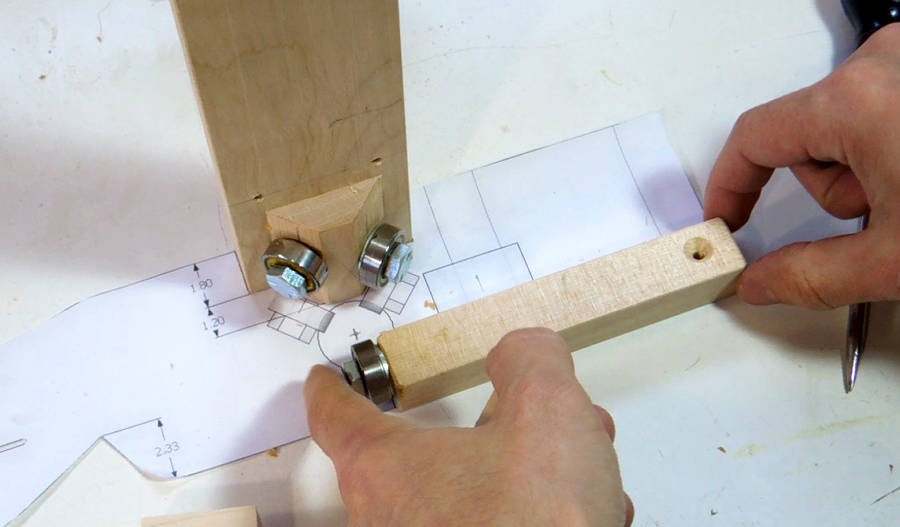
 Getting the lateral position of the bearings just right is important.
It's tricky to measure, so I'm just holding my part up to the 1:1 drawing
and marking where the holes should be drilled.
Getting the lateral position of the bearings just right is important.
It's tricky to measure, so I'm just holding my part up to the 1:1 drawing
and marking where the holes should be drilled.
 Drilling the holes. The work piece is supported on pieces of wood
with a V cut into them.
Drilling the holes. The work piece is supported on pieces of wood
with a V cut into them.
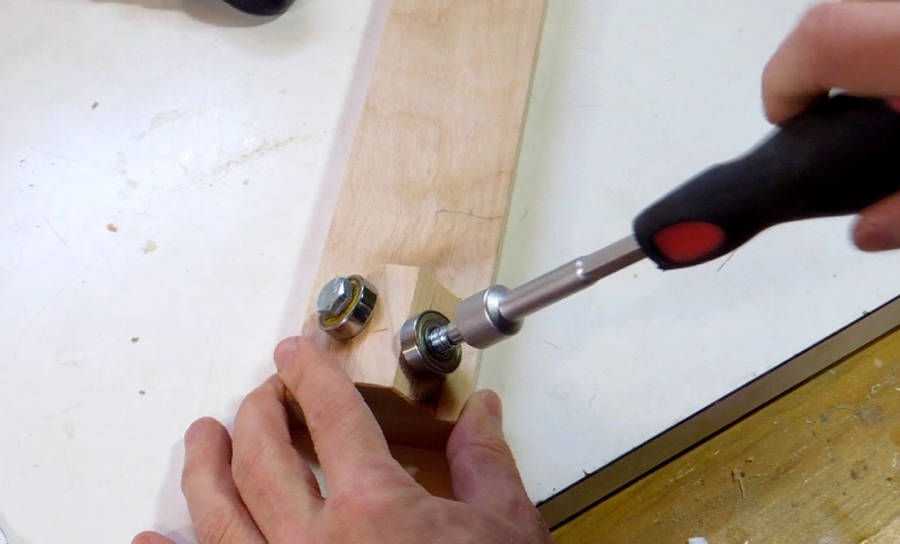 The two bearings are offset slightly from each other along the length of the
rails so that the screws don't interfere with each other.
The two bearings are offset slightly from each other along the length of the
rails so that the screws don't interfere with each other.
 Checking the fit with the 3/4" pipe that I'm using as the main support shaft.
A solid and polished steel rod would be ideal, but the pipe is cheap and adequate.
Checking the fit with the 3/4" pipe that I'm using as the main support shaft.
A solid and polished steel rod would be ideal, but the pipe is cheap and adequate.
Please note - this is not a plumbing pipe. If you use plumbing pipe, you have to make minor adjustments to where the bearings are mounted to accommodate the large diameter.
Do not use copper or aluminium piping - it's too flexible.
If you use plumbing pipe (~22 mm diameter), mount each bearing 1 mm further away from the pipe to maintain the same center line.
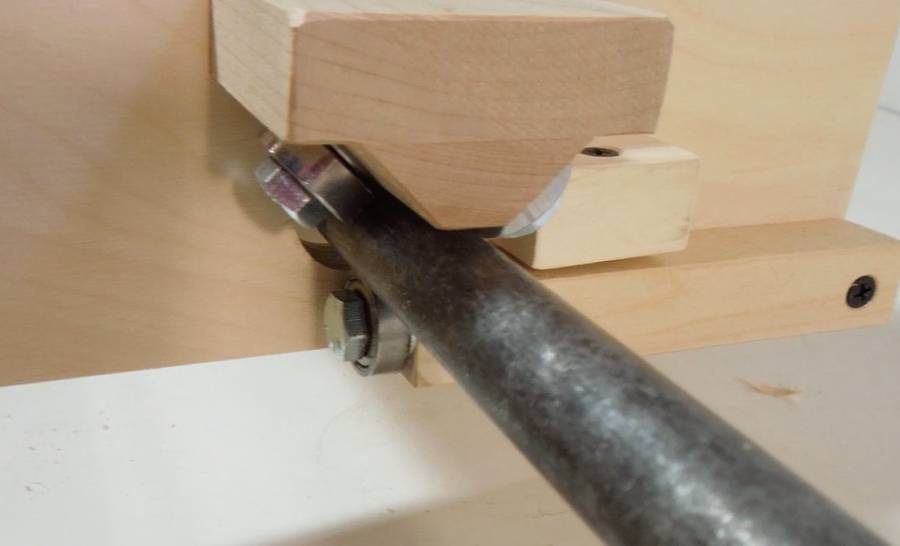
 A third "idler" bearing clamps against the shaft from the bottom. This bearing is
mounted on a pivoting piece of wood to allow for adjustment.
A third "idler" bearing clamps against the shaft from the bottom. This bearing is
mounted on a pivoting piece of wood to allow for adjustment.
 A screw is used to pull the lever up to clamp the bearing against the shaft.
Here's gluing the block for that screw in place.
A screw is used to pull the lever up to clamp the bearing against the shaft.
Here's gluing the block for that screw in place.
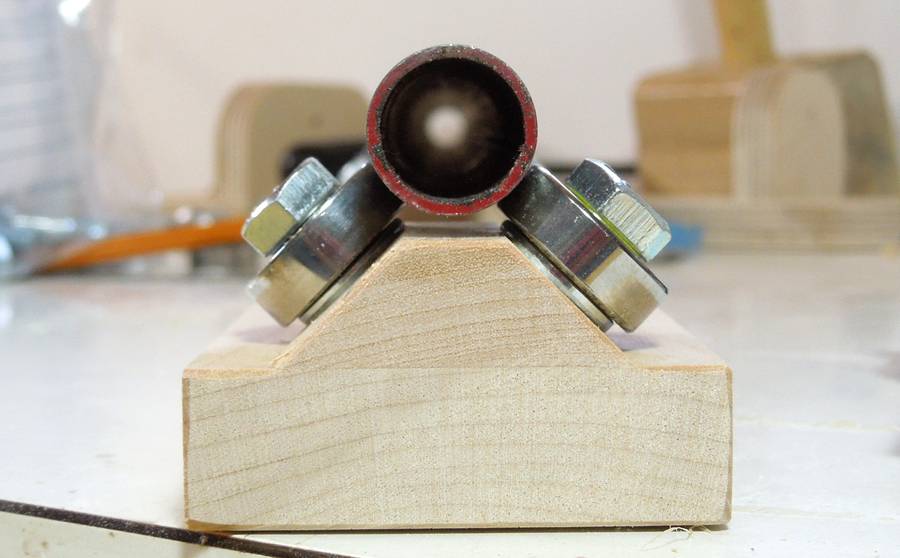
 Finished bearing mount, with pipe.