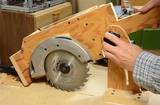
Aligning the table saw
 With the saw complete, it's time to fine-tune the alignment.
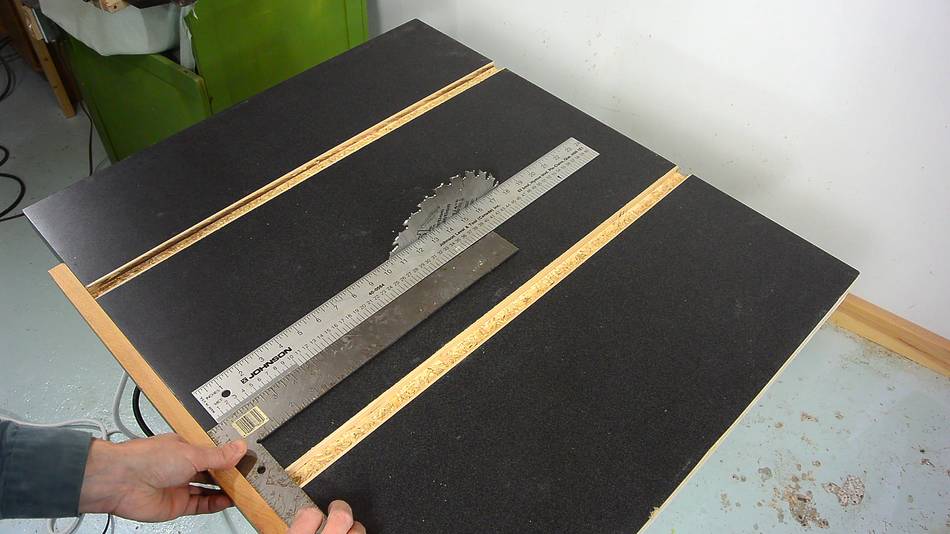
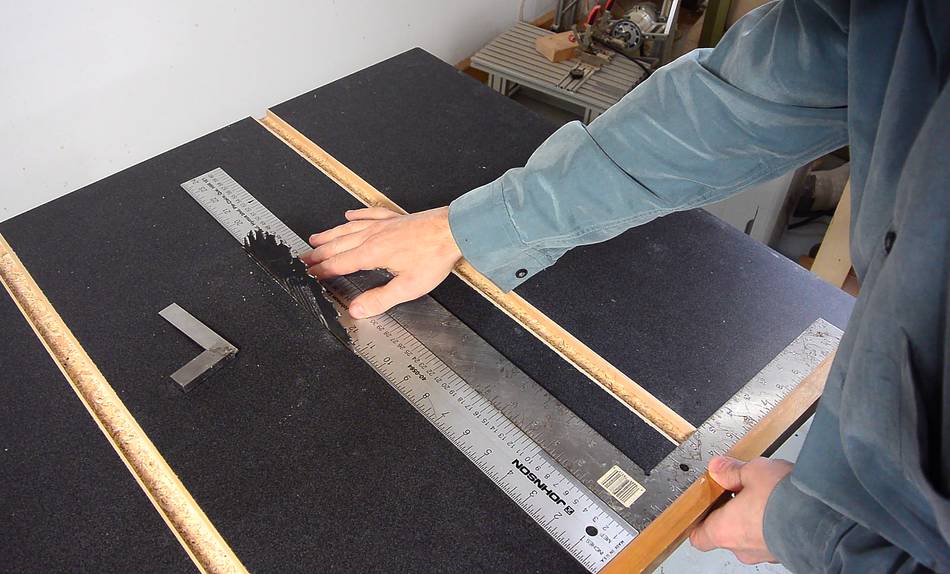
I spun the blade to make sure it didn't have any wobble on it. I then put a ruler against the side of the blade, being careful to position it so that it wasn't resting against the teeth.
I then held a long straight piece of wood to the front of the saw and slid a square along it until one end of it touched the ruler.
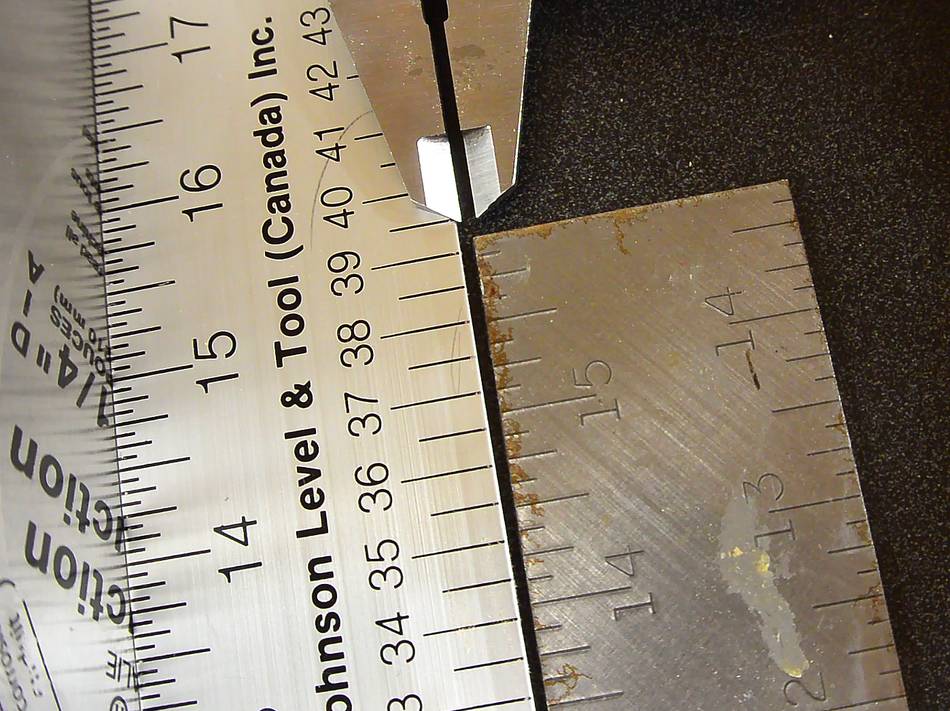 With the corner of the square touching the end of the ruler, I had about 2 mm
of space between them 40 cm away. I measured that by holding calipers next to
the gap and opening them until the two gaps looked about the same. I then read
the number off the calipers.
With the corner of the square touching the end of the ruler, I had about 2 mm
of space between them 40 cm away. I measured that by holding calipers next to
the gap and opening them until the two gaps looked about the same. I then read
the number off the calipers.
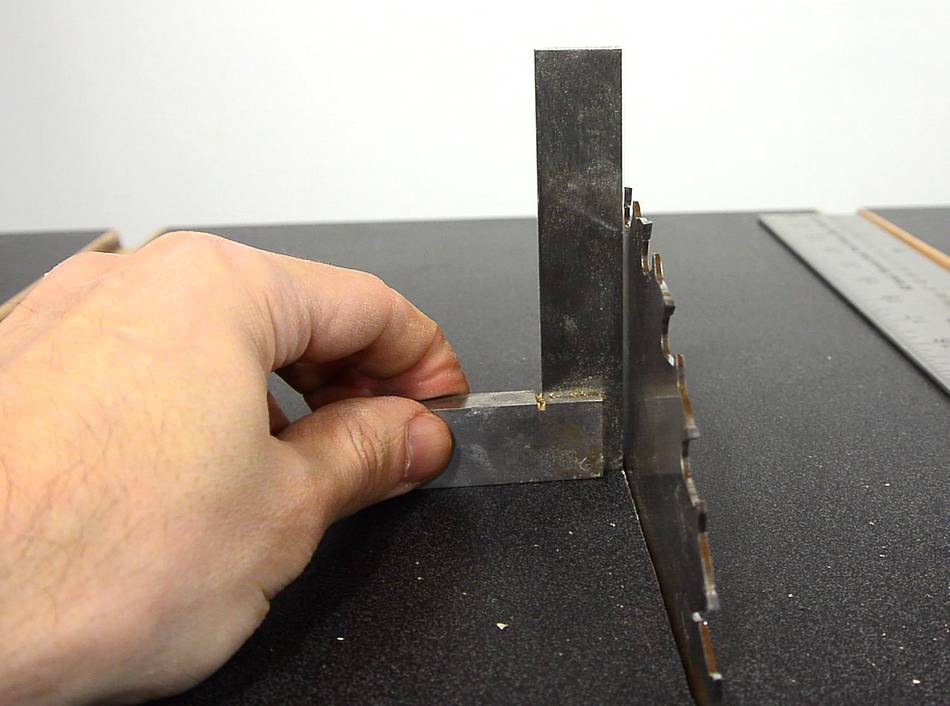 Blade tilt was already spot on 90, as far as I could tell.
 The front and back mounting screws on my saw are 16 cm apart. 2 mm over 40 cm
is the same slope as 0.8 mm over 16 cm. So I added 0.8 mm of shim behind
the far mount of the saw to bring that further to the right
The front and back mounting screws on my saw are 16 cm apart. 2 mm over 40 cm
is the same slope as 0.8 mm over 16 cm. So I added 0.8 mm of shim behind
the far mount of the saw to bring that further to the right
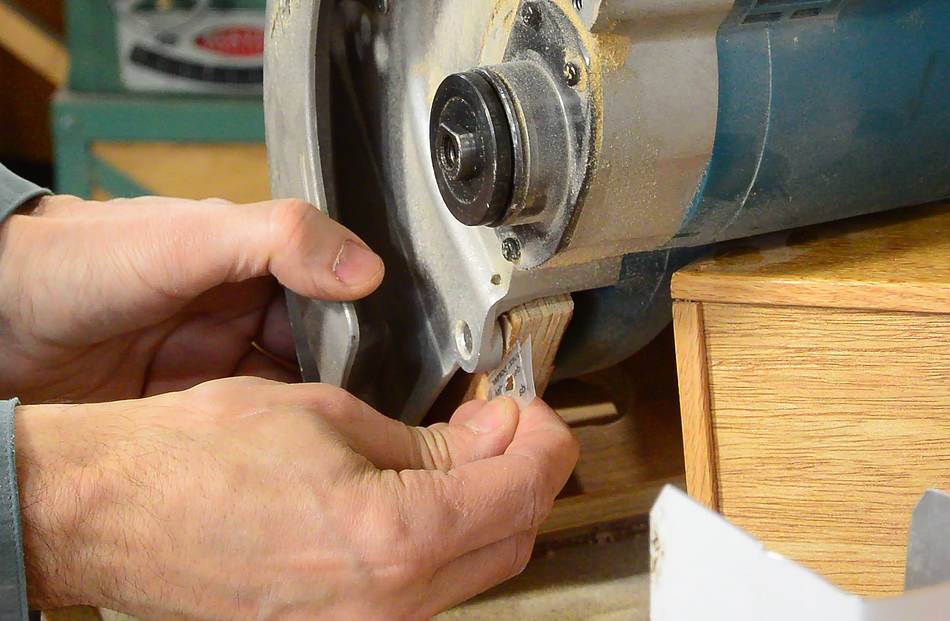
I cut a shim out of the plastic packaging from a box of nails, plus a piece of 6-mil polyethelene to get to 0.8 mm.
 With 0.8 mm added on the back, I figured I should add half that, or about
0.4 mm to the mounts on the top (or bottom when in working position). Basically,
the front and aft had an average of 0.4 added (average 0.8 and 0), so I should
add the same to the top to avoid adding blade tilt.
With 0.8 mm added on the back, I figured I should add half that, or about
0.4 mm to the mounts on the top (or bottom when in working position). Basically,
the front and aft had an average of 0.4 added (average 0.8 and 0), so I should
add the same to the top to avoid adding blade tilt.
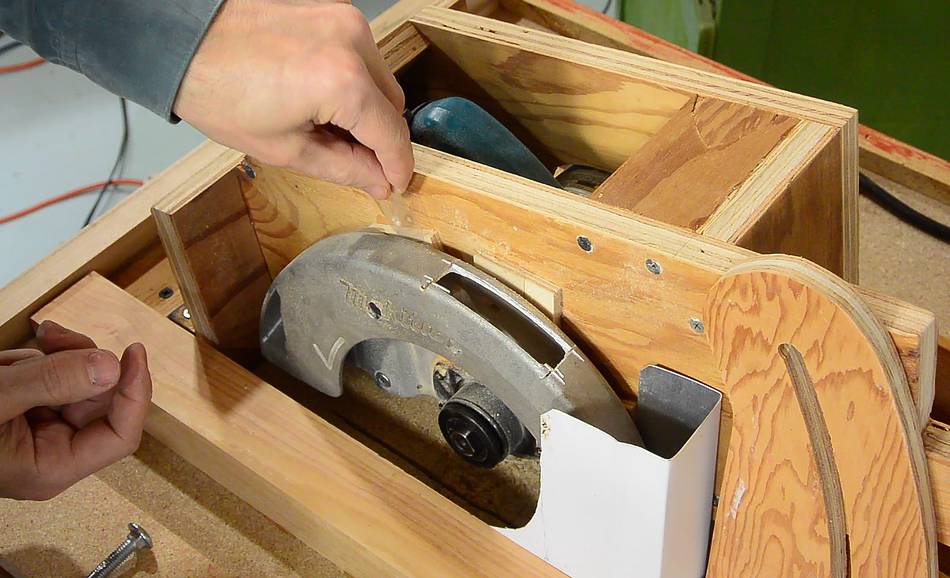
These shims came from a 2-liter soda bottle. They are transparent, so it's hard to see the shim I'm inserting in the photo.
 Checking the alignment again. It's spot on, to the best that this method
can tell. That said, I don't expect this saw to be as accurate as a proper cast
iron table saw.
Checking the alignment again. It's spot on, to the best that this method
can tell. That said, I don't expect this saw to be as accurate as a proper cast
iron table saw.
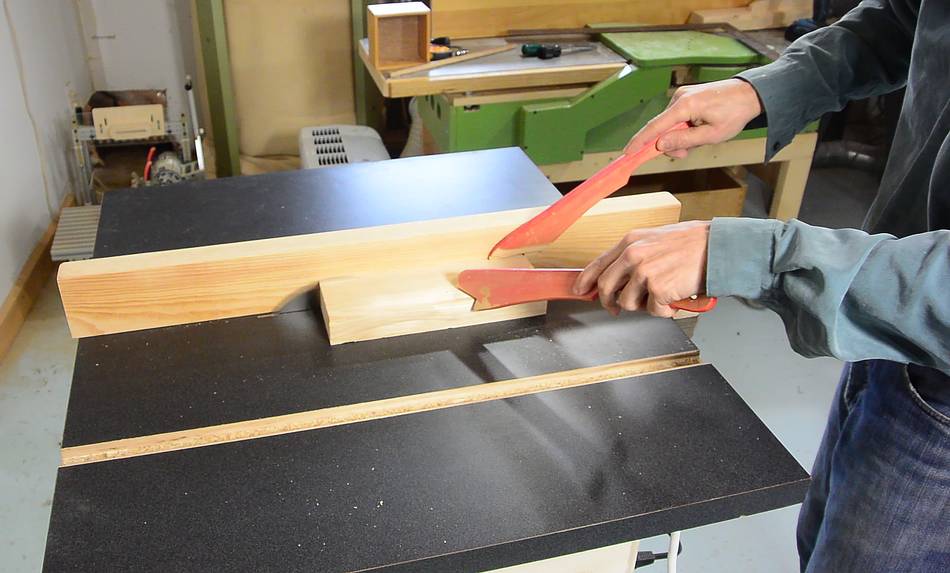
 For a test, I cut a piece of 2x4 into thin strips. The cuts came out smooth and
clean.
For a test, I cut a piece of 2x4 into thin strips. The cuts came out smooth and
clean.
See also:
 Homemade tablesaw 2
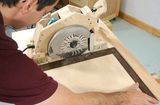 Homemade table saw
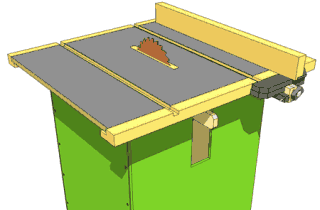 Plans for the table saw
Back to my Woodworking website.