 My homemade table saw still needed a fence. So far I've improvised by clamping a
piece of wood to the table, but that was always tricky to get aligned.
My homemade table saw still needed a fence. So far I've improvised by clamping a
piece of wood to the table, but that was always tricky to get aligned.
My homemade table saw still needed a fence. So far I've improvised by clamping a
piece of wood to the table, but that was always tricky to get aligned.
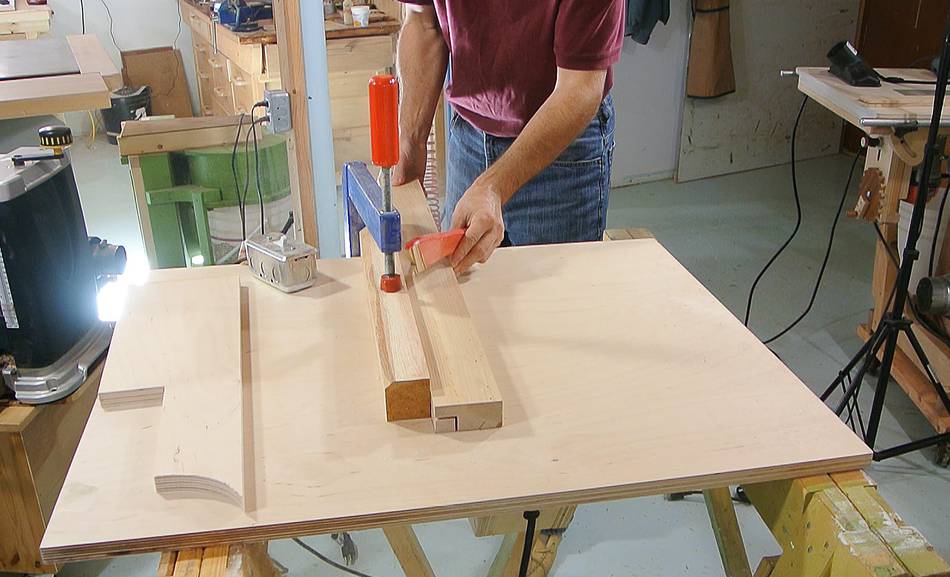
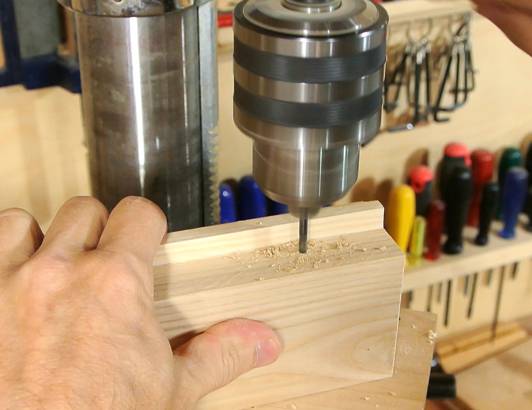
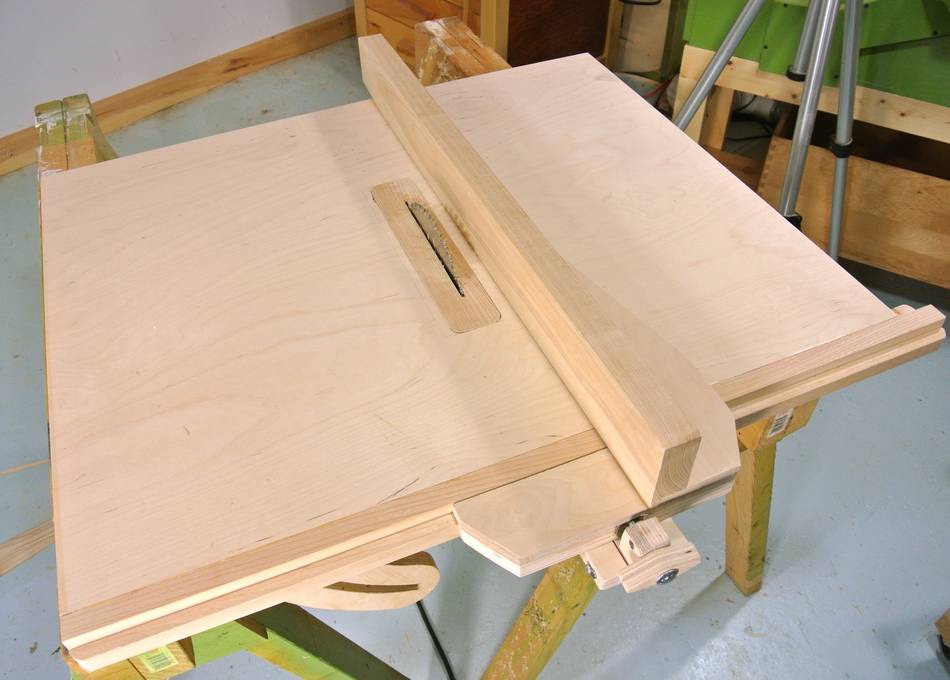
Here I'm cutting part of the new fence for my saw, on the homemade saw, using an improvised fence.
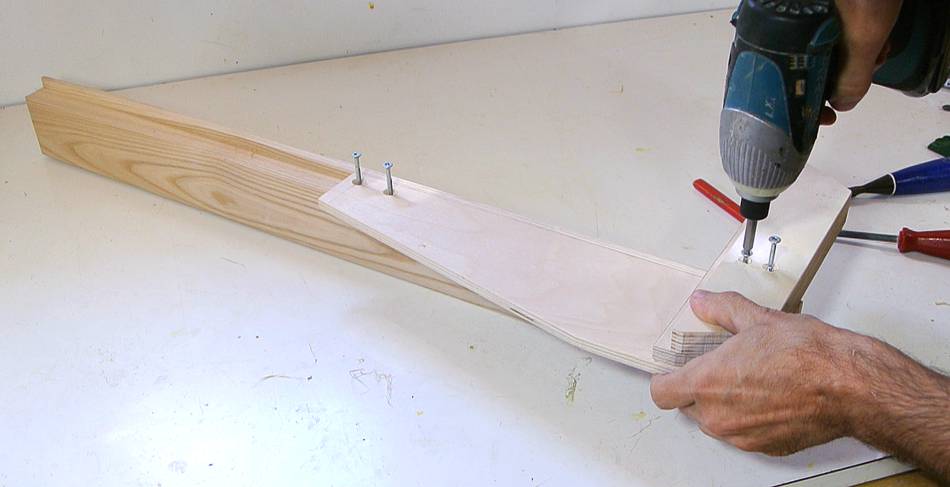
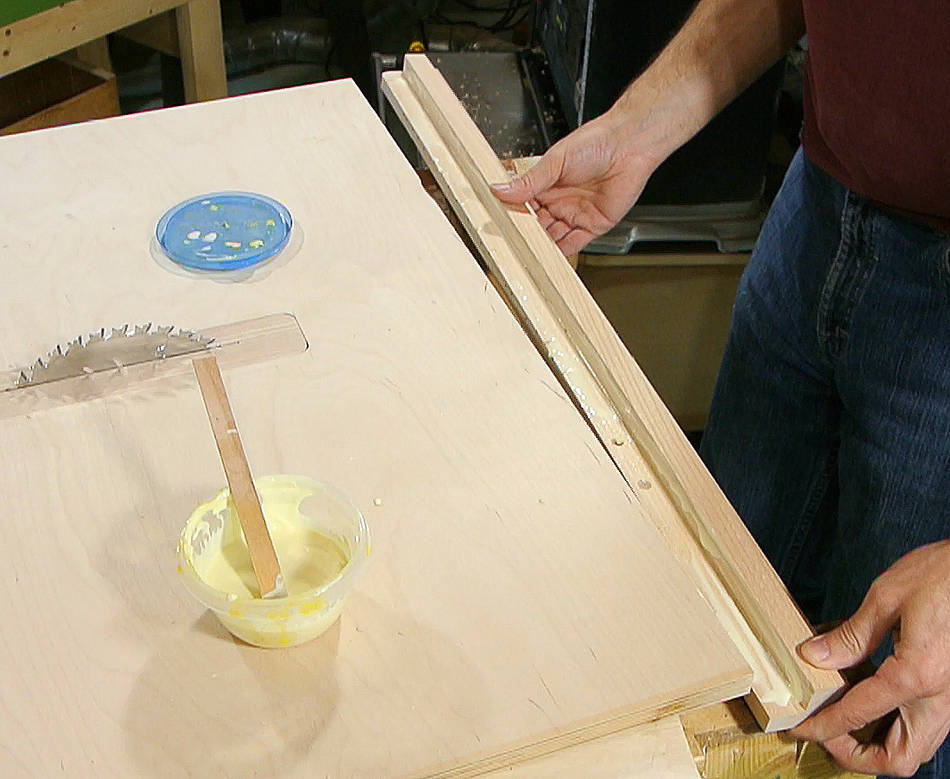
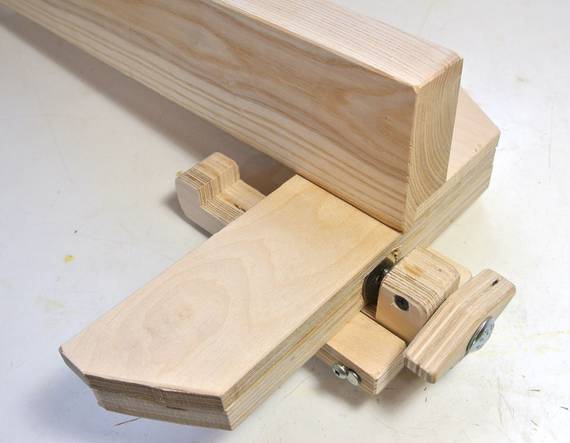
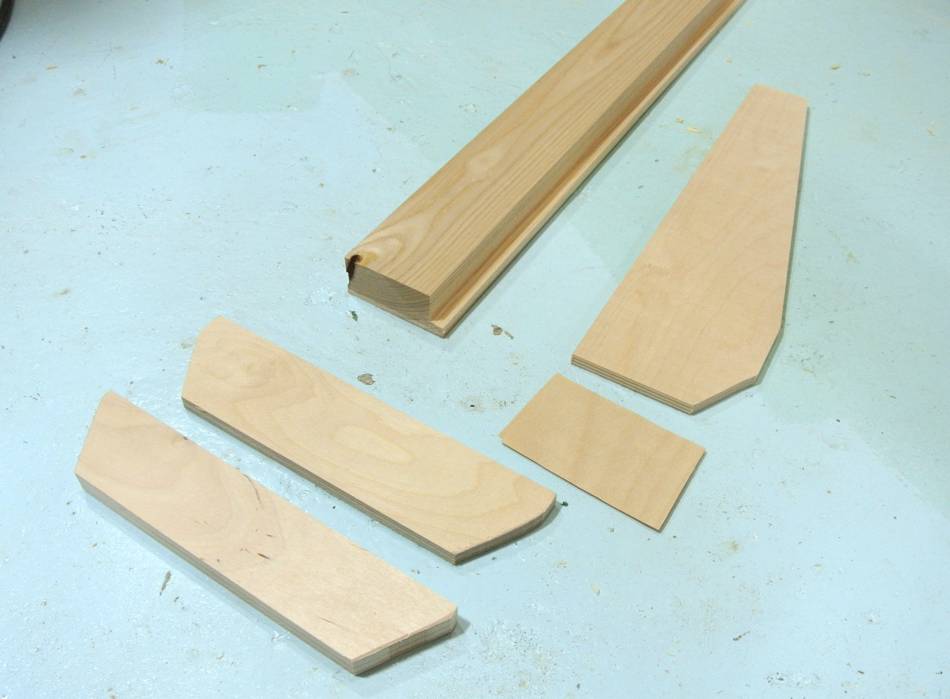 The fence pieces, before assembly. The main fence itself has a rabbet cut out
to fit over the long triangle-ish plywood piece that runs along
near the front. The design has some similarities with my
old homemade table saw rip fence.
The fence pieces, before assembly. The main fence itself has a rabbet cut out
to fit over the long triangle-ish plywood piece that runs along
near the front. The design has some similarities with my
old homemade table saw rip fence.
The thin rectangular piece is a spacer to go between the other layers of plywood.
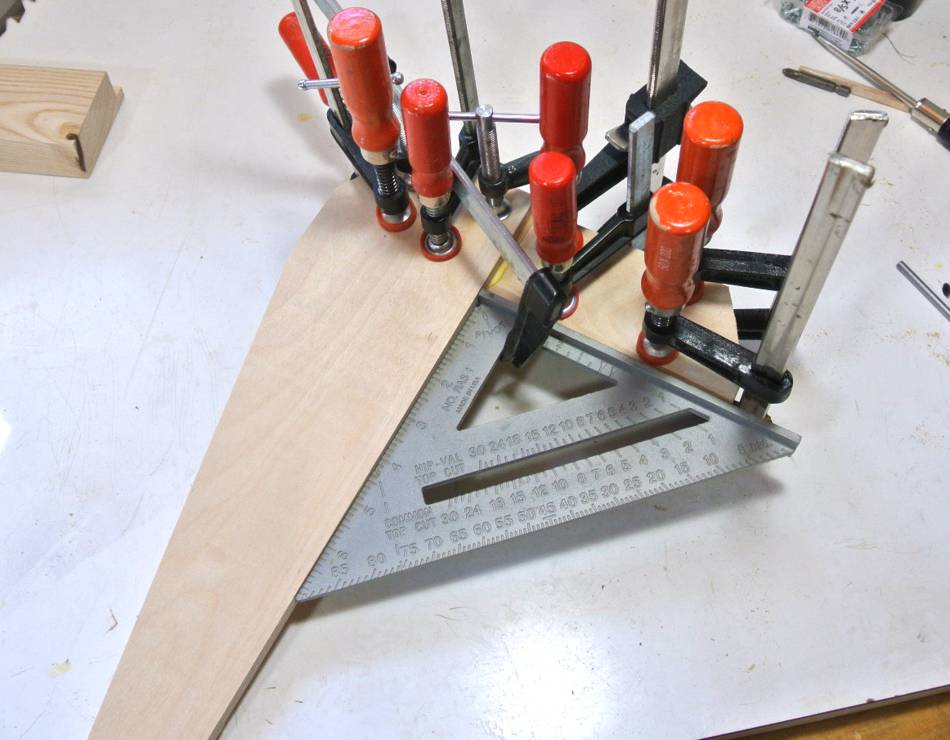 Clamping the T-square part together. Glue is a lubricant, and pieces
sometimes slide out of alignment when applying clamps, so I clamped my speed
square to it to keep it all aligned while the glue dries.
Clamping the T-square part together. Glue is a lubricant, and pieces
sometimes slide out of alignment when applying clamps, so I clamped my speed
square to it to keep it all aligned while the glue dries.
 The glued up T-square screws to the bottom of the long fence.
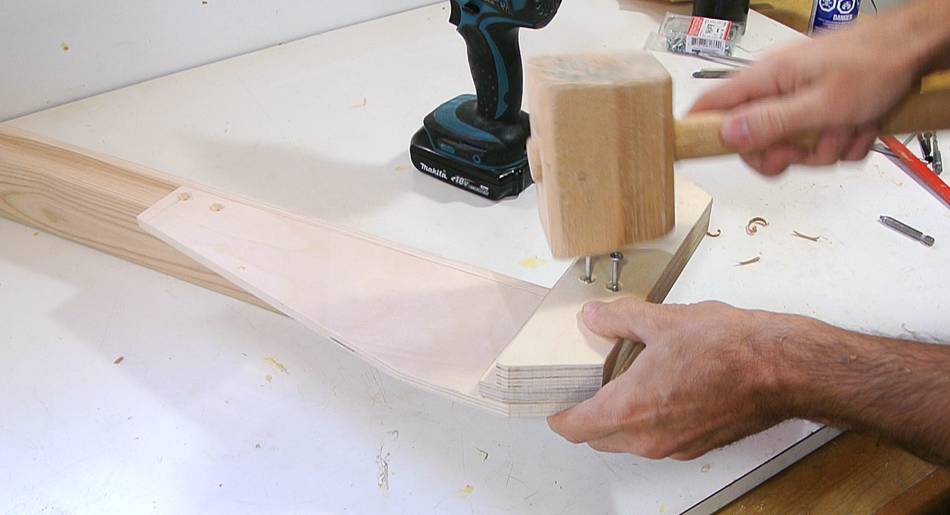
I'm tapping the screws to make divots in the fence rail for where to drill the pilot holes.
 The fence is only screwed to the T-square part. That way, I can still make slight
adjustments later if I have to.
The fence is only screwed to the T-square part. That way, I can still make slight
adjustments later if I have to.
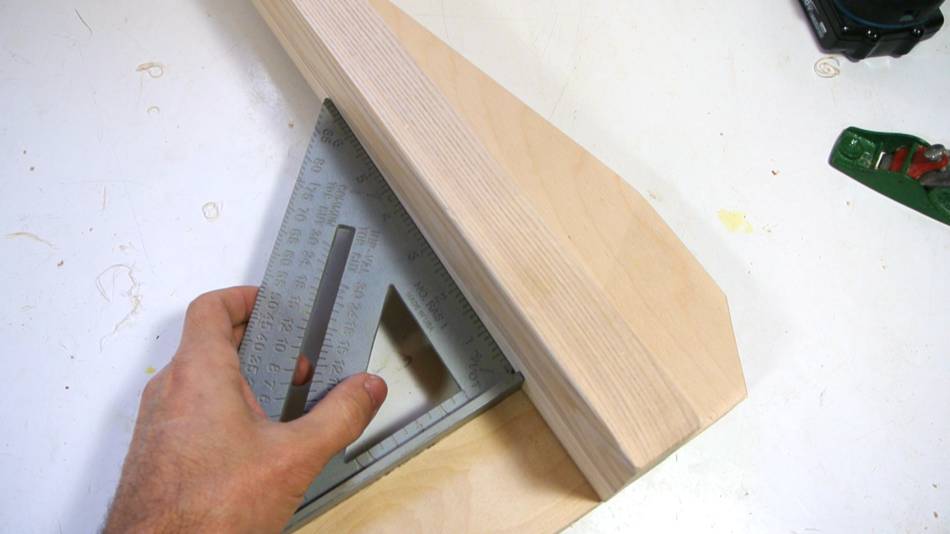
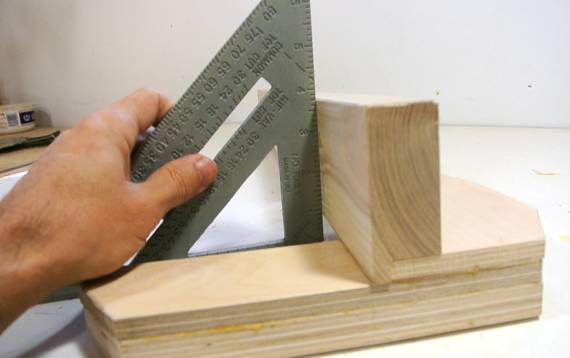 Checking the angle of the fence. It needs to be perpendicular to what will be the front
edge of the saw, but also vertical for ripping thin stock between the blade and fence.
Checking the angle of the fence. It needs to be perpendicular to what will be the front
edge of the saw, but also vertical for ripping thin stock between the blade and fence.
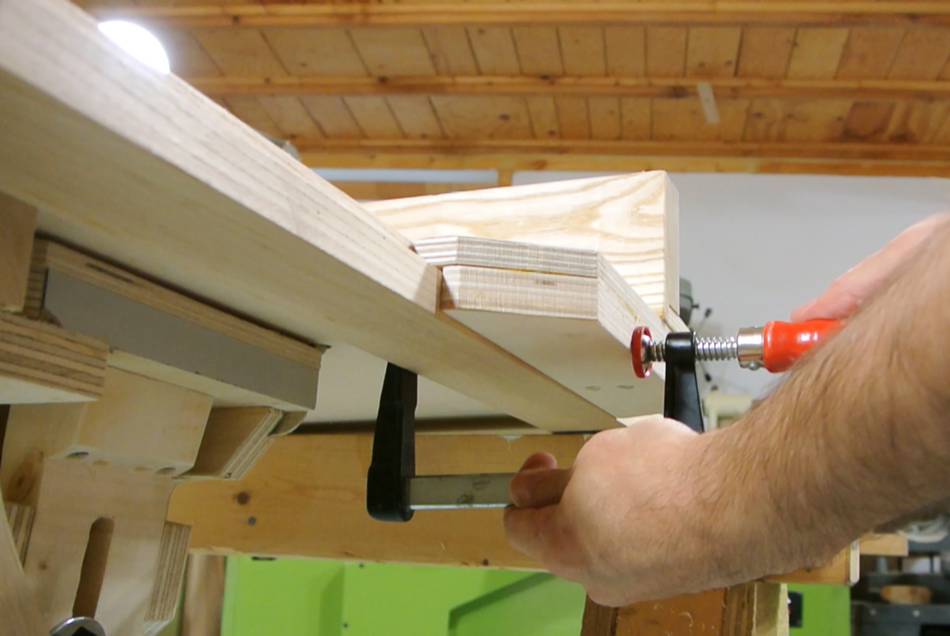
 The fence clamps to a hardwood rail along the front edge of the table. This rail has
roughly an inverted T as its profile. Here I'm getting ready to glue this onto the table.
The fence clamps to a hardwood rail along the front edge of the table. This rail has
roughly an inverted T as its profile. Here I'm getting ready to glue this onto the table.
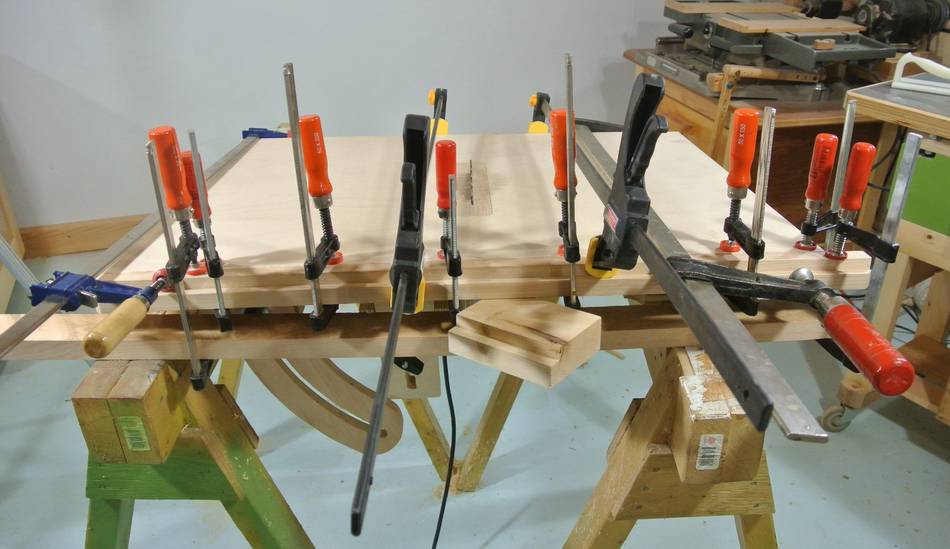 I used a lot of clamps when I glued on the profile. The idea is that the profile
acts as one thicker piece of wood with the table, making it more resistant to bending.
I used a lot of clamps when I glued on the profile. The idea is that the profile
acts as one thicker piece of wood with the table, making it more resistant to bending.
I had the idea of making this piece arch upwards slightly as I glued it to compensate for a probable downward sag over time from the weight of the saw. I had some success with this technique for compensating for fixing sag in a shelf.
 A small bar clamp works well enough to lock the fence in place, but it
would be an extra step each time I set the fence.
A small bar clamp works well enough to lock the fence in place, but it
would be an extra step each time I set the fence.
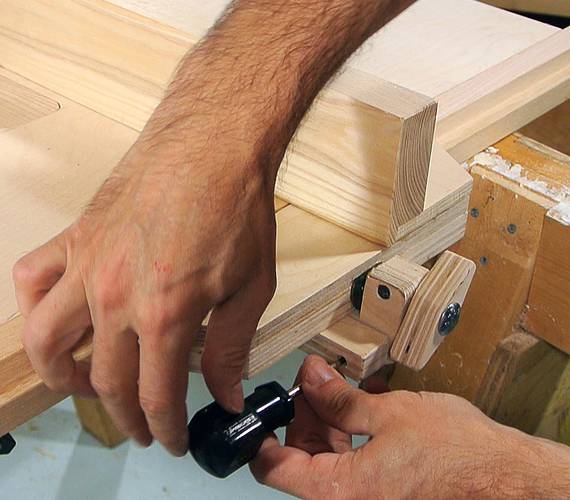
A C-clamp would be better, but C-clamps that open up far enough are bulky and heavy. So I made my own clamp. I glued two pieces of plywood together to get something 30 mm thick to cut the clamp out of.
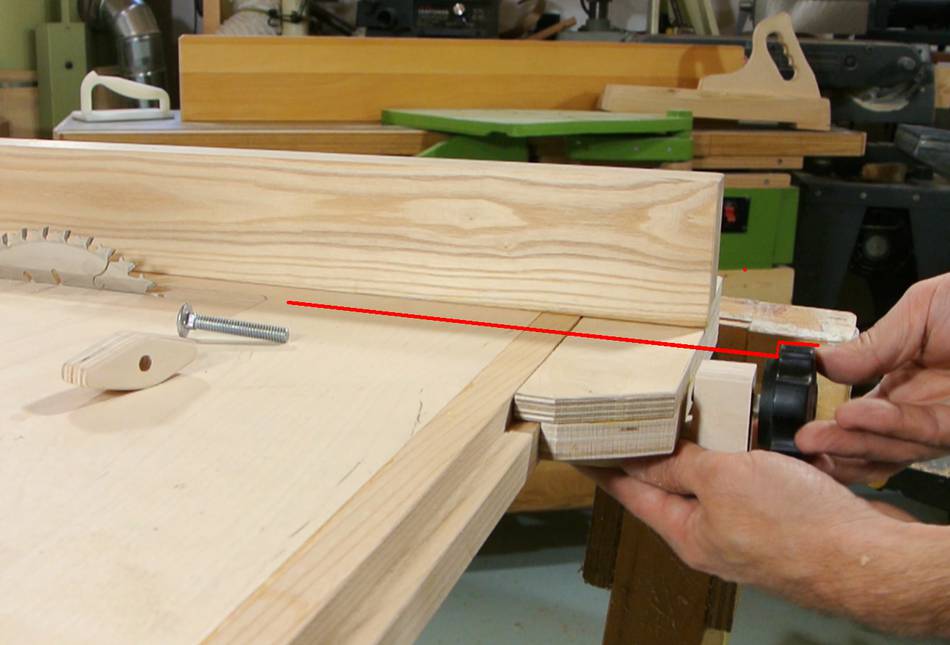 I originally intended to use a black plastic knob to lock the fence, but
that knob would always protrude above the table surface (see red line at left)
I originally intended to use a black plastic knob to lock the fence, but
that knob would always protrude above the table surface (see red line at left)
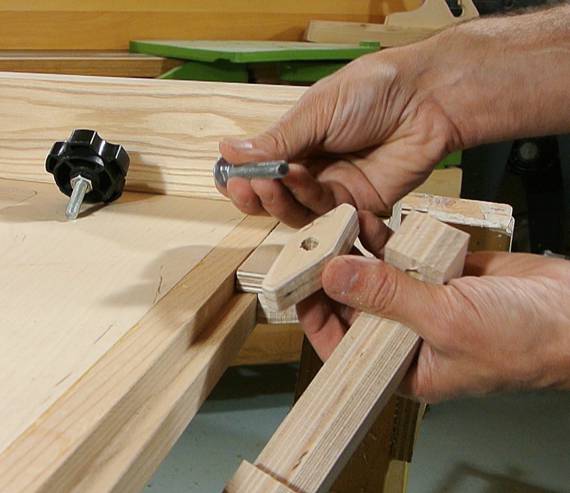 So I decided to make a sort of "bar knob" out of a carriage bolt and a
piece of plywood.
So I decided to make a sort of "bar knob" out of a carriage bolt and a
piece of plywood.
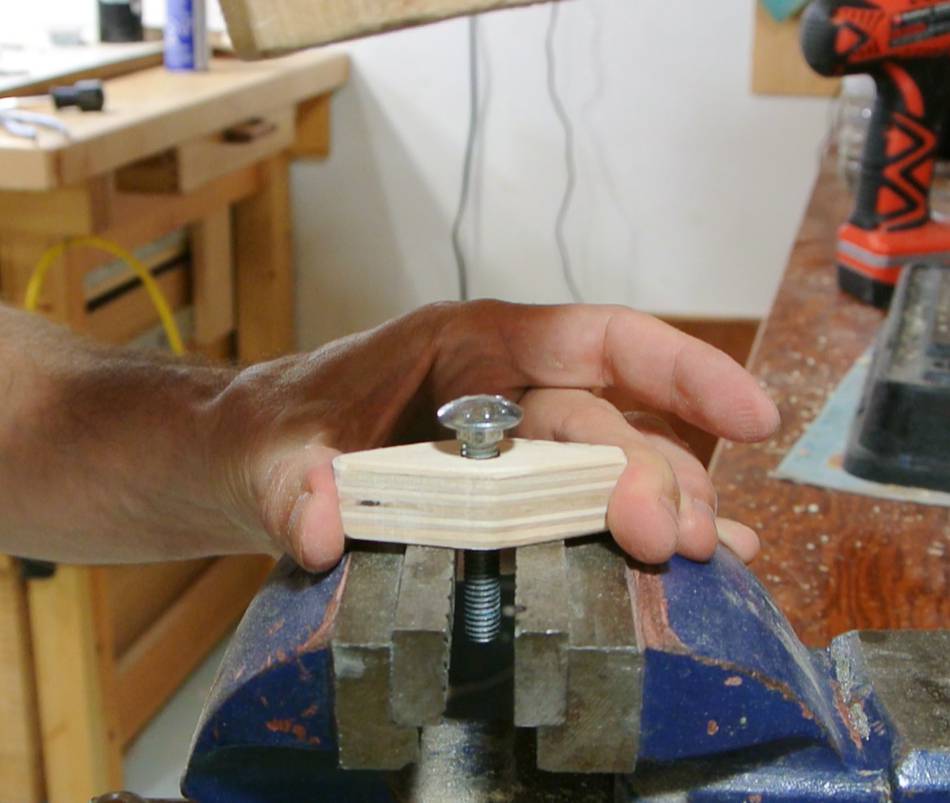 I drilled a 19/64" hole for the 5/16" carriage bolt (about 0.4 mm smaller than
a 8 mm bolt), with a square indentation on one end of the hole.
I then hammered the carriage bolt in.
I drilled a 19/64" hole for the 5/16" carriage bolt (about 0.4 mm smaller than
a 8 mm bolt), with a square indentation on one end of the hole.
I then hammered the carriage bolt in.
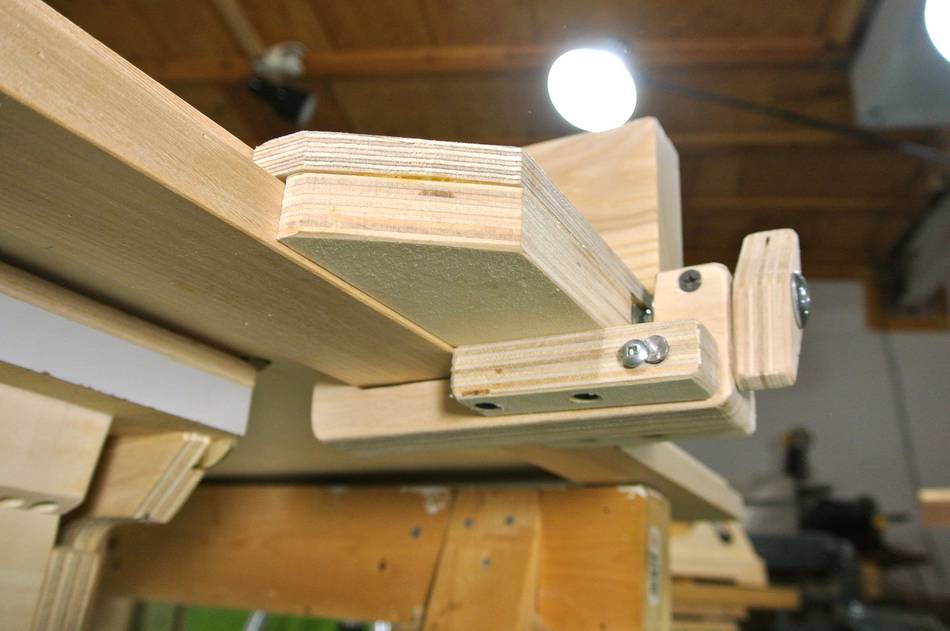
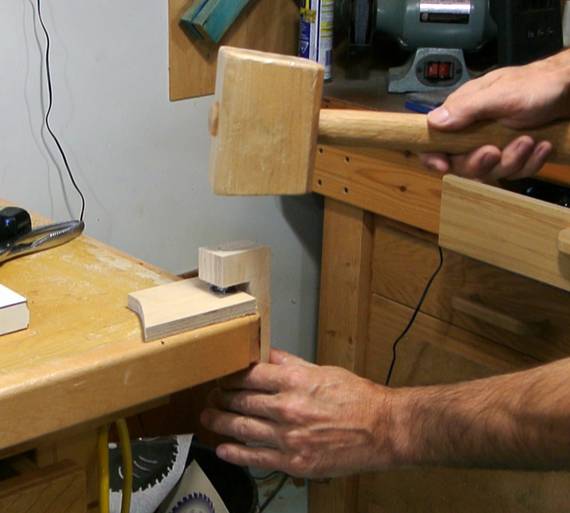 I also hammered a T-nut into the plywood clamp.
 T-nut and knob in place.
The plywood split slightly from hammering the T-nut in, so I added a drywall screw to pull it together.
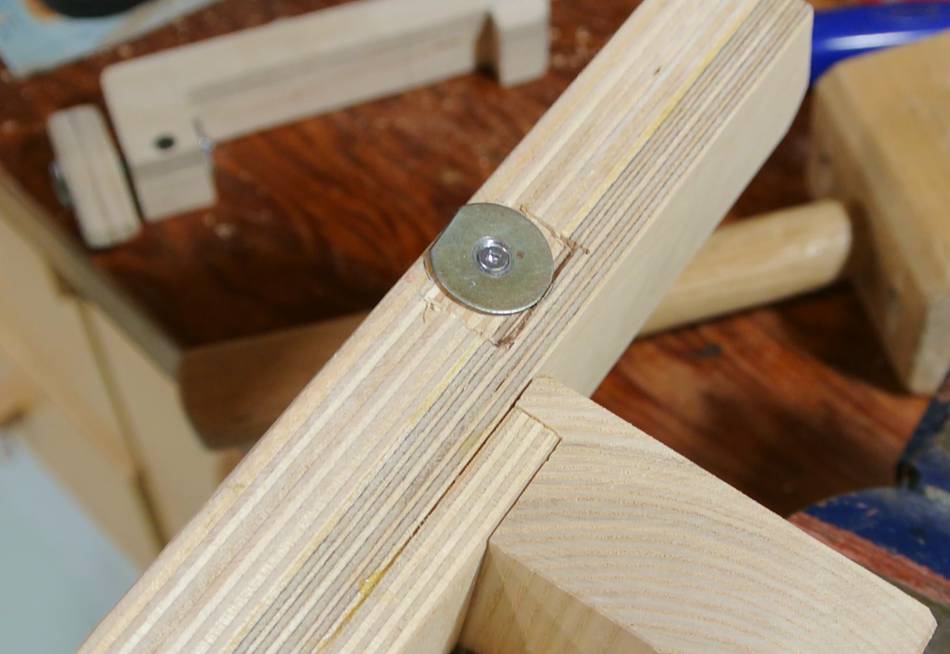
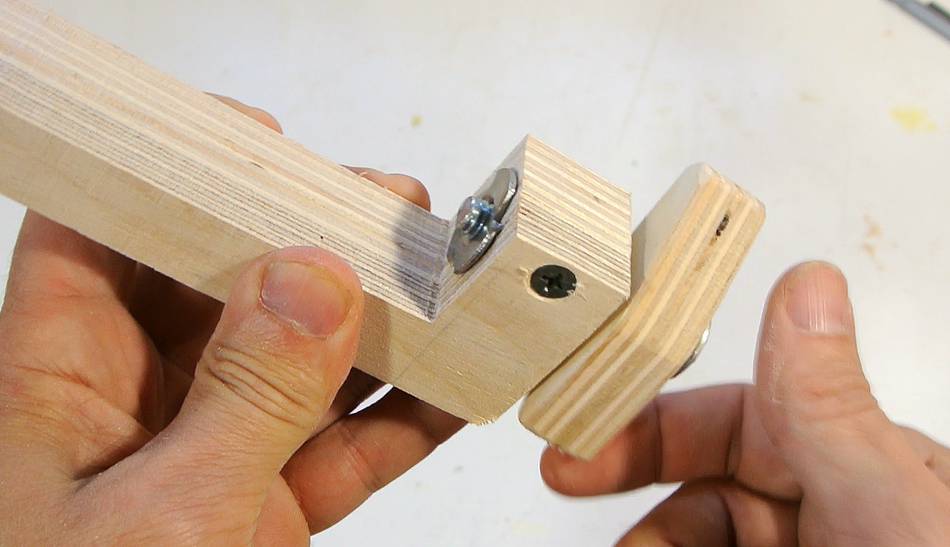
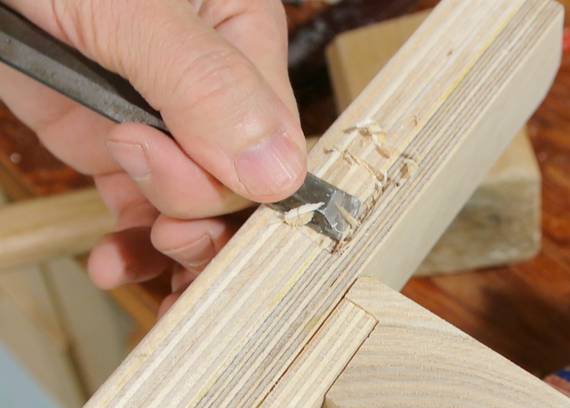 I added a metal washer as a bearing surface for the end of the bolt.
I mounted the washer at a slight angle in a chiseled out cavity to ensure
that the clamp would not slip down while tightening it.
I added a metal washer as a bearing surface for the end of the bolt.
I mounted the washer at a slight angle in a chiseled out cavity to ensure
that the clamp would not slip down while tightening it.
 As a result of the washer's incline, the clamp now liked to wander slightly
to the side as it's tightened, so I added two blocks to hold the clamp in
place.
As a result of the washer's incline, the clamp now liked to wander slightly
to the side as it's tightened, so I added two blocks to hold the clamp in
place.
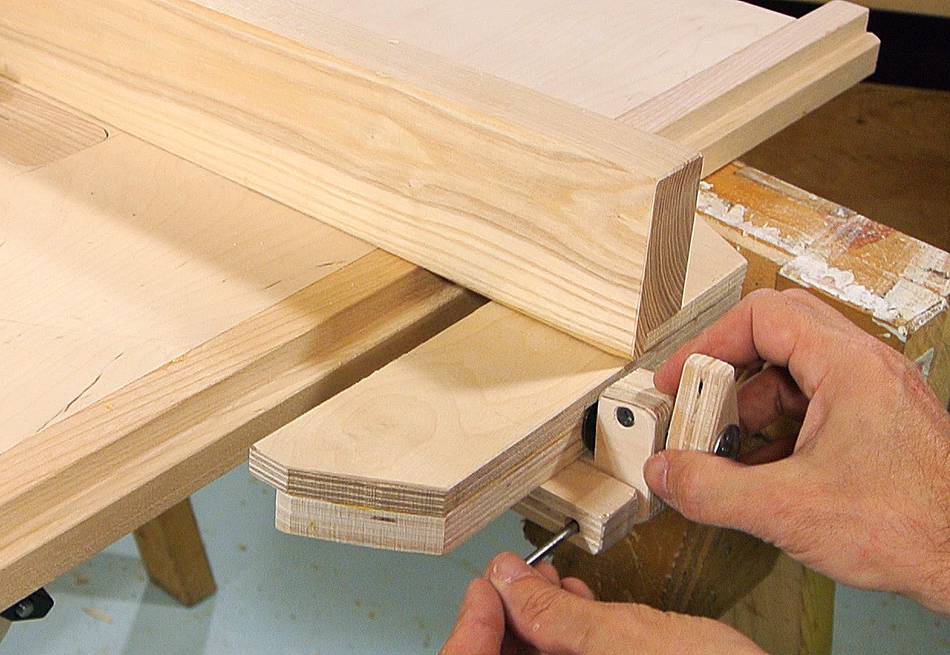
 A pin (nail, actually) goes through the two blocks and the clamp
to keep the clamp in place when it's loosened. The pin needs to
fit loosely so it doesn't interfere with clamping.
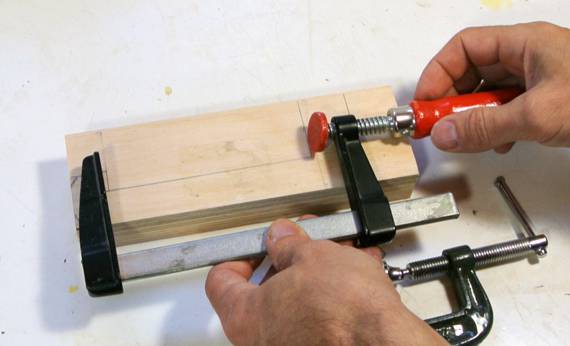
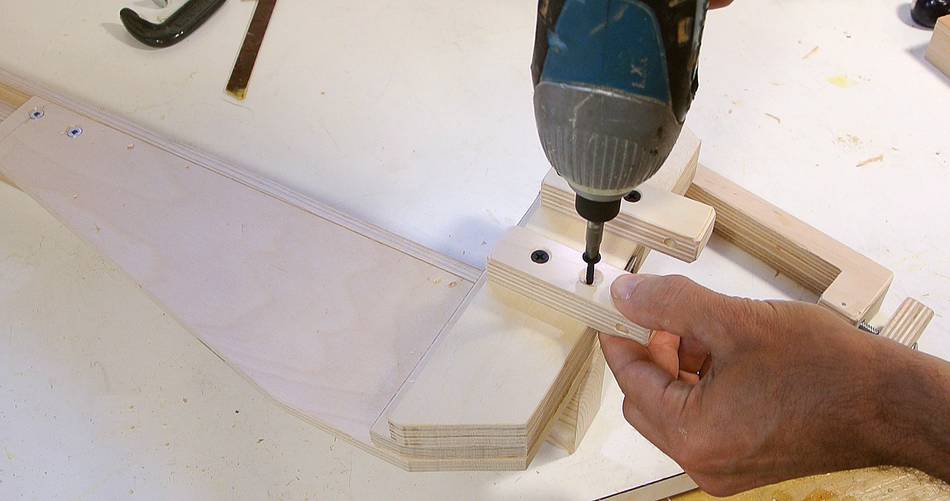
I determined the exact location for the
hole in the clamp by clamping it on and then using an awl to scratch
where the holes line up.
A pin (nail, actually) goes through the two blocks and the clamp
to keep the clamp in place when it's loosened. The pin needs to
fit loosely so it doesn't interfere with clamping.
I determined the exact location for the
hole in the clamp by clamping it on and then using an awl to scratch
where the holes line up.
 Fence, clamped on. I also added a screw to keep the nail from falling out.
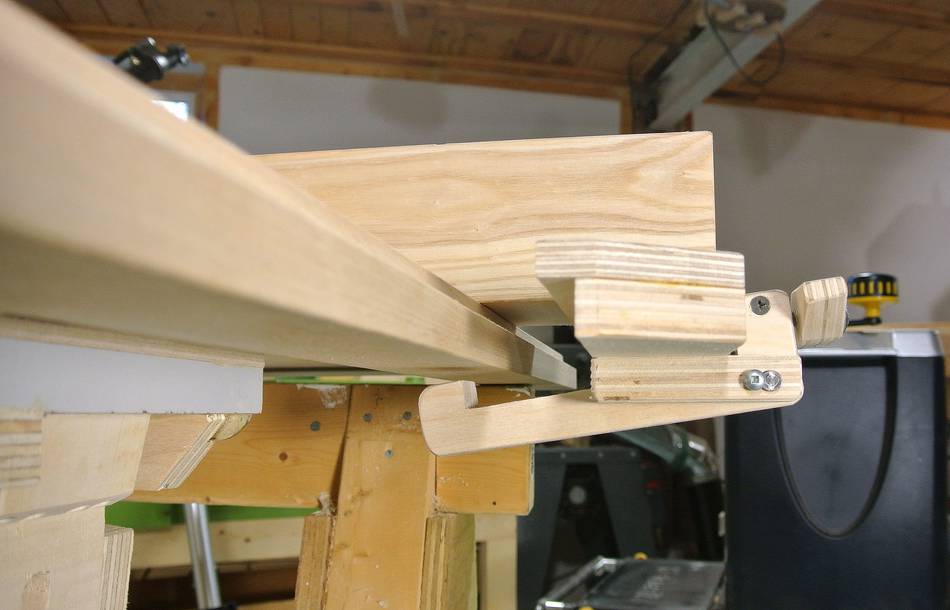 When the screw is loosened, the clamp drops down, allowing the fence to
be pulled away from the saw.
When the screw is loosened, the clamp drops down, allowing the fence to
be pulled away from the saw.
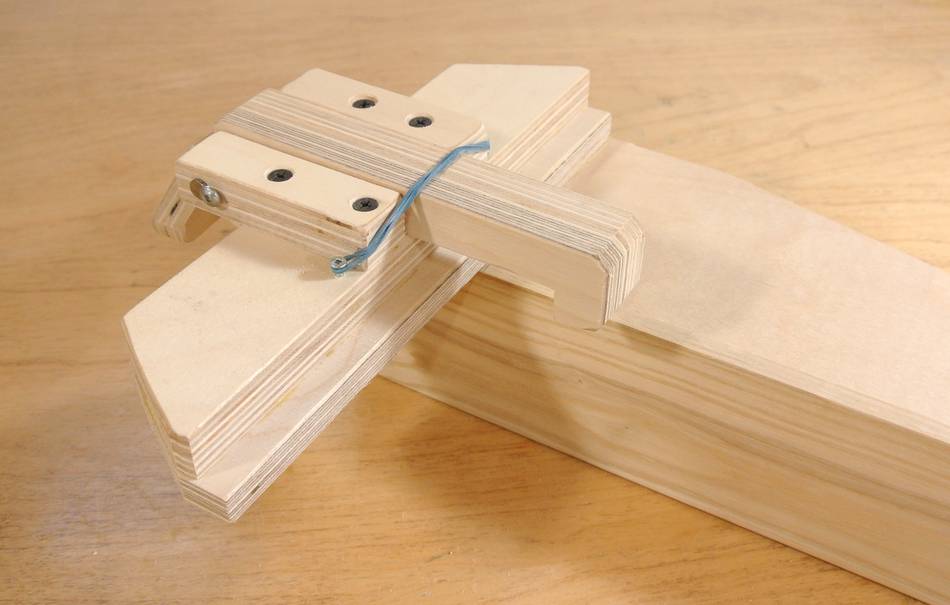 After using the fence for a while, I realized I didn't always have the hook
fully engaged. So I added a rubber band to pull the hook fully up
by default.
After using the fence for a while, I realized I didn't always have the hook
fully engaged. So I added a rubber band to pull the hook fully up
by default.
 I'm happy with how it turned out.
Things I like about this design is that it has no place for sawdust to get wedged into and it doesn't add a lot of bulk to the front of the table. Even the fence bracket itself can be thought of as an infeed side table extension.
And it's more convenient to use than the fence I made for my old table saw.
I used almostthe same design for the fence for my second homemade table saw
Next: Alignment and miter slots
 Old table saw rip fence
 Fence micro adjusting
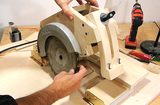 Homemade tablesaw