Why I built marble machine 2.1
 One of the most frequently requested plans on my website is for marble machine 2.
The only problem with that is, I never drew any plans for that machine . The
original marble machine 2 was cobbled together completely ad-hoc, and as such is of a "design" that
is not well suited to draw up plans from. Hoping to appease my readers, I created the
modular marble machine, with plans. It's been a popular project, but it hasn't stopped people
from asking for plans for marble machine 2.
One of the most frequently requested plans on my website is for marble machine 2.
The only problem with that is, I never drew any plans for that machine . The
original marble machine 2 was cobbled together completely ad-hoc, and as such is of a "design" that
is not well suited to draw up plans from. Hoping to appease my readers, I created the
modular marble machine, with plans. It's been a popular project, but it hasn't stopped people
from asking for plans for marble machine 2.
 So at the start of April (still recuperating from a
broken wrist and unable to build stuff in
my workshop) I started to draw up a CAD model for a new "marble machine 2".
So at the start of April (still recuperating from a
broken wrist and unable to build stuff in
my workshop) I started to draw up a CAD model for a new "marble machine 2".
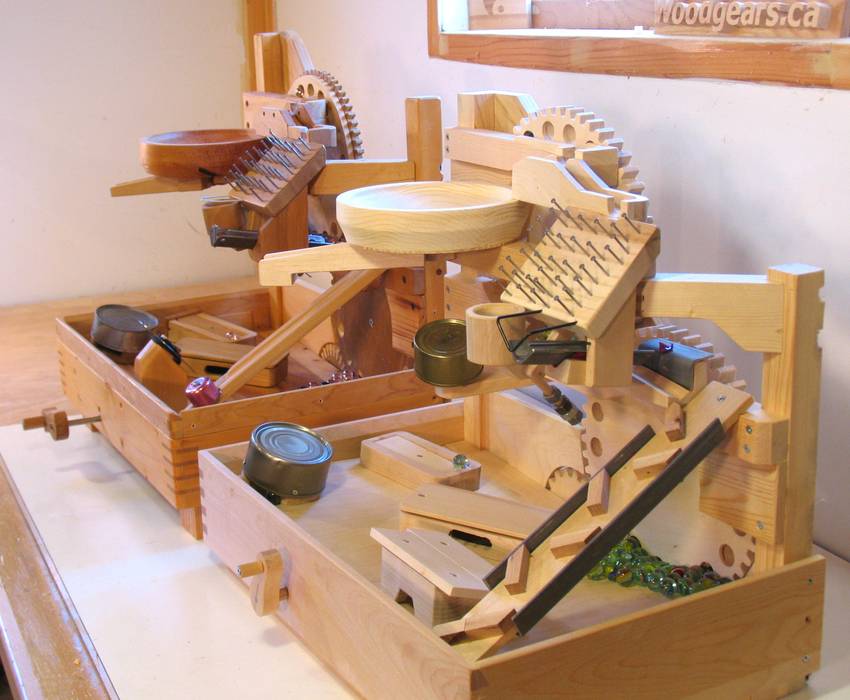
I finally finished building that machine, taking pictures and video of every step along the way. Building the machine actually didn't take that much shop time, but setting up the camera and tripod for every important step adds a lot of time. Editing the video and documenting the process takes even more time. At this point I have only produced rough edits of some of the construction. So over the next few weeks, I will be finishing the edits and releasing more articles and videos about how this machine is put together. I will also put together a detailed set of plans, which will be for sale once they are done. Turning a CAD model into a set of dimensioned drawings is a lot of work.
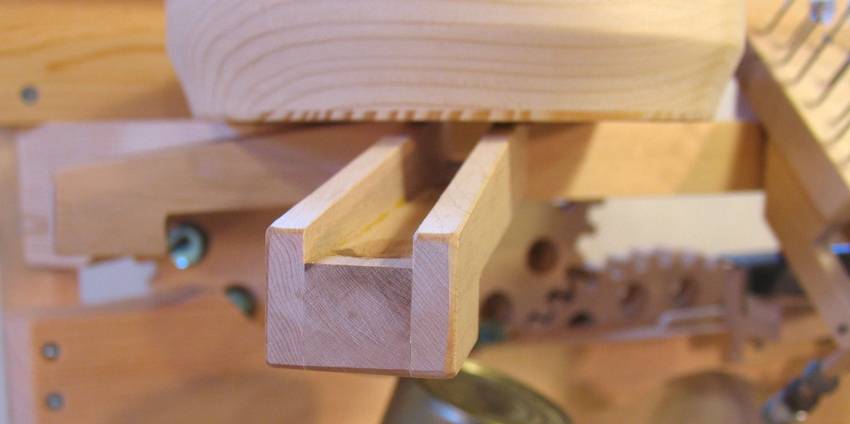
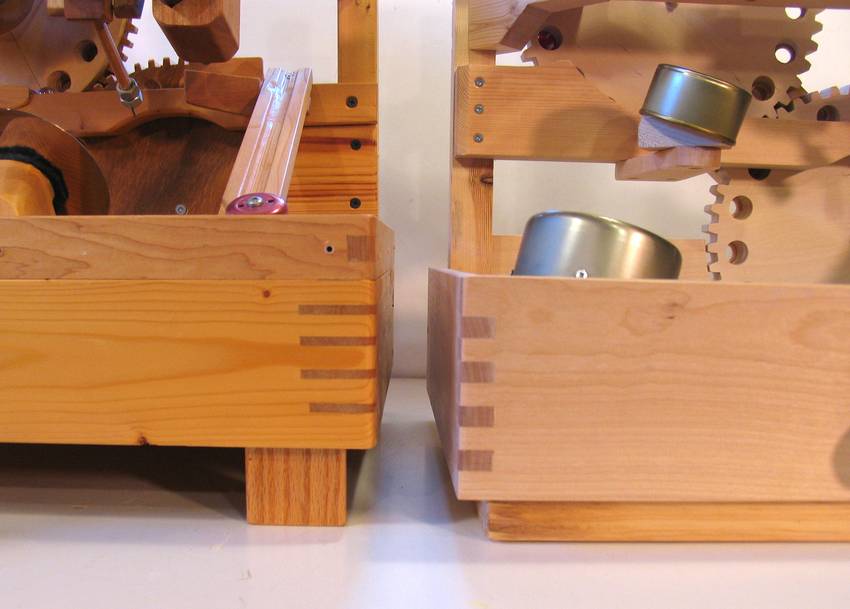 The new machine is more elegant than the old one in many ways. On the right, you can a the nice
box joint on the hardwood enclosure. On the original machine (at left), I started with an
enclosure made out of spruce, and added a hardwood rail to heighten it
when I had too many marbles escape from the machine.
The new machine is more elegant than the old one in many ways. On the right, you can a the nice
box joint on the hardwood enclosure. On the original machine (at left), I started with an
enclosure made out of spruce, and added a hardwood rail to heighten it
when I had too many marbles escape from the machine.
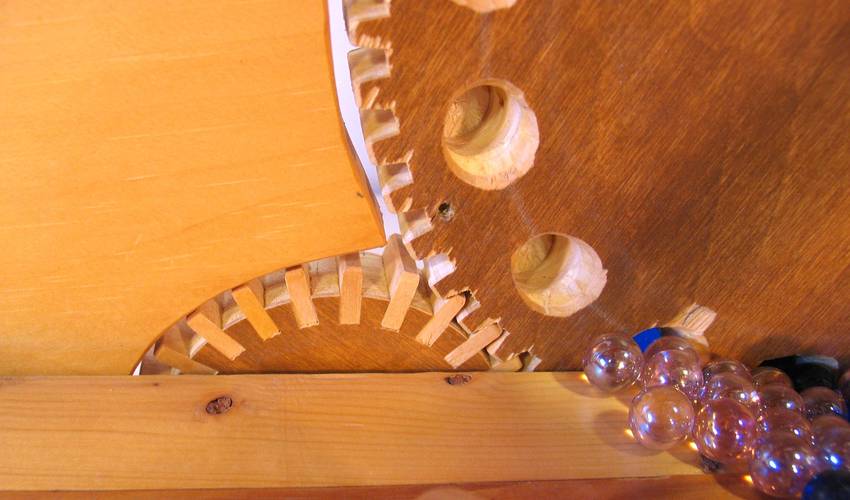
 Here you can see how the original machine was cobbled together ad-hoc. The top elevating wheel
has some pieces of hardwood glued to the front because I ran out of the thick plywood that
I made the bottom wheel from. The ramp that feeds from the wheel to the flip-flop marble divider
was whittled out until the marbles flowed just right, with a few bits of wood glued on to keep
the marbles on track. Then, on the right side, another piece was tacked on to deflect the
marbles forward to the nail board.
Here you can see how the original machine was cobbled together ad-hoc. The top elevating wheel
has some pieces of hardwood glued to the front because I ran out of the thick plywood that
I made the bottom wheel from. The ramp that feeds from the wheel to the flip-flop marble divider
was whittled out until the marbles flowed just right, with a few bits of wood glued on to keep
the marbles on track. Then, on the right side, another piece was tacked on to deflect the
marbles forward to the nail board.
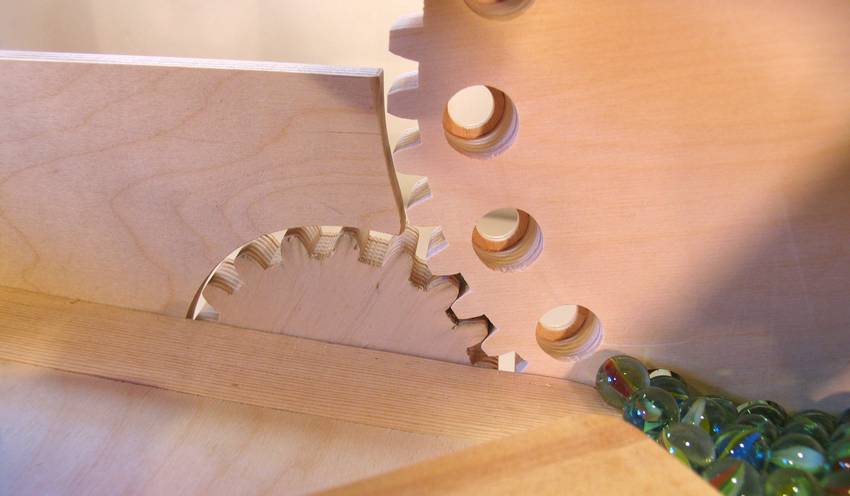
 With the new machine, I knew what I wanted to build before I started construction,
so the parts are actually designed for what they do.
I started with the right thickness of plywood, so no need to add layers to the wheel. The marble
track is made out of bandsawed-out layers of wood glued together, which makes for easier
construction from the design, especially using 1:1 paper templates glued on the wood.
With the new machine, I knew what I wanted to build before I started construction,
so the parts are actually designed for what they do.
I started with the right thickness of plywood, so no need to add layers to the wheel. The marble
track is made out of bandsawed-out layers of wood glued together, which makes for easier
construction from the design, especially using 1:1 paper templates glued on the wood.
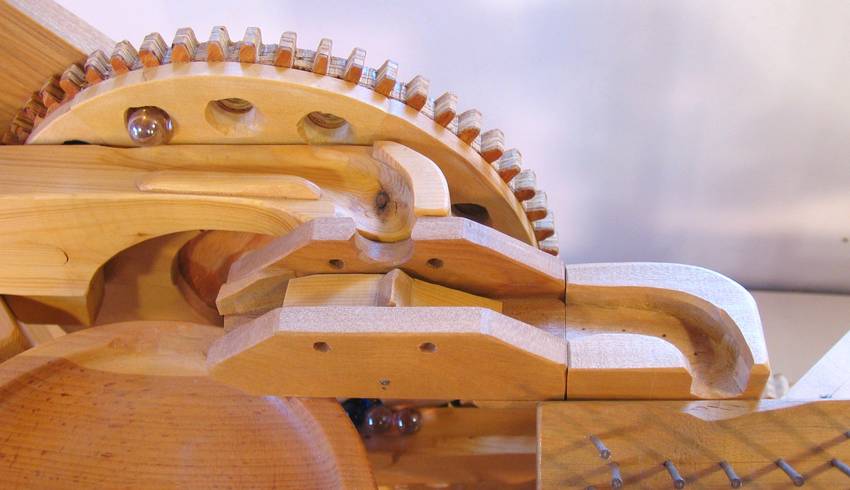
 Most of the parts that were tricky to cut for the original machine are changed
to a design sandwiched out of layers on this machine.
The layers are cut on the bandsaw using paper templates, then glued together to make the parts.
Most of the parts that were tricky to cut for the original machine are changed
to a design sandwiched out of layers on this machine.
The layers are cut on the bandsaw using paper templates, then glued together to make the parts.
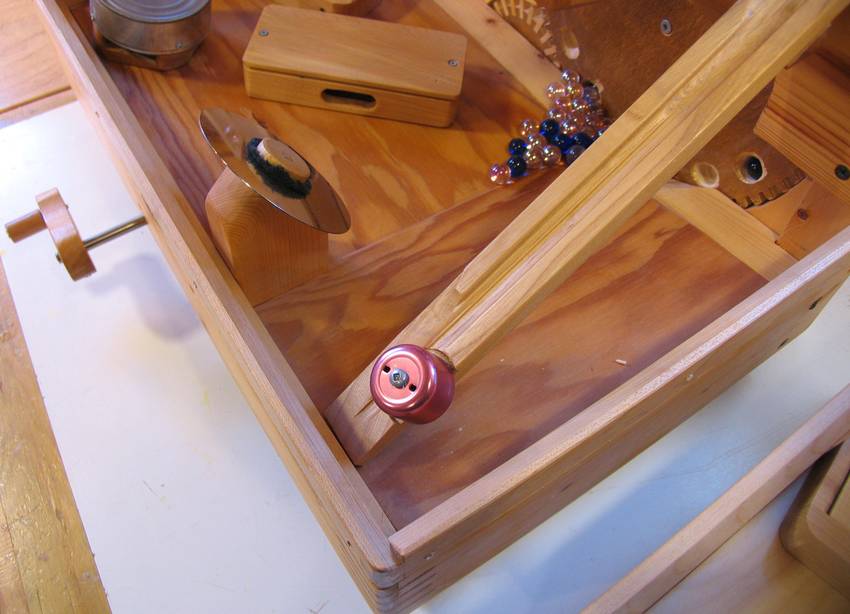 On the old machine, I used a bicycle bell at the bottom of the ramp. I also used
a hard-drive platter, which gets hit with marbles when the dump-o-matic above it
drops it's load.
But I was never totally satisfied with these. They sounded too tinny compared to
the rest of the machine. I also figured these parts are too hard to obtain.
On the old machine, I used a bicycle bell at the bottom of the ramp. I also used
a hard-drive platter, which gets hit with marbles when the dump-o-matic above it
drops it's load.
But I was never totally satisfied with these. They sounded too tinny compared to
the rest of the machine. I also figured these parts are too hard to obtain.
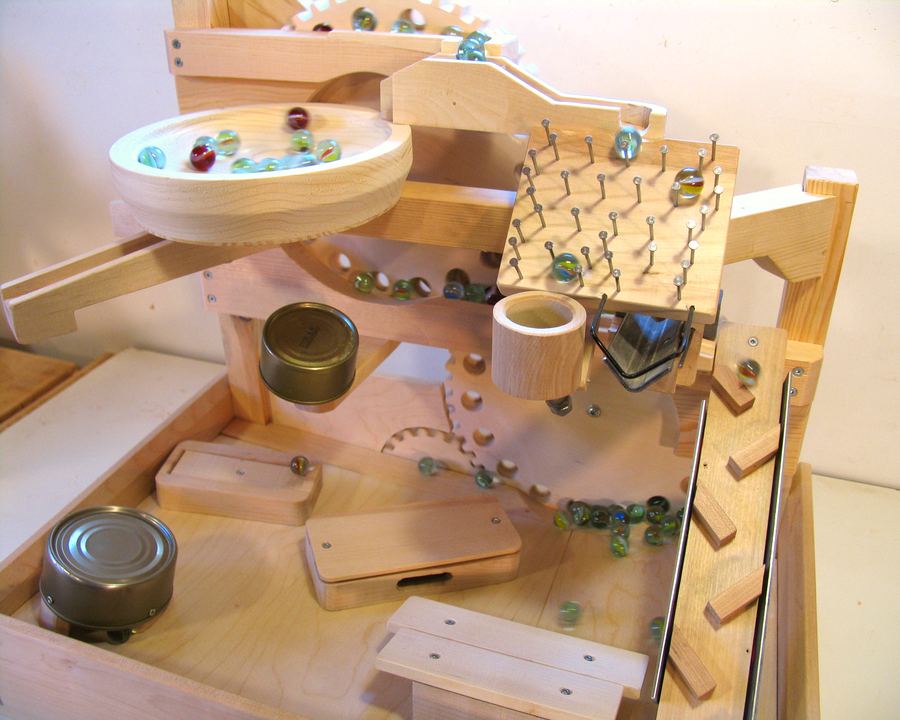
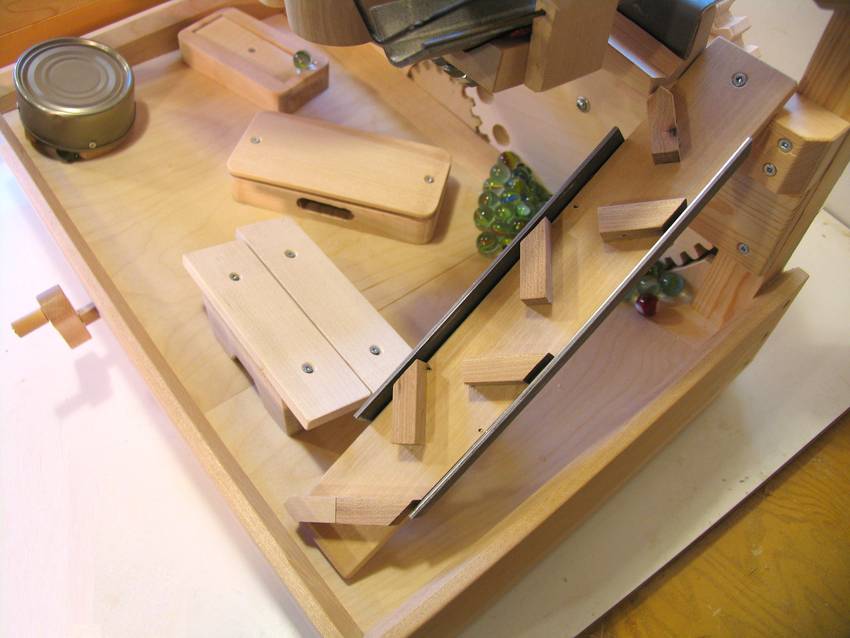 So on the new machine, I replaced that straight ramp to the bicycle bell with a zigzag ramp,
with angle iron on either side. The angle iron is loosely mounted so that it makes
a nice ring as the marbles bounce off it several times on the way down.
So on the new machine, I replaced that straight ramp to the bicycle bell with a zigzag ramp,
with angle iron on either side. The angle iron is loosely mounted so that it makes
a nice ring as the marbles bounce off it several times on the way down.
The hard-drive platter is replaced by two wooden xylophone bars, which make a more satisfying noise when the dump-o-matic dumps on them.
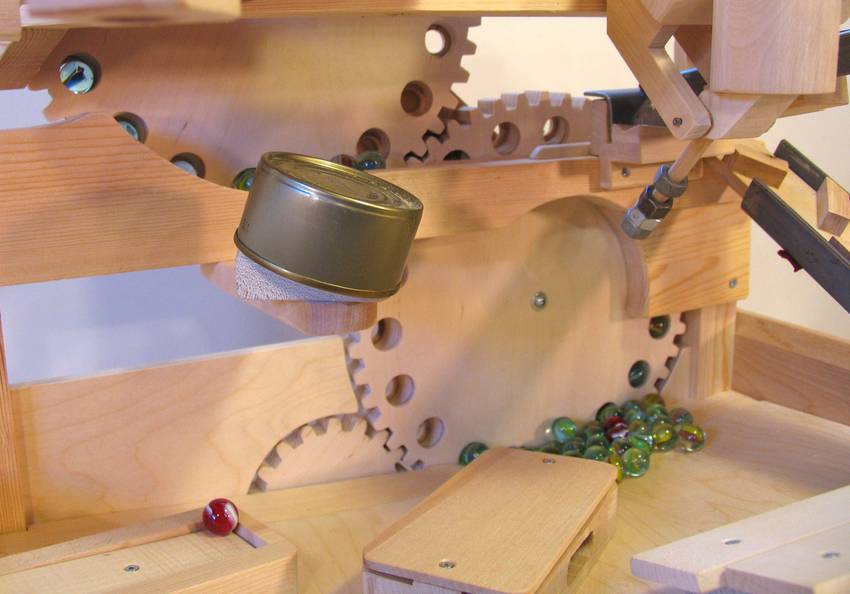 I also added this small tuna-can drum below the bowl. Marbles bounce off the drum
and get bounced over to the xylophone bars. Both the drum and the xylophone
bars make nice noises.
I also added this small tuna-can drum below the bowl. Marbles bounce off the drum
and get bounced over to the xylophone bars. Both the drum and the xylophone
bars make nice noises.
 The drive gear for the original machine has inset teeth that I cut out with my
gear cutting jig. But that was a complicated
operation.
The drive gear for the original machine has inset teeth that I cut out with my
gear cutting jig. But that was a complicated
operation.
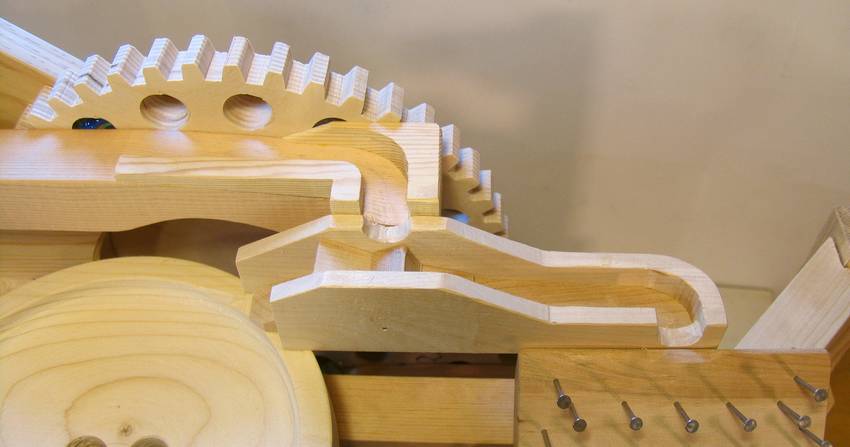
 Since then I wrote my free gear template
generator and more sophisticated (but not free) gear generator
program, which really simplifies making gears. Using good quality Baltic birch
plywood, it's possible to make nice and proper involute gears just by cutting along
the lines of a paper template with the bandsaw.
I will include printable templates for the gear
(and most of the other parts) in the plans
Since then I wrote my free gear template
generator and more sophisticated (but not free) gear generator
program, which really simplifies making gears. Using good quality Baltic birch
plywood, it's possible to make nice and proper involute gears just by cutting along
the lines of a paper template with the bandsaw.
I will include printable templates for the gear
(and most of the other parts) in the plans
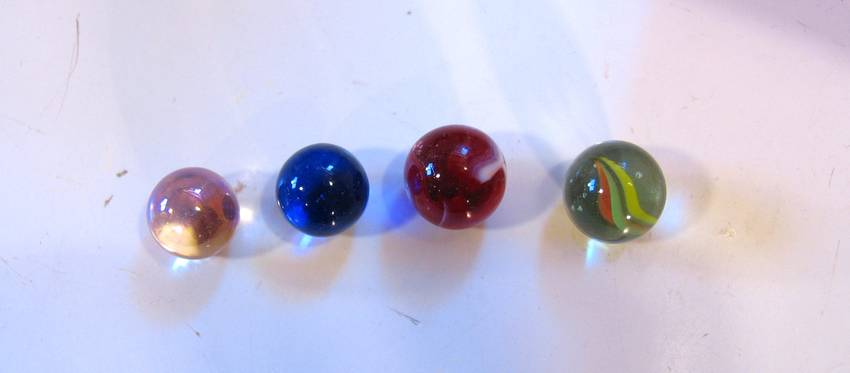 And finally, a very important change: The new machine uses standard sized (16 mm or 5/8")
marbles. These are the type of marbles you can get at a dollar store. The old machine
used 14 mm marbles that I bought at a craft store at some point, but it would be hard
to find more.
And finally, a very important change: The new machine uses standard sized (16 mm or 5/8")
marbles. These are the type of marbles you can get at a dollar store. The old machine
used 14 mm marbles that I bought at a craft store at some point, but it would be hard
to find more.
 Like its predecessor, marble machine 2.1 is quite loud when it's running. But nobody
seems to mind, or at least not whoever is turning the crank. When I was still
working at Research In Motion, I took the original
marble machine 2 to work one time. People kept coming into my office to crank
the machine, but the people working nearby eventually got tired of the
never ending racket and complained.
So I had to tell people to close the door before cranking the machine.
Like its predecessor, marble machine 2.1 is quite loud when it's running. But nobody
seems to mind, or at least not whoever is turning the crank. When I was still
working at Research In Motion, I took the original
marble machine 2 to work one time. People kept coming into my office to crank
the machine, but the people working nearby eventually got tired of the
never ending racket and complained.
So I had to tell people to close the door before cranking the machine.
So if you want to build one for your kids but don't want to be disturbed, you might consider getting them quieter toys, like maybe a drum kit, bagpipes, or a tuba.
That said, whenever I have visitors with kids, marble machine two has always kept them fascinated for a long time, and if you send the kids to a separate room with the machine, you can still have conversation.
It's actually quite tricky to design such a machine. You can't design it without building it, but if you build it without a design, it won't end up with something that is easy to draw up. Which means you pretty much have to build the machine twice - which is what I ended up doing.
For the parts that I changed from the original, I ended up prototyping the components before drawing them up in CAD, just to make sure they'd actually work. So if you build the machine, buying a copy of the plans could save you a lot of time.
More about how the machine works
Back to Marble machine 2.1
Other marble machines