
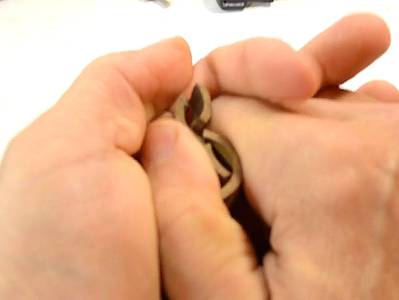
 I wanted to experiment with making wooden rings - the kind you wear
on your fingers..
I wanted to experiment with making wooden rings - the kind you wear
on your fingers..
I wanted to experiment with making wooden rings - the kind you wear
on your fingers..
I had previously made a ring by drilling a hole in some wood and cutting it out with a scrollsaw. But to get a proper fit on a finger, the size needs to be right to within half a millimeter. It's not always possible to get a drill of the right size.
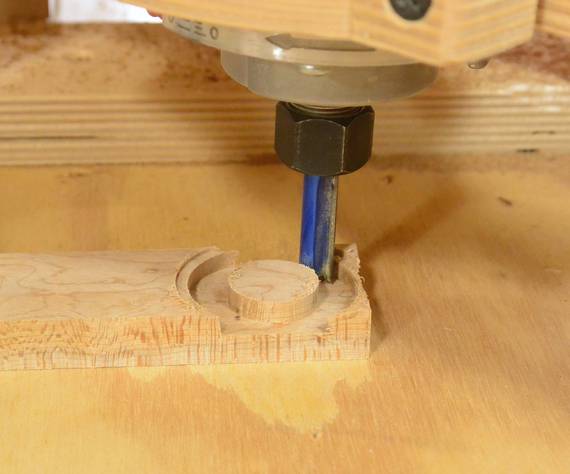
I had the idea of using my router pantograph to route a hole of any size, then figured if I use the router for the hole I might as well route around the outside as well.
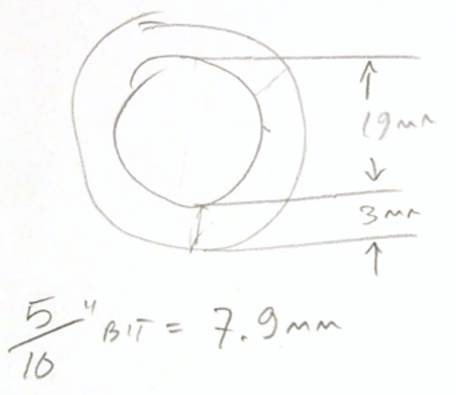
For the inside, the router needs to sweep around a circle that is one router bit diameter smaller than the inside diameter desired, and on the outside, the diameter of the router bit needs to be added. I wanted a 19 mm inside diameter, and 3 mm thickness, so 25 mm outside diameter. This worked out to the router moving in circles of 11 mm and 33 mm diameter.
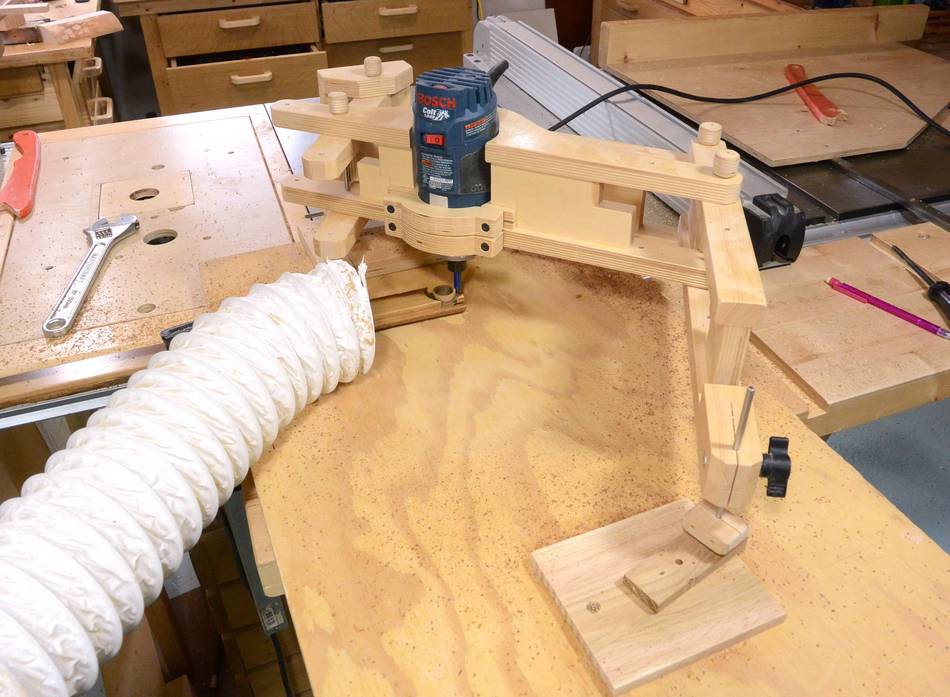 I set my router pantograph to 1:3 reduction, so
before reduction, In need to trace circles of 33 mm and 99 mm diameter,
or radii of 16.5 and 59.5 mm.
I set my router pantograph to 1:3 reduction, so
before reduction, In need to trace circles of 33 mm and 99 mm diameter,
or radii of 16.5 and 59.5 mm.
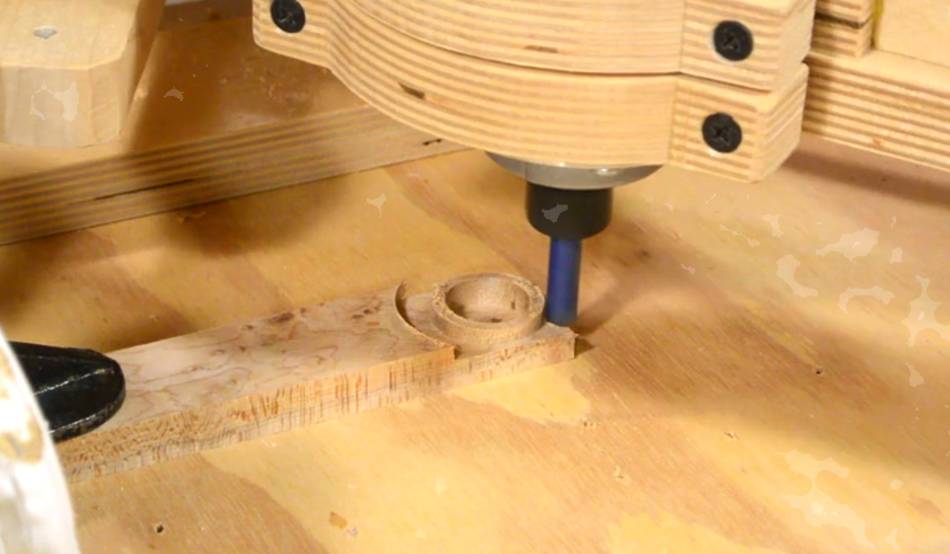 Routing out the first test piece, from maple. I routed the inside with a
counter clockwise motion, and the outside clockwise. That way, the router
is always cutting into the wood, not out, to minimize chipout.
Routing out the first test piece, from maple. I routed the inside with a
counter clockwise motion, and the outside clockwise. That way, the router
is always cutting into the wood, not out, to minimize chipout.
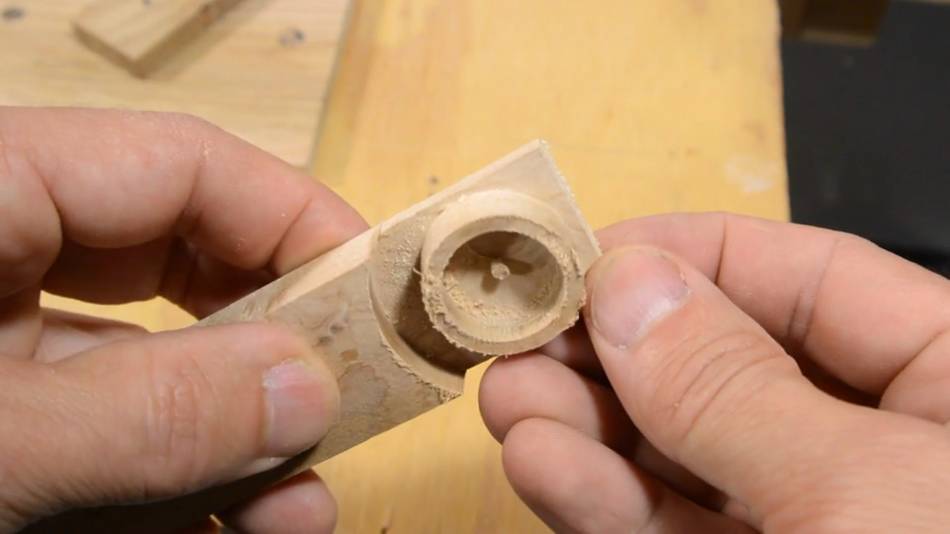 First blank routed out...
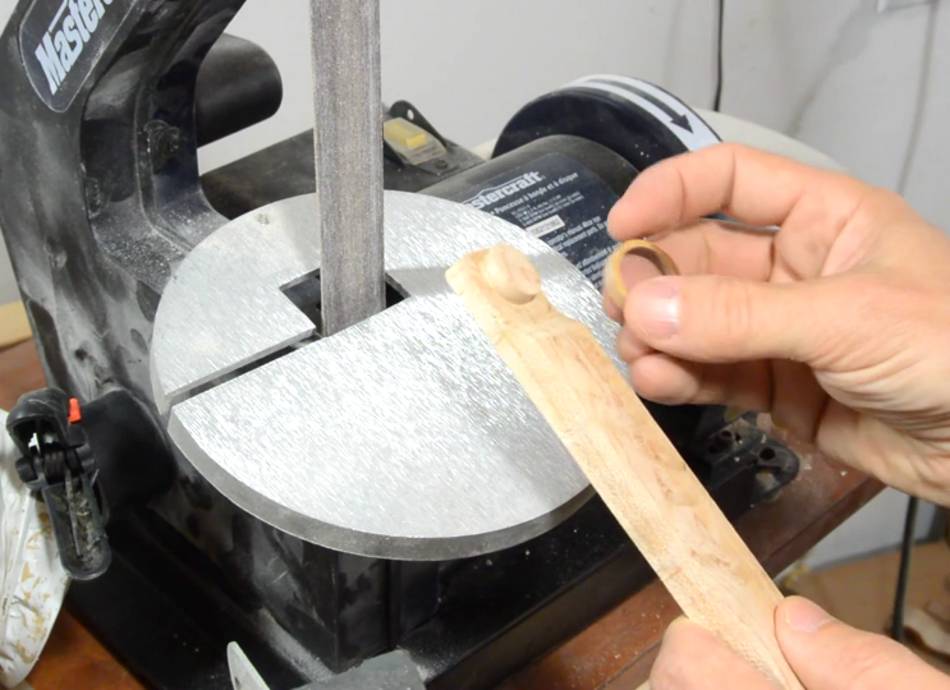
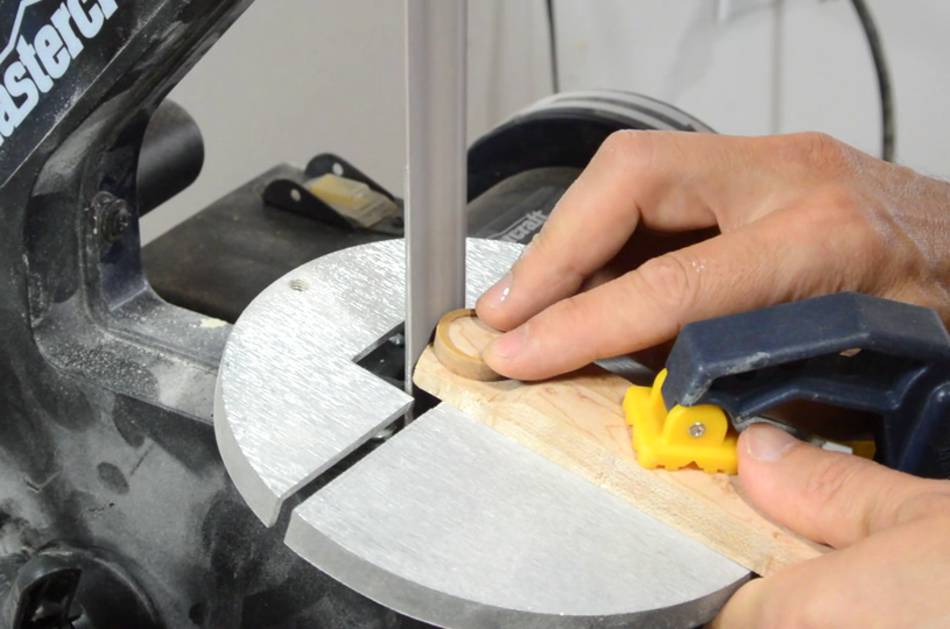
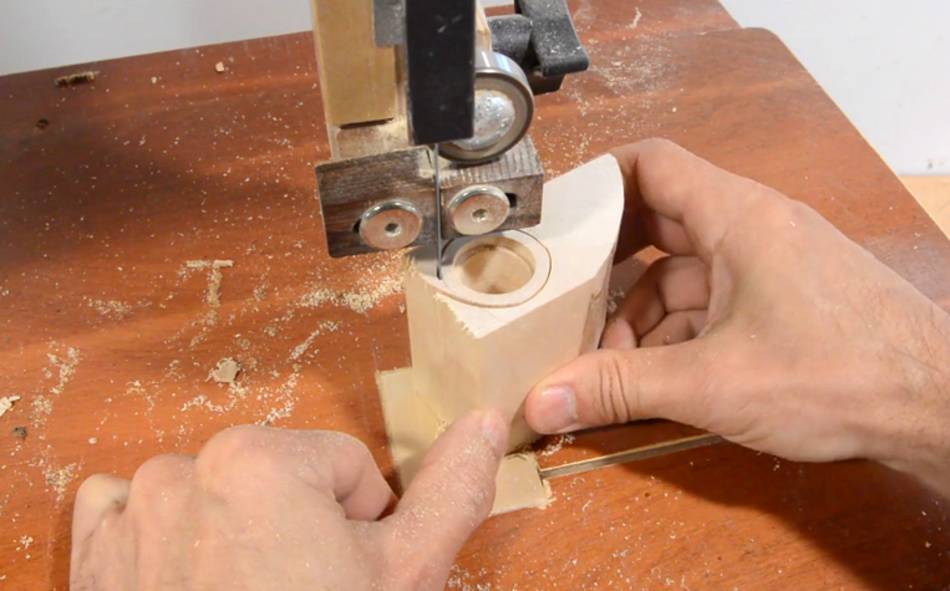
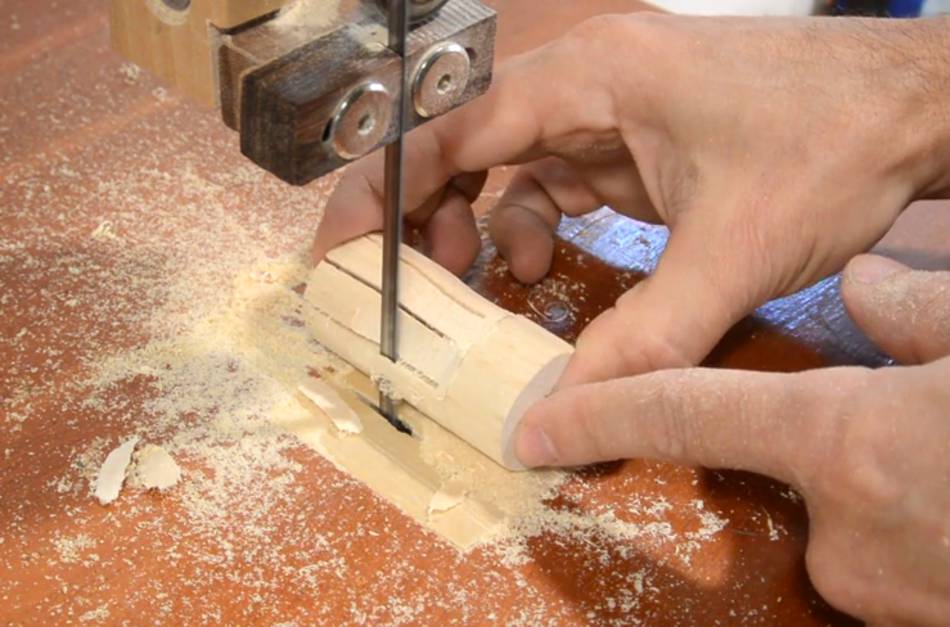
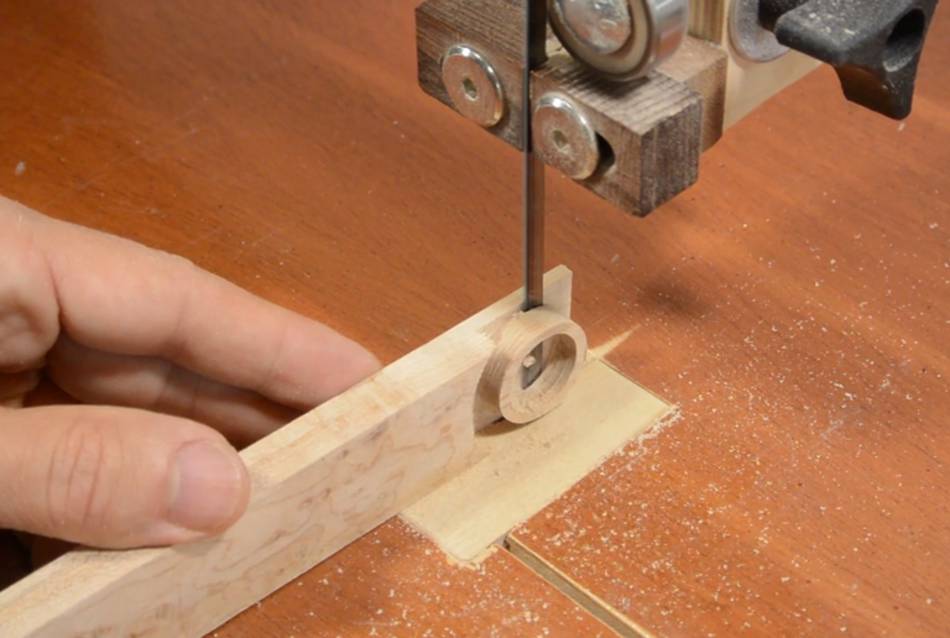 Now cutting it off with the bandsaw.
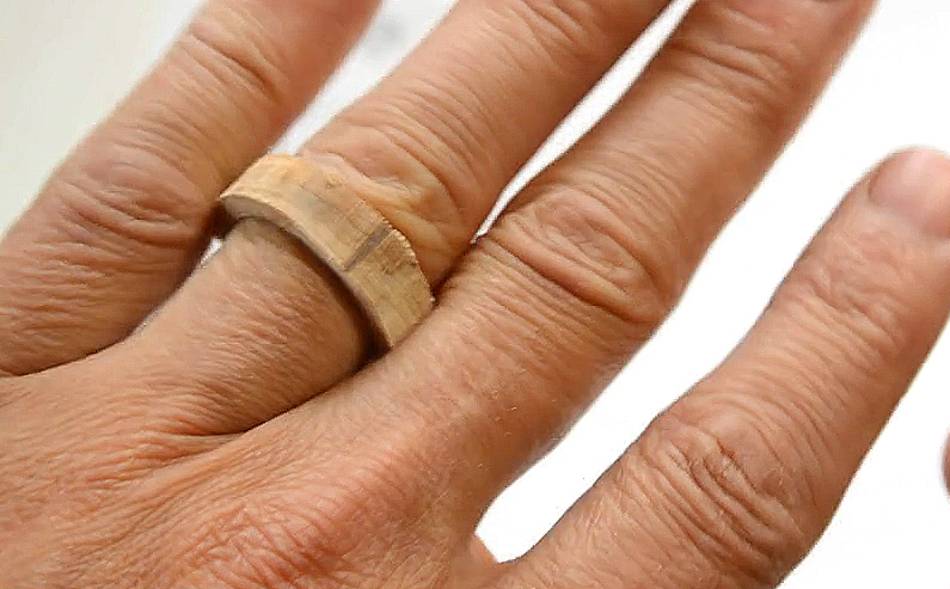 Trying it on. At 3 mm thick, it was awfully clunky.
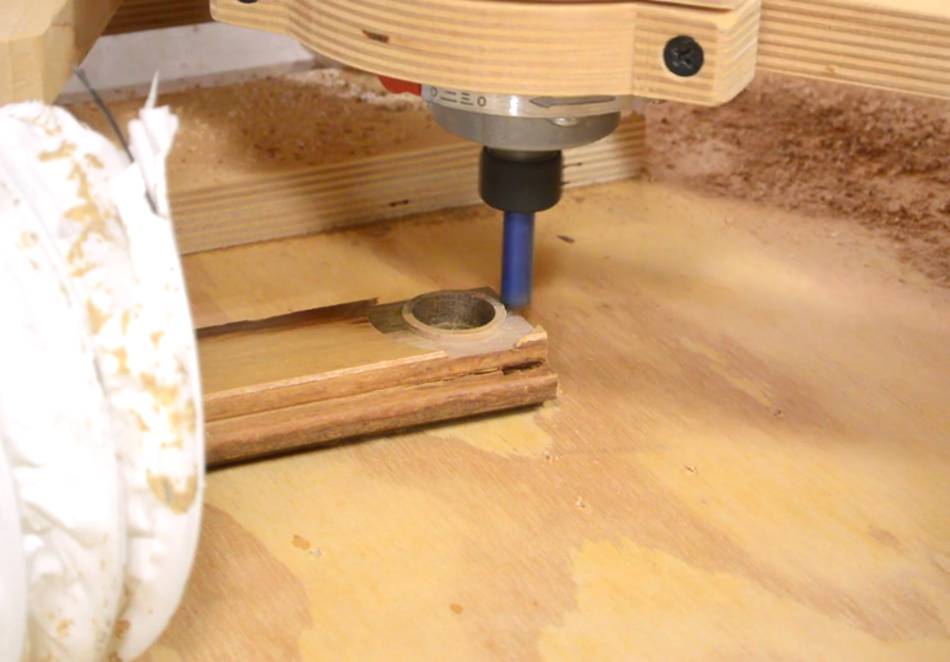 Routing out another one, this time with 2 mm wall thickness, and cut
from exotic hardwood.
Routing out another one, this time with 2 mm wall thickness, and cut
from exotic hardwood.
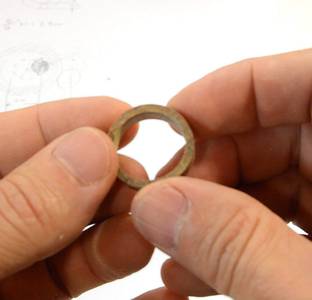
 Second ring cut out. I experimented with how hard it was to break.
I was able to break it by pressing on it with my fingers, but it
was surprisingly strong.
Second ring cut out. I experimented with how hard it was to break.
I was able to break it by pressing on it with my fingers, but it
was surprisingly strong.
Routing it out went relatively fast, so I just made another one.
 I wanted to bevel the outside edges of the ring. That is best done
with a sander. But it would be hard to do this consistently
freehand, so I made a tool to hold the ring with.
I wanted to bevel the outside edges of the ring. That is best done
with a sander. But it would be hard to do this consistently
freehand, so I made a tool to hold the ring with.
 I made that tool on the pantograph the same way I made the rings.
 Bevels sanded.
Next challenge: How to sand the inside of it.
Maybe a really skinny spindle sander, but that would be very tricky to use, and the grit would probably be too coarse. That, and I don't have a spindle sander.
 It occurred to me that a four-jaw lathe chuck could be used to spin
the ring while sanding the inside. Except, I don't have
a four jaw lathe chuck either. So I improvised something out of wood.
It occurred to me that a four-jaw lathe chuck could be used to spin
the ring while sanding the inside. Except, I don't have
a four jaw lathe chuck either. So I improvised something out of wood.
I started by drilling a hole slightly larger than the ring, and inside that a much deeper hole, about 3 mm smaller. I then cut around the hole on the bandsaw...
 ...then cut a series of slots in this thing, and also thinning it out a bit
to make the fingers more flexible. If I made the walls thinner to
begin with, this step wouldn't have been needed.
...then cut a series of slots in this thing, and also thinning it out a bit
to make the fingers more flexible. If I made the walls thinner to
begin with, this step wouldn't have been needed.
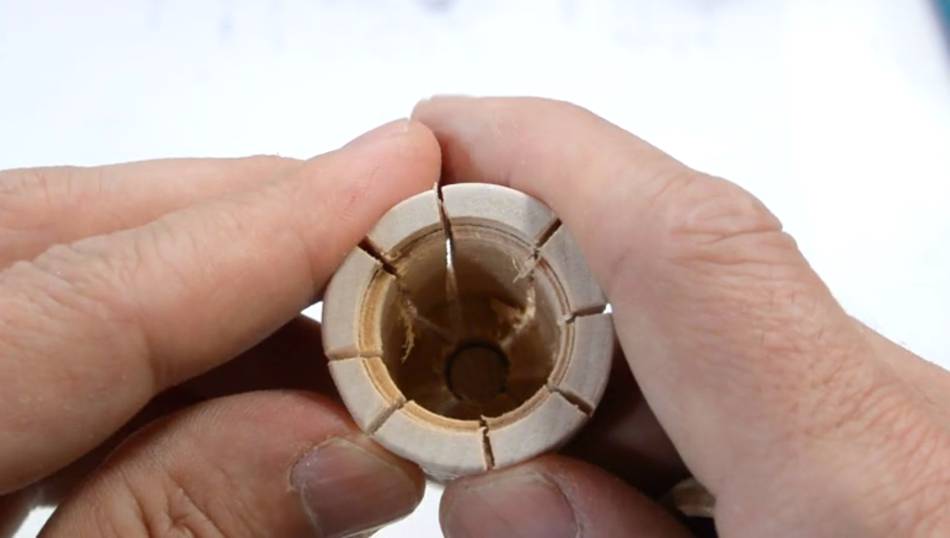 Looking into my ring-holder
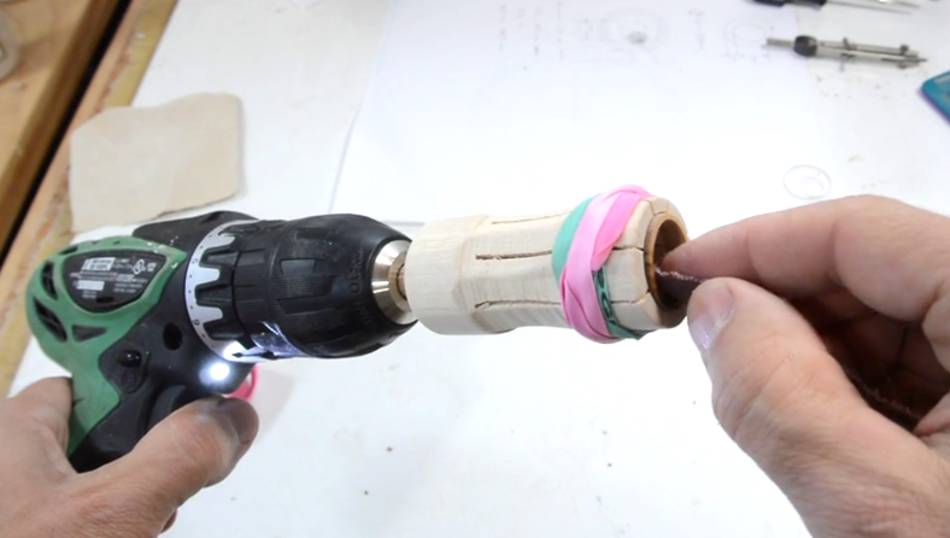 Some rubber bands around the holder provide even pressure. Spinning
the holder in a drill allowed me to sand the inside with progressively
finer sandpaper.
Some rubber bands around the holder provide even pressure. Spinning
the holder in a drill allowed me to sand the inside with progressively
finer sandpaper.
 I made a mandrel on the table saw for fine sanding the outside of
the ring. The mandrel was a piece of 3/4" dowel, which I cut down
to 3/8" by spinning it against the fence, cutting a bit away with the
blade. I then put it in the chuck, and again spun it against the
blade to shape the other end just the right size and slightly conical.
I made a mandrel on the table saw for fine sanding the outside of
the ring. The mandrel was a piece of 3/4" dowel, which I cut down
to 3/8" by spinning it against the fence, cutting a bit away with the
blade. I then put it in the chuck, and again spun it against the
blade to shape the other end just the right size and slightly conical.
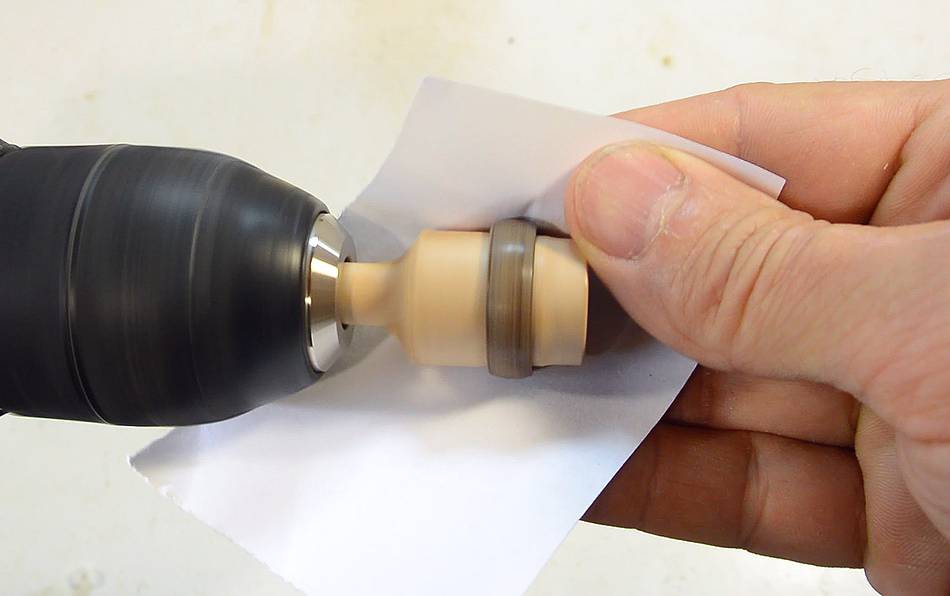
Here I'm using some 600 grit sandpaper to smooth the ring...
 ...followed by rubbing some paper against it (paper is slightly abrasive)
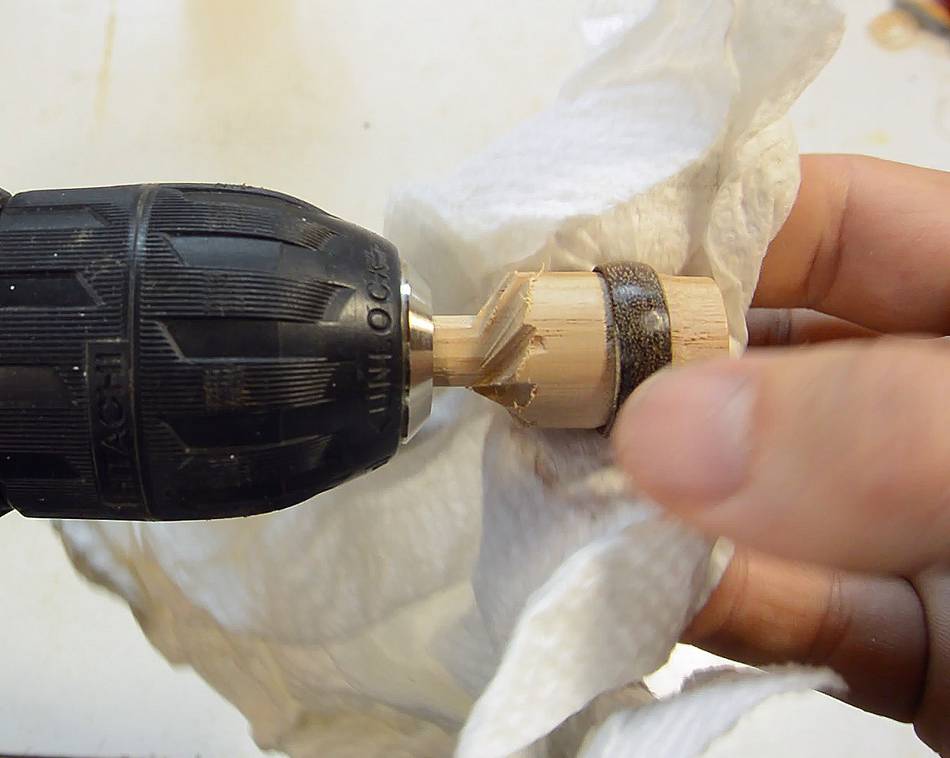 And finally, spinning it against some paper towel to add more polish.
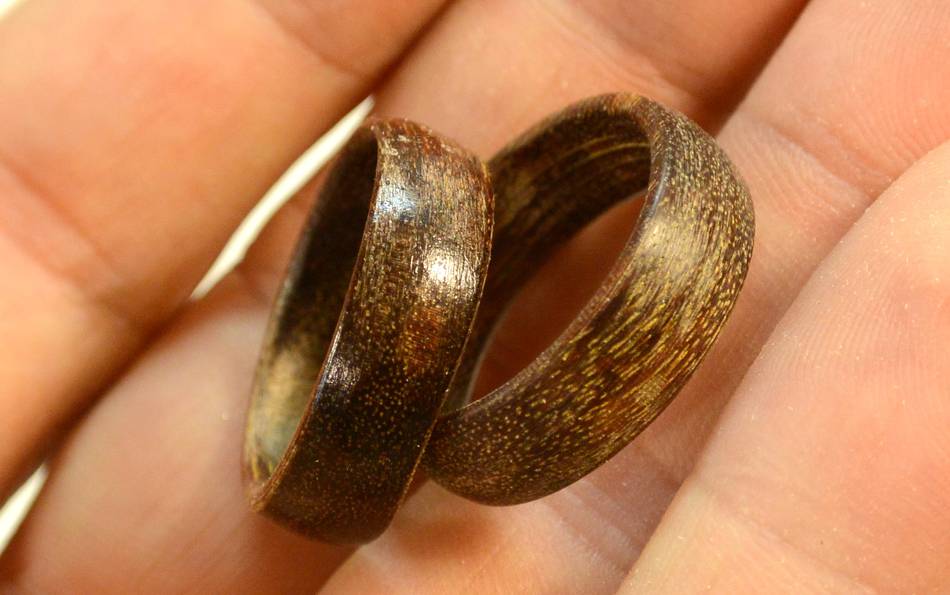 And here's two rings that I made. The right one just polished, the left
with some varnish on it. These are different ones from the one in the
pictures at the start of the article. That first one I sanded too thin,
and it broke pretty soon, so I made some more, from darker wood, and a
bit wider and thicker. But I had a hard time pulling one of the
thicker ones off the joint on my fingers and in the process it also
cracked.
And here's two rings that I made. The right one just polished, the left
with some varnish on it. These are different ones from the one in the
pictures at the start of the article. That first one I sanded too thin,
and it broke pretty soon, so I made some more, from darker wood, and a
bit wider and thicker. But I had a hard time pulling one of the
thicker ones off the joint on my fingers and in the process it also
cracked.
So making wooden rings is more of a novelty thing. It doesn't take long to make one, but it certainly won't last as long as one made of metal.
 Cutting circles
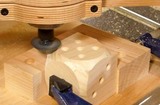 Making rounded dice
 Pekka's
sailboat
Pekka's
sailboat Guitar inlay experiments
 Jewelry rack
 Tiny little box