Assembling the all-metal pantorouter (2014)
This is an older version of the guide from 2014.2015 assembly
2018 assembly
For how to buy an all metal pantorouter, plase go to pantorouter.com
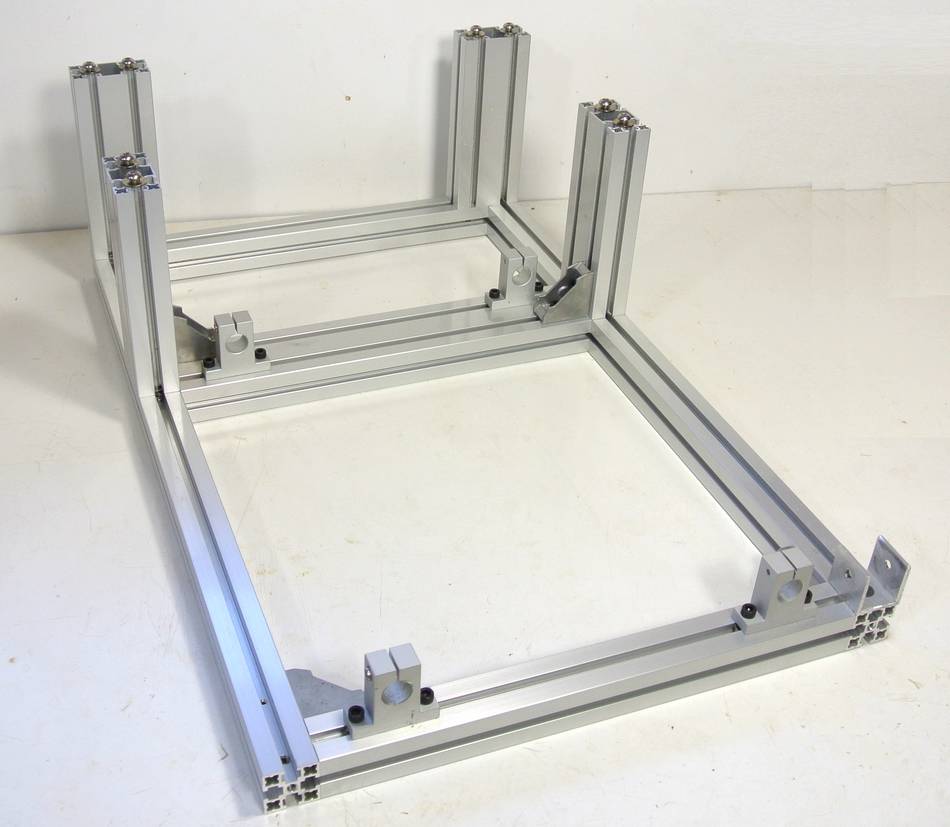
Assembling the base frame
You can see a cool animation of assembling the pantorouter,part of one of Frank Howarth's videos
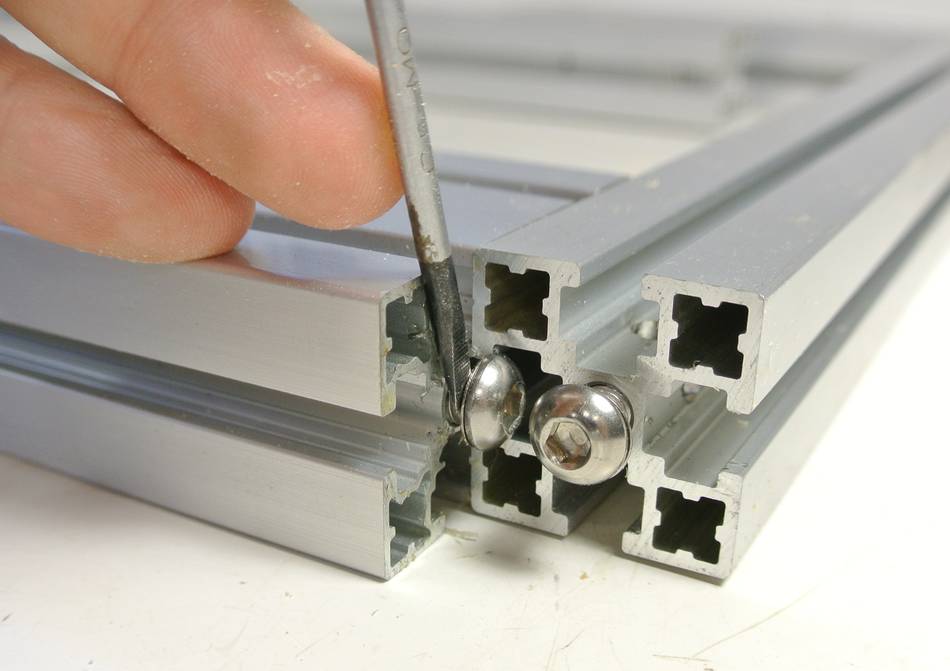
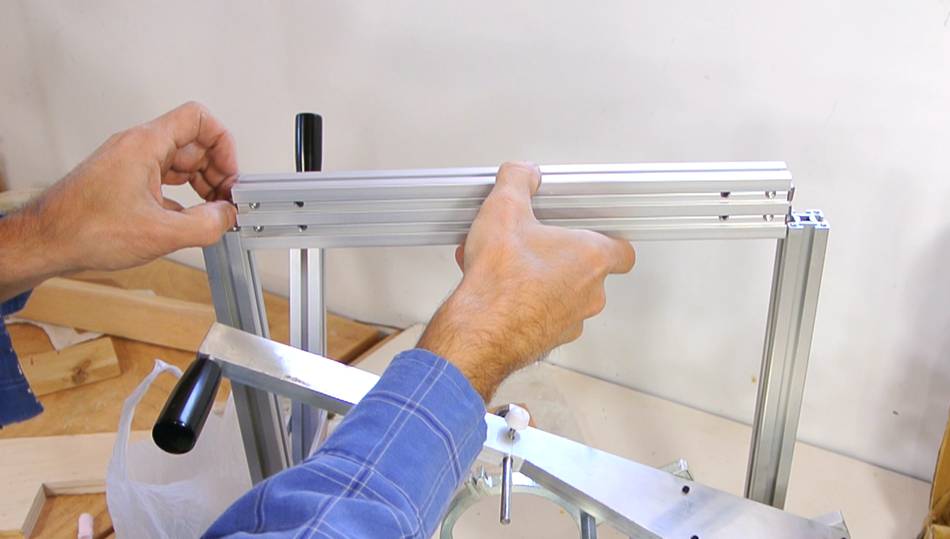
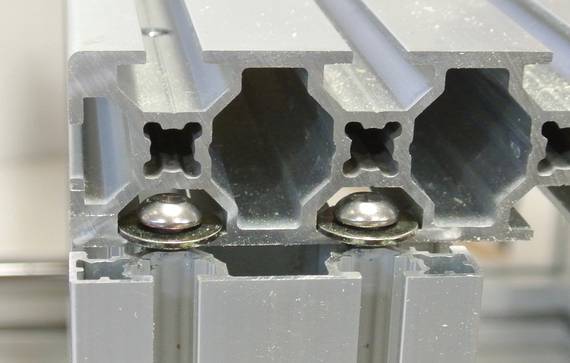
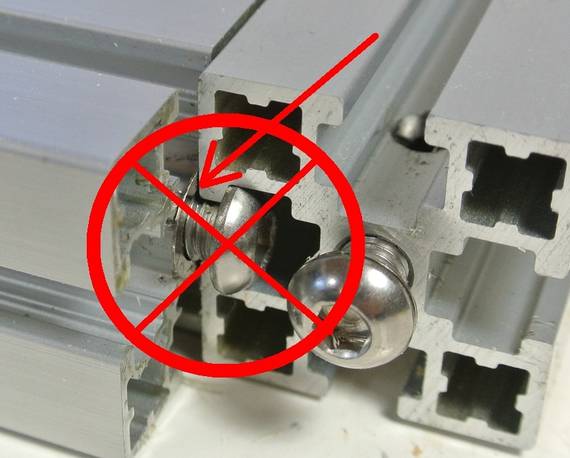 When assembling the base frame, make sure the thin washers go
inside the slots in the rails, not outside. I used a small
screwdriver to push the washers against the screw's head while
sliding the rails together.
When assembling the base frame, make sure the thin washers go
inside the slots in the rails, not outside. I used a small
screwdriver to push the washers against the screw's head while
sliding the rails together.
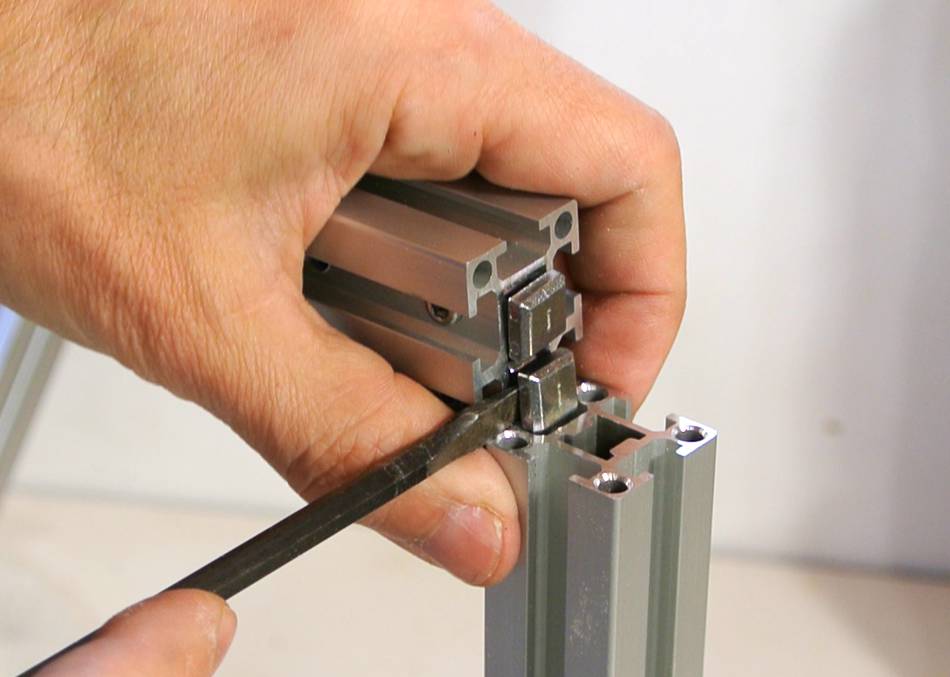
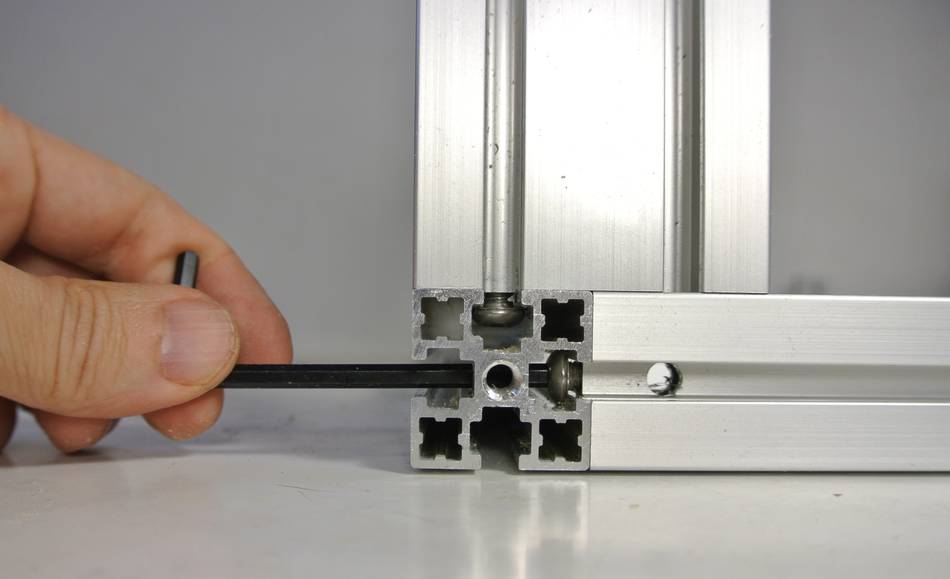 Holes in the frame rails allow the screws to be tightened with an Allen key
once the parts are slid into the right place.
Holes in the frame rails allow the screws to be tightened with an Allen key
once the parts are slid into the right place.
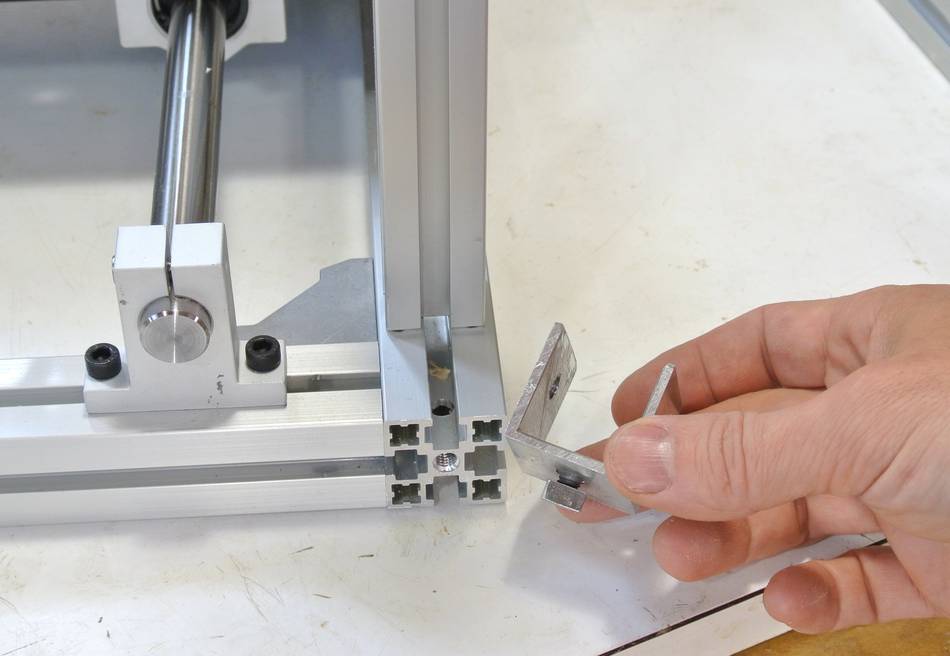
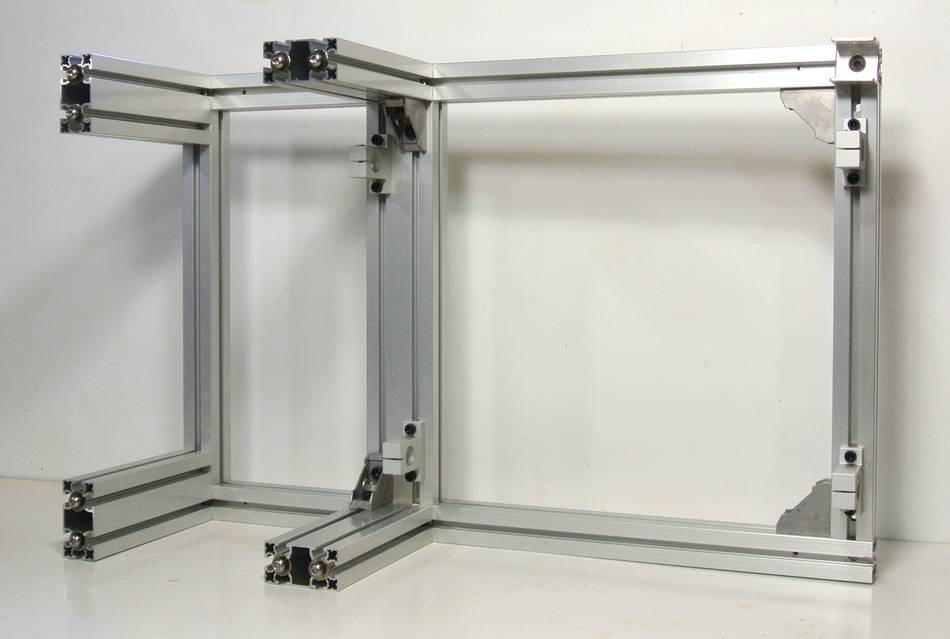 Please note the relative positions of the angle braces and the shaft holders.
It's best to add the shaft holders and the angle braces to the double-wide crosspiece in the middle before joining it with the rails on either side.
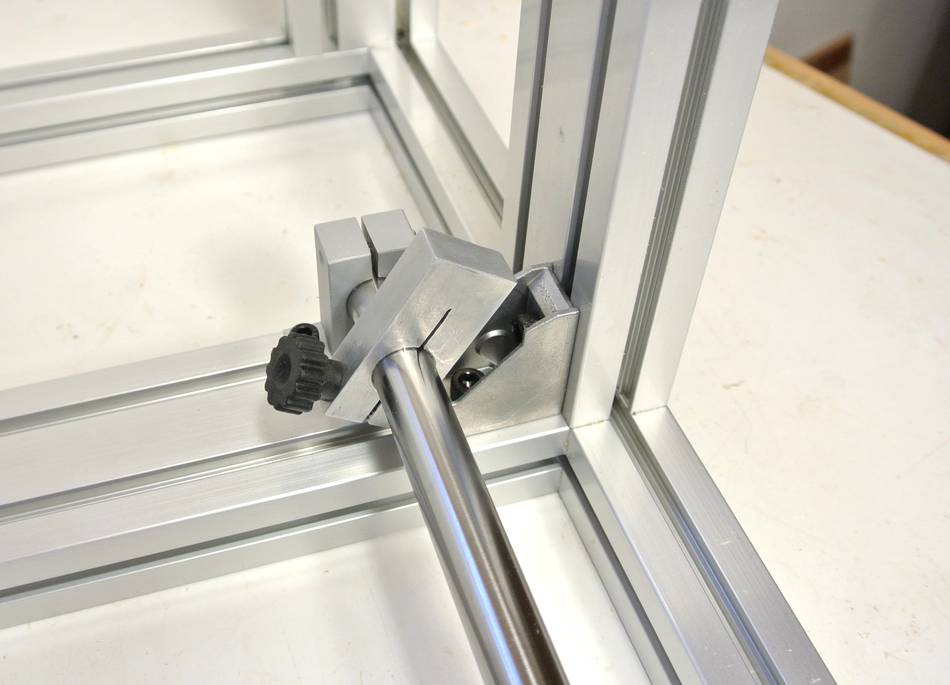 On one side, the shaft holder is placed further to the front so that the depth stop
can be slid further to get out of the way for full plunge sled travel.
On one side, the shaft holder is placed further to the front so that the depth stop
can be slid further to get out of the way for full plunge sled travel.
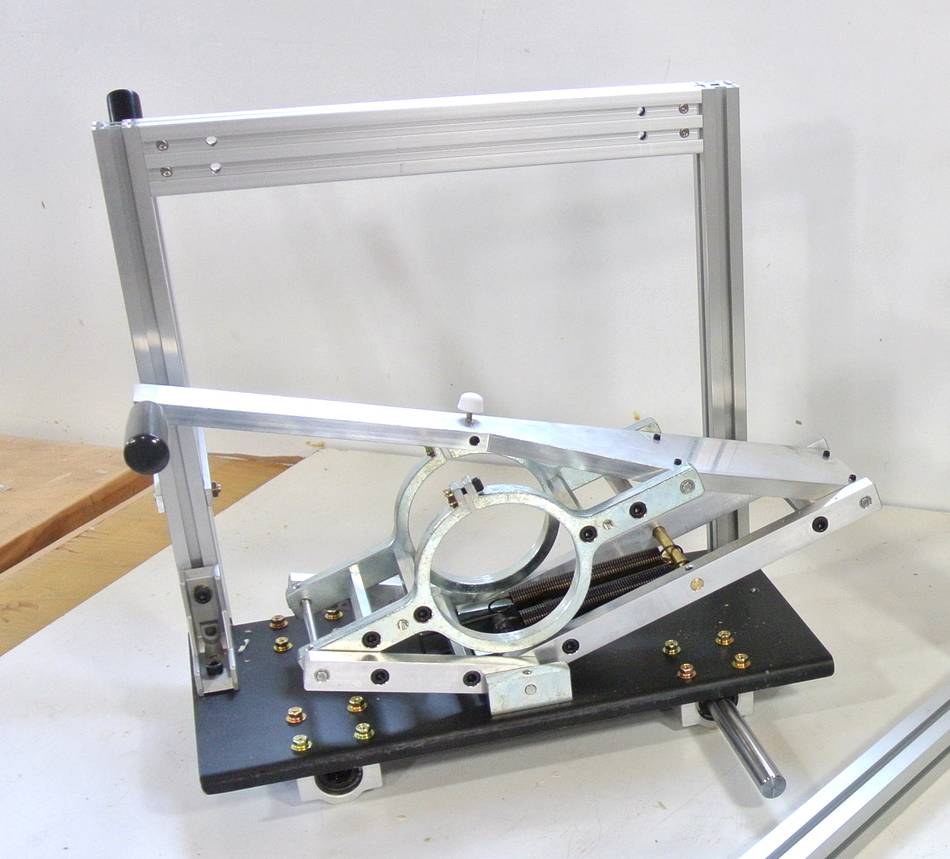
Assembling the plunge carriage
The plunge carriage comes mostly pre-assembled. However, you will need to assemble and install the template holder on the carriage.
 Mount the vertical parts of the template holder to the metal base with
four screws. Be careful inserting these screws, it's easy
to get them cross threaded. It's advisable to use a regular
screwdriver so you can tell if they are cross-threaded.
Mount the vertical parts of the template holder to the metal base with
four screws. Be careful inserting these screws, it's easy
to get them cross threaded. It's advisable to use a regular
screwdriver so you can tell if they are cross-threaded.
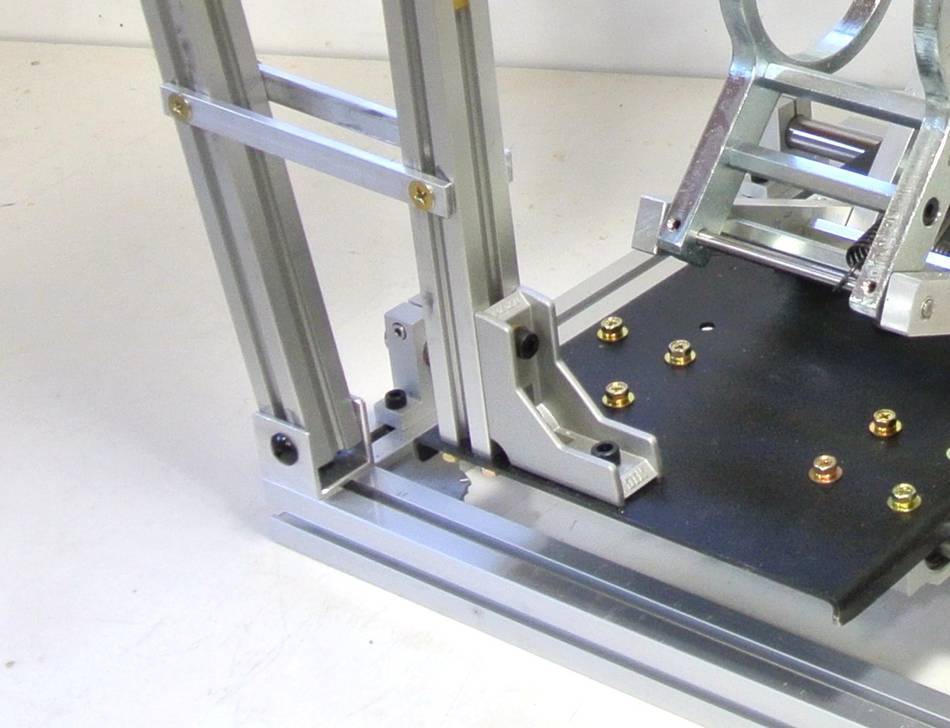
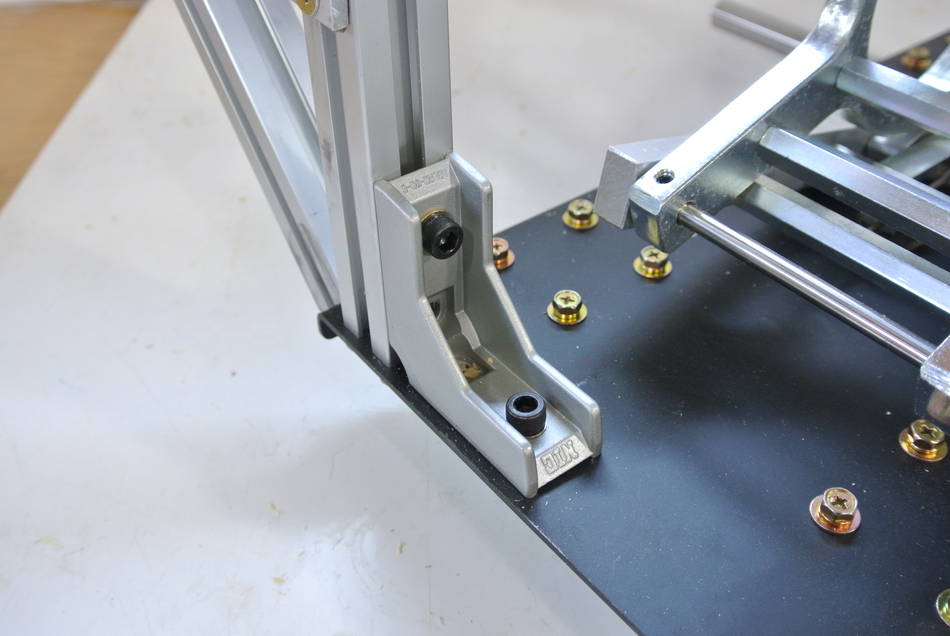 Install an angle brace on the plunge lever side. Slide a square nut
into the channel to screw the angle brace into.
Install an angle brace on the plunge lever side. Slide a square nut
into the channel to screw the angle brace into.
 Then slide the cross piece into the uprights.
 The cross piece has two fasteners on each end for attaching to the rail.
You may need to use a screwdriver to lightly push them outwards as you
slide the crosspiece in. You may also need to loosen the screws holding
these fasteners to get them in.
The cross piece has two fasteners on each end for attaching to the rail.
You may need to use a screwdriver to lightly push them outwards as you
slide the crosspiece in. You may also need to loosen the screws holding
these fasteners to get them in.
lock the cross piece in place by tightening the screws in the side of the crosspiece with an Allen key.
There are some springs in the pantograph mechanism to help hold up the router. It's easiest if you leave these unhooked until the rest of the machine is assembled so that the pantograph lies flat and does not push itself upwards.
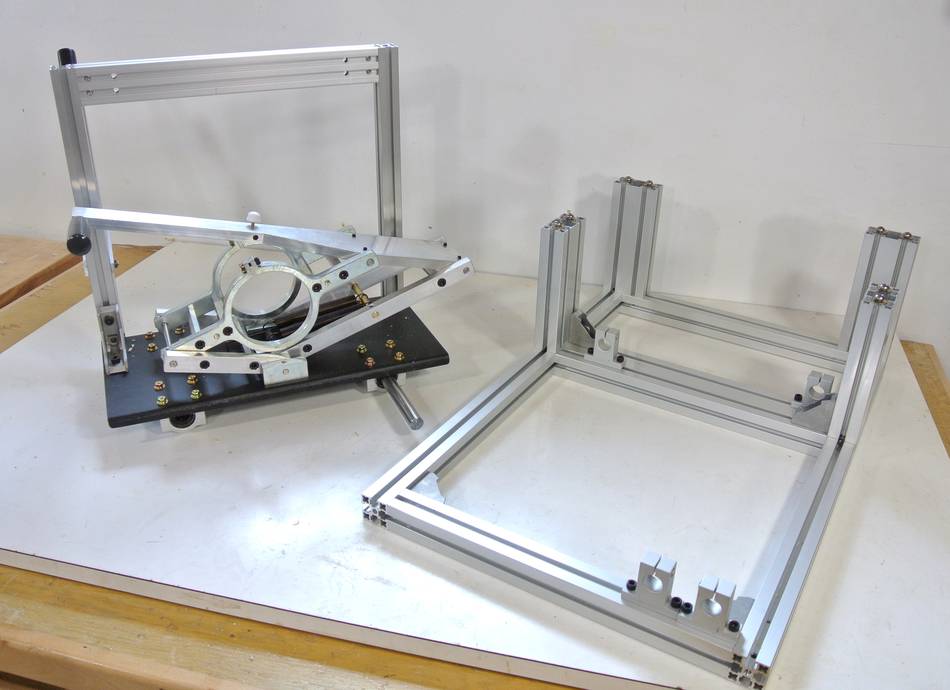
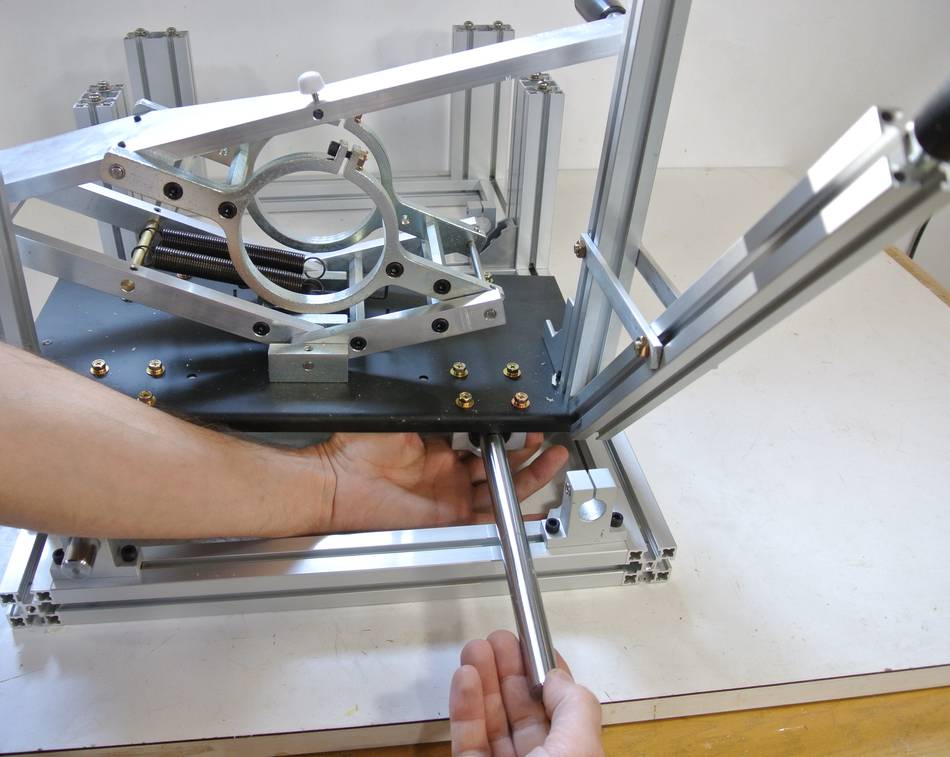
Mating the sled with the frame
Plunge sled and frame ready for mating.Start by inserting one of the shafts in the linear bearings under the plunge sled. Also note that the tension springs in the pantograph have not yet been hooked up. This keeps the pantograph nice and flat.
 With the shaft in place, lift the plunge sled onto the frame.
Be sure to hold the shaft while lifting the pantograph so it won't slide out.
Slide the shaft forward through the front shaft holder. Slide it about
8 cm (3") beyond the shaft holder
With the shaft in place, lift the plunge sled onto the frame.
Be sure to hold the shaft while lifting the pantograph so it won't slide out.
Slide the shaft forward through the front shaft holder. Slide it about
8 cm (3") beyond the shaft holder
 Slide the rear shaft mount over to line up with the shaft and pull the shaft
back into the rear shaft holder.
Slide the rear shaft mount over to line up with the shaft and pull the shaft
back into the rear shaft holder.
The screws on all shaft holders should be loose during these steps.
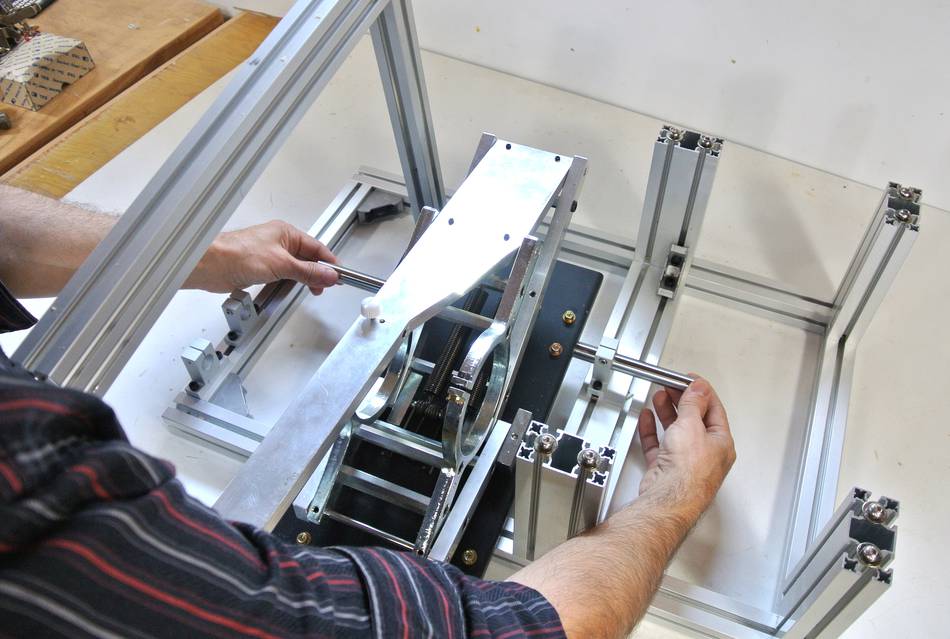
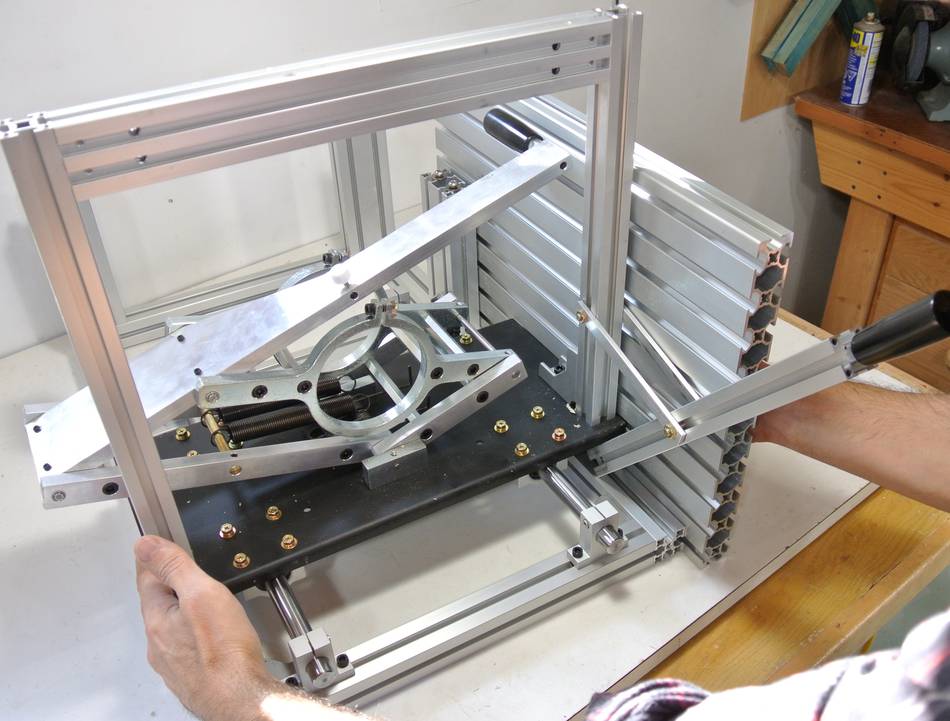
 With the first shaft mounted on both ends, slide the second shaft
into the linear bearings of the sled. It's easier if you do not
try to slide it through the shaft holders at the same time.
With the first shaft mounted on both ends, slide the second shaft
into the linear bearings of the sled. It's easier if you do not
try to slide it through the shaft holders at the same time.
Once the shaft is in the linear bearings, slide the front shaft holder in place to line up with the shaft and push the shaft through it.
 slide the shaft forward enough to clear the rear shaft holder, then slide
the rear shaft holder to line up with the shaft, and bring he shaft
back far enough to go into the rear shaft holders.
slide the shaft forward enough to clear the rear shaft holder, then slide
the rear shaft holder to line up with the shaft, and bring he shaft
back far enough to go into the rear shaft holders.
 With the shaft holders still loose (able to slide side-to-side), use the table top
to bring the plunge carriage parallel to the frame.
With the shaft holders still loose (able to slide side-to-side), use the table top
to bring the plunge carriage parallel to the frame.
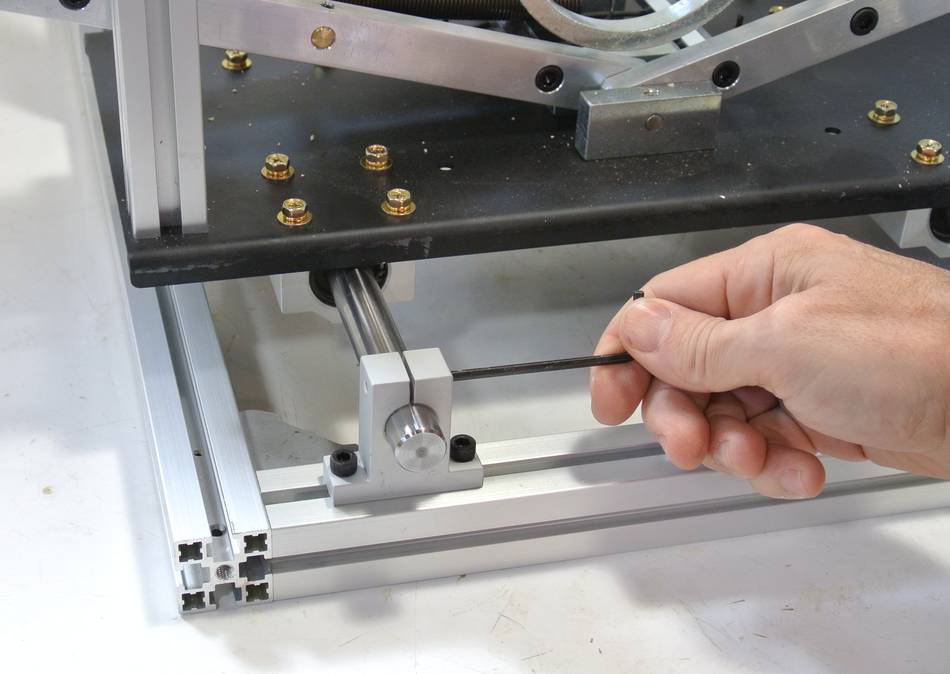 Tighten the shaft mounts
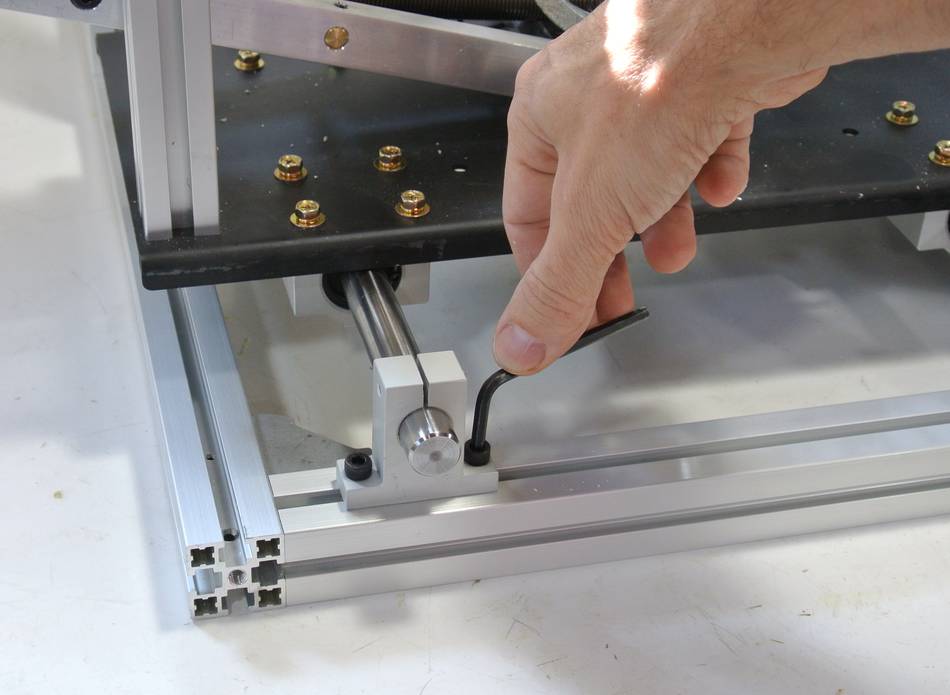 Tighten the mounting screws for the shaft holders.
 Install the U-bracket for the plunge lever. You will have to detach the U-bracket
from the plunge lever to do this.
Install the U-bracket for the plunge lever. You will have to detach the U-bracket
from the plunge lever to do this.
 Use a screw and nut to mount the plunge lever in the U-bracket.
 Mount the table. The table is slid from the side. Make sure the washers
go inside the channels.
Mount the table. The table is slid from the side. Make sure the washers
go inside the channels.
Please note: Earlier versions had the table further back, but mounting it this way allows the router to move further from the table, allowing for more plunge depth.
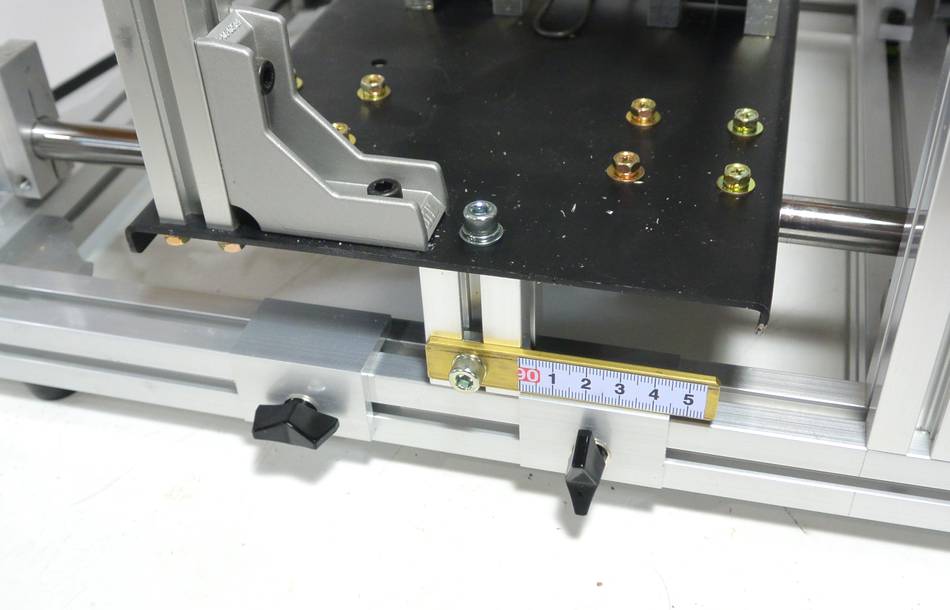 Update 2014:
Kuldeep has redesigned the depth stops for easier access, including a scale.
I made a made a short video on this
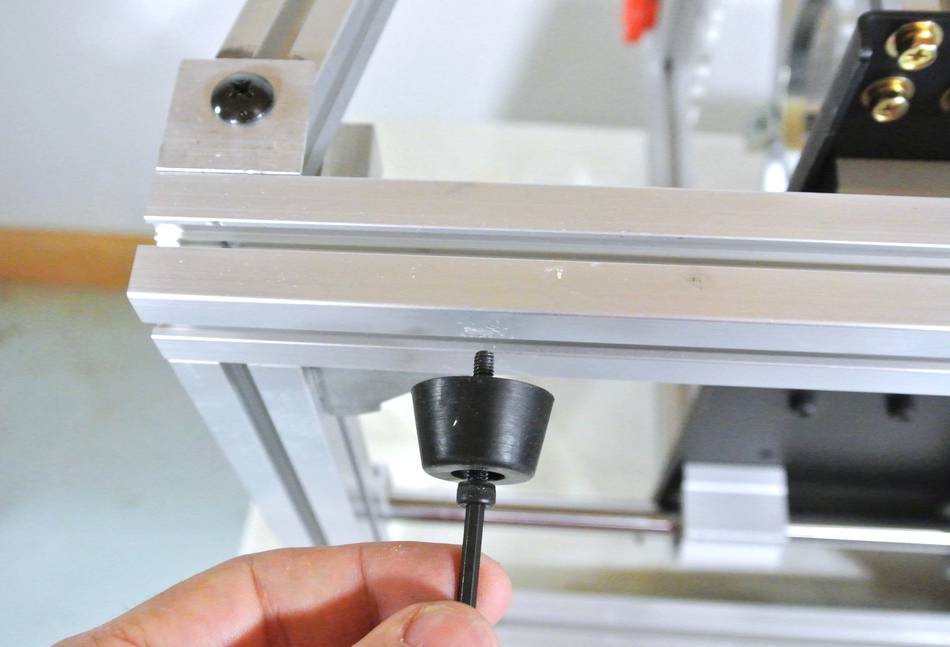 The feet are attached with small M4 screws to the bottom of the rails.
The screws screw directly into pre drilled and tapped holes in the bottom
of the frame, about 8 cm (3") from the ends of the long rails.
The feet are attached with small M4 screws to the bottom of the rails.
The screws screw directly into pre drilled and tapped holes in the bottom
of the frame, about 8 cm (3") from the ends of the long rails.
For a video on assembling the machine, see:
Unboxing the all metal pantorouter
If you would like to buy an all metal pantorouter
go to pantorouter.com
See also:
 Buy an all-metal pantorouter (old page)
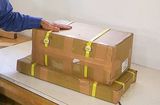 Unboxing the all-metal pantorouter
 Kuldeep's pantorouter production
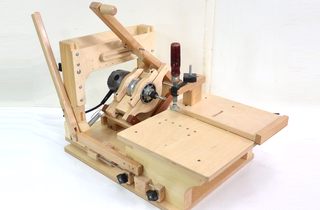 More about the wooden pantorouter
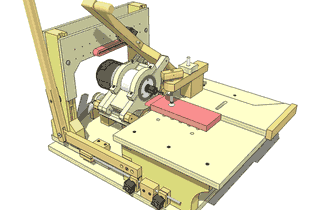 Buy plans for the wooden pantorouter