Setting up through-dovetails on the all-metal pantorouter
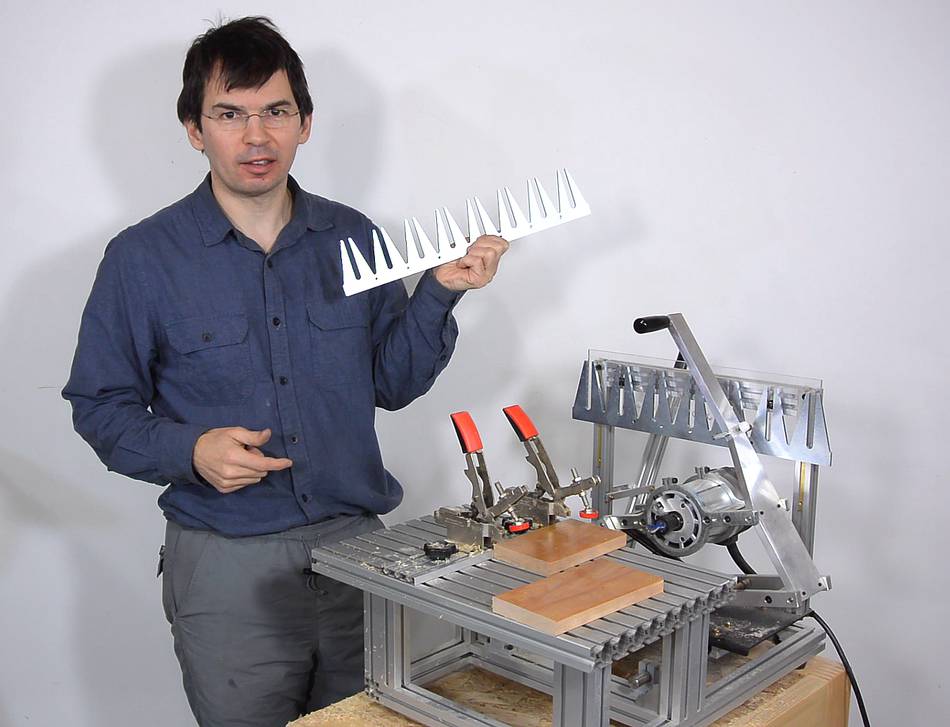
I have previously made dovetail joints
with my pantorouter using separate wooden templates for the pins and
the tails, but Kuldeep has come up with a template that can be used for
both pins and tails. Kuldeep sells these templates as accessories with the
metal pantorouter, but he sent me two of them for
free.
 The tricky thing with the template is that it interferes with the screws
that are normally used to fix the template holder in place. I initially
solved this by putting washers behind the template so there was
still room for the screws. But Kuldeep pointed out that that was not
the way it was intended to go together.
The tricky thing with the template is that it interferes with the screws
that are normally used to fix the template holder in place. I initially
solved this by putting washers behind the template so there was
still room for the screws. But Kuldeep pointed out that that was not
the way it was intended to go together.
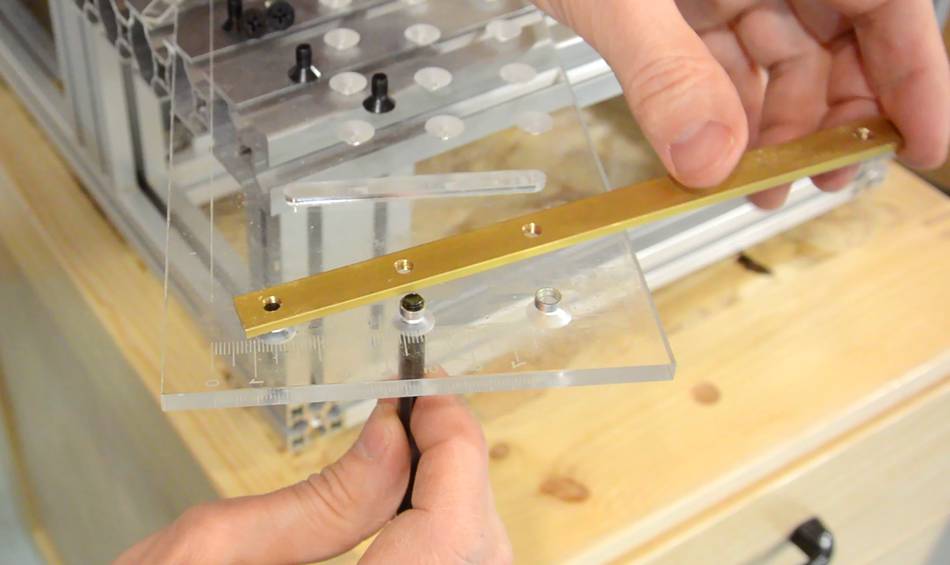
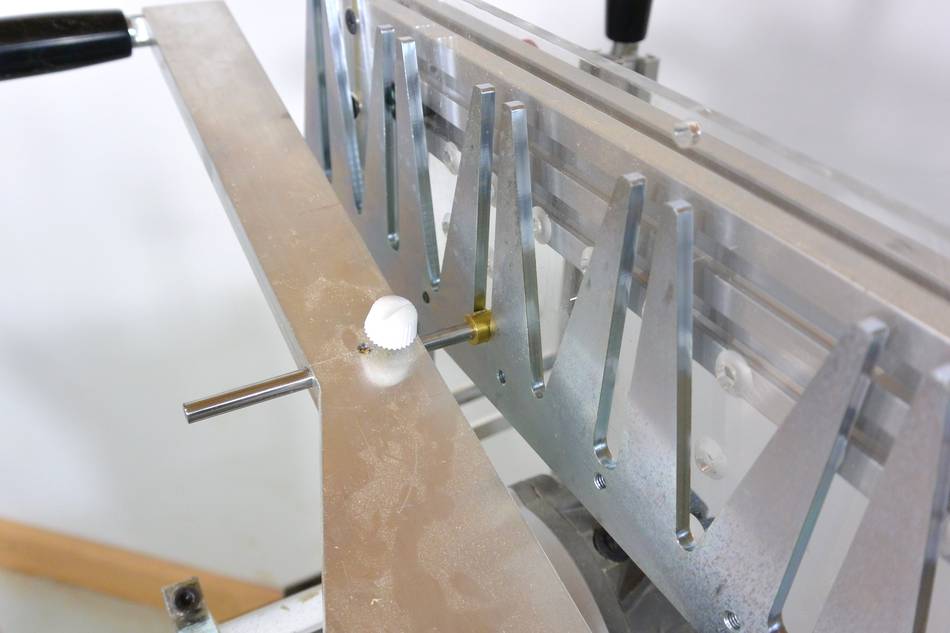
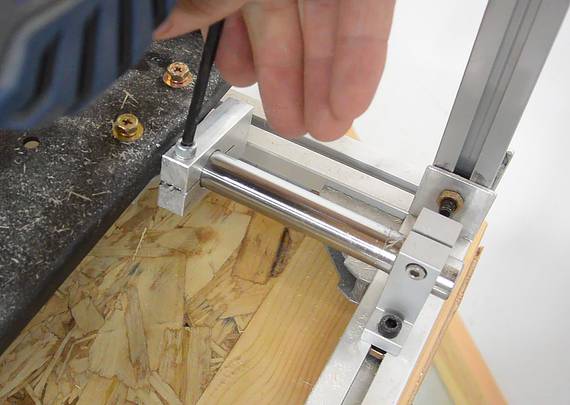
The way to fix the template is to put two screws into the bottom of the brass bars that slide into the frame, and use those to fix the vertical position.
 On my pantorouter, I couldn't fully tighten the screws that attach the
template holder to the brass bars without jamming it vertically, but
Kuldeep has since fixed this. He sent me some metal spacers to
replace a plastic spacer in mine. These are more precise.
On my pantorouter, I couldn't fully tighten the screws that attach the
template holder to the brass bars without jamming it vertically, but
Kuldeep has since fixed this. He sent me some metal spacers to
replace a plastic spacer in mine. These are more precise.
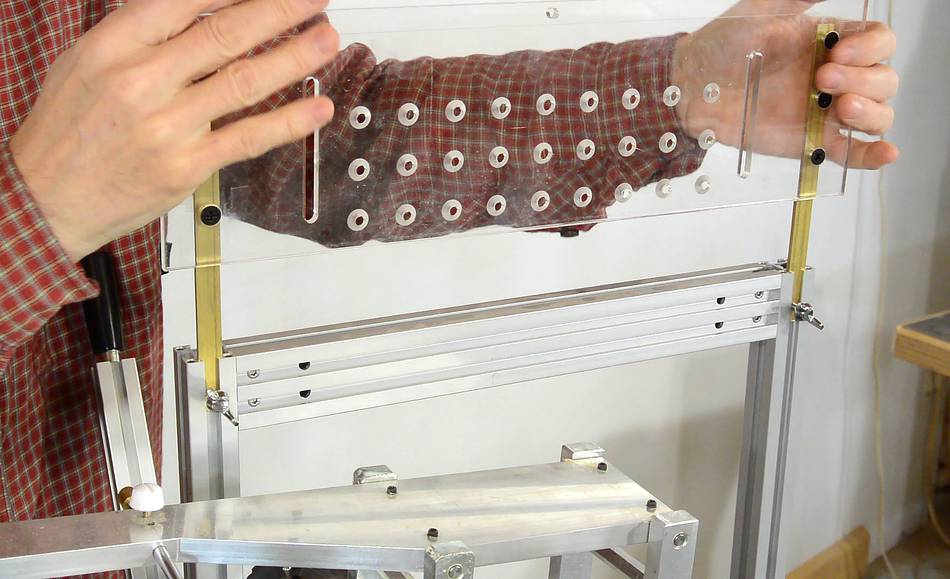
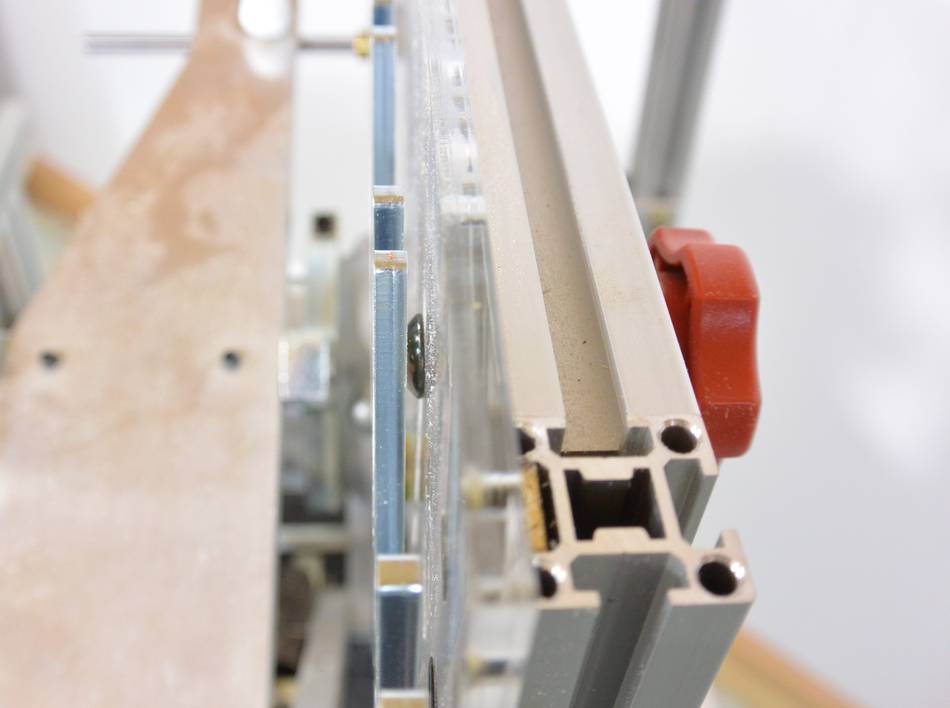
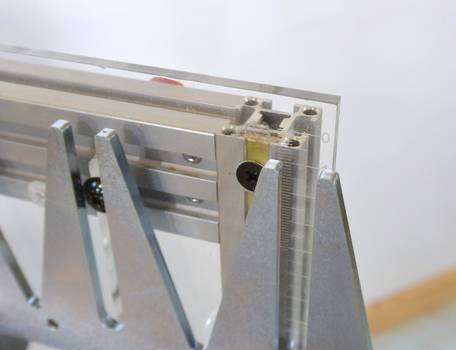
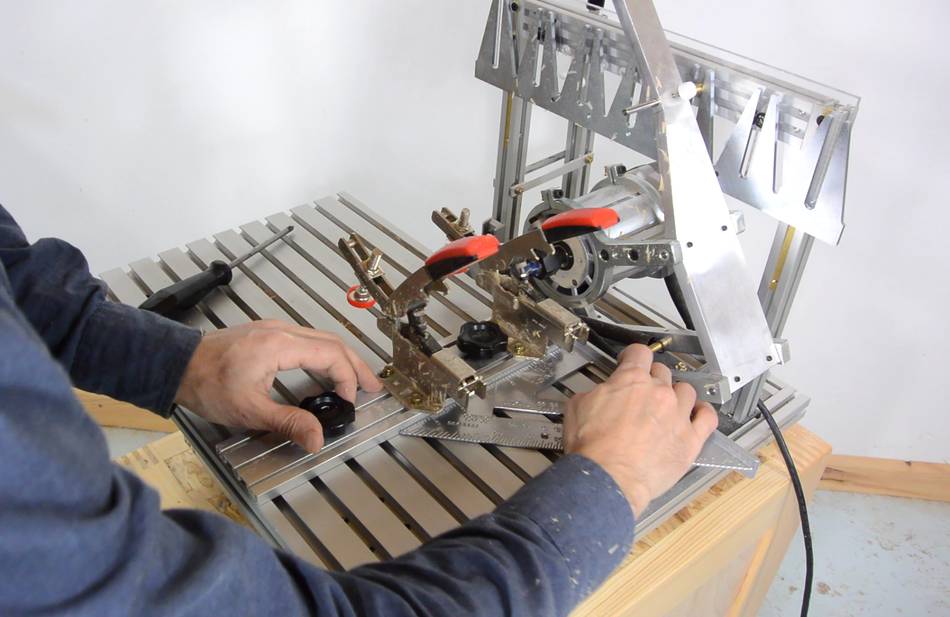
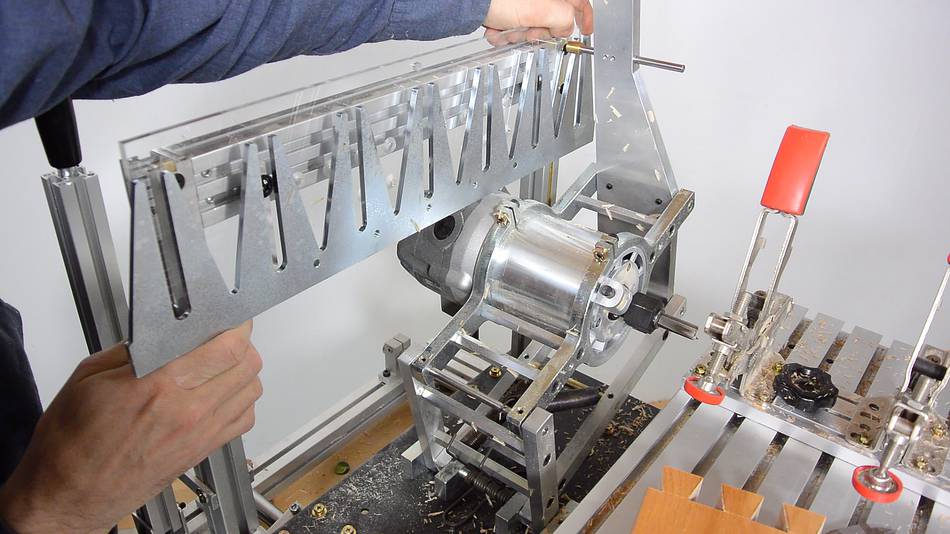
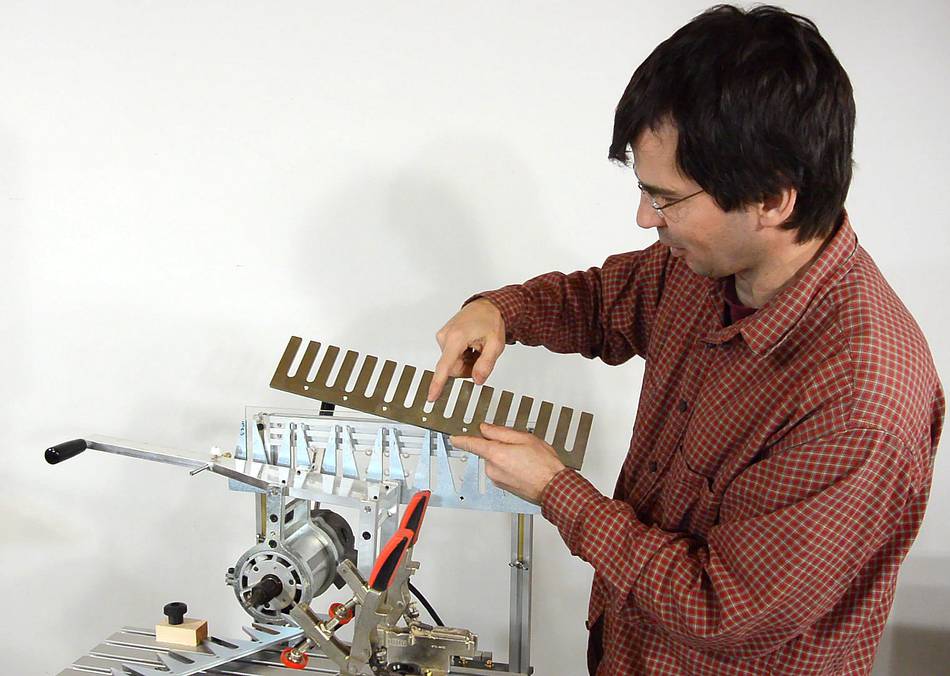
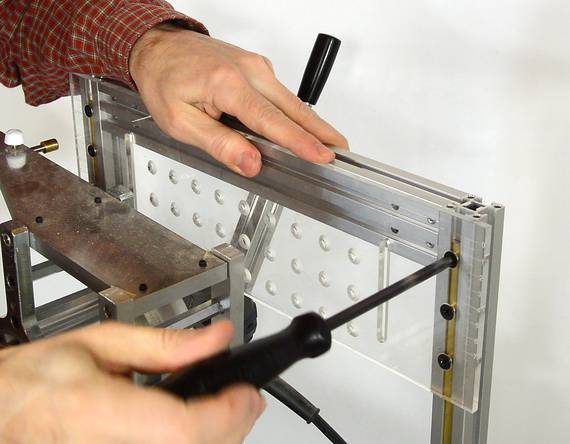 With the screws holding the template holder to the bars still loose, I
slide both bars into the template holder frame. Then, with the
plexiglass template holder exactly level with the top of the frame, I can
tighten the screws that fix it to the brass bars.
This will keep the template holder horizontal as it's
adjusted up or down later.
With the screws holding the template holder to the bars still loose, I
slide both bars into the template holder frame. Then, with the
plexiglass template holder exactly level with the top of the frame, I can
tighten the screws that fix it to the brass bars.
This will keep the template holder horizontal as it's
adjusted up or down later.
Also note the two wing nuts in the bottom of the brass bars. These are used to fix the vertical position of the template holder when using the dovetail template.
 I start with the setup for the "tails". The width of the tails
can't be adjusted. So it's best to start with the "tails" and
adjust the "pins" to fit.
I start with the setup for the "tails". The width of the tails
can't be adjusted. So it's best to start with the "tails" and
adjust the "pins" to fit.
In terms of terminology, the "tails" of a dovetail joint look like the tail of a bird (wider at the end) when looking on the flat side of the board.
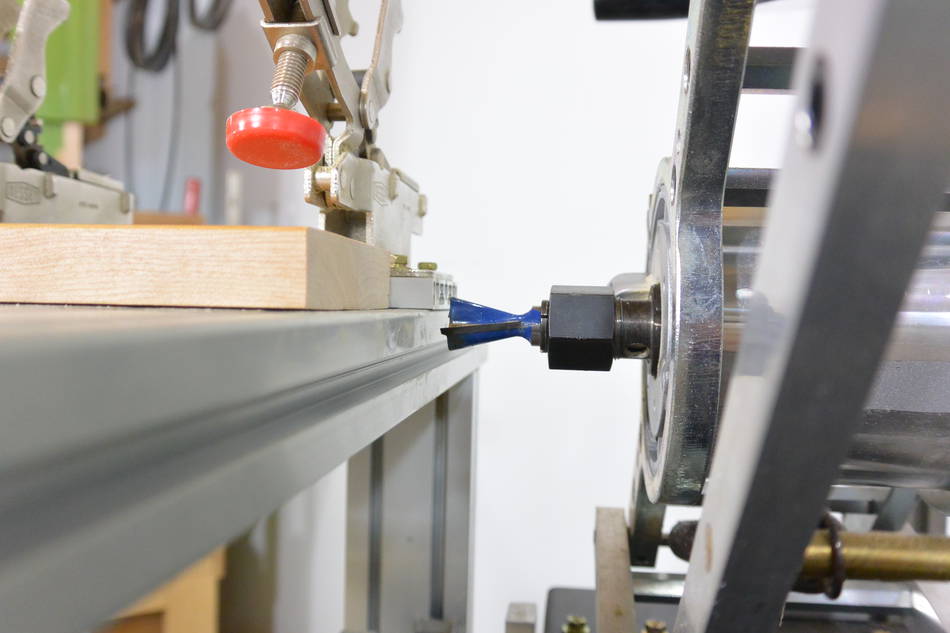
 The template needs to be mounted low enough so that the center of the
bit goes just below the table when the follower is in the bottom of the
straight slots.
The template needs to be mounted low enough so that the center of the
bit goes just below the table when the follower is in the bottom of the
straight slots.
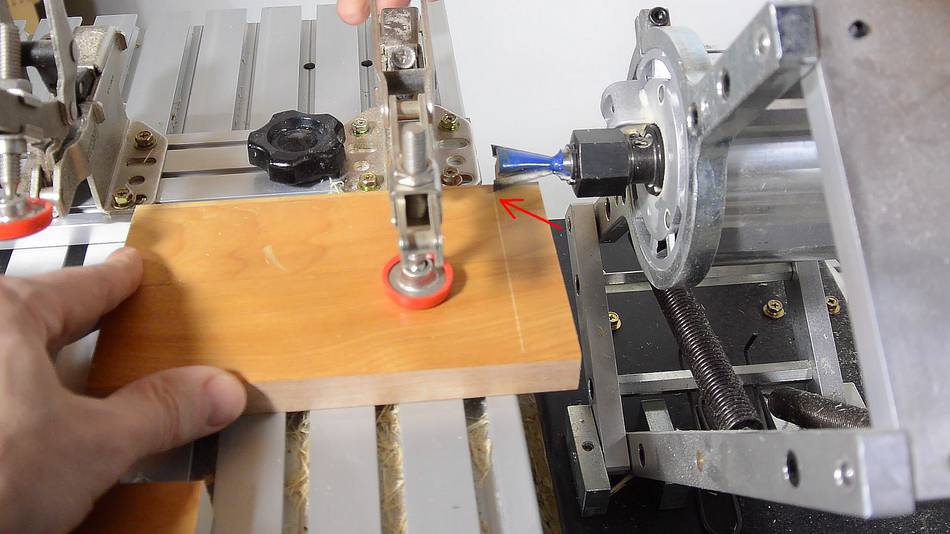
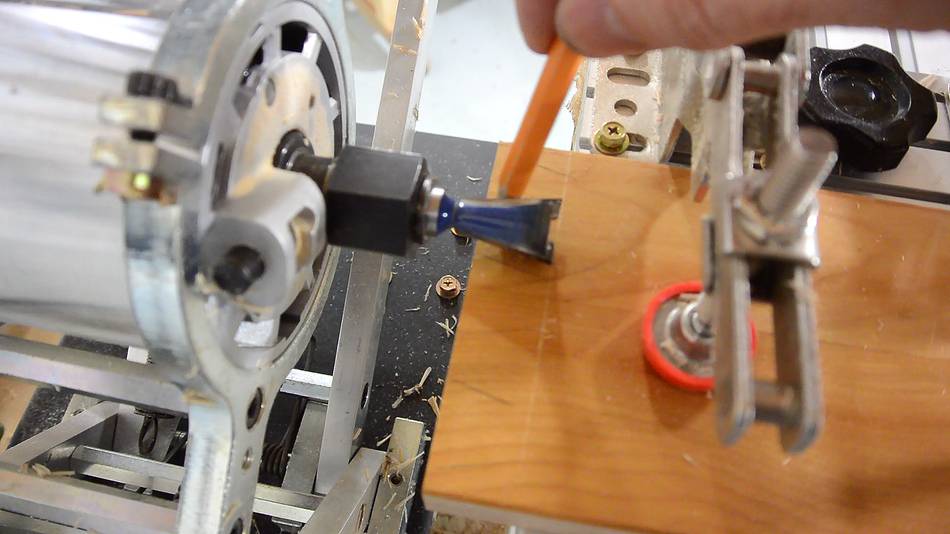
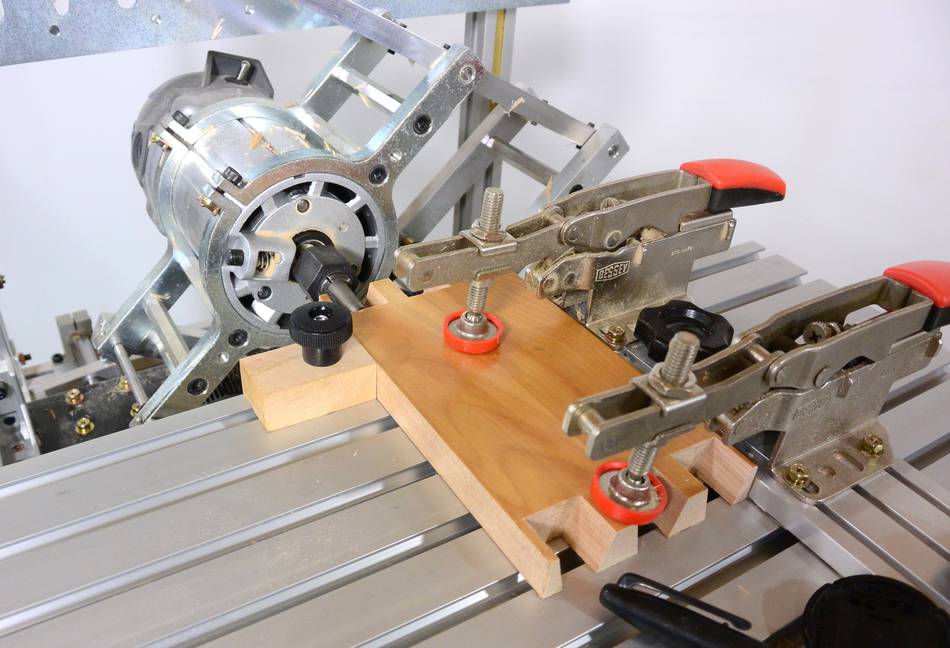
 I score a line on the board for how deep I want to cut, then position
the board so that the tip of the bit is on the score line. Also, I set
the back plunge stop forward so that the router cannot be plunged
forward or back.
I score a line on the board for how deep I want to cut, then position
the board so that the tip of the bit is on the score line. Also, I set
the back plunge stop forward so that the router cannot be plunged
forward or back.
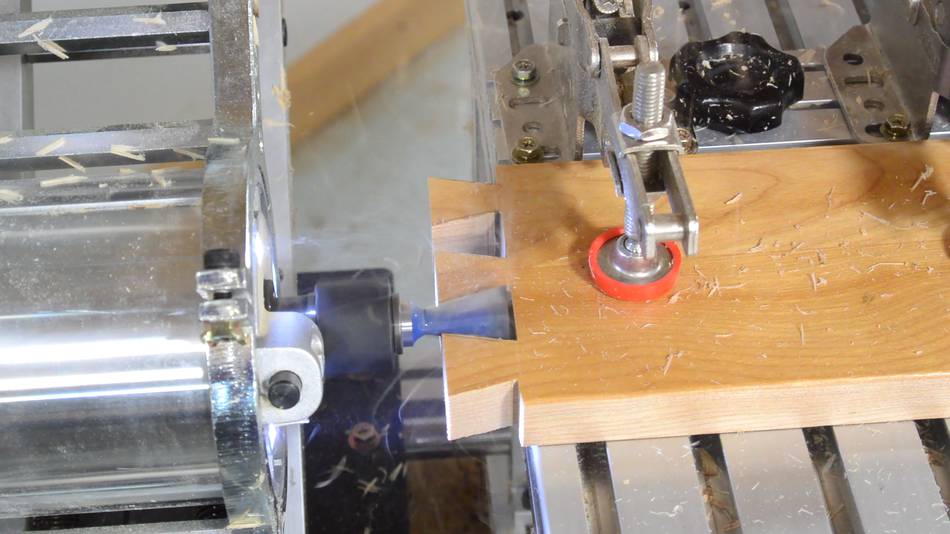
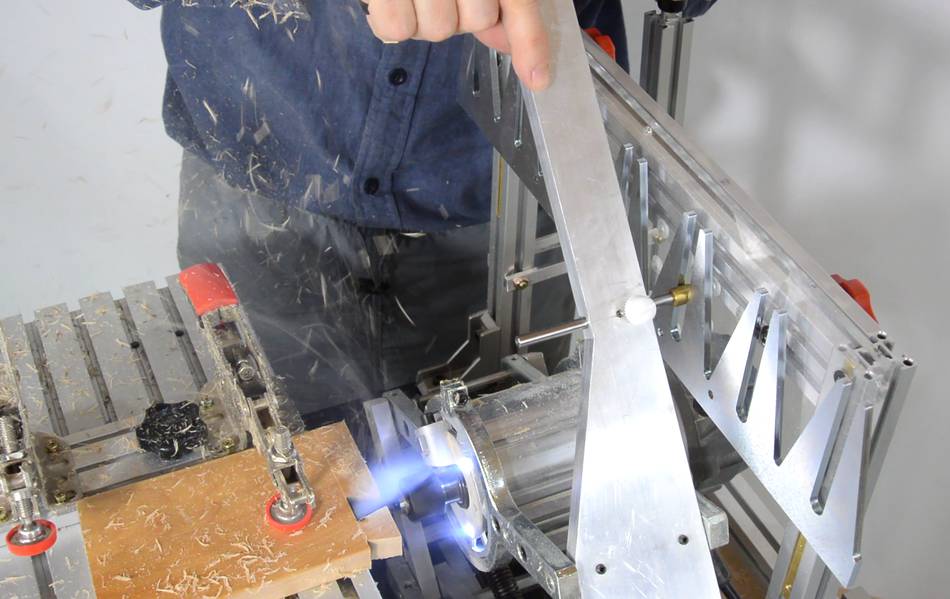 Routing out the tails. Hard maple is hard on router bits. It's slow
going, with a lot of smoke produced. But I also found that the stock
wasn't clamped tight enough and had a tendency to move away from the
clamp from the rotation of the router bit...
Routing out the tails. Hard maple is hard on router bits. It's slow
going, with a lot of smoke produced. But I also found that the stock
wasn't clamped tight enough and had a tendency to move away from the
clamp from the rotation of the router bit...
 ... so I moved the fence to the other side so that, as I cut down, the
rotation of the bit pushed the stock towards the fence.
... so I moved the fence to the other side so that, as I cut down, the
rotation of the bit pushed the stock towards the fence.
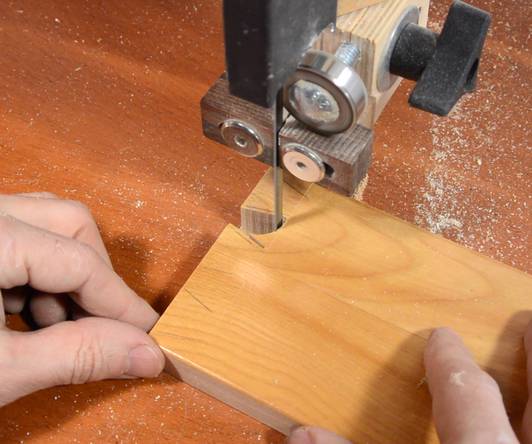 But with all the smoke and burning, I was sure I'd destroy the router bit
with this hard maple. So I marked where the dovetails would go and removed
most of the material with my bandsaw before routing them out.
But with all the smoke and burning, I was sure I'd destroy the router bit
with this hard maple. So I marked where the dovetails would go and removed
most of the material with my bandsaw before routing them out.
 This worked much better.
When I built these under bed drawers out of pine, I was able to cut the tails without pre-cutting them on the bandsaw, and without any smoke. Some of the harder hardwoods are just too hard to cut at full depth in one pass. With dovetails, making multiple passes at increasing depth can't be done, unfortunately. It's been suggested to use a straight bit to pre-cut a notch, but I prefer to do it on the bandsaw.
 With the "tails" cut, time to switch to a straight bit for cutting the "pins".
My straight bit has a 1/4" shank, but my dovetail bit has a 1/2" shank, so
I have to swap out the whole router collet.
With the "tails" cut, time to switch to a straight bit for cutting the "pins".
My straight bit has a 1/4" shank, but my dovetail bit has a 1/2" shank, so
I have to swap out the whole router collet.
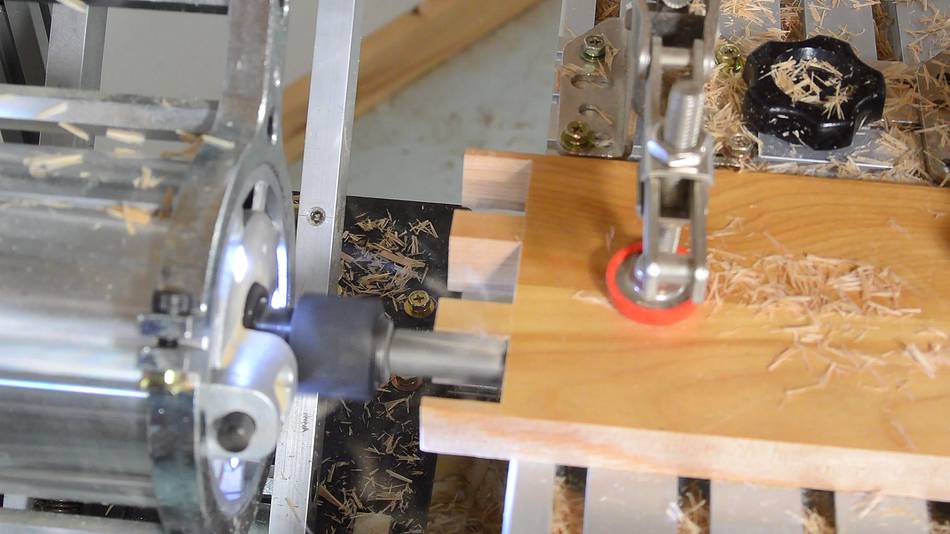
 The pins are routed by running the follower along the edges of the 'V' in the
template.
The pins are routed by running the follower along the edges of the 'V' in the
template.
I'm cutting these really short (or shallow), just 3 mm long, because this first cut is just a fit check.
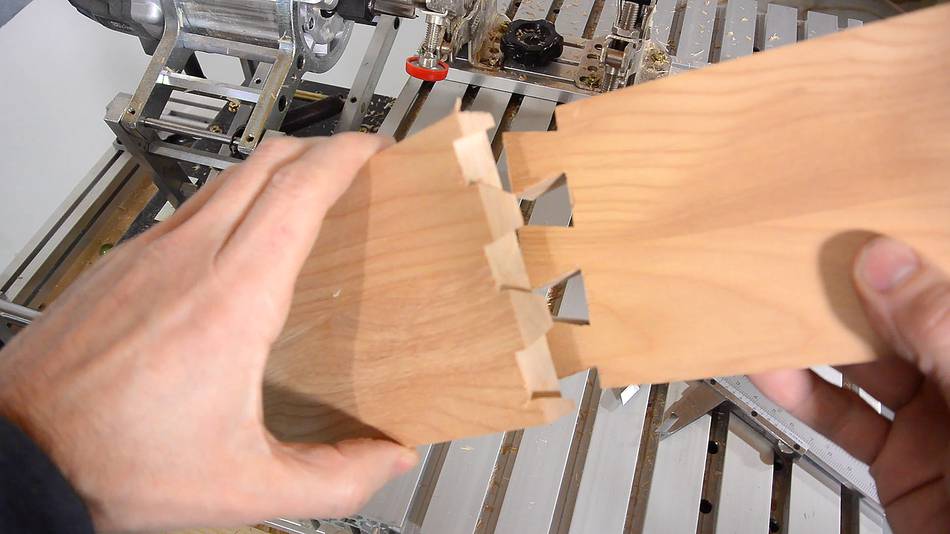
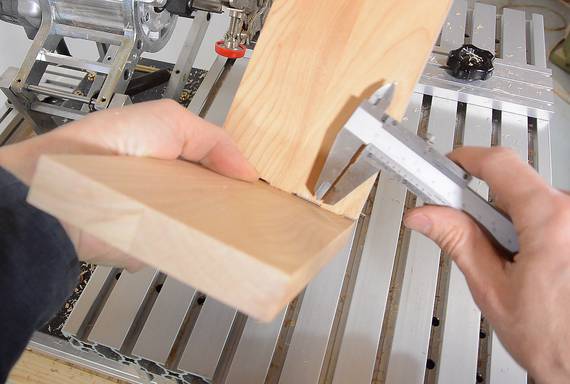 The pieces fit, but with about a 1.7 mm gap
 To close this gap, effectively, the board would have to be moved 1.7 mm
further down on the pantorouter. But the table is fixed, so instead, I
move the cut positions up by 1.7 mm by moving the template up by twice
that amount. It needs to be moved by twice as much because every movement
at the template gets reproduced at half scale by the router.
To close this gap, effectively, the board would have to be moved 1.7 mm
further down on the pantorouter. But the table is fixed, so instead, I
move the cut positions up by 1.7 mm by moving the template up by twice
that amount. It needs to be moved by twice as much because every movement
at the template gets reproduced at half scale by the router.
 Cutting the tails again.
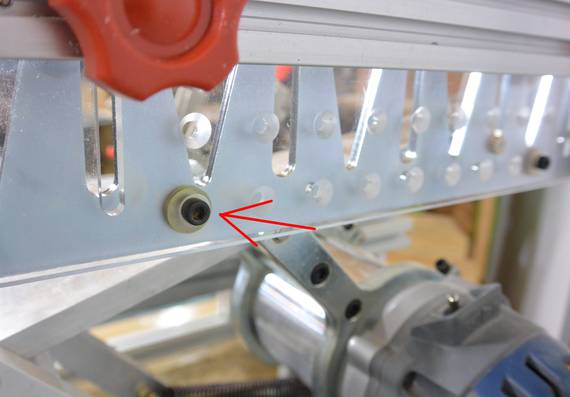
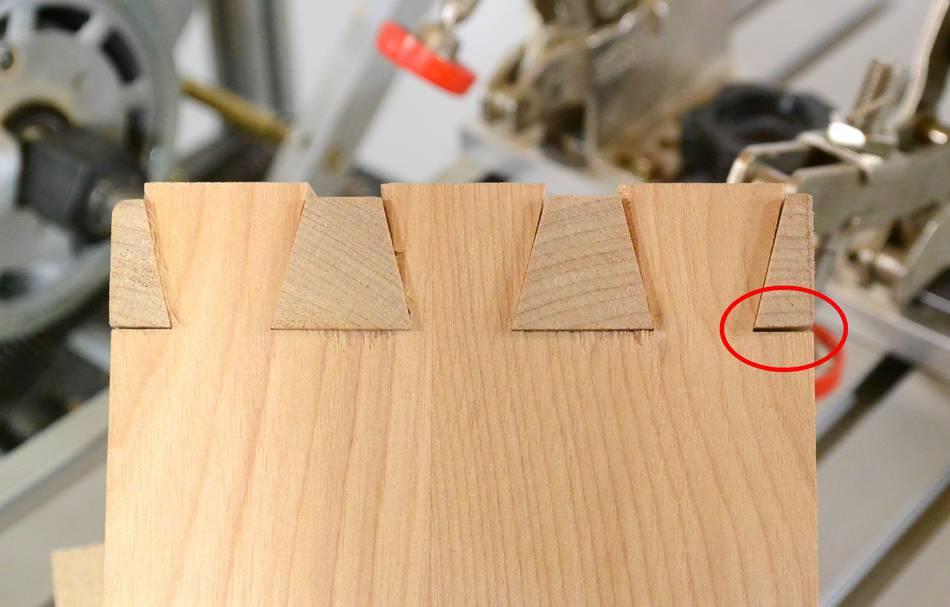 Fit check again.
Note the gap under the right-most half-pin (circled). It turned out, my board wasn't entirely flat, so it didn't rest flat on the table.
 I still encountered some side-to-side sliding of the stock, so
I made a small block to clamp against the side. Just a piece
of wood with a hole in it, a T-slot bolt and a threaded knob..
The t-slot bolt came from a jig & fixture parts kit from Lee Valley Tools.
I still encountered some side-to-side sliding of the stock, so
I made a small block to clamp against the side. Just a piece
of wood with a hole in it, a T-slot bolt and a threaded knob..
The t-slot bolt came from a jig & fixture parts kit from Lee Valley Tools.
Setting up dovetails on the pantorouter is slightly more complex than with a typical dovetail jig, but the advantage is that no collet is needed around the router, so you don't need to extend a long router bit through a router base and dovetail guide.
Also, once it's set up, you can just record the height that the template was set to for next time (it's the only thing that needs tweaking), and as long as you are using the same router bits, it will work for the next set of dovetails, even if your wood is a different thickness.
 The template I used here is for dovetails over 32 mm, suitable for wood up to 3/4" (19 mm)
thick with the appropriate 14° dovetail bit. Kuldeep also has a template
for 14° dovetails every inch. You need a smaller dovetail bit to go with that,
so the thickest wood you can use that with is 15 mm (9/16").
The template I used here is for dovetails over 32 mm, suitable for wood up to 3/4" (19 mm)
thick with the appropriate 14° dovetail bit. Kuldeep also has a template
for 14° dovetails every inch. You need a smaller dovetail bit to go with that,
so the thickest wood you can use that with is 15 mm (9/16").
Kuldeep also has a box joint template, with slots every inch (25.4 mm) This can be used for box joints with fingers every 1/2" (1/4" thick fingers and spaces), or for 1/2" box joints if only every other slot in the template is used.
The pantorouter is limited to joints that are 19 cm (7.5") in width, although you could cut part of the joint, then move the stock to the side to finish the cuts.
See also:
 Buy an all-metal
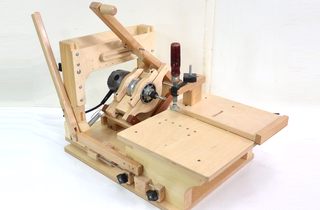 About the wooden
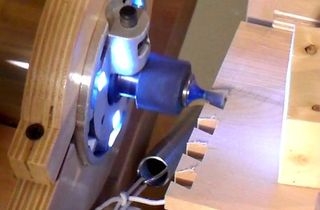 Dovetails on the wooden
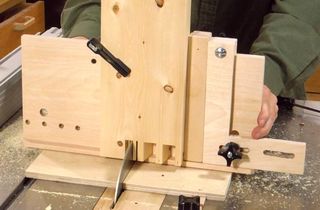 Table saw dovetail jig
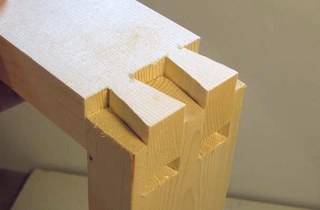 Dovetails on the bandsaw
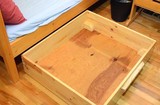 Dovetail joined
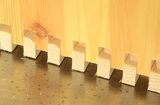 Box joints on the pantorouter
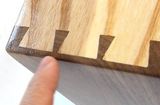 Half-blind dovetail joints
More about dovetail joints
Back to the pantorouter page.