The router I used for the Pantorouter is the type that comes
with a fixed and a plunge base. Such routers are available from several different
manufacturers in North America, and most of them have the same 3.5" (89 mm) diameter
body. They are often used with router lifts, including my
home made router lift
Routers like this are harder to find and more expensive in other parts of the world.
And shipping one from USA or Canada does not make sense either because our
electrical grid is 120 volt, not 240.
A number of people in Europe have used DeWalt D26204 routers, but these are smaller
and more expensive. More about fixed based routers.
I have also since (2014) designed my Pantorouter XL, which has a
larger pantograph mechanism that can accomodate most plunge routers.
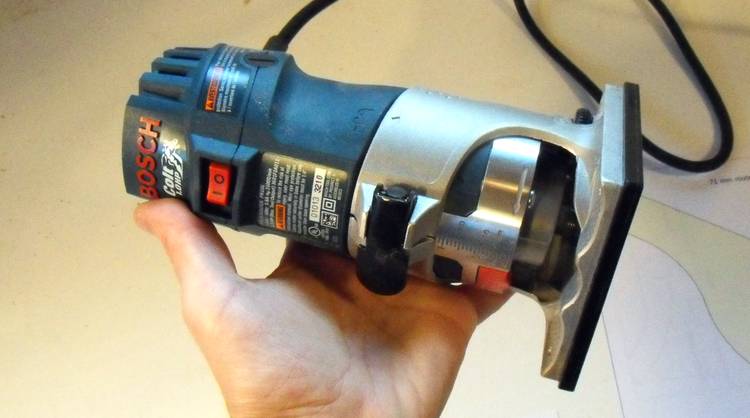
So to demonstrate that different types of routers can be used with the Pantorouter, I
built a mount for a much smaller Bosch Colt router (Also known as GKF 600 in other parts of the world).
Most of the time I use fairly small
bits on the Pantorouter, so the capacity for large bits of the router that I initially
mounted isn't necessary. And with the lighter weight of this router, there isn't as much
of a need for springs to counteract the weight of it.
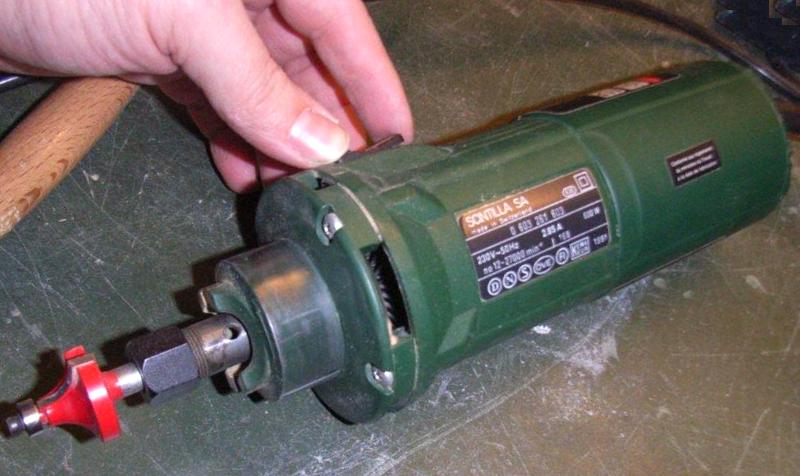
Another really good choice of router would have been a router of the style pictured here.
The front part of the enclosure is cylindrical and 43 mm in diameter, ideal for mounting,
and the narrow body would be easy to accommodate.
But this router is from Germany, has a metric collet (8 mm), and runs on 240 volts.
So it's not suitable for North America. I don't have this router - I got a German friend,
Michael Shultheiss to take a picture of his router for me.
I haven't seen this style of router in Canada, but they are not uncommon in Europe.
The Bosch Colt router has a cylindrical mount with a 71 mm diameter, quite similar to
other palm routers. So I updated the plans to also
include templates for a 71 mm diameter mount. I also added a guide lines with a 43mm
and 60mm diameter to the templates, so if you are building it from the plans and
using one of those routers, you can just cut out the templates to those respective
circles instead of the 71mm circle.
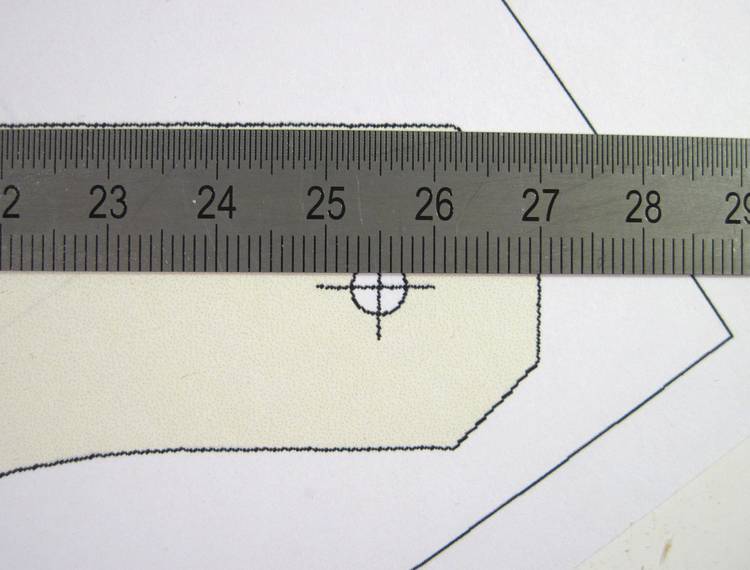
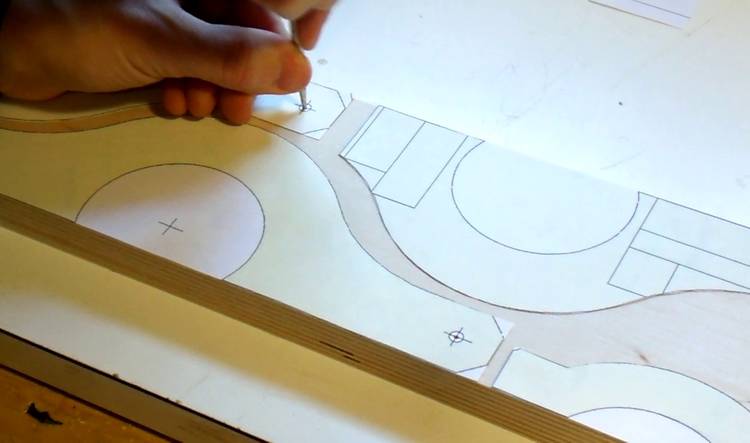
Before proceeding, I made sure my templates were the right scale. If you printed the templates
and they don't come quite the right size, try altering the print scale in your web browser to
get the size right. You should be able to enter fractional percentage points with the keyboard.
I cut out my templates and glued them on to plywood. I only used a few dabs of glue.
to make it easier to get them off again and there's less risk of distorting the paper by
soaking it with glue.
The first thing I did was to transfer the center marks for the mounting holes with an awl.
Having made sure my print scale was exactly right, I could now trust these to be accurate.
The center marks are really important, so best
to transfer them before there is any risk of messing up the templates. But don't drill the
holes right away - that might mess up the templates.
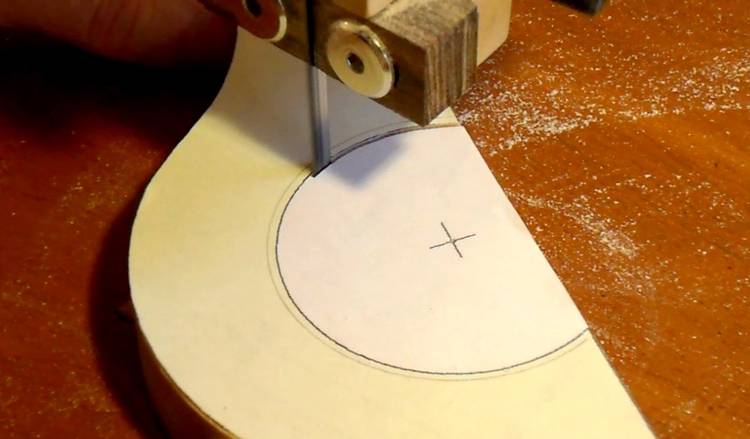
Cutting out the shape. The cut for the mount is very critical. I used a bandsaw blade
that I had stoned on the sides to get a smoother cut.
Stoning really cleaned up the cut of that blade, even though that blade had a slight
kink in it from a mishap when I originally uncoiled it.
If you don't have a bandsaw, you might try using a hole cutter to make the inside cuts,
but make sure there is wood all the way around the circle if you do. But a bandsaw
really would be the best. Maybe consider building one.
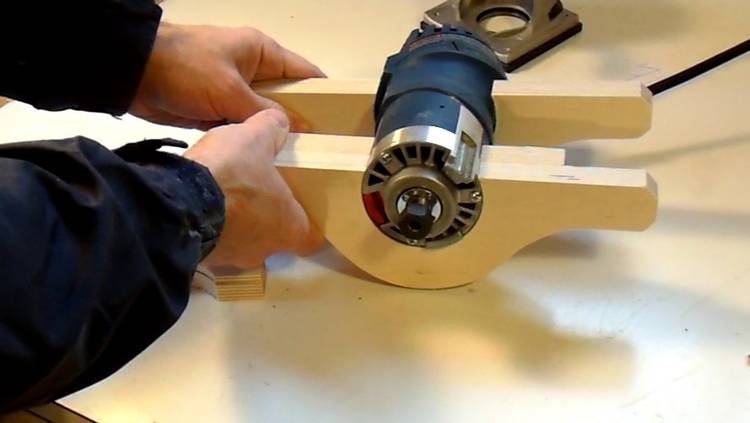
Checking that the cut out shapes fit around my router. Much easier to fix that before I glue the
mount together! I already removed the templates before taking this photo, but it would be a
good idea to leave them on until after you checked the fit, just in case you have to
make some adjustments.
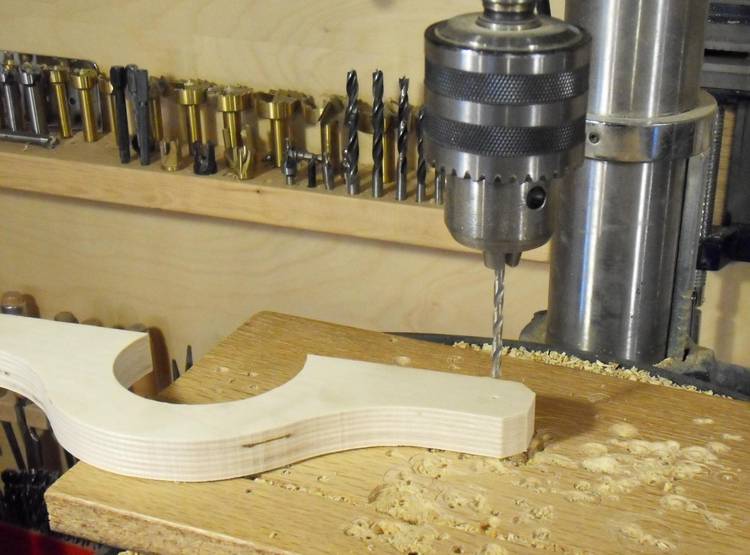
Drilling the holes for the shafts. I punched relatively large pilot holes with the awl.
These holes really help guide the drill to the right spot.
Gluing two layers together. For my Bosch Colt router, I doubled up the front layer because
that is the only part of the router that is cylindrical. If you are using a router like the green
one with the 43 mm mount, you shouldn't double up the front layer. Either double up the
back layer, or make both front and back layers single layers and add 19 mm to the spacers
between them to make up for it.
From building a previous router mount, I learned that it was just about impossible to
glue and line everything up all at once.
So I glued the spacers on separately before gluing on the back layer.
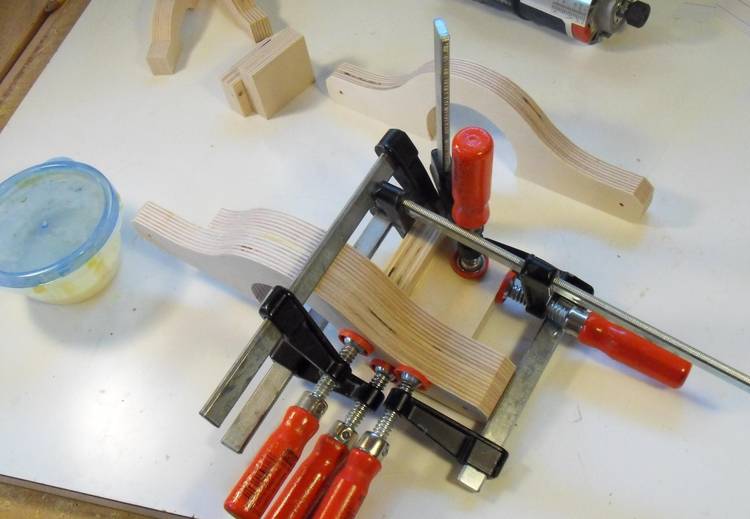
Ready to glue the back layer. My flat table surface helps to align the pieces. I also have a framing
square ready to make sure I get the lateral alignment just right.
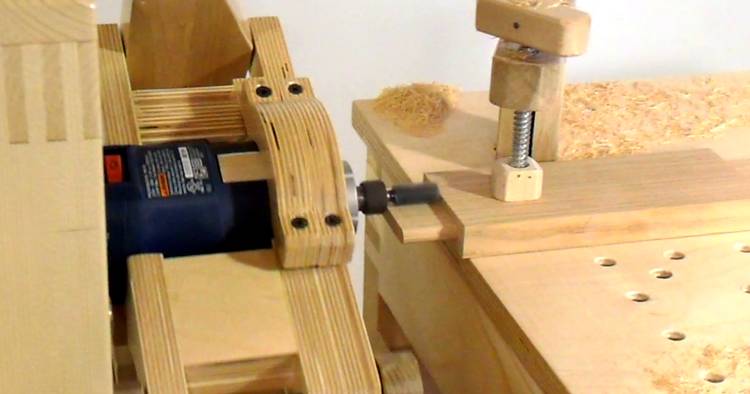
All glued up and fitting the router. I'm tapping the screws for the clamping bracket to
make divots in the router mount. These divots tell me where to drill the pilot
holes for the screws.
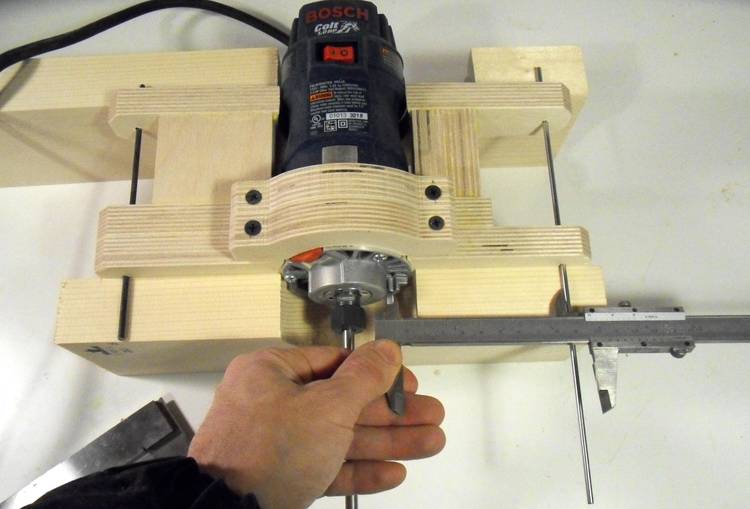
Checking the router lateral position against shafts on either side. This measurement is just
a check - it would have taken a serious cutting error for the router to be off significantly
Checking up/down pitch of the router axis. I put a 1/4" shaft into the router mount for checking.
It's best to manually spin the router a bit to see if the shaft is in straight.
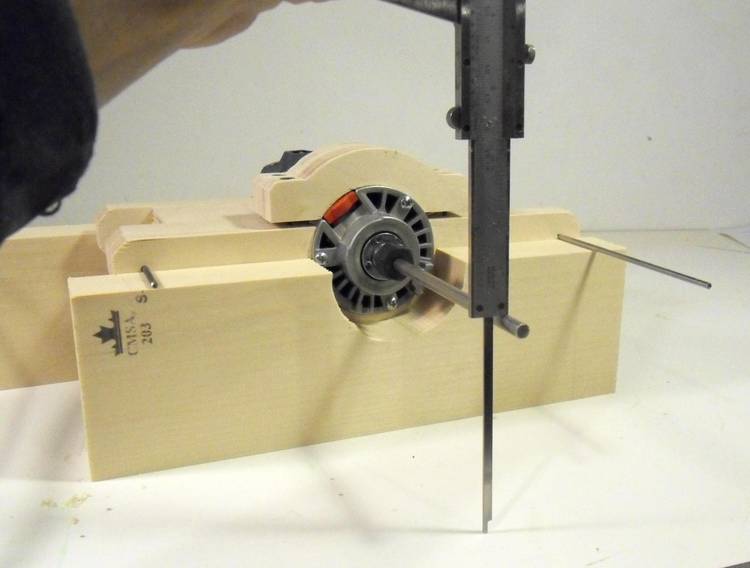
The shafts supporting the router mount are all on blocks the same height from the table,
and here I'm checking that the shaft is the same height from the table front to back.
Make sure your router mount doesn't rock back and forth when supported like that. If it does,
it probably has some twist in it, and that needs to be addressed first.
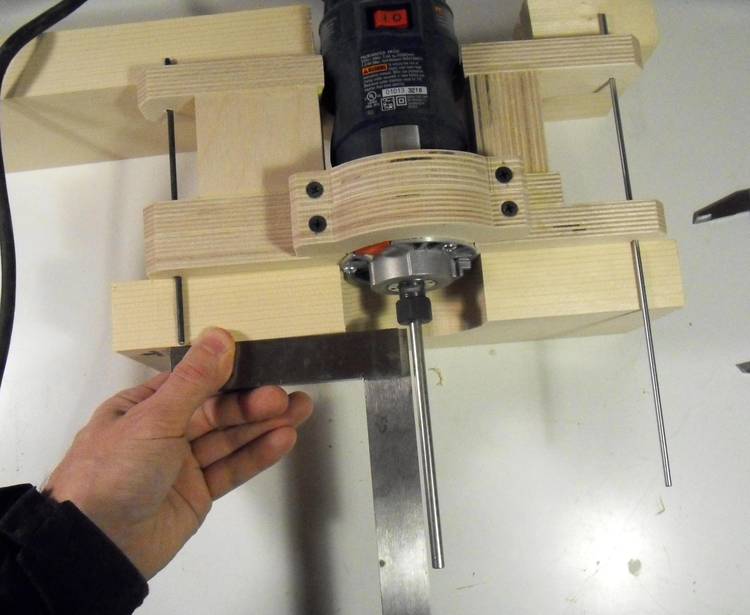
Checking that it's square laterally.
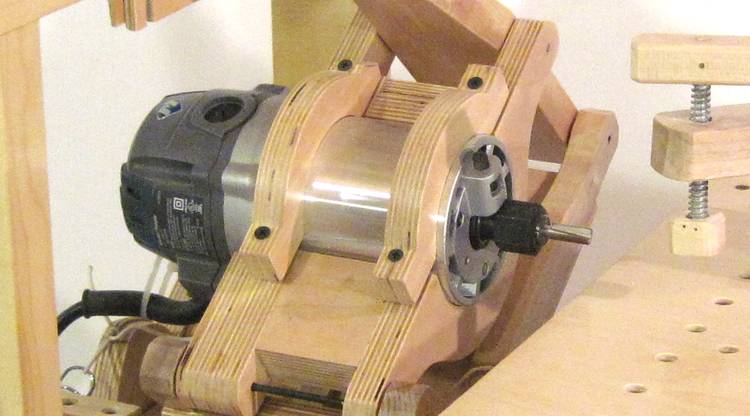
The Bosch Colt (GKF 600) router unfortunately has an ergonomic shape in the back of the housing.
This makes it difficult to support it there. But once I banged it into alignment,
I glued some blocks of wood to push up against the plastic case. Hopefully, this will keep it
aligned, and will re-align it when I remove and reinsert the router in this mount.
Once I mounted this in the Pantorouter, I realized there are some advantages to using a smaller
router. I get a larger range of motion with this router before it bumps into the template
mount. Also, with its lighter weight, my springs don't need to be as big.
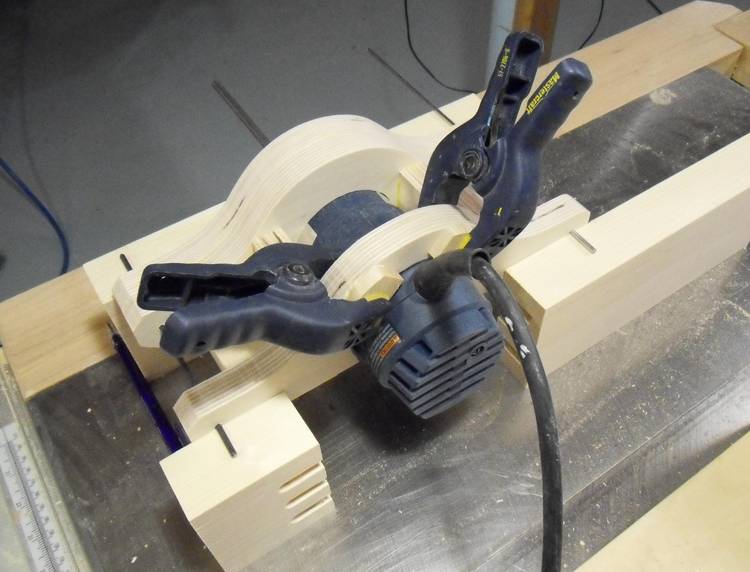
Here I'm using a 1/2" (12.7 mm) diameter router bit to cut a 3 cm long
tenon in oak. Oak is quite hard and I had to cut this tenon in several stages, but it
came out ok. I won't be cutting any really really big mortise and
tenon joints with this router, but for typical work, it's actually more elegant than the
big router. I think the ideal size router would have been one with an 8 mm collet, but those,
along with 8 mm bits, are unavailable in North America.
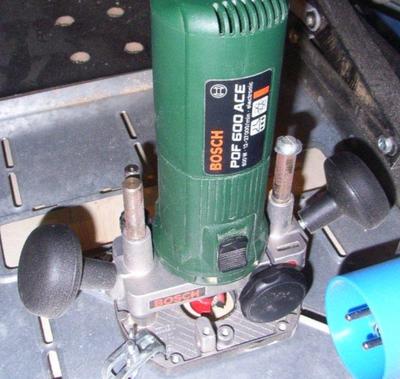
I added the templates that I used for this router to the plans. For other diameters of router,
use a compass to add a circle of the correct size on the templates before using them.
Update 2014: I have since designed the Pantorotuer XL, which has a larger pantograph
mechanism and is able to accomodate most plunge routers.
 The router I used for the Pantorouter is the type that comes
with a fixed and a plunge base. Such routers are available from several different
manufacturers in North America, and most of them have the same 3.5" (89 mm) diameter
body. They are often used with router lifts, including my
home made router lift
The router I used for the Pantorouter is the type that comes
with a fixed and a plunge base. Such routers are available from several different
manufacturers in North America, and most of them have the same 3.5" (89 mm) diameter
body. They are often used with router lifts, including my
home made router lift