Making the bed posts
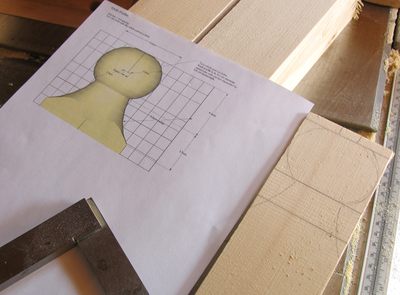 With the headboard assembled, it was time to tackle the posts. I sketched the approximate
shape onto one of the posts just to check my lines were good. The lines
across the post are still faintly visible even while the post is turning,
so these help me figure out where to start turning.
With the headboard assembled, it was time to tackle the posts. I sketched the approximate
shape onto one of the posts just to check my lines were good. The lines
across the post are still faintly visible even while the post is turning,
so these help me figure out where to start turning.
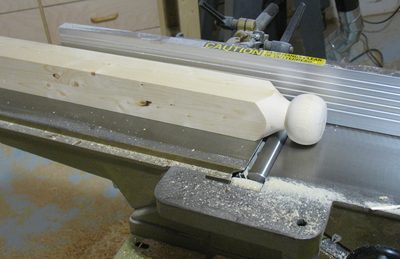
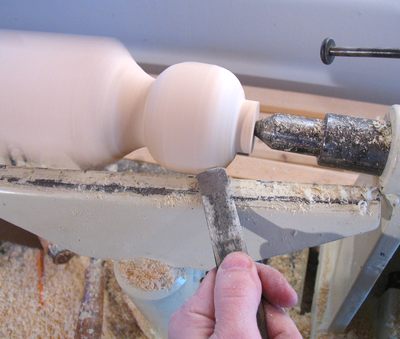 Here's turning one of the knobs on my lathe.
I messed up the second knob that I turned, so I had
to make another post. If I had been smarter about this, I would have made all four
posts to be long enough for the headboard. The footboard posts are about 15 cm shorter.
That way, if I messed up while turning one of the knobs, I could always cut it off,
and reused that post for the footboard.
Here's turning one of the knobs on my lathe.
I messed up the second knob that I turned, so I had
to make another post. If I had been smarter about this, I would have made all four
posts to be long enough for the headboard. The footboard posts are about 15 cm shorter.
That way, if I messed up while turning one of the knobs, I could always cut it off,
and reused that post for the footboard.
 I left about a centimeter at the top of the post just for my dead center on my
lathe. Afterwards, I cut that part off. That way, I didn't have a hole in the top
of my post from where it was mounted on the lathe.
I left about a centimeter at the top of the post just for my dead center on my
lathe. Afterwards, I cut that part off. That way, I didn't have a hole in the top
of my post from where it was mounted on the lathe.
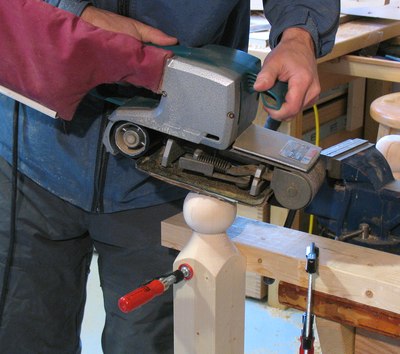 I then shaped the curvature of the very top of the post with my belt sander.
I put a soft pad behind the belt
of my belt sander to make it easier to sand a soft curve onto the top of the knob.
I then shaped the curvature of the very top of the post with my belt sander.
I put a soft pad behind the belt
of my belt sander to make it easier to sand a soft curve onto the top of the knob.
I moved around the post while doing this so that sanding belt was always sanding
towards the top center of the post.
 Note how the Times-Roman 'O' is actually taller than the 'M' |
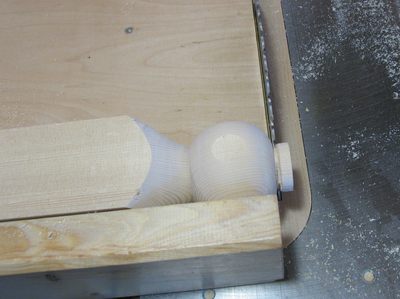
 I actually wanted my posts to be about 6.4 cm wide. But gluing two 2x4's together,
even after planing them, I had just over 7 cm x 7 cm of material. Rather than cut them down
I actually wanted my posts to be about 6.4 cm wide. But gluing two 2x4's together,
even after planing them, I had just over 7 cm x 7 cm of material. Rather than cut them down
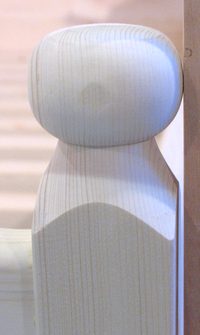 to final size, I decided to turn the knobs on them first, and then shave
about 3 mm off each side with my jointer afterwards. I had to take the 3 mm
off in one pass, and had to be careful to push it just far enough to trim the length
of the post, but not cut into the knob. The result was that the knob
was just slightly wider than the post.
to final size, I decided to turn the knobs on them first, and then shave
about 3 mm off each side with my jointer afterwards. I had to take the 3 mm
off in one pass, and had to be careful to push it just far enough to trim the length
of the post, but not cut into the knob. The result was that the knob
was just slightly wider than the post.
Aesthetically, it's better to have the knob just a bit larger than the post. If the knob was the same width as the post, it would actually look as though it was smaller than the post. It's a bit of an optical illusion that way. If you look at the times roman "MO" above, you can see that font designers use similar trickery to make the letters look as though they were the same size. Holding a straight piece of wood against the post and knob, you can see the square post and round knobs have similar proportions as the roman font square-ish 'M' and 'O'.
 Next it was time to taper the legs. I rigged up a temporary tapering jig on
my table saw sled for this purpose. It consisted of a piece of 2x6 cut off at
90 degrees minus my tapering angle and with a 1" hole near the end which I used to clamp it
against the fence of my table saw sled.
Next it was time to taper the legs. I rigged up a temporary tapering jig on
my table saw sled for this purpose. It consisted of a piece of 2x6 cut off at
90 degrees minus my tapering angle and with a 1" hole near the end which I used to clamp it
against the fence of my table saw sled.
Next: Joining the posts to the headboard
Previous: Making the headboard
Back to Building a queen size bed
![]()