Years ago I purchased a ShopVac to collect balsa dust from my model airplane
construction. I thought the dust would fall clear of the pleated cartridge
filter when the vacuum was turned off. This was not the case. The fine balsa
dust packed tight as plaster and starved the motor of necessary cooling air.
So, the motor burned up in just over 3 months. Most anything sucked up with
a ShopVac will plug the pleated cartridge filter.
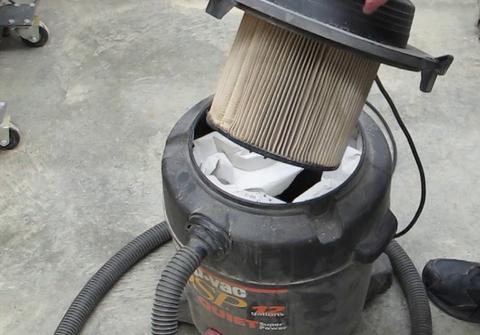
Since then, I have used a
paper bag inside every ShopVac I own. The paper bags have a large surface
area and allow full air volume, even when the bag is nearly full. Full air
volume means maximum suction and maximum motor cooling.
The bags are easily torn by chunks of wood, rocks, metal shavings, etc. and
you won't know the bag is damaged unless you notice the airflow has
diminished (due to the pleated filter getting plugged).
Emptying ShopVac is a messy operation, even with a bag. Wrestling a full bag
out of the ShopVac can create a cloud of dust.
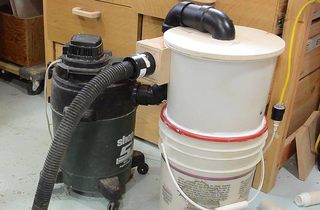
The best solution is the use of a cyclone separator in conjunction with a
paper bag and a pleated cartridge filter inside the ShopVac. This cyclone
separator will remove most particulate matter (including fine sanding dust)
from the air stream allowing mostly clean air to return to the ShopVac.
You won't need to look inside the ShopVac again for years.
Following is a relatively simple construction method anyone can use to
construct one of these cyclone separators from wood scraps, using tools
found in most home shops.
Constructing the cone following my method is a fast, imprecise build. I did
not bother to make the sticks fit together perfectly. You will need
approximately 40 sticks 1/2"x 1/4" x 12" long. The sticks will be tapered 1/2"
to 1/4" wide along the length and then the edges slightly beveled to allow
them to be glued together to form a cone.
The assembly jig consists of a 6" and 3" diameter 1/2" thick discs with holes
drilled in the center for a 14" length of wood dowel.
Glue the sticks to the large 6"
disc and to each other. DO NOT glue the sticks to the 3" disc.
Fill all of the external gaps with a mixture of glue and sawdust. If you want
to take more time to hand-fit each stick, then perhaps you won't have any
gaps to fill. Personally, I didn't spend that much time on this project.
Cut a 5" diameter 1/2" thick disc (mounting flange) with a 3.5" hole in the
center. Taper the inside edge of the hole to match the taper of the cone.
You want the flange to slide up the cone just far enough to clear the 3"
disc used as the small end of the construction jig. We are moving the flange
up the cone so when we are done the final opening will be large enough to
allow our hand to fit inside.
This 5" disc will be the mounting flange for
the 5-gallon bucket lid. Glue the 5" diameter flange to the cone, then remove
the wood dowel and the 3" disc. Cut off the excess sticks and sand them flush
with the 5" flange. This should provide a 3.5" opening in the small end of
the cone.
You will need to taper and sand smooth the inside edges of the
sticks so you can easily stick you hand inside the cone to seal up all the
gaps and holes. If you have a large hand, you might need to modify the
construction accordingly. Wearing a disposable glove, I pushed wood filler
into all the gaps and holes on the inside of the cone. Then, I used a wet
paper towel to wipe out the excess.
The cone needs to be 100% airtight or the separator will not work correctly.
Use a bright light to look for any remaining gaps or holes.
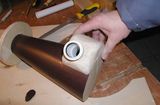
You will need two pieces of 1-1/2" PVC pipe 7" long.
For the input pipe, use whatever attachment method works best for you.
I sanded mine to the contour of the cone and glued it in place with a glue
gun.
I ground a groove around the edge of the pipe to give the glue
something to hold onto. Then I supported the outside of the pipe with a wood
ring and other pieces of wood, which were glued to the cone.
The important part here is the pipe needs to be firmly attached and
internally flush with the inside of the cone.
Use a lid which is easy to remove. Make you own or find one on eBay (search
for 5-gallon bucket lid). I made my bucket lid from a piece of particle board
with a wood ring to keep it from sliding off.
The 5-gallon bucket needs to be in good condition, no holes or cracks.
Not all 5-gallon buckets are created equal. My first choice was of thinner
plastic and the sides kept buckling due to the vacuum. An older, heavier gauge,
paint bucket worked best.
I gave the inside of the cone two coats of varnish to make it a bit smoother
and to further seal the inside surface.
I sanded the exterior and varnished it to seal the wood and help keep it clean.
A dolly was constructed to keep the ShopVac and Cyclone Separator together.
If they are always together you are more likely to use it.
This cyclone separator works very well. If your friends see it, they will want
you to make one for them!
I haven't tried this (yet) but, given a couple more coats of varnish, I think
this would work very well for water pickup…. No need to empty the ShopVac
every 60 seconds when the ball floats to the top. Do Not use a bag or
pleated cartridge when using the ShopVac for water pickup. Just watch the
bucket doesn't get too full. Remember to wipe out the inside of the separator
and let it dry when you are done.
There is also a YouTube video series about this cyclone
 Years ago I purchased a ShopVac to collect balsa dust from my model airplane
construction. I thought the dust would fall clear of the pleated cartridge
filter when the vacuum was turned off. This was not the case. The fine balsa
dust packed tight as plaster and starved the motor of necessary cooling air.
So, the motor burned up in just over 3 months. Most anything sucked up with
a ShopVac will plug the pleated cartridge filter.
Years ago I purchased a ShopVac to collect balsa dust from my model airplane
construction. I thought the dust would fall clear of the pleated cartridge
filter when the vacuum was turned off. This was not the case. The fine balsa
dust packed tight as plaster and starved the motor of necessary cooling air.
So, the motor burned up in just over 3 months. Most anything sucked up with
a ShopVac will plug the pleated cartridge filter.
 Since then, I have used a
paper bag inside every ShopVac I own. The paper bags have a large surface
area and allow full air volume, even when the bag is nearly full. Full air
volume means maximum suction and maximum motor cooling.
Since then, I have used a
paper bag inside every ShopVac I own. The paper bags have a large surface
area and allow full air volume, even when the bag is nearly full. Full air
volume means maximum suction and maximum motor cooling.
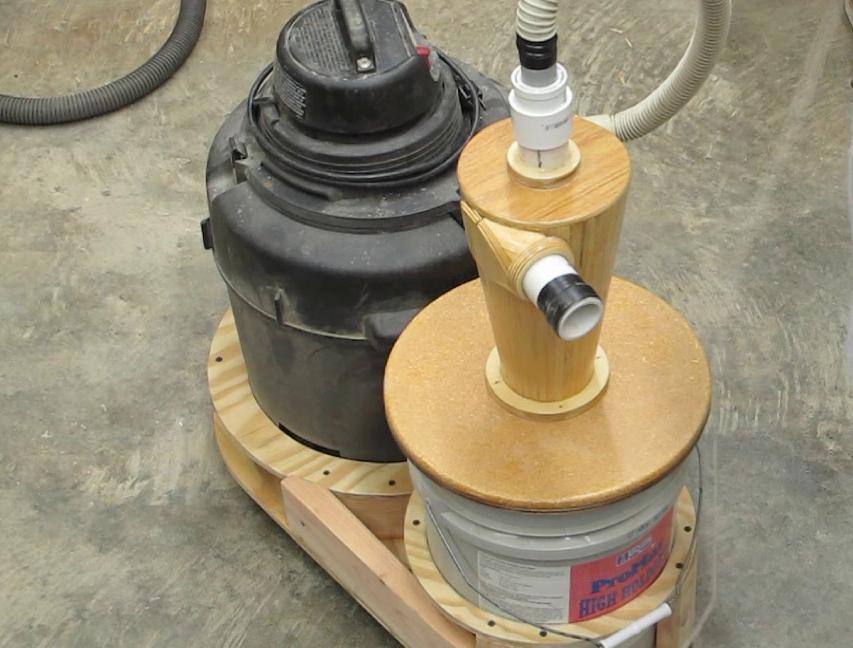
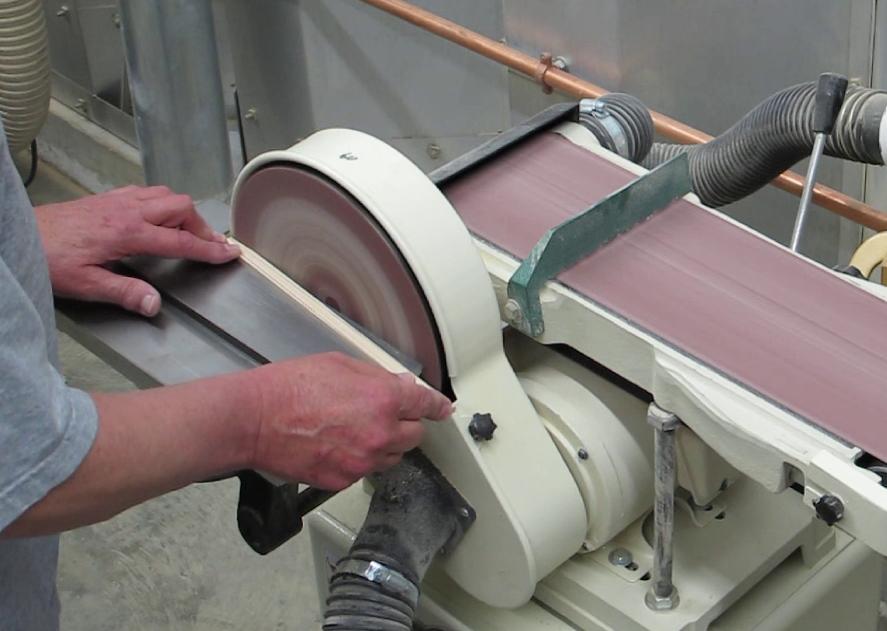
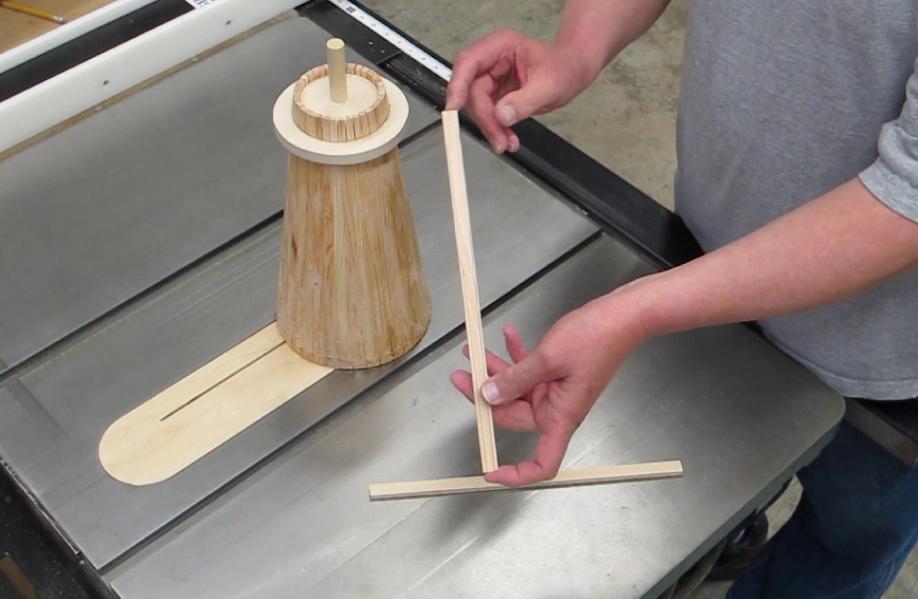
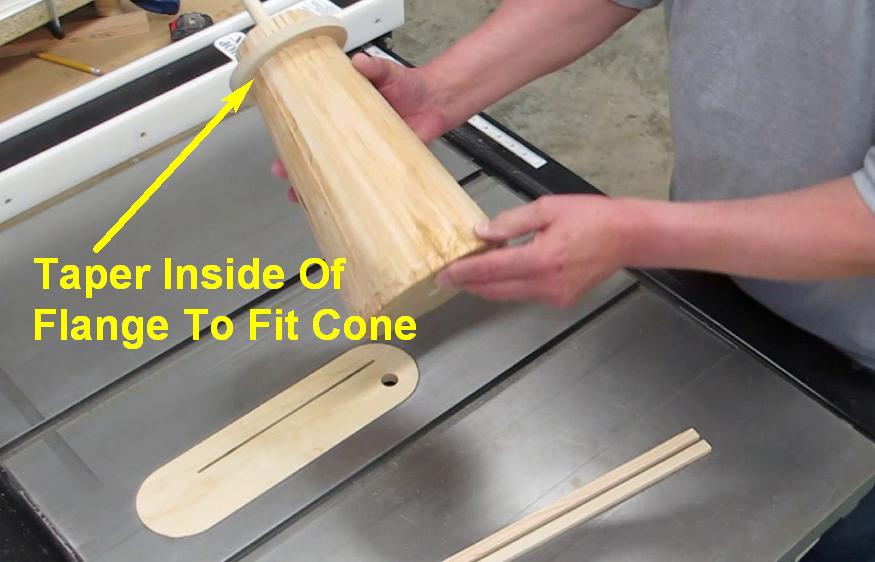
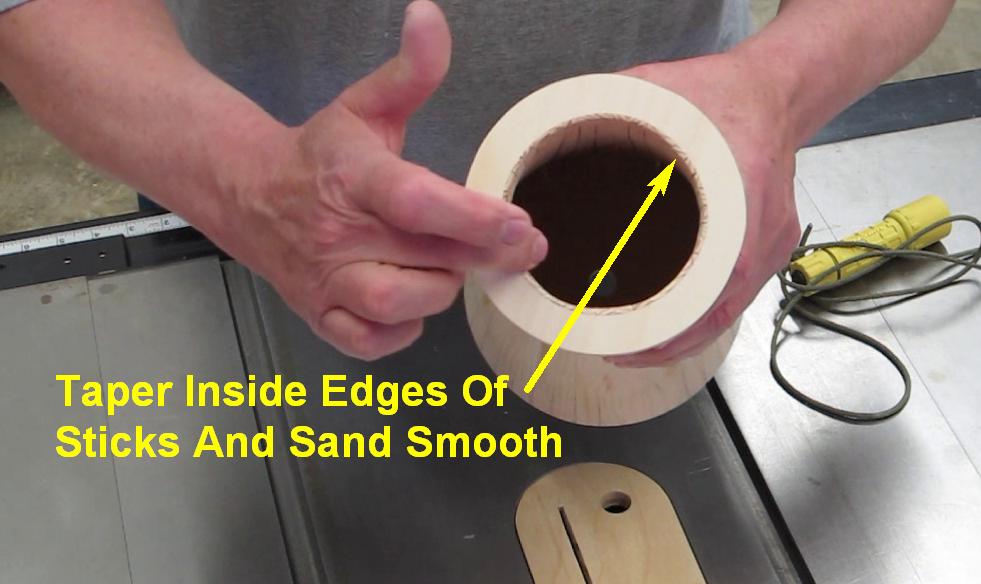
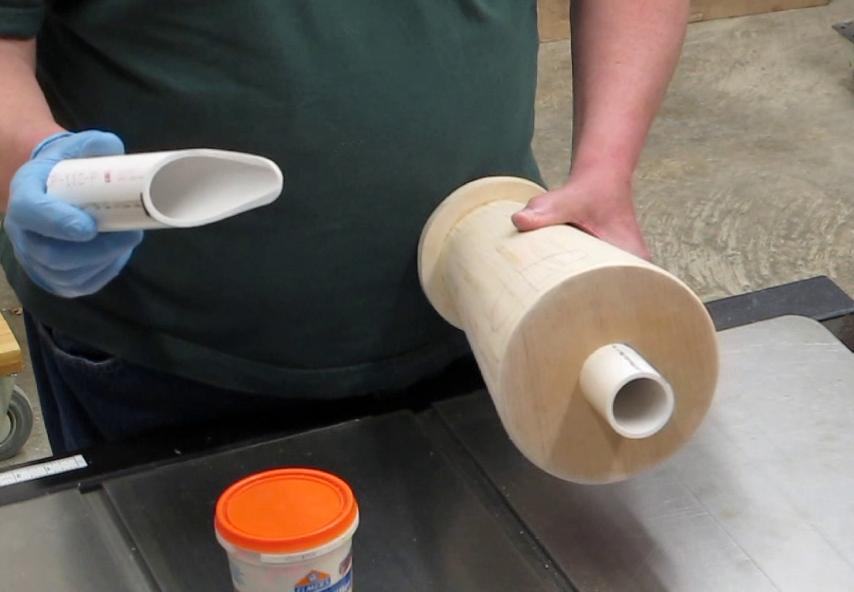

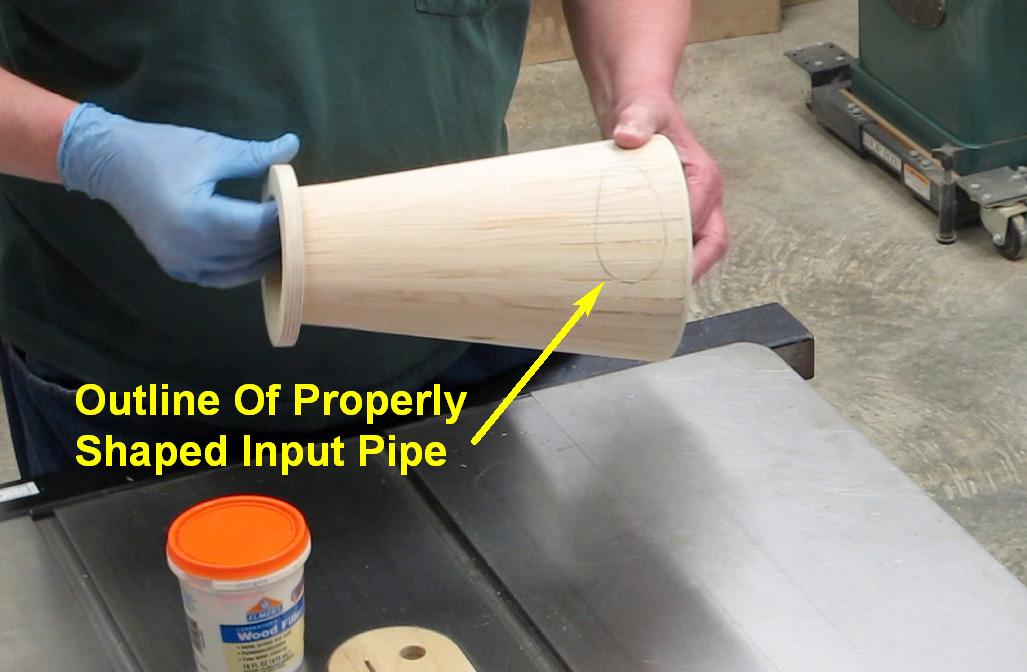
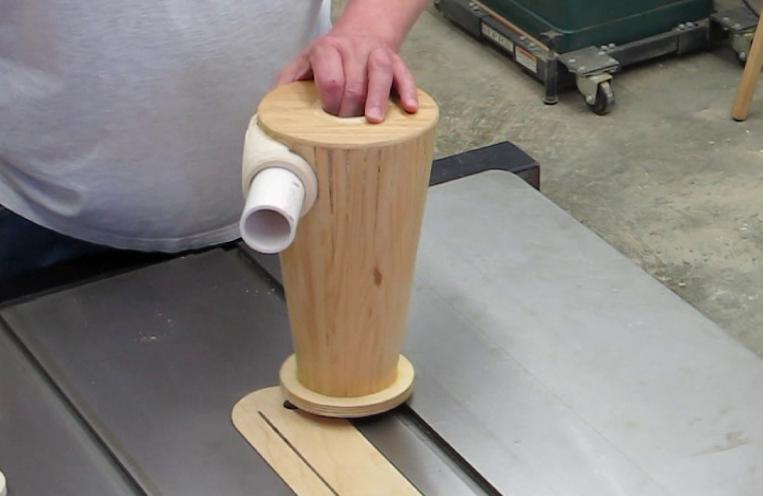
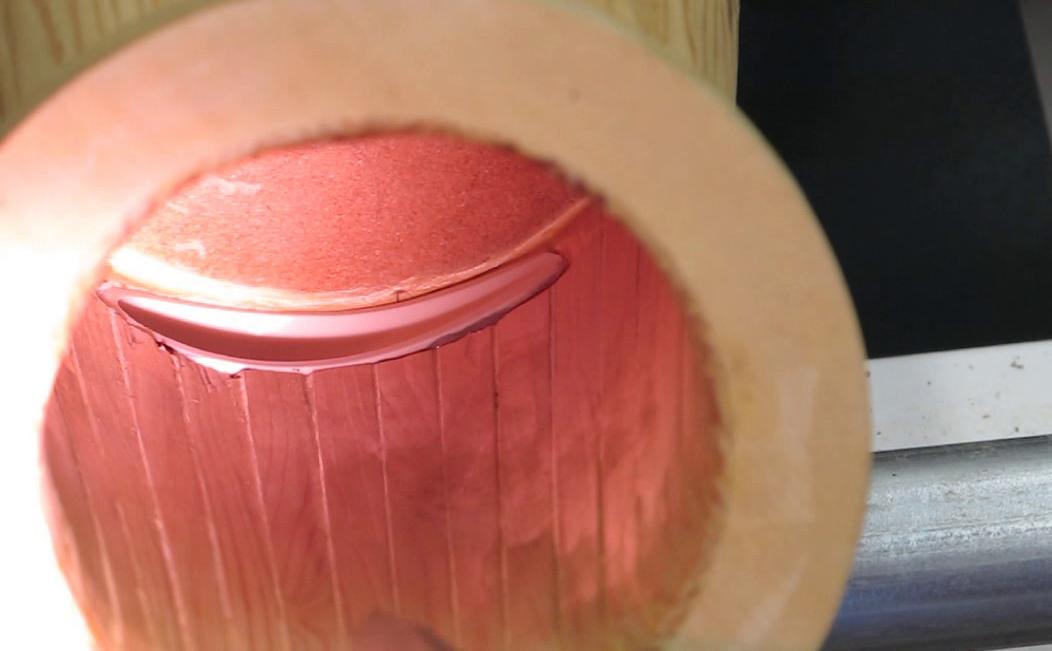

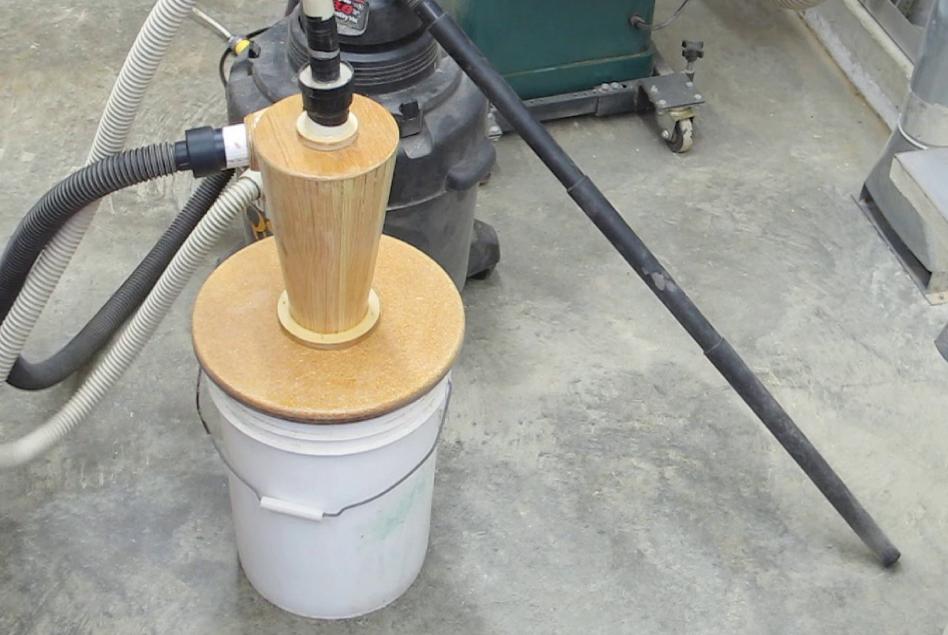
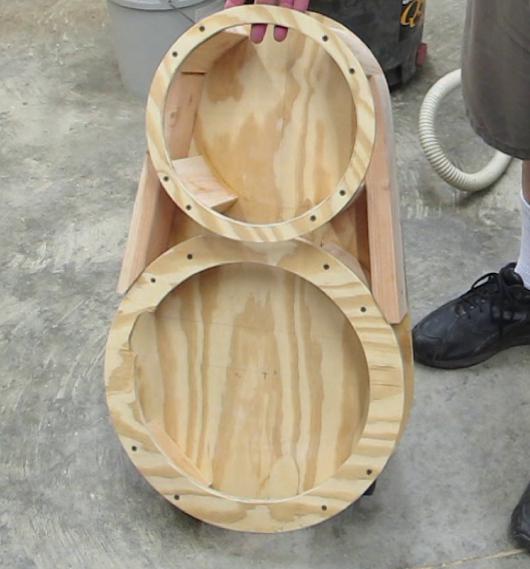
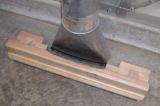
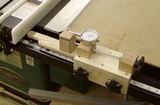 Table saw fence micro adjuster
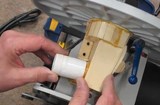 Dust extraction
 Building a
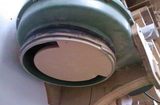
 Two bucket cyclone