Making wooden try squares
This is an older (2009) version of my making squares, See here for a newer (2018) article and video.
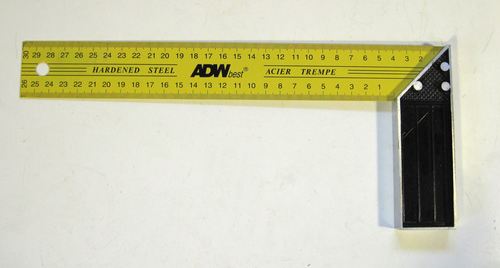 It started with this rather nice looking square I bought on my last trip to Germany.
I figured it would be nice to have a square with metric markings on it, and the yellow
scale also makes it easier to read than black on steel.
It started with this rather nice looking square I bought on my last trip to Germany.
I figured it would be nice to have a square with metric markings on it, and the yellow
scale also makes it easier to read than black on steel.
After I returned from my trip, I did the usual thing of doing a quick check on the square to make sure that it was good. Lo and behold, it wasn't square. It deviated from square by about a quarter millimeter along the length of its blade!
No problem I figured, I'll just pound and file the thing into square-ness. But checking it some
more, I realized that the edges of the yellow blade weren't even parallel!
Oh well, I guess I just spent €10 on a yellow ruler with a handle on it.
 In my dad's workshop, my dad mostly uses wooden try squares that he made himself.
After my experience with this yellow square, I figured I could do at least as well as
that square myself. So I made some wooden squares of my own.
In my dad's workshop, my dad mostly uses wooden try squares that he made himself.
After my experience with this yellow square, I figured I could do at least as well as
that square myself. So I made some wooden squares of my own.
A catch with a wooden try square is that it's easy to lose among the wood, so I put a light coat of paint on them. The paint was actually an afterthought, so I put it on after I varnished the squares. They would have looked better if I had rubbed the paint on the wood first before varnishing.
I used the try square when I built this storage shelf and, without
the paint on it, the square is easy to mistake as part of the shelf in the photos.
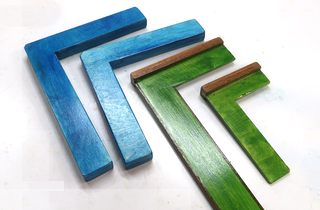
 The two blue squares in the previous photo are clamping squares. They are meant to be clamped
to a joint to hold it square as it is being glued up. As such, the strength of the joint in these
squares is important, because they can get a fair bit of force applied to them during
clamping.
The two blue squares in the previous photo are clamping squares. They are meant to be clamped
to a joint to hold it square as it is being glued up. As such, the strength of the joint in these
squares is important, because they can get a fair bit of force applied to them during
clamping.
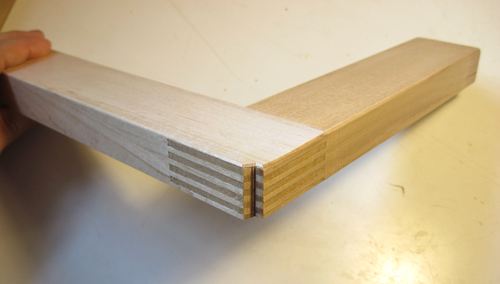
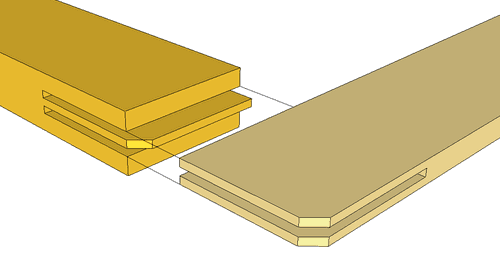
So I cut the joint as a sort of finger joint on my box joint
jig
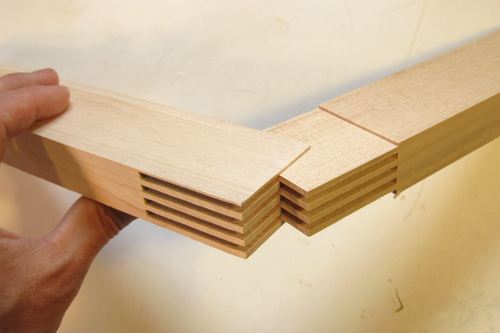 With the joints cut this way, I get eight times as much gluing area as I would with a
half-lap joint, and four times as much as a bridle joint. I'm pretty sure the wood
would come apart before the joint failed if push came to shove.
With the joints cut this way, I get eight times as much gluing area as I would with a
half-lap joint, and four times as much as a bridle joint. I'm pretty sure the wood
would come apart before the joint failed if push came to shove.
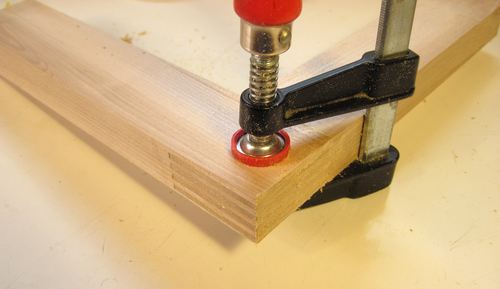 For good measure, I clamped the joint together as the glue dried. I had already wiped the excess
glue off the joint when I took this photo.
For good measure, I clamped the joint together as the glue dried. I had already wiped the excess
glue off the joint when I took this photo.
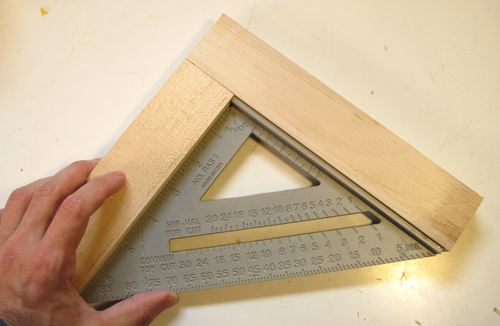 Checking the joint for square-ness. A rafter gauge is a good square to check against. With the
one-piece construction, the only way this sort of square would be non-square is if the tooling
it was made from wasn't square.
Checking the joint for square-ness. A rafter gauge is a good square to check against. With the
one-piece construction, the only way this sort of square would be non-square is if the tooling
it was made from wasn't square.
The square is not detectably non-square. If it was a little off square, I could correct for this
by just trimming or sanding it into square-ness.
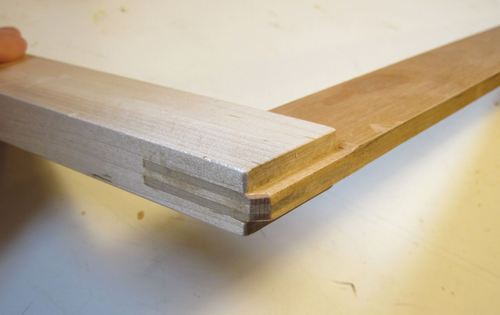
 I cut a notch out of the outside corner of the clamping squares. That way, the corner of the
square won't dip into any glue squeezeout that I often get when clamping joints together.
I took this photo before I painted the square.
I cut a notch out of the outside corner of the clamping squares. That way, the corner of the
square won't dip into any glue squeezeout that I often get when clamping joints together.
I took this photo before I painted the square.
Another advantage of paint for a clamping square is that it will inevitably get some dried
glue stuck to it. With the square painted, the dried glue will be much easier to see.
 I also made a wooden try-square. I wanted its blade to be a bit narrower, but I was still
able to make it a double joint.
I also made a wooden try-square. I wanted its blade to be a bit narrower, but I was still
able to make it a double joint.
 I checked this square against a framing square. I find framing squares, made out of one
piece of thick sheet metal, are also quite trustworthy as far as squares go.
I checked this square against a framing square. I find framing squares, made out of one
piece of thick sheet metal, are also quite trustworthy as far as squares go.
 The joint of my try-square. I'm pretty sure this joint will never let go.
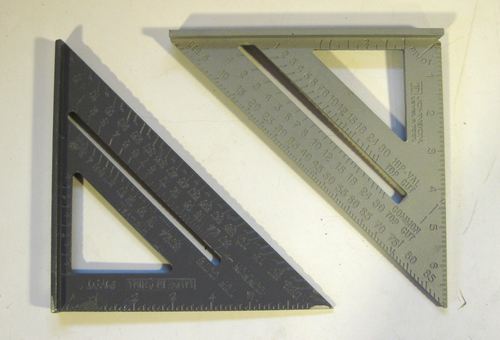
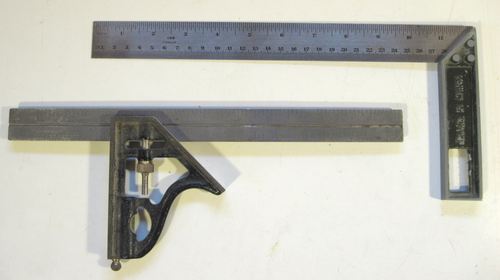 Overall, I find it remarkable how many cheap squares simply are not square. The two squares at
left are two primary candidates for the types of squares to mistrust.
Overall, I find it remarkable how many cheap squares simply are not square. The two squares at
left are two primary candidates for the types of squares to mistrust.
Naturally, if you spend a lot of money on a quality square, even these designs of squares can be accurate. But for cheap squares of this type accuracy is a matter of luck.
The only square that is not made out of one piece that I trust is a machinist square. It wasn't
cheap. I mostly use it for checking that fences and saws are set square.
 One piece squares, on the other hand, tend to be trustworthy, even if they are cheap squares.
I really like these rafter squares at left - good for smaller things, like making sure that the
table saw or jointer fence are at 90 degrees. Big framing squares (not pictured) are good
for things like checking that a table saw sled is square.
One piece squares, on the other hand, tend to be trustworthy, even if they are cheap squares.
I really like these rafter squares at left - good for smaller things, like making sure that the
table saw or jointer fence are at 90 degrees. Big framing squares (not pictured) are good
for things like checking that a table saw sled is square.
So there's really no need to get an expensive square. Just get the right kind of square.
Or make your own.
See also:
 Newer (2018) version of squres, and video
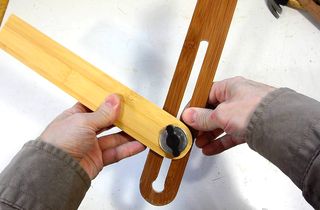 Making a bevel gauge
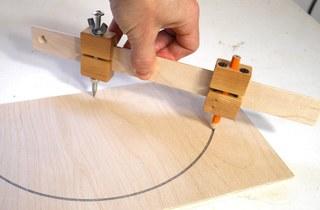 Trammel points compass
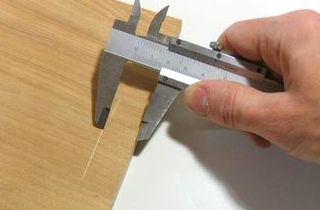 Callipers as
 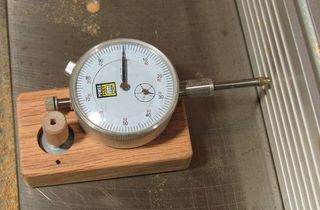 Table saw fence
Back to my Woodworking website
![]()