Making a Crokinole board
 For Christmas of 2007, my sister suggested that a Crokinole game for Christmas would
be a lot of fun. So of course, given this challenge, I had to figure out how
to build one. I built the board on the day of a big snowstorm, so
my choice of materials was very much dictated by what I already had in the shop.
For Christmas of 2007, my sister suggested that a Crokinole game for Christmas would
be a lot of fun. So of course, given this challenge, I had to figure out how
to build one. I built the board on the day of a big snowstorm, so
my choice of materials was very much dictated by what I already had in the shop.
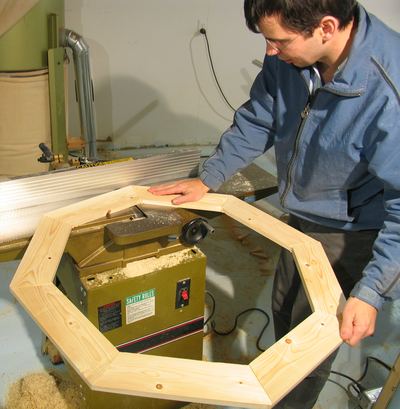
 For the octagonal surround, I resawed a short 2x4 to two boards 3.5" wide. To join the pieces
into an octagon, I decided to make finger joints on the ends of the pieces using a tenon jig.
I did this with the tenon jig that came included with my delta
table saw
For the octagonal surround, I resawed a short 2x4 to two boards 3.5" wide. To join the pieces
into an octagon, I decided to make finger joints on the ends of the pieces using a tenon jig.
I did this with the tenon jig that came included with my delta
table saw
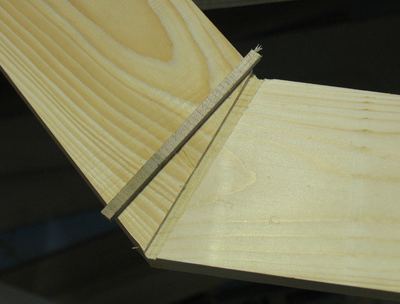
Also note the supporting block of wood attached to the tenon jig on the left.
With the tenon jig mostly being above the table saw throat insert while making the cut,
giving it a bit of extra support by attaching a block of wood really helped.
 I cut the joints in such a way that I could cut the fingers in the same position on
either end of the pieces of wood, so that they would fit together. I made the fingers
the same width as the saw blade (3 mm), so didn't need to use a dado blade for the cuts or
make multiple cuts per finger.
I cut the joints in such a way that I could cut the fingers in the same position on
either end of the pieces of wood, so that they would fit together. I made the fingers
the same width as the saw blade (3 mm), so didn't need to use a dado blade for the cuts or
make multiple cuts per finger.
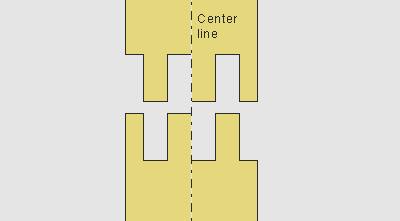
This was a bit fiddly to set up with the jig, so in the plans I drew
for this board, I replaced this with a tenon joint. I have since built my
screw advance box joint jig, which makes
cutting this sort of joint a snap.
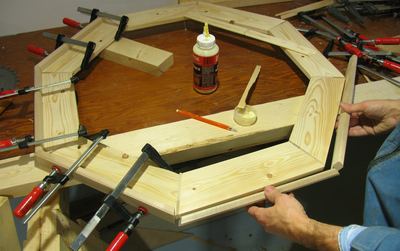
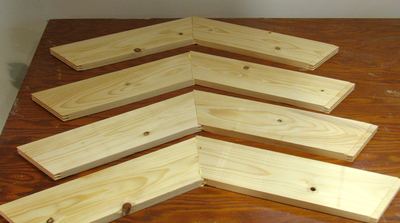 After cutting the pieces, I glued them together in pairs at first, before joining them
together in an octagon. Because I cut the finger joints to be rather tight, and they
have lots of gluing surface, clamping them while gluing was unnecessary.
After cutting the pieces, I glued them together in pairs at first, before joining them
together in an octagon. Because I cut the finger joints to be rather tight, and they
have lots of gluing surface, clamping them while gluing was unnecessary.
Gluing them all together into an octagon was a little tougher though, and not all the
joints came together as closely and precisely as I had hoped they would.
 Because the joints didn't all fully go together, the result didn't look as good as I wanted
it to look. So to hide this defect, and turn it into a "feature", I cut a slots into
the joints, and inset a piece of maple into the slots.
Because the joints didn't all fully go together, the result didn't look as good as I wanted
it to look. So to hide this defect, and turn it into a "feature", I cut a slots into
the joints, and inset a piece of maple into the slots.
I cut these as multiple passes on a radial arm saw. If you cut them on the table saw it
would be better to cut them in one pass with a dado blade.
 Finally, once the glue on everything was dry, I planed everything smooth and
flush on my jointer.
This also allowed me to hide a slight bit of alignment error I had on the joints. The wood
on one side of the joints was about half a millimeter higher than on the other side
after assembly.
Finally, once the glue on everything was dry, I planed everything smooth and
flush on my jointer.
This also allowed me to hide a slight bit of alignment error I had on the joints. The wood
on one side of the joints was about half a millimeter higher than on the other side
after assembly.
So with the pieces inserted into the joints and planing it all, I was able to completely hide
any lack of precision in the frame.
 The next step was to make the trim around the frame. A nice aspect of making an octagonal
frame was that I could use short pieces for the frame. I used short pieces of hardwood
that I cut out of a piece of firewood.
The next step was to make the trim around the frame. A nice aspect of making an octagonal
frame was that I could use short pieces for the frame. I used short pieces of hardwood
that I cut out of a piece of firewood.
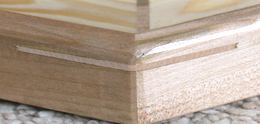
I cut a rabbet into the pieces to join them with the frame, and rounded the top corners with
a small hand plane. To join them to the frame, I cut one end of all the pieces to the
required 22.5 degree miter and then fitted one piece at a time. Once fitted, I glued it
on, then measure and cut the next piece and checked the fit of that with the piece to
go on after that before gluing int on.
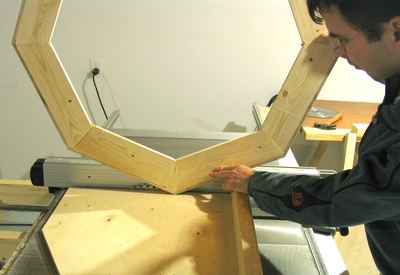 Once the glue was dry in the frame, I cut splines into the edges of the trim.
I used a table saw sled to support the frame at the right angle, and slid it against the rip
fence to position the cut where I wanted it.
Once the glue was dry in the frame, I cut splines into the edges of the trim.
I used a table saw sled to support the frame at the right angle, and slid it against the rip
fence to position the cut where I wanted it.
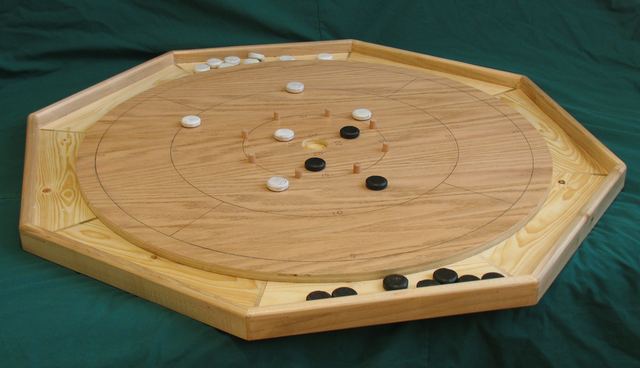
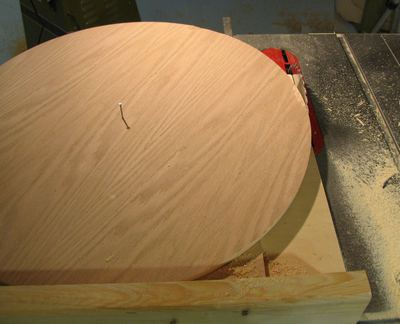 The next step is to cut the main playing board. The board itself is a circle of 26" diameter,
cut from veneered plywood. 26" is just a little too big to cut from a quarter sheet of plywood.
After I cut it approximately round on the band saw, I put a small nail through the middle and
put it on another piece of plywood on my table saw sled.
By rotating it past the blade, I was able to get the edge perfectly round.
The next step is to cut the main playing board. The board itself is a circle of 26" diameter,
cut from veneered plywood. 26" is just a little too big to cut from a quarter sheet of plywood.
After I cut it approximately round on the band saw, I put a small nail through the middle and
put it on another piece of plywood on my table saw sled.
By rotating it past the blade, I was able to get the edge perfectly round.
Researching Crokinole board dimensions on the web, apparently, a lot of manufacturers actually make boards
of 24" diameter, so that they can cut 8 from a full sheet of 4'x8' plywood. Fortunately, the scrap of
plywood I had at hand was just a little wider than 26", so I didn't have to compromise
on dimensions.
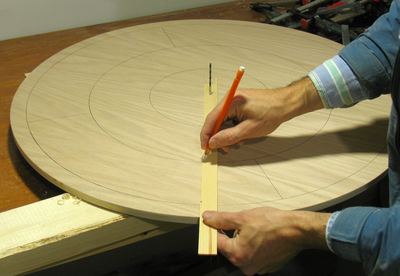 Some people cut the markings on the board by cutting V groves with a router. I didn't quite have
time for that, and I figured pencil lines would be just as good. I used a 0.9 mm pencil.
A strip of wood with some notches cut into the edge served as a sort of compass to draw
the circles. For the center pivot I jus stuck a drill bit backwards into the hole.
If I was doing it again, I'd use a slightly thicker pencil to get wider lines.
Some people cut the markings on the board by cutting V groves with a router. I didn't quite have
time for that, and I figured pencil lines would be just as good. I used a 0.9 mm pencil.
A strip of wood with some notches cut into the edge served as a sort of compass to draw
the circles. For the center pivot I jus stuck a drill bit backwards into the hole.
If I was doing it again, I'd use a slightly thicker pencil to get wider lines.
Pencil is of course easily smeared, so I dabbed the first coat of varnish instead of
brushing it on. That way I didn't end up smearing the pencil lines.
Once the first coat of varnish was on, I could sand the varnish smooth without risk of
smearing the pencil marks.
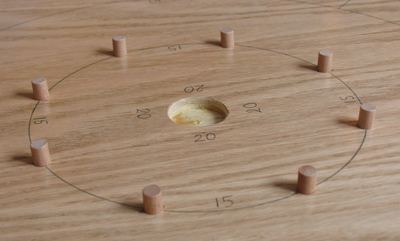 After the first coat of varnish I drilled the 1 3/8" center hole
and the 3/8" holes for the pegs. I then proceeded to put on the remaining coats of varnish
on the board (4 coats in total), and then inserted the pegs. The pegs are just pieces
of 3/8" dowel.
With varnish on the pegs and the hole, the pegs actually needed driving in with a
hammer. I fixed them in place with a bit more varnish rather than glue seeing that the wood
and pegs were already sealed with varnish at this point.
After the first coat of varnish I drilled the 1 3/8" center hole
and the 3/8" holes for the pegs. I then proceeded to put on the remaining coats of varnish
on the board (4 coats in total), and then inserted the pegs. The pegs are just pieces
of 3/8" dowel.
With varnish on the pegs and the hole, the pegs actually needed driving in with a
hammer. I fixed them in place with a bit more varnish rather than glue seeing that the wood
and pegs were already sealed with varnish at this point.
Next: Making crokinole disks
Crokinole board plans
 Marble run
 Wooden burr puzzles
 Making wooden dice
 Making loaded cheating dice
 Xylophone toy build