Making dowels - the pencil sharpener method
Buying dowels can be a frustrating experience. I have started taking calipers with me when I try to shop for dowels. Lately, I often return empty handed - unable to find a single dowel that is round and close enough to its specified size to be usable for joinery.
 I start by cutting some square stock, just a bit (0.020" or half a millimeter)
larger than the dowels I want to make.
I start by cutting some square stock, just a bit (0.020" or half a millimeter)
larger than the dowels I want to make.
 Next I round or chamfer the corners on the router table. A 1/4" (6 mm) roundover bit is ideal for
rounding the corners for 3/8" (10 mm) dowel blanks. I don't so much want to make a stick that
is perfectly round, but just to round the corners a bit so less material needs to be removed
in the next step.
Next I round or chamfer the corners on the router table. A 1/4" (6 mm) roundover bit is ideal for
rounding the corners for 3/8" (10 mm) dowel blanks. I don't so much want to make a stick that
is perfectly round, but just to round the corners a bit so less material needs to be removed
in the next step.
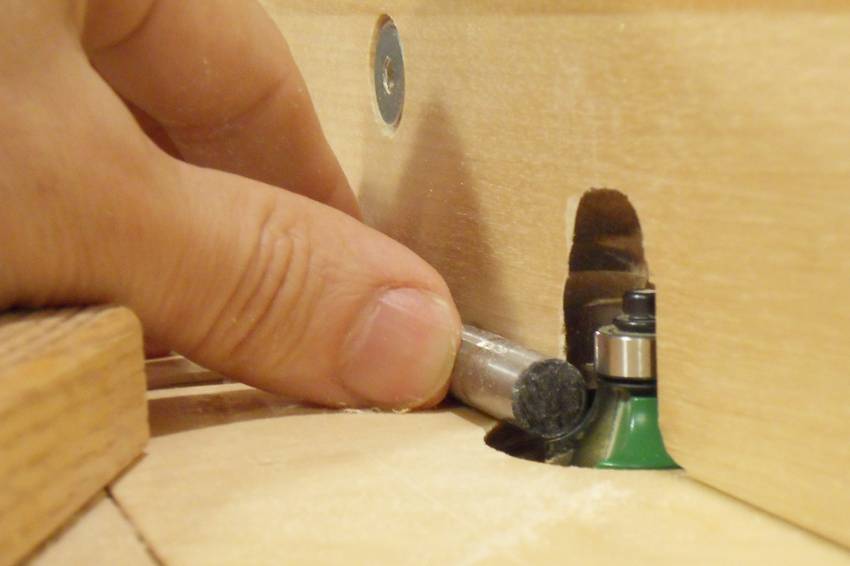
I use a 3/8" drill bit to check that my roundover would not cut away anything that would be part of a 3/8" dowel.
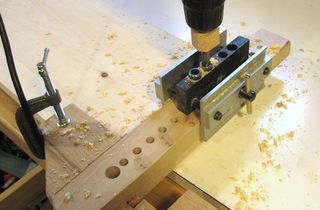
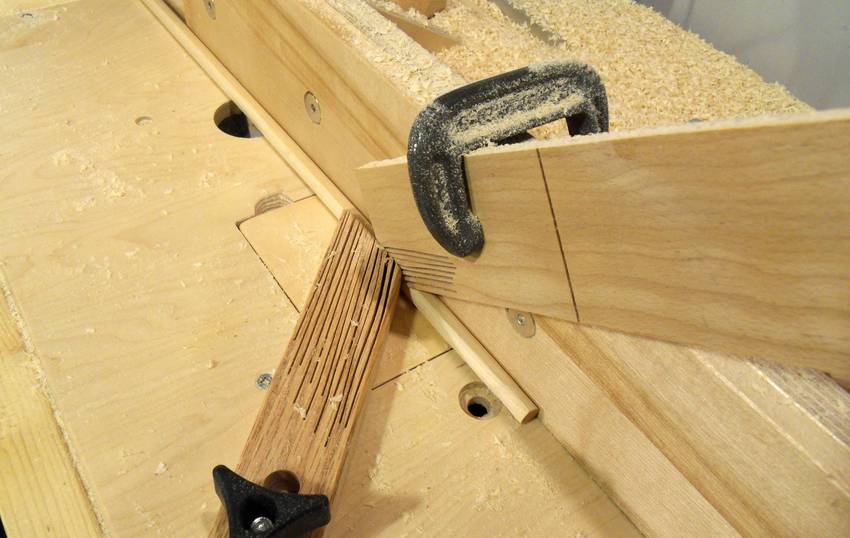 I'm using two featherboards to ensure that the sticks are always right up against
the fence and the table.
I'm using two featherboards to ensure that the sticks are always right up against
the fence and the table.
 Looking through between the featherboards and fence, you can see the corner that
the router bit will cut away.
The opening you see is a bit smaller than the sticks I will pass through
so that the featherboards will have to flex away from the stick.
Looking through between the featherboards and fence, you can see the corner that
the router bit will cut away.
The opening you see is a bit smaller than the sticks I will pass through
so that the featherboards will have to flex away from the stick.
 Pushing the stick through goes quite fast. With the featherboard pressing it in place,
I only need to worry about pushing forward. I use the next stick to push the last
one all the way through. Each stick needs four passes to do all the edges.
Pushing the stick through goes quite fast. With the featherboard pressing it in place,
I only need to worry about pushing forward. I use the next stick to push the last
one all the way through. Each stick needs four passes to do all the edges.
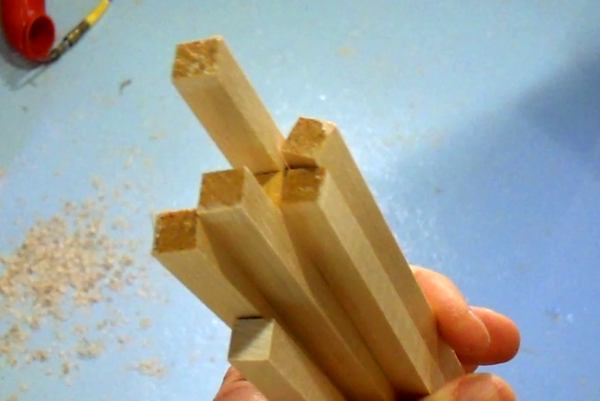
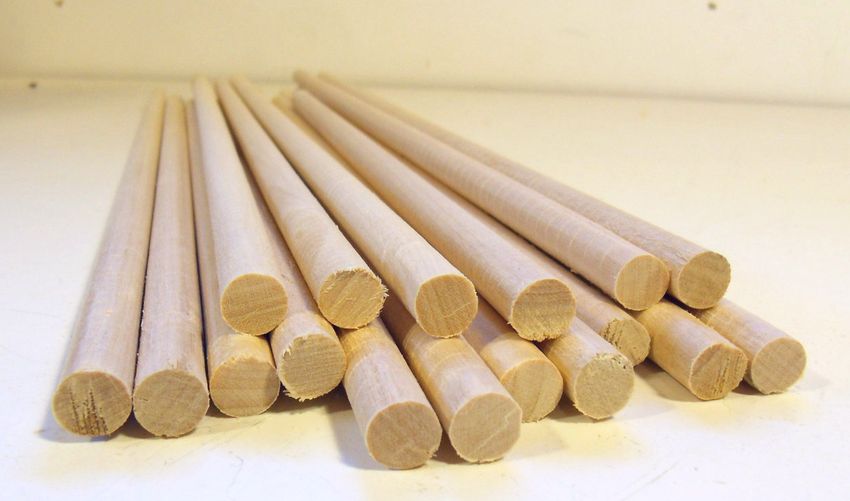
![]() Here's my sticks with the edges rounded off. They aren't quite round, and they aren't the
right size yet. Though they'd probably pass as "dowels" from a home improvement store!
Here's my sticks with the edges rounded off. They aren't quite round, and they aren't the
right size yet. Though they'd probably pass as "dowels" from a home improvement store!
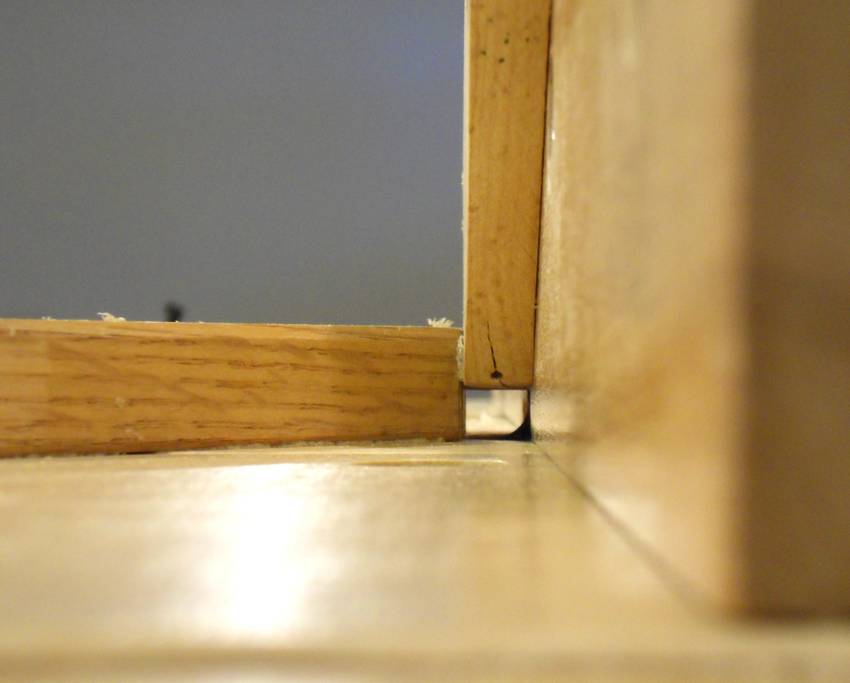
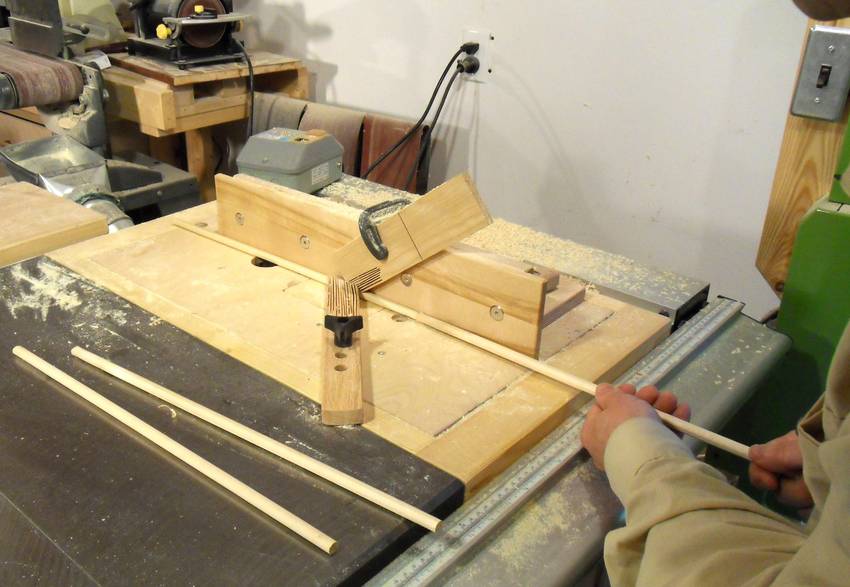
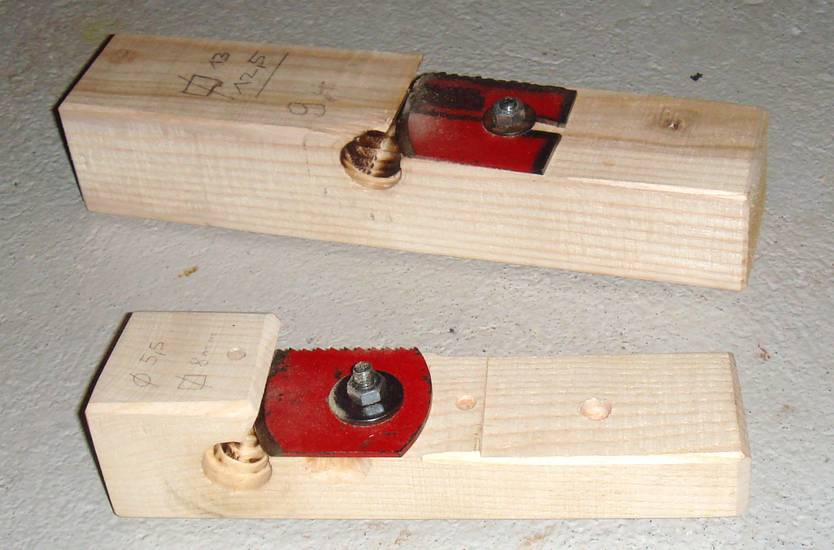
 Finally, here's the dowel making jig. It's a block of hardwood with a hole
and a chisel clamped to it at an angle.
Finally, here's the dowel making jig. It's a block of hardwood with a hole
and a chisel clamped to it at an angle.
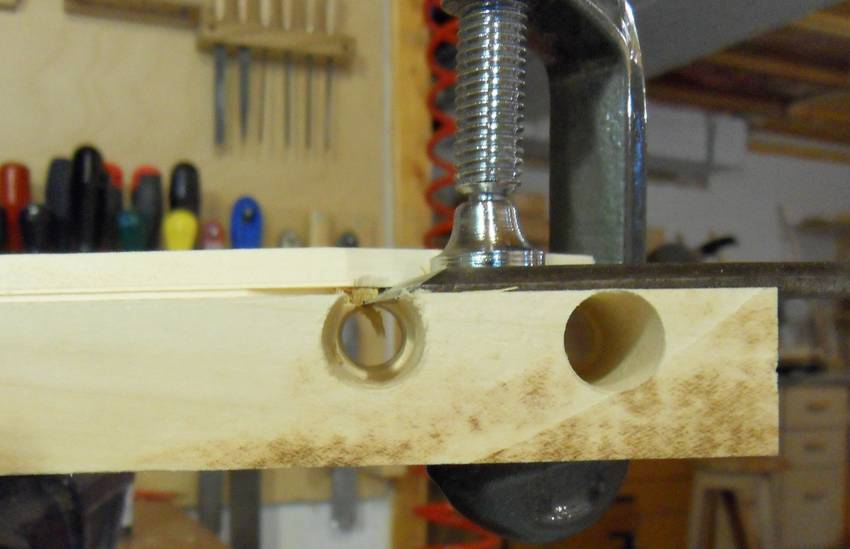 The hole has two sizes. The infeed size is 29/64", but then reduces to a 3/8"
outfeed hole. Metric equivalents would be a 12 mm infeed hole
transitioning to a 10 mm outfeed hole.
The infeed side hole is large enough for the blank, while the smaller outfeed hole
will guide out the finished dowel. The chisel is positioned so that its edge
is tangent to the edge of the smaller outfeed hole. The chisel is mounted at an angle, so
that its cutting edge, on the infeed side extends out to the edge of the larger hole.
The hole has two sizes. The infeed size is 29/64", but then reduces to a 3/8"
outfeed hole. Metric equivalents would be a 12 mm infeed hole
transitioning to a 10 mm outfeed hole.
The infeed side hole is large enough for the blank, while the smaller outfeed hole
will guide out the finished dowel. The chisel is positioned so that its edge
is tangent to the edge of the smaller outfeed hole. The chisel is mounted at an angle, so
that its cutting edge, on the infeed side extends out to the edge of the larger hole.
I made the jig by drilling the larger hole, then the smaller hole through, then cutting away part of the block on the table saw. The cutaway is deep enough to reach the edge of the smaller hole. If you cut too deep, you can always shim under the chisel, although I was lucky and didn't need to.
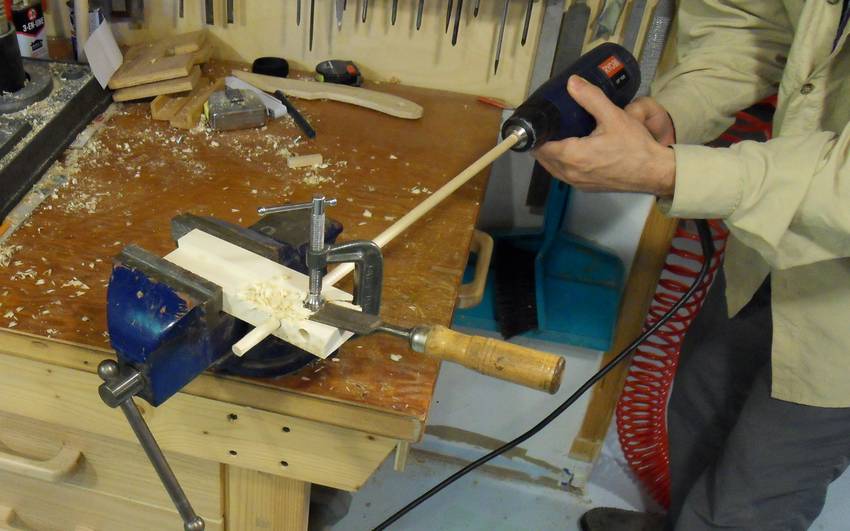
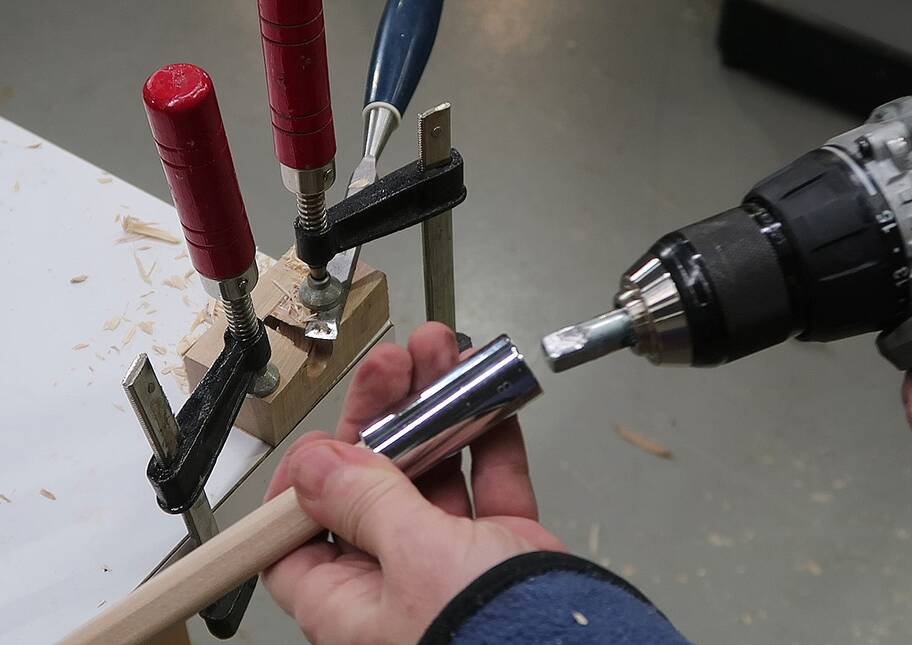
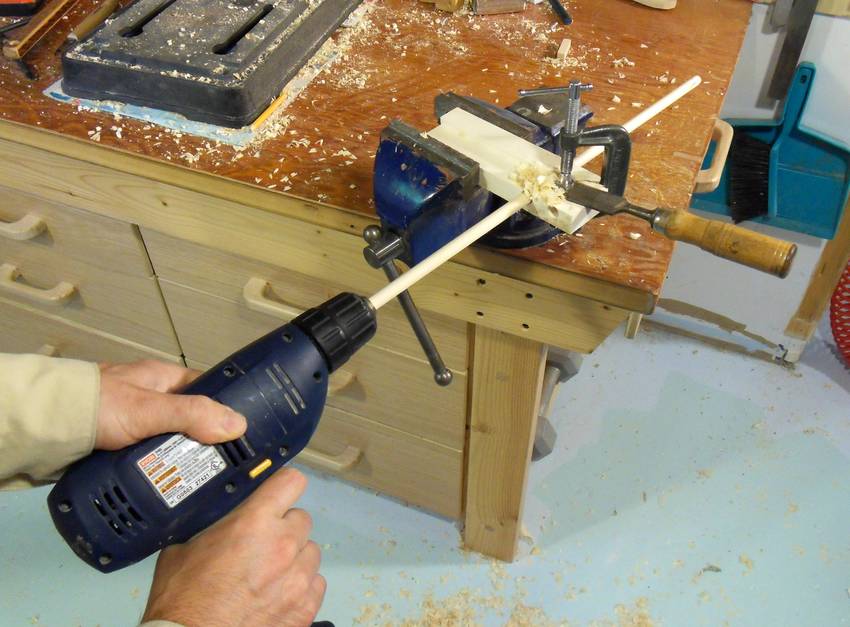 Making the dowels is as simple as putting the dowel blank in the drill chuck
and pushing it through the jig while spinning it.
Making the dowels is as simple as putting the dowel blank in the drill chuck
and pushing it through the jig while spinning it.
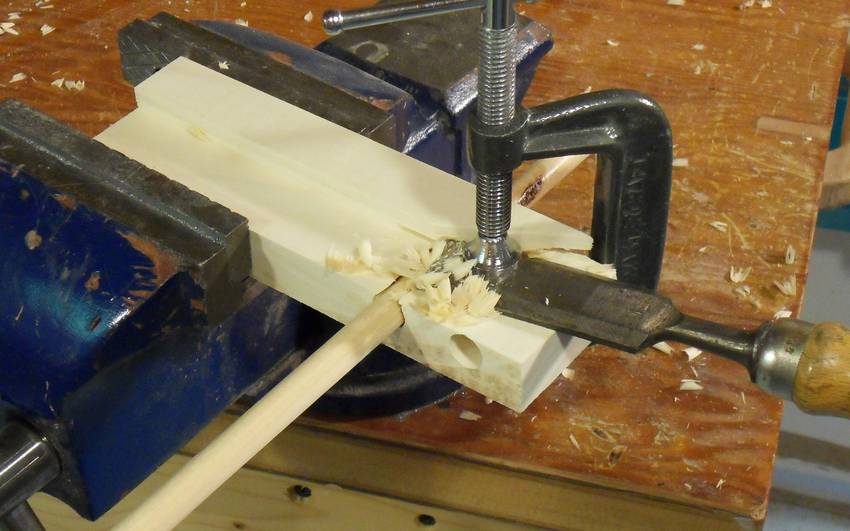 Works like a charm! About five seconds to cut a 40 cm long dowel.
 Once the chuck was up against the jig, I unchucked the dowel and put the
drill on the other end. Reversing the drill to keep the dowel spinning
in the same direction, I was able to pull it through to finish the dowel.
Once the chuck was up against the jig, I unchucked the dowel and put the
drill on the other end. Reversing the drill to keep the dowel spinning
in the same direction, I was able to pull it through to finish the dowel.
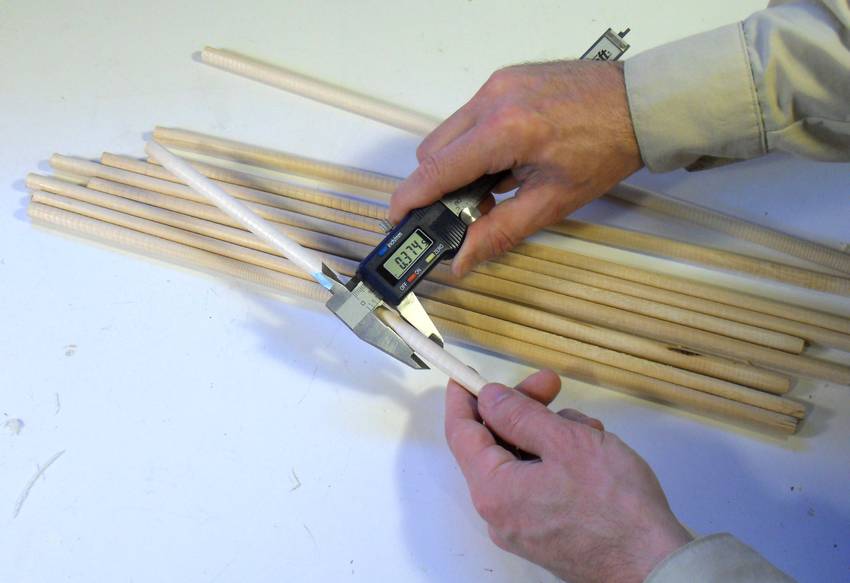 The dowels end up perfectly round, and quite consistent in size.
I was aiming for 0.375", and the worst
of them was .005" (about 0.1 mm) under. Most were around .002" (.05 mm) under, none was over.
The dowels end up perfectly round, and quite consistent in size.
I was aiming for 0.375", and the worst
of them was .005" (about 0.1 mm) under. Most were around .002" (.05 mm) under, none was over.
The dowels above were made of birch, and the procedure worked flawlessly. I later used that same procedure to make some 1/2" (12.5 mm) dowels out of maple, but I ended up breaking a few of them. Specifically, some of them would jam into the chisel when starting and then snap. Sanding the starting end to be slightly conical, so that the start of the cone fit into the 1/2" outfeed hole right at the start, solved that. I only ever encountered problems on starting the dowels. Once started, none of the dowels jammed or broke. Part of the problem may have been that my 1/2" dowel blanks fit too loosely in the infeed hole, so they could move and jam into the knife. Another factor may have been that maple doesn't carve as nicely.
 A better solution would be to have a conical hole in my dowel jig so that the dowel
blank is tight in the hole even when starting. But I don't have a conical drill.
Another solution would be to buy a pre-made jig. Lee Valley Tools sells a product
they call the "Veritas dowel and tenon cutter"
which has a conical hole and a curved knife. I'd expect that gadget to work quite well,
considering how well my improvised jig works already.
A better solution would be to have a conical hole in my dowel jig so that the dowel
blank is tight in the hole even when starting. But I don't have a conical drill.
Another solution would be to buy a pre-made jig. Lee Valley Tools sells a product
they call the "Veritas dowel and tenon cutter"
which has a conical hole and a curved knife. I'd expect that gadget to work quite well,
considering how well my improvised jig works already.
I also made a sort of "adapter" for mounting the 1/2" dowel blanks in a 3/8" drill. this consisted of a block of hardwood with a 5/8" hole in which I could secure the 1/2" dowel blanks with a wood screw. A 3/8" dowel on the other end of the adapter could be mounted in the chuck. But after several jams, the 3/8" dowel got twisted off. So I switched to a hand drill with a 1/2" chuck to finish the job.
So, summarizing, the following helps to make the procedure go smoothly:
- Woods that are not prone to splintering (such as birch) work best
- The blank should fit snugly in the larger infeed hole (little play)
- Tapering the starting end of the blank can prevent jams on starting the dowel
- Make sure the chisel is really sharp
More about how I made the dowel maker
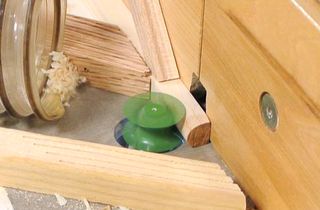
 Paul Grundbacher sent me a picture of his "rundstabhobel" dowel makers. These are for making
very small dowels for his marble machines. The knives are made from
hacksaw blades.
Paul Grundbacher sent me a picture of his "rundstabhobel" dowel makers. These are for making
very small dowels for his marble machines. The knives are made from
hacksaw blades.
I like the idea of a blade permanently fixed to to the block. That way, the jig doesn't need re-tweaking when it's used again, so it's more suitable for making dowels on demand.
Making bigger dowels, and more details
 I last used this method to make dowels out of nice hardwoods in 2013, but since then made
dowels with a half-round router bit because it's faster.
But this time, I needed 15 mm dowels, a size I can't buy here, nor can I make that size
with a round over or a half round bit on the router because I don't have a bit for that size.
I last used this method to make dowels out of nice hardwoods in 2013, but since then made
dowels with a half-round router bit because it's faster.
But this time, I needed 15 mm dowels, a size I can't buy here, nor can I make that size
with a round over or a half round bit on the router because I don't have a bit for that size.
The 15 mm dowel blank also doesn't fit in the drill chuck, but I could pound the blank into a 15 mm socket set socket. I made an adapter for turning that socket with a drill by grinding four flat faces onto a cylindrical piece of metal.
 Making dowels with
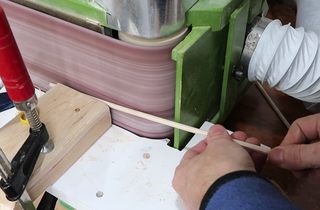 Making thin dowels, no jig required
 Bamboo skewers as 5mm dowels. Any good?
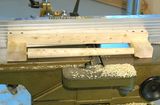 conic dowels and
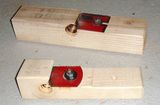
 More about using dowels
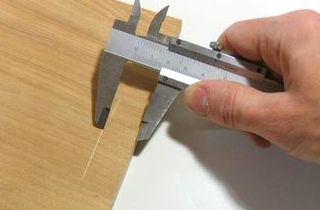 More shop tricks
Back to my Woodworking website