This project is part silliness, and part experimenting with lantern / cycloid gear pairs
that my gear template generator can generate.
Sometimes, if a pen stutters, you can get it going again by shaking it. But
sometimes it seems to take a lot of shaking.
So I figured, what if I could shake it really really hard?
What if I built a centrifuge to get the ink flowing again?
And so this project came about!
Using my gear template generator program, I was able
to establish that a three-tooth lantern against a mating cycloid shaped gear should just
barely work smoothly. I wanted a high gear ratio for my pen centrifuge, so this
was a good place to a gear with such a small number of teeth.
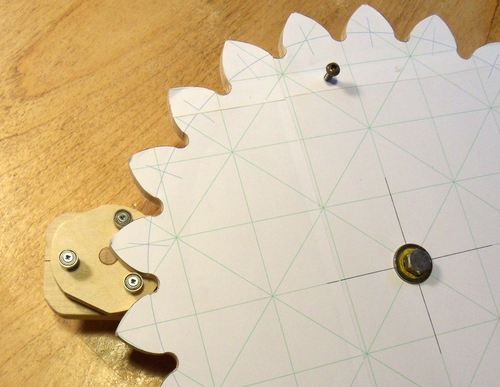
I wasn't completely sure how well it would work, so I made a test gear. Not wanting
to waste too much plywood, I only made a segment of a larger gear. The little gear
has three "pins", which are actually small 3/8" (10 mm) ball bearings. There's
no rubbing on this gear!
You can buy 3/8" outer diameter ball bearings as replacement router bit guide bearings.
As it is though, I have two identical router bit sets. Most of the bits I
never use, and when I do use them, it's usually with a fence or some
other form of guide
so its very rare that I actually use the guide bearings.
So I figured there'd be no harm in "borrowing" some of the router guide bearings
for this project. The bearings are just screwed onto a post on the end of the router
bit with an Allen head machine screw and are easy to take off.
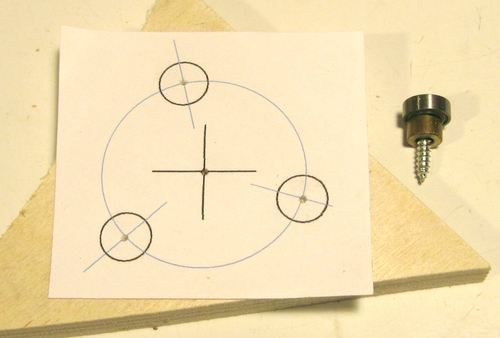
The lantern gear itself is a pretty straightforward layout. But seeing that I already
had to make a printout for the big gear template, I printed the layout for
the pantern gear as well.
I glued the paper onto the piece of wood, and used an awl to punch the centers of my holes.
Then I drilled pilot holes for the screws, and a 3/8" hole in the middle for the shaft.
It's really quite amazing how accurate paper printouts can be. Using the paper template
cut down on measuring, and eliminates errors. But don't use too much glue,
or the paper might expand from the moisture.
To the right, you can see one of the 3/8" ball bearings with a brass spacer below it,
and a 3/4" #6 wood screw through both of these parts. That's what I used for the gear's
pins.
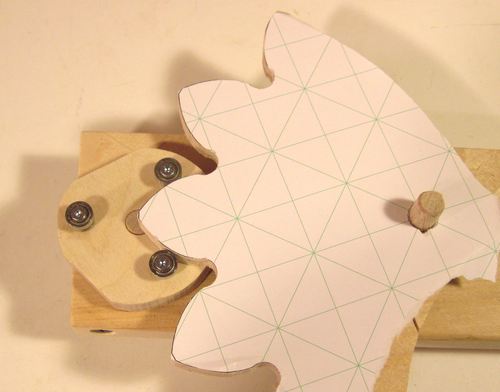
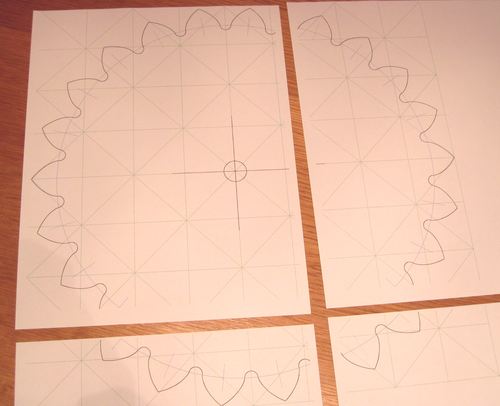
The big gear was large enough that it took four pages to print it. I glued these
together with some paper glue before gluing it onto the wood. The grid lines in
combination with the diagonal grid lines makes it easy to align the sheets of a
printout very accurately.
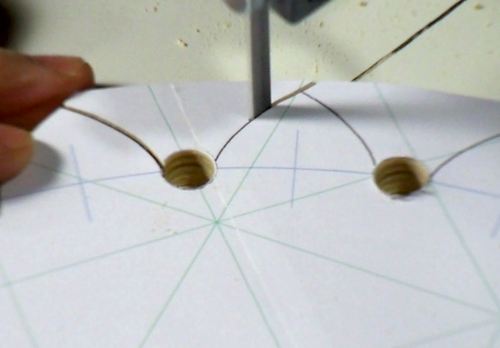
The inside corners of my cycloid gear form 3/8" diameter arcs that match the ball bearings.
Its easiest to just drill these out with a 3/8" Forstner bit.
You can also see the line where I pasted two sheets of paper together. The fact that
the grid lines and the diagonal grid lines are all straight gives me confidence
that I got the alignment just right.
After drilling out the corners, cutting the teeth is fairly quick on the bandsaw.
With a good blade, and a a bit of patience, it's possible to follow a line very accurately.
With the templates produced by the gear template generator, it's best to cut away
half the printed line.
I wanted to test the
big gear against the three tooth lantern gear before removing the paper template,
just to be safe. I figured if I had to trim some material off the teeth, I'd still
want to see the remnants of the printed lines on the template as a guide. But
the gears fit with a bit of slack, so trimming was unnecessary.
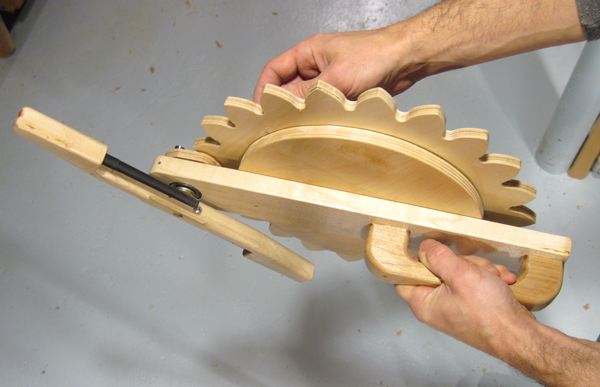
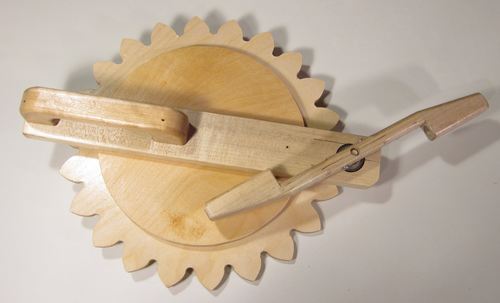
Here's a close-up of the ball bearings meshing with the main gear.
I mounted a knob on the face of the large gear for cranking
the mechanism with. The knob straight on the gear as a crank works well - I'd used that
approach on my box joint jig. I used a ball bearing
for the main bearing of the primary gear. I happened to have some appropriate
ball bearings kicking around from some roller blade skates that I had disassembled.
The teeth of the big gear reach all the way to the center of the latnern gear, so it wasn't
possible to have a shaft going through the middle of the lantern gear. That meant that I
could only have bearings on one side, and that the bearings were fairly critical.
I had some old mostly worn out metric sized ball bearings kicking around.
The catch with the metric bearings
is that my drills and dowels are unfortunately all sized in fractional inches. So I took
two of my 30 mm outer diameter metric ball bearings, and wrapped about five turns of electrical
tape around them to bring them up to 1 1/4", which is the next largest size of Forstner
bit that I have.
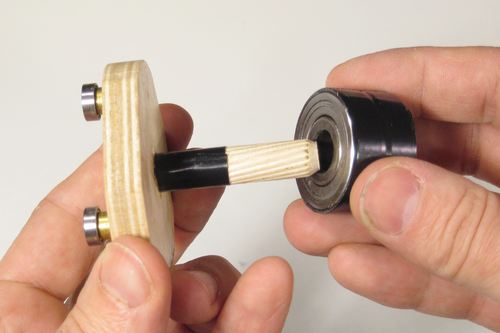
I also had to wrap one turn of tape around my 3/8" dowel to make it fit tightly inside
the 10 mm hole of the bearings.
I'm actually using a 2" long dowel pin that is meant to be used for joinery. All the 3/8"
dowels I had around the shop were so inaccurately made that they were unusable for this purpose.
The dowel pin wasn't meant to be used as a shaft, but at least it was round and accurate.
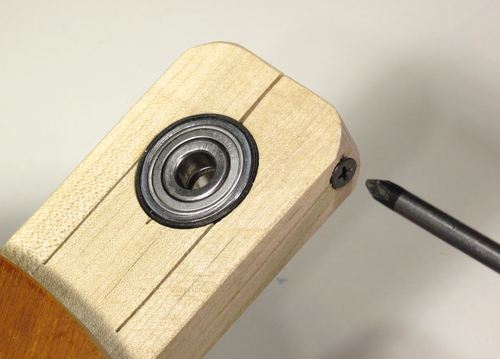
I cut a few slots around the 1 1/4" hole and added a screw to flex the wood to clamp
the ball bearing in place.
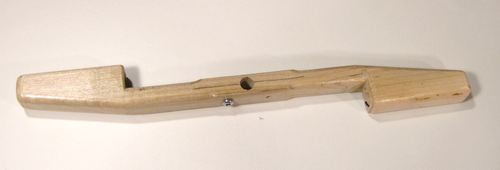
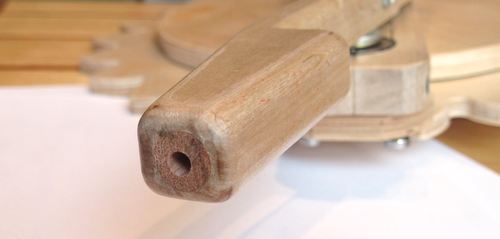
This odd shaped piece of wood is the pen holder. The pens are inserted into the pockets on either
side from the center. Once the device spins, centrifugal force holds the pens in place.
Ideally, the holes to hold the pen would have been drilled from the center, but there was no
way to reach that with a drill. So I drilled the holes through from the outside in, and then
glued a piece of 1/2" doweling into the end of the holes. After that, I drilled another
smaller hole through the plugs so that if the pen became stuck in the holder, I would still
be able to push them back out through the smaller hole.
I finished it off by mounting a large drawer handle
to hold the apparatus by. Its important to be able to get a good grip on the device
when cranking it vigorously.
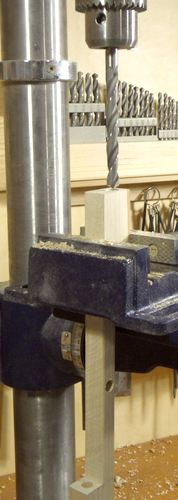
I was hoping that this device would be able to bring long unused ball point pens back
from the dead, but it didn't work. I tried mounting the pen holder in my drill press
and spun it up to 3000 rpm, but even that couldn't revive some pens. It did howerver
cause one of the pens that use more liquid ink to pop a leak at the front and drain
all the ink out of it.
It also does quite a number on felt pens, though, unfortunately, most of the ink just
gets transferred into the pen cap.
 Sometimes, if a pen stutters, you can get it going again by shaking it. But
sometimes it seems to take a lot of shaking.
So I figured, what if I could shake it really really hard?
What if I built a centrifuge to get the ink flowing again?
And so this project came about!
Sometimes, if a pen stutters, you can get it going again by shaking it. But
sometimes it seems to take a lot of shaking.
So I figured, what if I could shake it really really hard?
What if I built a centrifuge to get the ink flowing again?
And so this project came about!
 Using my
 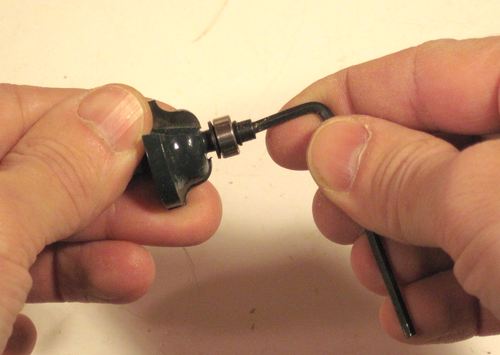 You can buy 3/8" outer diameter ball bearings as replacement router bit guide bearings.
As it is though, I have two identical router bit sets. Most of the bits I
never use, and when I do use them, it's usually with a fence or some
You can buy 3/8" outer diameter ball bearings as replacement router bit guide bearings.
As it is though, I have two identical router bit sets. Most of the bits I
never use, and when I do use them, it's usually with a fence or some
 The lantern gear itself is a pretty straightforward layout. But seeing that I already
had to make a printout for the big gear template, I printed the layout for
the pantern gear as well.
The lantern gear itself is a pretty straightforward layout. But seeing that I already
had to make a printout for the big gear template, I printed the layout for
the pantern gear as well.
 The big gear was large enough that it took four pages to print it. I glued these
together with some paper glue before gluing it onto the wood. The grid lines in
combination with the diagonal grid lines makes it easy to align the sheets of a
printout very accurately.
The big gear was large enough that it took four pages to print it. I glued these
together with some paper glue before gluing it onto the wood. The grid lines in
combination with the diagonal grid lines makes it easy to align the sheets of a
printout very accurately.
 The inside corners of my cycloid gear form 3/8" diameter arcs that match the ball bearings.
Its easiest to just drill these out with a 3/8" Forstner bit.
The inside corners of my cycloid gear form 3/8" diameter arcs that match the ball bearings.
Its easiest to just drill these out with a 3/8" Forstner bit.
 After drilling out the corners, cutting the teeth is fairly quick on the bandsaw.
With a good blade, and a a bit of patience, it's possible to follow a line very accurately.
With the templates produced by the gear template generator, it's best to cut away
half the printed line.
After drilling out the corners, cutting the teeth is fairly quick on the bandsaw.
With a good blade, and a a bit of patience, it's possible to follow a line very accurately.
With the templates produced by the gear template generator, it's best to cut away
half the printed line.
 I wanted to test the
big gear against the three tooth lantern gear before removing the paper template,
just to be safe. I figured if I had to trim some material off the teeth, I'd still
want to see the remnants of the printed lines on the template as a guide. But
the gears fit with a bit of slack, so trimming was unnecessary.
I wanted to test the
big gear against the three tooth lantern gear before removing the paper template,
just to be safe. I figured if I had to trim some material off the teeth, I'd still
want to see the remnants of the printed lines on the template as a guide. But
the gears fit with a bit of slack, so trimming was unnecessary.
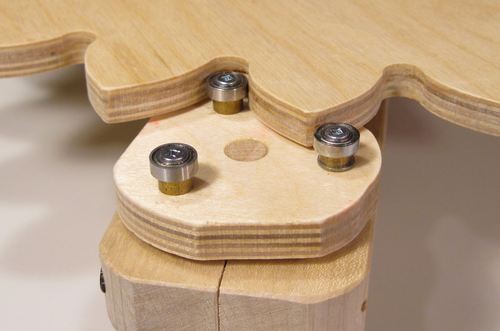 Here's a close-up of the ball bearings meshing with the main gear.
 I mounted a knob on the face of the large gear for cranking
the mechanism with. The knob straight on the gear as a crank works well - I'd used that
approach on my
I mounted a knob on the face of the large gear for cranking
the mechanism with. The knob straight on the gear as a crank works well - I'd used that
approach on my 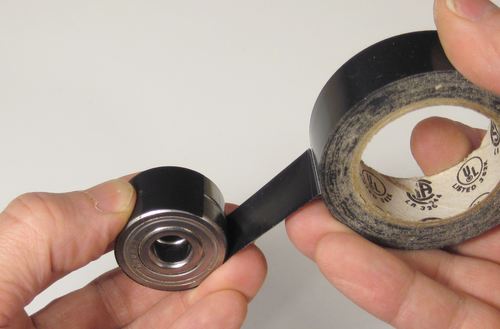 The teeth of the big gear reach all the way to the center of the latnern gear, so it wasn't
possible to have a shaft going through the middle of the lantern gear. That meant that I
could only have bearings on one side, and that the bearings were fairly critical.
The teeth of the big gear reach all the way to the center of the latnern gear, so it wasn't
possible to have a shaft going through the middle of the lantern gear. That meant that I
could only have bearings on one side, and that the bearings were fairly critical.
 I also had to wrap one turn of tape around my 3/8" dowel to make it fit tightly inside
the 10 mm hole of the bearings.
I also had to wrap one turn of tape around my 3/8" dowel to make it fit tightly inside
the 10 mm hole of the bearings.
 I cut a few slots around the 1 1/4" hole and added a screw to flex the wood to clamp
the ball bearing in place.
I cut a few slots around the 1 1/4" hole and added a screw to flex the wood to clamp
the ball bearing in place.
 This odd shaped piece of wood is the pen holder. The pens are inserted into the pockets on either
side from the center. Once the device spins, centrifugal force holds the pens in place.
This odd shaped piece of wood is the pen holder. The pens are inserted into the pockets on either
side from the center. Once the device spins, centrifugal force holds the pens in place.
 I finished it off by mounting a large
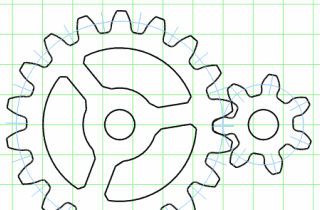
 Roger Mill's pen shaker
 Another silly and
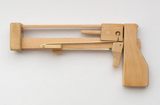 Jenga pistol
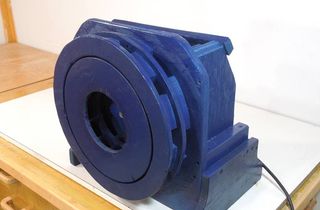 Building an air raid siren
 how to make gears
 Wood geared baby soothing machine