 Having had success with my
baby rocking machine, I had another idea for a baby calming machine.
Having had success with my
baby rocking machine, I had another idea for a baby calming machine.
Having had success with my
baby rocking machine, I had another idea for a baby calming machine.
Our baby Harriet really likes car rides and stroller rides, so I was thinking of a machine to simulate that. Ideally, with some slow turning bumpy cams to make for irregular motion. My next thought was to make something that slowly pulls the stroller across a bumpy lawn, and from that, figured, why not some sort of motorized carriage to drive the baby in circles on the lawn?
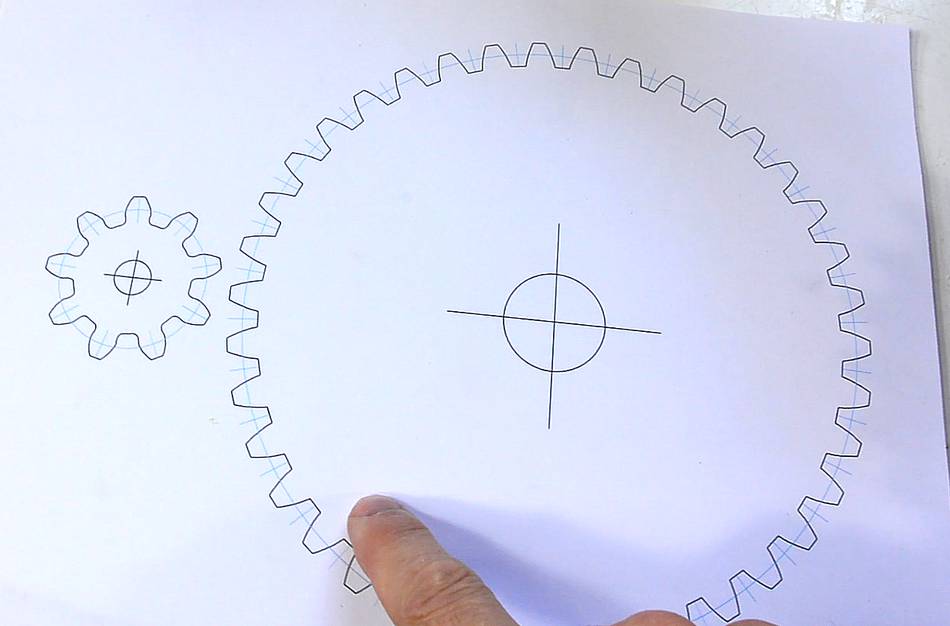
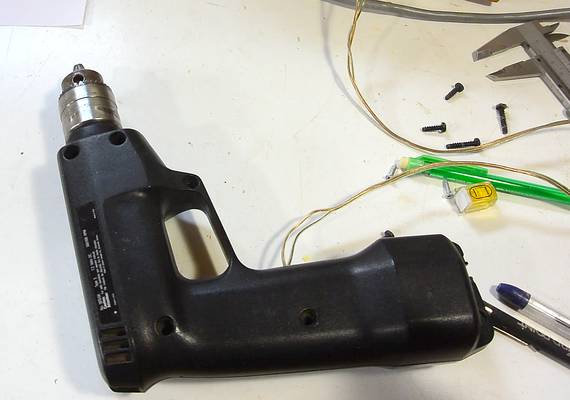
A windshield wiper motor might be ideal for that, but I didn't have one at hand. My next idea was to use an old cordless drill (batteries long expired) and gear it down with wooden gears. Here, my design for the final reduction to the wheels (with my gear program, of course).
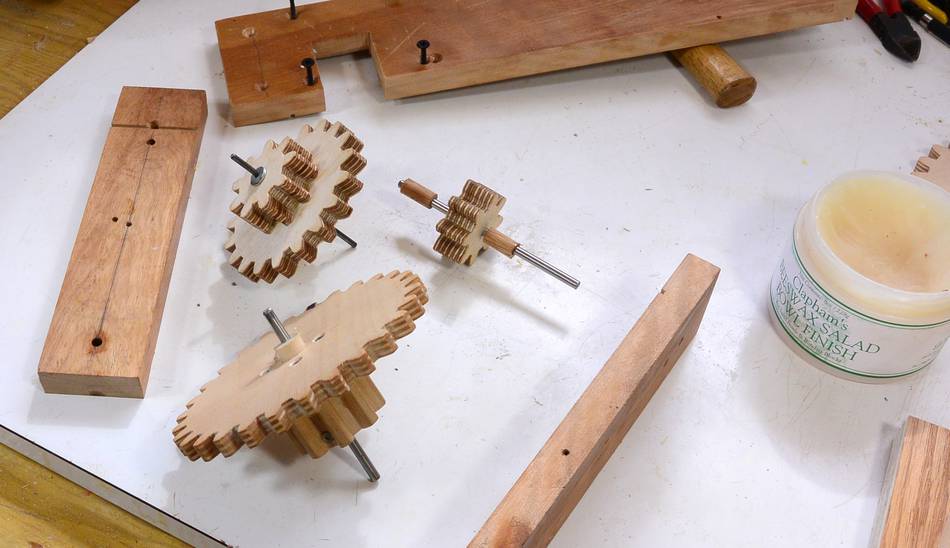
 But then it occurred to me that I could just reuse some gears I made earlier.
At left, the gear pair from an earlier attempt at
motorizing the apple grinder,
and at right, my 1:12 reduction clock gears that I built
as a demonstration for gear ratio calculations.
But then it occurred to me that I could just reuse some gears I made earlier.
At left, the gear pair from an earlier attempt at
motorizing the apple grinder,
and at right, my 1:12 reduction clock gears that I built
as a demonstration for gear ratio calculations.
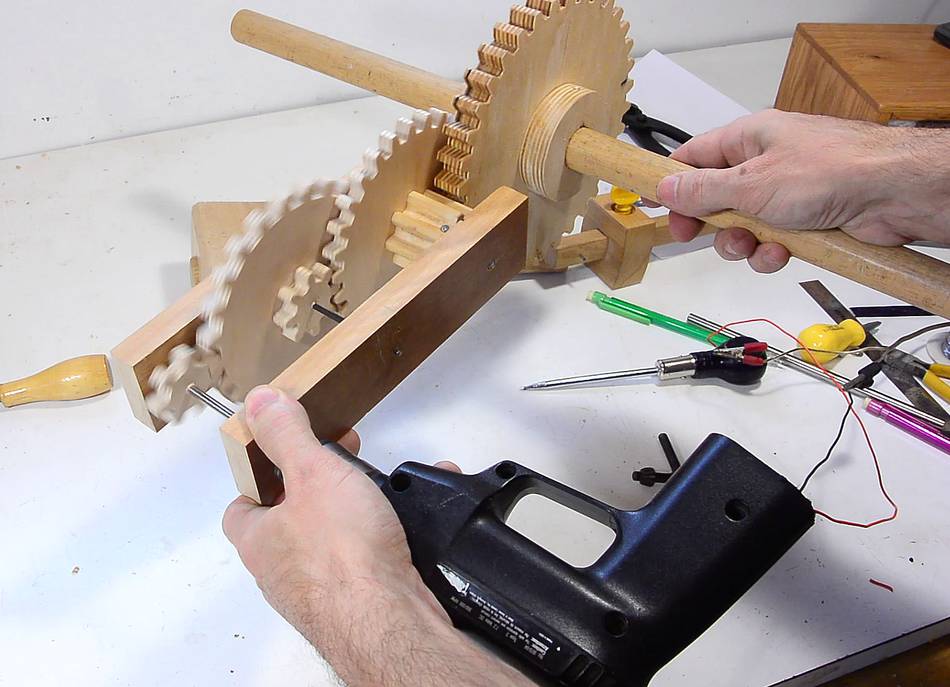
 Putting those gears together into a gear train. It's more reduction
than ideal, but I'll stick with those for now.
Putting those gears together into a gear train. It's more reduction
than ideal, but I'll stick with those for now.
The gear train squeaked a little, so I oiled where the shafts turn in the wood until the squeak stopped.
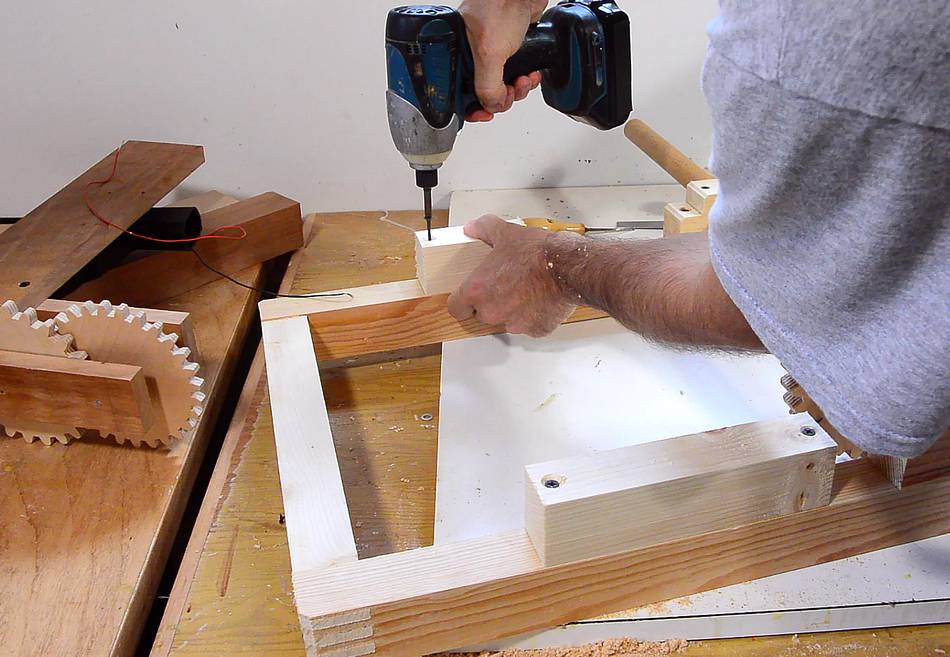
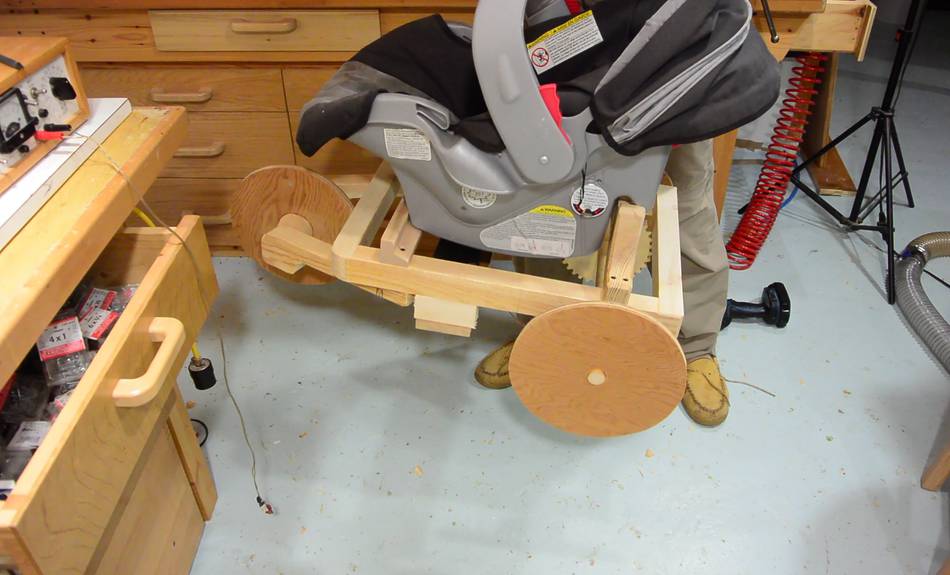
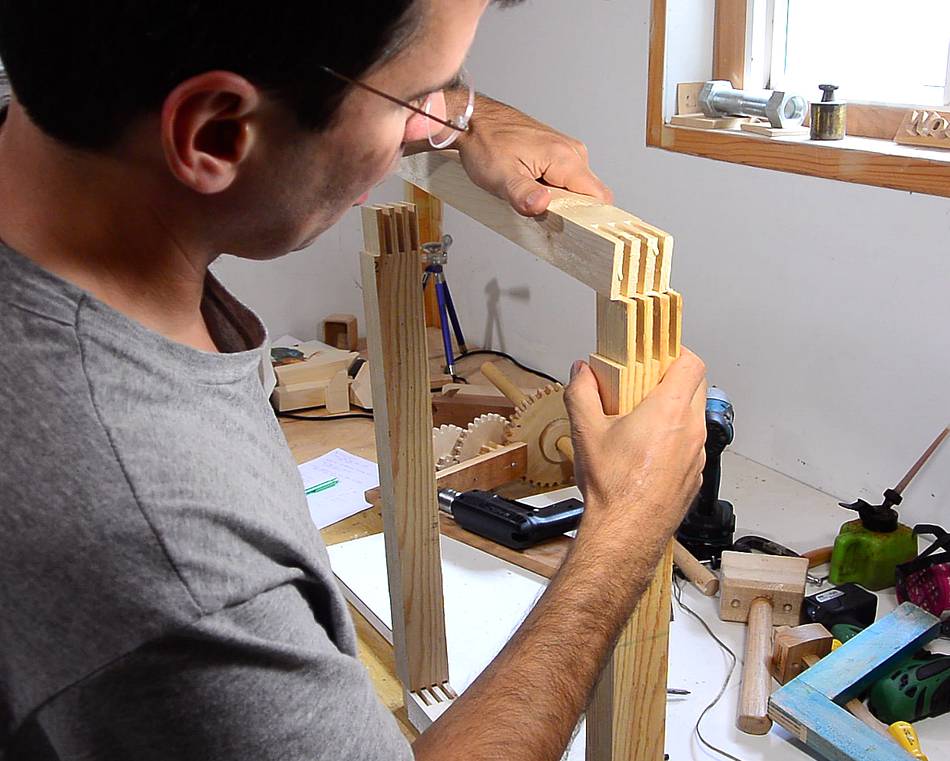 Having worked out the gear train, I built a wooden frame to use as a chassis
for my baby driving machine.
Having worked out the gear train, I built a wooden frame to use as a chassis
for my baby driving machine.
I used my box joint jig to make 1/4" finger joints for the corners.
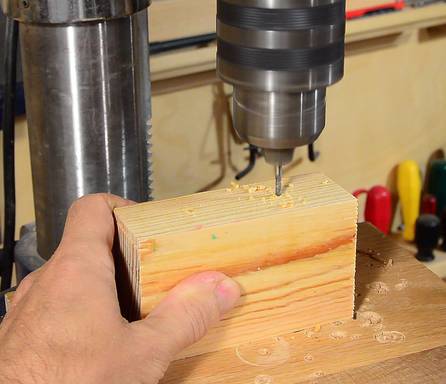
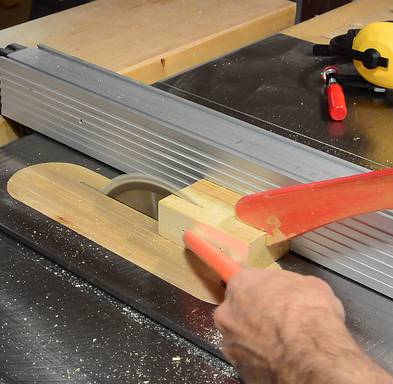
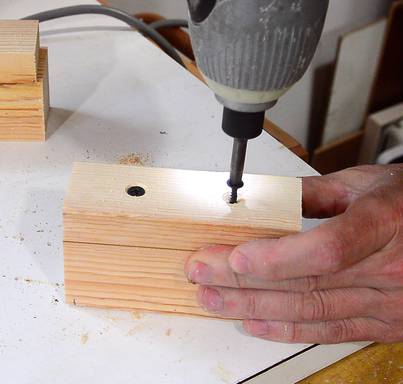
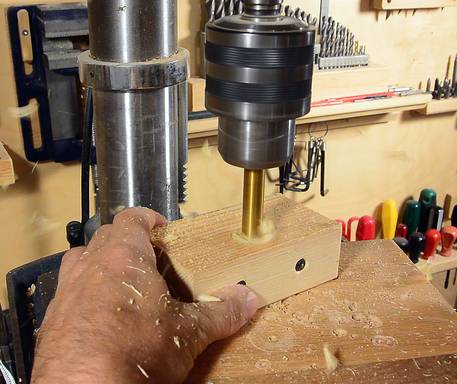
I made some wooden pillow blocks for the main axle bearings, much like I did for the apple grinder. The way to make sure the holes line up is to start with a solid block of wood, drill pilot holes for the screws, then cut the block apart where the hole is supposed to go, screw it back together, and only then drill the main bearing hole.
 I cut away part of the pillow blocks to make it easier to screw them to
the frame of the machine.
I cut away part of the pillow blocks to make it easier to screw them to
the frame of the machine.
 I added some spacer blocks to the bottom of the frame for mounting the gear
train to. That way the gears are low enough not to protrude out the top
of the frame.
I added some spacer blocks to the bottom of the frame for mounting the gear
train to. That way the gears are low enough not to protrude out the top
of the frame.
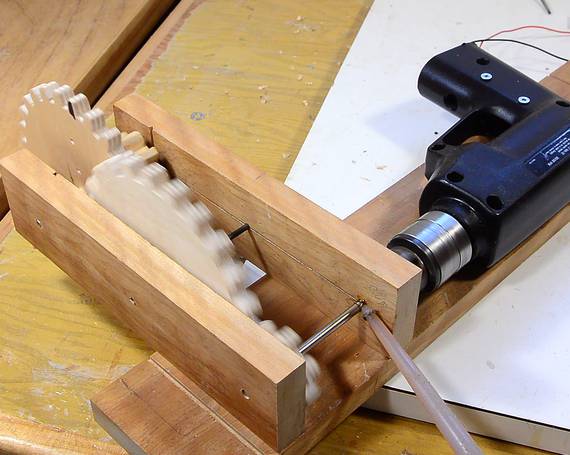
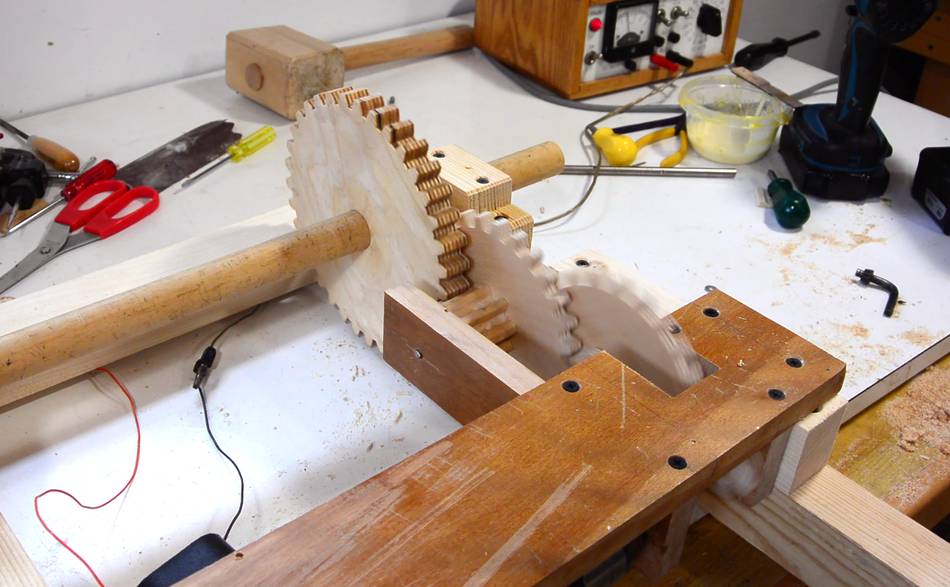 Testing the mounted gear train. The cordless drill is powered by a
benchtop power supply.
Testing the mounted gear train. The cordless drill is powered by a
benchtop power supply.
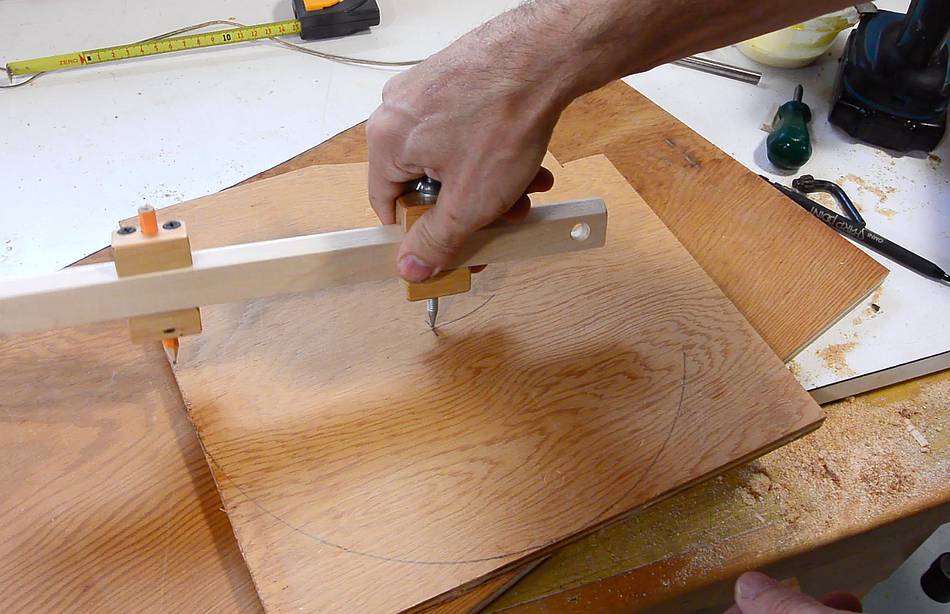 Then it was time to make some wheels. Here using my
beam compass
to draw circles on some scraps of plywood.
Then it was time to make some wheels. Here using my
beam compass
to draw circles on some scraps of plywood.
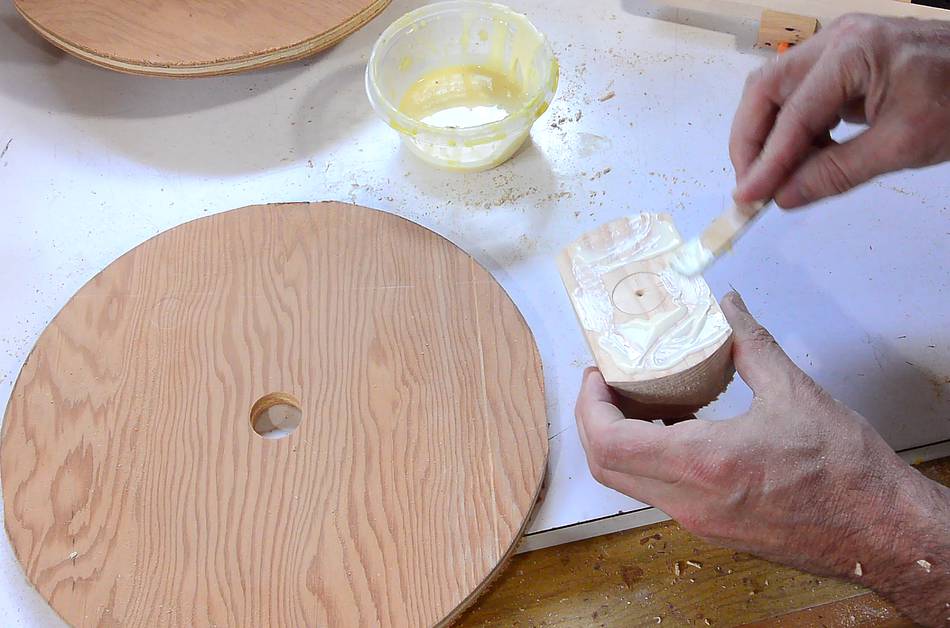 Then adding some blocks where the hole is in order to mount the wheels
to the main axle a little better. I glued these on before drilling the
hole through the blocks. That way I didn't have to worry about slight
hole misalignments.
Then adding some blocks where the hole is in order to mount the wheels
to the main axle a little better. I glued these on before drilling the
hole through the blocks. That way I didn't have to worry about slight
hole misalignments.
 I also made a front wheel (this one with flanges on both sides)
and glued it onto a 1/2" dowel
I also made a front wheel (this one with flanges on both sides)
and glued it onto a 1/2" dowel
 I made two wooden arms to extend out the front and hold the front axle.
The axle spins in slightly larger holes in the arms.
I made two wooden arms to extend out the front and hold the front axle.
The axle spins in slightly larger holes in the arms.
 First test. Moving very slowly, but it works.
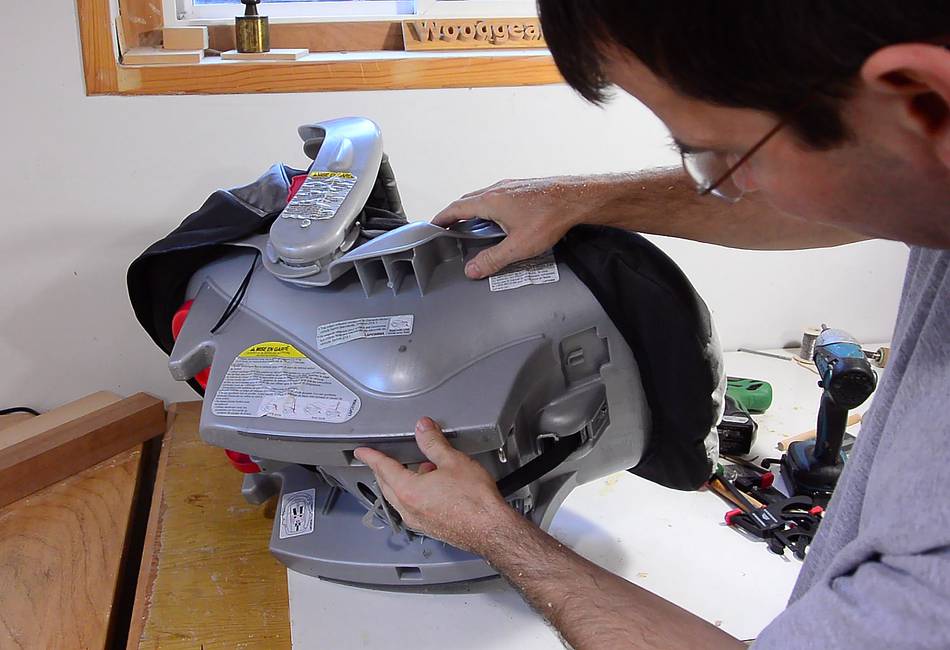 I figured the best option for a seat was to use an infant car seat.
Those should be fairly safe.
I figured the best option for a seat was to use an infant car seat.
Those should be fairly safe.
 I made some wooden rails to interlock with the car seat's mounting points.
This rail has an L-shaped profile, with two dowels to engage with the metal hooks
on the bottom of the seat.
I made some wooden rails to interlock with the car seat's mounting points.
This rail has an L-shaped profile, with two dowels to engage with the metal hooks
on the bottom of the seat.
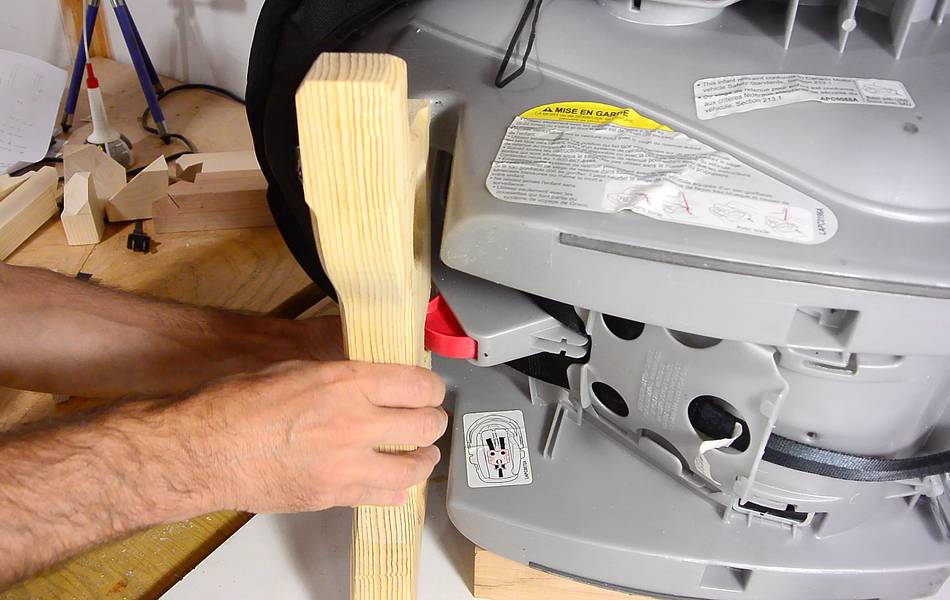 A larger bar on the back fits the seat's supports and the red hook for locking it in.
 Testing the interlock. With the seat locked in, I can lift the whole cart with it.
But pulling the seat's release handle releases it from the cart, front and back.
Testing the interlock. With the seat locked in, I can lift the whole cart with it.
But pulling the seat's release handle releases it from the cart, front and back.
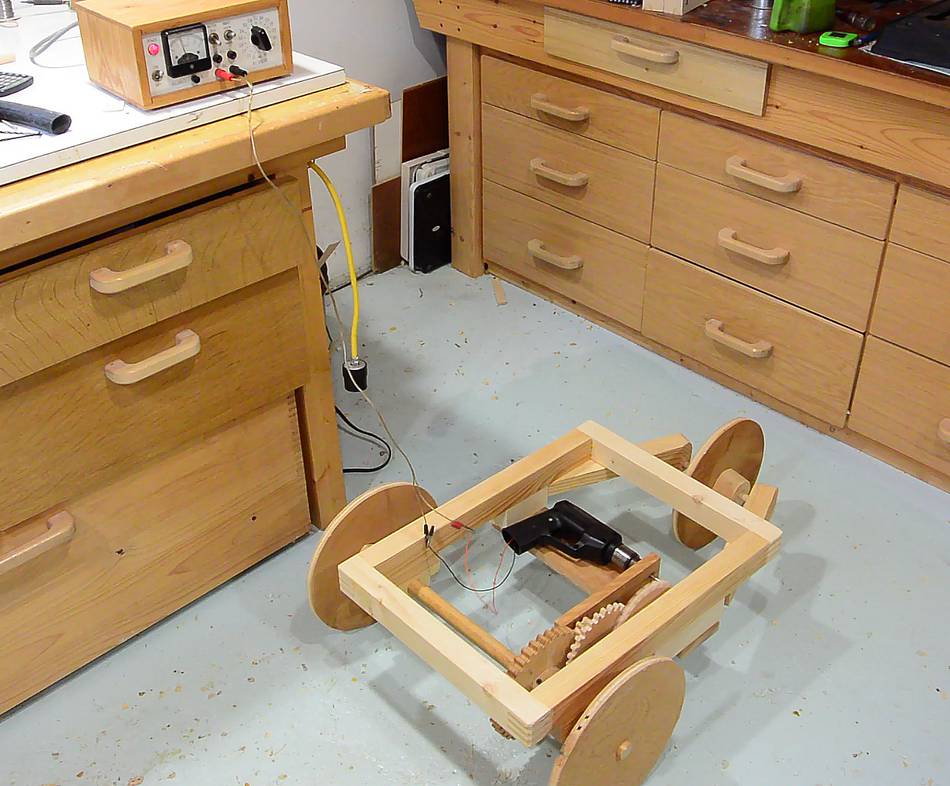
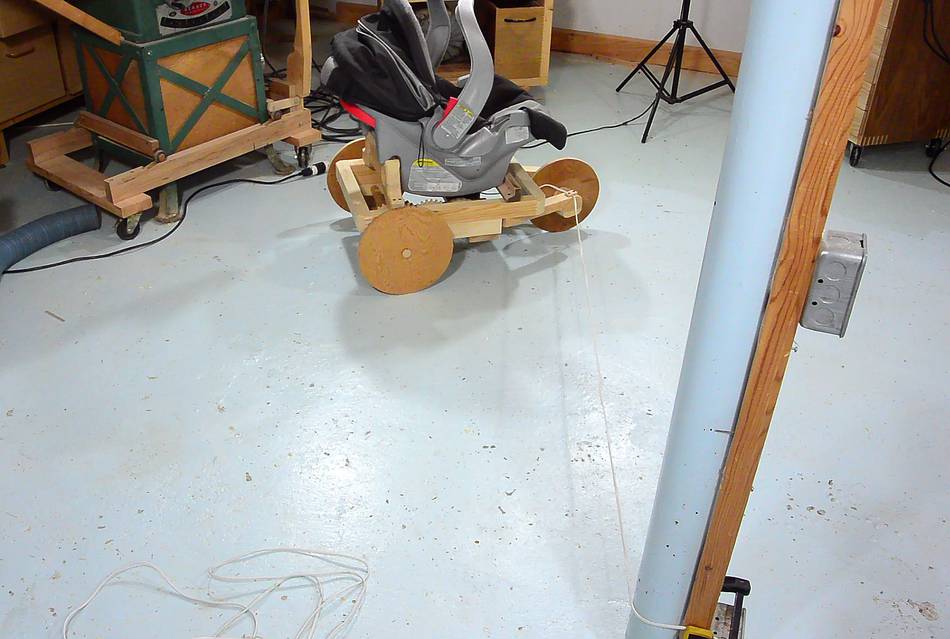 My plan is to run the machine off a long cord for power and attach the
cord to a stake in the middle of the lawn. Tension in the power cord will
guide the machine in circles. Here testing it with the cord around
the pillar in the middle of my shop.
My plan is to run the machine off a long cord for power and attach the
cord to a stake in the middle of the lawn. Tension in the power cord will
guide the machine in circles. Here testing it with the cord around
the pillar in the middle of my shop.
I had to run the drill fairly fast to get about the speed I wanted. That made the machine too loud. Time to change the gear ratio.
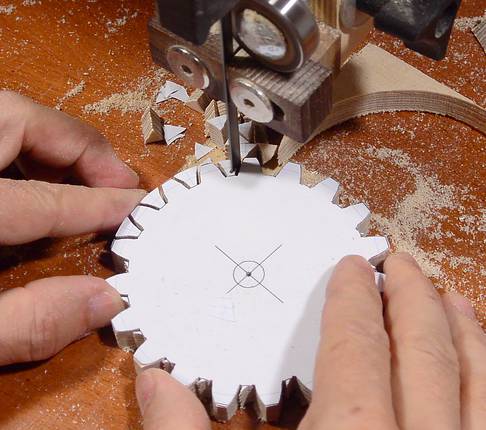 So I made new gears for the first two stages. I also smeared some beeswax
salad bowl finish onto the gear teeth. This finish is quite greasy.
The gears run noticeably smoother with it. I could have used axle grease
instead, but that grease is very messy.
So I made new gears for the first two stages. I also smeared some beeswax
salad bowl finish onto the gear teeth. This finish is quite greasy.
The gears run noticeably smoother with it. I could have used axle grease
instead, but that grease is very messy.
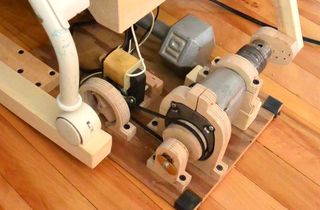
 Modified gears installed. I was able to put the axles a bit closer together.
Very satisfying spinning these gears!
Modified gears installed. I was able to put the axles a bit closer together.
Very satisfying spinning these gears!
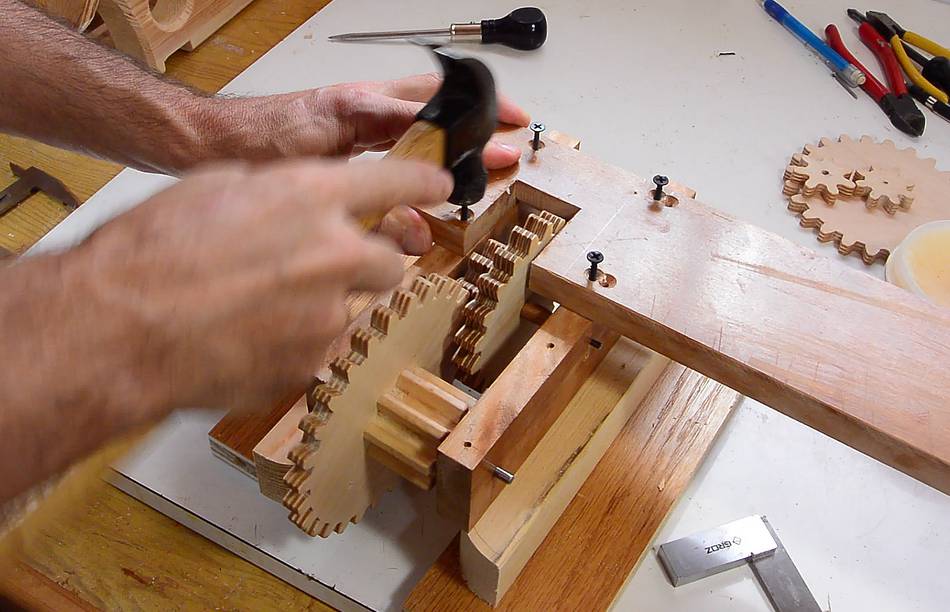 Marking pilot hole locations for the modified gears. I like to transfer the
hole locations by placing screws in the holes of the piece that screws to it,
then hitting the screws with a hammer. That leaves a divot where the pilot
holes need to be drilled.
Marking pilot hole locations for the modified gears. I like to transfer the
hole locations by placing screws in the holes of the piece that screws to it,
then hitting the screws with a hammer. That leaves a divot where the pilot
holes need to be drilled.
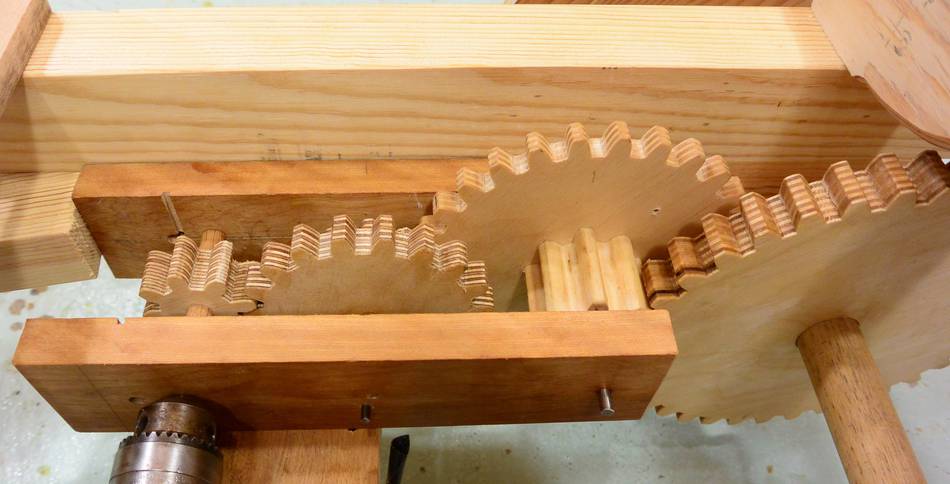 Improved gear train mounted.
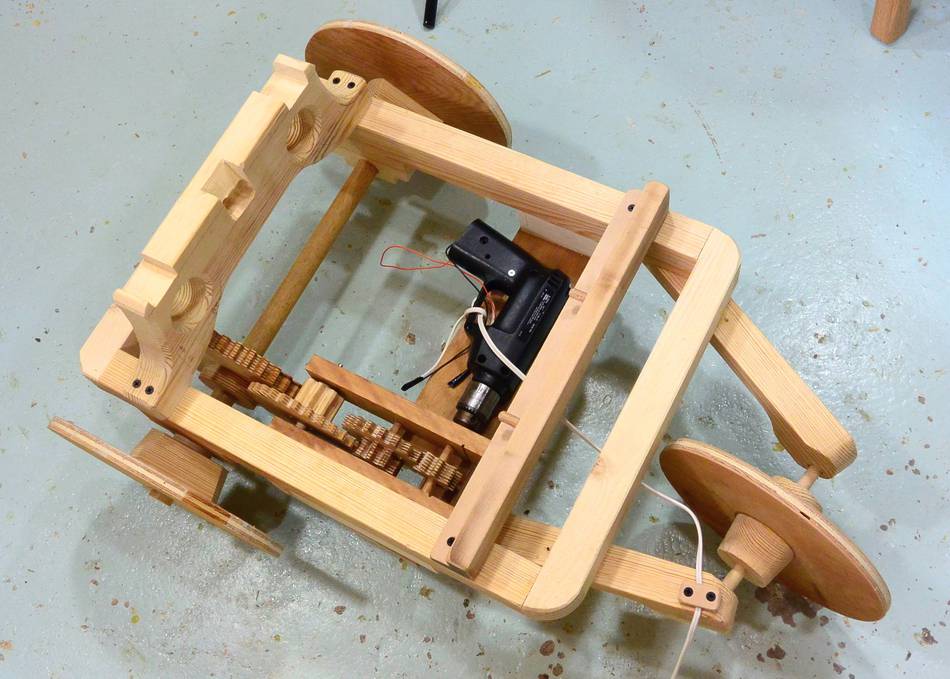 I also changed the front wheel mount to be at an angle. I figure if the machine is
already biased towards driving in a curve, it will take less tension on
the cord to steer it into a smaller circle.
I also changed the front wheel mount to be at an angle. I figure if the machine is
already biased towards driving in a curve, it will take less tension on
the cord to steer it into a smaller circle.

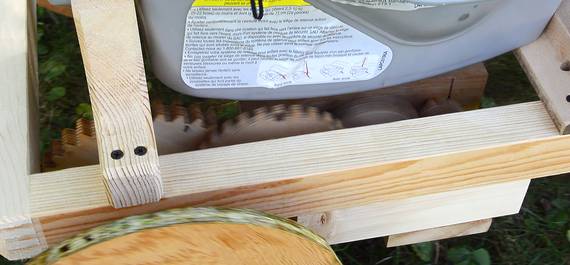 Testing it in the yard, it drove in a circle quite nicely, winding the
cord around the post and spiralling slowly inwards.
That way the wheels won't wear circular grooves into the lawn.
Testing it in the yard, it drove in a circle quite nicely, winding the
cord around the post and spiralling slowly inwards.
That way the wheels won't wear circular grooves into the lawn.
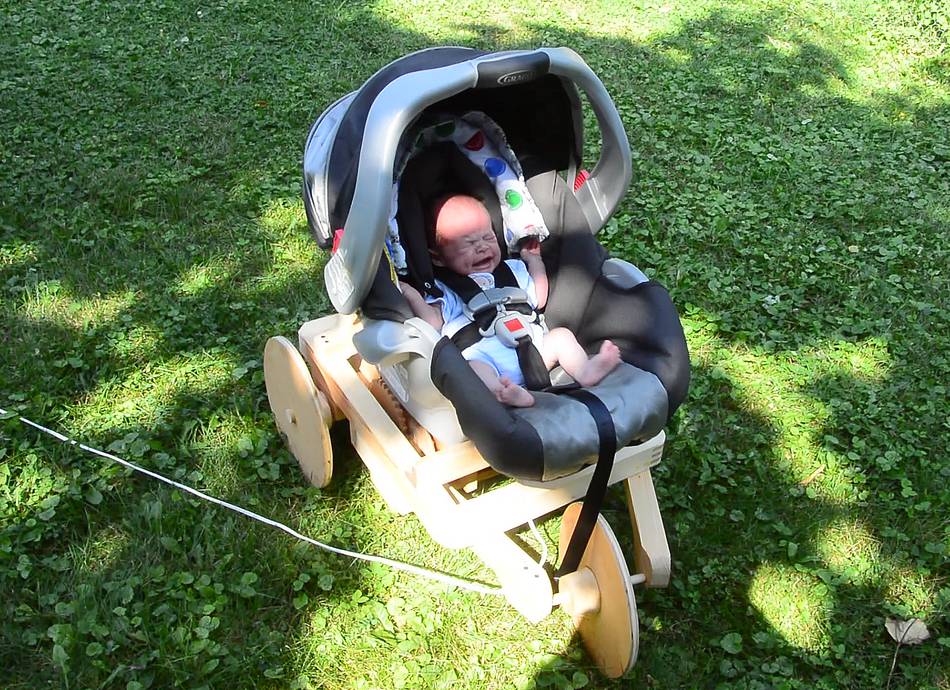
 But testing it with baby Harriet did not go as well as expected.
It turns out, she completely hated it! Riding slowly on this rickety machine, high pitched screaming at the top of her lungs, something about it was just really funny. You will have to watch the video to appreciate it! After about 20 seconds, we turned off the machine (which immediately calmed her) and Rachel took her out to hold her.
Harriet usually likes motion, but I wonder if the whine of the drill (quite a different sound from the baby rocking machine or a car) may have contributed to her hating it. This will require further experiments at some point.
 Baby rocking machine
 Parallelogram baby gate
 Captive ring baby rattle
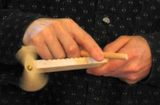 Wooden toys
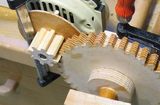 Motorizing the apple grinder
 Automatic hopper fed catapult
 Wiper motor powered forklift toy
 Wood gear wear test
 Kid's wagon
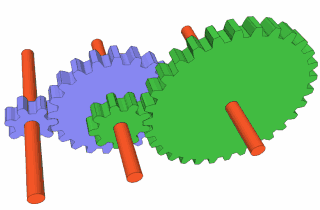 Calculating gear ratios
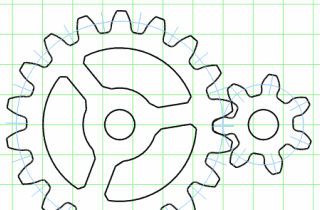 Gear generator program