Mobile tool stand
I built my slot mortising machine
so it could be used as a benchtop tool. But when I tried it for the first time
on my workbench, I found that in addition to losing space,
I ended up with wood chips all over my work area.
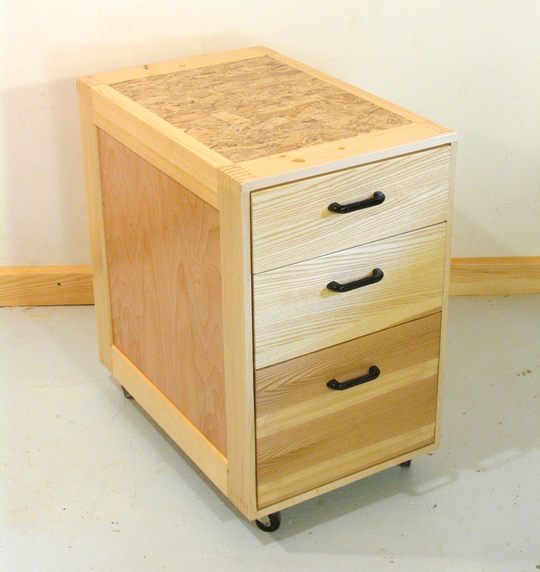
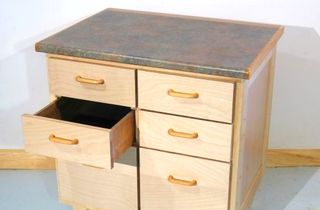
The next time I used my slot mortiser, I put it on top of a small dresser that
I temporarily hauled into my workshop. I found that the dresser
was just about the right size, so I set out to build a
tool stand of about the same size, complete with wheels.
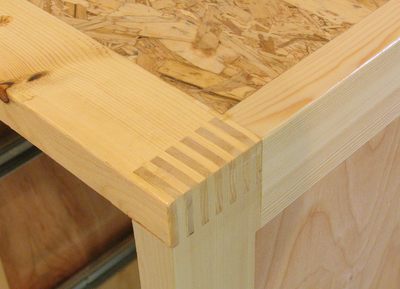 I used tight 1/4" finger joints for the corners of the frame. That way,
I could have the entire front of the box be drawers, without having to worry about having
any sort of diagonal bracing. This enabled me to maximize how much of the space in the tool
stand could be used for drawers. I cut these joints with my screw advance
box joint jig
I used tight 1/4" finger joints for the corners of the frame. That way,
I could have the entire front of the box be drawers, without having to worry about having
any sort of diagonal bracing. This enabled me to maximize how much of the space in the tool
stand could be used for drawers. I cut these joints with my screw advance
box joint jig
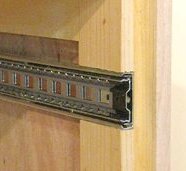 I used full extension drawer slides to guide the drawers. These are kind of expensive, but
I had already been experimenting with
ball bearing slides when I built the slot mortising
machine, so I was curious about actually using them for drawers.
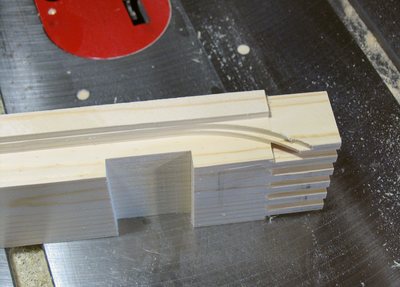
These slides typically are about 1/2" (13 mm)
thick. I decided to inset them about 11 mm into the sides of the case, so that I could put
larger drawers in the case. I already had the 1/4" (6 mm) box joint cutters in my saw from
cutting the corner joints, and seeing that the slots needed to be about 45 mm wide,
I had to cut these with multiple
passes anyway. I clamped two of the vertical pieces together at a time while making
the cuts, so effectively, I only had to do two pieces instead of four.
I used full extension drawer slides to guide the drawers. These are kind of expensive, but
I had already been experimenting with
ball bearing slides when I built the slot mortising
machine, so I was curious about actually using them for drawers.
These slides typically are about 1/2" (13 mm)
thick. I decided to inset them about 11 mm into the sides of the case, so that I could put
larger drawers in the case. I already had the 1/4" (6 mm) box joint cutters in my saw from
cutting the corner joints, and seeing that the slots needed to be about 45 mm wide,
I had to cut these with multiple
passes anyway. I clamped two of the vertical pieces together at a time while making
the cuts, so effectively, I only had to do two pieces instead of four.
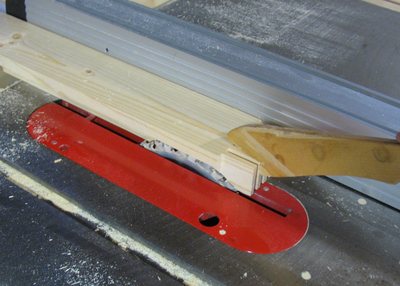 For the front side, I also cut a rabbet on the insides of the pieces, again with the
box joint cutter that I already had in the saw. The idea was that the drawer fronts
would fit into this rabbet. If I had just made the drawers the width of the opening,
the ends of the drawer slides would have still been visible with the drawers closed,
seeing that they are inset into the frame.
For the front side, I also cut a rabbet on the insides of the pieces, again with the
box joint cutter that I already had in the saw. The idea was that the drawer fronts
would fit into this rabbet. If I had just made the drawers the width of the opening,
the ends of the drawer slides would have still been visible with the drawers closed,
seeing that they are inset into the frame.
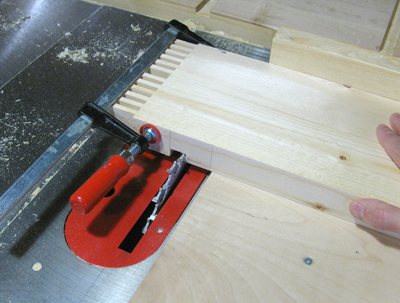
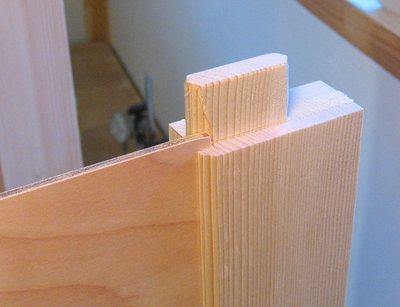
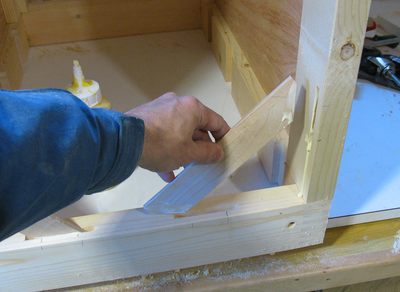
 This photo shows the rabbet more clearly. I didn't cut it all the way to the end, because
I didn't want to cut away too much of the joint in the corner. If I cut away part of the
fingers with this rabbet cut, I'd have gaps once the joint was assembled.
This photo shows the rabbet more clearly. I didn't cut it all the way to the end, because
I didn't want to cut away too much of the joint in the corner. If I cut away part of the
fingers with this rabbet cut, I'd have gaps once the joint was assembled.
 After I cut the fingers on the ends, the dados for the drawer slides, and the rabbet on
the inside edge for the front, I assembled the two rectangular frames that form the
front and back of the box. I spread glue on a thin piece of wood, and used that to
apply glue to the space between the fingers of my corner joint.
After I cut the fingers on the ends, the dados for the drawer slides, and the rabbet on
the inside edge for the front, I assembled the two rectangular frames that form the
front and back of the box. I spread glue on a thin piece of wood, and used that to
apply glue to the space between the fingers of my corner joint.
 With the rectangular frames for the front and back of the case assembled, I cut mortises
near the corners of the assembled frame to join rails that go front to back between
the two rectangular frames.
With the rectangular frames for the front and back of the case assembled, I cut mortises
near the corners of the assembled frame to join rails that go front to back between
the two rectangular frames.
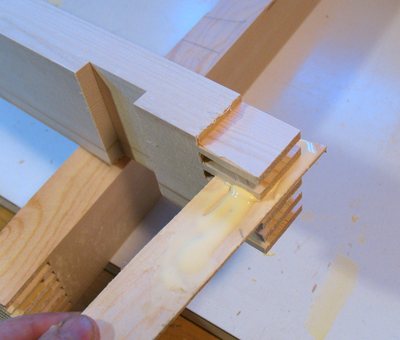
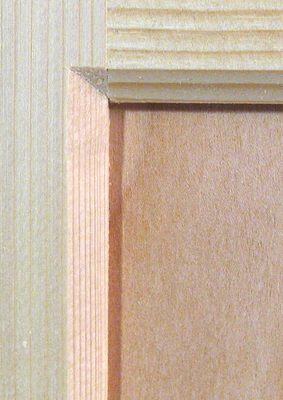
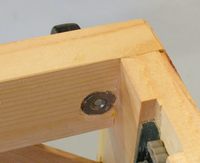
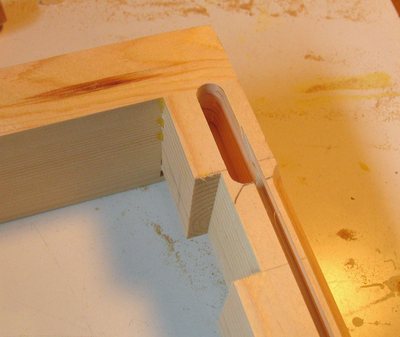 This photo shows the hole for the tenon, on the bottom corner.
If I was building it again, I would move the slot for the drawer slide further up (down
in the photo) so that it is further away from the mortise.
This photo shows the hole for the tenon, on the bottom corner.
If I was building it again, I would move the slot for the drawer slide further up (down
in the photo) so that it is further away from the mortise.
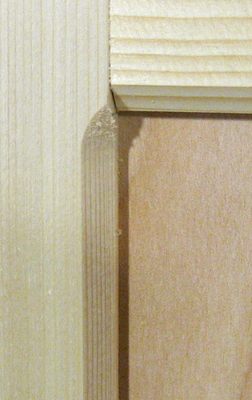
You can also see a narrow dado slot that I cut for the side panel.
Also noticeable is the 45-degree chamfer that I routed into the frame next to where the panel goes.
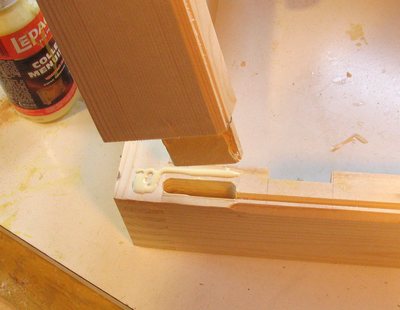 Inserting the frame rail into the end frame, with the glue already applied. The slot for
the panel, and the chamfer for around the panel is much more clearly visible in this photo.
Inserting the frame rail into the end frame, with the glue already applied. The slot for
the panel, and the chamfer for around the panel is much more clearly visible in this photo.
 After I glued the rails into the front frame, I glued the panel in place. Because the
panel is jut plywood, I didn't have to worry about crossgrain expansion and contraction
of the panel, and just glued it into the slots all around. That way, the panel helps keep the
stand rigid.
After I glued the rails into the front frame, I glued the panel in place. Because the
panel is jut plywood, I didn't have to worry about crossgrain expansion and contraction
of the panel, and just glued it into the slots all around. That way, the panel helps keep the
stand rigid.
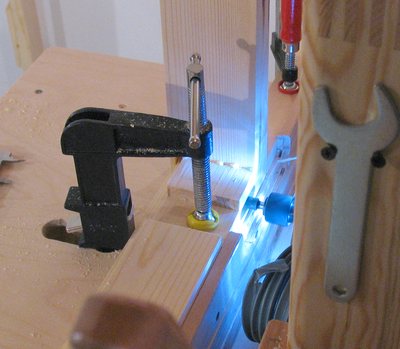
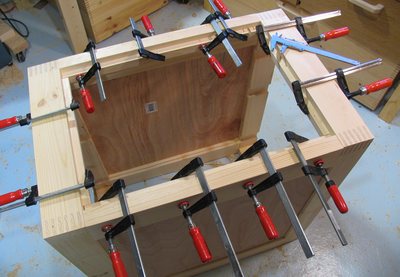
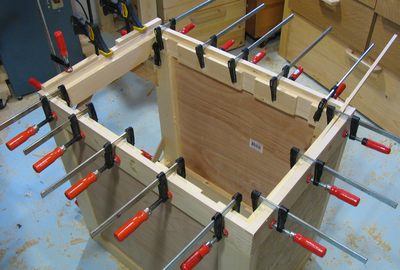
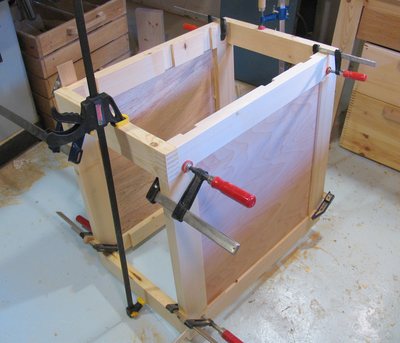 And finally, gluing on the back frame. I like to put clamps across my mortise and tenon
joints while gluing, hoping that squeezing them together while the glue dries makes the
joint tighter. I'm not sure if it helps any though.
And finally, gluing on the back frame. I like to put clamps across my mortise and tenon
joints while gluing, hoping that squeezing them together while the glue dries makes the
joint tighter. I'm not sure if it helps any though.
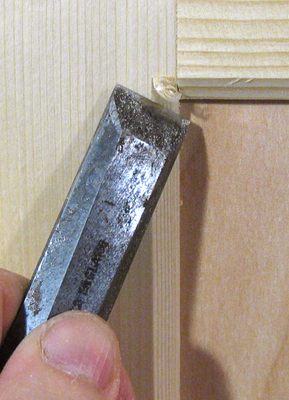
I routed a chamfer into the pieces surrounding the panel. But you can't route a square
corner with a round bit. But squaring the corner can be done relatively quickly
with just a few cuts with a chisel.
 For the top, I decided to insert a panel into the top. To give this panel something to rest
against, I glued a ledge to the inside of the frame. I cut the panel to the exact
size of the opening, so that it was touching all around when I glued it in.
For the top, I decided to insert a panel into the top. To give this panel something to rest
against, I glued a ledge to the inside of the frame. I cut the panel to the exact
size of the opening, so that it was touching all around when I glued it in.
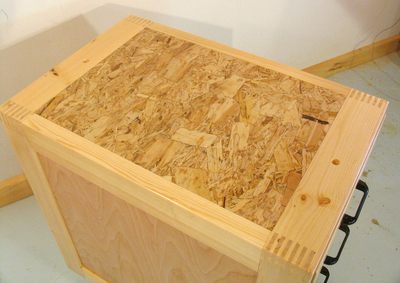 I made the panel out of a scrap piece of oriented strain board (OSB).
OSB, if sanded down a fair bit and with five
coats of varnish on it, makes a a nice and hard top surface. The biggest drawback to OSB
is that it takes an awful lot of sanding. If you do use OSB that way, make sure you have
a really coarse belt for your belt sander to do the initial flattening.
I also used OSB for the top of my
knock down student desk back in 1990. That surface has held up
very well over the years.
I made the panel out of a scrap piece of oriented strain board (OSB).
OSB, if sanded down a fair bit and with five
coats of varnish on it, makes a a nice and hard top surface. The biggest drawback to OSB
is that it takes an awful lot of sanding. If you do use OSB that way, make sure you have
a really coarse belt for your belt sander to do the initial flattening.
I also used OSB for the top of my
knock down student desk back in 1990. That surface has held up
very well over the years.
 With three sides made rigid by having panels glued in, and the back made rigid by the
tight finger joints in the corners, that left the square-ness
of the bottom as the weakest part of the stand. That said, reinforcing the corners
was probably unnecessary, but I reinforced them just for good measure.
With three sides made rigid by having panels glued in, and the back made rigid by the
tight finger joints in the corners, that left the square-ness
of the bottom as the weakest part of the stand. That said, reinforcing the corners
was probably unnecessary, but I reinforced them just for good measure.
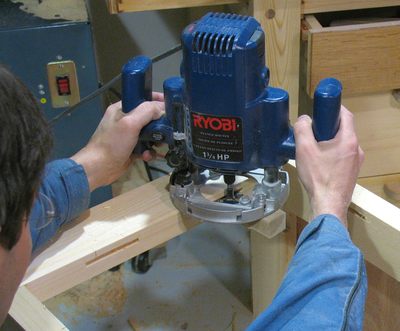
I used my router and a 7 mm wide T-slot bit to cut 1 cm deep mortises near the corners.
 I then made these corner splines out of 7 mm thick maple, and glued them into the mortises.
 For the wheels of this box, I used some casters that mount by a threaded rod through the wood,
rather than the usual flange with four screws type caster mounts. Not for any special reason,
just that these casters were on sale when I went to buy casters.
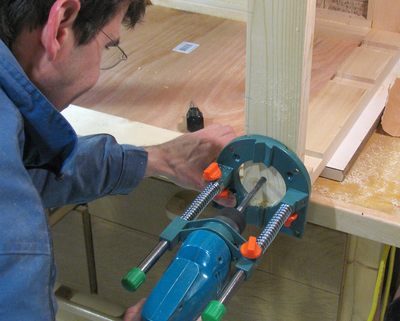
The box overall was too big to put in my drill press, so I used this nifty drilling jig that
I had just bought to make sure I got the holes square to the surface.
For the wheels of this box, I used some casters that mount by a threaded rod through the wood,
rather than the usual flange with four screws type caster mounts. Not for any special reason,
just that these casters were on sale when I went to buy casters.
The box overall was too big to put in my drill press, so I used this nifty drilling jig that
I had just bought to make sure I got the holes square to the surface.
I sometimes get asked where you can get that sort of jig. Search for "drill guide".
Or you could even build your own
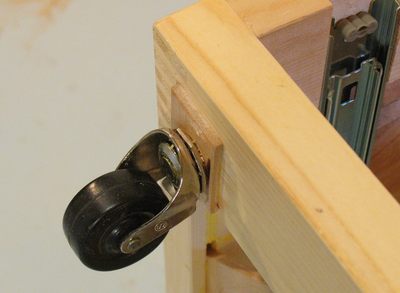
 I added a pad made of hardwood, glued on with the grain 90 degrees to the frame, just for
extra reinforcement. To hold the casters in place, I put a T-nut on the other side
of the wood. I pretty much had to use some sort of nut that went flush with the surface,
because I only had about two millimeters of clearance between the frame and the bottom
of the lowest drawer.
I added a pad made of hardwood, glued on with the grain 90 degrees to the frame, just for
extra reinforcement. To hold the casters in place, I put a T-nut on the other side
of the wood. I pretty much had to use some sort of nut that went flush with the surface,
because I only had about two millimeters of clearance between the frame and the bottom
of the lowest drawer.
 Finally, I added some hardwood trim to the front edge of the tool stand.
I don't have any edge clamps, but I only needed a little bit of pressure against the edge, and
I found that if I put a bar clamp all the way against the piece of trim, tightened it up
a little, and then twisted it sideways a bit, it held the trim in place with enough pressure. So I
didn't even bother with this trick this time.
Finally, I added some hardwood trim to the front edge of the tool stand.
I don't have any edge clamps, but I only needed a little bit of pressure against the edge, and
I found that if I put a bar clamp all the way against the piece of trim, tightened it up
a little, and then twisted it sideways a bit, it held the trim in place with enough pressure. So I
didn't even bother with this trick this time.
 I built this tool stand for my slot mortising machine.
But I needed some way to keep the machine from sliding around on this
stand. An obvious solution would have been to just screw the slot mortiser to the stand, but
I didn't want to bung up the top that way - especially because the stand ended up nice enough
that maybe someday it will become upstairs furniture. Another method would have been to
have some protrusion from either the stand or the mortising machine protrude into the other
part, but I didn't want to add any bumps to the top of the stand nor the bottom of
the machine.
I built this tool stand for my slot mortising machine.
But I needed some way to keep the machine from sliding around on this
stand. An obvious solution would have been to just screw the slot mortiser to the stand, but
I didn't want to bung up the top that way - especially because the stand ended up nice enough
that maybe someday it will become upstairs furniture. Another method would have been to
have some protrusion from either the stand or the mortising machine protrude into the other
part, but I didn't want to add any bumps to the top of the stand nor the bottom of
the machine.
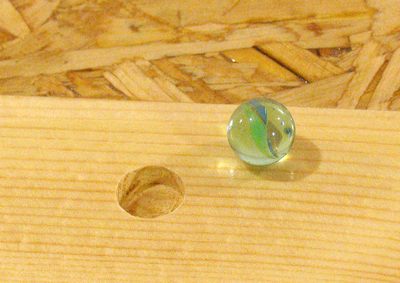
So instead, I drilled two shallow marble-sized holes into the top of the stand and the bottom
of the machine. With a marble placed into the holes on the stand, the mortiser, once aligned
with the marbles, is prevented from sliding around. And it's very satisfying, sliding the
mortiser into place and having it just click into place when its holes line up with the marbles.
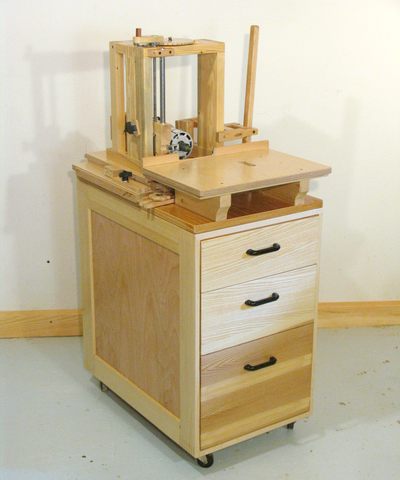 And finally, the finished stand, with the slot mortiser on it.
I made the stand the exact same size as the slot mortiser so that it would occupy a minimum
footprint when rolled away into a corner. If I was building it again though, I'd make it
slightly wider than the mortiser, seeing that there is always some part of the mortiser
that is sticking out beyond its base. So a wider stand really wouldn't add to the footprint much.
And finally, the finished stand, with the slot mortiser on it.
I made the stand the exact same size as the slot mortiser so that it would occupy a minimum
footprint when rolled away into a corner. If I was building it again though, I'd make it
slightly wider than the mortiser, seeing that there is always some part of the mortiser
that is sticking out beyond its base. So a wider stand really wouldn't add to the footprint much.
Next: Making the drawers for the tool stand
 Another mobile
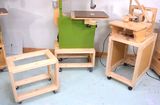 More tool stands
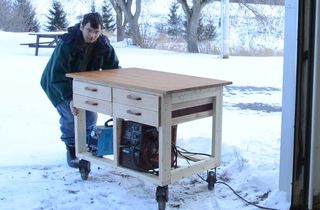 Workbench on wheels
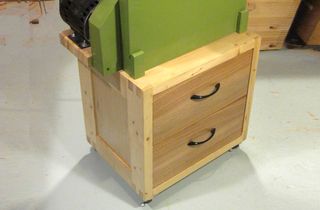 Mobile bandsaw stand
 Dresser
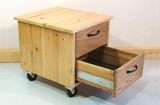 Planer stand
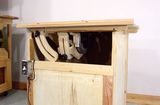 Homemade table saw stand
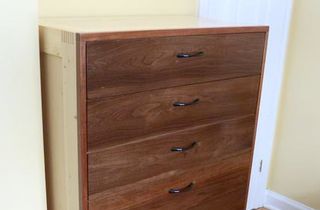 Seven drawer dressr build