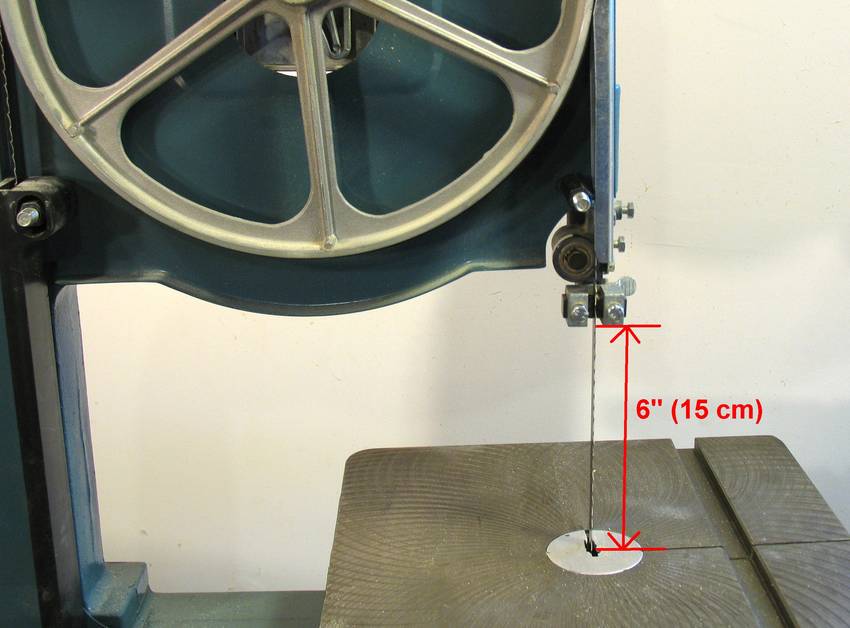
The problem with 14" cast iron framed bandsaws is that the upper blade guide can
only be raised 6" (15 cm) above the table. This really limits the saw in terms of resaw
capacity. A lot of people end up installing a "riser block kit", which is mounted between
the top and bottom half of the frame to raise the top half of the saw by 6", for a total of 12"
(30 cm) of maximum opening for resawing.
But riser block kits have their disadvantages. They tend to be costly, are difficult to
install, and they make the saw less rigid. This is especially true for the upper blade guide,
which ends up at the end of a metal rod twice as long as before.
Riser blocks are also a bit of an obstruction, as they are as wide as the mounting
flange of the upper part of the frame, and they extend that width to above the table's
surface. So, effectively, the horizontal distance between the blade
and the post on the left is reduced by about an inch.
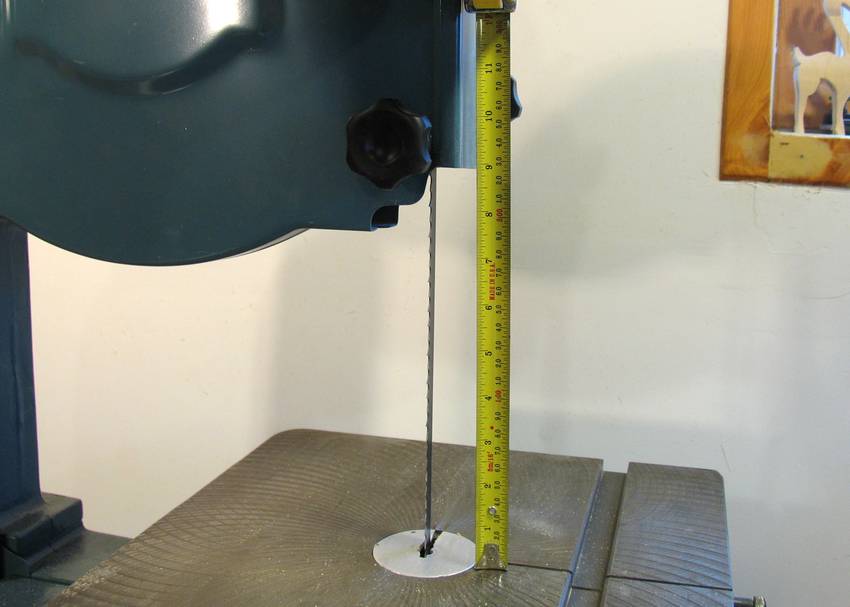
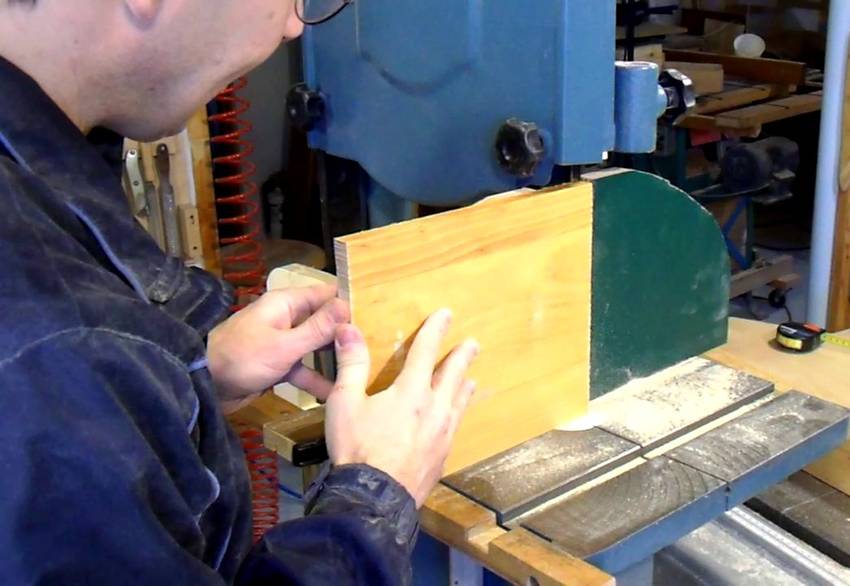
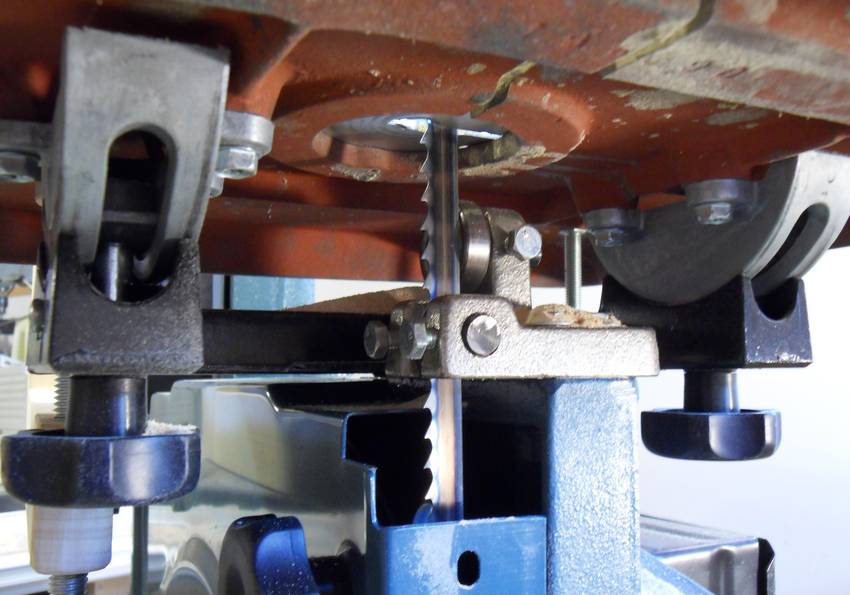
If we remove the upper blade guide, on this saw, there is over 8" (20 cm)
of blade exposed between the table and the top. I had previously experimented
with doing some resawing without a
top blade guide. That was before I
built my own bandsaw. The homemade blade guides on my homemade saw work quite
well, so I figured, why not try building a blade guide to mount further up
to use for resawing on my 14" saw?
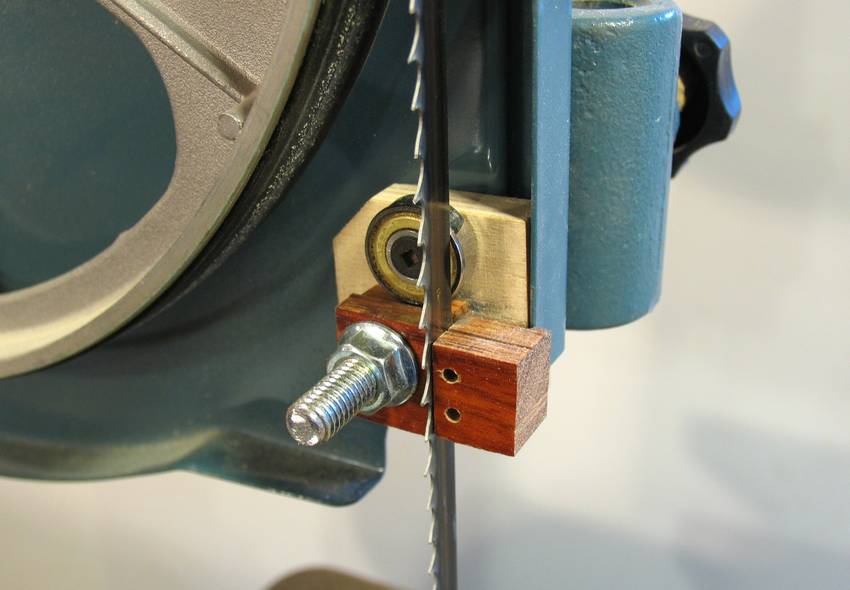
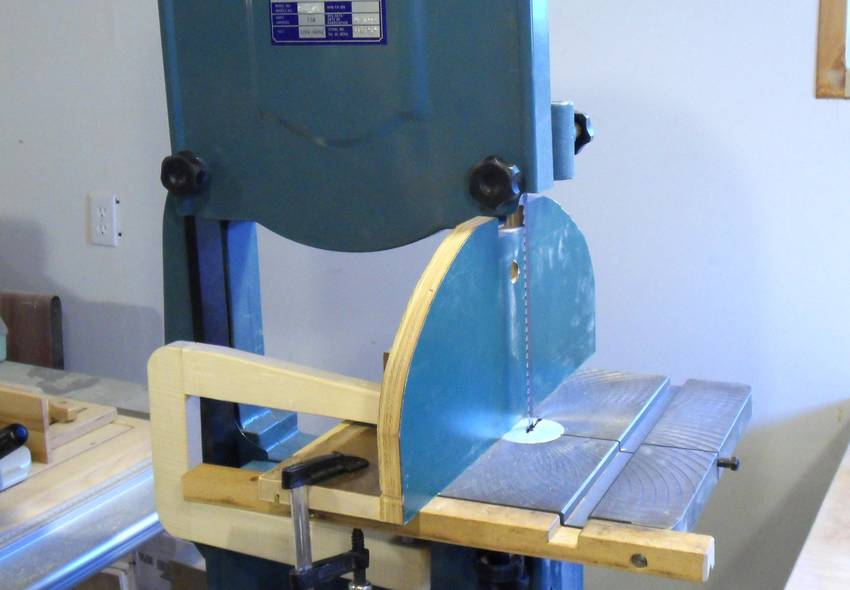
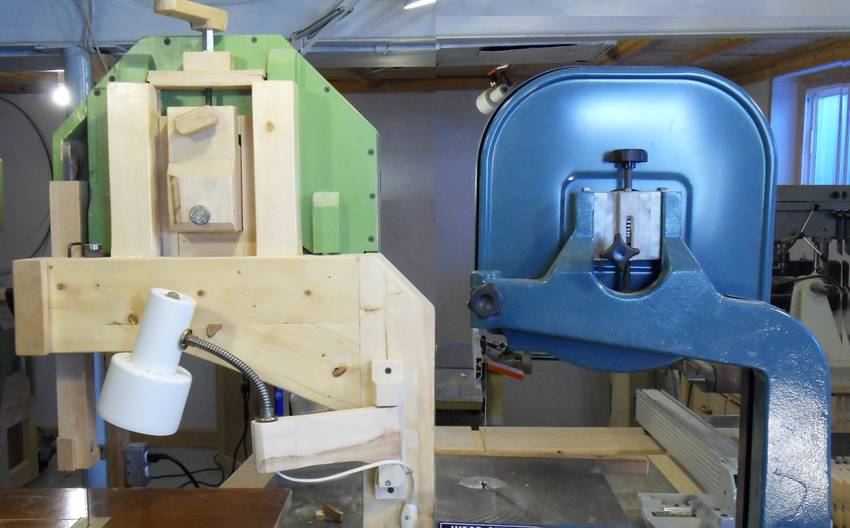
So here's my homemade upper blade guide. The blade guide is fixed in place (no adjustments).
The rationale is that this blade guide is only used when cutting really wide lumber with
a fairly wide blade. For anything else, I can use the adjustable blade guide that
the saw came with.
I removed the funny bolt and spacer that normally hold the top enclosure and replaced
it with a piece of threaded rod with a nut on it. The nut holds everything in place,
including the left guide block. Adjustments are made by
sliding everything in place, then tightening the nut.
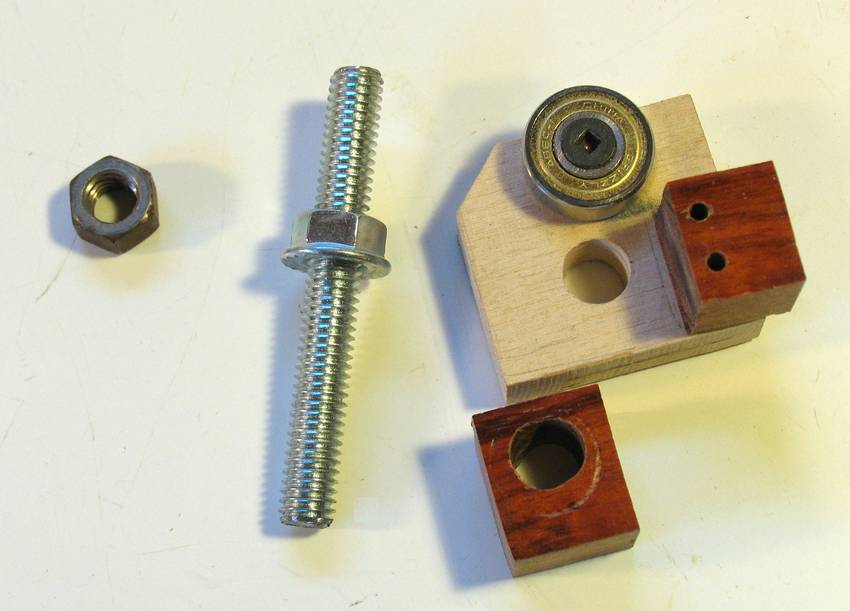
There really isn't much to this blade guide. The thrust bearing is a 22 mm (7/8") ball bearing
from a pair of roller blade skates, held in place with a large countersink wood screw. There's
a washer behind the bearing so that it can turn freely without rubbing against the wood.
The guide blocks are made of a piece of exotic hardwood
The right block is attached with two drywall screws from behind, and the left one has
a large enough hole to allow some adjustment. It's held in place when the nut is tightened
down on it. The right guide block is adjusted by sliding the whole assembly left and right.
There's also an extra nut to put on the threaded rod so that the enclosure knob can be
tightened against it.
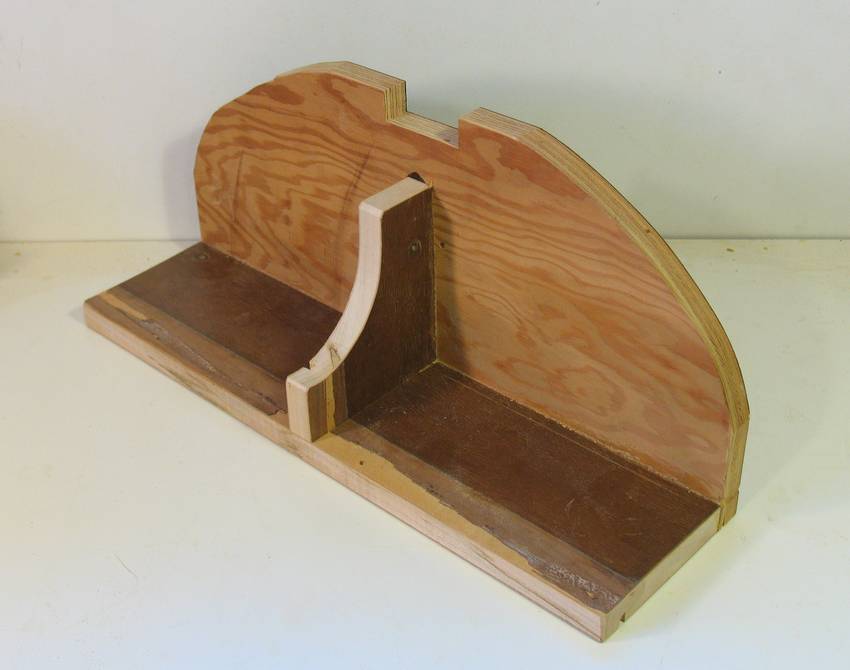
I also built a simple resaw fence. It's just three pieces of scrap plywood
glued together. This fence is meant to be attached to the bandsaw table with
clamps.
It's useful to have different fence heights on a resaw fence so that the upper blade guide
can be moved closer to the stock. This fence can be flipped on its side, so that
the narrower base acts as a less tall fence.
Resaw fence mounted on the bandsaw with clamps.
The Big wooden clamp in this photo is actually the prototype for my
Long reach C-clamps.
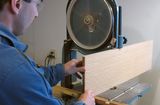
Resawing some wide scraps of birch hardwood. It was slow going. I got a fair bit of
vibration from the saw. Also, the bandsaw blade I was using had a bit of a kink to it.
On my other bandsaws, I wind the blade tension way up to help straighten the blade, but
I can't get a lot of tension on this little 14" saw.
I was also getting a fair bit of vibration, both from the V-belt shaking the saw,
and from the wheels on this saw having a slight eccentricity.
I would probably be a good idea to use a very thin blade to pre-cut a kerf
from either side on the table saw like I did in
this technique, but my goal here was to see if the saw could cut it striaight.
But I still managed to get some decent results. I cut some sheets of wood about 1.5 mm
(1/16") thick.
I also didn't have as much blade tension
as I would have liked to. The problem
with typical 14" cast iron frame bandsaws is that they have a rather wimpy
blade tensioning mechanism with a very small spring in it. Last time I realy tried
to crank up the tension on my 14" saw, I bent the spring!
Here's comparing the blade tensioner on my 14" saw to that on my
homemade wooden 16" bandsaw
(click photo to enlarge). Note the difference in size of the
upper wheel mount and blade tensioning mechanism.
The homemade saw can apply more than twice as much bension as the 14" saw.
Wood is not as strong or stiff as iron, but I used much more wood than
the other saw has iron, so overall, the wooden frame is stiffer too.
The other weakness of my 14" saw is that the lower blade guide is quite far down from
the table, so it doesn't guide as effectively. The lower wheel acts like a fan
and blows air out of the opening of the case. This blows the dust from the saw
all over the place, whereas on my homemade saw,
this area is enclosed and the dust
falls into a drawer underneath the saw.
I wouldn't recommend using a 14" saw like this one to do a lot of resawing - it's not really
up to the job. I think most 14" bandsaws are better than the one I have.
I had a good look at the one that
The Home Depot sells, and I could see various improvements compared to mine.
Higher-priced 14" saws tend to be better still.
I used to think my homemade bandsaw was as nothing special. But having gotten
used to it now and trying the 14" bandsaw again, the 14" saw seems like a piece
of crap now. I had at times questioned the economics of building a bandsaw.
If you have to buy all the parts new, especially the motor, you don't end up saving
much over buying a cheap 14" bandsaw for around $500. But then again, if well built,
the homemade bandsaw is a much better machine than a $500 bandsaw.
My 14" bandsaw is not very good at containing the dust:
 The problem with 14" cast iron framed bandsaws is that the upper blade guide can
only be raised 6" (15 cm) above the table. This really limits the saw in terms of resaw
capacity. A lot of people end up installing a "riser block kit", which is mounted between
the top and bottom half of the frame to raise the top half of the saw by 6", for a total of 12"
(30 cm) of maximum opening for resawing.
The problem with 14" cast iron framed bandsaws is that the upper blade guide can
only be raised 6" (15 cm) above the table. This really limits the saw in terms of resaw
capacity. A lot of people end up installing a "riser block kit", which is mounted between
the top and bottom half of the frame to raise the top half of the saw by 6", for a total of 12"
(30 cm) of maximum opening for resawing.
 Resawing wide lumber
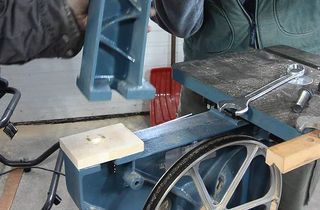 Wooden bandsaw riser block
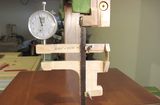 Bandsaw blade
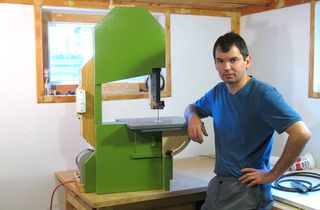 Homemade 14" bandsaw
 The physics of
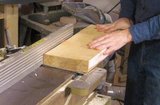 Flattening boards wider
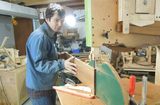 Shelves to guitar sides
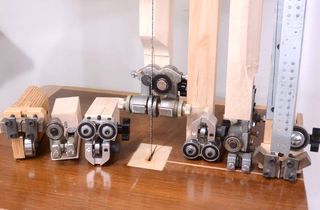 Comparing bandsaw blade guides