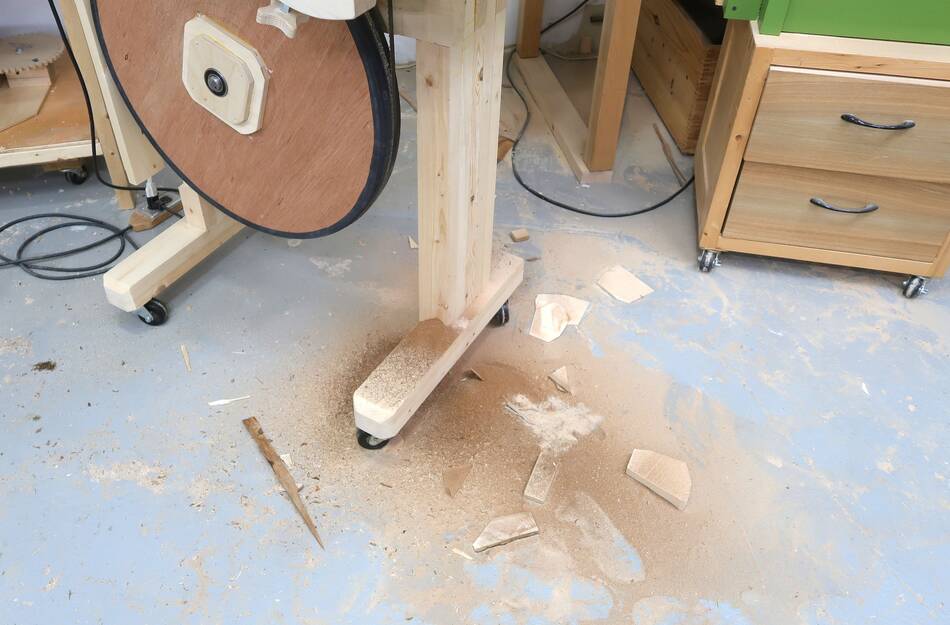
 Using my incomplete bandsaw, the sawdust ended up all over the place
underneath the saw. So it was time to start working on the bottom
enclosure to contain the dust better.
Using my incomplete bandsaw, the sawdust ended up all over the place
underneath the saw. So it was time to start working on the bottom
enclosure to contain the dust better.
Using my incomplete bandsaw, the sawdust ended up all over the place
underneath the saw. So it was time to start working on the bottom
enclosure to contain the dust better.
 I finally added the front-most layer to the column on the left.
This layer is narrower than the layers behind it, leaving some space
on the right of it.
I finally added the front-most layer to the column on the left.
This layer is narrower than the layers behind it, leaving some space
on the right of it.
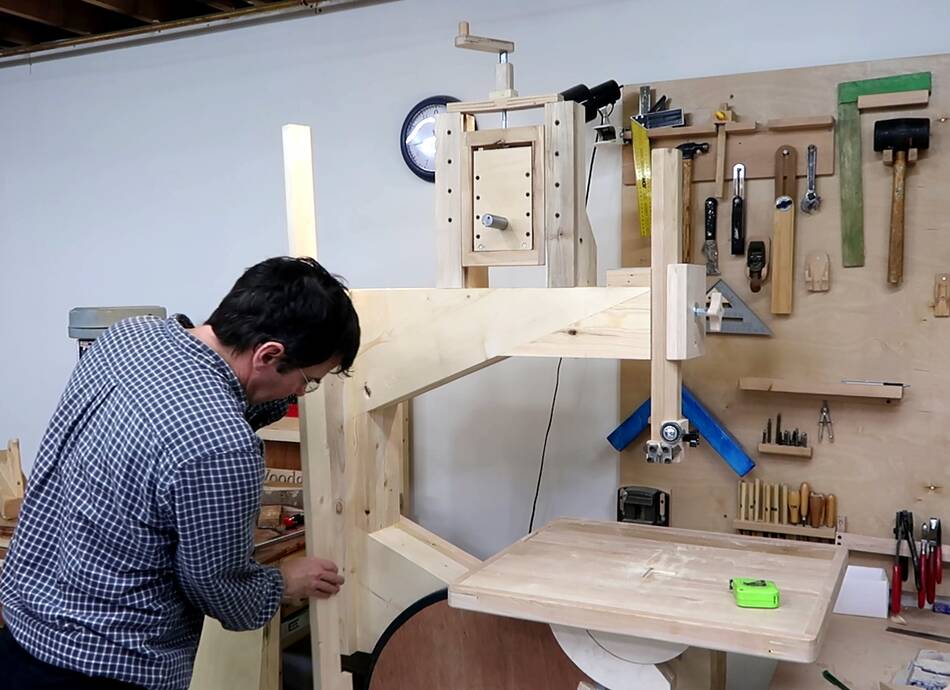 A long vertical piece screws to the right side of this narrower layer.
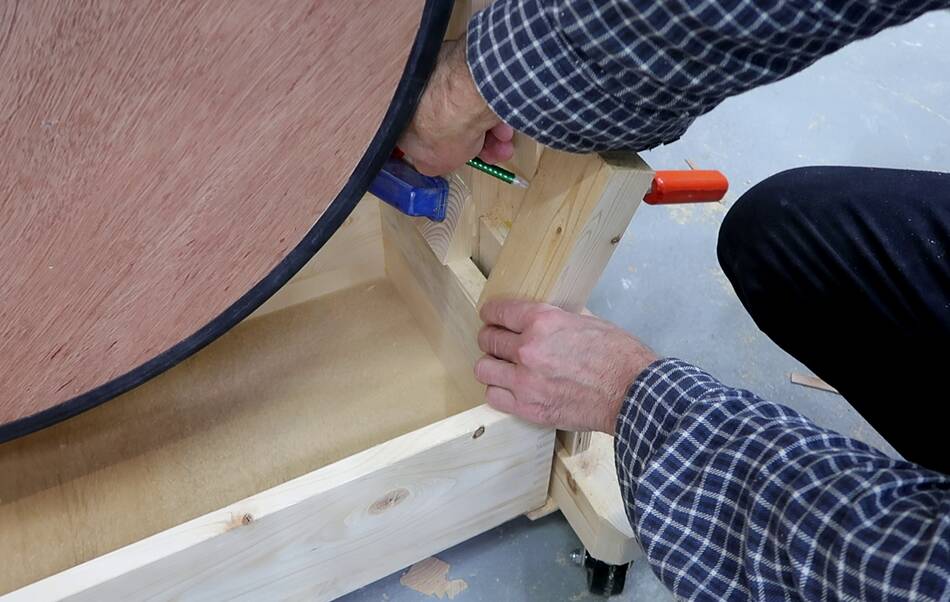
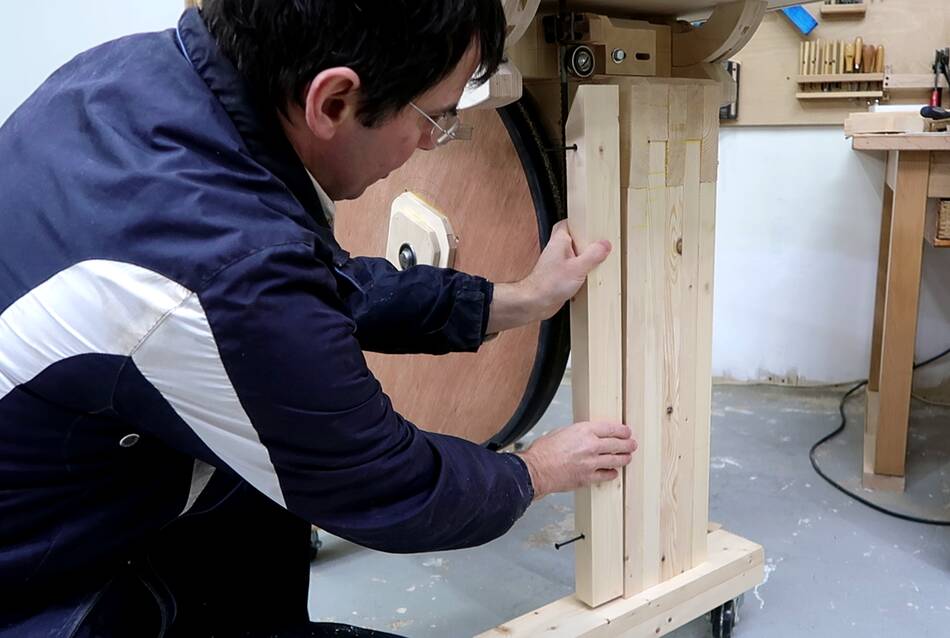 The right-side post needs a piece added to the front as part of
the enclosure. It's made from a piece of 2x4 and will also be structural.
I screwed it on at first, but later glued it.
The right-side post needs a piece added to the front as part of
the enclosure. It's made from a piece of 2x4 and will also be structural.
I screwed it on at first, but later glued it.
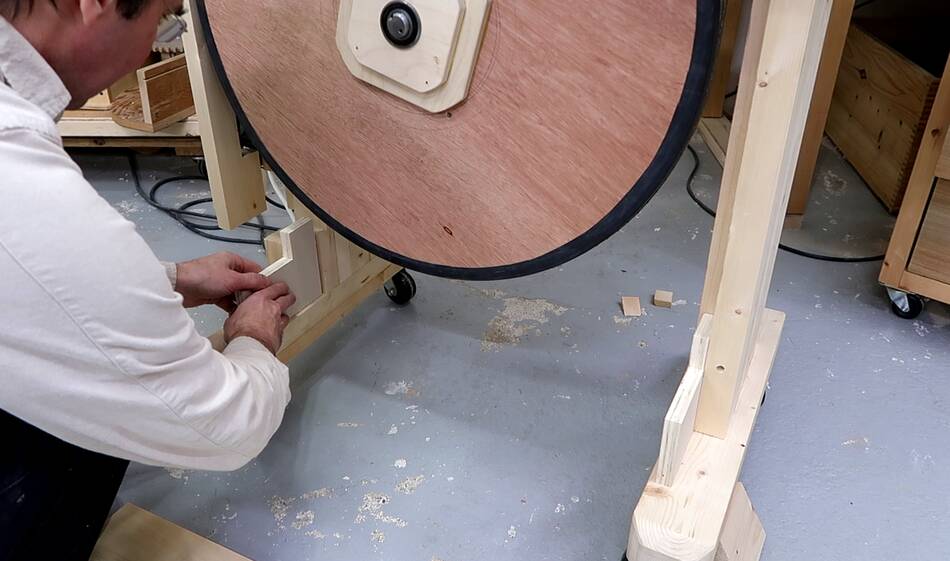
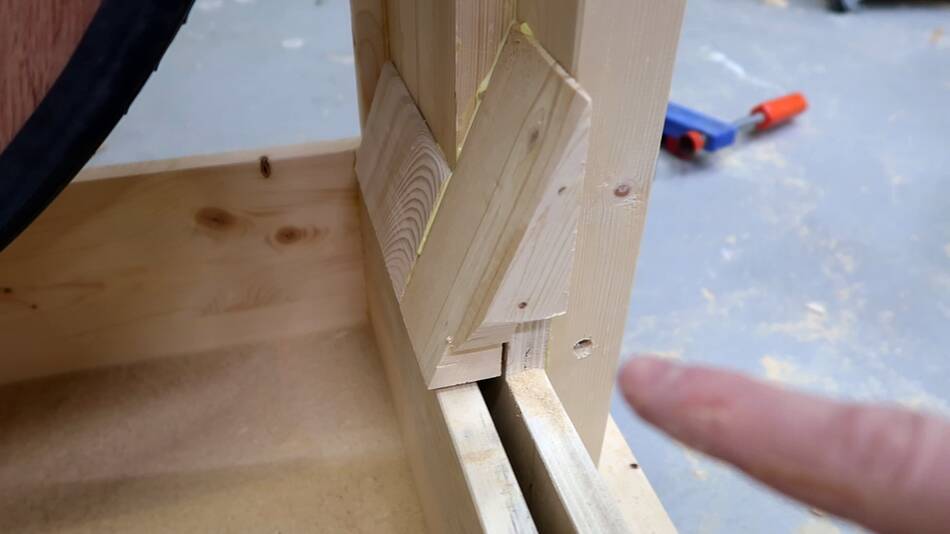
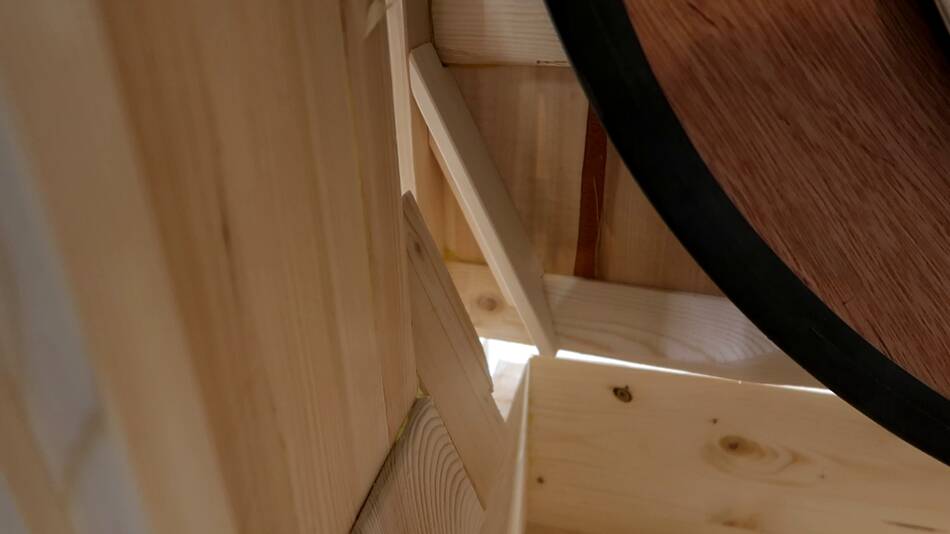
 Some fiddly bits of wood go on the bottom to hold the drawer and a ledge
above it.
Some fiddly bits of wood go on the bottom to hold the drawer and a ledge
above it.
 I didn't glue these pieces on until quite a bit later because I wasn't
sure if I'd need to make changes. It's one thing to have a CAD model
on the computer, but another to see the pieces come together, and I often
make revisions to the design as I build something. The photos here are
not necessarily in the order I built them.
I didn't glue these pieces on until quite a bit later because I wasn't
sure if I'd need to make changes. It's one thing to have a CAD model
on the computer, but another to see the pieces come together, and I often
make revisions to the design as I build something. The photos here are
not necessarily in the order I built them.
 I made the door to go on the bottom. This door will swing open on a
piano hinge on the left.
I made the door to go on the bottom. This door will swing open on a
piano hinge on the left.
But the door needs a cut-out to swing around the front trunnion and locking knob.
 Rather than try to base this on the dimensions in the
plans, I just
put the door where it hits the trunnion and traced around the trunnion
and the knob with a pencil.
Rather than try to base this on the dimensions in the
plans, I just
put the door where it hits the trunnion and traced around the trunnion
and the knob with a pencil.
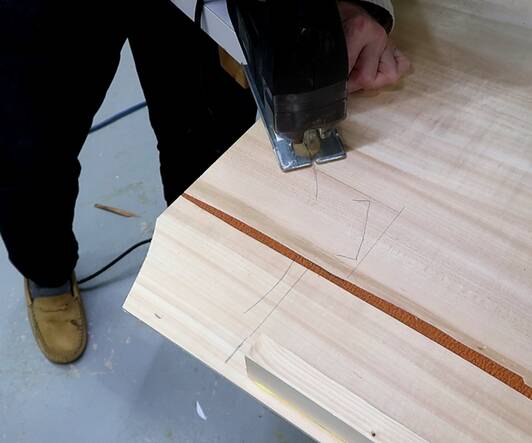
I then used a square to make that cutout look a bit more geometrical, then cut it out with a jigsaw.
I would have cut it with a bandsaw, but I wanted the tear-out to be on the back of the door. Seeing that I marked it on the back, I'm cutting from the back, and with a jigsaw, the tear-out is always on the top, which is the inside here.
 Testing how it fits around the trunnion.
 The door is made of 4 mm thick plywood. It has a frame around
the edges, just glued to the plywood. I decided to add some ribs in the
middle to stiffen it some more, being careful not to put any ribs
in front of the lower wheel hub, just in case I run out of space there.
I'd recommend making this door out of 6 mm thick plywood so the ribs
will be unnecessary.
The door is made of 4 mm thick plywood. It has a frame around
the edges, just glued to the plywood. I decided to add some ribs in the
middle to stiffen it some more, being careful not to put any ribs
in front of the lower wheel hub, just in case I run out of space there.
I'd recommend making this door out of 6 mm thick plywood so the ribs
will be unnecessary.
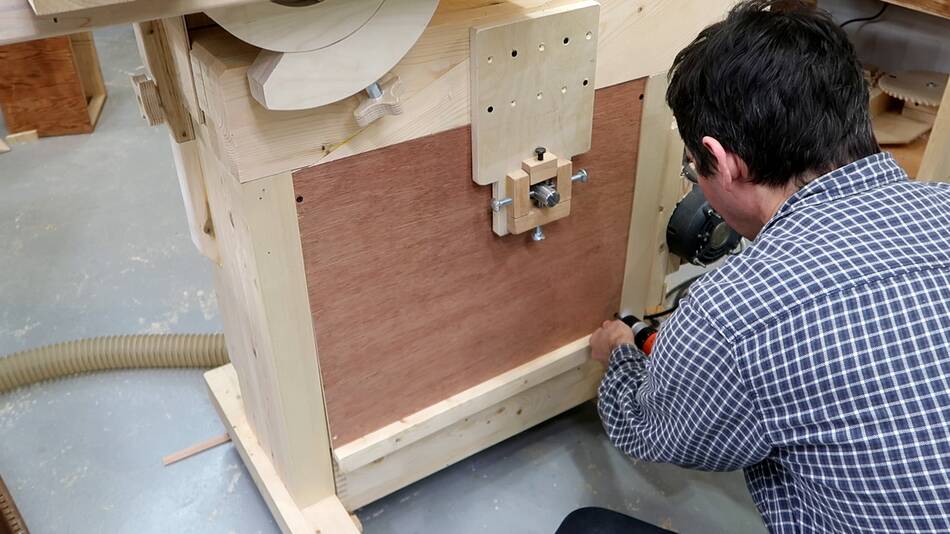
 I laid a piano hinge on the door, carefully placing it, marking the hole
locations, then drilled pilot holes. I did the same for the vertical part
on the bandsaw
I laid a piano hinge on the door, carefully placing it, marking the hole
locations, then drilled pilot holes. I did the same for the vertical part
on the bandsaw
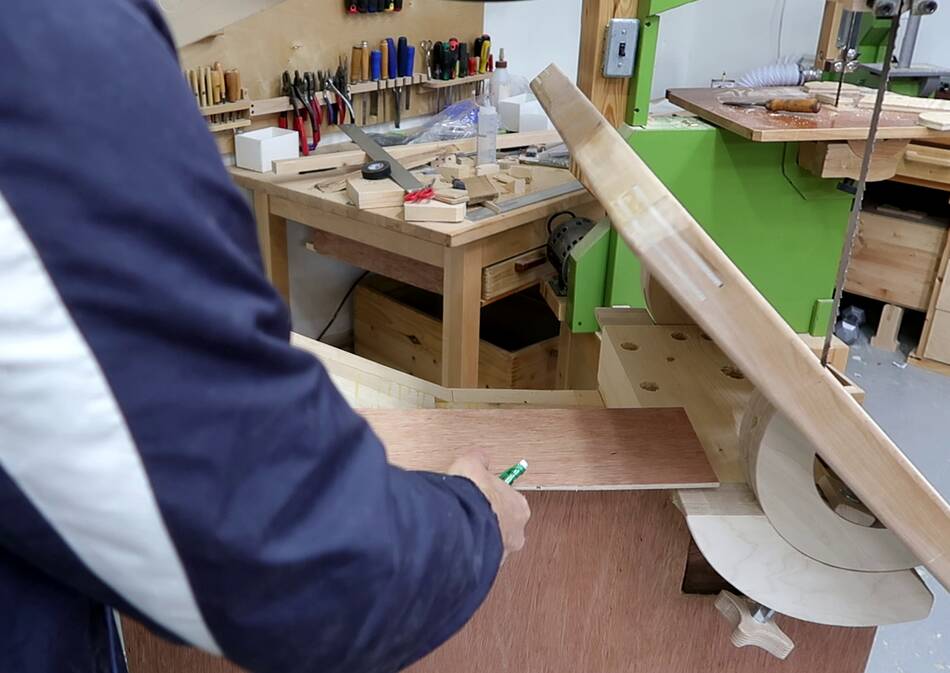
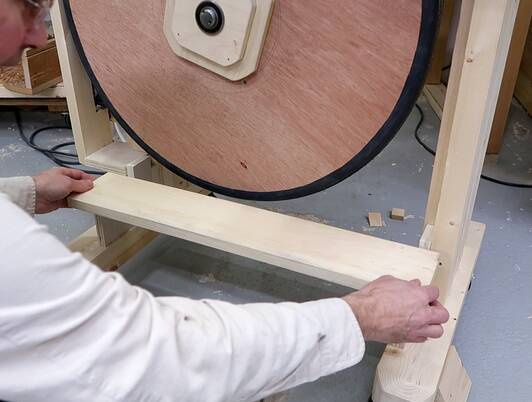
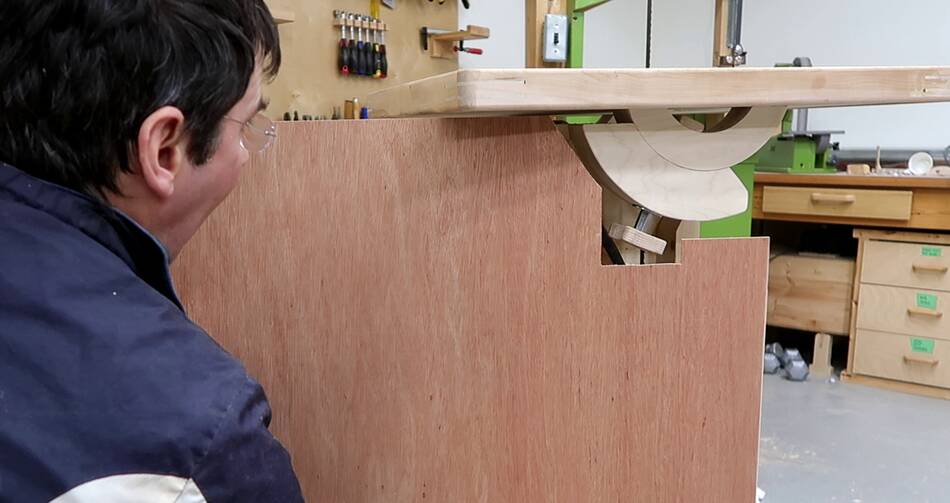
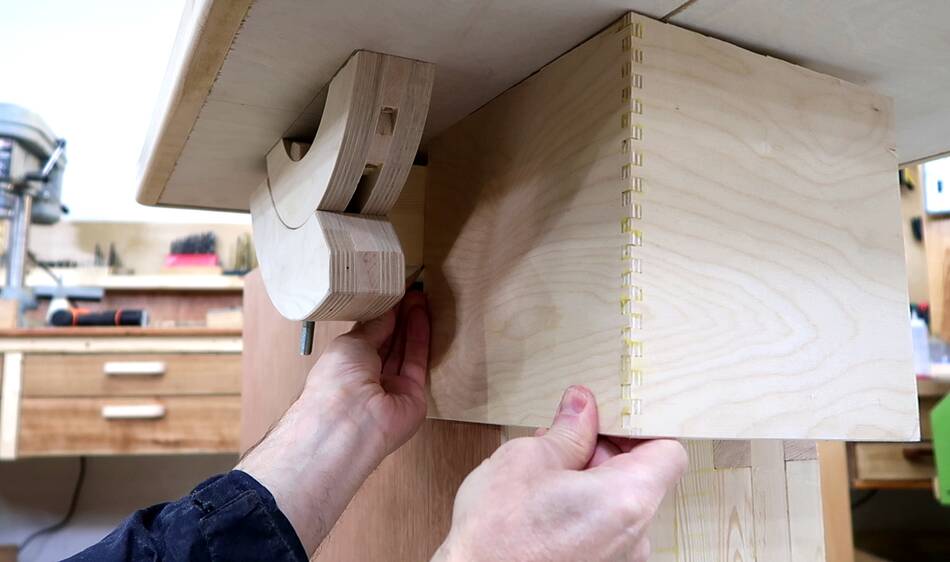
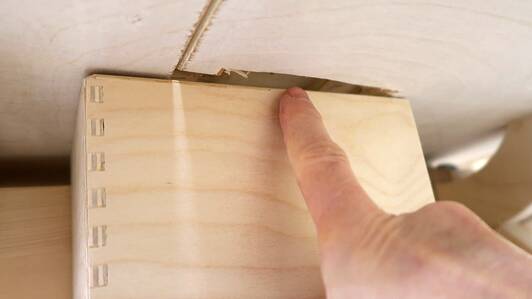
 With the front bottom cover swung closed, it was time to fit the piece
that goes on the top. I held it in place and marked
where I had to cut it to leave room for the blade and
the diagonal gusset part of the frame.
With the front bottom cover swung closed, it was time to fit the piece
that goes on the top. I held it in place and marked
where I had to cut it to leave room for the blade and
the diagonal gusset part of the frame.
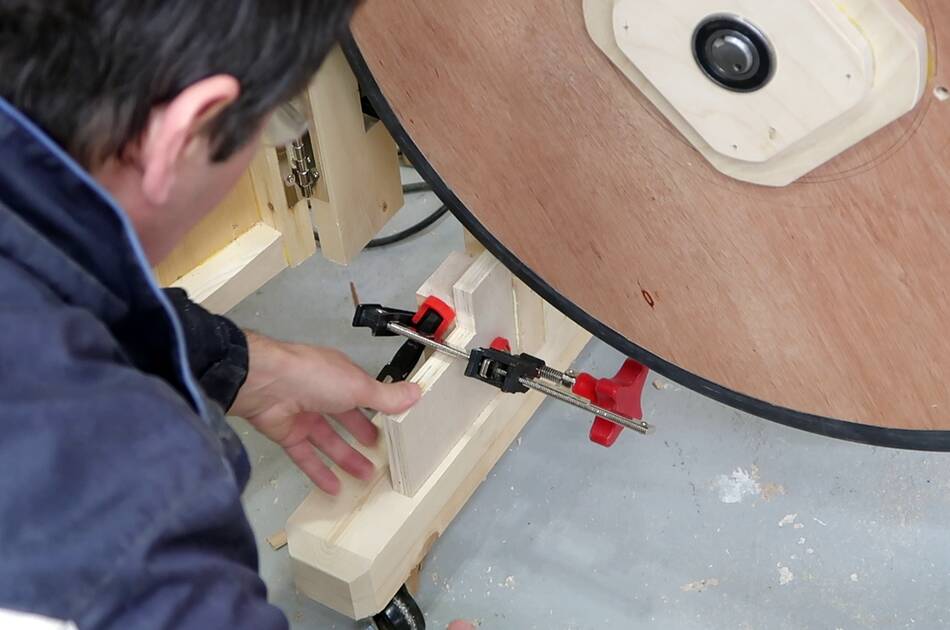
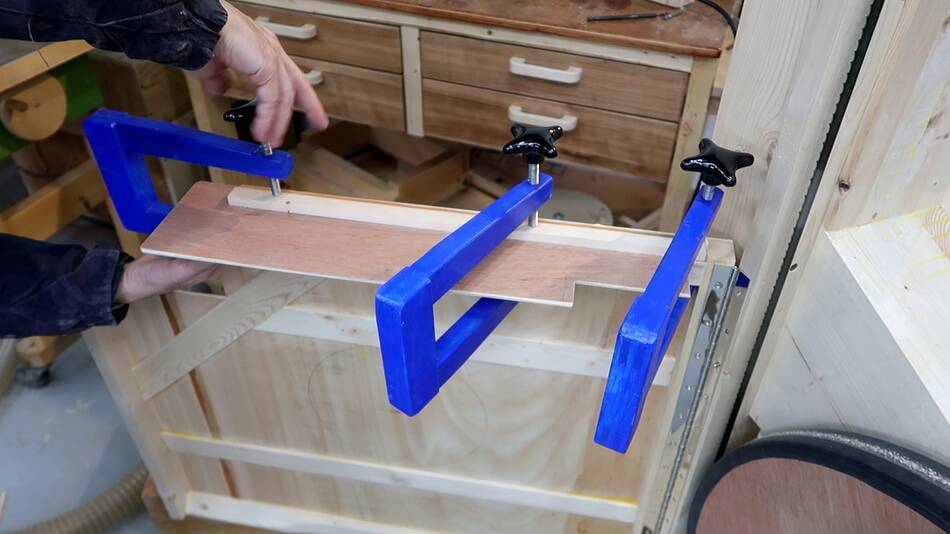 Then gluing it to the bottom cover. If you don't have long reach clamps
use long clamps and clamp to the bottom edge (that would have been easier)
or just screw it or brad nail it on.
Then gluing it to the bottom cover. If you don't have long reach clamps
use long clamps and clamp to the bottom edge (that would have been easier)
or just screw it or brad nail it on.
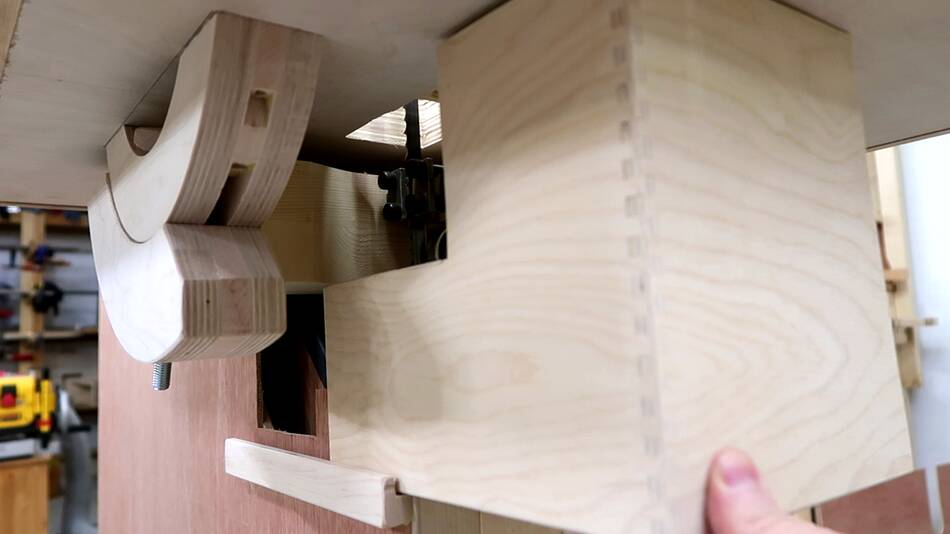
 Another piece, cut from a 2x4, goes behind the wheel to close that off.
 The top part of the bottom cover swings just over this piece.
I fastened this piece in place with two wood screws from the top
(not seen in this picture)
The top part of the bottom cover swings just over this piece.
I fastened this piece in place with two wood screws from the top
(not seen in this picture)
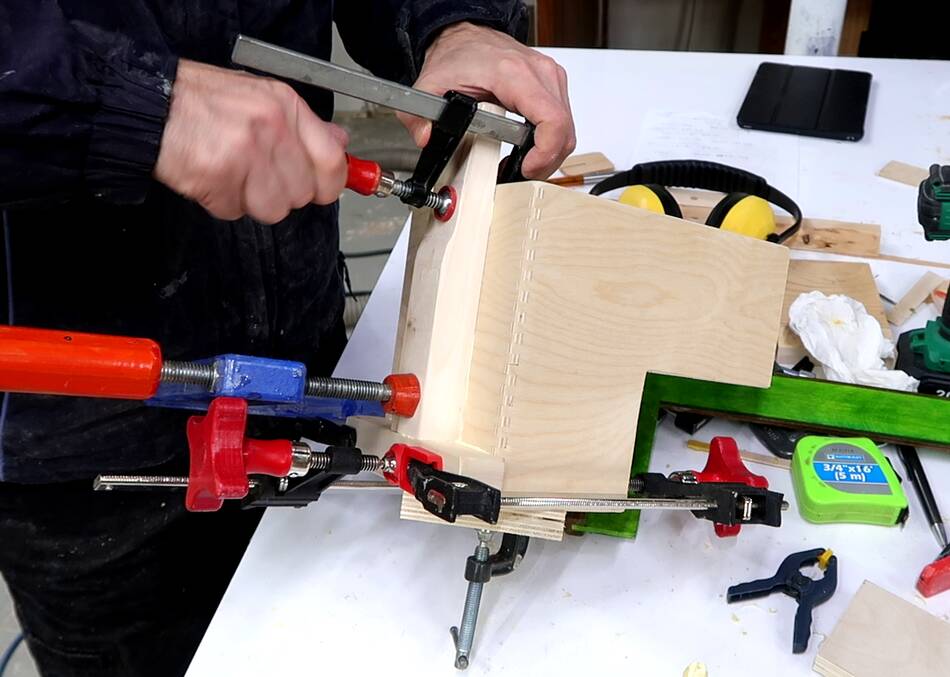
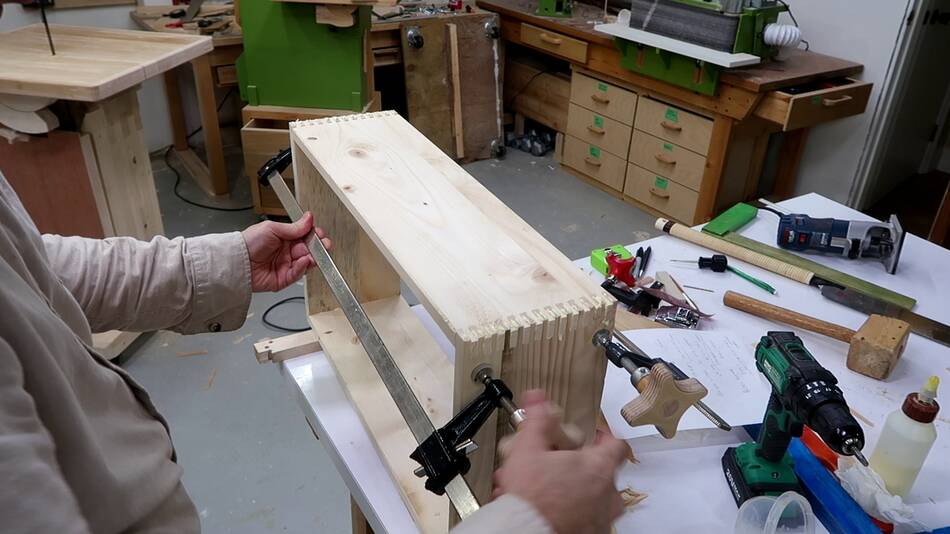
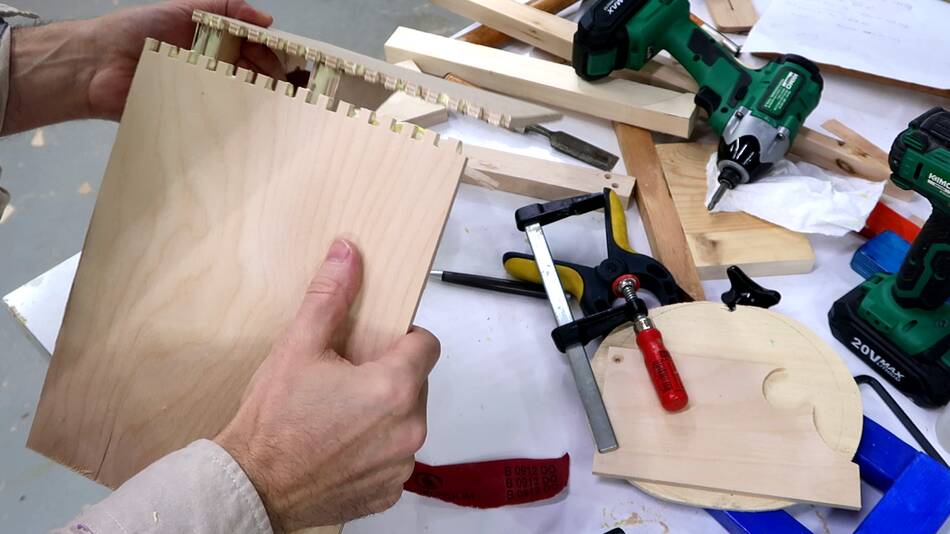 I used my box joint jig to join two pieces of 6 mm plywood to make
the corner of the bottom blade guide cover. A butt joint, with a few
splines added later would work just as well.
I used my box joint jig to join two pieces of 6 mm plywood to make
the corner of the bottom blade guide cover. A butt joint, with a few
splines added later would work just as well.
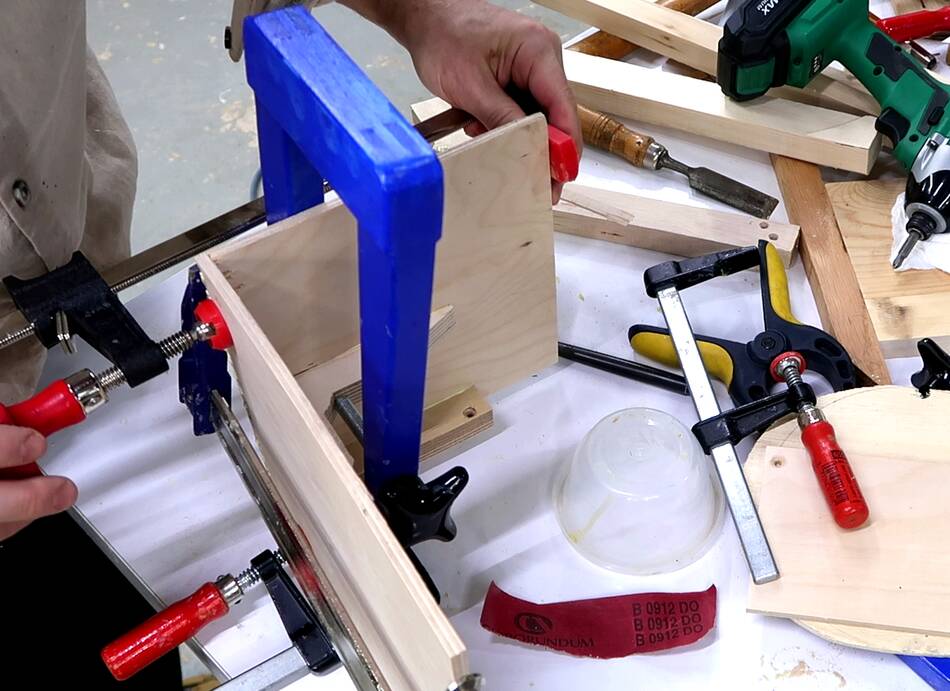 Clamping it while the glue dries. The inside of this cover has
two L-shaped pieces of plywood, glued in, to hold the shape.
I had glued these to one side already before gluing the second
piece on to make gluing simpler.
Clamping it while the glue dries. The inside of this cover has
two L-shaped pieces of plywood, glued in, to hold the shape.
I had glued these to one side already before gluing the second
piece on to make gluing simpler.
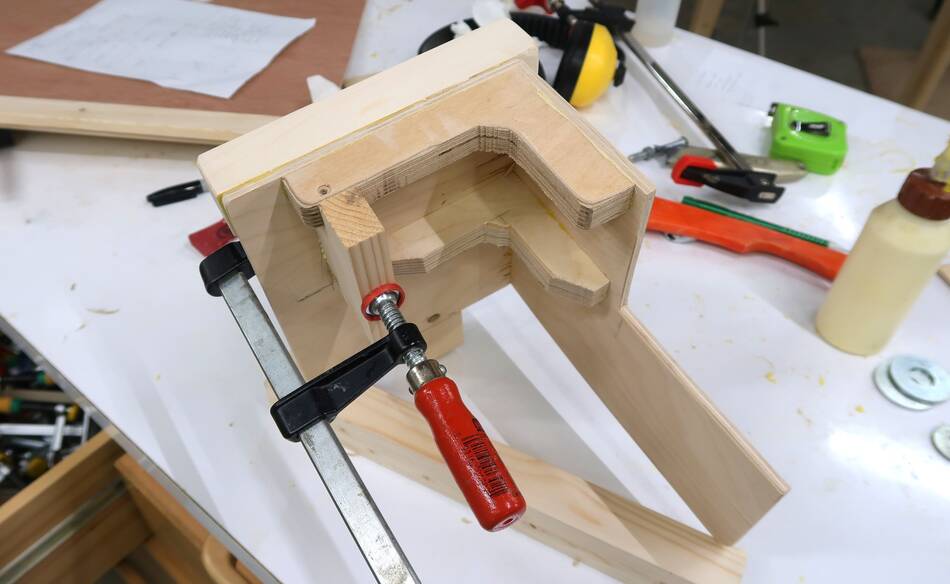 Later on I added this extra piece shown here, to close off the space
behind the blade guides.
Later on I added this extra piece shown here, to close off the space
behind the blade guides.
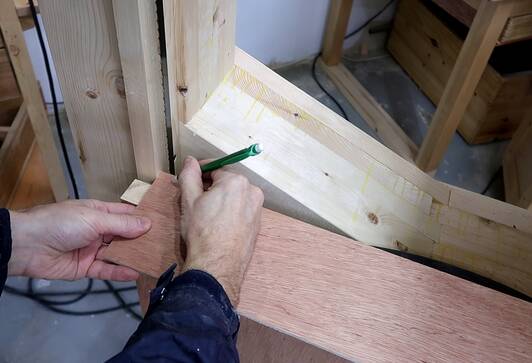
 Holding the cover below the table, and marking where I need to cut
a notch out of it for the trunnion beam.
Holding the cover below the table, and marking where I need to cut
a notch out of it for the trunnion beam.
I cut that notch out with two cuts on the table saw.
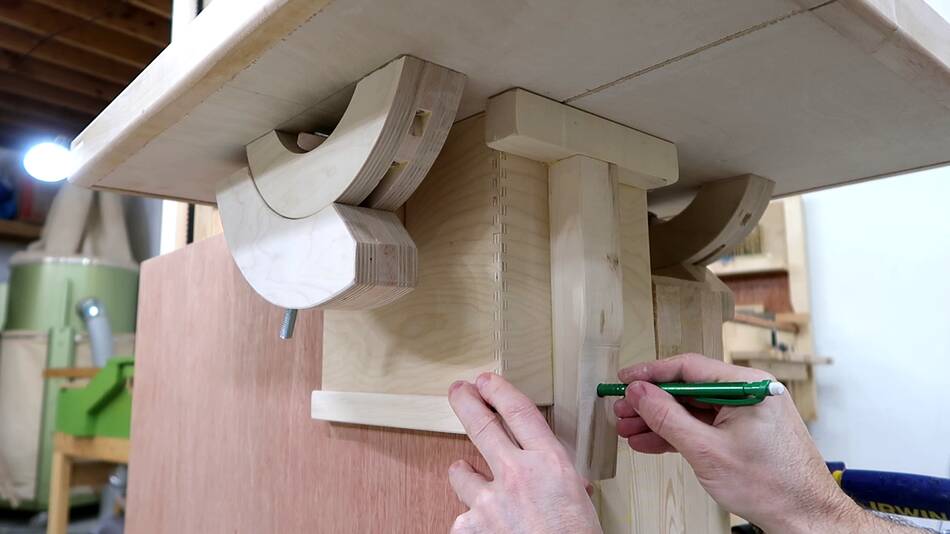
 Then with the cover in place again, I mark the bottom edge of it.
 Then gluing an L-shaped profile 2 mm below the line I marked.
 This L-shaped profile allows me to slide the cover in place from
the right side. The cover will need to be removed to open the bottom
door or to tilt the table.
This L-shaped profile allows me to slide the cover in place from
the right side. The cover will need to be removed to open the bottom
door or to tilt the table.
There is still a gap at the top from the cu-out that I made on the bottom side of the table to fit around the blade guides when the table is tilted 45 degrees.
 So I glued another piece of wood across the top of the guard, plus
another piece, shown here, that ends up vertical.
So I glued another piece of wood across the top of the guard, plus
another piece, shown here, that ends up vertical.
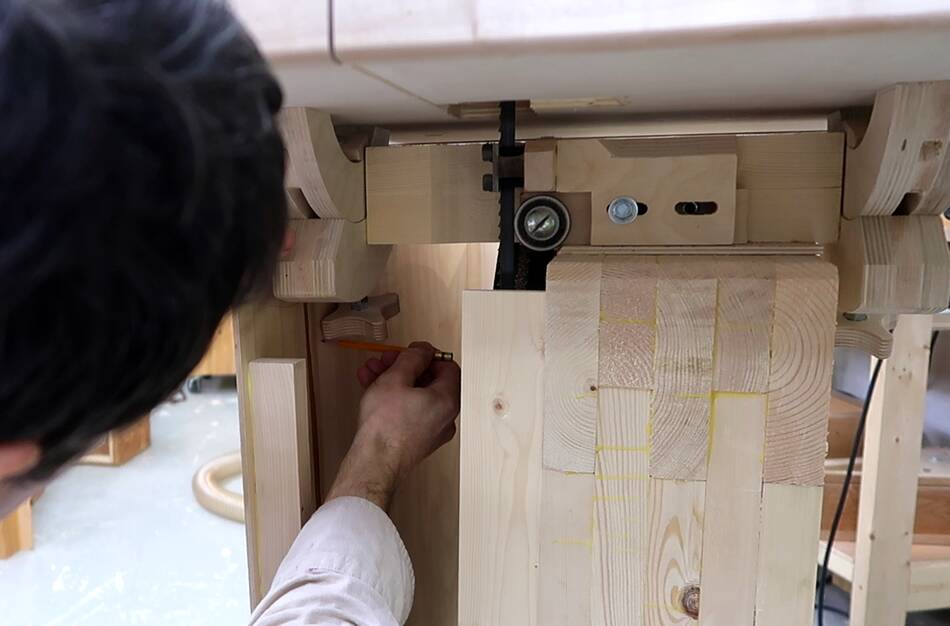
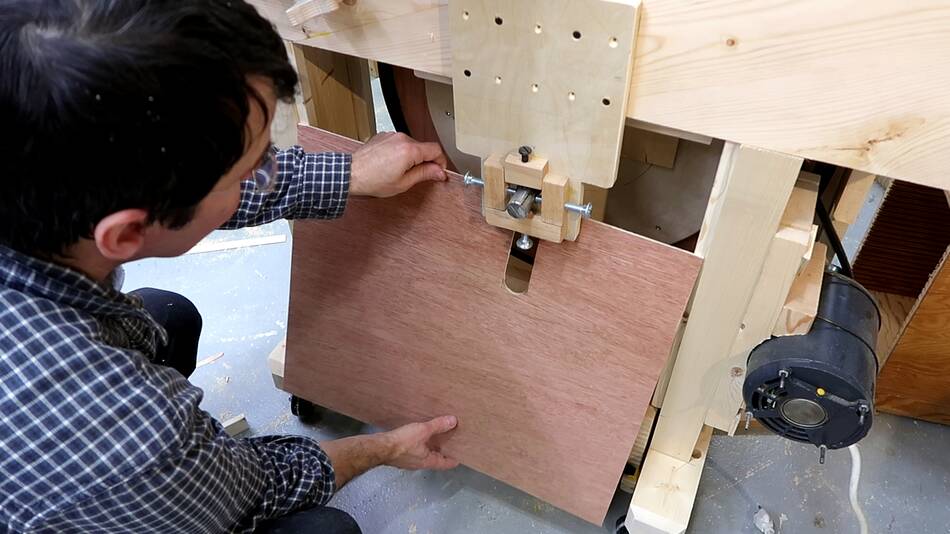
 The cover with these pieces glued on in place again. I ensured the
top of the cover touches the bottom of the table, then
transferred the hole location for the attachment knob from
the cover to the bandsaw with a pencil.
The cover with these pieces glued on in place again. I ensured the
top of the cover touches the bottom of the table, then
transferred the hole location for the attachment knob from
the cover to the bandsaw with a pencil.
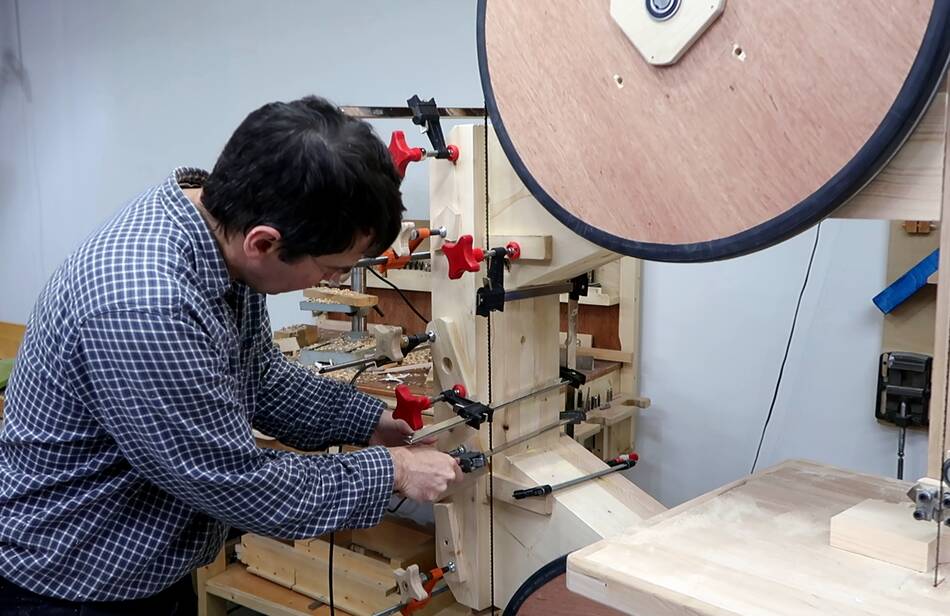
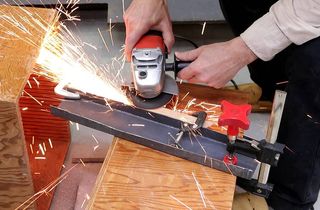
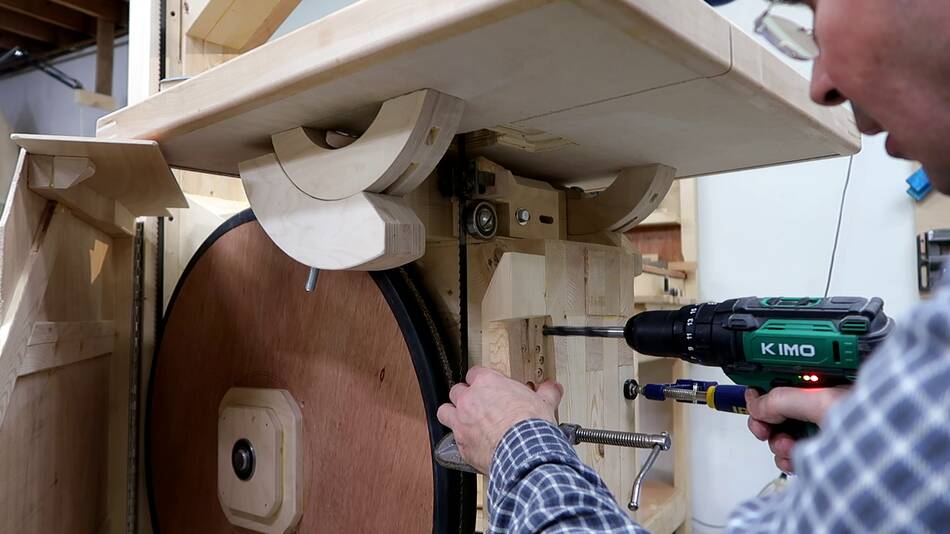 As it was, the hole location was right next to a knot in the wood, but
at this point I couldn't just put the hole somewhere else. I clamped a piece of oak
to the bandsaw to help guide the drill so the knot would not move it
to the side.
As it was, the hole location was right next to a knot in the wood, but
at this point I couldn't just put the hole somewhere else. I clamped a piece of oak
to the bandsaw to help guide the drill so the knot would not move it
to the side.
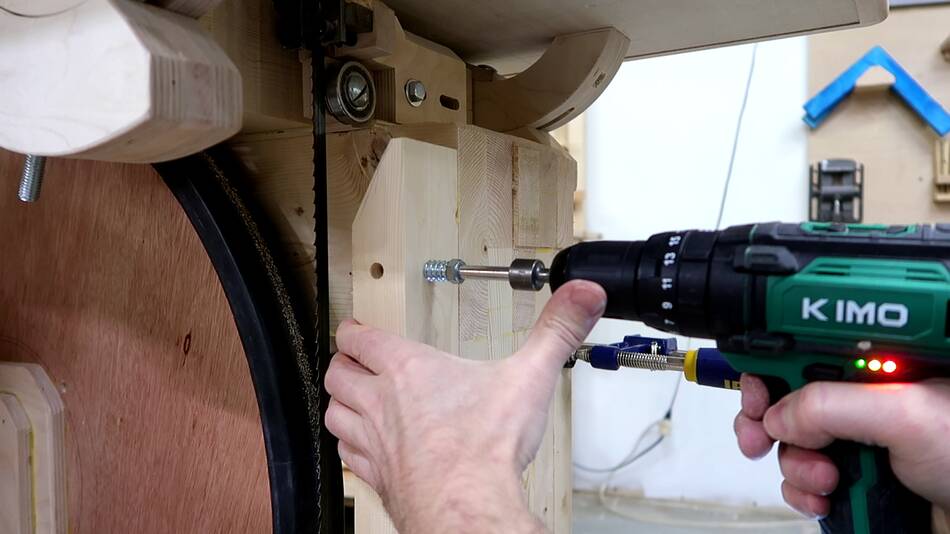 Then driving a threaded insert into the hole.
This is where things got messy. The threaded insert ended up going in at an angle because the knot in the wood on one side was much harder.
I noticed this before it was all the way in, so I was able to grab it with some vise-grips and unscrew it.
Unfortunately, the second time I screwed it in with confidence, but it was crooked again! It was in so tight that the two small slots in the back of the insert were not enough to back it out. I ended up placing a stack of washers around the insert, then used a bolt to brute-force pull it out of the wood. I then drilled the hole bigger and just glued it in, square this time!
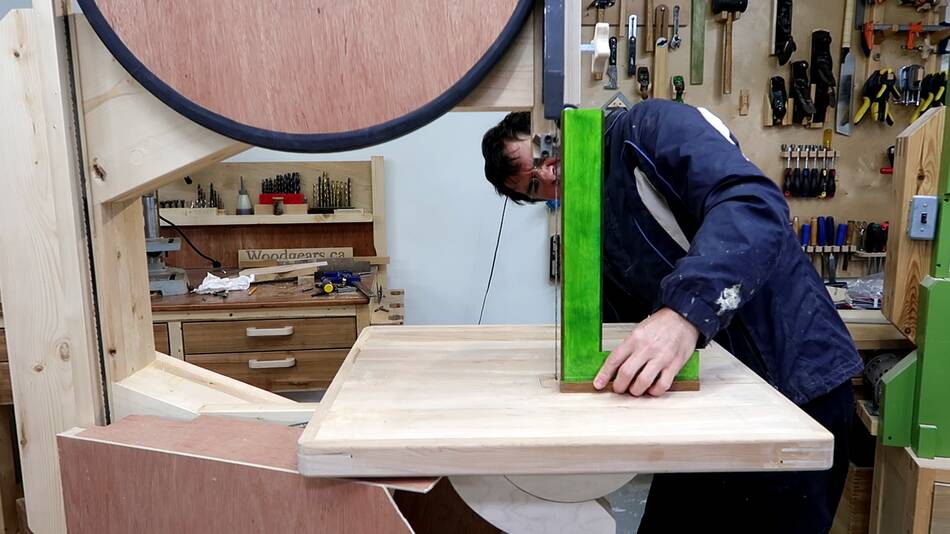 I then made sure the table was set to exactly square.
 After that I glued another piece to the bandsaw to push against the bottom
of the blade guide cover.
After that I glued another piece to the bandsaw to push against the bottom
of the blade guide cover.
When the blade guide cover is in place, it provides additional support to the table. Setting the table to anything other than level is not possible with the cover in place. But tilting the table is relatively rare, so I just take the cover off for angled cuts.
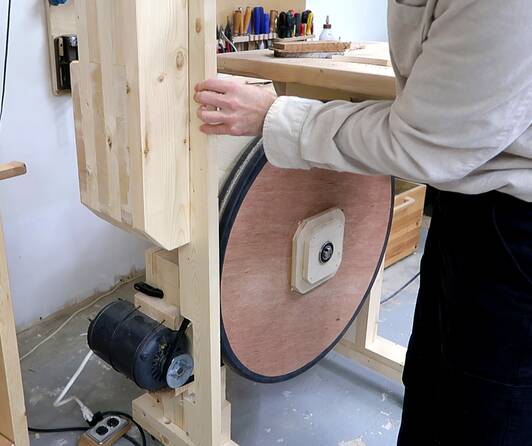
 The saw has room for a sawdust drawer below the bottom wheel.
One of the reasons I didn't make the saw larger than it is was to leave
room for a sawdust drawer below the bottom wheel.
The saw has room for a sawdust drawer below the bottom wheel.
One of the reasons I didn't make the saw larger than it is was to leave
room for a sawdust drawer below the bottom wheel.
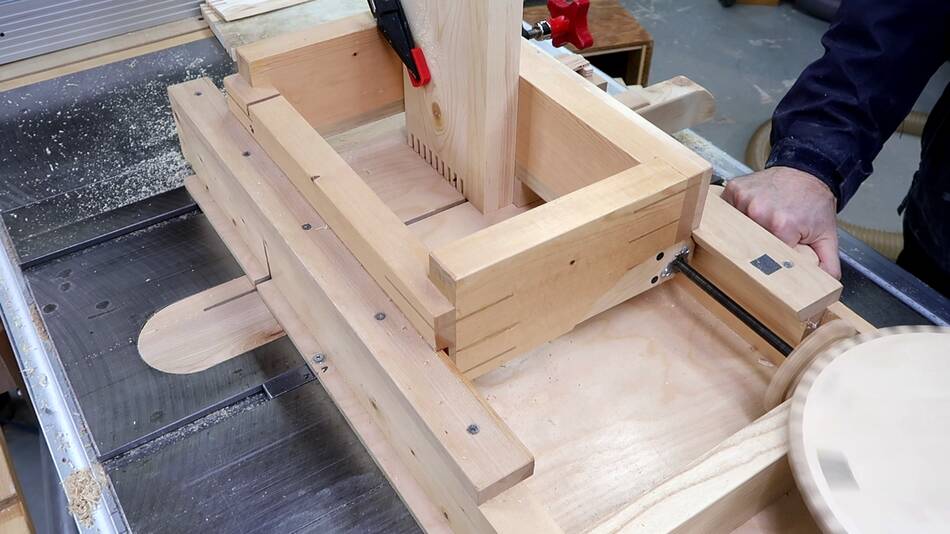
I joined the corners of this drawer with box joints, using my box joint jig. This is perhaps overkill. But the jig is always set up, and I don't need to change blades in the saw to use it, so it's an easy default choice.
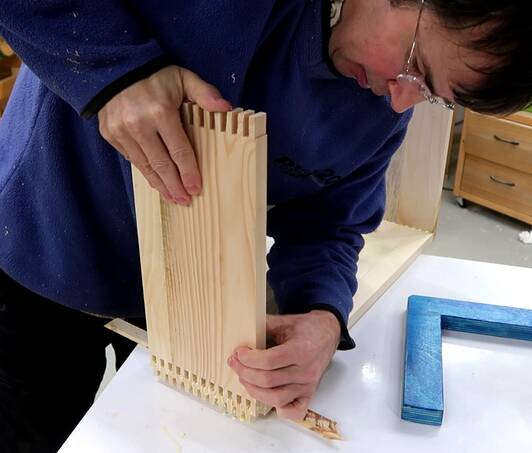 Gluing it together. I cut the joints to leave the ends sticking out
a little bit.
Gluing it together. I cut the joints to leave the ends sticking out
a little bit.
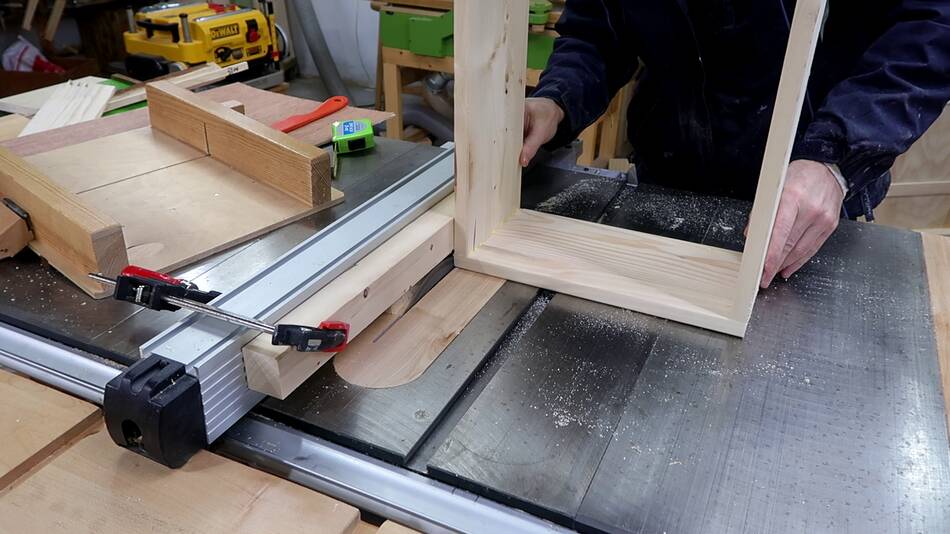 Then with a block clamped to the fence, right above the blade, I'm using
my table saw to flush trim the joints. I tilted the blade by one degree
away from the workpiece so that the top edge of the blade doesn't mar up
the surface.
Then with a block clamped to the fence, right above the blade, I'm using
my table saw to flush trim the joints. I tilted the blade by one degree
away from the workpiece so that the top edge of the blade doesn't mar up
the surface.
my table saw is a right-tilt saw, on left-tilt saws, you would have to do this on the left side of the fence if you want to tilt the blade.
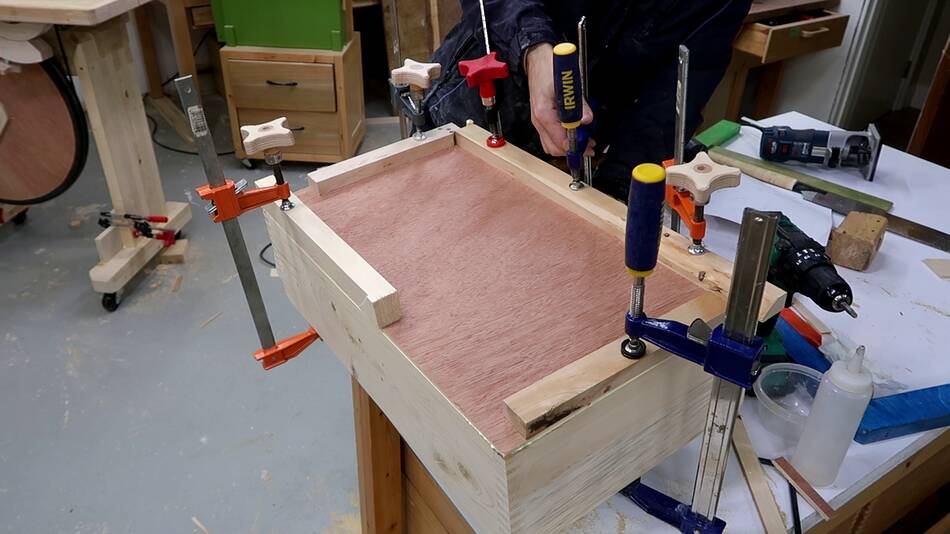 Then gluing on the bottom.
After gluing on the bottom, I glued hardwood strips, 3 mm thick, along the sort sides to provide a bitter siding surface (not shown)
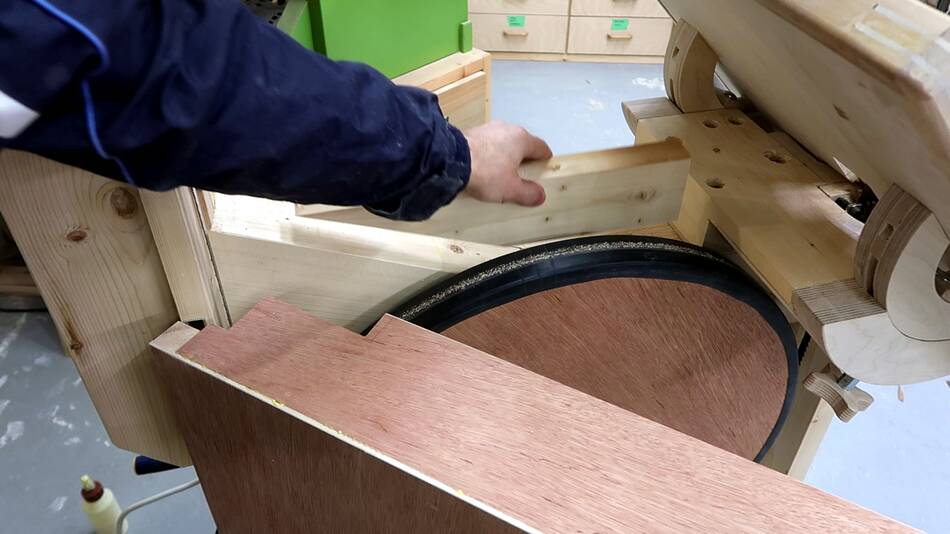
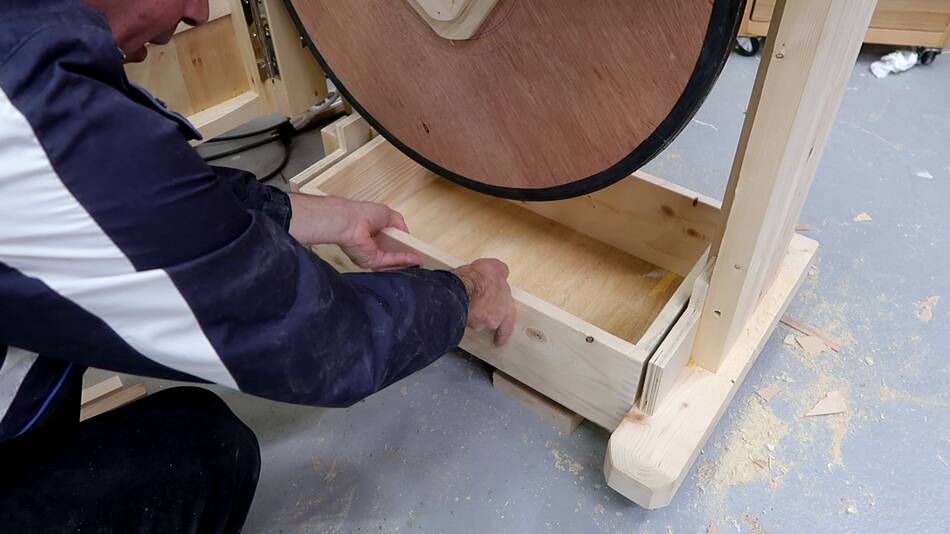 Checking how the drawer fits where it needs to go.
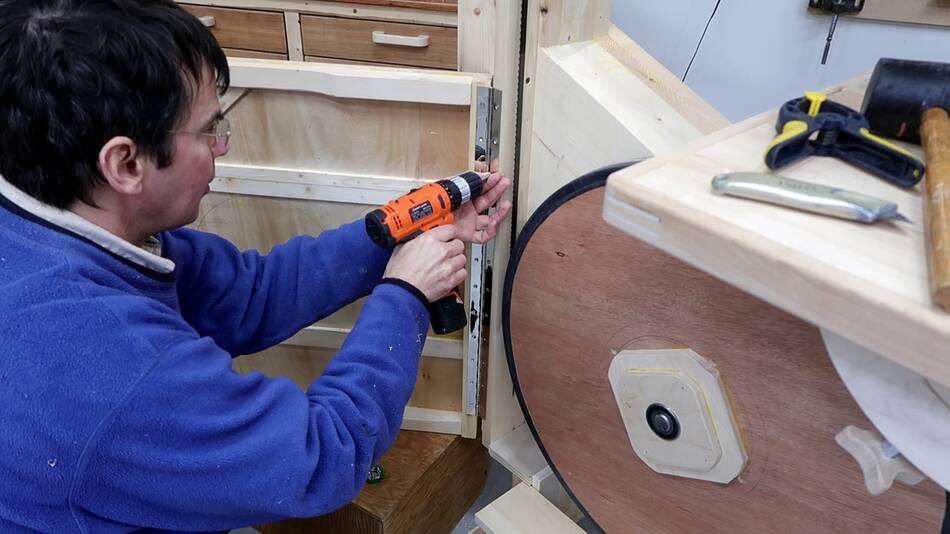
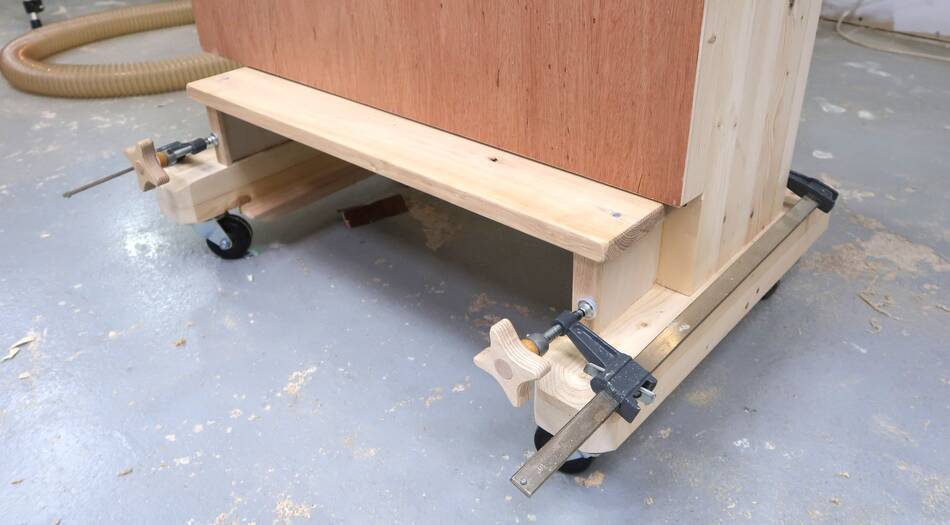
I need to attach something for the drawer to slide on to the bottom of the legs.
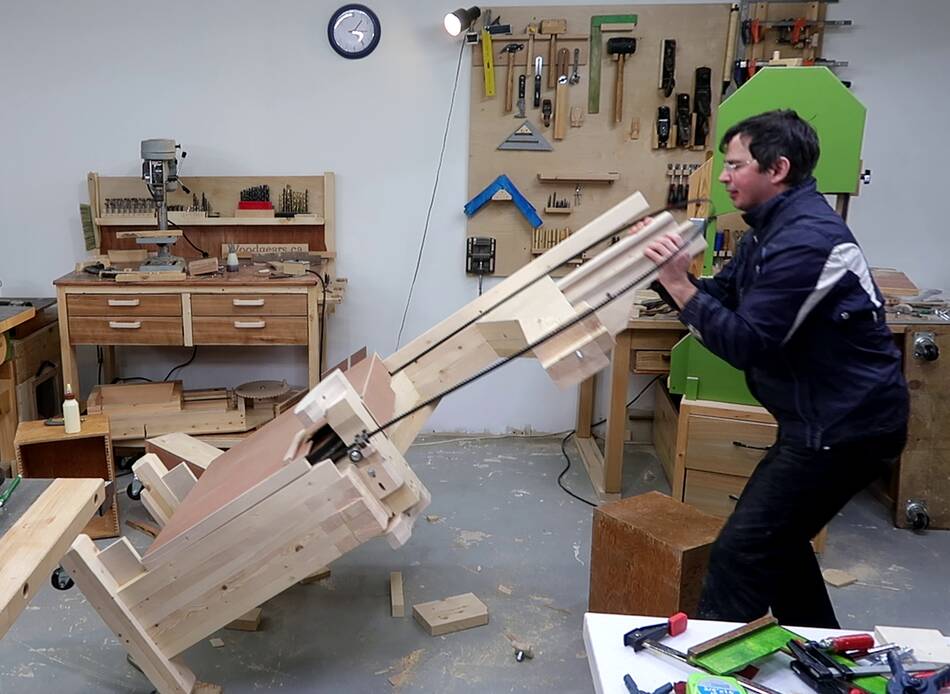
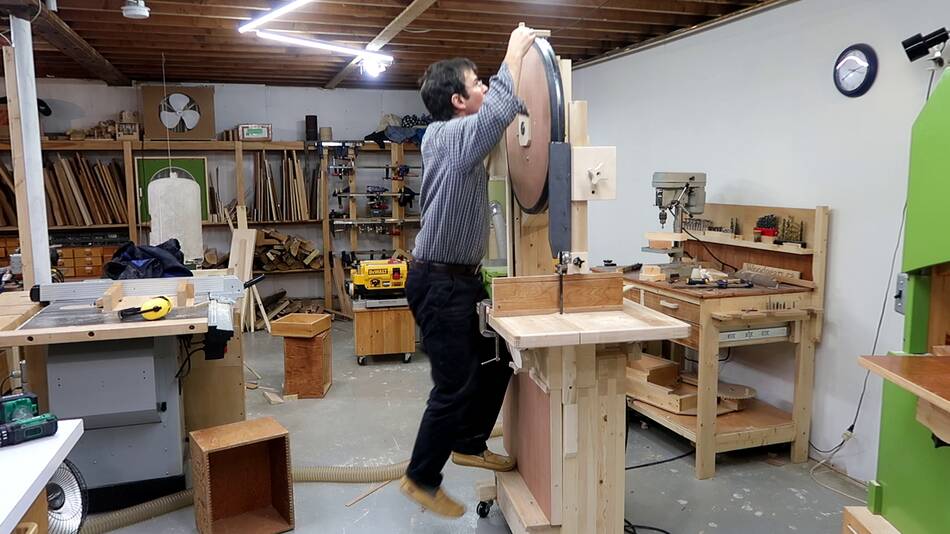
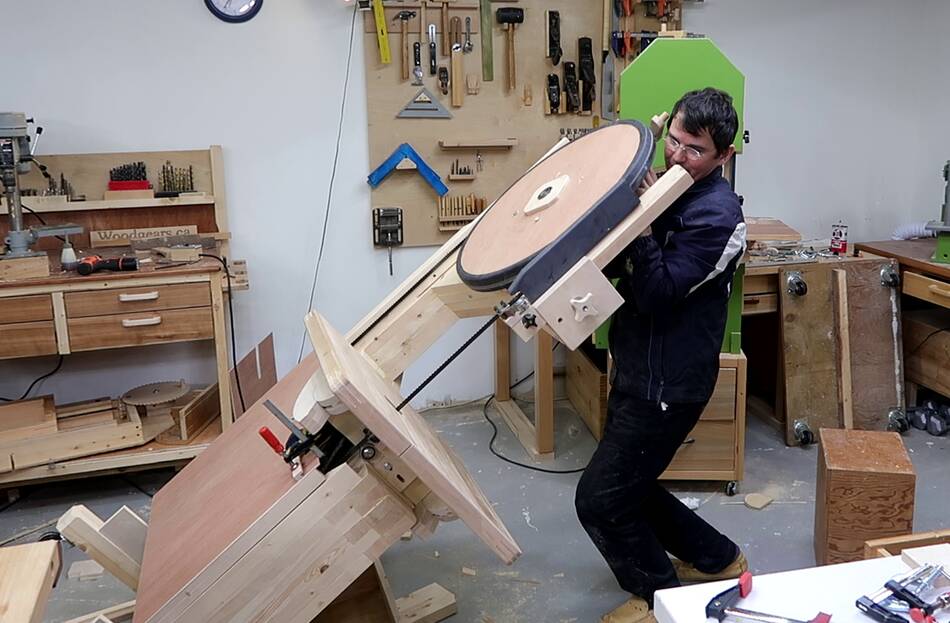 Screwing to the bottom of the legs is best done with the saw lying on it's
back. So without removing anything from the saw to lighten it, I tipped it
back. This was a bit of a mistake, as the saw was heavier than I expected
and it nearly ended in disaster.
Screwing to the bottom of the legs is best done with the saw lying on it's
back. So without removing anything from the saw to lighten it, I tipped it
back. This was a bit of a mistake, as the saw was heavier than I expected
and it nearly ended in disaster.
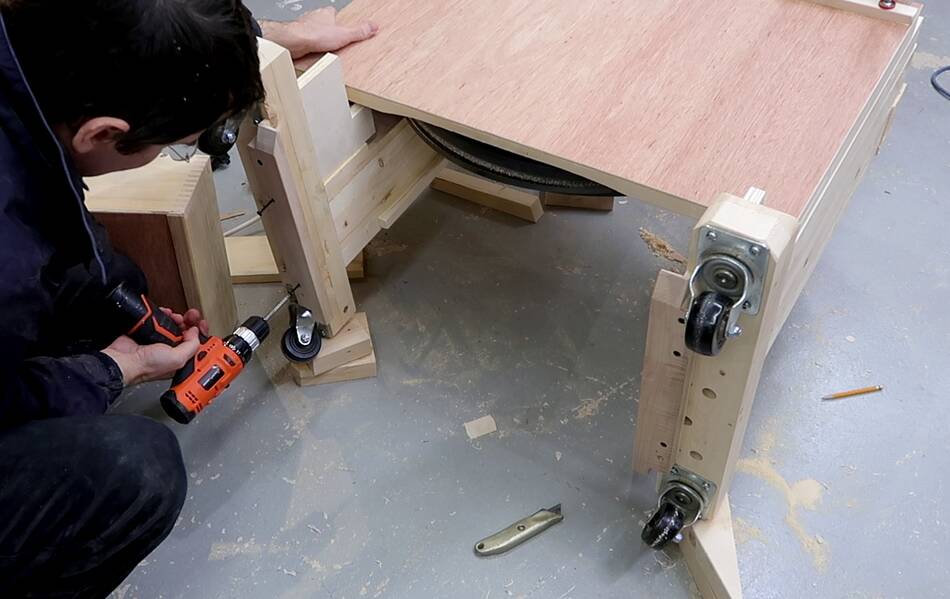
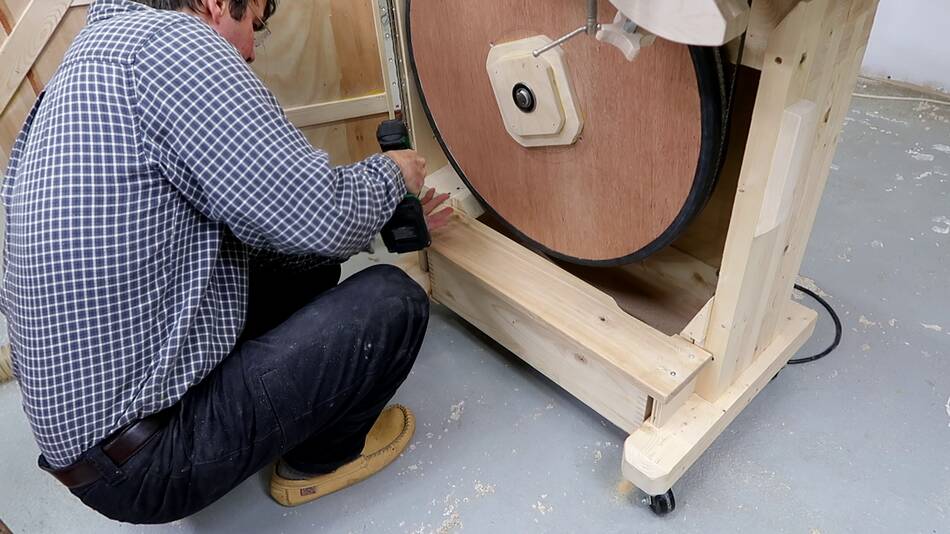
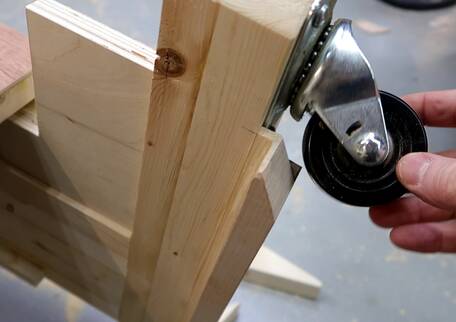 Then screwing on the L-shaped profiles to the bottom. These are a bit
of a funny shape because they have to fit around the caster wheels and
also support the drawer slightly lower than the bottom of the legs.
Then screwing on the L-shaped profiles to the bottom. These are a bit
of a funny shape because they have to fit around the caster wheels and
also support the drawer slightly lower than the bottom of the legs.
In the plans, I have the drawer slightly less deep, which simplifies this part a bit.
 I took the top wheel, wheel mount, blade guide and table off before
raising the saw back to vertical. This made lifting it much easier.
I took the top wheel, wheel mount, blade guide and table off before
raising the saw back to vertical. This made lifting it much easier.
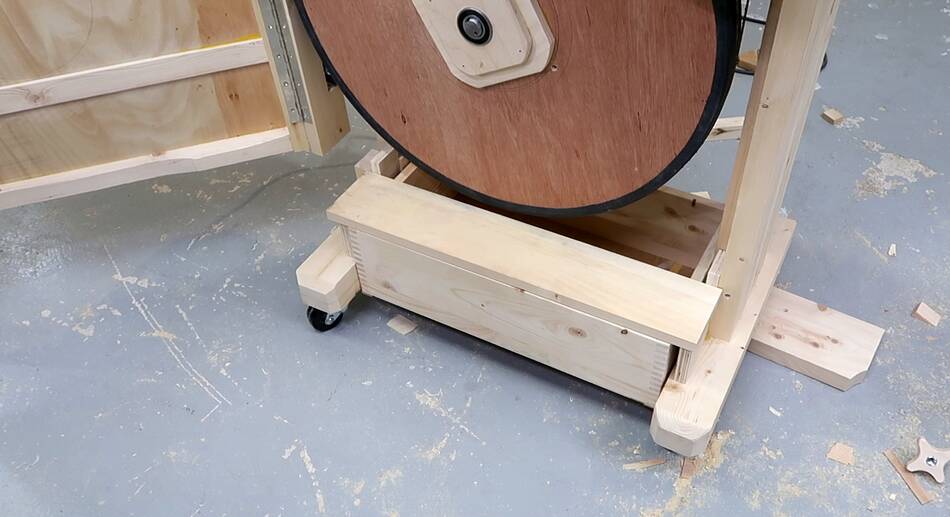 Drawer in place.
 I added two small blocks to the back to limit how far back this
drawer can slide.
I added two small blocks to the back to limit how far back this
drawer can slide.
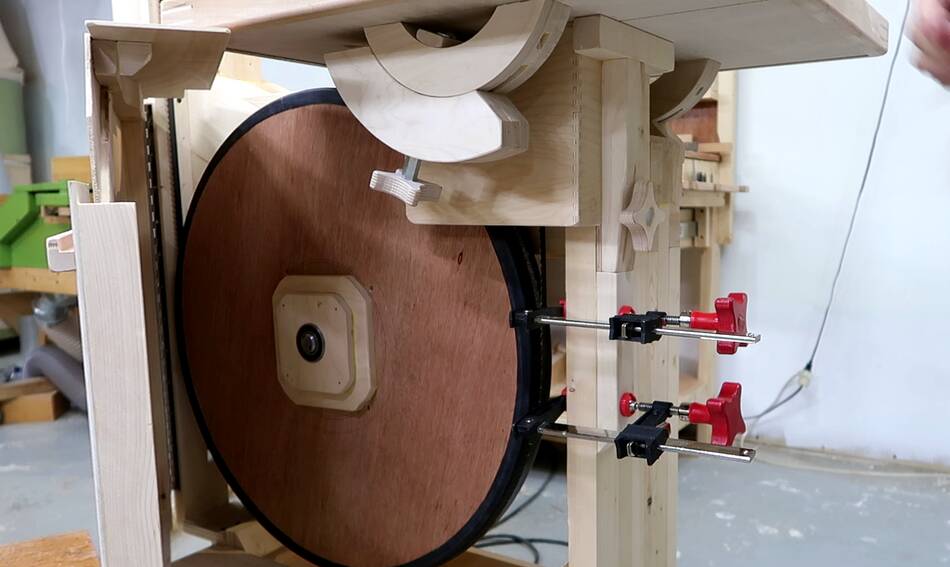
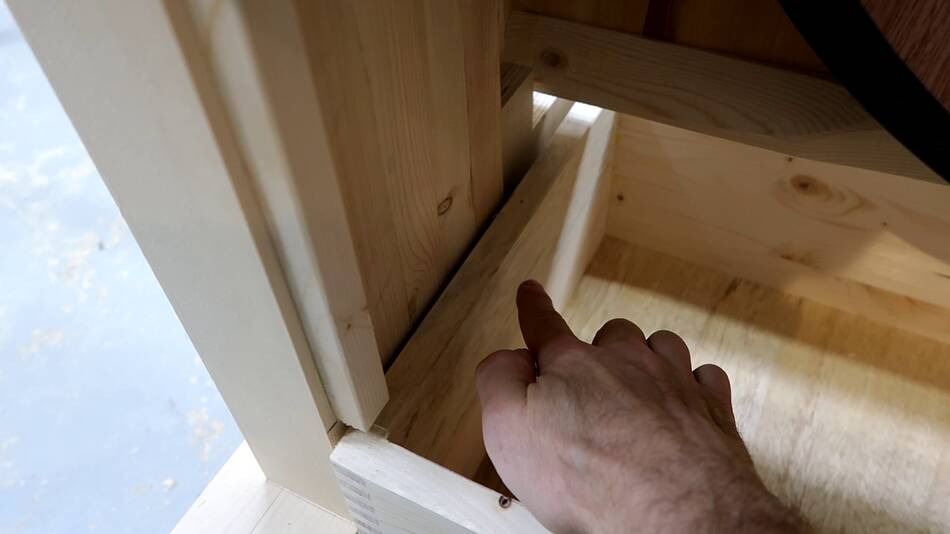
 Then adding a back cover. This fits between the legs, flush with the
back of the legs. I had glued some 19x19 mm pieces of wood to the inside side
of the legs for a support for this piece of plywood.
Then adding a back cover. This fits between the legs, flush with the
back of the legs. I had glued some 19x19 mm pieces of wood to the inside side
of the legs for a support for this piece of plywood.
 If my drawer was just 1 cm less deep, the cover would have fit behind the
drawer (in the plans, I have it this way)
If my drawer was just 1 cm less deep, the cover would have fit behind the
drawer (in the plans, I have it this way)
 Test fitting the bottom cover.
 A lot of sawdust will fall into the gap between the drawer and the bandsaw
frame. So I made some pieces to deflect this sawdust into the drawer.
A lot of sawdust will fall into the gap between the drawer and the bandsaw
frame. So I made some pieces to deflect this sawdust into the drawer.
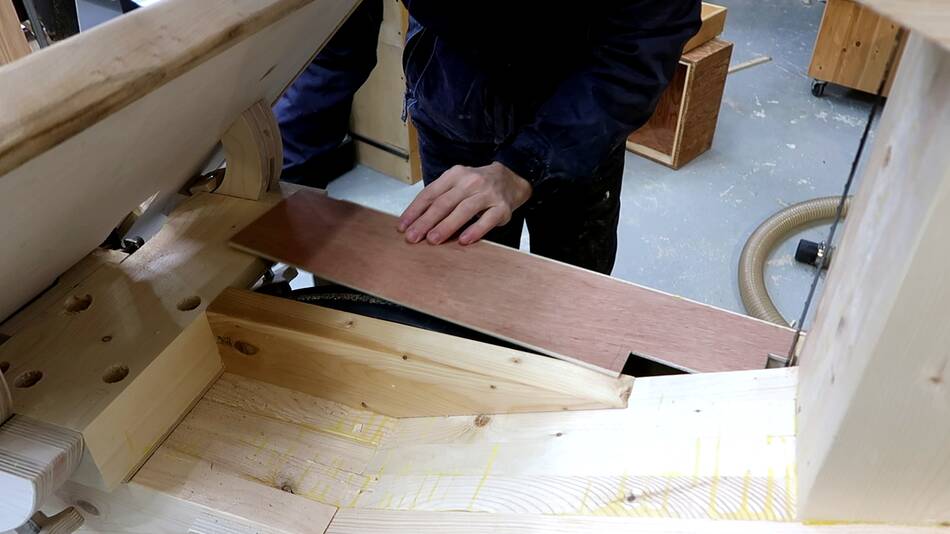
 I cut out some wedges out of a piece of 2x6 on my bandsaw.
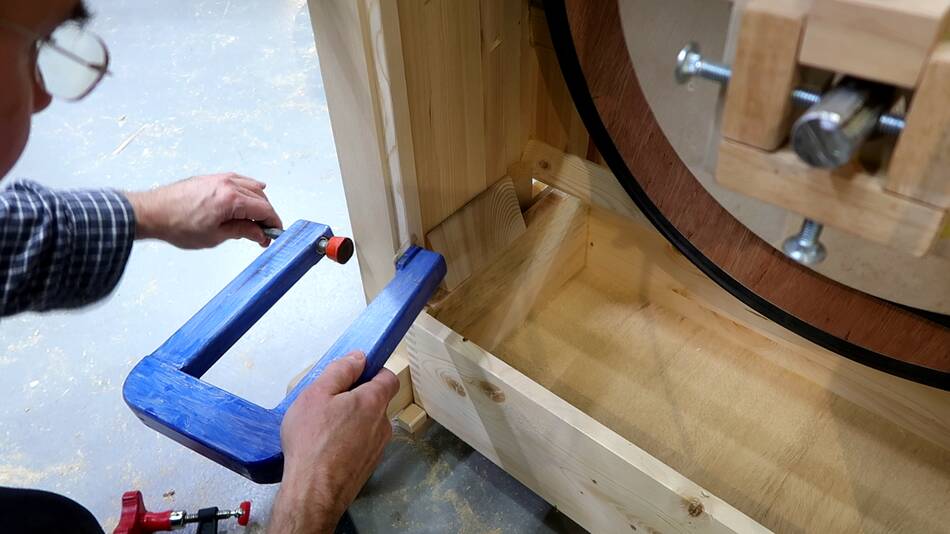 Then glued the wedges to the inside bottom of the legs. I put a 3 mm thick
spacer on top of the drawer, then placed the wedge on that, then glued it
on. If you don't have long-reach clamps, attach the wedge with screws.
Then glued the wedges to the inside bottom of the legs. I put a 3 mm thick
spacer on top of the drawer, then placed the wedge on that, then glued it
on. If you don't have long-reach clamps, attach the wedge with screws.
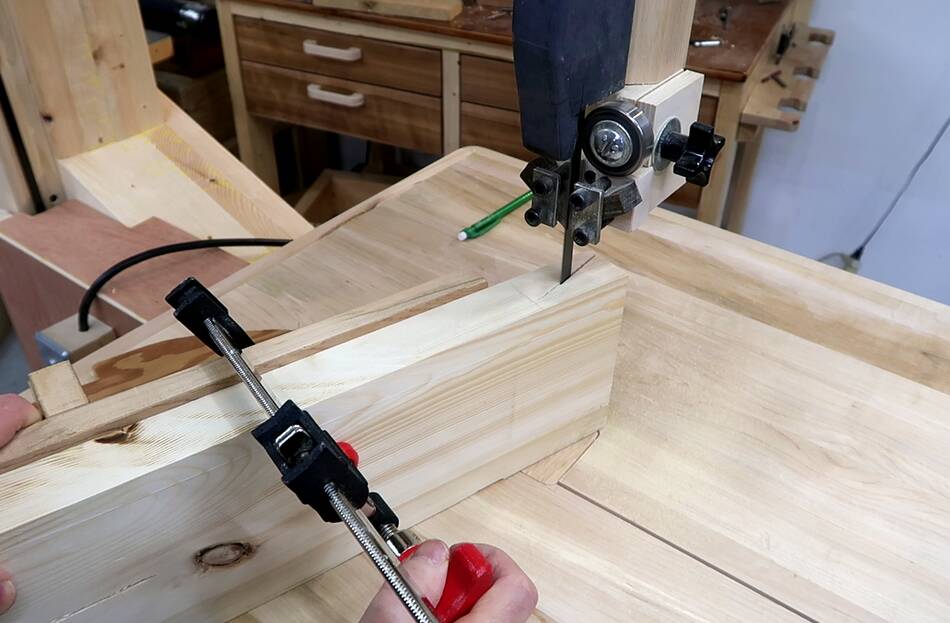
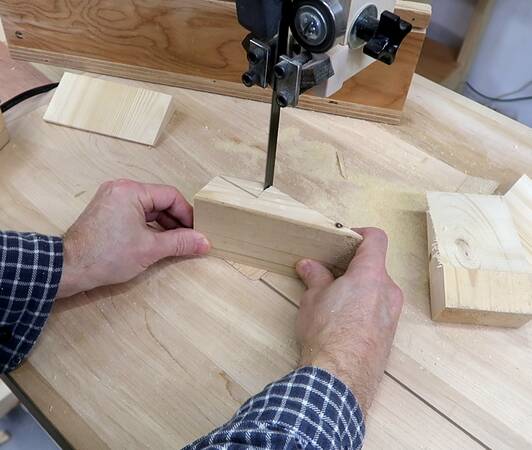 Then I got a bit fancy making another dust deflector for near the
front. This has to fit around some other pieces. I marked the shape of
off the frame and cut it out on the bandsaw
Then I got a bit fancy making another dust deflector for near the
front. This has to fit around some other pieces. I marked the shape of
off the frame and cut it out on the bandsaw
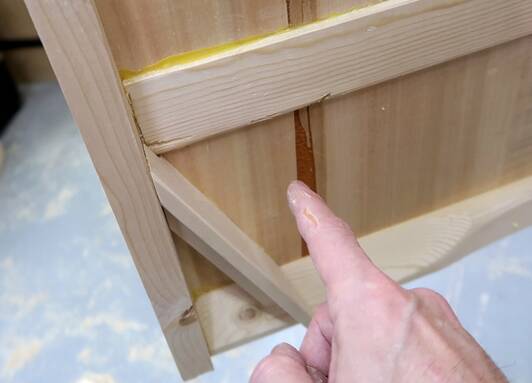 I cut a few notches on that to fit against the inside of the bottom
cover. This sort of thing is not something that's practical to do from
dimensioned drawings, so I won't be including this part in the plans.
I cut a few notches on that to fit against the inside of the bottom
cover. This sort of thing is not something that's practical to do from
dimensioned drawings, so I won't be including this part in the plans.
I also added a diagonal dust deflector to the corner of the bottom door.
 With the door closed, these pieces nest and deflect all the sawdust
that falls down into the drawer.
With the door closed, these pieces nest and deflect all the sawdust
that falls down into the drawer.
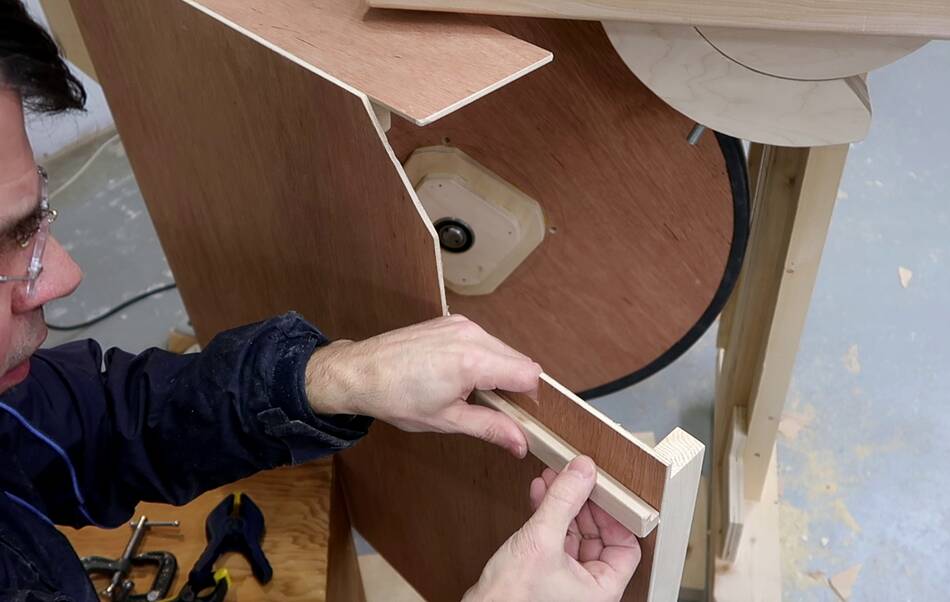
 I screwed a nice piece of hardwood on to go on top of the
front of the drawer. The idea is that with the drawer extending
forward with respect to the enclosure, there will be more room
for sawdust to pile up in it.
I screwed a nice piece of hardwood on to go on top of the
front of the drawer. The idea is that with the drawer extending
forward with respect to the enclosure, there will be more room
for sawdust to pile up in it.
 But the other function of extending the drawer forward is that I get
a ledge above it, which makes a convenient step for getting at the
tension crank, which is hard to reach.
But the other function of extending the drawer forward is that I get
a ledge above it, which makes a convenient step for getting at the
tension crank, which is hard to reach.
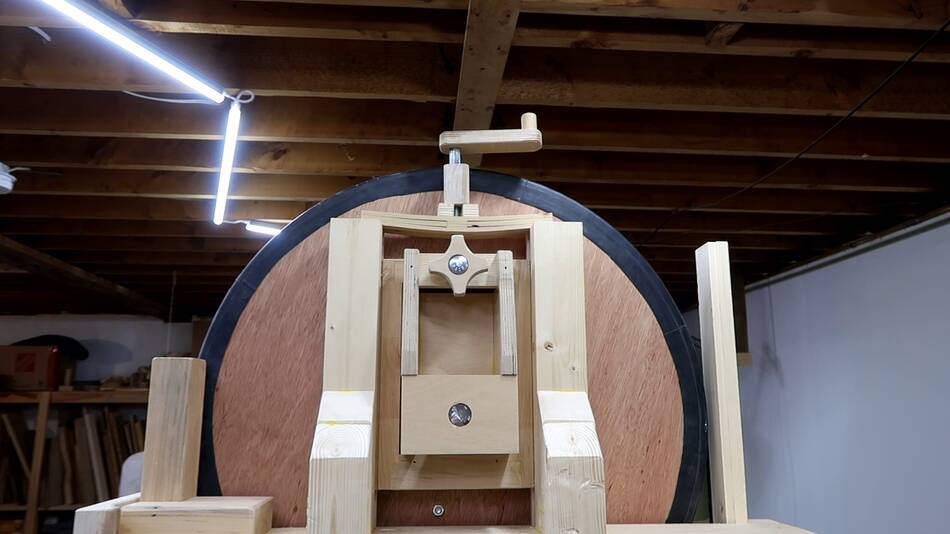 I had thought about some alternate arrangement for the tension crank
to avoid the hard-to-reach aspect.
I had thought about some alternate arrangement for the tension crank
to avoid the hard-to-reach aspect.
A lot of larger bandsaws have the tension adjustment below the upper wheel, but then it would get in the way on the bottom, and I'd have to move the upper wheel further up to get the crank further out of the way. Also, it would be hard to accommodate a wooden leaf spring on the bottom side.
Another alternative would be some L-shaped lever to translate the vertical adjustment of the wheel to horizontal movement and put the crank on the left side, out of the way and easy to reach. But that gets complicated. So in the end, I decided to leave the crank on top and live with the inconvenience.
 I made a hardwood drawer front for the sawdust drawer. I made a recessed
drawer pull for this drawer to avoid bumping into it with my legs,
similar to these ones
or these ones for my
20" bandsaw
I made a hardwood drawer front for the sawdust drawer. I made a recessed
drawer pull for this drawer to avoid bumping into it with my legs,
similar to these ones
or these ones for my
20" bandsaw
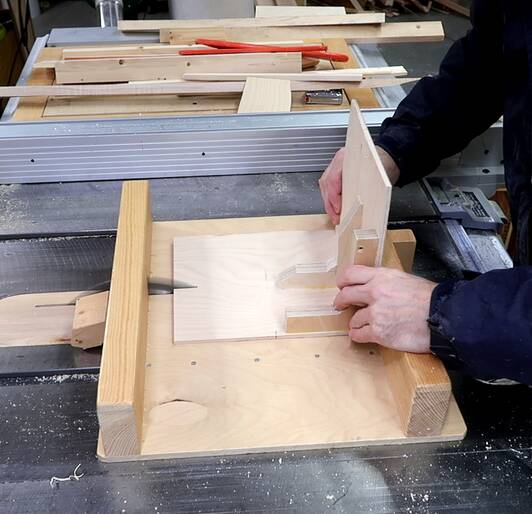
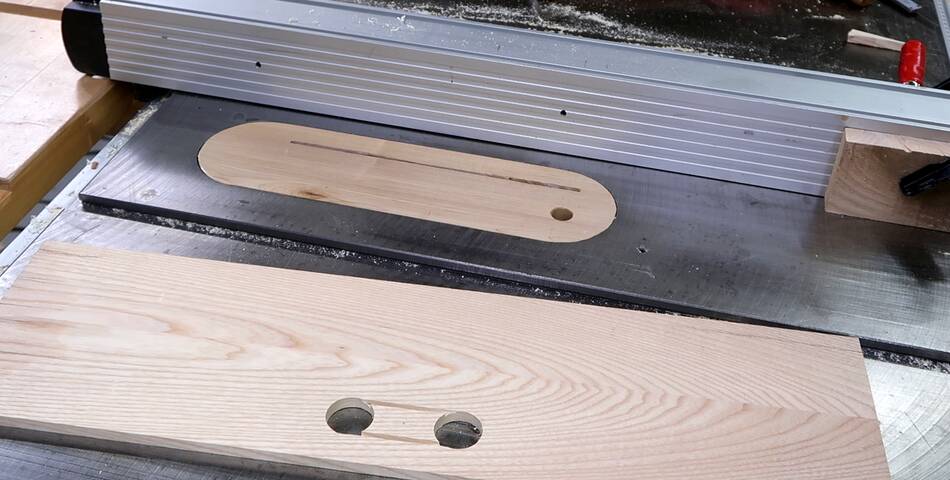
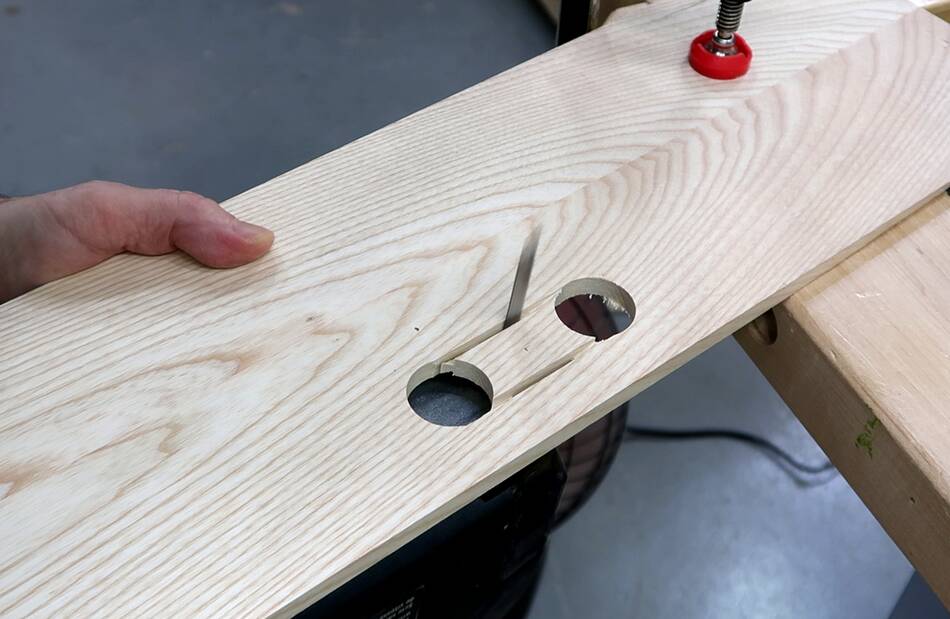 I drilled two holes for ends of the slot for the handle, then plunged
between them with my table saw as far as I could without
making the cut too long.
I drilled two holes for ends of the slot for the handle, then plunged
between them with my table saw as far as I could without
making the cut too long.
The idea of these plunge cuts is to get a nice straight and accurate edge between the holes.
I then finished the cut with a jigsaw.
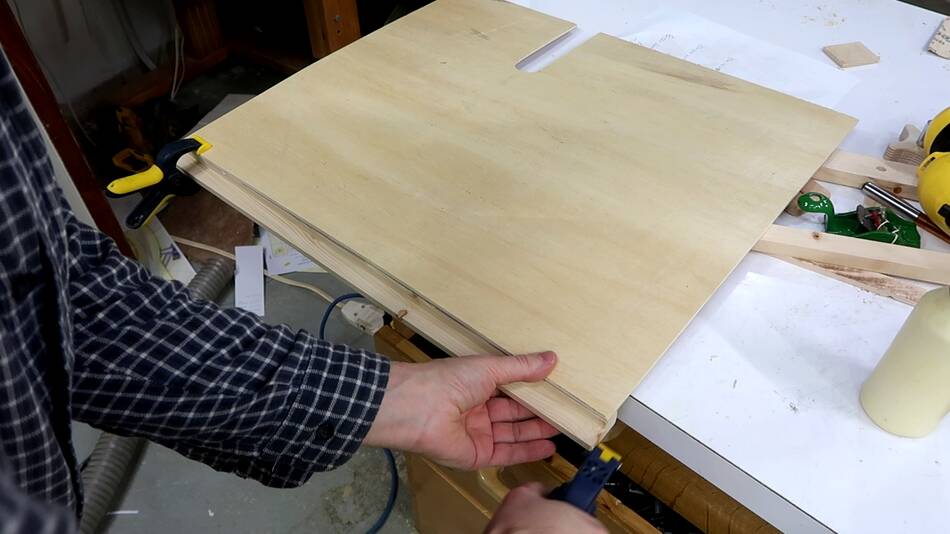
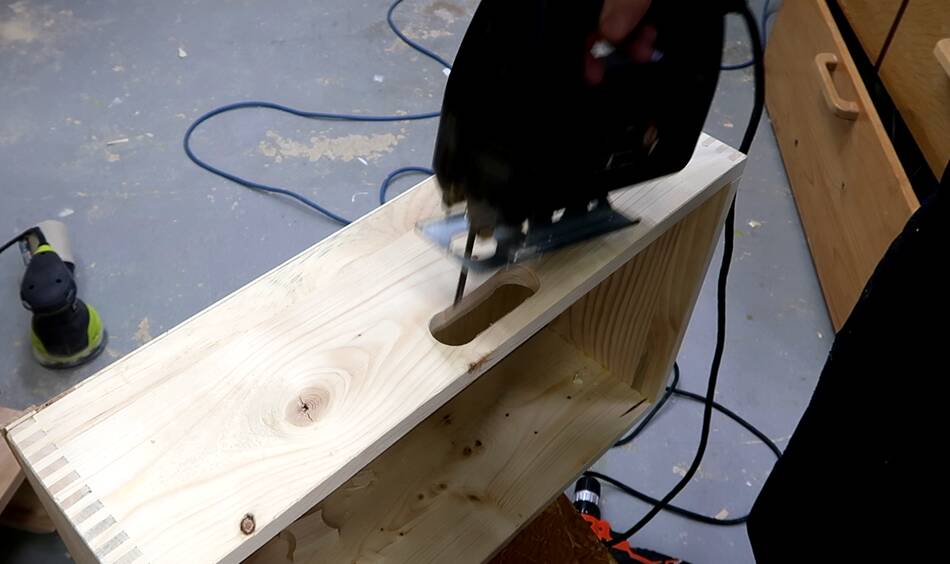 The layer behind the hardwood front also has a hole, but this hole
is a bit wider and extends up behind the hole in the front, effectively
forming a ledge behind the the front layer to pull the drawer by.
The layer behind the hardwood front also has a hole, but this hole
is a bit wider and extends up behind the hole in the front, effectively
forming a ledge behind the the front layer to pull the drawer by.
 It's important to round the back edges of the front layer before gluing
it on, so that when pulling the drawer, you dont' have to pull by
a sharp edge.
It's important to round the back edges of the front layer before gluing
it on, so that when pulling the drawer, you dont' have to pull by
a sharp edge.
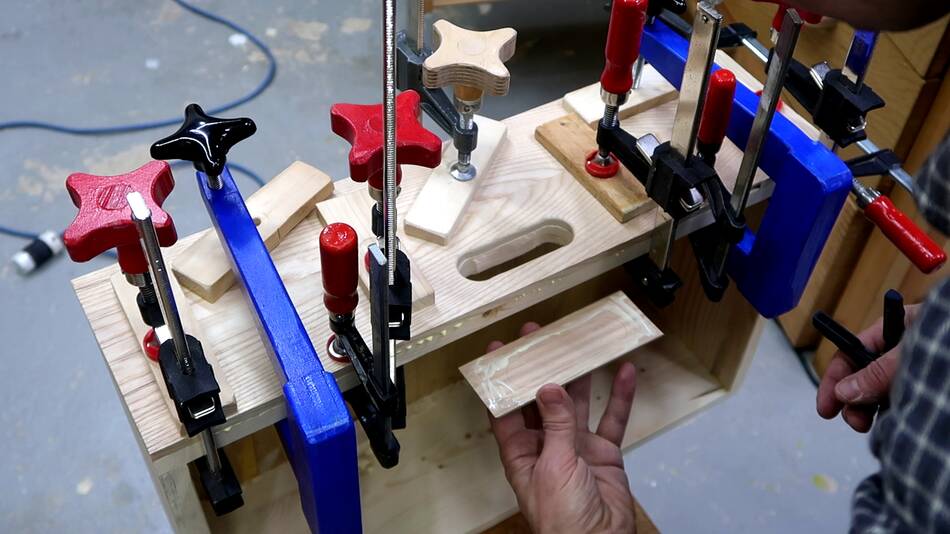
Then gluing on the front hardwood layer plus another thin piece of hardwood to close off the handle hole to the inside of the drawer.
 I ended up gluing some pieces of trim to the plywood edges either side of
the drawer.
I ended up gluing some pieces of trim to the plywood edges either side of
the drawer.
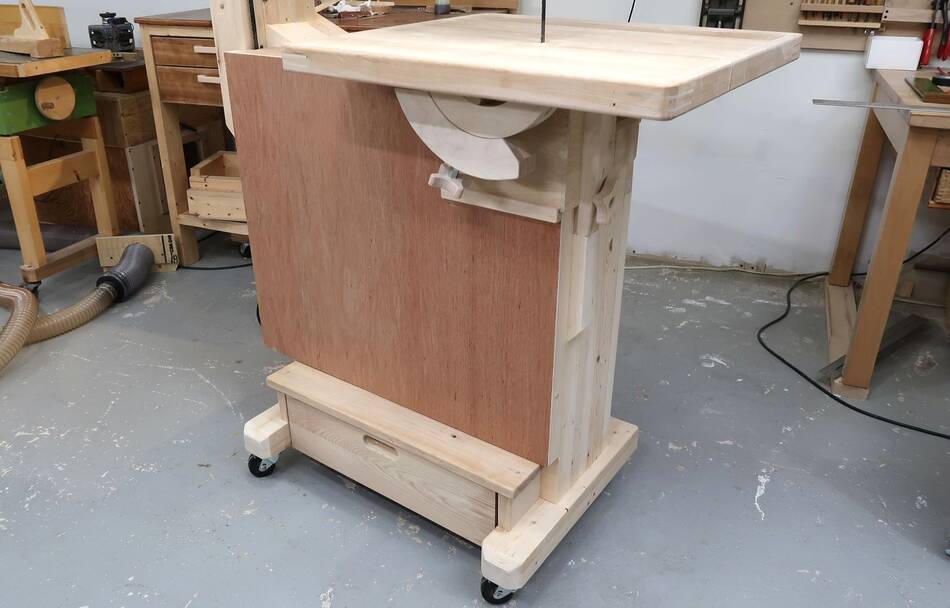 With the drawer in place, the bottom enclosure is almost done. Still missing
is a cover around the motor and belt, and a latch for the bottom door.
With the drawer in place, the bottom enclosure is almost done. Still missing
is a cover around the motor and belt, and a latch for the bottom door.
Next: Bandsaw top enclosure
 Blade guard and first resaw test
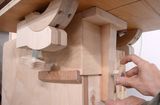 20" bandsaw enclosure
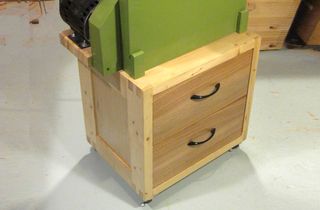 16" bandsaw stand
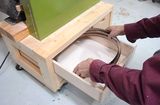 Drawers for my 20" bandsaw stand
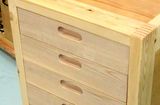 Recessed drawer handles
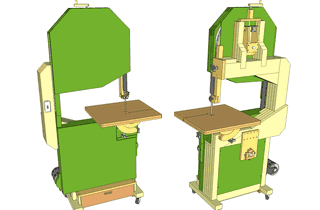 Buy plans for the 26" bandsaw