 I was thinking about building bar clamps before I built my
long reach C-clamps. But then I thought about making my clamps
unique by giving them a long reach, and C-clamps were much easier to make sturdy enough for that.
I was still planning to build some bar clamps eventually, but when I visited John Heisz,
I saw these clamps so he beat me to it!
I was thinking about building bar clamps before I built my
long reach C-clamps. But then I thought about making my clamps
unique by giving them a long reach, and C-clamps were much easier to make sturdy enough for that.
I was still planning to build some bar clamps eventually, but when I visited John Heisz,
I saw these clamps so he beat me to it!
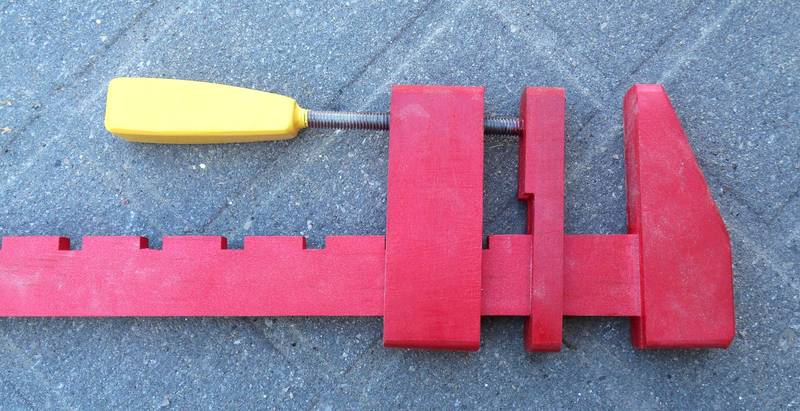
The design of these clamps is very close to what I was thinking of building myself.
 Made of wood, the clamps are very light. John intended these clamps to be his "overflow"
clamps. Basically, these would be the clamps to go to when doing a glue up,
and all other clamps are already used up.
Made of wood, the clamps are very light. John intended these clamps to be his "overflow"
clamps. Basically, these would be the clamps to go to when doing a glue up,
and all other clamps are already used up.
He painted them red because otherwise the clamps are hard to spot among other bits of wood in the shop. Same reason I painted my C-clamps.
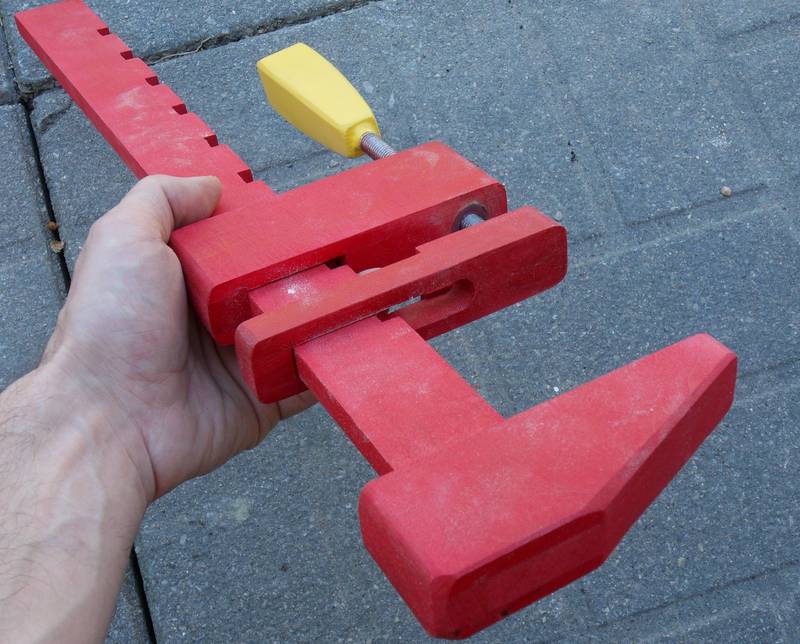
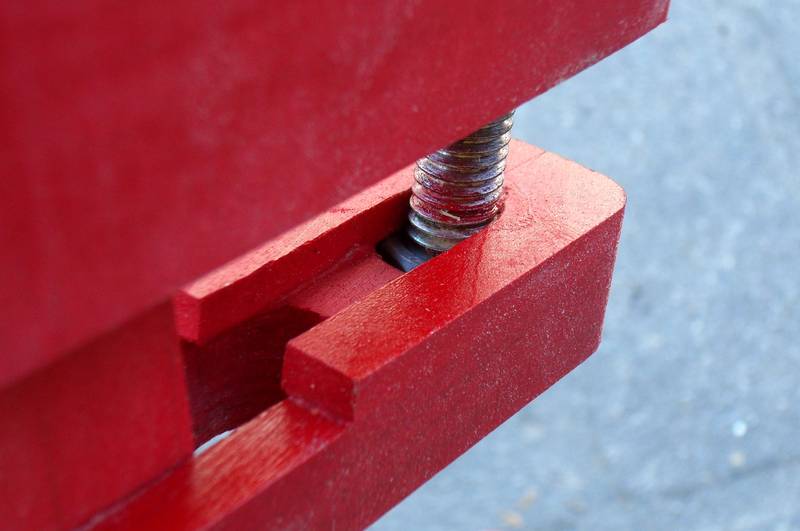
 Just like my C-clamps, these clamps rely on a nut in either side of the piece of wood. But instead
of cutting a hexagonal hole, John just glued them in place. Although that could
become an issue with wood shrinkage and expansion - if the nuts are rigidly mounted in
the wood, they could end up binding on the screw thread when the wood between them shrinks
or expands from humidity changes. It's a simpler solution than my solution though,
but on my clamps, the nuts were so large that if I had drilled a round hole
to fit them in, I would have drilled away almost all the wood.
Just like my C-clamps, these clamps rely on a nut in either side of the piece of wood. But instead
of cutting a hexagonal hole, John just glued them in place. Although that could
become an issue with wood shrinkage and expansion - if the nuts are rigidly mounted in
the wood, they could end up binding on the screw thread when the wood between them shrinks
or expands from humidity changes. It's a simpler solution than my solution though,
but on my clamps, the nuts were so large that if I had drilled a round hole
to fit them in, I would have drilled away almost all the wood.
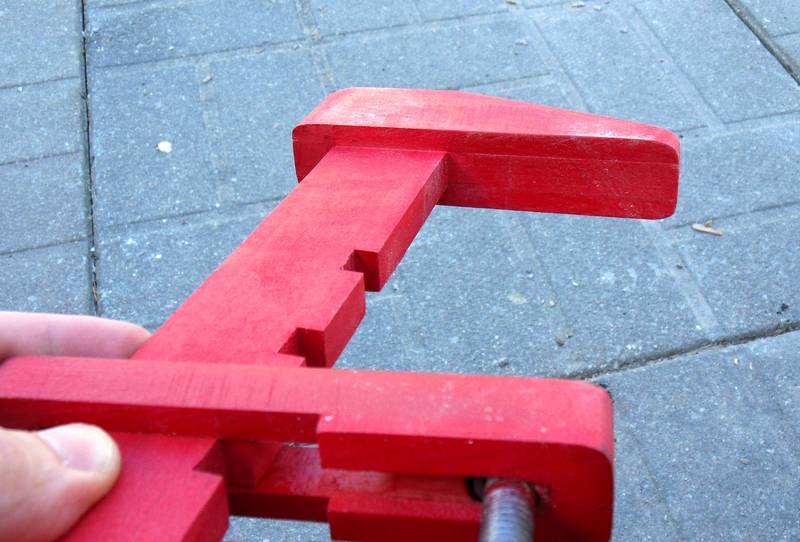
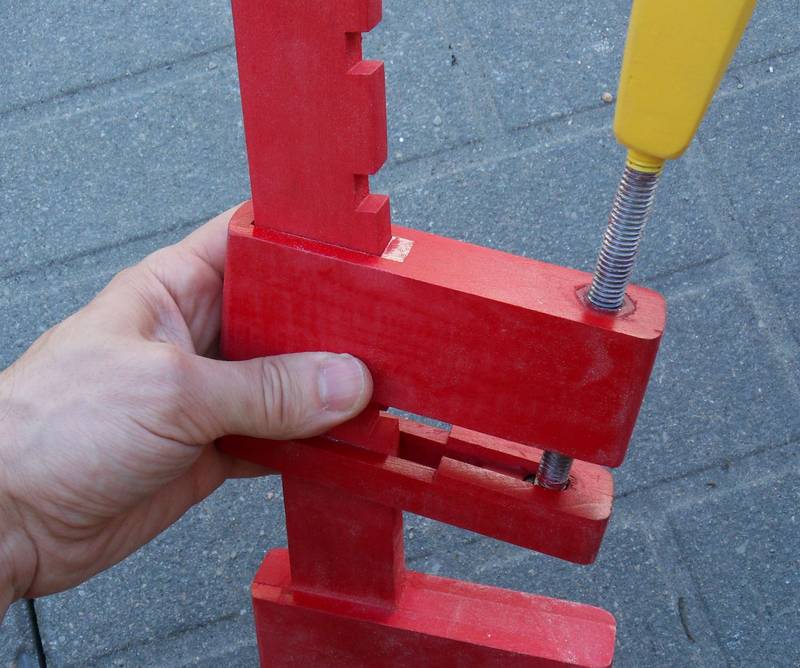 The upper part of the clamp can tilt to move it from one notch to the next.
With the notches about 4 cm (1.5") apart, you often have to turn the handle quite a few
turns to set the clamp to the right opening - a similar nuisance as with C-clamps.
That is one thing that is convenient about regular bar clamps - just close them
on the piece to clamp, and then a few turns tightens them.
If or when get around to building some bar clamps of my own, I'll try to put the notches
closer together. Very useful to be able to play with John's clamps to experience this!
The upper part of the clamp can tilt to move it from one notch to the next.
With the notches about 4 cm (1.5") apart, you often have to turn the handle quite a few
turns to set the clamp to the right opening - a similar nuisance as with C-clamps.
That is one thing that is convenient about regular bar clamps - just close them
on the piece to clamp, and then a few turns tightens them.
If or when get around to building some bar clamps of my own, I'll try to put the notches
closer together. Very useful to be able to play with John's clamps to experience this!
 John used a 3/8" threaded rod, whereas I used 1/2" (mostly to get a coarser thread).
Where I used my angle grinder/drill press trick to cut a neck on the end of the screw,
John just welded a nut onto the end of his threaded rods. The nut turns inside a cavity
in part of the clamp, but with that part of the clamp reaching around the bar, there's no
risk of the pad turning on the wood. A clever solution.
John used a 3/8" threaded rod, whereas I used 1/2" (mostly to get a coarser thread).
Where I used my angle grinder/drill press trick to cut a neck on the end of the screw,
John just welded a nut onto the end of his threaded rods. The nut turns inside a cavity
in part of the clamp, but with that part of the clamp reaching around the bar, there's no
risk of the pad turning on the wood. A clever solution.
 The ends of the clamps are made by sandwiching three layers together - easy to make
that way. John used LePage PL construction adhesive (the kind of glue that comes
in caulking gun tubes), which he's come to swear by. John says:
The ends of the clamps are made by sandwiching three layers together - easy to make
that way. John used LePage PL construction adhesive (the kind of glue that comes
in caulking gun tubes), which he's come to swear by. John says:
" Advantages are very high strength - if not as strong as yellow wood glue, it has other very attractive features that counterbalance this, such as longer open time, superior gap filling, doesn't drip off, will adhere to other materials (such as steel hex nuts) and it's very easy to clean up squeeze out once dry. It also has an attractive quality for work on pieces that have a fine finish: it does not creep, like carpenters glue will. Previously, using hide glue was about the only reasonable option if you wanted to avoid cold creep glue lines "
I wasn't fully convinced, but John had some very short cutoffs from making these clamps lying around, and they were surprisingly hard to break. They did break along the glue lines though, whereas with wood glue, the break often wanders from the glue line.
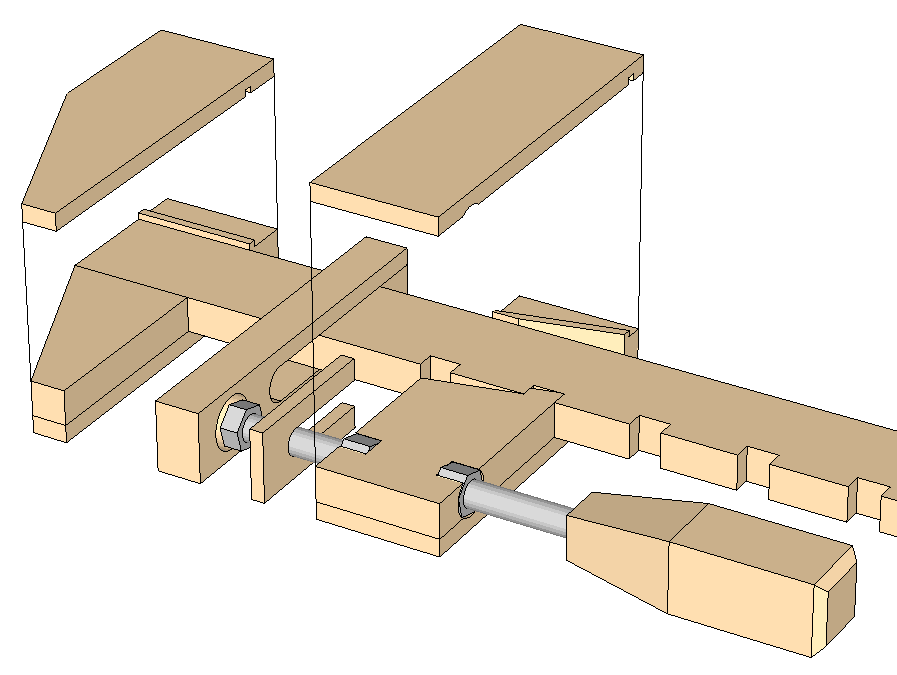 John also has a SketchUp model for the clamps:
"Attached is the SketchUp model I did during the final stages of construction, mainly to work out some of the details. The small dadoes in the side pieces of the head and screw stock are not only for added strength, they are very important for alignment - setting the screw stock to the correct angle and the head at 90 degrees. The slots may be closer together but that increases the risk of fracture, especially if dropped. I first considered saw tooth notches but settled on these as easier to cut accurately. "
Joh Heisz has also shot a video explaining more about how these clamps are made and work.
Update: John Heisz has since come up with an improved design, which he wrote about on his website
 Long reach
 Homemade table saw
 Router table
 Disk sander
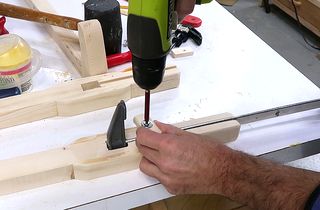 Bar clamp extender