Using spacers to lay out drawer slides
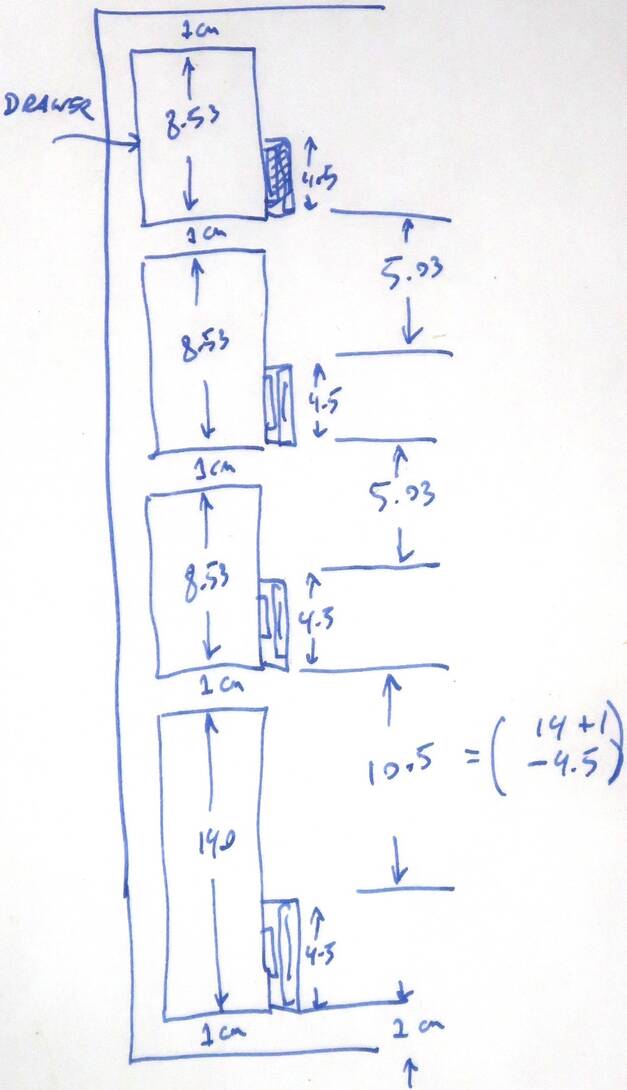
 Mounting drawer slides precisely is hard to get right.
But cutting spacers to a precise length on the table saw is easy. So I had the idea of using spacers to lay out the drawer slides for this workbench cabinet.
The drawers stacked inside the cabinet leave 5 cm of vertical height. With four drawers, I have a total of five gaps (counting above and below the drawers), so I figured 1 cm for all gaps would be good.
 I then calculated how big the spacers between the drawer slides need to be, based on
the drawer slides being 4.5 cm wide (it's advisable to use Metric for this, unless
you are a die-hard inch person and also like to rip your hair out).
I then calculated how big the spacers between the drawer slides need to be, based on
the drawer slides being 4.5 cm wide (it's advisable to use Metric for this, unless
you are a die-hard inch person and also like to rip your hair out).
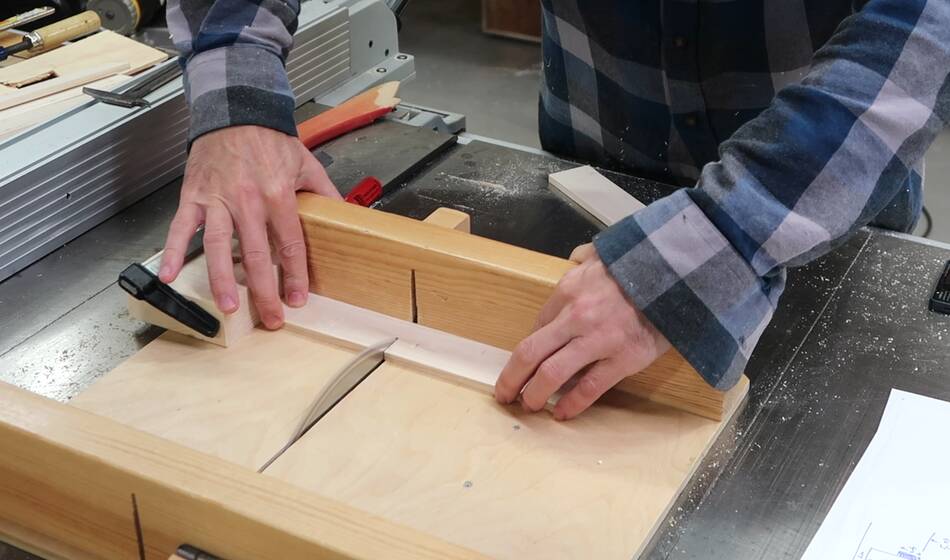
I then used a stop block on a table saw sled to precisely cut the spacers.
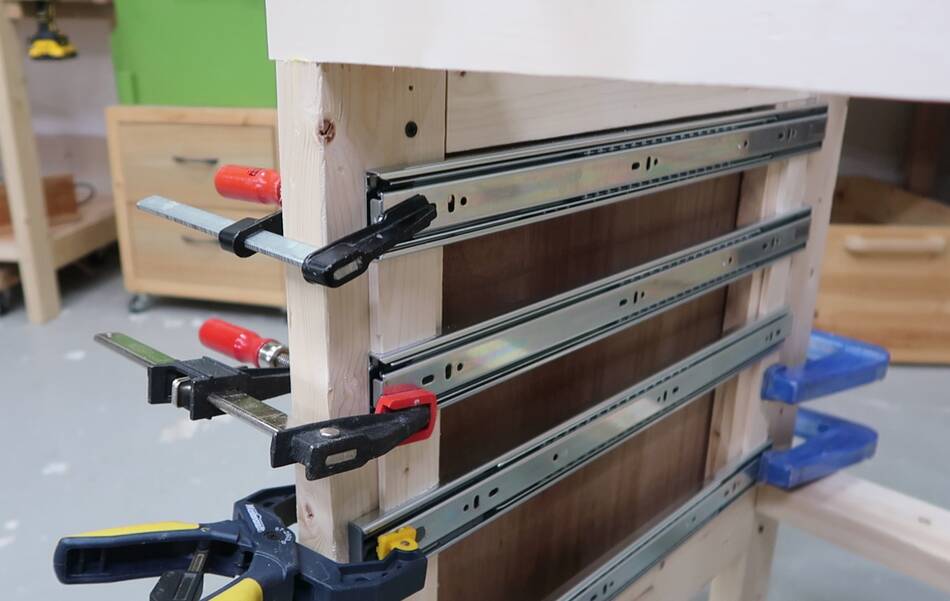 Then stacking drawer slides and spacers. I had to clamp the slides in place
to keep them all from tumbling down. In retrospect, I should have just
propped up one side of the cabinet to put it at maybe a 10° angle, so
I wouldn't have to clamp the slides to keep them from falling.
Then stacking drawer slides and spacers. I had to clamp the slides in place
to keep them all from tumbling down. In retrospect, I should have just
propped up one side of the cabinet to put it at maybe a 10° angle, so
I wouldn't have to clamp the slides to keep them from falling.
 After I was satisfied that the layout was correct (I tweaked the size of the blocks
after the first check), I glued the blocks in place.
After I was satisfied that the layout was correct (I tweaked the size of the blocks
after the first check), I glued the blocks in place.
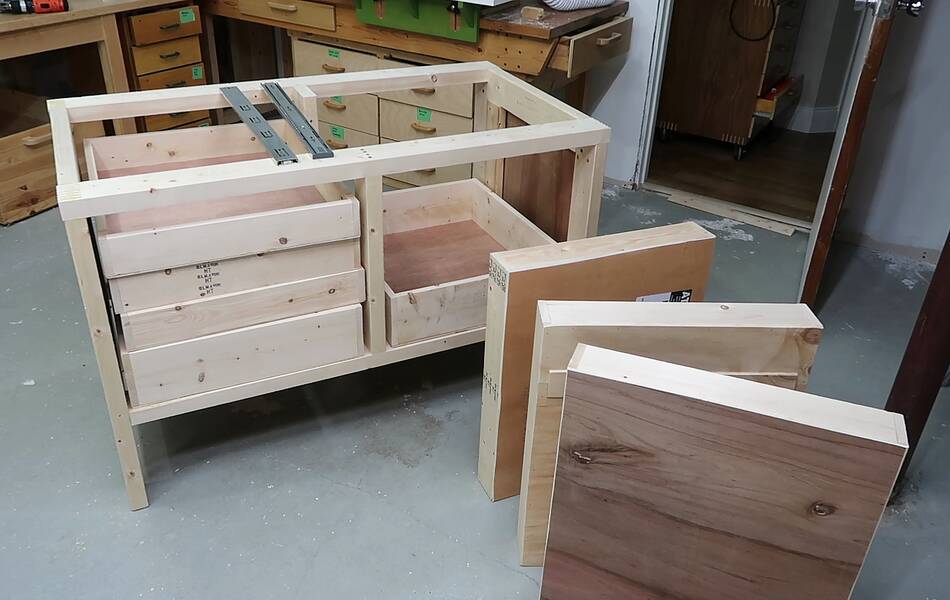
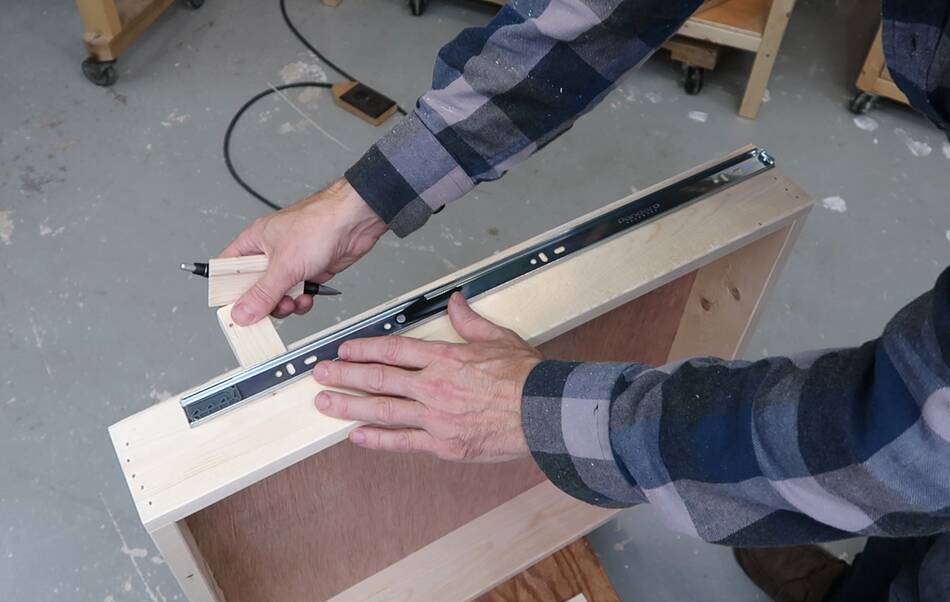 Then attaching the drawer slides. I mounted the inner part so that the outer part
of the slide would be flush with the bottom of the drawer. I made a little
spacer block with a rabbet cut in the end of it to help position the slides
with respect to the drawer bottom. I had another little block to position the
end of the slide about 2.5 mm in from the end.
Then attaching the drawer slides. I mounted the inner part so that the outer part
of the slide would be flush with the bottom of the drawer. I made a little
spacer block with a rabbet cut in the end of it to help position the slides
with respect to the drawer bottom. I had another little block to position the
end of the slide about 2.5 mm in from the end.
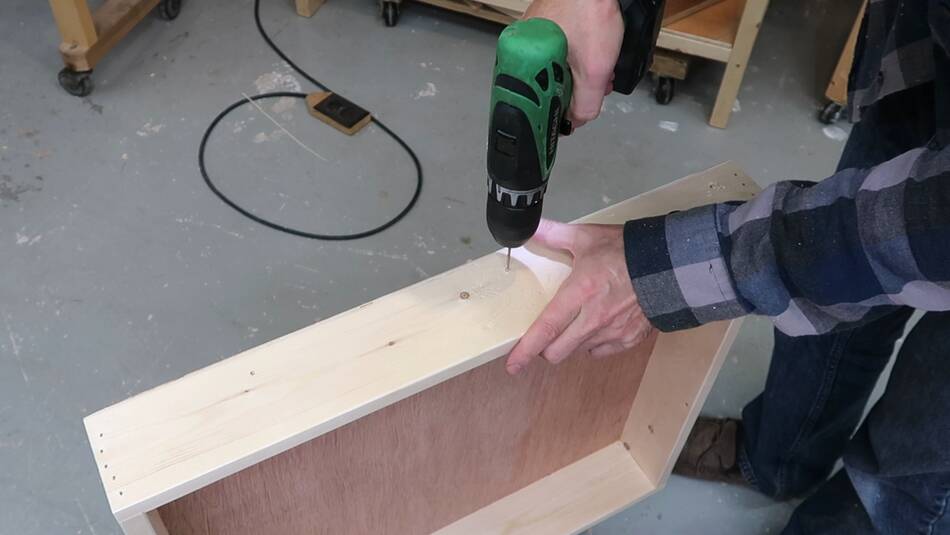 I marked where the holes in the slides are and used an awl to center-punch the
screw positions, then drilled small pilot holes for the screws.
I marked where the holes in the slides are and used an awl to center-punch the
screw positions, then drilled small pilot holes for the screws.
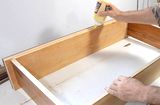
Pilot holes weren't strictly necessary, but I found I could position the screws more accurately with a pilot hole. Also, the Posi-drive screws didn't fit that well on my Phillips screwdriver, and the pilot hold helped to get them in straight. Posi-drive screws look a lot like Phillips screws, but they don't fit snug on a Phillips screwdriver, and I can't be bothered to find a Posi-drive screwdriver for those rare cases.
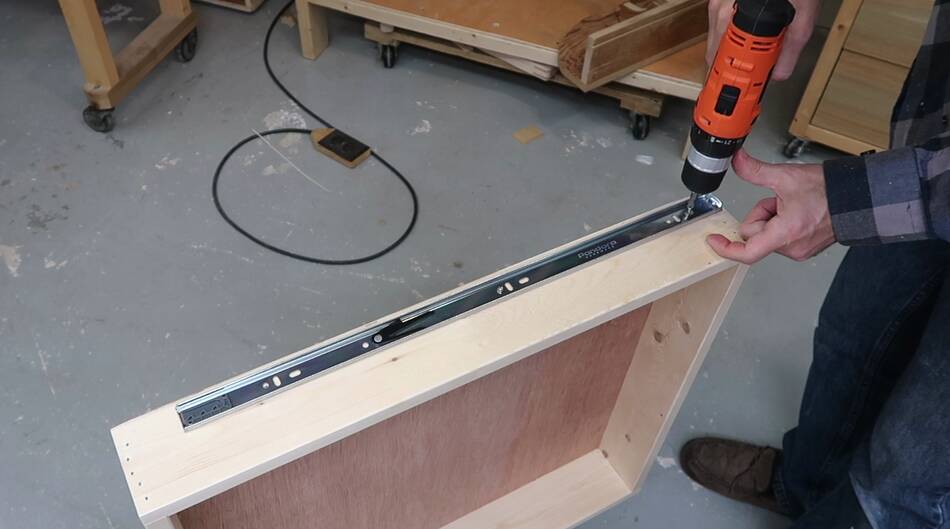 Then screwing on the drawer slides.
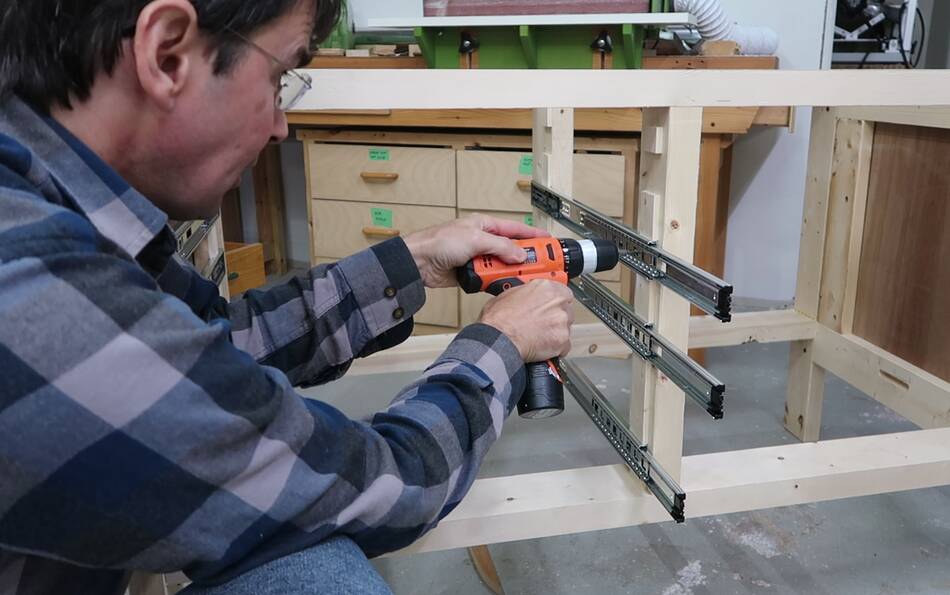 Mounting the outer part of the drawer slides in the cabinet. This was much easier
because the spacers already set the exact position of the slides, even if the screw ends up
half a millimeter out of place.
Mounting the outer part of the drawer slides in the cabinet. This was much easier
because the spacers already set the exact position of the slides, even if the screw ends up
half a millimeter out of place.
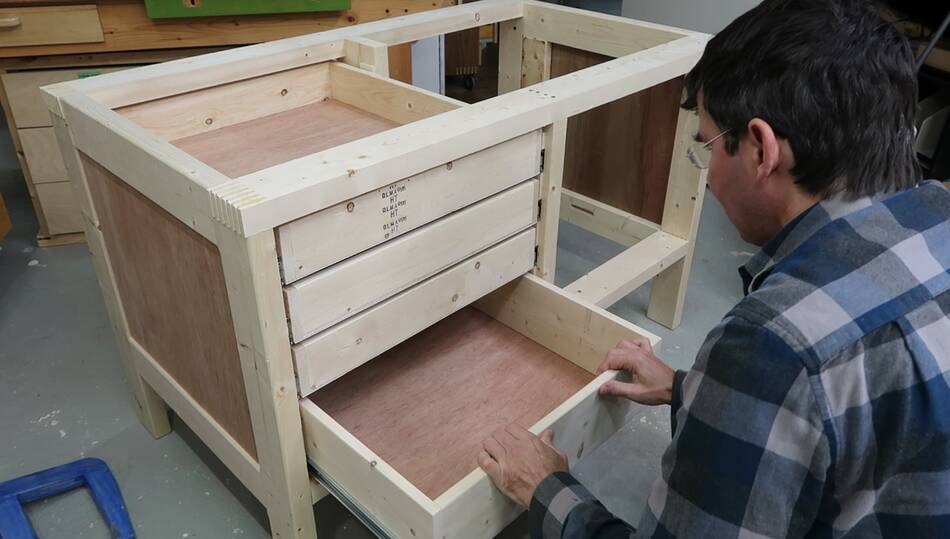 Test fitting the drawers, so far so good.
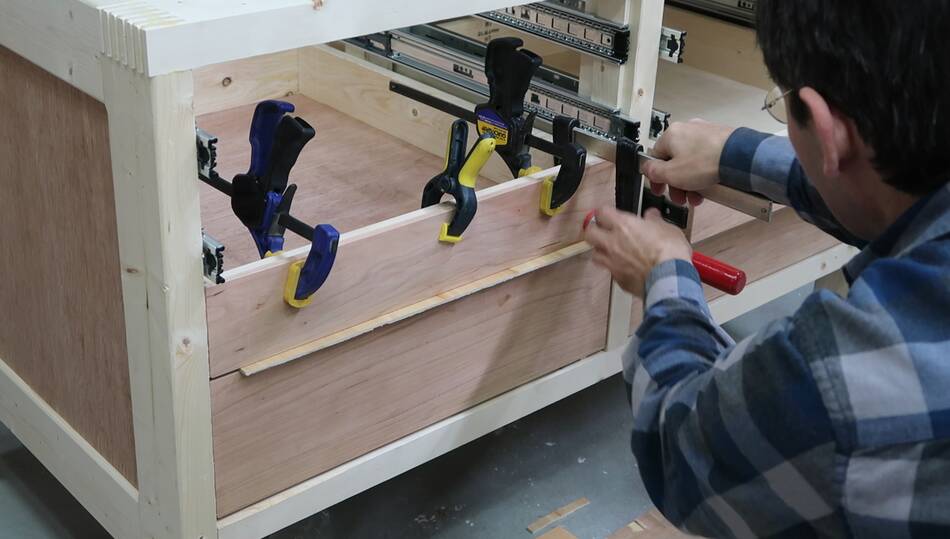 I first glued the bottom drawer front on, then put a spacer above it and glued the next drawer
front on. But rather than space the drawer above that one to the previous one, I glued each
drawer front on above the bottommost drawer. That way, I could be sure the drawers were all
consistent with each other.
I first glued the bottom drawer front on, then put a spacer above it and glued the next drawer
front on. But rather than space the drawer above that one to the previous one, I glued each
drawer front on above the bottommost drawer. That way, I could be sure the drawers were all
consistent with each other.
This method also avoided the awkward gluing the top drawer front on, because there wouldn't have been any room for the clamps when gluing the drawer front on (yes, there are tricks to get around that, but it's much easier to be able to just clamp it in place).
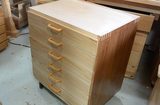
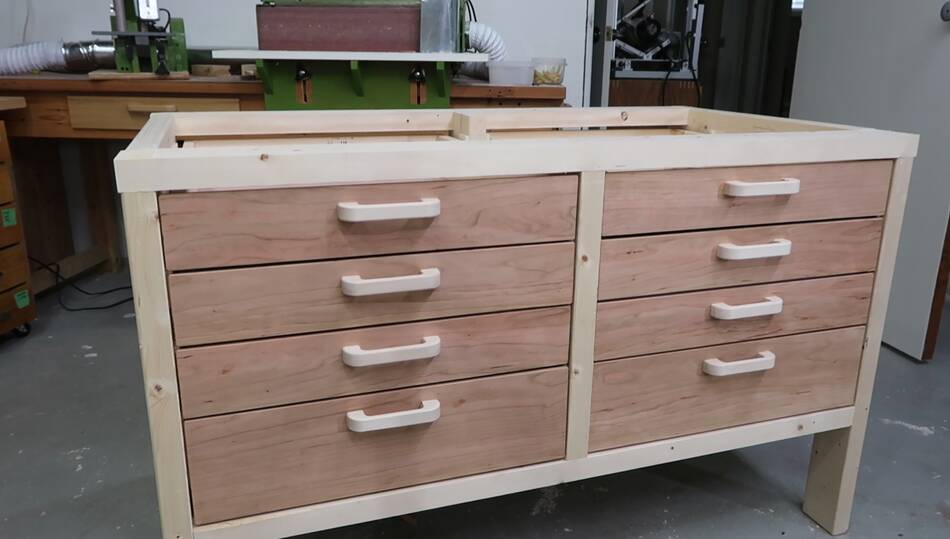 All the drawers are in place. The gaps are consistent enough, though not as consistent as
the drawers for this dresser, on which I
manually tweaked the gaps with a hand plane.
The problem with manually tweaking the gaps is that if you swap drawers, the spacing may
no longer be correct. On this one, I can swap the drawers around without messing up
the gaps in between.
All the drawers are in place. The gaps are consistent enough, though not as consistent as
the drawers for this dresser, on which I
manually tweaked the gaps with a hand plane.
The problem with manually tweaking the gaps is that if you swap drawers, the spacing may
no longer be correct. On this one, I can swap the drawers around without messing up
the gaps in between.
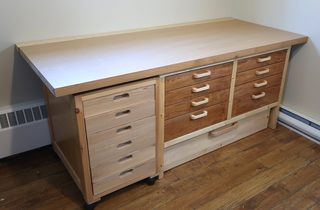
The drawer fronts are from a quarter cherry log that I got from my friend Peter Collin a few years ago.
This was part of my workbench with drawers build
See also
 Building a workbench with lots of drawers
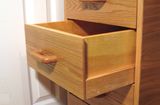
 Making drawers for a
dresser (2014)
 Tool stand drawers (2015)
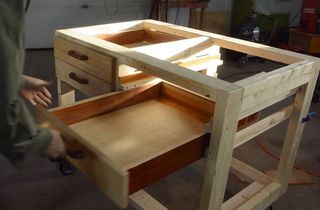 Drawers for the work-
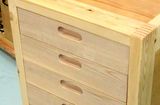 Drawers with recessed handles
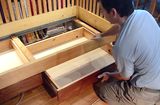 Drawers for the daybed (2015)
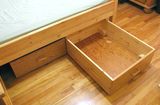 Under bed storage drawers (2008)
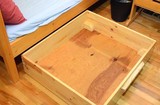 Under bed storage drawer (again)
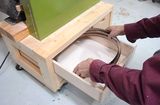 Drawers for the bandsaw stand
 Best way to attach drawer bottoms: destructive test
 Box joined drawers (2009)
 Making drawer pulls
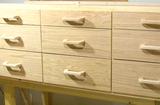 Workbench drawers (2008)
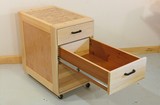 Building Drawers for a
mobile tool stand. (2009)
Building Drawers for a
mobile tool stand. (2009)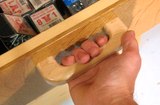 Making drawer handles (2009)
Back to my Woodworking website