With the frame completed and
drawers built, time to install the drawer slides.
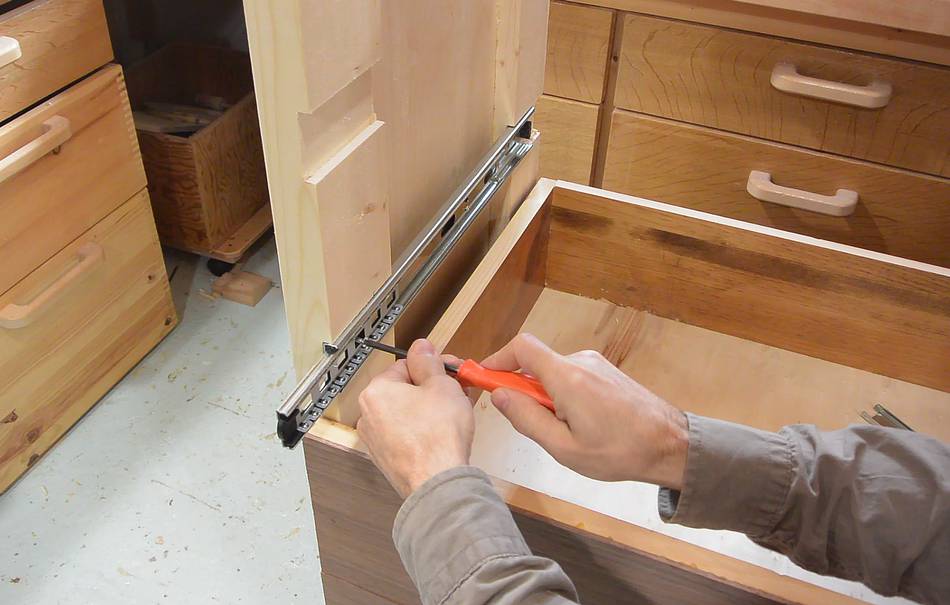
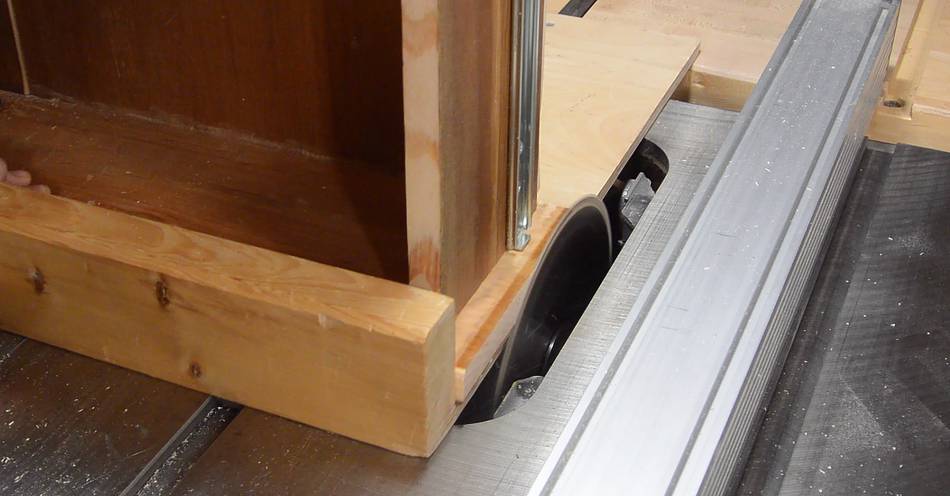
I mounted the outer part of the full extension drawer slides in the dadoes
I cut earlier. The dadoes fix the position, so no need to measure or fiddle
with some jig.
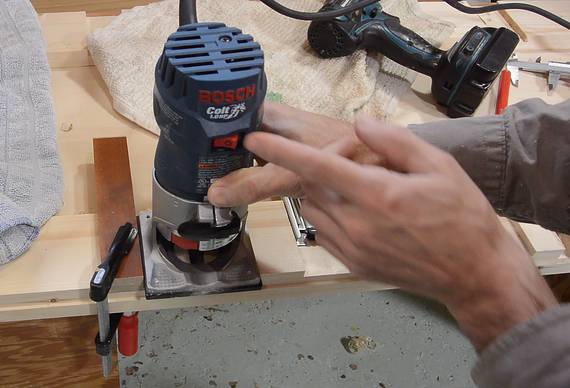
Only problem was, the drawers were too tight between the slides. I hadn't cut the dadoes deep enough, so I had to rout them out a bit more with a hand-held router. I re-routed them not quite to the dado's edges, then used a knife and chisel to cut them to the corners.
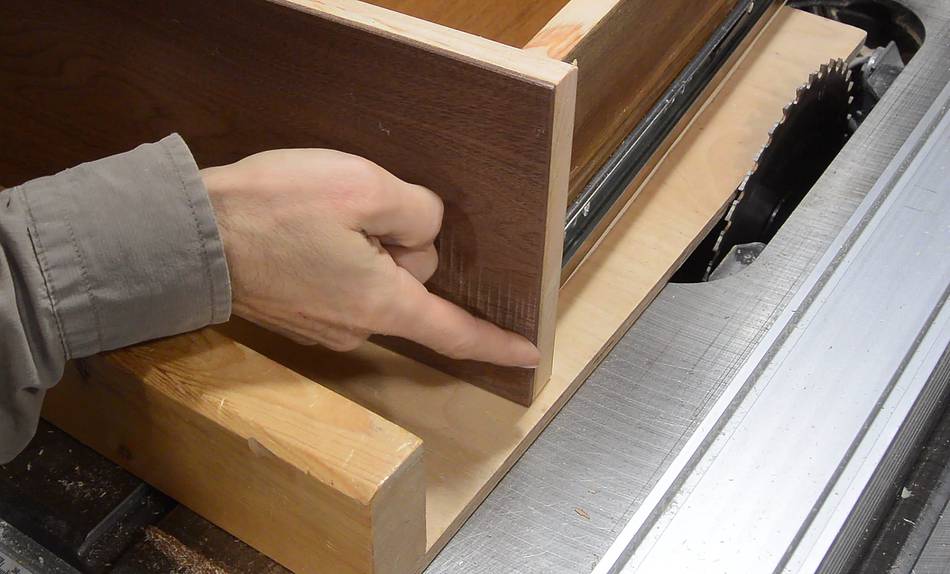
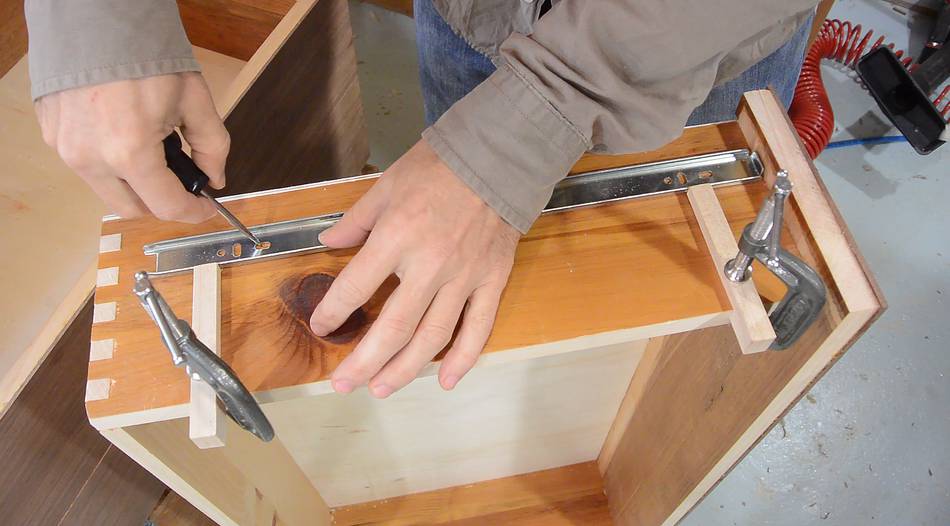 I made two spacer "hooks" to help position the other part of the slides a
consistent distance from the top edge of the drawers. I referenced the
top edge, not the bottom edge, because I used various plywood scraps for
the bottoms, and these were not all the same thickness.
I made two spacer "hooks" to help position the other part of the slides a
consistent distance from the top edge of the drawers. I referenced the
top edge, not the bottom edge, because I used various plywood scraps for
the bottoms, and these were not all the same thickness.
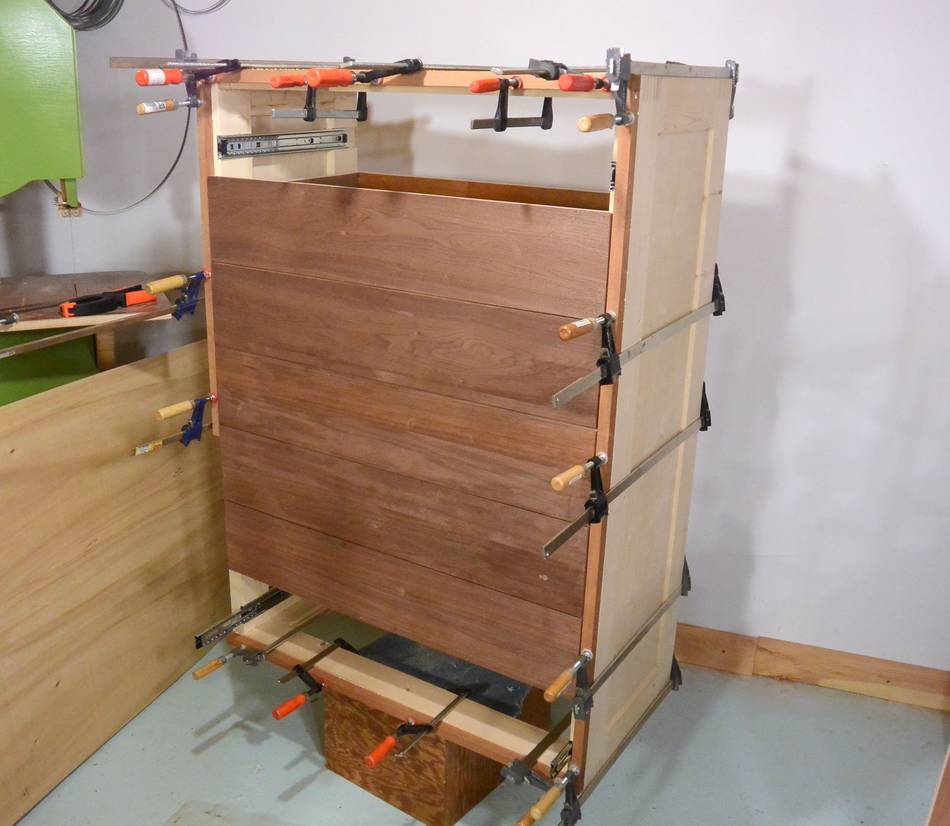
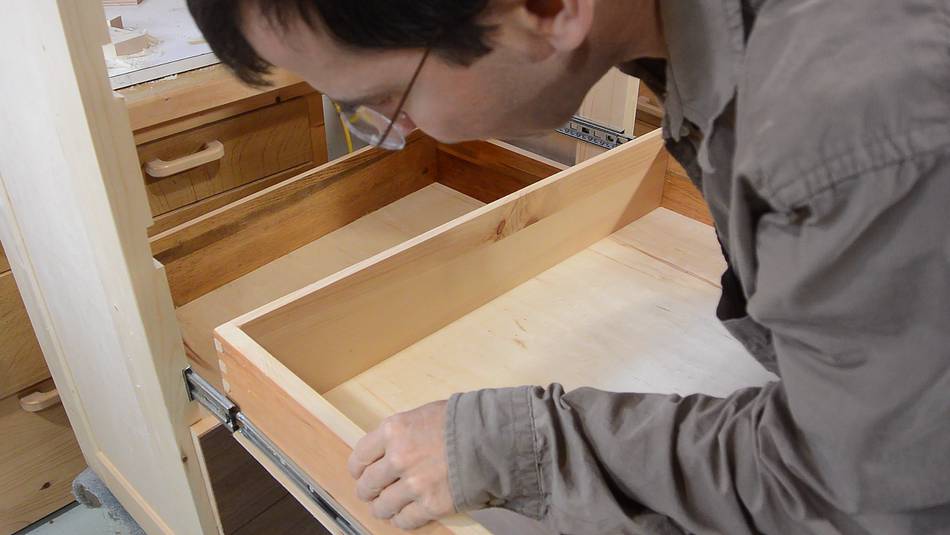 Re-meshing the two halves of the slides to put the drawers back in.
 It always takes a bit of shoving back and forth on the drawers when re-meshing
the slides. The balls of the ball bearing slide end up way towards one end
of the range and need to be dragged back into the middle, which is done
by forcing the drawer shut.
It always takes a bit of shoving back and forth on the drawers when re-meshing
the slides. The balls of the ball bearing slide end up way towards one end
of the range and need to be dragged back into the middle, which is done
by forcing the drawer shut.
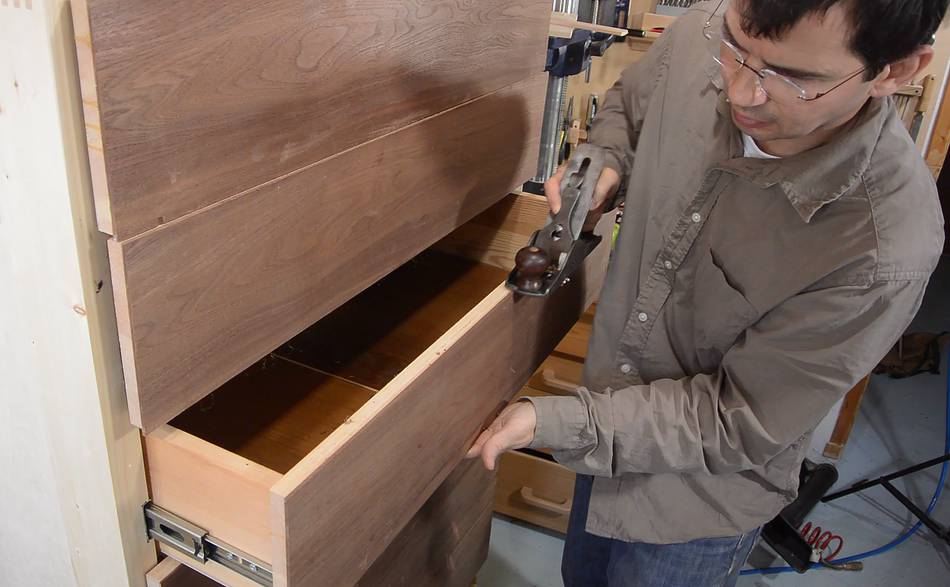
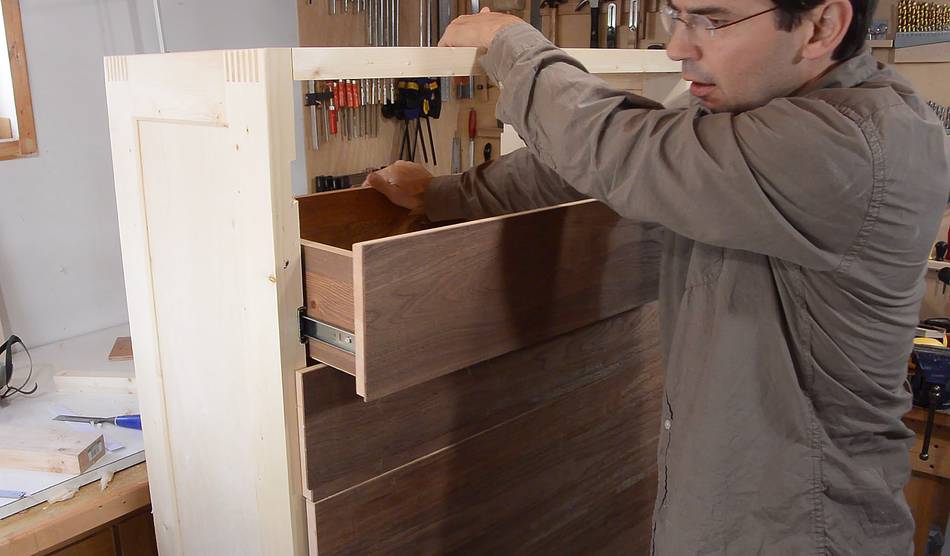
 I hadn't trimmed the veneer that I glued on the front, just in case I needed
to make some adjustments. But with the size and spacing of the drawers, I only
had about 3 mm between them. So I had to trim off the veneer overhang for the
drawers to clear each other.
I hadn't trimmed the veneer that I glued on the front, just in case I needed
to make some adjustments. But with the size and spacing of the drawers, I only
had about 3 mm between them. So I had to trim off the veneer overhang for the
drawers to clear each other.
 I did adjust the position of three of the 14 slides. I did this by chiseling
the dado wider by about 1 mm on one side, and gluing a shim in on the opposite
side.
I did adjust the position of three of the 14 slides. I did this by chiseling
the dado wider by about 1 mm on one side, and gluing a shim in on the opposite
side.
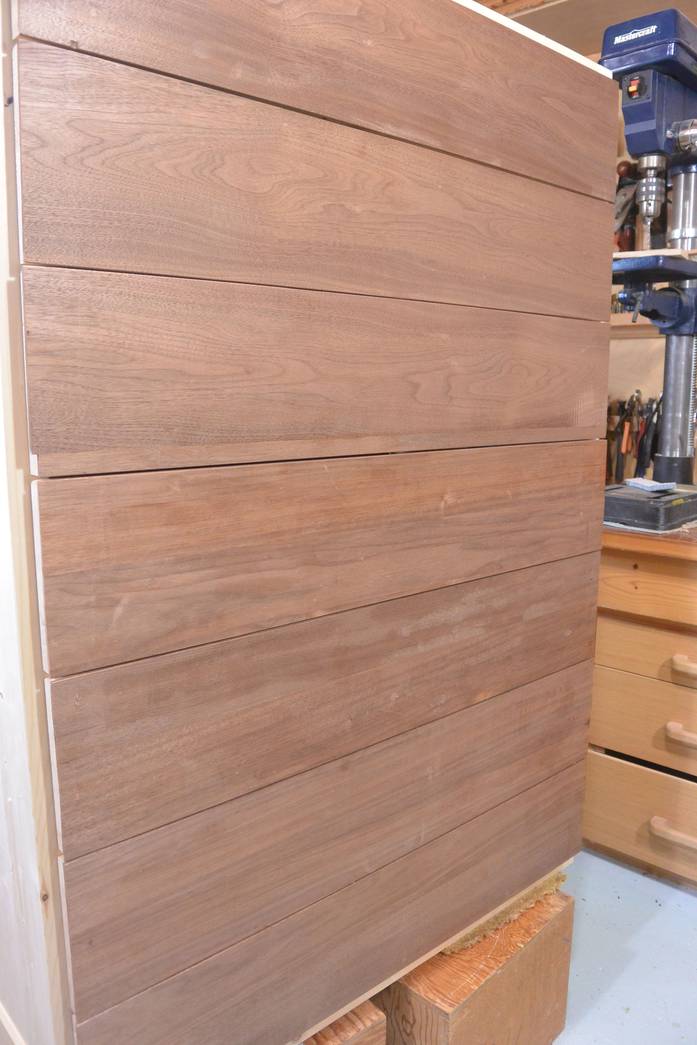
The end result: Very consistent gaps between the drawers.
 I also hadn't trimmed the veneer on the left and right either. With the drawers
all lined up, it was time to trim that too.
I also hadn't trimmed the veneer on the left and right either. With the drawers
all lined up, it was time to trim that too.
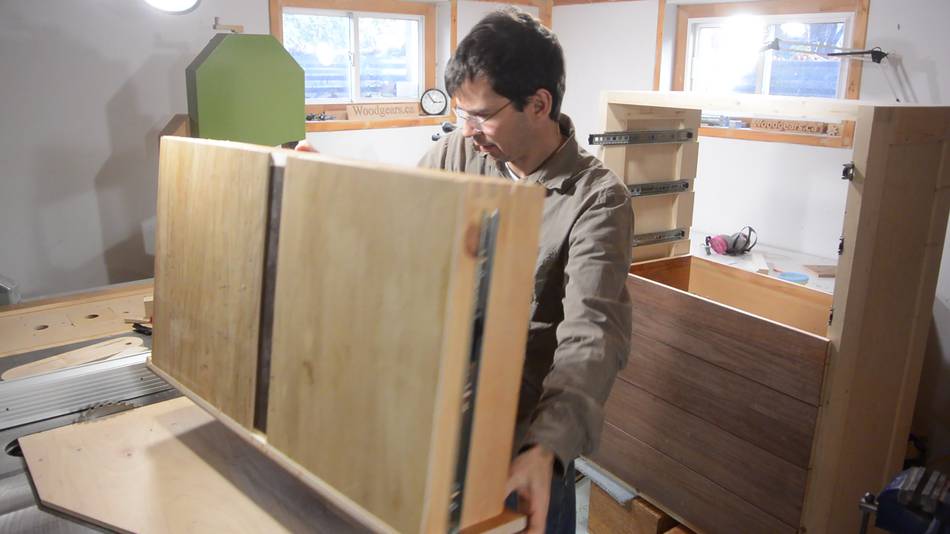 I put the drawers, face down, on the table saw sled.
 I used a block of wood to consistently position every drawer to the fence.
(A two-sided sled would have made this unnecessary, but my
big table saw sled
is left-side only).
I used a block of wood to consistently position every drawer to the fence.
(A two-sided sled would have made this unnecessary, but my
big table saw sled
is left-side only).
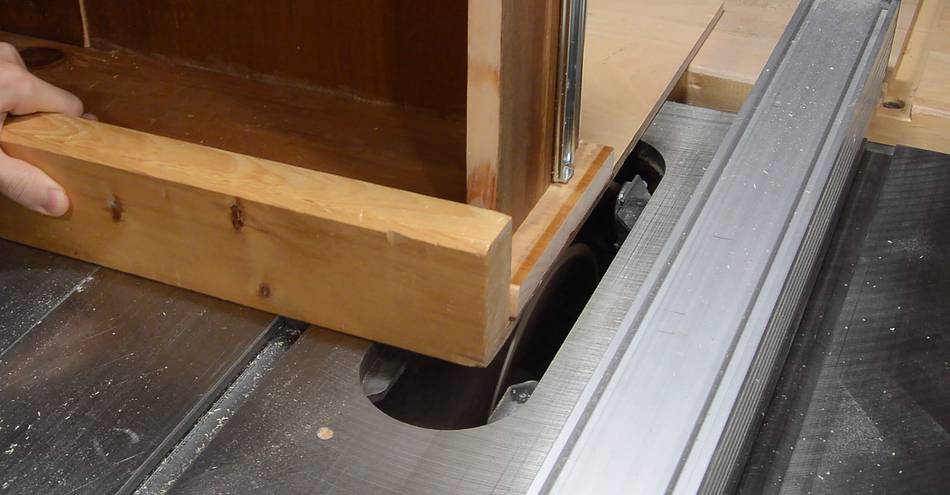 Once the drawer is positioned, I wind the blade down, move the sled past
the blade, then wind the blade up so it cuts about 2 mm deep, and pull
the sled back over the blade, towards me.
Once the drawer is positioned, I wind the blade down, move the sled past
the blade, then wind the blade up so it cuts about 2 mm deep, and pull
the sled back over the blade, towards me.
This effectively makes a "backwards" cut, with the back of the blade doing the cutting. Because the back of the blade is doing the cutting, the teeth cut while moving into the wood, so they aren't tearing out any fibers.
Cutting with the back edge of the blade can be dangerous because, for small workpieces, it is sure to lead to kickback. But with a shallow cut on a big table saw sled, the blade doesn't have enough "grip" to throw the workpiece.
 With the shallow backwards scoring cut made, I raise the blade
to full depth, then make a forward cut. That way, the top edge
is also cut with the teeth moving into the wood.
With the shallow backwards scoring cut made, I raise the blade
to full depth, then make a forward cut. That way, the top edge
is also cut with the teeth moving into the wood.
 Finished cut, with no chipout, top or bottom.
I previously covered this trick here: Avoiding tearout when cutting veneered sheets
 I also glued some mahogany trim around the front edge of the cabinet.
That way, when the drawers are closed they are flush with the front,
and you can't see the pine edges of the drawer fronts.
I also glued some mahogany trim around the front edge of the cabinet.
That way, when the drawers are closed they are flush with the front,
and you can't see the pine edges of the drawer fronts.
 I'm normally not a fan of any sort of dividers or "dust frames " between
drawers. They take up space that could be used for bigger drawers.
I'm normally not a fan of any sort of dividers or "dust frames " between
drawers. They take up space that could be used for bigger drawers.
But with this dresser as tall as it is, I was afraid that the sides might bow in or out over time. So I added one horizontal rail on the front, and three horizontal rails in the back.
I started by cutting open-ended mortises for these with a small router.
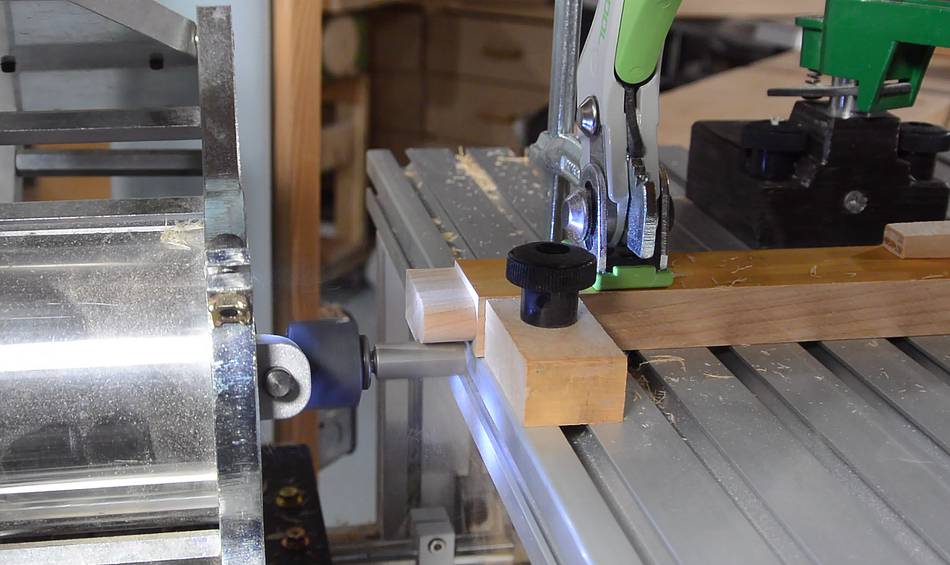 I cut the corresponding tenons on the pantorouter.
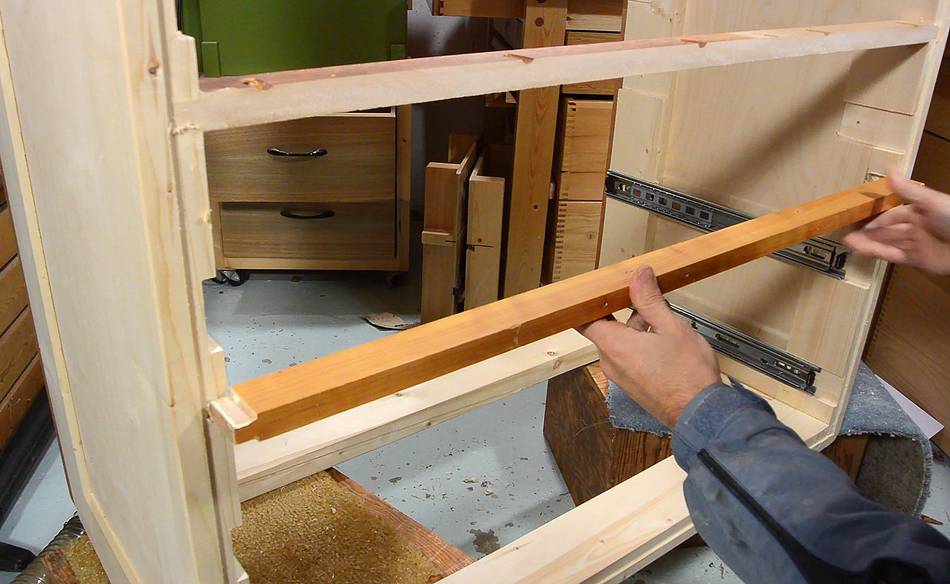
 Here, inserting one of the back rails.
I used three rails in the back because the plywood I had for the back was very thin and not very flat, so the rails help to hold it flat.
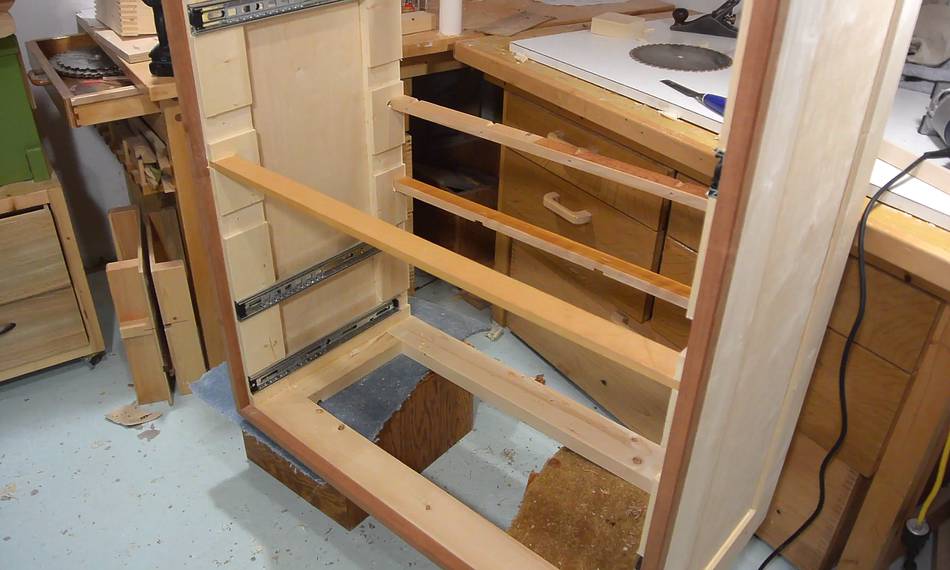 The rails fit in the space between drawers. However, without these rails,
the drawers can be filled as high as the drawer fronts. The third
drawer from the bottom, with the rail across, can only be filled as high
as the drawer sides. The back rails only interfere with overfilling the last
1 cm of the drawer, so not much of a problem.
The rails fit in the space between drawers. However, without these rails,
the drawers can be filled as high as the drawer fronts. The third
drawer from the bottom, with the rail across, can only be filled as high
as the drawer sides. The back rails only interfere with overfilling the last
1 cm of the drawer, so not much of a problem.
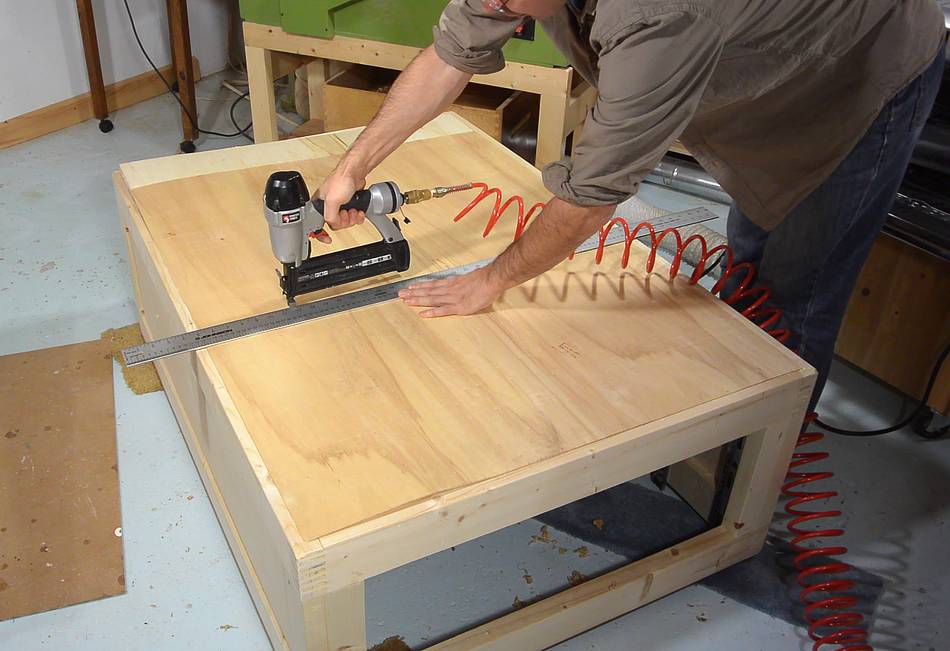 Nailing on the back, with brad nails. These really don't hold the plywood all
that well, but I also used glue. The brad nails mainly hold the back
while the glue dries.
Nailing on the back, with brad nails. These really don't hold the plywood all
that well, but I also used glue. The brad nails mainly hold the back
while the glue dries.
I used a ruler to make sure I was working in a straight line when I nailed to the back braces.
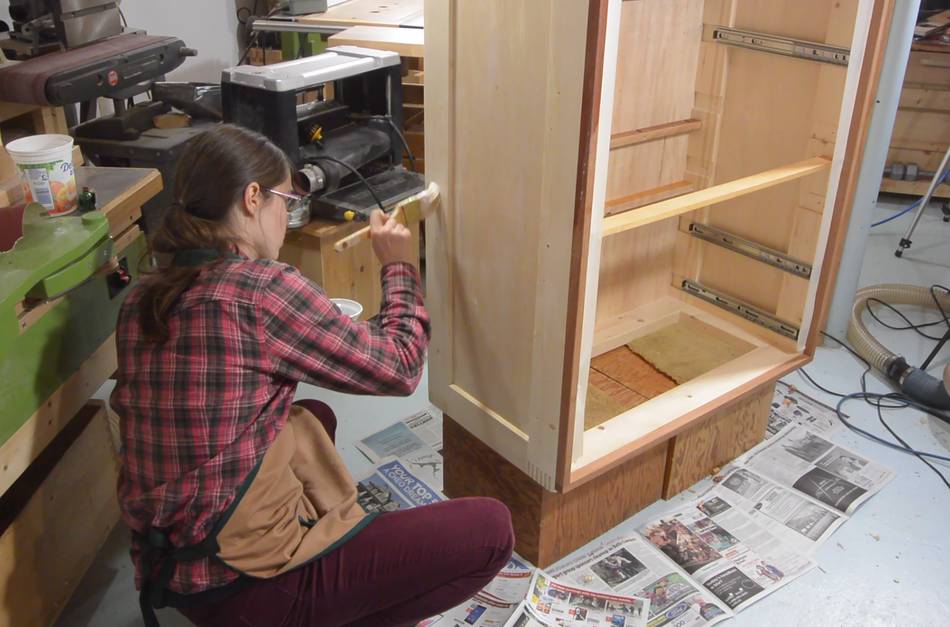
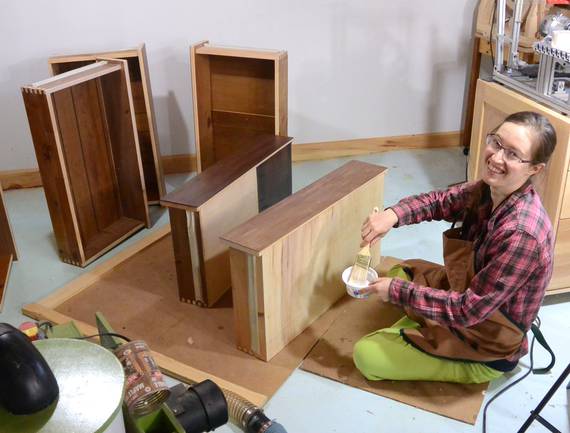 Finally, time to varnish everything.
Because this dresser is for holding Rachel's stuff, I figured it's only fair to get her to do the varnishing :)
It's the usual, three or four coats of Varathane Diamond floor varnish. Luckily, much of the wood for the drawers was already varnished from whichever furniture it came from.
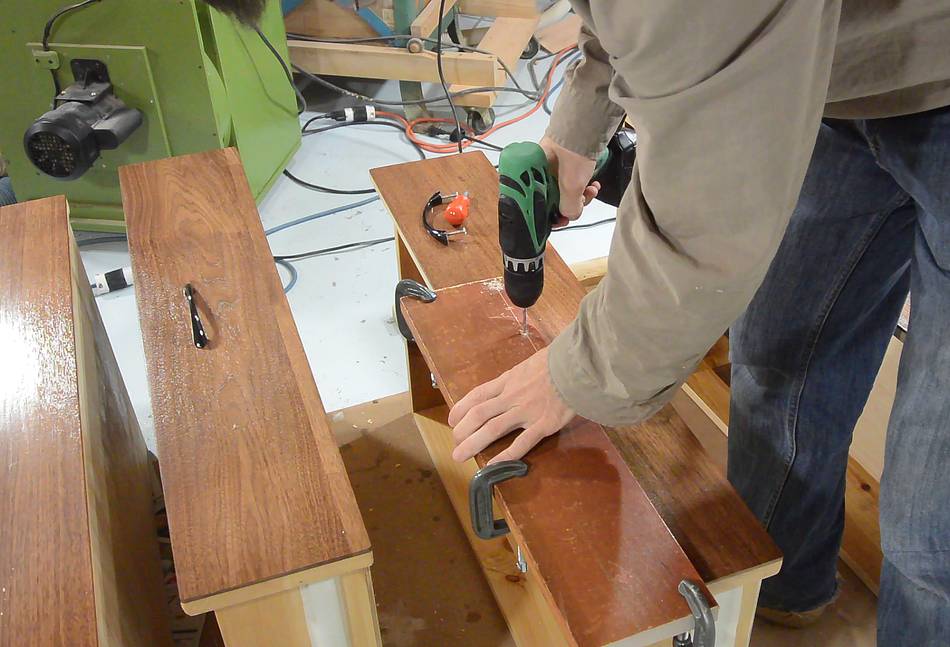
 After varnishing I mount the drawer handles.
I rigged up a temporary jig to drill the holes. Just two holes at the right spacing in a piece of hardwood, with some blocks clamped to the underside of the board to help position it on the front of each drawer.
Once the seven drawers are drilled, the temporary "jig" goes back in the scrap bin.
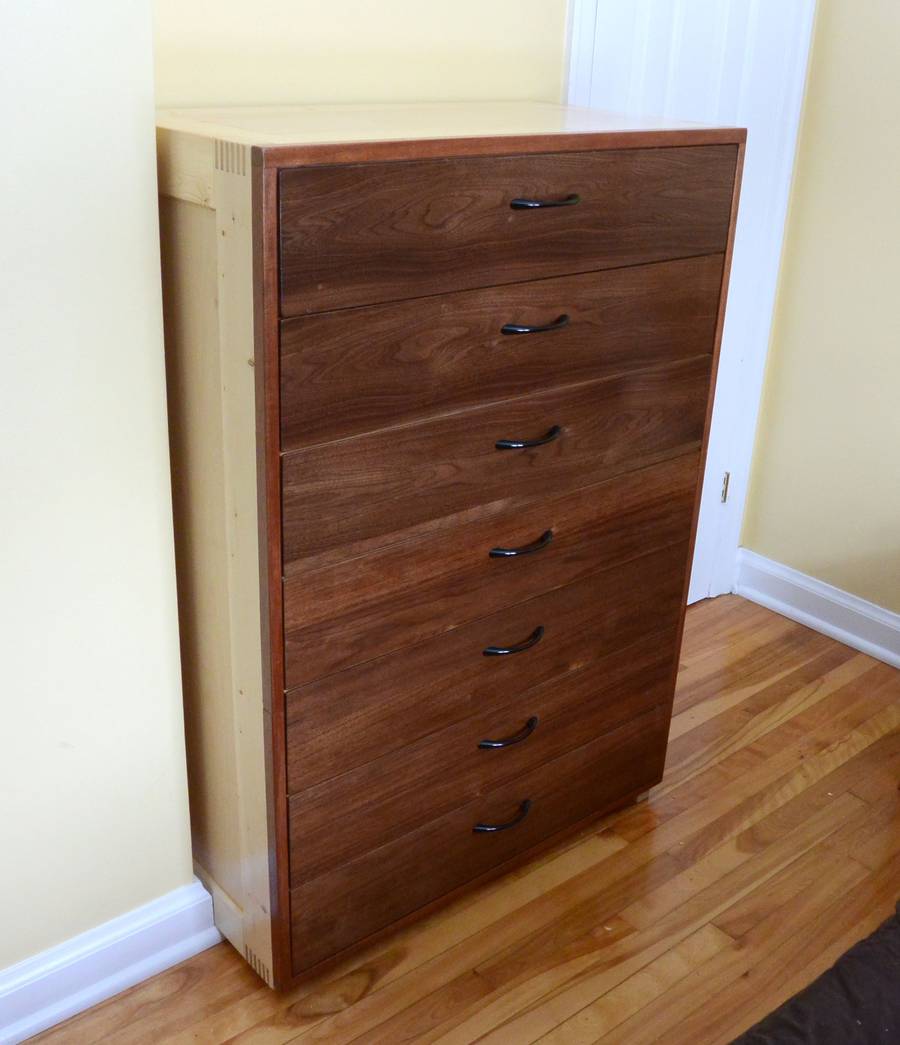
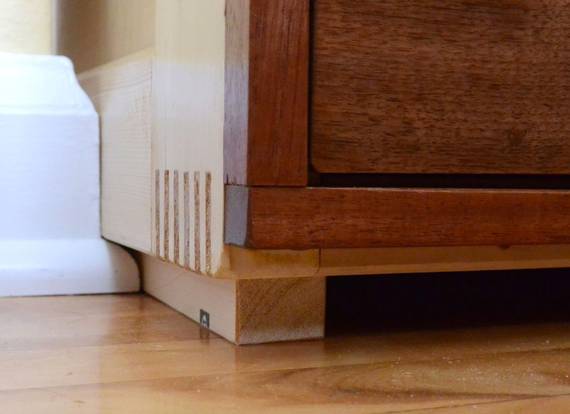 And here it is, all set up. I put it up on some pieces of 2x4 to get the bottom just above
the quarter-rounds on the base boards so I could push it further in the corner.
I might still make taller legs to get it over the baseboard too, and maybe a box to slide under it.
And here it is, all set up. I put it up on some pieces of 2x4 to get the bottom just above
the quarter-rounds on the base boards so I could push it further in the corner.
I might still make taller legs to get it over the baseboard too, and maybe a box to slide under it.
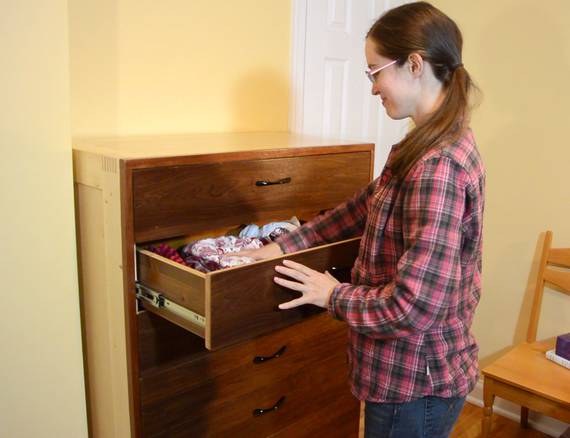 Rachel is quite happy with the extra space for clothes, along with some
under-bed drawers that
are under this bed.
Rachel is quite happy with the extra space for clothes, along with some
under-bed drawers that
are under this bed.
Back to the 7-drawer dresser build
 Mobile tool stand
of
Mobile tool stand
of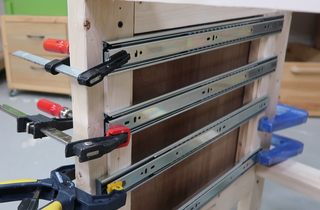 Using spacers to lay out drawer slides
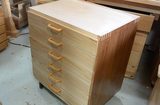 Mobile tool stand
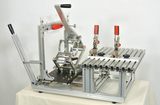 Metal pantorouter
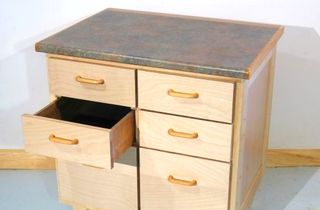 A previous dresser build
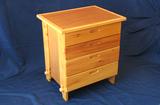 Knock-down dresser
 Storage cabinet
 Dresser made from junk