45 degree jig build
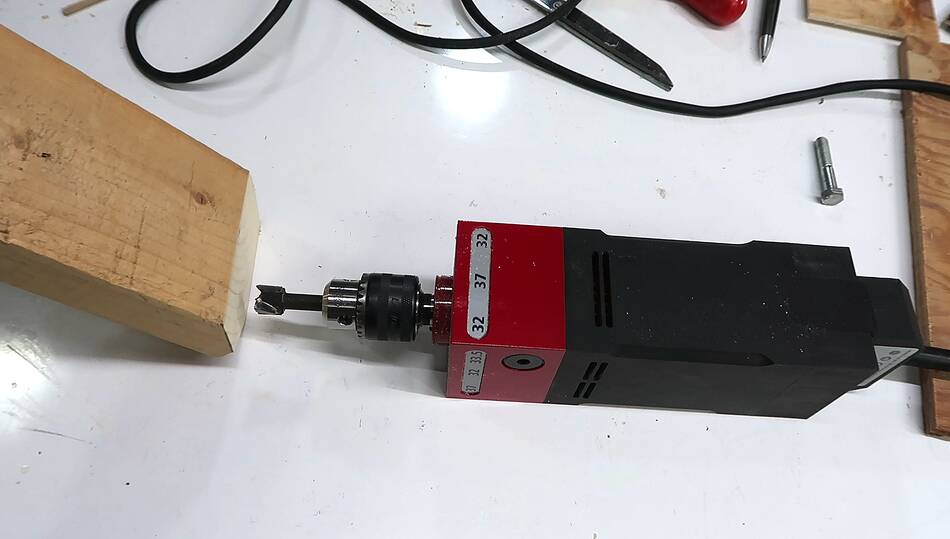 I had an idea for a project where I want to use
this square drill to drill some 45° holes in
the end of some wood, but for that, I needed to build a jig to hold the stock.
I had an idea for a project where I want to use
this square drill to drill some 45° holes in
the end of some wood, but for that, I needed to build a jig to hold the stock.
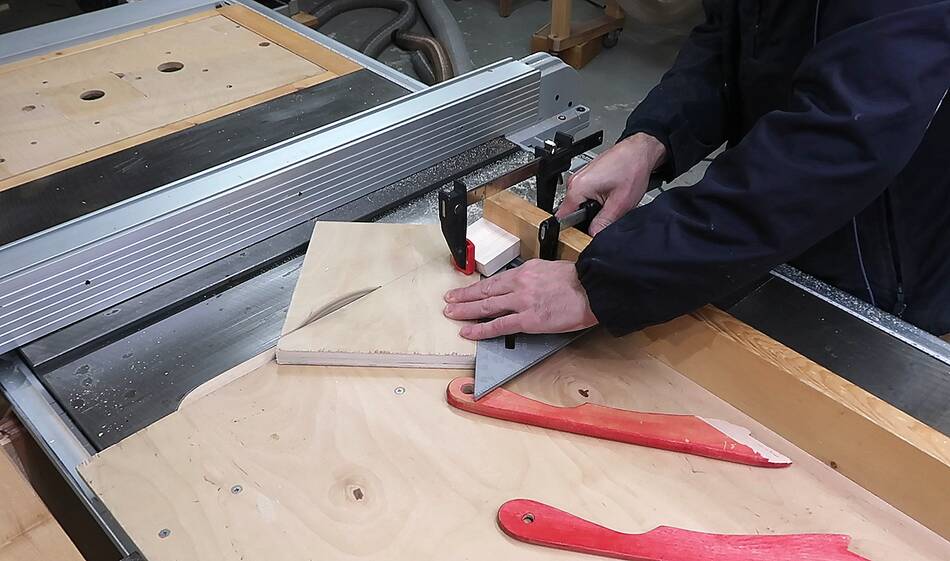 I started by cutting a rectangular piece of wood at a 45 degree angle, using a framing
square as a guide. I figured this should be quite accurate, but...
I started by cutting a rectangular piece of wood at a 45 degree angle, using a framing
square as a guide. I figured this should be quite accurate, but...
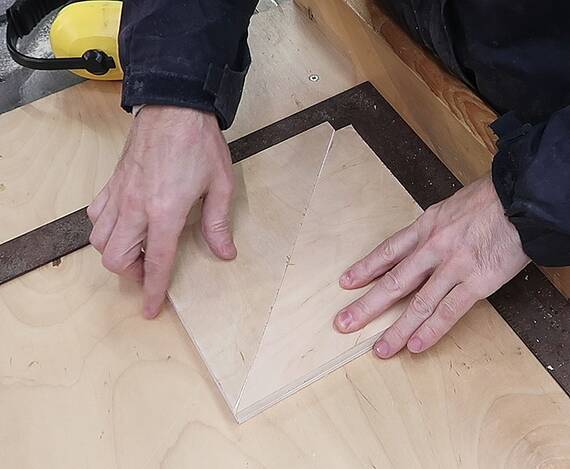
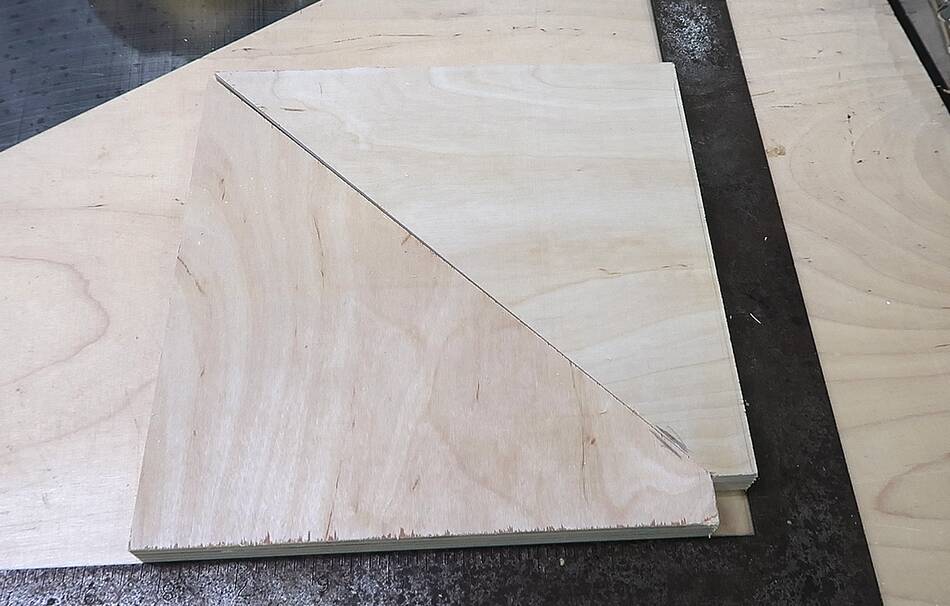 ...when I placed the two pieces I cut inside a framing square, with one piece flipped
over since cutting, there was a very noticeable gap.
Over the long edge, each triangle was off the 45° by just over half a millimeter.
...when I placed the two pieces I cut inside a framing square, with one piece flipped
over since cutting, there was a very noticeable gap.
Over the long edge, each triangle was off the 45° by just over half a millimeter.
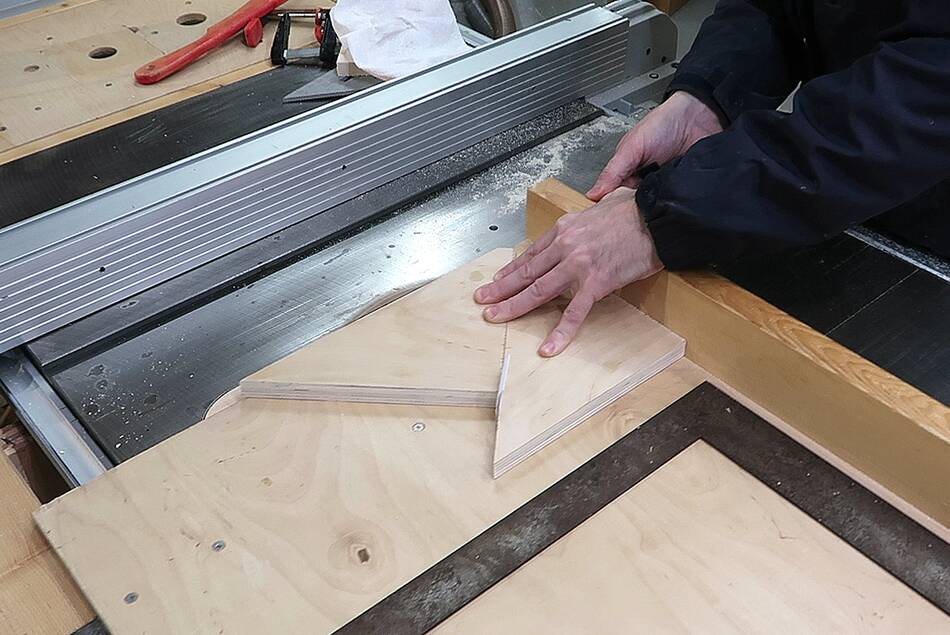 Using one of my 45° triangles as a guide, and a folded piece of paper as a shim,
I trimmed a corresponding amount off of each triangle.
Using one of my 45° triangles as a guide, and a folded piece of paper as a shim,
I trimmed a corresponding amount off of each triangle.
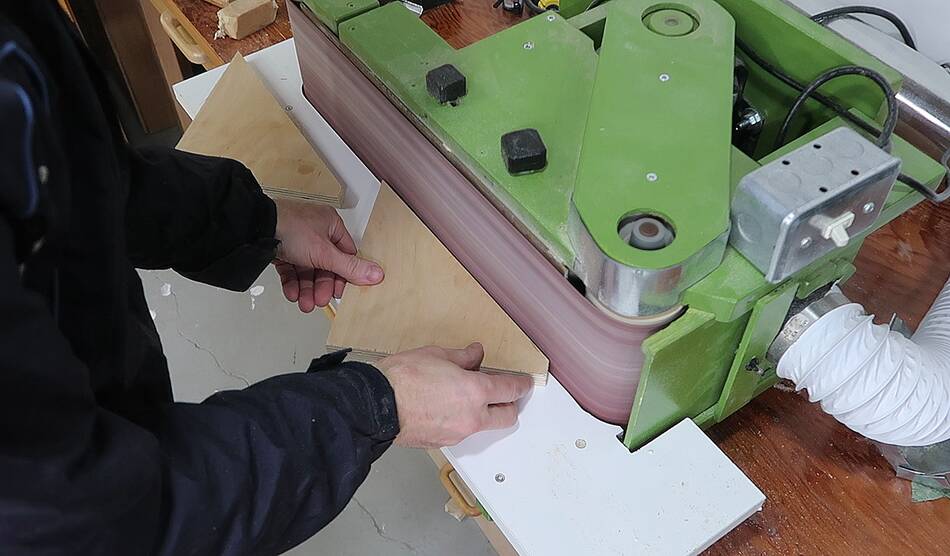
 This mostly closed the gap, but I took the last fraction of a millimeter off using
my edge belt sander. After that they
fit in the square perfectly.
This mostly closed the gap, but I took the last fraction of a millimeter off using
my edge belt sander. After that they
fit in the square perfectly.
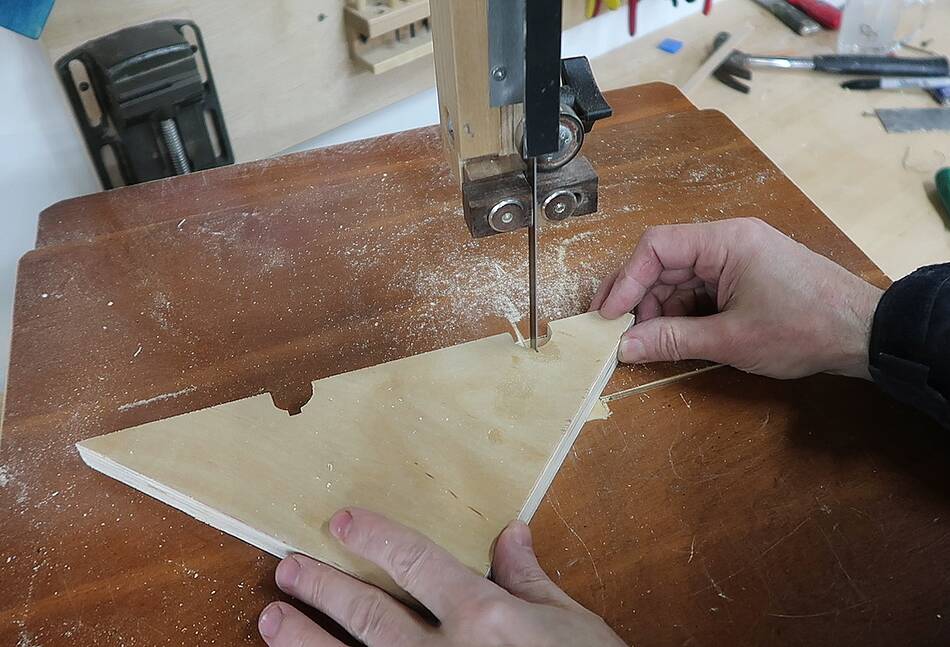
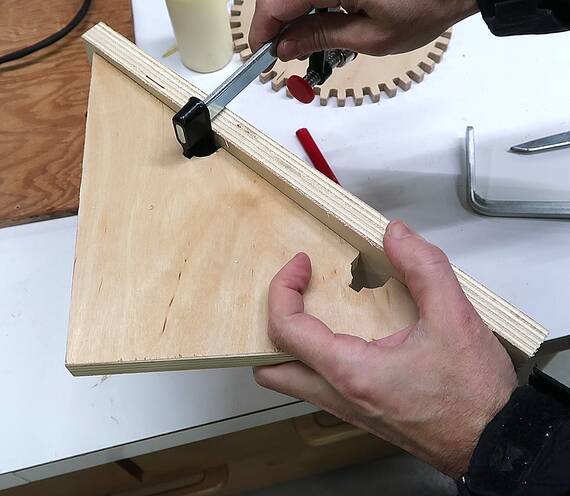 I cut some notches in the long edge of the triangles to make room
for clamps to go through.
I cut some notches in the long edge of the triangles to make room
for clamps to go through.
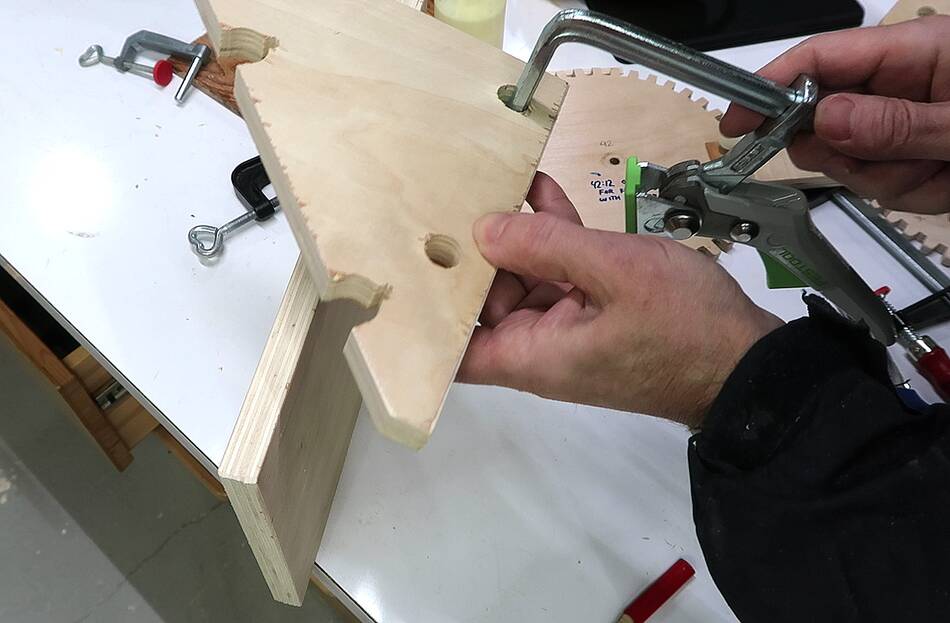 I also drilled some holes in the triangles for clamping the jig
to a workbench. I drilled these holes relatively small
because I have some dovetail clamps that MicroJig sent me
for free, and these fit in a fairly small hole.
I also drilled some holes in the triangles for clamping the jig
to a workbench. I drilled these holes relatively small
because I have some dovetail clamps that MicroJig sent me
for free, and these fit in a fairly small hole.
These dovetail clamps are a bit pricey though. T-slot clamps, such as this Festool clamp (which I bought years ago, and it costs as much as two of the dovetail clamps) also work with small holes. The other alternative would have been to just drill the holes bigger so regular clamps fit in the holes.
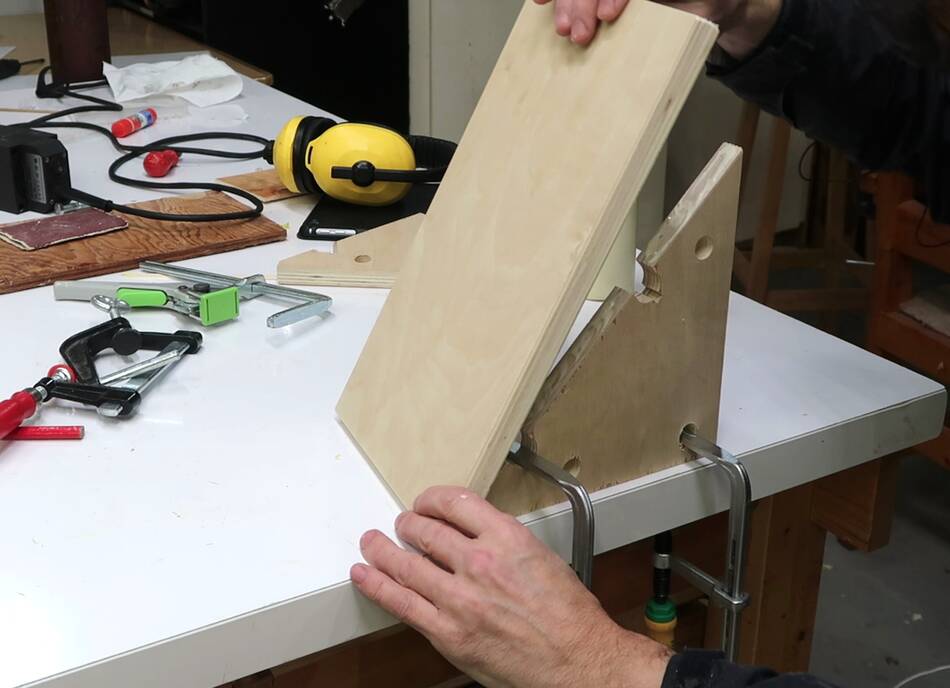
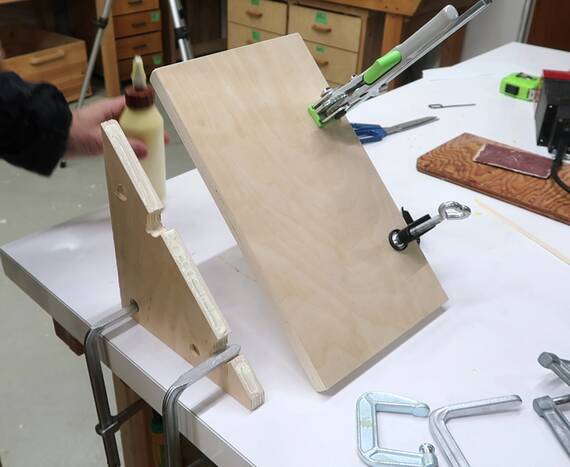 Gluing the jig together. I clamped one triangle onto the bench
to help me with it, but using the clamping notch to clamp
it down so that I had two holes free for clamping the top onto
this jig.
Gluing the jig together. I clamped one triangle onto the bench
to help me with it, but using the clamping notch to clamp
it down so that I had two holes free for clamping the top onto
this jig.
I also ended up using a big skinny C-clamp with the holes. That would be another option, much cheaper, for clamping into small holes. Or you could grind away part of a C-clamp to fit into even smaller holes.
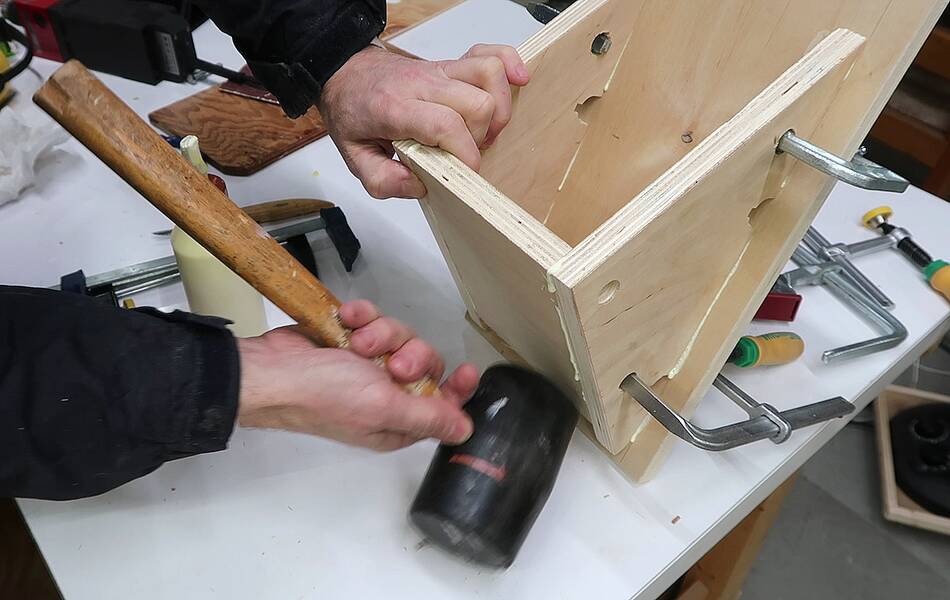
 After that, I realized the jig really needs a bottom. because as it was,
if I were to drop it and it fell on one of the triangles, that would
break it off, or at least damage it. A bottom on the jig would reinforce
the jig. But with the clamping holes I had drilled were too close to
the edge, I had to cut some notches out of the 18 mm plywood bottom
to leave room behind the clamping holes.
After that, I realized the jig really needs a bottom. because as it was,
if I were to drop it and it fell on one of the triangles, that would
break it off, or at least damage it. A bottom on the jig would reinforce
the jig. But with the clamping holes I had drilled were too close to
the edge, I had to cut some notches out of the 18 mm plywood bottom
to leave room behind the clamping holes.
I used my resaw fence as a 90-degree jig, clamped the workpiece to it, and cut those notches vertically on the bandsaw. That resaw fence comes in handy as a 90-degree jig here and there, which is why I figure a 45 degree jig would also be handy from time to time.
 I wanted to reinforce how the top is attached, but it's happened from time
to time that I drilled or milled into one of my jigs, so I didn't want
screws there to damage the cutter. So I drilled dowel holes instead.
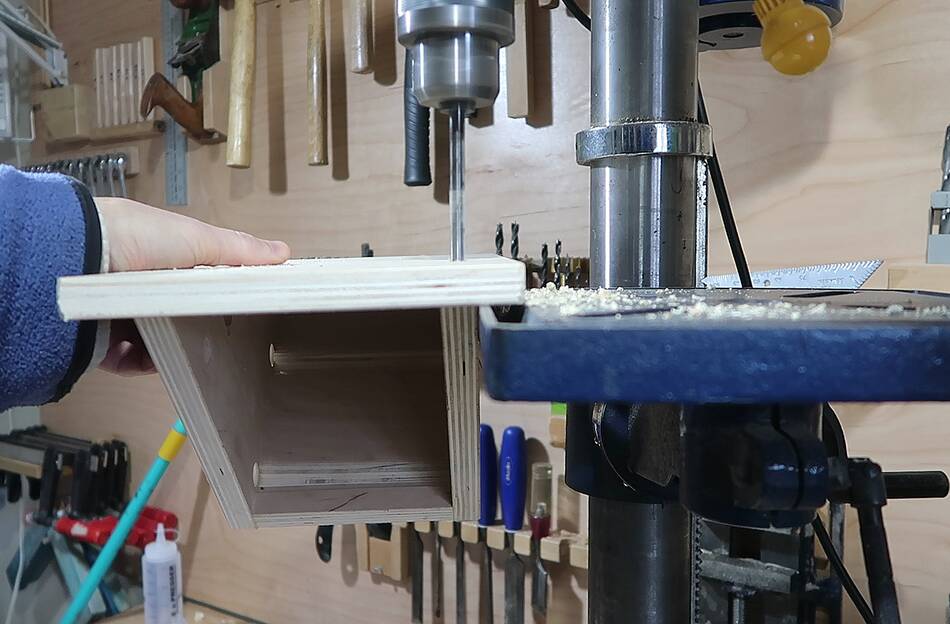
I hung the jig off the edge of the drill press to drill those holes.
I wanted to reinforce how the top is attached, but it's happened from time
to time that I drilled or milled into one of my jigs, so I didn't want
screws there to damage the cutter. So I drilled dowel holes instead.
I hung the jig off the edge of the drill press to drill those holes.
I quite like adding dowels aftera glue up, because that way I don't need to worry about precisely aligning stuff when I drill.
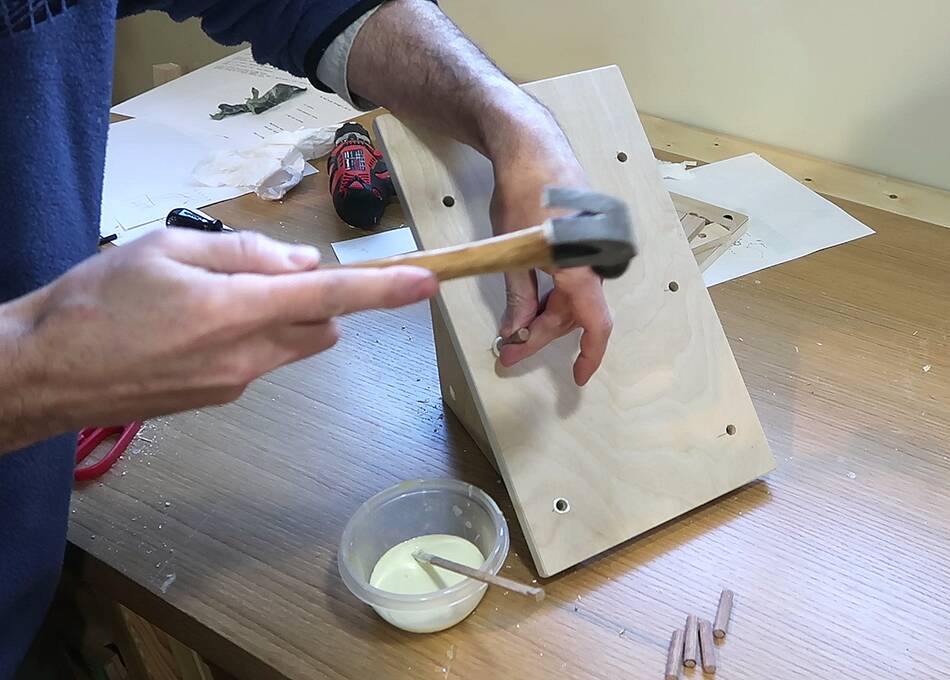 Tapping in the dowels. I'm using an extra piece of dowel as a sort of
nail-set to drive in the dowels. I cut the dowels a millimeter
shorter than the holes are deep so I didn't need to flush trim them afterwards.
Tapping in the dowels. I'm using an extra piece of dowel as a sort of
nail-set to drive in the dowels. I cut the dowels a millimeter
shorter than the holes are deep so I didn't need to flush trim them afterwards.
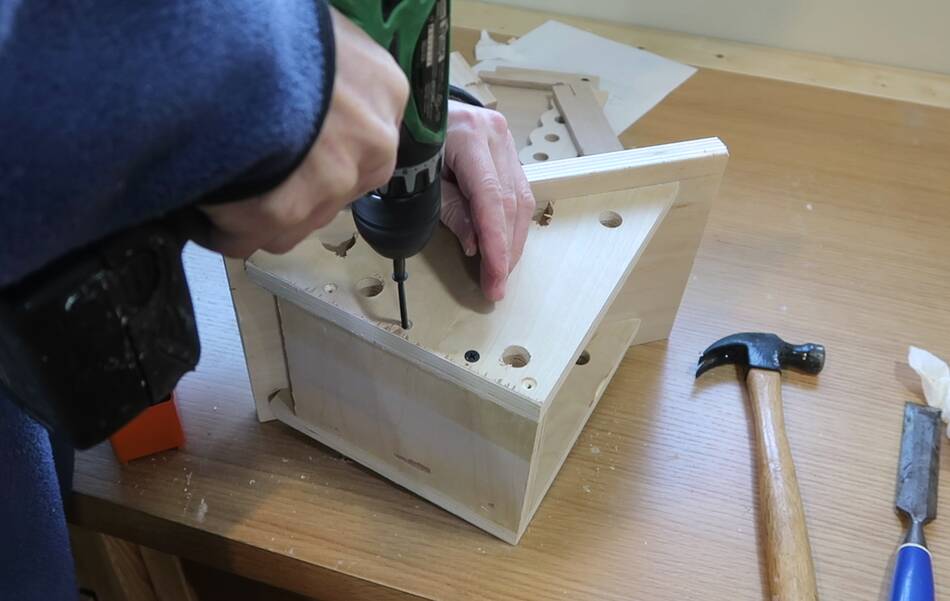 Then adding reinforcing screws to the bottom as well. I thought about using
dowels here as well, but screws were quicker.
Then adding reinforcing screws to the bottom as well. I thought about using
dowels here as well, but screws were quicker.
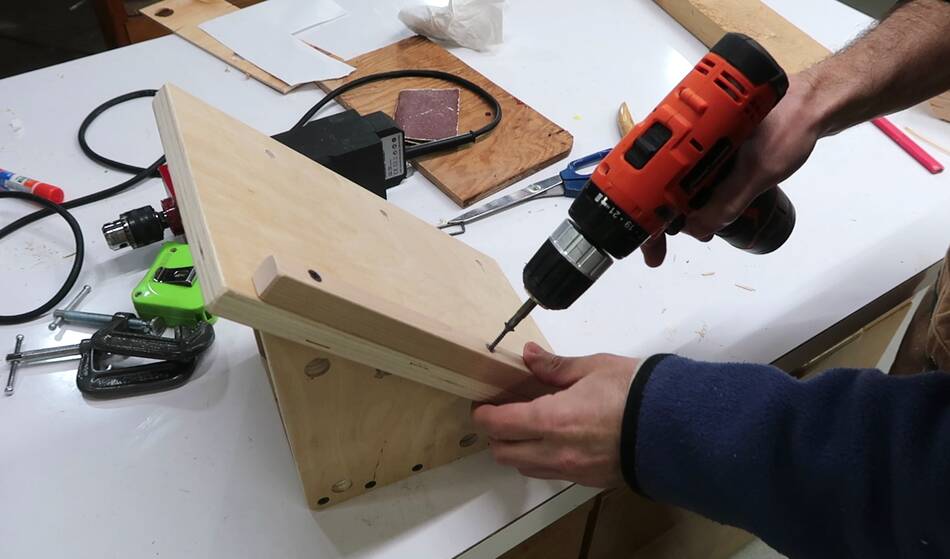 Then adding a fence to the jig. I don't want this fence to be permanent,
because I might want to move it, so it's just screwed on. I'll have to be
careful not to mill into those screws! But if I mill into the fence, I can replace it.
Then adding a fence to the jig. I don't want this fence to be permanent,
because I might want to move it, so it's just screwed on. I'll have to be
careful not to mill into those screws! But if I mill into the fence, I can replace it.
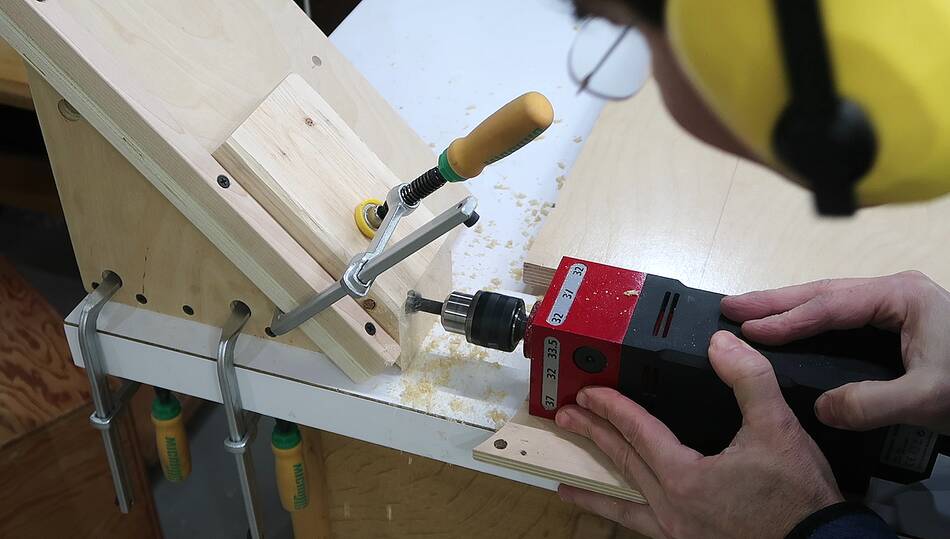 Testing out the jig. Drilling 45 degrees into the wood like that takes
almost as much force as it does to drill into end grain.
Testing out the jig. Drilling 45 degrees into the wood like that takes
almost as much force as it does to drill into end grain.
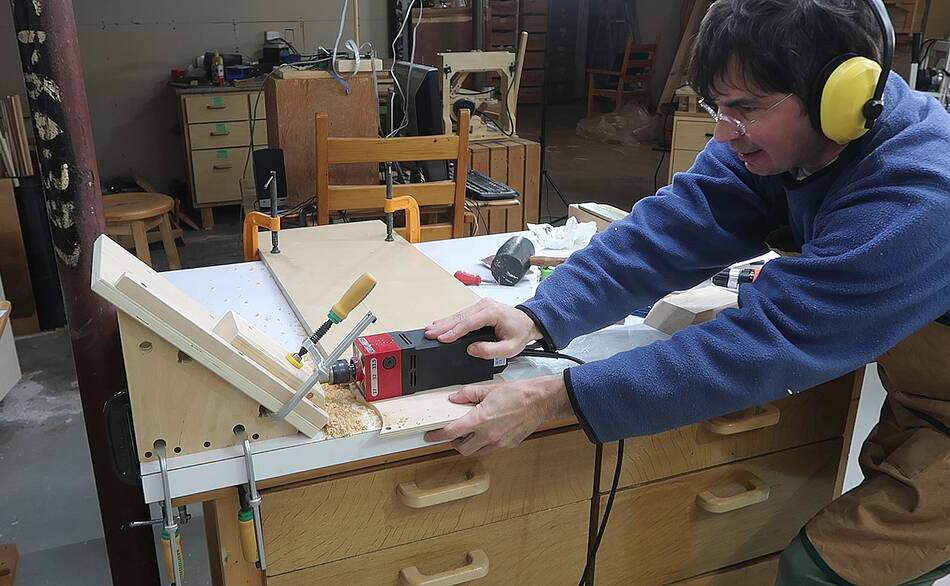 I'm pulling against the workbench with my left arm here to get more force
onto the drill. Once enough force is applied, the drill drills
relatively quickly.
I'm pulling against the workbench with my left arm here to get more force
onto the drill. Once enough force is applied, the drill drills
relatively quickly.
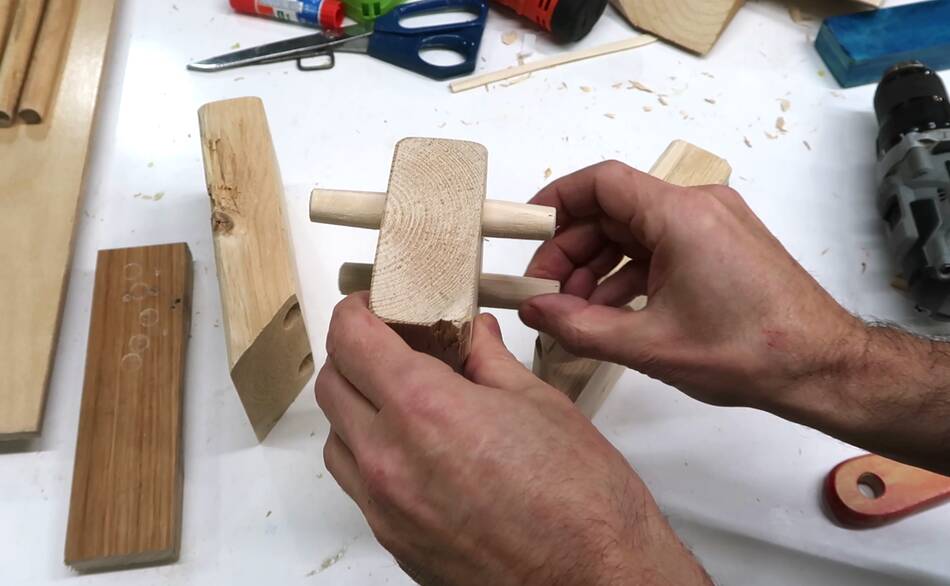
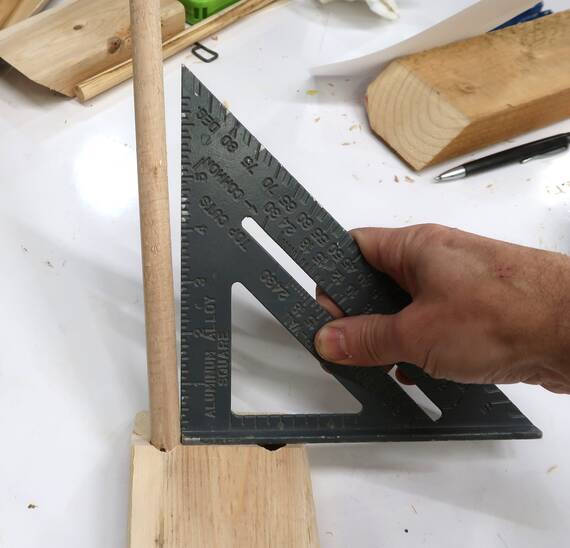 I also drilled some holes perpendicular in another piece to prototype my
45° table leg idea. But notice the dowels are slightly tapered on the ends.
I had to do that because the holes ended up slightly crooked (see image at right with
dowel inserted in the hole)
I also drilled some holes perpendicular in another piece to prototype my
45° table leg idea. But notice the dowels are slightly tapered on the ends.
I had to do that because the holes ended up slightly crooked (see image at right with
dowel inserted in the hole)
What I think happened is that the drill grabbed the wood grain harder on the top, where the wood grain was coming more "into" the drill. That caused the drill to wander to the left as I drilled. This caused the drill to wander away from the fence. I think I'll flip it around next time so the drill gets pulled towards the fence, so it can't move to the side.
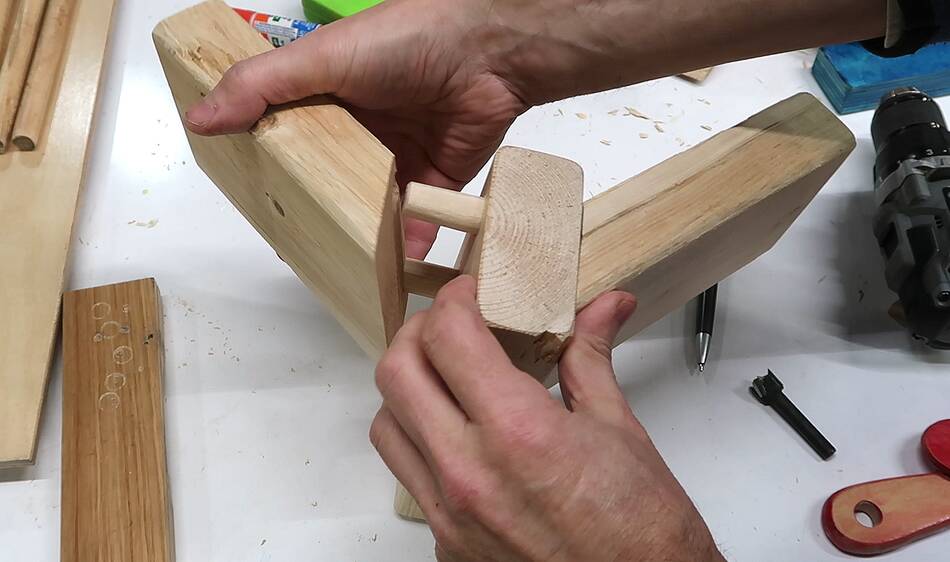 The dowels go through the piece of 2x4 to join the 45 degree pieces on either side.
This joint will be joining a leg to the table apron rails.
The dowels go through the piece of 2x4 to join the 45 degree pieces on either side.
This joint will be joining a leg to the table apron rails.
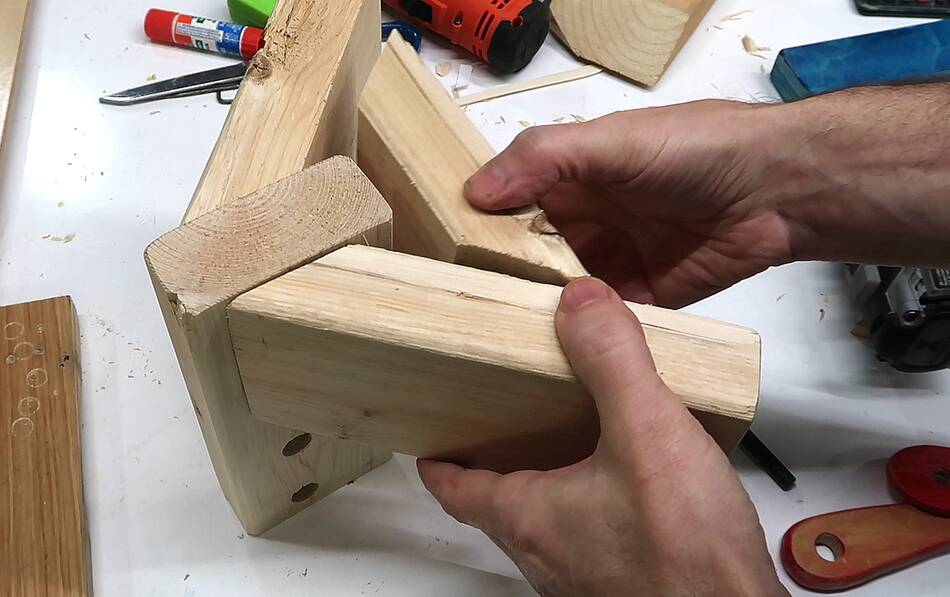 I may end up adding another 45° piece on the inside. I'm not sure yet.
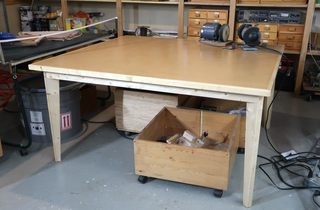
I built a table with these joints,
but ended up not using the square drill because it was
too hard to get accurate results with a 15 mm forstner bit on the drill.
So I used the 45 degree jig on the pantorouter to mill out the holes instead.
See also:
 Miter joined table
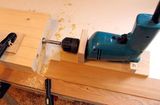 Horizontal boring jig
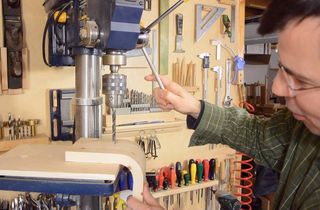 Why I don't use a
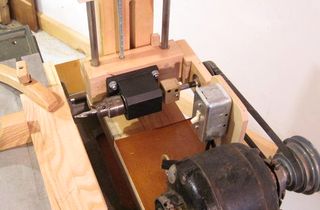 Horizontal boring machine
 A square drill for round holes
To my Woodworking website