Marble machine base
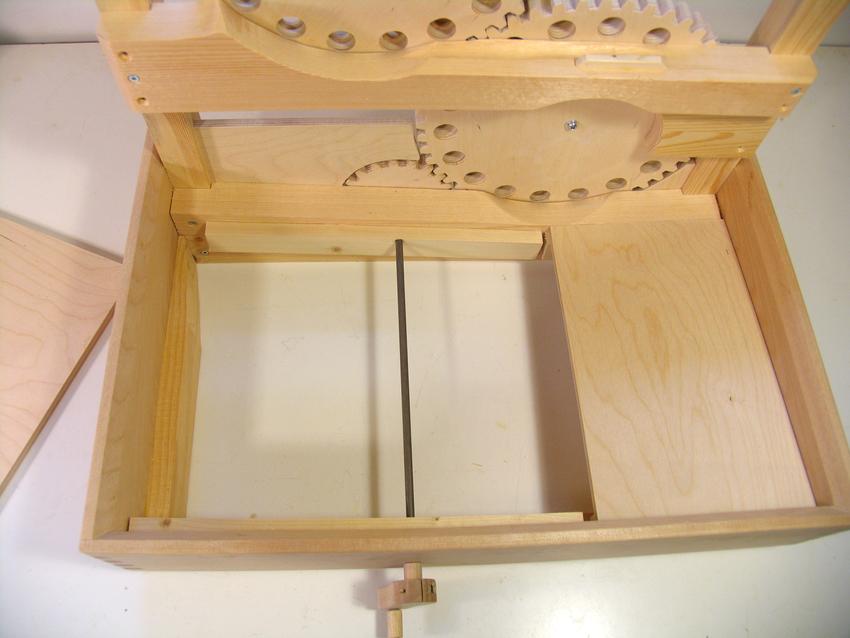
 The base of marble machine 2 acts as a sort of funnel to direct marbles
towards the pickup point of the elevating wheels. The floor
is made of two pieces of plywood, each sloped four degrees back and
four degrees towards the center.
The base of marble machine 2 acts as a sort of funnel to direct marbles
towards the pickup point of the elevating wheels. The floor
is made of two pieces of plywood, each sloped four degrees back and
four degrees towards the center.
Making the box
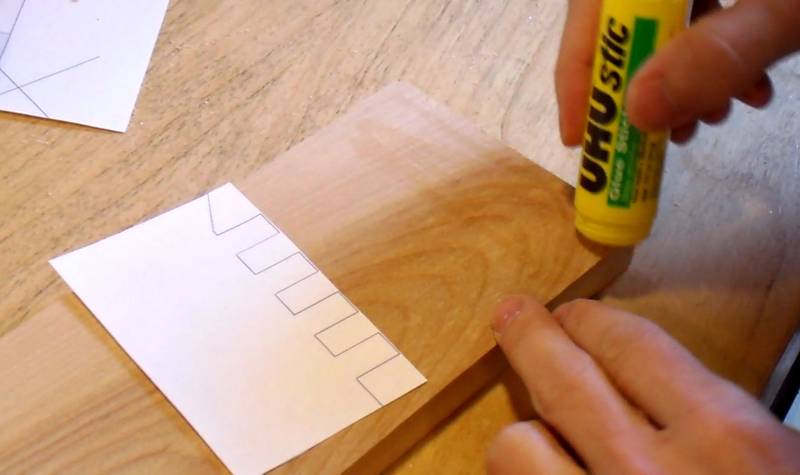 The front corners are joined with box joints.
Because so much of this machine is already made by cutting out paper
templates with the bandsaw, I figured I'd try that approach for the box joined
corners as well. Here I'm applying some glue to the wood.
A nice thing about glue sticks is that it's not a very strong glue, so it's easier
to get the template off afterwards.
The front corners are joined with box joints.
Because so much of this machine is already made by cutting out paper
templates with the bandsaw, I figured I'd try that approach for the box joined
corners as well. Here I'm applying some glue to the wood.
A nice thing about glue sticks is that it's not a very strong glue, so it's easier
to get the template off afterwards.
I normally use my screw advance box joint jig for making this type of joint, but I didn't want to make this machine dependent on having one of those jigs.
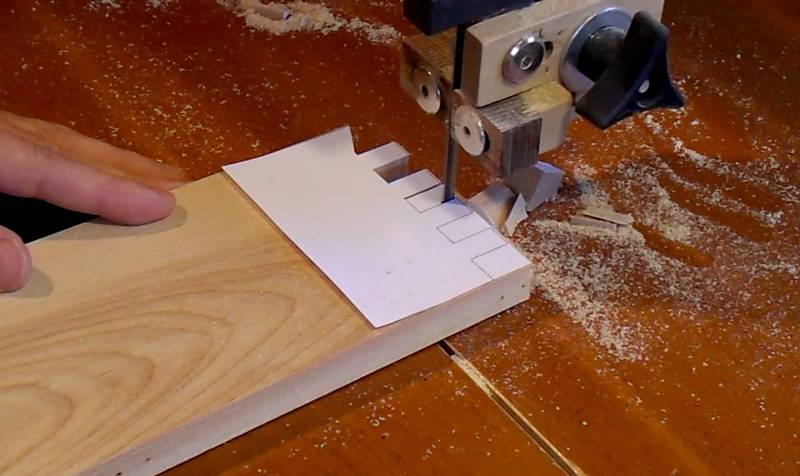 It's possible to follow lines to a fraction of a millimeter with a good bandsaw.
For these joints to fit properly, you need to cut away on the waste side, but
still cut away the line itself.
It's possible to follow lines to a fraction of a millimeter with a good bandsaw.
For these joints to fit properly, you need to cut away on the waste side, but
still cut away the line itself.
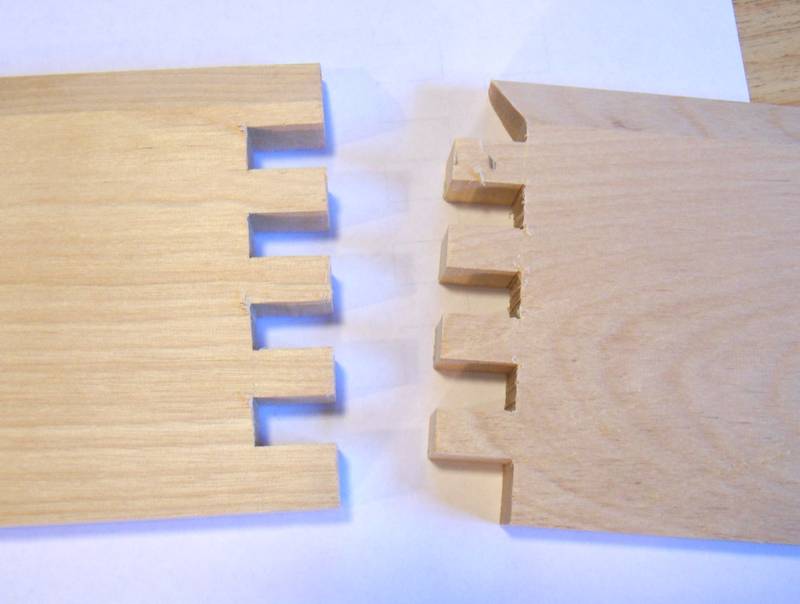 Here's the cut joint. The top right notch is at an angle to mate with the bevel that
I cut on the top edge of the boards. You can cut that bevel before or after bandsawing
the joints - depending on whether you prefer to adjust the joint to the bevel or
the bevel to the joint.
Here's the cut joint. The top right notch is at an angle to mate with the bevel that
I cut on the top edge of the boards. You can cut that bevel before or after bandsawing
the joints - depending on whether you prefer to adjust the joint to the bevel or
the bevel to the joint.
 Dry fit looking OK.
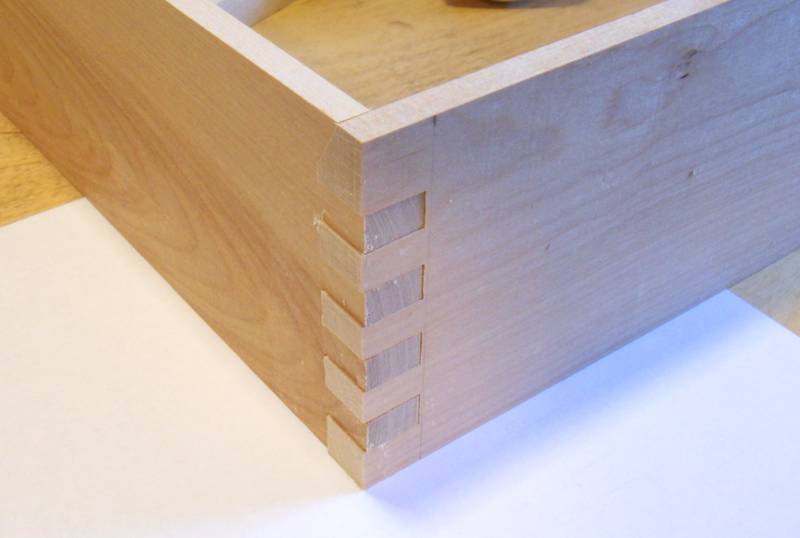
 Glued up joint. I used lots of glue, then rubbed fine bandsaw sawdust on it
to clean up the glue and fill small voids. After that, I sanded it flush.
It looks more precise than it actually is. You can enlarge the image
to have a closer look by clicking on it.
Glued up joint. I used lots of glue, then rubbed fine bandsaw sawdust on it
to clean up the glue and fill small voids. After that, I sanded it flush.
It looks more precise than it actually is. You can enlarge the image
to have a closer look by clicking on it.
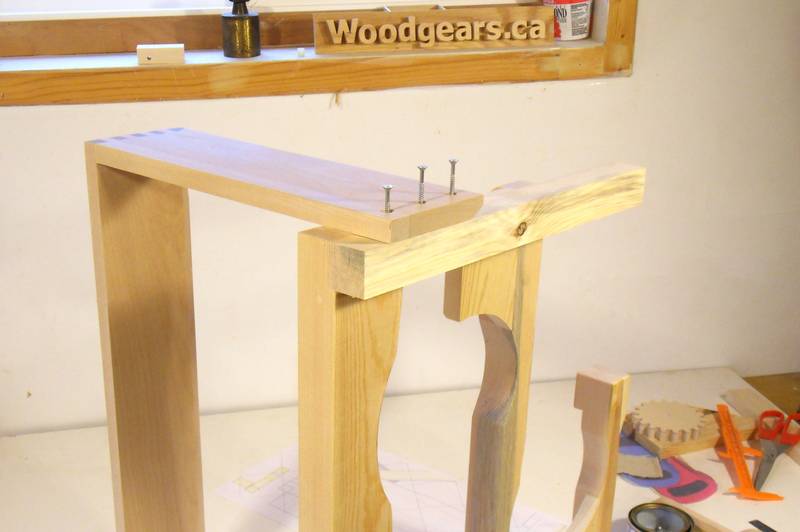 Only the front corners are box joints. At the back, the boards just screw into
the vertical posts.
Only the front corners are box joints. At the back, the boards just screw into
the vertical posts.
Making the floor
 Although the plans include dimensions for the floor, it's better to cut the floor
pieces a little bit larger than needed and then mark the actual size of floor
off the machine itself.
Although the plans include dimensions for the floor, it's better to cut the floor
pieces a little bit larger than needed and then mark the actual size of floor
off the machine itself.
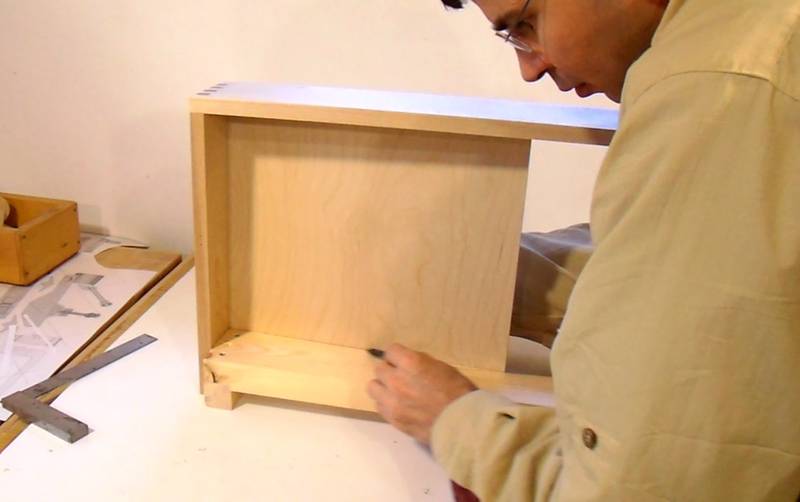
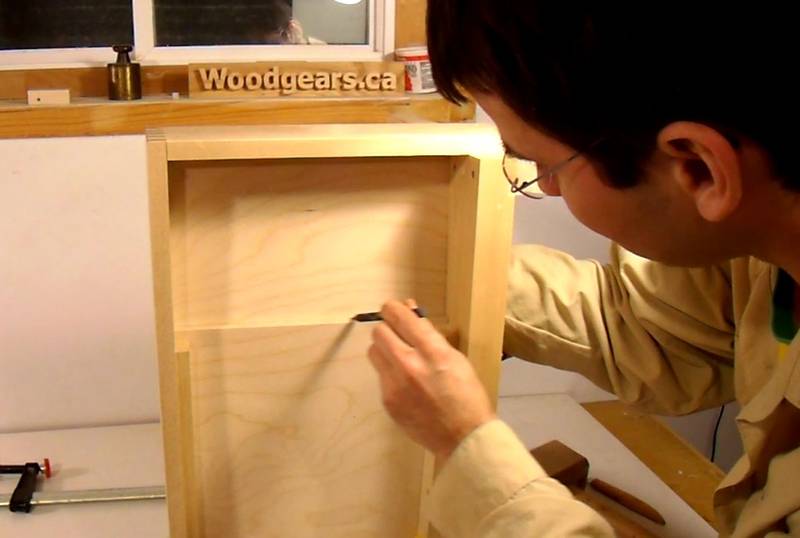
Don't forget that the floor has to go into the machine at a slight angle. I have it angled correctly here, and I am marking the line for where to cut it from the underside.
I then cut to that line on the table saw. The line may not be exactly square to the wood - the slight angle of the floor and slight non square-ness of the box may contribute to that.
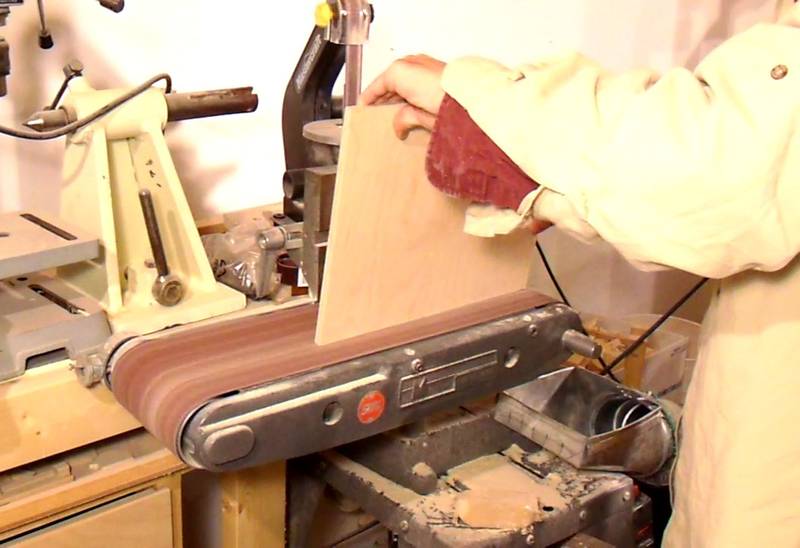 The floor slopes by about four degrees. To get the final fit, I'm sanding the bevel
on it with my belt sander.
The floor slopes by about four degrees. To get the final fit, I'm sanding the bevel
on it with my belt sander.
I used 11 mm thick (7/16") Baltic birch plywood for the floor. Thinner plywood would have worked too, but I like the sound of marbles dropping on that thicker plywood more. It's a more refined sound, and not quite as loud, so it doesn't overpower the more interesting sounds from the rest of the machine.
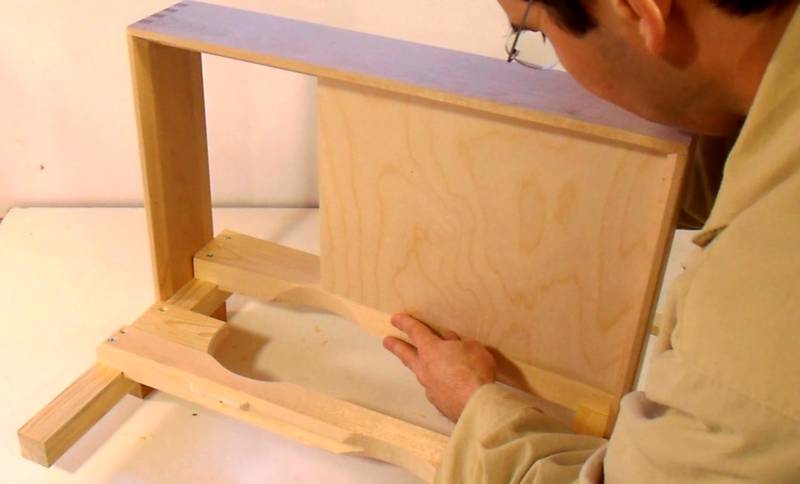 Fitting the floor in place. It's tight enough that friction will hold it in place.
The floor should be 1.4 cm higher on the front of the machine than on the back.
Fitting the floor in place. It's tight enough that friction will hold it in place.
The floor should be 1.4 cm higher on the front of the machine than on the back.
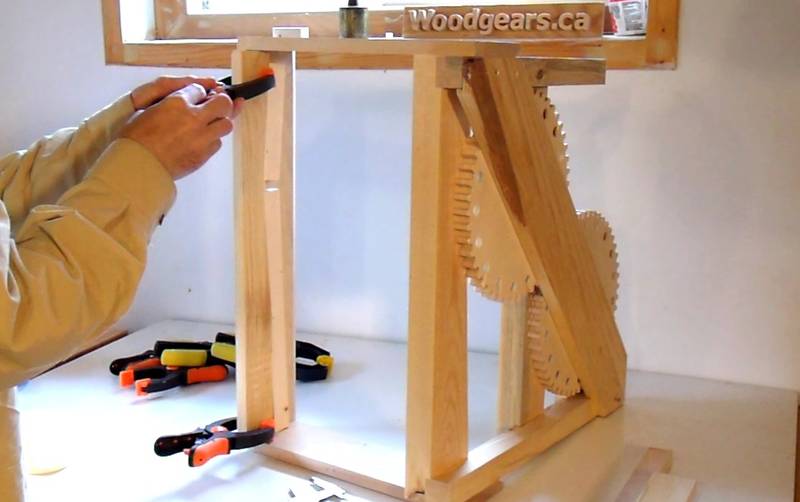
Positioning the floor was a bit tricky, making sure it's sloped right and the edge flush with the piece at the back of the machine. What I didn't think of until afterwards was to just clamp a piece of wood to the top of the rail on the back of the machine (where my left hand is) so I could push the floor against that to bring it flush with that piece.
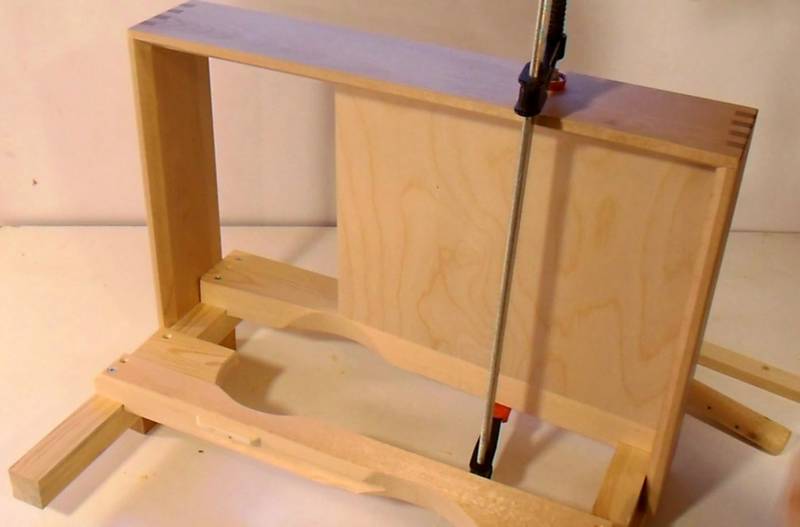 With the tight fit, putting a clamp around the box locks the floor in place for
the next step.
With the tight fit, putting a clamp around the box locks the floor in place for
the next step.
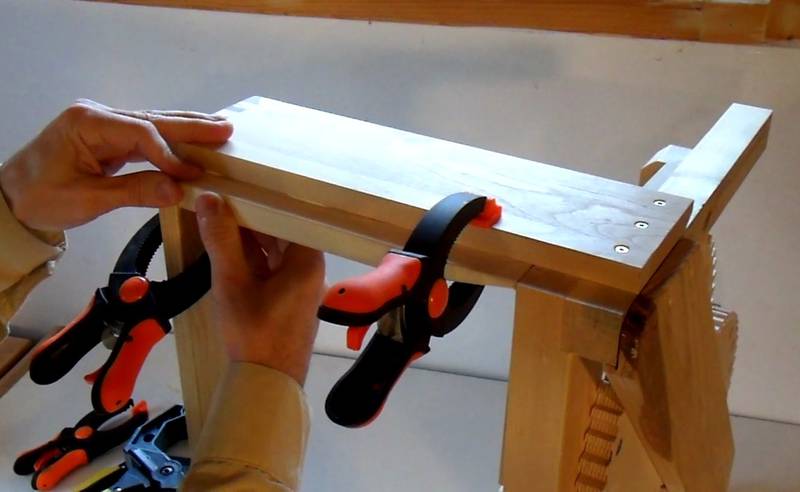
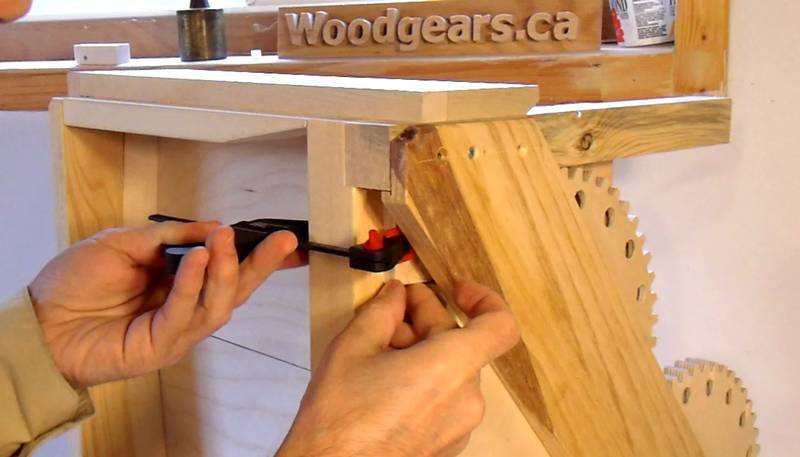
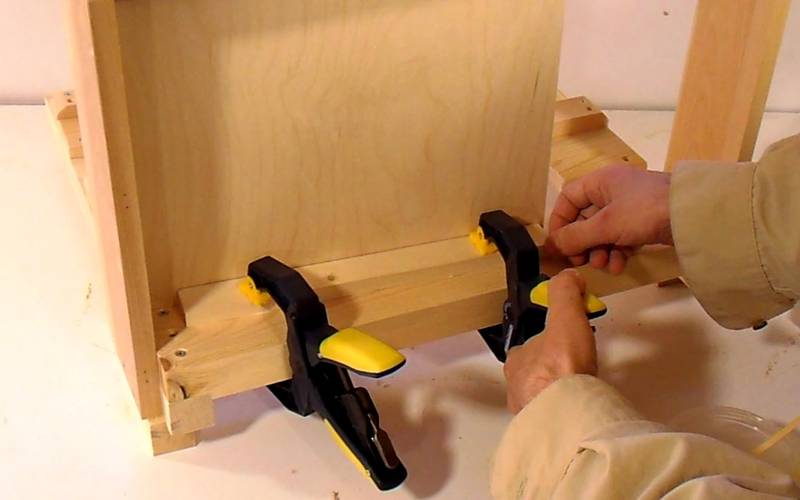 Here I'm gluing the support rail in place. I just push that up against the edge
of the floor. I didn't bother beveling the support rail to match the slope of the floor.
Just pushing it up against the floor makes for good enough support.
Here I'm gluing the support rail in place. I just push that up against the edge
of the floor. I didn't bother beveling the support rail to match the slope of the floor.
Just pushing it up against the floor makes for good enough support.
 Gluing in the second rail.
It's important not to use excess glue, or the squeeze out could end up gluing the
floor in place! After letting the glue dry for a few minutes, the rails are less
likely to slide around, so I removed the floor after that.
Gluing in the second rail.
It's important not to use excess glue, or the squeeze out could end up gluing the
floor in place! After letting the glue dry for a few minutes, the rails are less
likely to slide around, so I removed the floor after that.
Even if you decide that you should glue the floor in place, don't glue it yet. You will still need to take it out a few more times before the machine is finished.
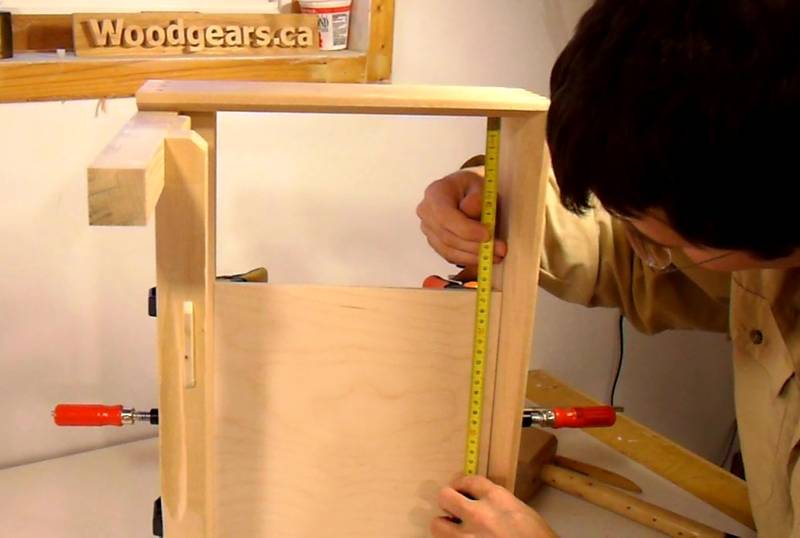 Measuring the remaining opening.
 With a piece cut slightly larger than needed, I'm again marking
where to make the final cut.
With a piece cut slightly larger than needed, I'm again marking
where to make the final cut.
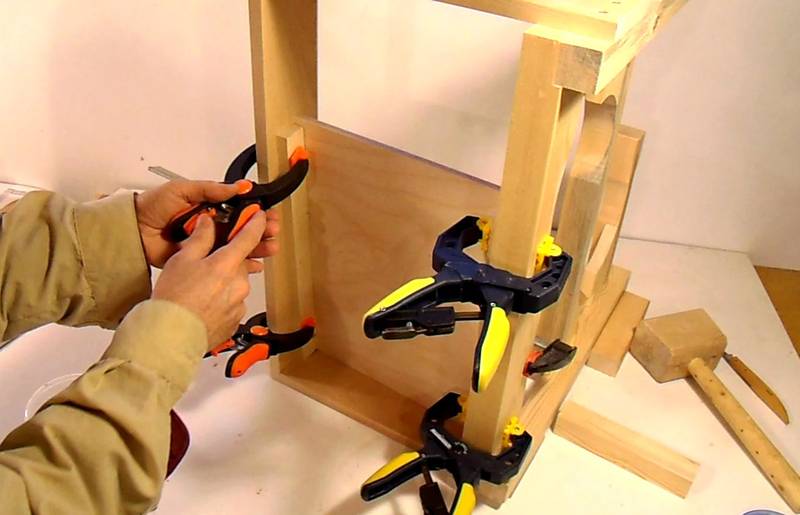
 Same procedure as the first half; I position the floor, apply a clamp to the box
to lock it in place, and then glue on the support rails.
Same procedure as the first half; I position the floor, apply a clamp to the box
to lock it in place, and then glue on the support rails.
 The base box, as built so far, doesn't actually go all the way to the
table or whatever the machine will sit on. So here I'm gluing another ledge
on the bottom inside of the box. The front rail of this ledge has a very
shallow 'V' cut out the top to fit around the support rails glued in
the previous step.
The base box, as built so far, doesn't actually go all the way to the
table or whatever the machine will sit on. So here I'm gluing another ledge
on the bottom inside of the box. The front rail of this ledge has a very
shallow 'V' cut out the top to fit around the support rails glued in
the previous step.
 I Also put rails along the sides, it looks much better with those.
The end of this rail towards the back is tapered thinner so that I can still get
at some of the screws without taking the base box off (I'm not sure if that
matters, but I thought I'd play it safe)
I Also put rails along the sides, it looks much better with those.
The end of this rail towards the back is tapered thinner so that I can still get
at some of the screws without taking the base box off (I'm not sure if that
matters, but I thought I'd play it safe)
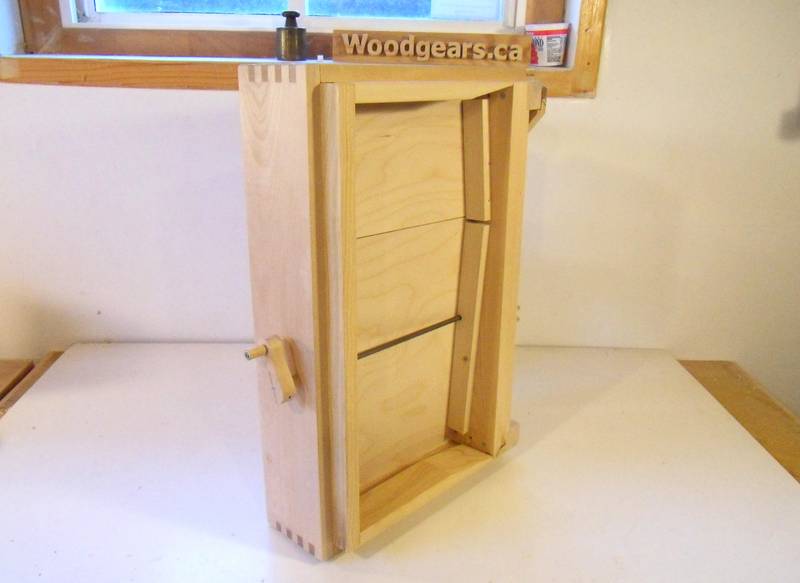 The lower rails and floor in place, after I installed the drive shaft and crank
(see towards the end of this page)
The lower rails and floor in place, after I installed the drive shaft and crank
(see towards the end of this page)
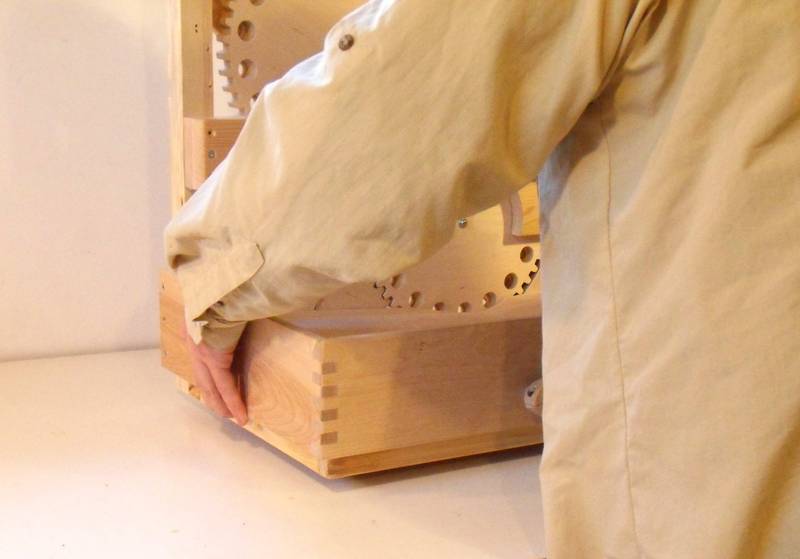 Aside from looking more appealing, that ledge at the bottom of the machine
is also useful for picking it up.
Aside from looking more appealing, that ledge at the bottom of the machine
is also useful for picking it up.
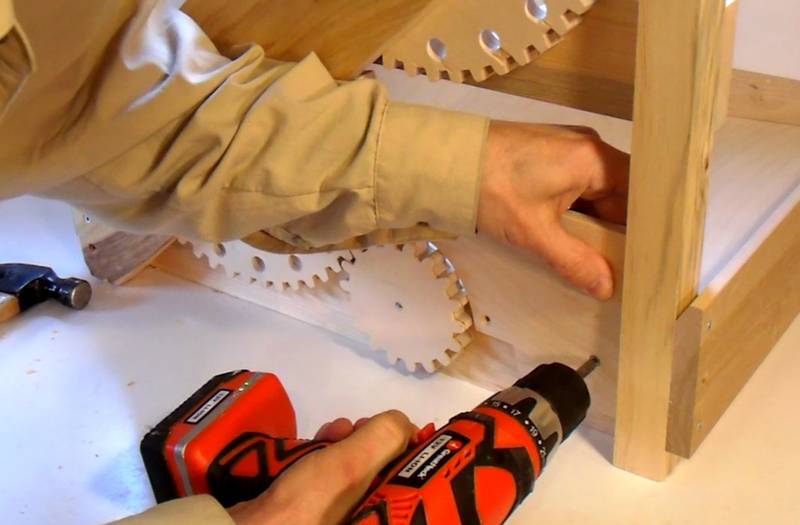 Adding a piece of plywood around the drive gear to prevent marbles
from rolling out the back of the machine. The gears and teeth
act as part of the back wall. The marbles are larger than the gear
teeth, so there's no risk of the marbles getting into the gears.
Adding a piece of plywood around the drive gear to prevent marbles
from rolling out the back of the machine. The gears and teeth
act as part of the back wall. The marbles are larger than the gear
teeth, so there's no risk of the marbles getting into the gears.
 Another piece to fill the corner to the right of the lower wheel.
No room for screws without taking the machine apart, so I just used
glue to hold that small piece in place.
Another piece to fill the corner to the right of the lower wheel.
No room for screws without taking the machine apart, so I just used
glue to hold that small piece in place.
 I left the floor removable.
Floor in place. The marbles all roll towards the wheel's pickup point
as intended.
Next: Support arm
Back to Marble machine 2.1