I'm very much a fan of mortise and tenon joinery.
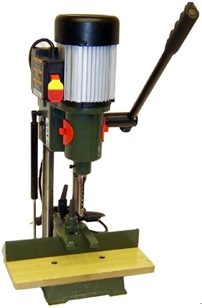
The classic North American power tool for making mortises is a hollow chisel mortiser.
I have been a little dismissive of hollow chisel mortising all along,
but I thought I should explore the technique a bit more.
This article is about my experiments at building such a mortiser out of mostly wood.
My plan was to cobble together a proof of concept machine, and based on
that experience design a more elegant second machine, similar to
what I did when I came up with
developing the Pantorouter concept
But I don't think I'll build a second machine now, so I figured I
might as well tell you about my proof of concept machine and why I decided to
leave it at that.
About twenty years ago, my dad bought a hollow chisel mortiser drill press kit.
He tried it out once, decided it was too slow, and then never used it again.
He offered it to me years ago, and on my visit last Christmas,
I finally took him up on the offer. I figured this kit would be a good starting
point for a hollow chisel mortiser.
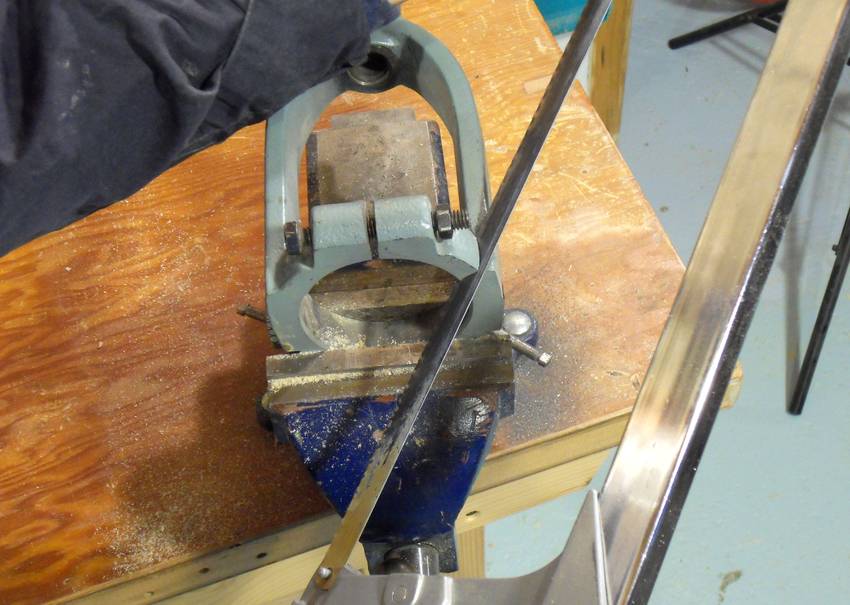
The kit consists of a bracket (top left in image) that attaches to the drill press
quill and reaches around the chuck to hold the chisel, four chisels
(1/4", 5/16", 3/8" and 1/2"), and this funny bracket (top right) to attach to a
fence on the drill press table to hold down the stock.
You can get this style of kit for as little as $40 without the chisels,
so I figured a kit like this could be the basis of a cheap hollow chisel
mortising machine design.
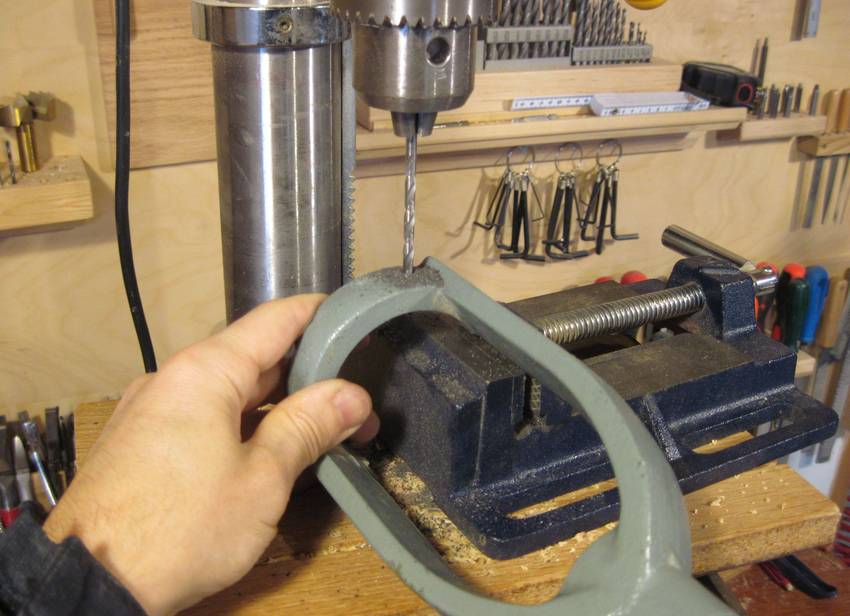
I had to cut parts off the bracket to allow the hand drill to fit inside it.
This bracket is meant to fit around a 2 5/8" diameter quill on a drill press.
It didn't fit on my drill press, so I couldn't even try it out before I cut it open.
I also drilled some extra holes in the bracket to screw it down on the plywood.
Cast iron is remarkably easy to drill!
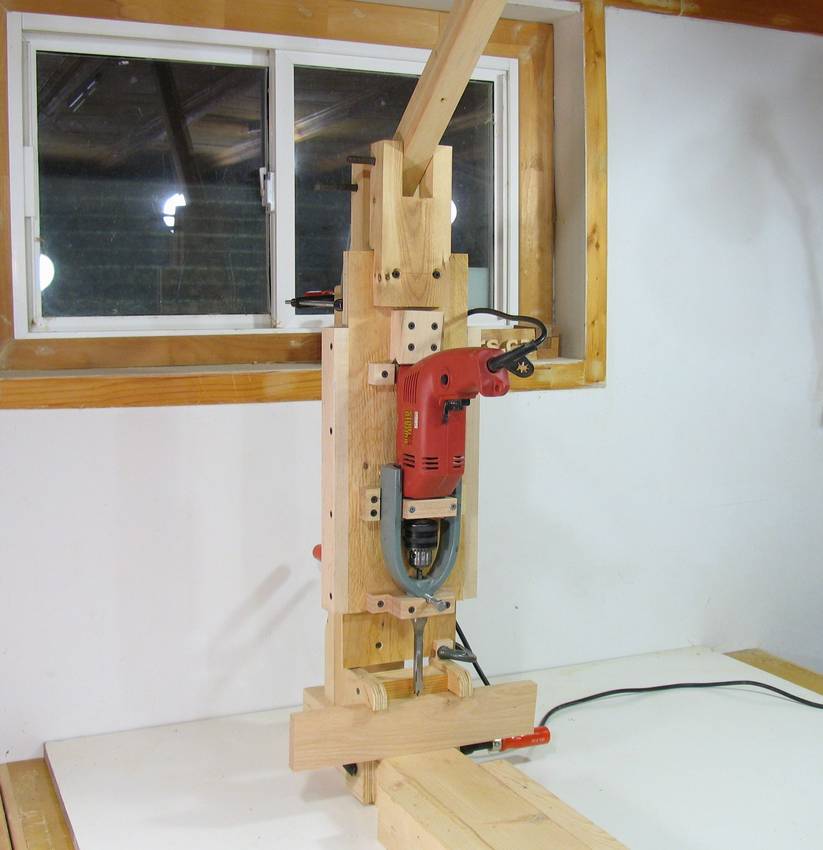
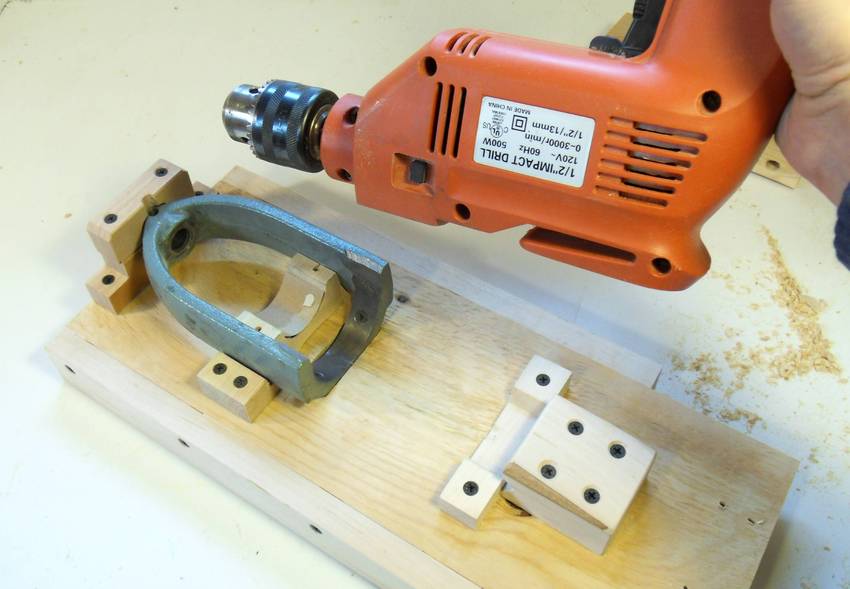
The idea was to mount this part on a piece of plywood. I cut a slot in the plywood
so that part of the casting could fit into it. A lot of force is needed for
hollow chisel mortising, so I figured the best way to support the casting is
by letting it push right up against the plywood base itself.
Another block holds the front of the bracket. Between the two of them,
I should have pretty good support.
I also added several blocks to mount the drill. The drill I used has part of the
plastic housing cylindriecal near the front, which makes it relatively easy to mount.
I used some very cheap packing crate plywood. This was meant to be my proof of concept
machine, so I didn't want to use up any of the good birch plywood.
The plywood that holds my cast iron bracket and hand drill slides up and down on dovetails
on either sides of it. The dovetail rails are screwed to the side of the plywood.
This would allow me to adjust the fit of the dovetail. Basically, cut small slivers off the
plywood until the dovetail becomes tight. If I cut too much off, I can always add shims
to make it looser.
The other half of the dovetail is just the edge of the plywood. Not ideal. If I was building
a permanent machine, I might add a strip of wood to glide on. Or maybe put a layer of UHMW tape
against the edge of the wood. As it is, I put two coats of varnish on the plywood edge to
make it glide a little easier.
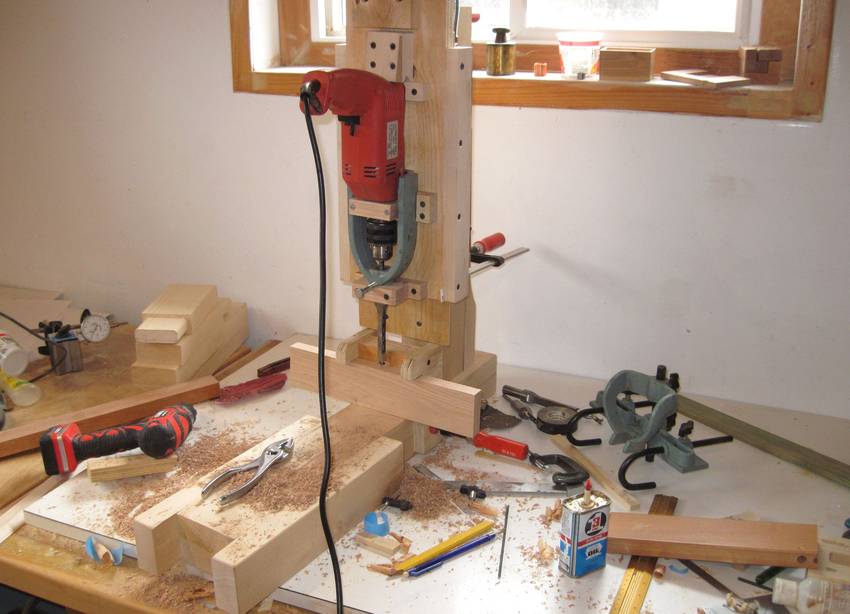
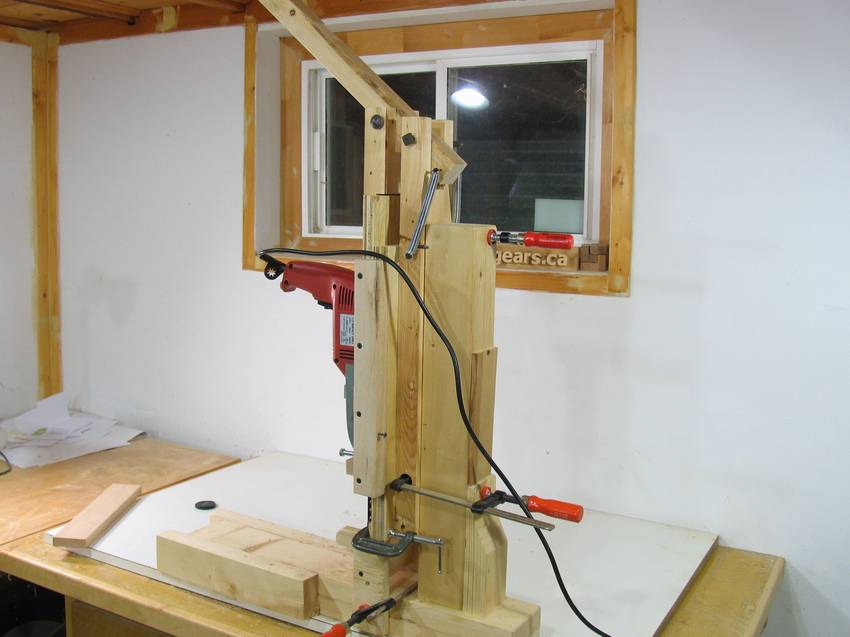
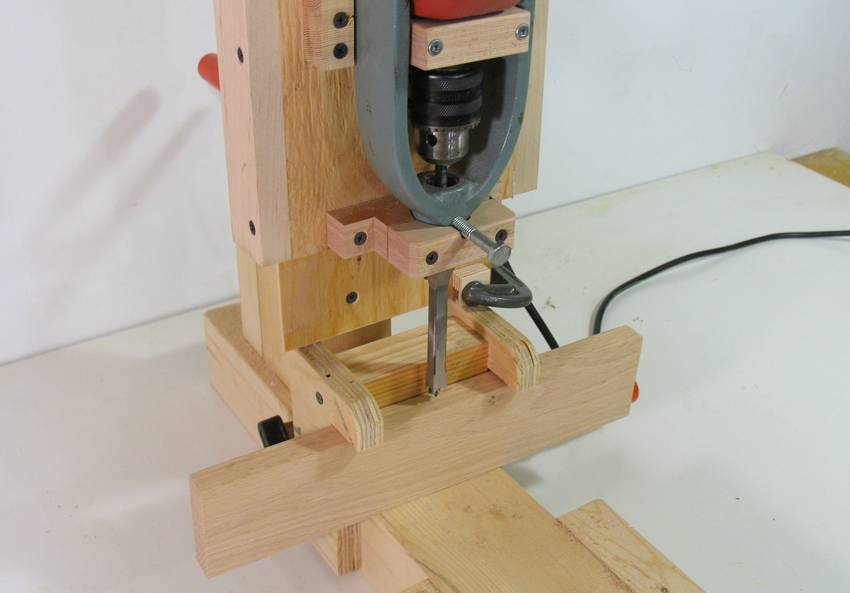
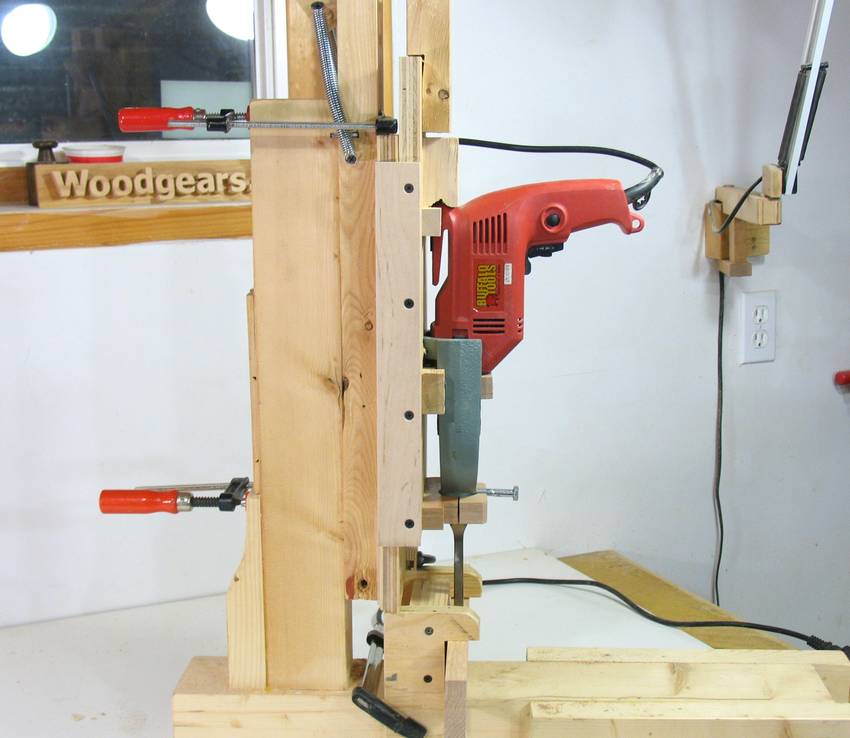
And here's my proof of concept machine making the first mortises.
The basic frame of the machine is actually the stand that I used for my
joint strength tests, with the
mortising mechanism just clamped to the front of it.
For a final machine, I would have made a frame more optimized for this application.
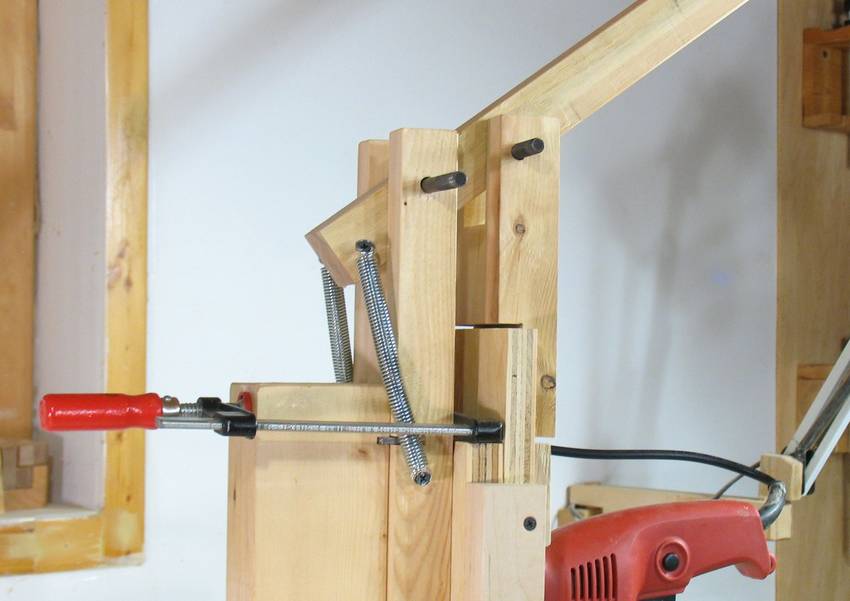
It can take a lot of force to ram that chisel into the wood, so I added a piece of 2x2
(38 x 38 mm) as a lever. The lever pivots on two 3/8" (10 mm) bolts. The vertical
piece on the right is only screwed loosely to the plywood piece with the drill on
it to allow it to pivot. (a little inelegant, but good enough to try the concept).
Two springs counteract gravity so that the mechanism rests in the "up" position
when I let go of the handle.
The two bar clamps are there to hold the mechanism to my stand.
The clamps don't have to take up the vertical forces - there's a metal ledge that's part
of my stand that the mechanism hooks on to, although you can't really see that in
the photo.
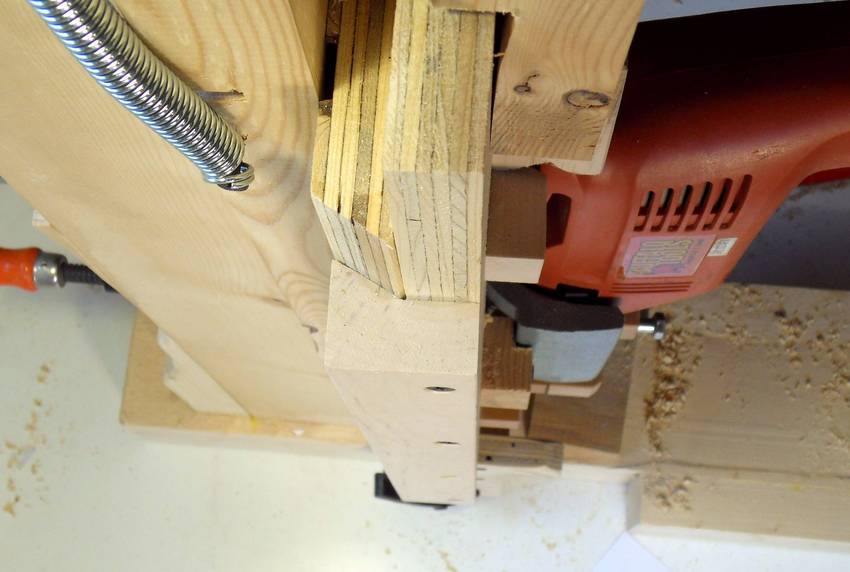
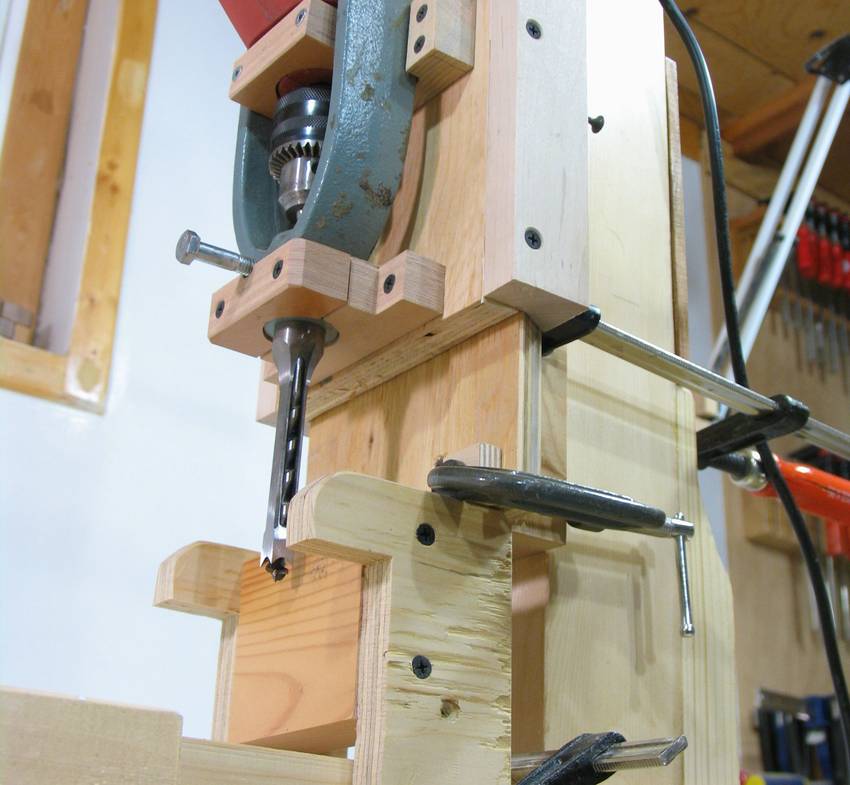
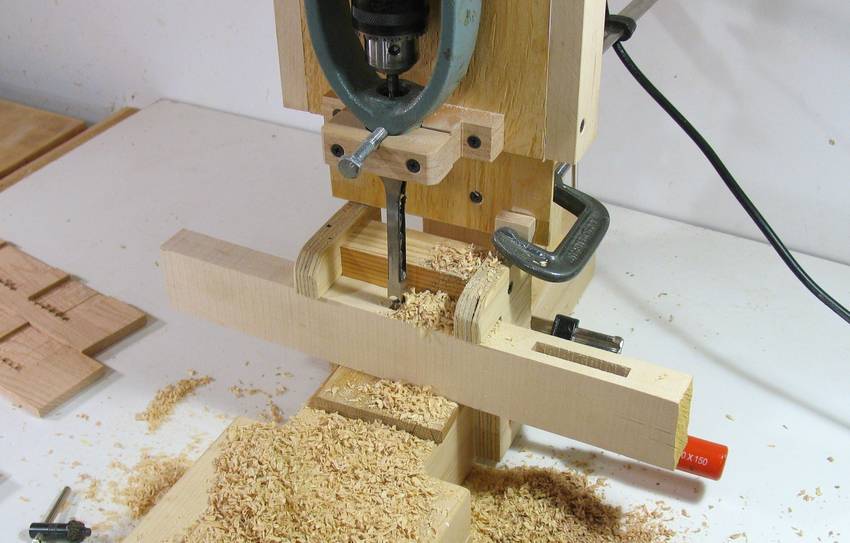
Here's the chiselling head of the machine. I added two wooden hooks to hold the piece
down while I pull the chisel up. It can take a lot of force to pull the chisel back out
of the wood, especially after the first plunge.
Cheap hollow chisel mortisers tend to use a similar mechanism to hold the stock down.
It would have been good to use the funny bracket for holding the stock to a fence
that came with the mortising kit, but the bracket would have interfered with how
I mounted the part that holds the chisel.
On better hollow chisel mortisers, there's a clamp for holding the stock. But this requires
the mortiser have a table that can move side to side. On cheap mortisers
one just moves the stock side-to-side.
That previous photo was a close up of Jacques Jodoin's
General International hollow chisel mortiser. When I revisited Jacques to check out his
Ryobi WDP, I also took the opportunity to play with his
hollow chisel mortiser as well.
Now back to my proof of concept jury-rigged contraption.
The mortiser kit had a screw knob for locking the chisels in the mortiser.
But with my wooden block clamped around the front of the bracket, I had to find a longer bolt.
If this were a proper machine, I'd make a wooden knob for this bolt. But seeing that it was
just an experiment, I didn't bother.
I also didn't have much of a depth stop. I started by just putting a C-clamp on my
dovetail to limit how far it could come down. But hollow chisel mortisers involve so
much force, I found my clamp slipping without even noticing that I was pushing it.
So I clamped a block of wood to the dovetail. The
block of wood gets pushed up against my bracket that holds the wood, so it can't slip.
Inelegant, but works well enough to try it out.
Side profile view.
I was lucky that my drill has a bit of a hook on the back to help push it.
I made a wooden block that fits exactly against the hook, and i
screwed it onto the plywood with four screws. That block will take up the force on the
drill. It's not overly critical, because most of the force goes to the hollow chisel,
not the drill bit.
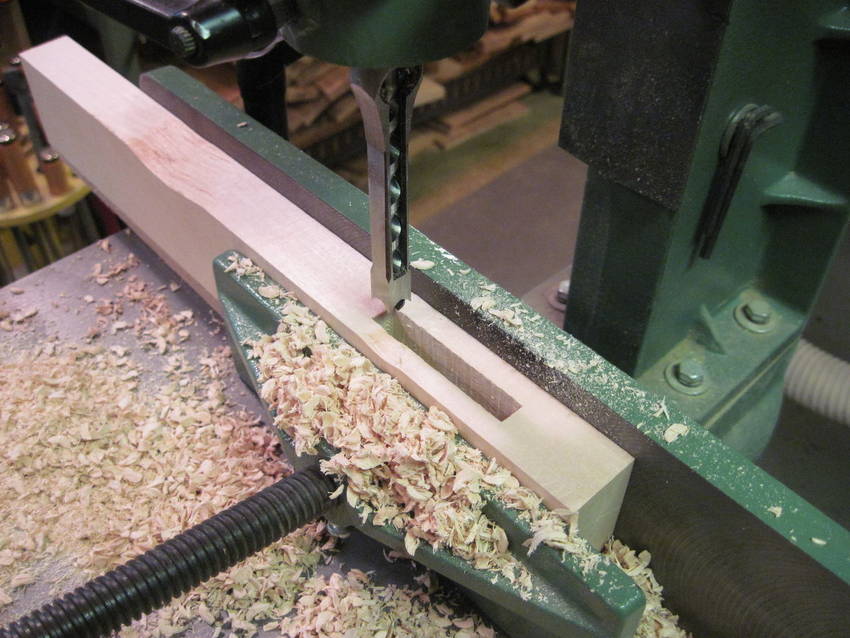
Making lots of mortises to test.
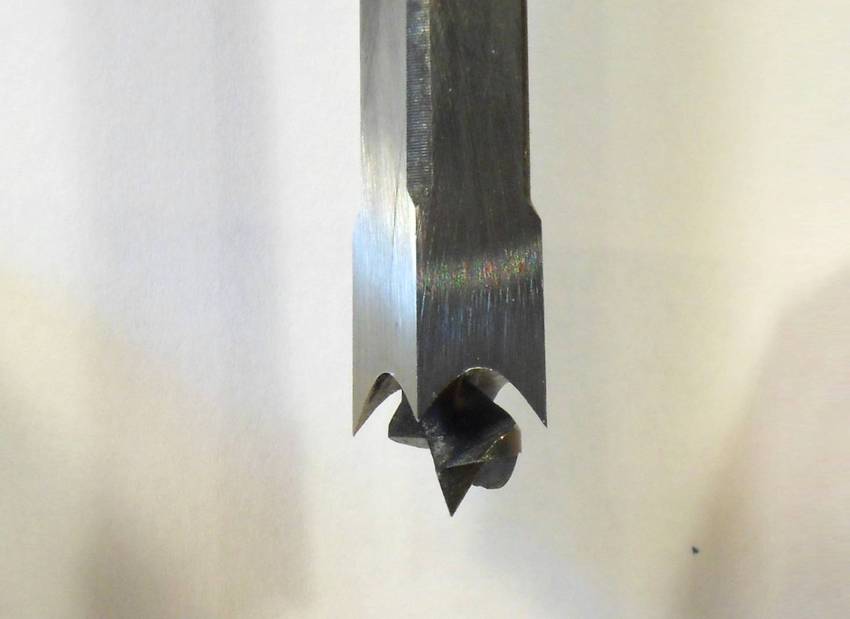
The drill I was using is a 0-3000 RPM drill, and I set the speed to just a few hundred RPM.
There's no speed regulation at all, and with the drill only having a single
stage gear reduction, it doesn't provide for very steady speed at low speeds and high torque.
With the 3/8" chisel, it slows down a fair bit when mortising.
The 3/8" chisel is the second largest I have. The largest is 1/2", but
I don't think my proof of concept machine is robust enough to really try that one, and
I don't think that hand drill would be up to the job either.
The other problem with the drill I'm using is that it's a hammer drill. The hammer function
can of course be turned off. But even with it off, the drill chuck
will move back by about two millimeters when pushed. This means I need to let the drill stick that
much further out of the front of the chisel to allow the bit and chuck movement
when mortising.
I used that drill because it has a chuck with a key and because it has the nice
cylindrical part to mount on the front. It was a really cheap drill - it only cost
me $20. But it's also the kind of quality you get for $20! Other than only having
a single stage gear reduction and a chuck that moves in and out of the drill a bt,
it would have been perfect for the job.
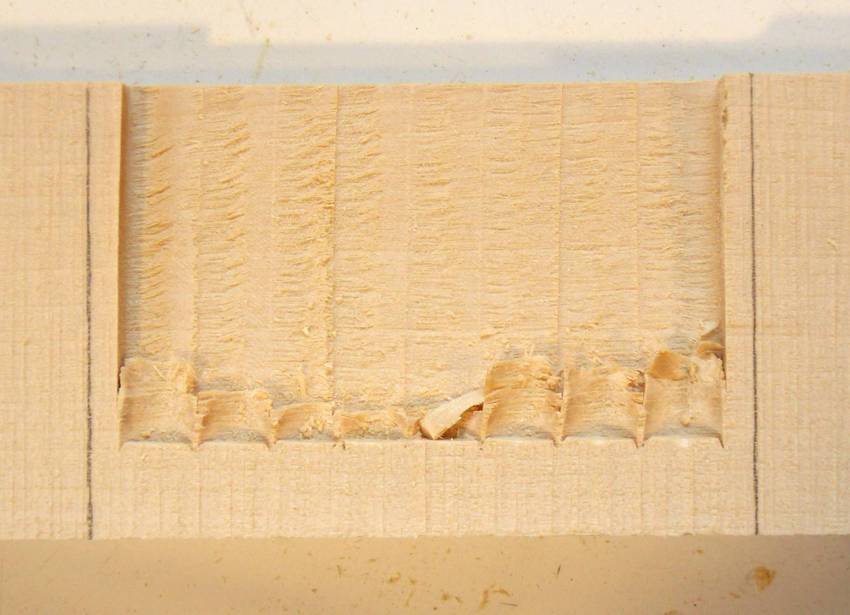
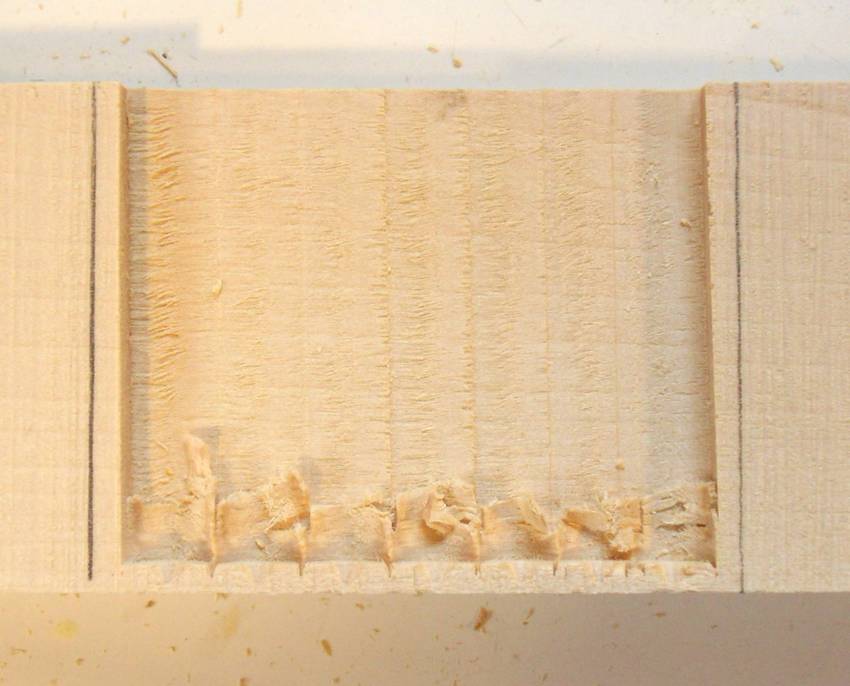
Once I got the hang of using the machine and made a few good mortises,
I cut some of them open on the bandsaw to see how they looked on the inside.
What I didn't like is that the bottom of the mortise isn't clean. This is because the
drill bit has to protrude forward of the chisel by quite a bit. So if I made
my mortises with a hollow chisel mortiser, I'd have to make the tenon
not protrude to the full depth of the
mortise. That, or clean up the bottom of the mortise with a chisel.
But the whole idea of experimenting with hollow chisel mortising was to get square
holes so I could just put square tenons in them without having to fuss. If I have
to clean it up with a chisel, I might as well start with a slot mortise and square up
the ends, or round the tenons with a hand file, or
make round ended tenons to begin with.
By comparison, here's a cut open mortise that was done on Jacques Jodoin's hollow chisel
mortiser (see picture earlier). Not much different on the bottom. The walls of his mortise
look better, but maybe his chisel was sharper.
I also noticed the left and right edges on this mortise weren't entirely vertical (compared
to the pencil lines I added with a square). The problem is that the chisel really pulls into
the wood on either side, especially if the chisel is only engaging the wood on one side.
My own mortising contraption did worse than Jacques's in this regard.
So I was really starting to question the point of hollow chisel mortises.
Slot mortises have the annoyances of round ends, but hollow chisel mortises
have plenty of issues as well.
I really should use a more solid, lower RPM drill with the mortiser.
So I went shopping for something more suitable, preferably around $50
instead of $20.
It turns out, there are quite a lot of drills that are cylindrical
on the front, have a nice hook on the back, and keyed chucks. Problem is, nearly every
drill that has those properties is a hammer drill, with a chuck that moves back
a little when you push on it, even with the hammer function turned off.
There was one nice DeWalt drill that wasn't a hammer drill and would have been perfect,
but that drill cost $150. At that price, it would make more sense to just buy a low
end mortiser for about $200. Even if I could build a better mortiser than a low end
mortiser, it would make more sense to start with the low end mortiser as raw material!
So that really put me off building a mortiser. I'd end
up spending about as much as it costs to buy a cheap one. Mortising
(even on a proper hollow chisel mortiser) is slower than slot mortising. The resulting
mortise is less accurate because of all the force involved, and there's the
problem with having to make shorter tenons or clean up the bottom of it.
So I conclude that it makes more sense to build a
slot mortiser than a hollow
chisel mortiser. By the time I'd have it done, the hollow chisel mortiser
would be more work than the slot mortiser or the
pantorouter
A more practical application of what I came up with might be to use that same
mechanism, without the hollow chisel part, to turn a hand drill into a drill press.
But then you have to weigh off the cost of a cheap drill press to that of a good hand
drill, and there probably aren't any savings there either.
Having said all that, If you are not up for building your own machines, low end hollow chisel
mortisers are surprisingly cheap - so if you are just starting out and want
a machine for making mortises, it would mame sense to buy one of
these cheap hollow chisel mortisers and use that until you have the money or time
to buy or build something better. The other nice thing about hollow chisel mortisers
is that they are quiet and don't make a lot of airborne dust. Although my contraption,
with the cheap hand drill strapped on wasn't that quiet.
 I'm very much a fan of mortise and tenon joinery.
The classic North American power tool for making mortises is a hollow chisel mortiser.
I have been a little dismissive of hollow chisel mortising all along,
but I thought I should explore the technique a bit more.
This article is about my experiments at building such a mortiser out of mostly wood.
I'm very much a fan of mortise and tenon joinery.
The classic North American power tool for making mortises is a hollow chisel mortiser.
I have been a little dismissive of hollow chisel mortising all along,
but I thought I should explore the technique a bit more.
This article is about my experiments at building such a mortiser out of mostly wood.


 So that really put me off building a mortiser. I'd end
up spending about as much as it costs to buy a cheap one. Mortising
(even on a proper hollow chisel mortiser) is slower than slot mortising. The resulting
mortise is less accurate because of all the force involved, and there's the
problem with having to make shorter tenons or clean up the bottom of it.
So I conclude that it makes more sense to build a
So that really put me off building a mortiser. I'd end
up spending about as much as it costs to buy a cheap one. Mortising
(even on a proper hollow chisel mortiser) is slower than slot mortising. The resulting
mortise is less accurate because of all the force involved, and there's the
problem with having to make shorter tenons or clean up the bottom of it.
So I conclude that it makes more sense to build a
 Home made slot mortising machine
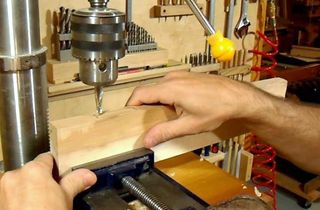 Mortising with the drill press
 Quick set tenon jig
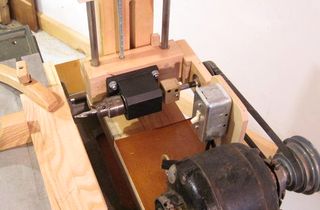 Horizontal boring machine
 Simple slot mortising jig
 The pantorouter