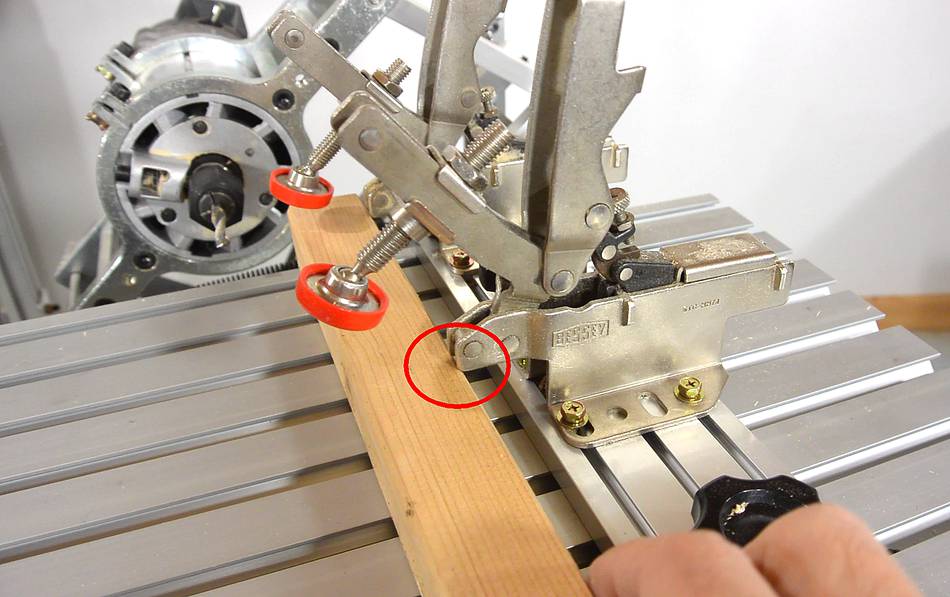
 The self adjusting Bessey toggle clamps on the metal pantorouter
are very convenient for holding boards, but for thicker stock (thicker
than 35 mm) the stock keeps hitting the clamp, and even thicker stock
can't be clamped at all.
The self adjusting Bessey toggle clamps on the metal pantorouter
are very convenient for holding boards, but for thicker stock (thicker
than 35 mm) the stock keeps hitting the clamp, and even thicker stock
can't be clamped at all.
The self adjusting Bessey toggle clamps on the metal pantorouter
are very convenient for holding boards, but for thicker stock (thicker
than 35 mm) the stock keeps hitting the clamp, and even thicker stock
can't be clamped at all.
Update 2015:
The clamps are now shipped with a thicker rail, so that a full 2x4 (38 mm thick) fits under the clamps
Update 2017:
Switched to Bessey T-slot lever clamps, which clamp much better.
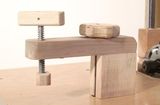
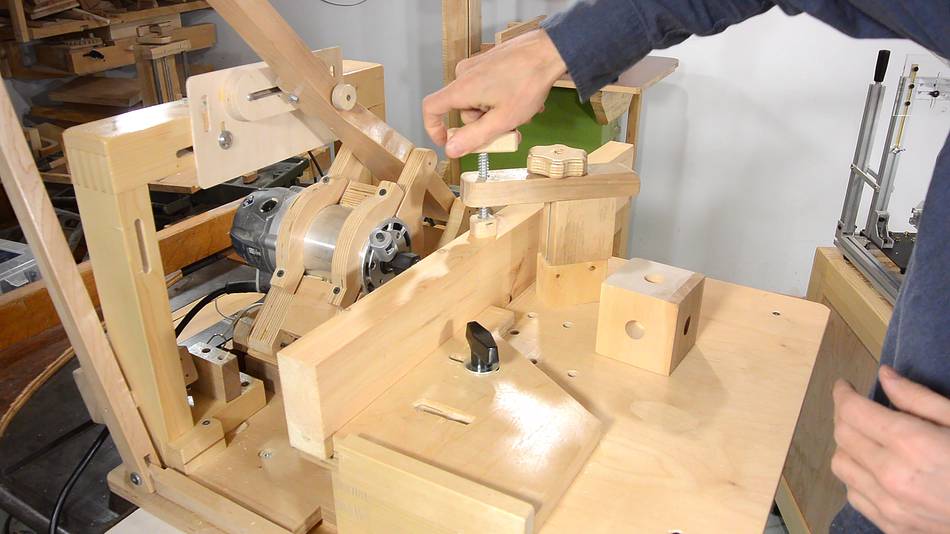 On my wooden pantorouter, I have this clamp,
that, with a riser block, can accommodate stock up to 100 mm thick.
On my wooden pantorouter, I have this clamp,
that, with a riser block, can accommodate stock up to 100 mm thick.
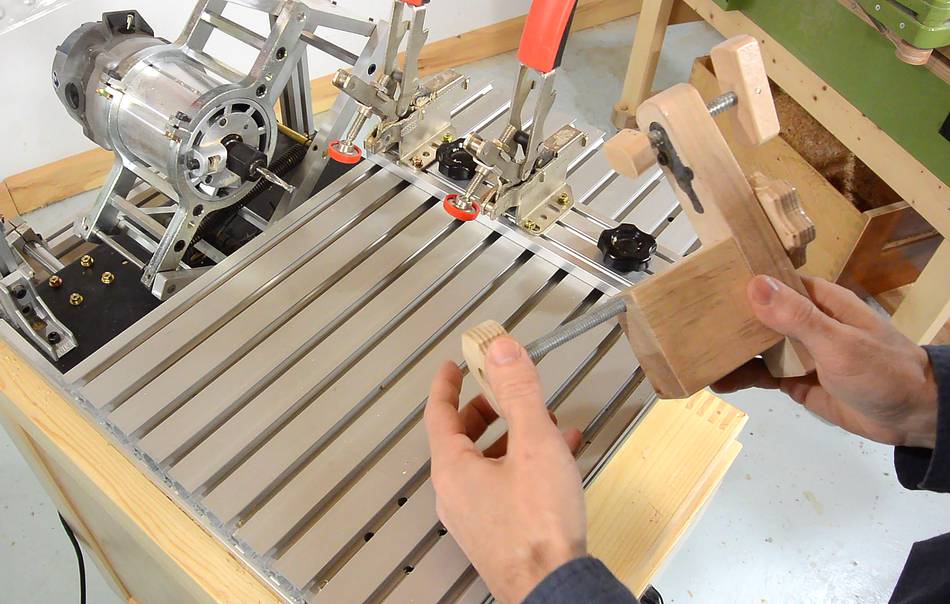 That hold-down clamp attaches via a threaded rod through the table. It's a system that is very
strong, but I'd have to drill a lot of holes through the aluminium table to be able
to use it on the metal pantorouter.
That hold-down clamp attaches via a threaded rod through the table. It's a system that is very
strong, but I'd have to drill a lot of holes through the aluminium table to be able
to use it on the metal pantorouter.
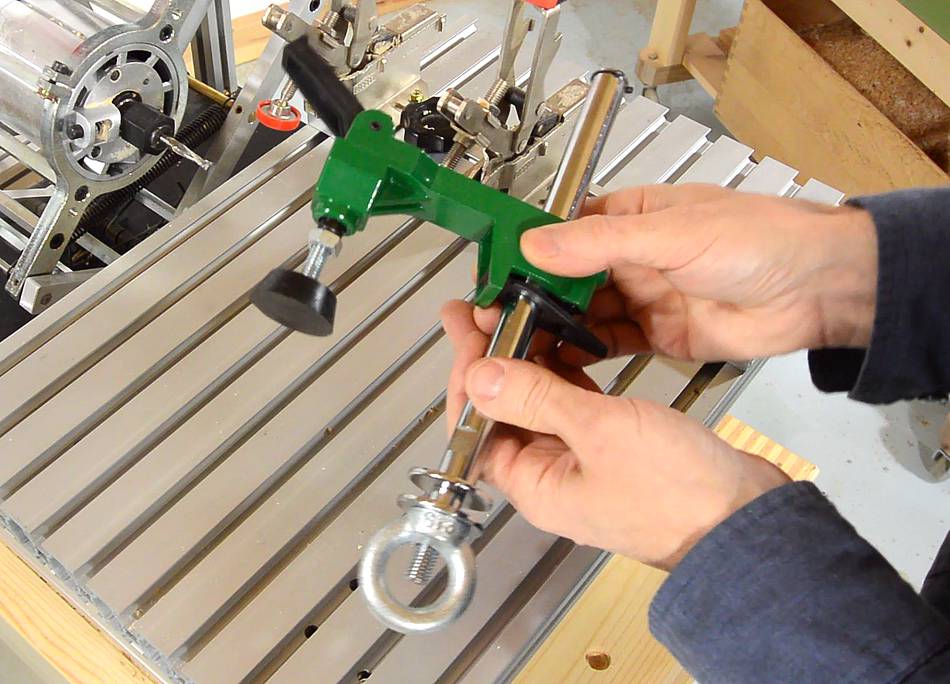 I found this drill press hold-down with a toggle clamp at Busy Bee Tools.
I figured I might be able to adapt this to use on the metal
pantorouter. The style of it certainly goes better with the
aluminium machine (and it's all about style!!!)
I found this drill press hold-down with a toggle clamp at Busy Bee Tools.
I figured I might be able to adapt this to use on the metal
pantorouter. The style of it certainly goes better with the
aluminium machine (and it's all about style!!!)
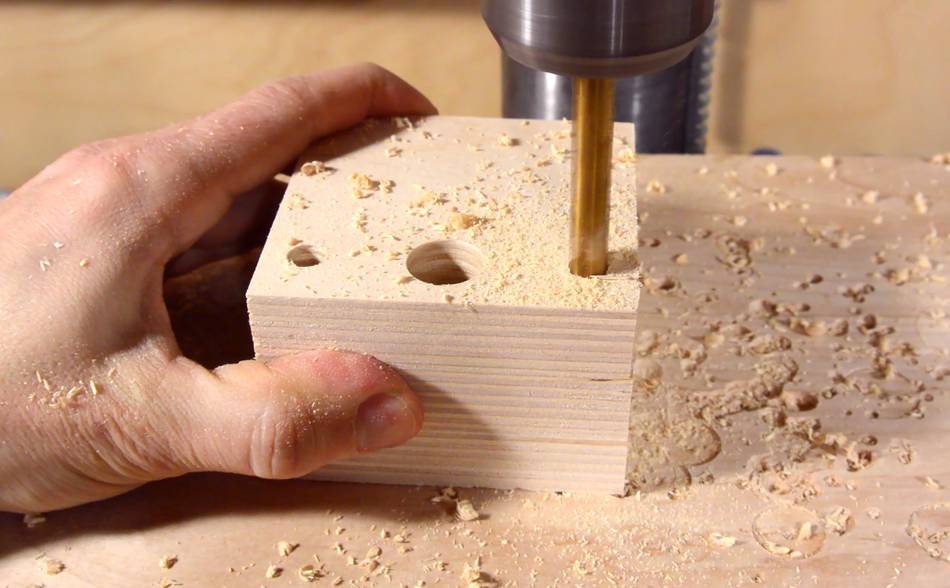
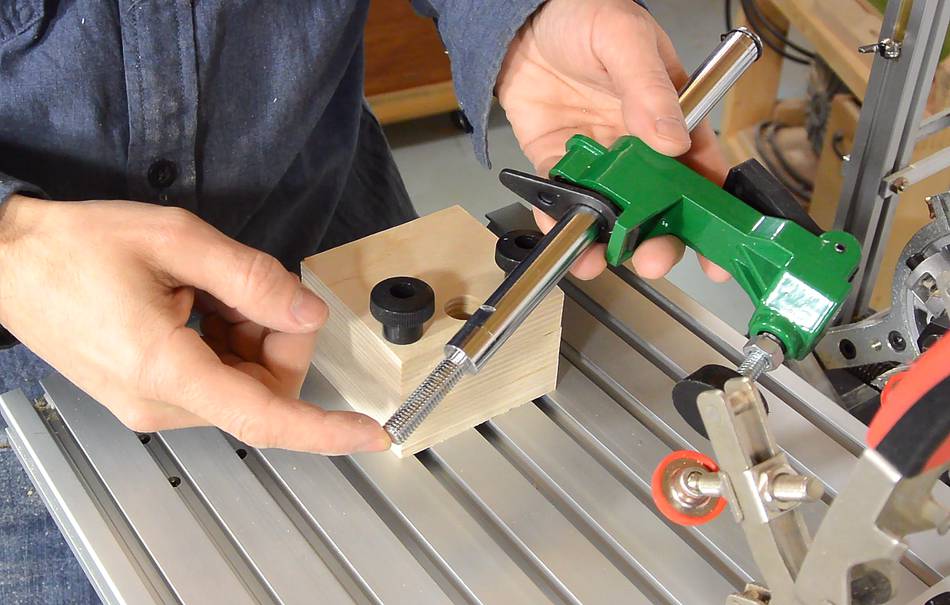
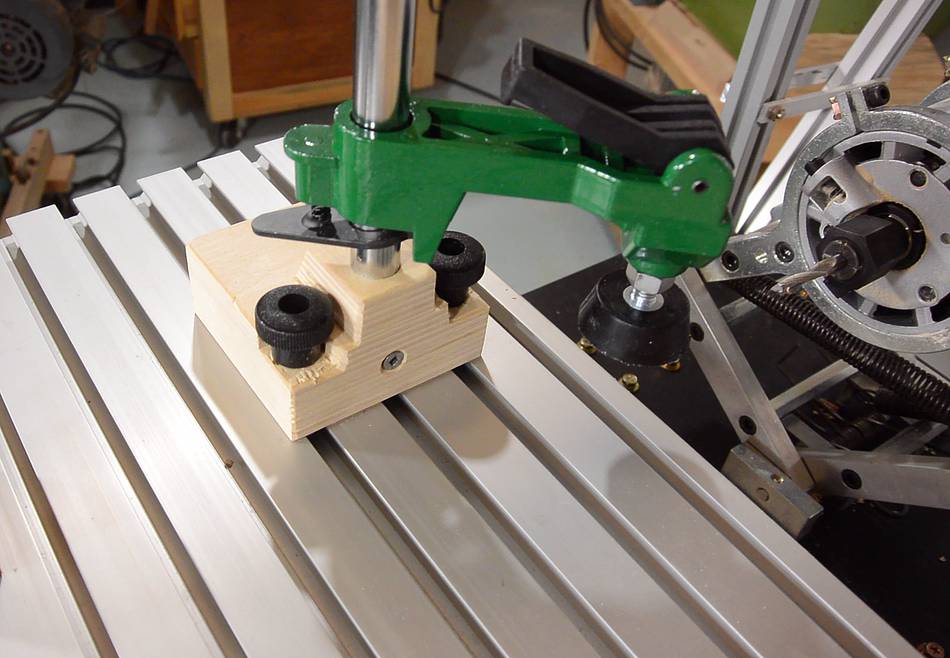
 I made a block of plywood by gluing three layers of 18 mm birch plywood
on top of each other, then drilled holes for the 5/8" (16mm) column,
plus two holes for 5/16" bolts.
I made a block of plywood by gluing three layers of 18 mm birch plywood
on top of each other, then drilled holes for the 5/8" (16mm) column,
plus two holes for 5/16" bolts.
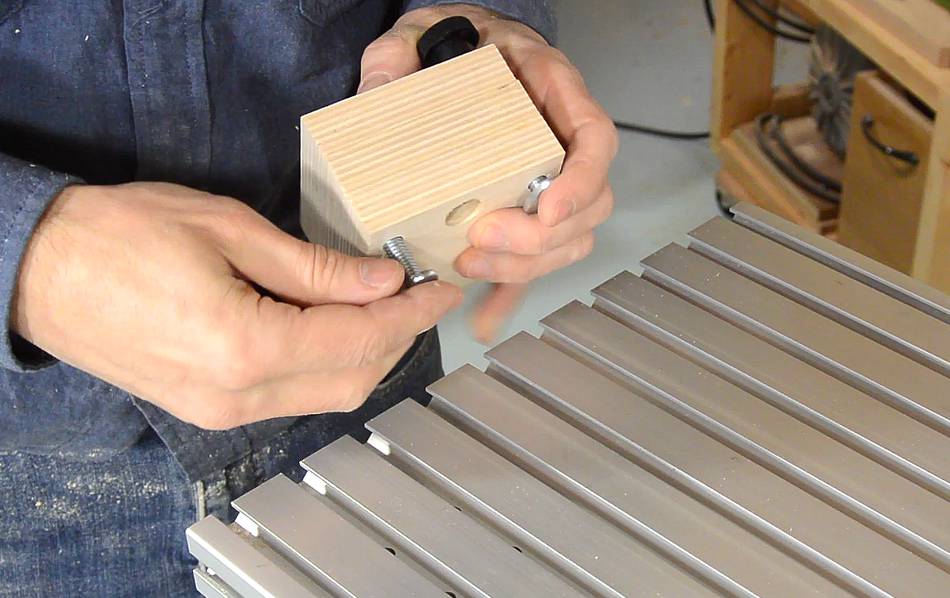 I'm using two T-slot bolts and two plastic knobs to hold the block in place.
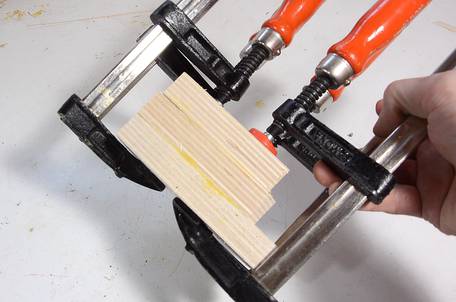
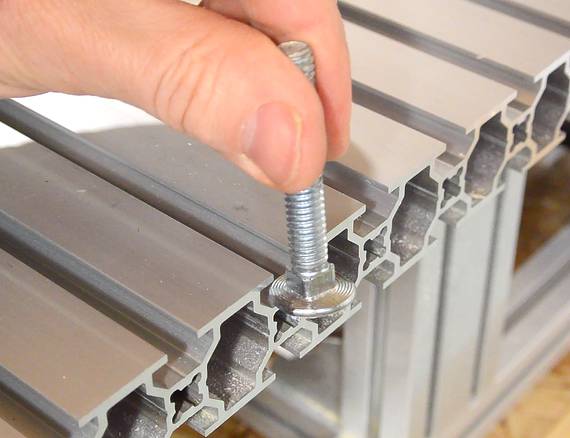 If you can't find T-slot bolts, you can also use 5/16" or M8 carriage
bolts and grind two sides flat. The carriage bolts have a bigger head,
so they are actually better than the T-slot bolts for this purpose.
If you can't find T-slot bolts, you can also use 5/16" or M8 carriage
bolts and grind two sides flat. The carriage bolts have a bigger head,
so they are actually better than the T-slot bolts for this purpose.
 With the mounting washers and spacers removed from the drill press
clamp, I still need to get rid of the threaded part on the bottom end.
With the mounting washers and spacers removed from the drill press
clamp, I still need to get rid of the threaded part on the bottom end.
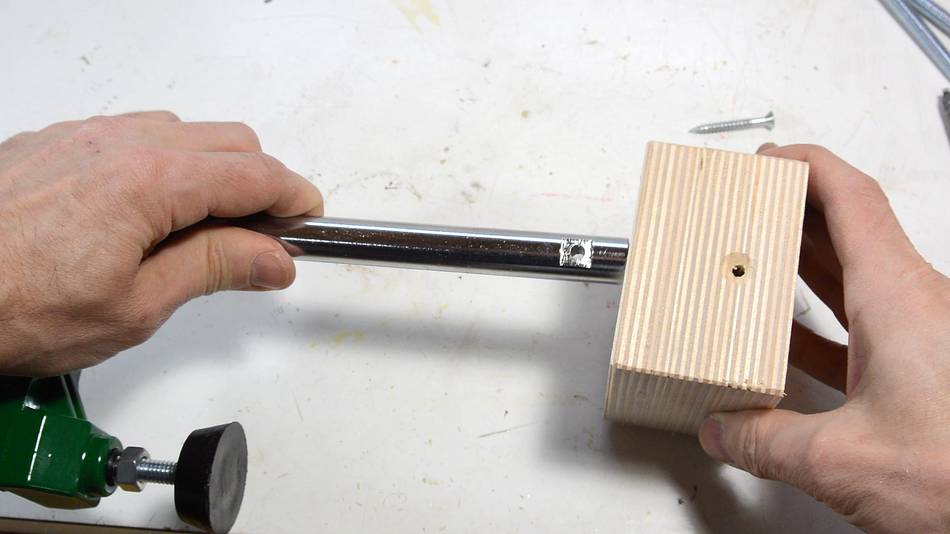
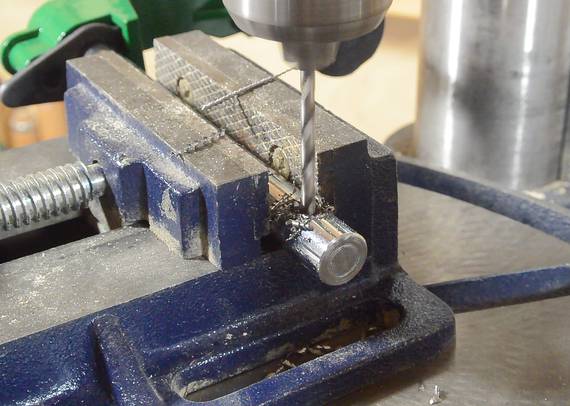 I drilled a hole through the end of the rod to lock it in the block with
a screw. If I had thought this through a bit more initially, I might
have left 1 cm of the threaded rod in place and made the hole in the
plywood blocks so that the threaded part threads into it.
I drilled a hole through the end of the rod to lock it in the block with
a screw. If I had thought this through a bit more initially, I might
have left 1 cm of the threaded rod in place and made the hole in the
plywood blocks so that the threaded part threads into it.
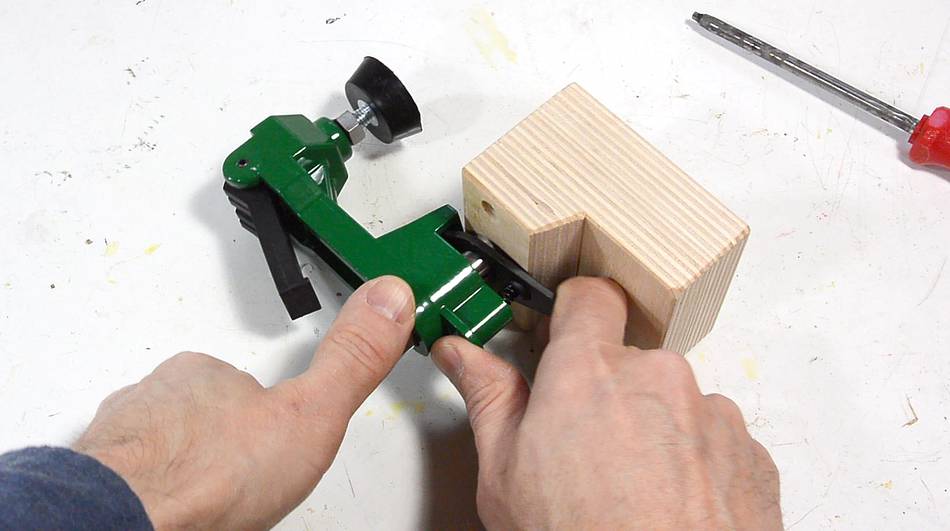 I needed to cut away part of the block so I could still reach the
unlocking lever when it's all the way down.
I needed to cut away part of the block so I could still reach the
unlocking lever when it's all the way down.
 And on further consideration, I also made cutouts to move the knobs further
down so I could swivel the clamp to the side without hitting the knobs.
And on further consideration, I also made cutouts to move the knobs further
down so I could swivel the clamp to the side without hitting the knobs.
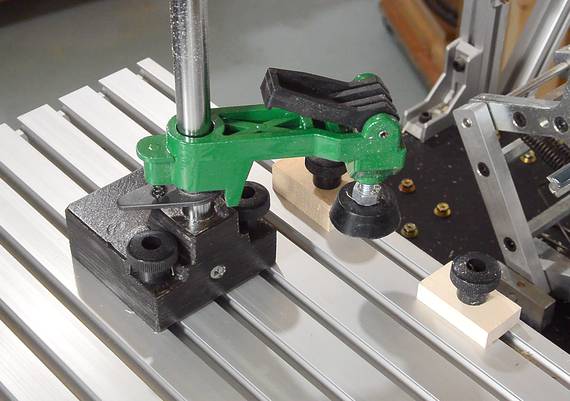 I painted it black to make it look more like part of the all metal
pantorouter.
I painted it black to make it look more like part of the all metal
pantorouter.
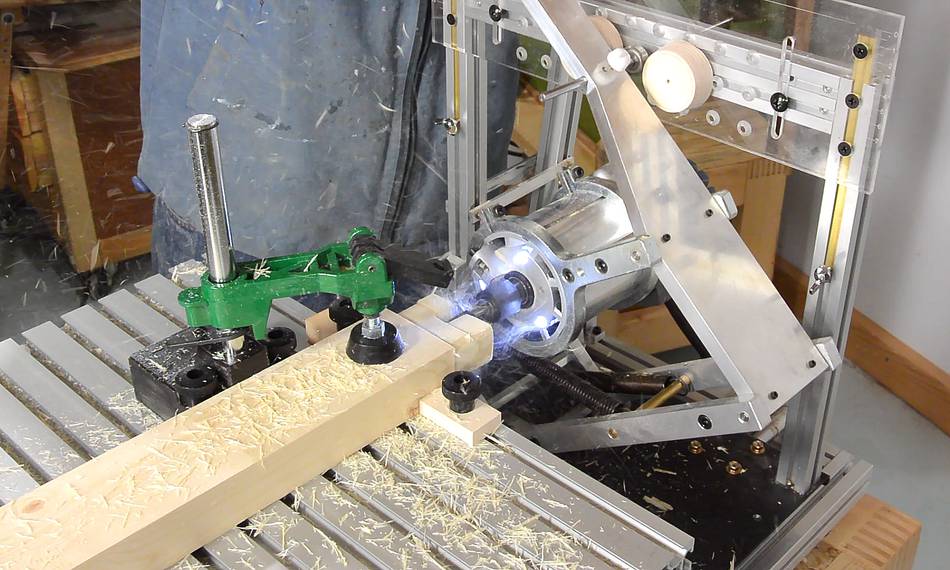
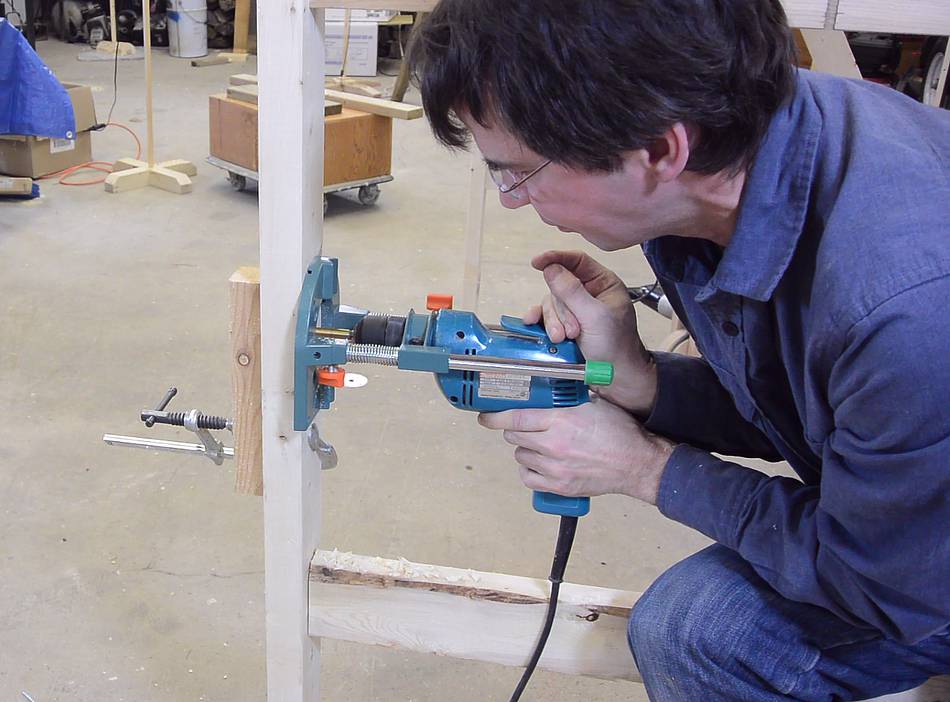
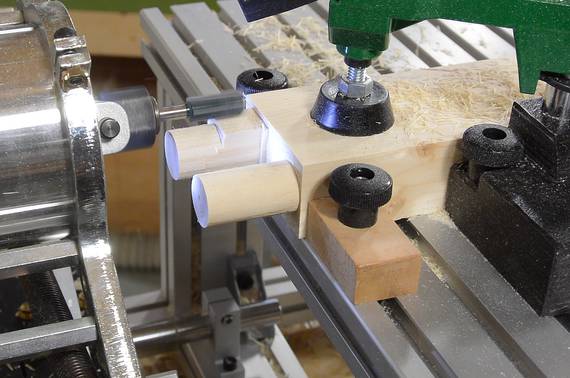 First test, routing out an end with two 7/8" dowels on the end of a piece of 2x4.
I found the wood had a tendency to slip, much like I did with the dovetail setup.
That aluminium table is just a bit too slippery. So I used two little blocks on either side of the wood to lock it down. Another solution would be to roughen up the aluminium, but I like the look of the smooth aluminium table.
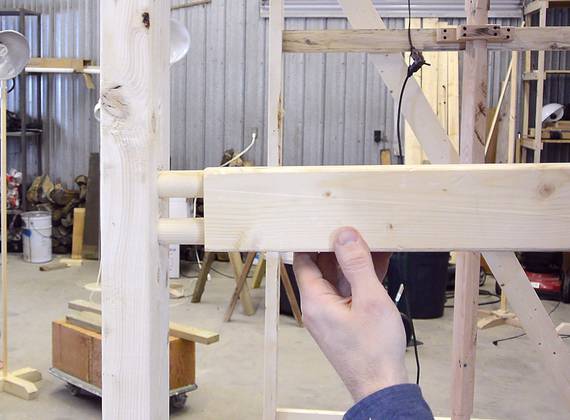 The dowel ends were for adding ladder steps to my rolling scaffold. I drilled pairs of
7/8" holes in the frame to join the steps.
The dowel ends were for adding ladder steps to my rolling scaffold. I drilled pairs of
7/8" holes in the frame to join the steps.
I'd like to say t hat this all worked smoothly, but the 7/8" drill needed a lot of force to drill into the wood, and I wasn't accurate enough with the drill guide. My initial test with the drill press worked much better. I should have made a drilling template with two 7/8" holes in it to drill through to make sure to place the holes more accurately.
 Hold-down clamp for
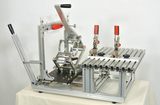 Buy an all-metal
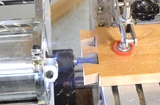 Setting up dovetails with
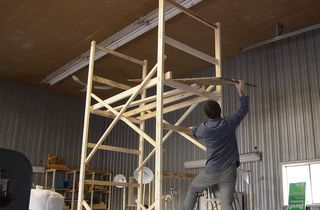 Rolling scaffold