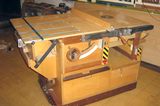
Hector's router lift
This article is about Hector's router lift, which is part of his table saw workstation
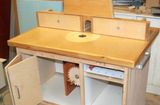
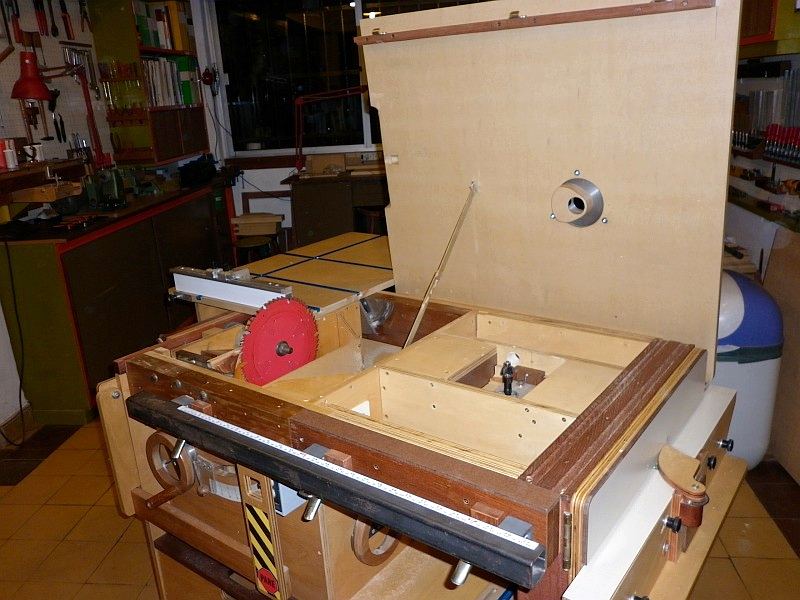 Opening the top of the table saw workstation reveals the
built in router lift on the right side.
Opening the top of the table saw workstation reveals the
built in router lift on the right side.
 The up-down carriage in place. This photo shows the router lift
still under construction.
The up-down carriage in place. This photo shows the router lift
still under construction.
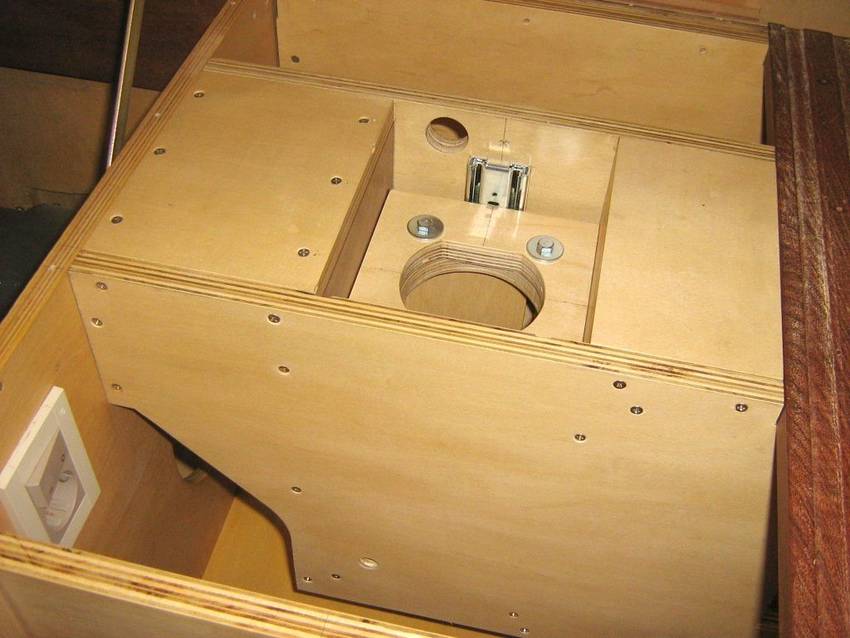
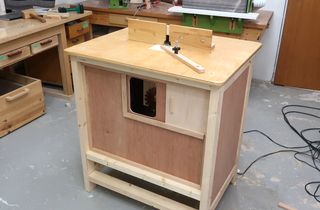
 This is the router cabinet module with the other part
of the slide in place (removed from the cabinet).
Since these slides can be separated it is
easy to take out the carriage for maintenance and cleaning.
Changing router motors only requires loosening the two 5/16"
Allen cap-head screws. No need to take out the
carriage.
This is the router cabinet module with the other part
of the slide in place (removed from the cabinet).
Since these slides can be separated it is
easy to take out the carriage for maintenance and cleaning.
Changing router motors only requires loosening the two 5/16"
Allen cap-head screws. No need to take out the
carriage.
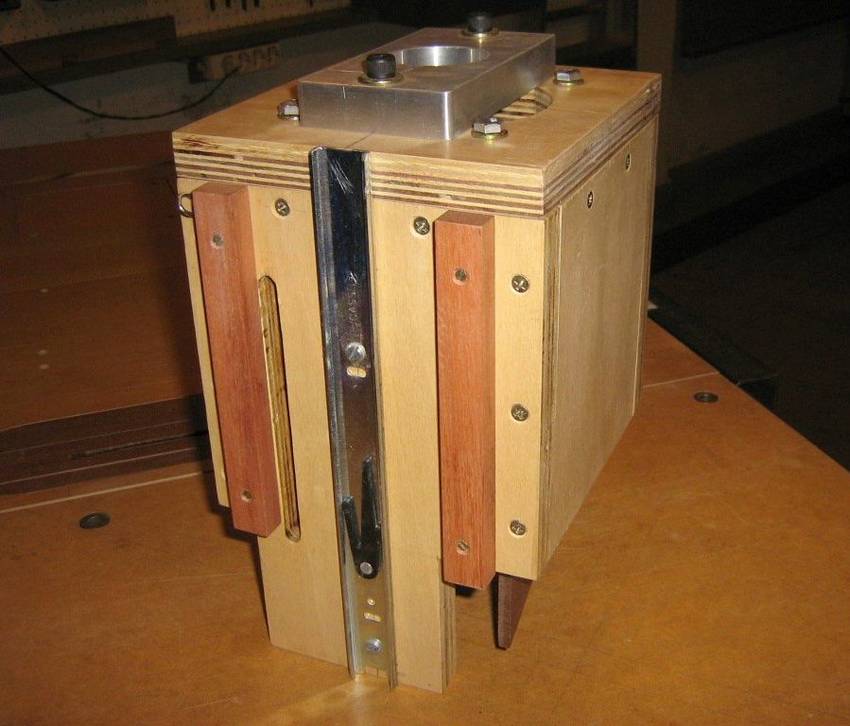 A view of the carriage with the slides screwed in place.
The hardwood runners are carefully planed to exact thickness to
counteract any slop of the carriage within the cabinet. The long
slot at the left is for the height locking mechanism. A thick
aluminum plate is used to mount the router. It has a 43mm hole
for the Eltos but a different plate can be used to mount the 71mm
Bosch. Even a 89mm router motor would eventually fit with a suitable
plate.
A view of the carriage with the slides screwed in place.
The hardwood runners are carefully planed to exact thickness to
counteract any slop of the carriage within the cabinet. The long
slot at the left is for the height locking mechanism. A thick
aluminum plate is used to mount the router. It has a 43mm hole
for the Eltos but a different plate can be used to mount the 71mm
Bosch. Even a 89mm router motor would eventually fit with a suitable
plate.
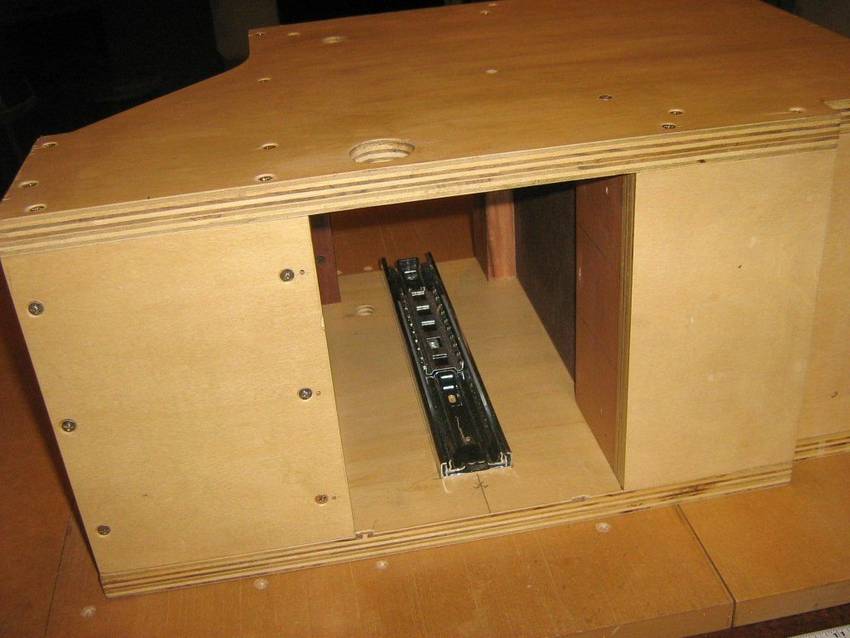
 A dust cover removed. Made from scrap hardwood, 1/8"
hardboard and aluminum sheet. This cover protects the drawer slide
from the router dust.
A dust cover removed. Made from scrap hardwood, 1/8"
hardboard and aluminum sheet. This cover protects the drawer slide
from the router dust.
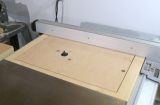
 A view of the controls. The hand wheel raises or lowers
the router. The star knob locks the carriage in place for working.
The hole was a dust collection port. It did not work as expected
so it will be eventually plugged.
A view of the controls. The hand wheel raises or lowers
the router. The star knob locks the carriage in place for working.
The hole was a dust collection port. It did not work as expected
so it will be eventually plugged.
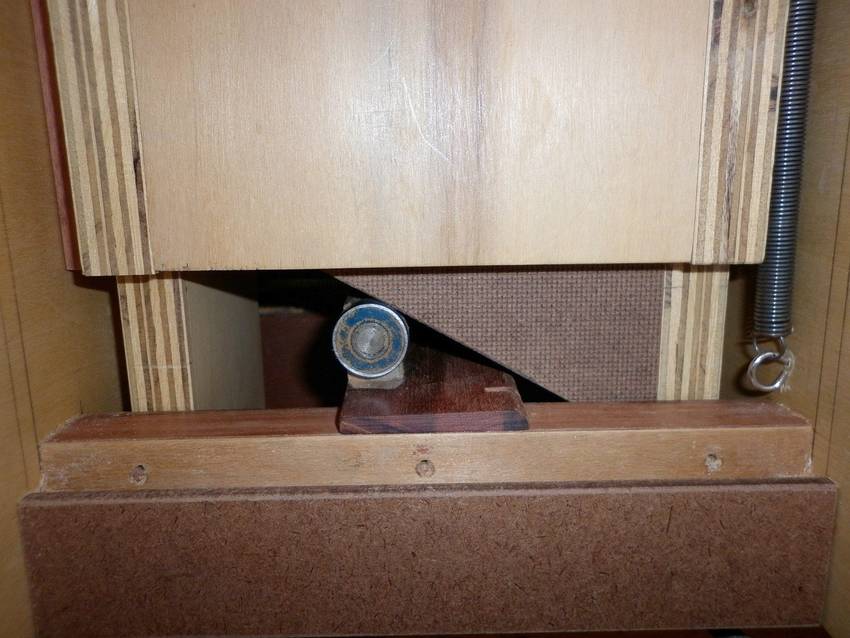
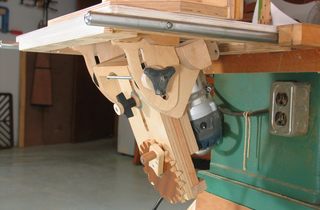
 A view of the bridge in its operating position. The
carriage has been lifted and locked in the bit changing position
to allow a better photo. At right, one of the two springs that
pull the carriage down against the bearings.
A view of the bridge in its operating position. The
carriage has been lifted and locked in the bit changing position
to allow a better photo. At right, one of the two springs that
pull the carriage down against the bearings.
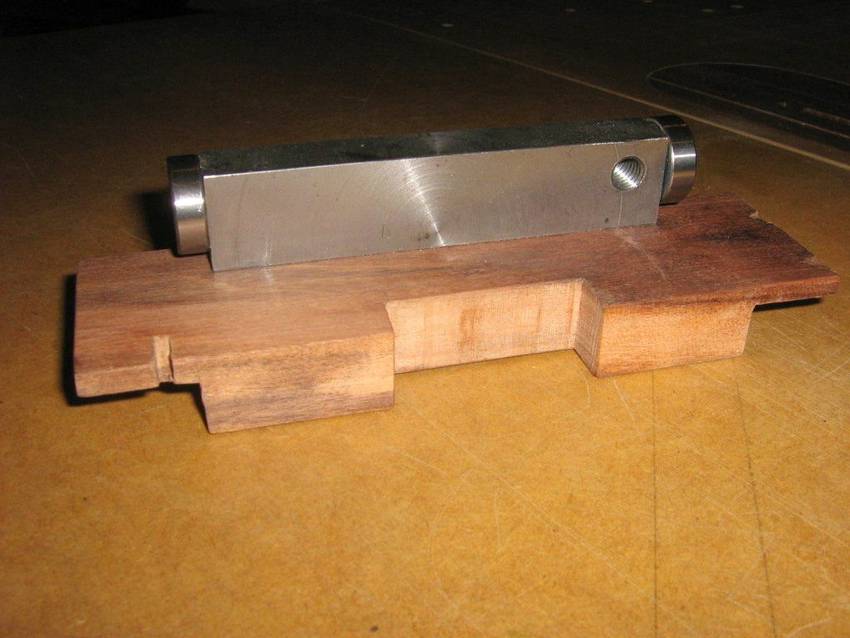 The bridge unit with ball bearings. Note the 3/8"
hole for the threaded rod that pushes/pulls the bridge to lift
the carriage.
The bridge unit with ball bearings. Note the 3/8"
hole for the threaded rod that pushes/pulls the bridge to lift
the carriage.
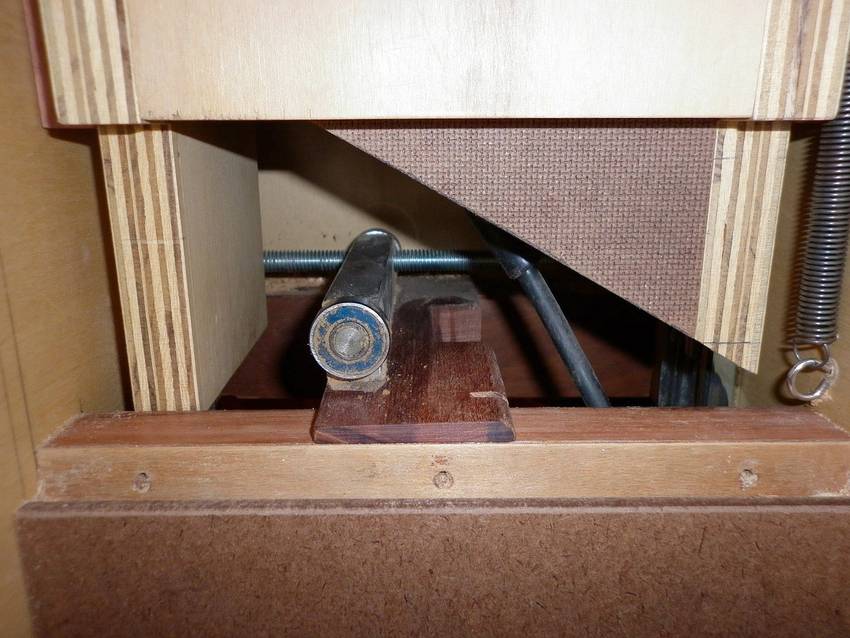
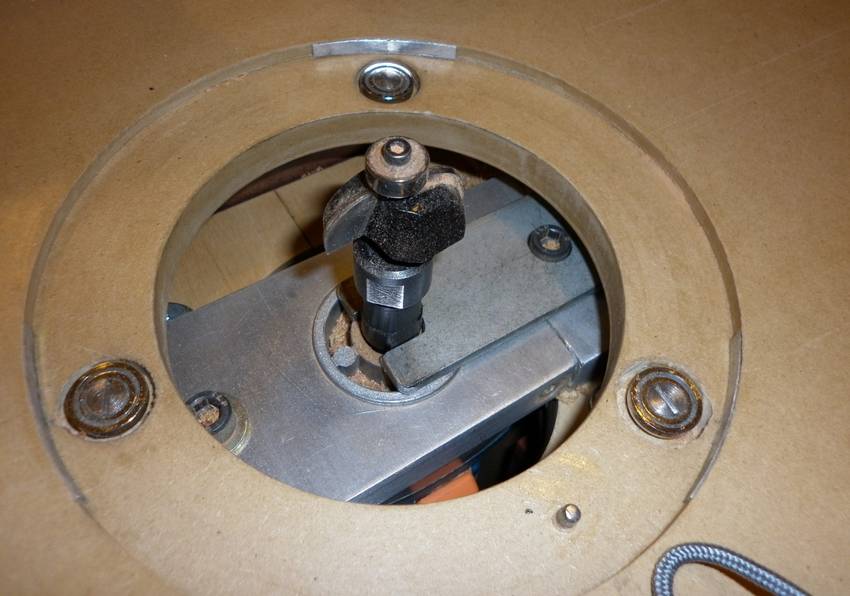
 The carriage in working position. When the bridge is
pulled or pushed, the bearings move along the slope and lift or
lower the carriage. The springs keep the slopes always in contact
with the bearings. Operation is very smooth and flawless. One
turn of the hand wheel raises the bit 1mm, so it is easy to control
and even return to a previous setting. The slopes are made out
of 1/4" hardboard.
The carriage in working position. When the bridge is
pulled or pushed, the bearings move along the slope and lift or
lower the carriage. The springs keep the slopes always in contact
with the bearings. Operation is very smooth and flawless. One
turn of the hand wheel raises the bit 1mm, so it is easy to control
and even return to a previous setting. The slopes are made out
of 1/4" hardboard.
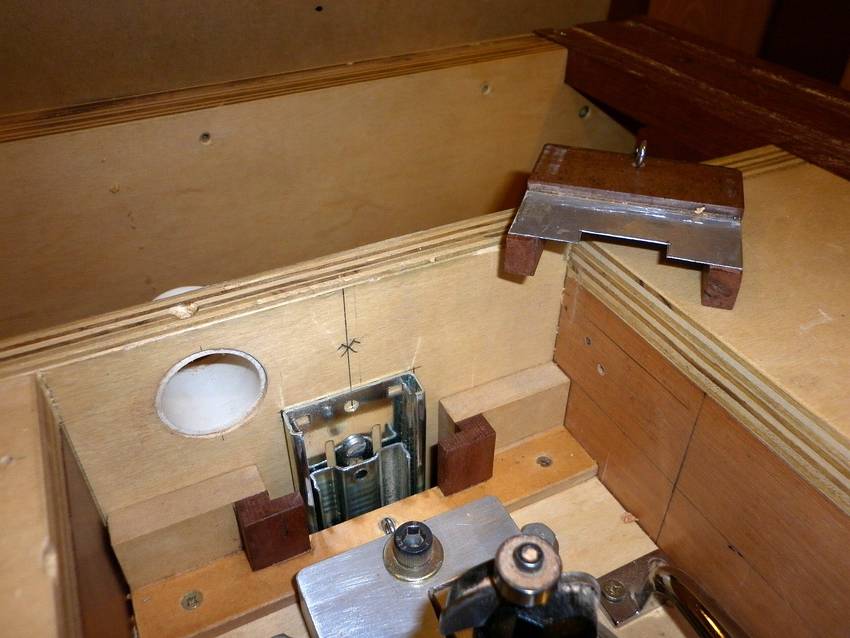
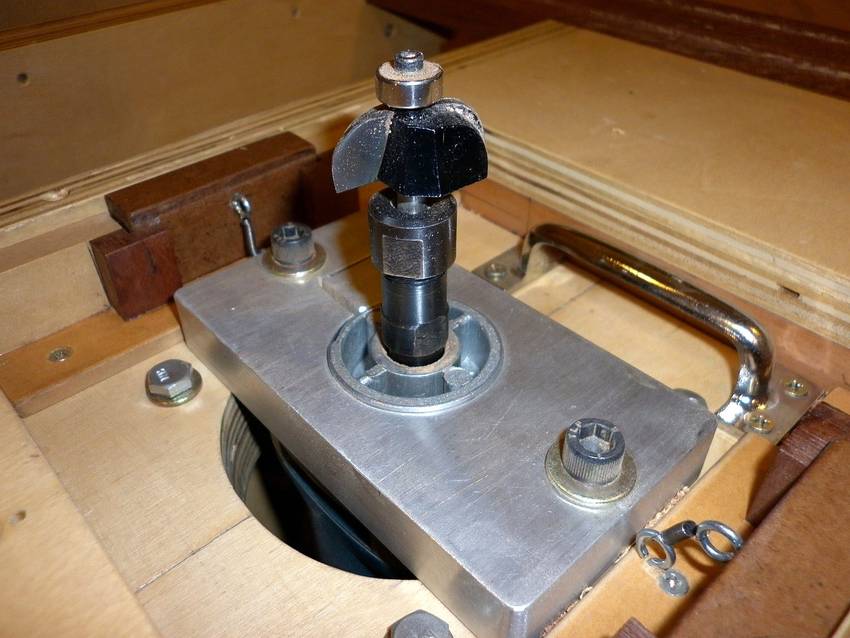 The router in bit changing position. The table was
lifted for the photo but bit changing can be accomplished from
the top, with the table in place. A handle is used to pull the
carriage up. It is then locked and a shop-made plate used to
lock the spindle. Only a single wrench is then required for
the bit change. The small dark boxes with a small spring attached
are dust covers for the slides.
The router in bit changing position. The table was
lifted for the photo but bit changing can be accomplished from
the top, with the table in place. A handle is used to pull the
carriage up. It is then locked and a shop-made plate used to
lock the spindle. Only a single wrench is then required for
the bit change. The small dark boxes with a small spring attached
are dust covers for the slides.
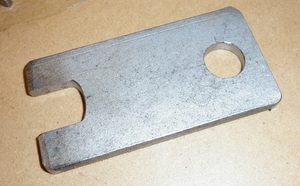 The spindle locking plate slips around the shaft of the router
and one of the mounting screws to lock the spindle during
bit changes.
The spindle locking plate slips around the shaft of the router
and one of the mounting screws to lock the spindle during
bit changes.
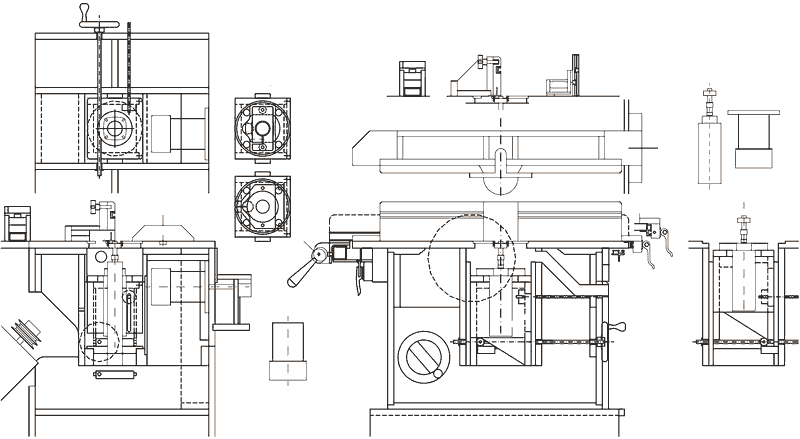 There are also some CAD drawings of the router lift.
You can download these drawings:
PDF version of table saw drawings
DWG (AutoCAD) version of table saw drawings
Please note that the drawings are 2D plan views, not 3D models.
More about Hector's table saw workstation
See also:
More about Hector's table saw workstation |
 Home made tilting Router lift, with gears! |
Dejan Kovac's router table |
Router table saw extension |
John Heisz's router table |